DIY Farmhouse Dresser Makeover


The rustic look adds a cozy and charming touch to any room, and one way to incorporate this style is with this DIY farmhouse dresser makeover! We will guide you through the process so you can easily recreate it with your own piece.
You don’t have to spend a fortune on these DIY dresser makeover ideas, and with some simple steps, you can easily give your own a fresh and cozy transformation. Let’s get started!

If you’re over that boring old dresser in your bedroom, maybe it’s time for an update. It’s easier on the budget (especially compared to buying a new one) and a great way to add your personal touch through the new color and style.

One popular style is the farmhouse look. It’s perfect if you want a cozy and welcoming feel for the piece and for your space. This style typically features classic or soft colors with a worn, distressed finish.
If you’re unsure how to create this look on your own, then keep reading for the step by step process of this DIY farmhouse dresser makeover! We’ve got plenty of tips that’ll help you not just with this project but with any future ones, too.

Supplies Used for DIY Farmhouse Dresser Makeover
As an Amazon Associate, I earn from qualifying purchases. I also may earn from other qualifying purchases with other companies or get free product to review and use. All opinions are my own.
- Screwdriver
- Hammer
- Circular Saw
- Clamp
- Metal Leg Plates
- Nail Gun
- Wood Filler
- Krud Kutter
- 220 Grit Sandpaper
- Shop Vac
- Tack Cloth
- DeWalt Orbital Sander
- Diablo Sanding Screens
- Painter’s Tape
- Pre Taped Plastic
- Clear Shellac
- Country Chic Paint in Vanilla Frosting
- Wagner Sprayer
- Minwax Oil Based Wood Stain in Dark Walnut
- Waterbased Polyurethane
- New Hardware
Remove Hardware and Apron
We started by taking off all the old hardware. Honestly, it’s my least favorite style when it comes to vintage furniture, so we were more than happy to get rid of it and toss it out.
Then, I had this vision to remove this detail on the front legs – I think it’s really ugly. I don’t like how the wood was cut on the front base, and I wanted some cute turned legs on this piece instead. So, I removed this front apron.
It was just held together with some nails and screws underneath. Flip it on its side, and you’ll be able to see if there are any screws holding the piece of wood in place. Unscrew those, then grab a hammer to push off the apron and get the nails off.

Once I got that done, though, I could clearly see that the side of the dresser was one solid piece of wood, which is exactly what I was worried about and what I could see before taking off the apron.
So, here’s what I did: I got our circular saw, then lined up and clamped a piece of wood to guide the saw and make sure it cut perfectly straight right where I needed it. The goal was to get it to cut exactly in line with where the front of the dresser stopped.
Add New Trim to Base
To cover up the ugliness of just the straight edge and add a little bit of flair, we put on this little trim just around the base. I cut these little pieces of trim, gave them 45 degree miter cuts on the front corners, and then straight edges on the back. And then, I secured them with little tiny nails using our nail gun.

Add New Legs
I flipped the piece over and attached some heavy duty metal plates for the legs. Just make sure to line them up properly so all the legs are evenly spaced. Maybe about 1/2 inch away from the edge on all sides.

Thankfully, this dresser is solid wood, so the plates had a sturdy base to screw into. And then all you have to do is twist the legs onto these plates, and voila, now we have legs! Get more tips on how to add legs to a dresser here.
Then, I filled those little nail holes from adding the new trim before and sanded down the wood filler. Check out the best wood fillers you can use here.
Once we flipped the piece upright, this is what it looked like. It looks so cute already with those turned legs! Check out this list of best wood legs to add to furniture for more options.

Prep for Makeover
Then, we prepped the piece by cleaning it off really well with Krud Kutter and a damp rag. We need to remove grease, grime, and oils – you don’t want those to get in the way of a good finish. Get more tips and tricks on how to clean furniture before painting here.


We gave the furniture a light sanding by hand using 220 grit sandpaper, folding the sandpaper in half. Scuff sanding just helps your paint to stick better to the surface. Then, I removed the dust with a shop vacuum with the brush attachment and a tack cloth to remove any remaining dirt.
Would you like to save this?
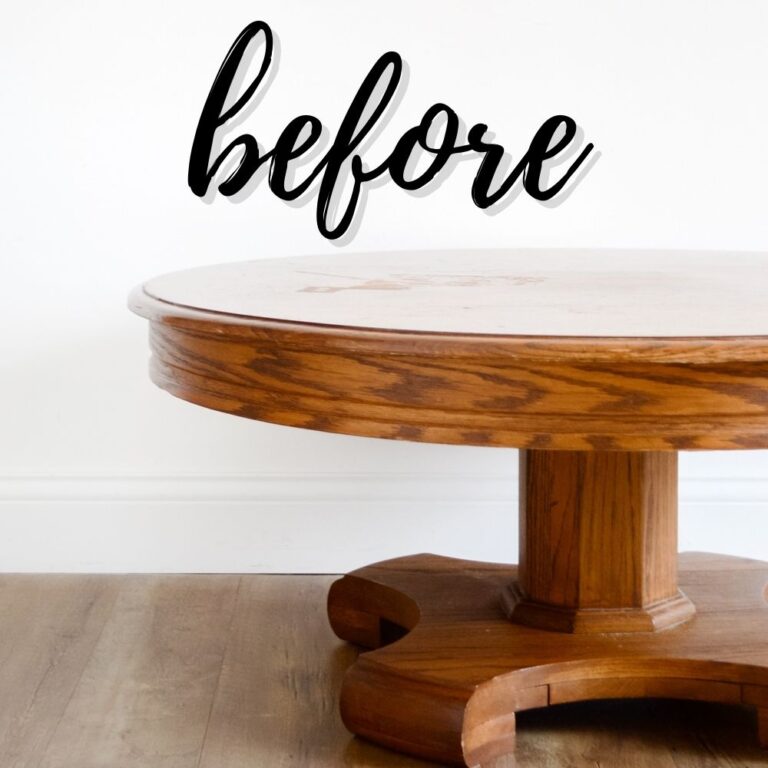
We also sanded the top down to the bare wood so we could stain it to a nice dark color. As you can see above, the piece started off super orange, and we wanted it to be a deep walnut instead. We sanded this old finish using our DeWalt orbital sander and Diablo sanding screens.

Next, I taped the top off with some painter’s tape and pre taped plastic to prevent getting any paint onto the raw sanded wood since I would stain it later on. Learn what is the best painters tape in this post.
Once all the sanding dust was cleaned up, I sprayed two coats of clear shellac. The shellac helps for better adhesion and prevents any bleedthrough from the wood that could stain our new white finish. I let the primer dry until the next day to really lock in those stains and prevent them from appearing. After that, we moved the piece into our little spray booth.

Paint Dresser White
We used Country Chic paint in Vanilla Frosting – it’s a nice, warm, creamy white color that’s perfect for that farmhouse style. Here’s our Country Chic paint review to learn more about the pros and cons of this product. We sprayed it using our Wagner Double Duty sprayer and it took about 3 coats to get full coverage.
The Double Duty has been discontinued, so a great alternative now is the Wagner 590 or the Wagner 595. These are great for spraying paints and topcoats – you can even use them for stain! Check out our Wagner FLEXiO 590 review and Wagner FLEXiO 595 review to learn more about these two.
In case you’re wondering – yep, we work with the drawers in. We tape them off using pre taped plastic and painter’s tape, then with each coat, we end up opening them to coat the tops, sides, and even behind them.
Then, for a nice distressed look, we used 220 grit sandpaper to lightly sand the white finish on the edges, underneath the hardware and then a couple of places on the feet. Then we cleaned off all of the dust with our shop vacuum and tack cloth.
Stain Wood Top
At this point, we took the plastic off the top so we could stain it. I went with a Minwax oil based wood stain in Dark Walnut. It’s a rich, deep brown that looks amazing with the warm creamy white pink base. I applied one coat and let it dry. Here’s a more detailed guide on how to stain wood furniture.

I did let it dry for 48 hours before adding the topcoat since I used a waterbased topcoat for everything. You definitely don’t want to use an oil based topcoat over a white or creamy finish – it’ll end up looking really yellow and tinted. It’ll also turn a stain more yellowy and orange.
Topcoat DIY Farmhouse Dresser
I put the Varathane waterbased polyurethane in satin into our sprayer. I thinned it out about 5 to 10% for a smoother and nicer finish. This topcoat protects the stain and paint while making the surface easy to clean and maintain. We sprayed three coats all over.
We let the poly dry for 24 hours, then we attached new hardware. These rustic cup pulls from Hobby Lobby didn’t match the hardware holes exactly, but it did cover them up. We screwed them in from the front, so it didn’t really matter where the holes were.
Here’s what it looks like now. Isn’t it completely different? Say goodbye to the orange wood, and say hello to fresh and modern with a rustic farmhouse flair. It’s just so cute! For a similar project, check out this farmhouse cabinet makeover.


More Before and After Makeovers
See All >
Click any of these “before” photos below to view the “after” of that makeover.


DIY Farmhouse Dresser Makeover
This DIY farmhouse dresser makeover is one way to incorporate the rustic look to add cozy and charming touch to any room.
Materials
Instructions
- Remove all the old hardware. You can also remove any detail like the front apron of the dresser. If held with screws, unscrew those, then grab a hammer to push it off.
- Add new trim to replace the part on the base you removed. Secure them with little tiny nails using a nail gun.
- Flip the dresser over and attached some heavy duty metal plates for the new legs. Line them up properly so all the legs are evenly spaced. Twist the legs onto these plates.
- Fill the nail holes from adding the new trim before and sand down the wood filler.
- Clean up the piece with Krud Kutter and a damp rag to remove grease, grime, and oils. Then lightly sand it with 220 grit sandpaper by hand.
- Sand the top down to the bare wood using an orbital sander and sanding screens. Remove all the dust with a shop vacuum with the brush attachment and a tack cloth to remove any remaining dirt.
- Next, tape the top off with some painter's tape and pre taped plastic to prevent getting any coating onto the raw sanded wood and to prepare for staining later on.
- Spray two coats of clear shellac. Let the primer dry until the next day to really lock in those stains and prevent them from appearing through the new finish.
- Spray 3 coats of the Country Chic Paint in Vanilla Frosting to get full coverage.
- For a nice distressed look, lightly sand over areas that naturally get worn using 220 grit sandpaper. Clean up all of the dust with a shop vacuum and tack cloth.
- Take the plastic off the top then stain it with Minwax oil based wood stain in Dark Walnut. Apply one coat and let it dry for 48 hours.
- Put the Varathane waterbased polyurethane in satin into the sprayer and thin it out about 5 to 10% for a smoother and nicer finish. Spray three coats all over and let it dry for 24 hours
- Attach new hardware like rustic cup pulls to complete this DIY farmhouse dresser makeover!
Recommended Products
As an Amazon Associate and member of other affiliate programs, I earn from qualifying purchases.


More Painted Furniture Makeovers
- White Chalk Painted Dresser
- Antique Dresser Makeover
- Magnolia Dresser Makeover
- Dining Table Makeover Ideas
- Painting a Chest of Drawers with Chalk Paint
Follow us on YouTube to get more tips for painting furniture. Or share your project with us on our Facebook Group and be part of our community. See you there!