Painting Wood End Tables
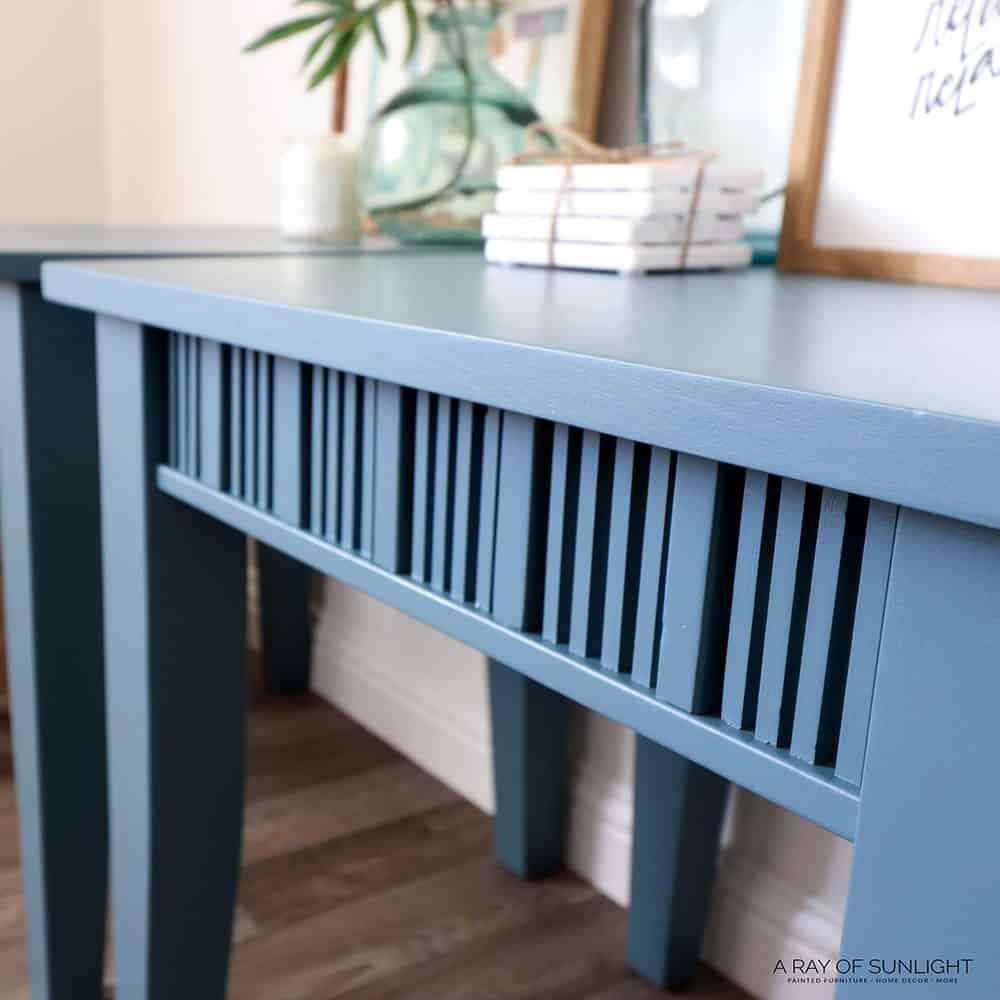
You may have some old, outdated end tables that need a little something extra. Then painting wood end tables is just for you! We added a little extra flare to them with some wood slats to give them a more trendy design.
With the help of Heirloom Traditions Paint, we were able to transform these pieces into stylish and unique pieces. Keep reading for the step by step process and learn how you can do the same!
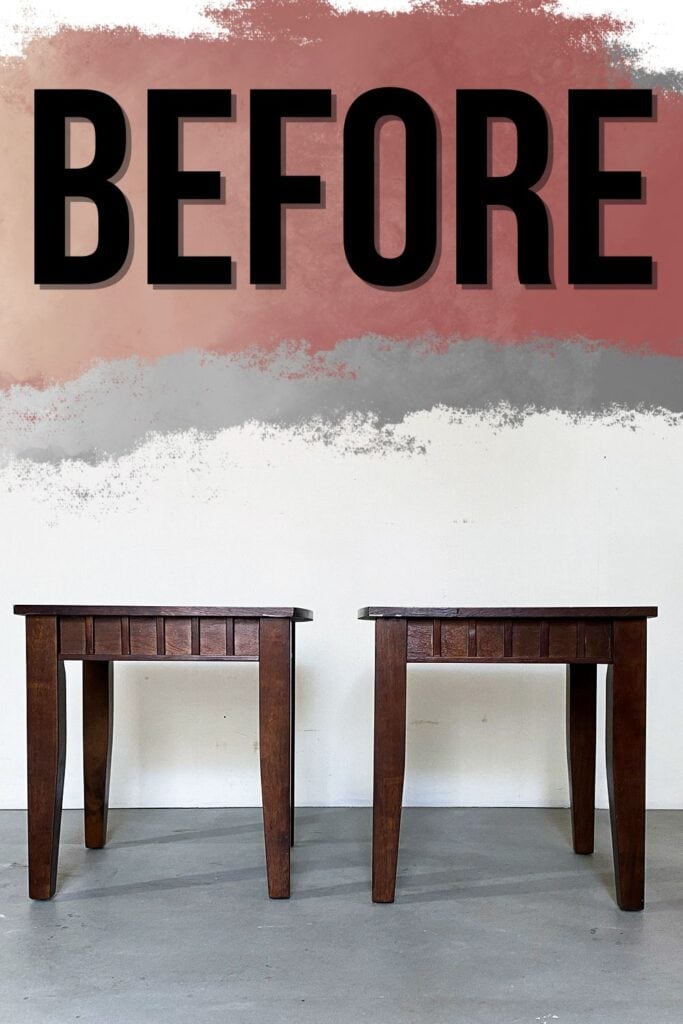
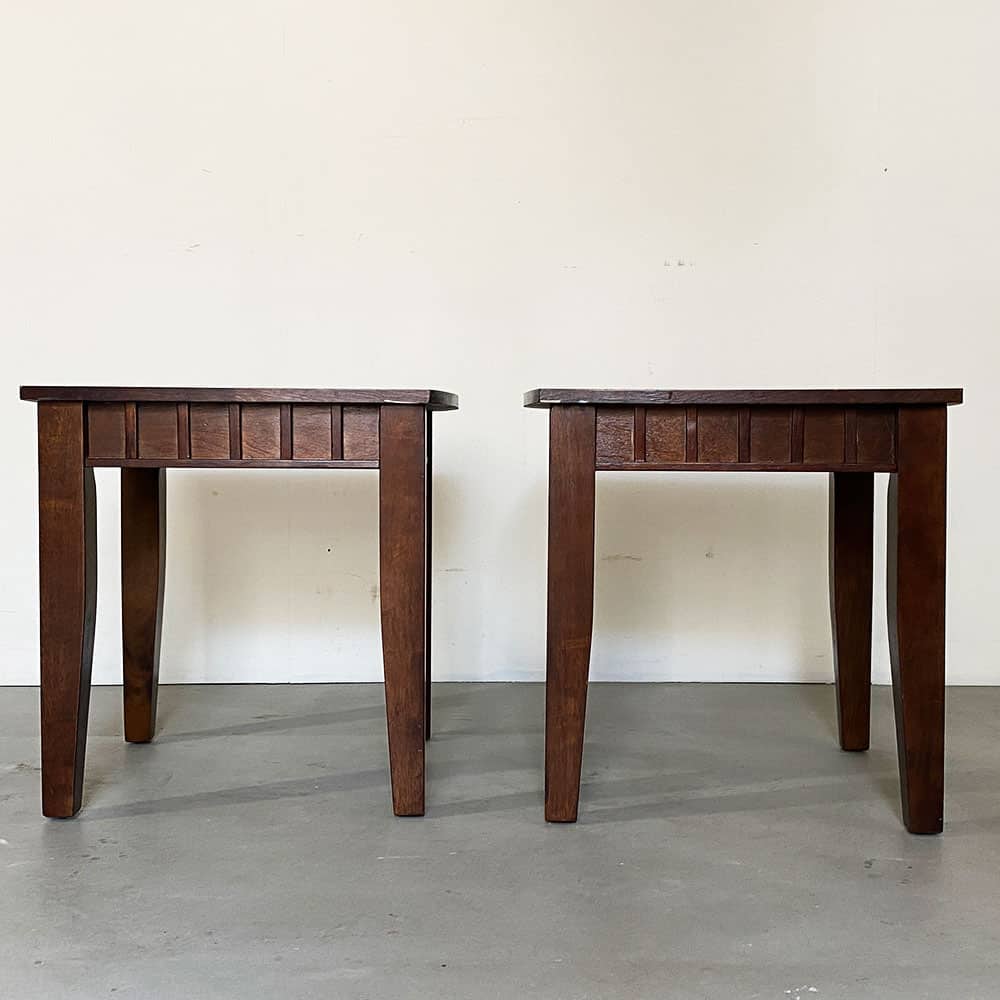
These end tables were just $15 each at our thrift store. They were in decent shape but a little plain and needed a few repairs. But we’re going to make them over with a new color and some added wood slats!

It’s amazing what a little paint can do! These pieces are not only getting a fresh new look but also some extra protection to keep the wood strong and durable. This way, you also match it better with your decor style and color scheme.
So, let’s get started on this fun project!

Supplies Used For Painting Wood End Tables
As an Amazon Associate, I earn from qualifying purchases. I also may earn from other qualifying purchases with other companies or get free product to review and use. All opinions are my own.
- Krud Kutter
- Wood Filler
- Wood Glue
- 1/4″ Square Dowels
- 220 Grit Sandpaper
- Shop Vac
- Tack Cloth
- BIN Shellac Based Primer
- Painters Tape
- Paint Filters
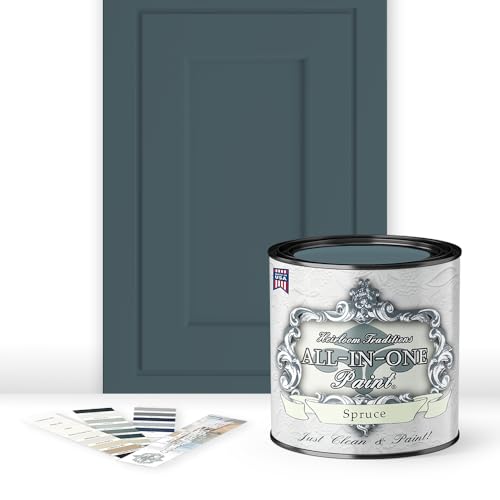
- Heirloom Traditions Paint in Spruce
- Paint Sprayer
- Respirator
Cleaning Tables and Fixing Chipped Wood
First, we got them ready and cleaned them off with Krud Kutter because you never know where thrifted pieces have been. Krud Kutter removes grease, oils, and grime that could prevent the paint from sticking. So even though it’s annoying to do, I clean every piece that I makeover.
Learn more on how to clean furniture before painting here and learn more about what, why, and how to prepare furniture for paint here.
Then, I had to fix all of the chipped wood. Here’s our guide on how to fix chipped wood furniture.
Get Our Secrets!
Grab this super convenient How to Repair Furniture Ebook with all of our secrets on how to repair furniture for only $14.
You can print it out and have instant access whenever you come across damaged furniture, and know exactly how to fix it!
Click on the picture of the book to purchase!

These thin pieces of wood were chipped off in a couple of places, so I filled those in, and I filled in the shallow damage on the top.
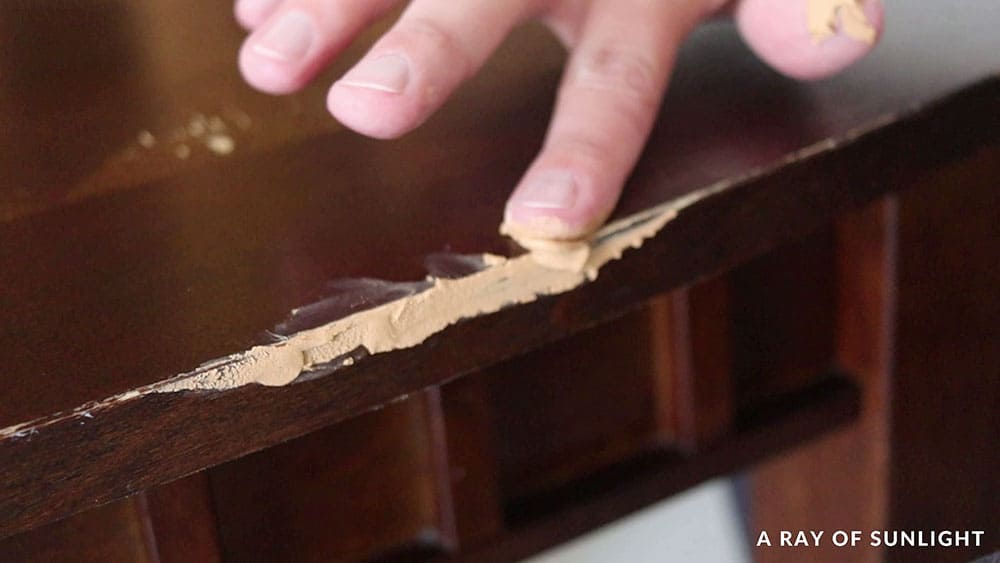
I just used regular wood filler for these since all of the repairs were very minimal. Check out the best wood fillers for furniture in this post.
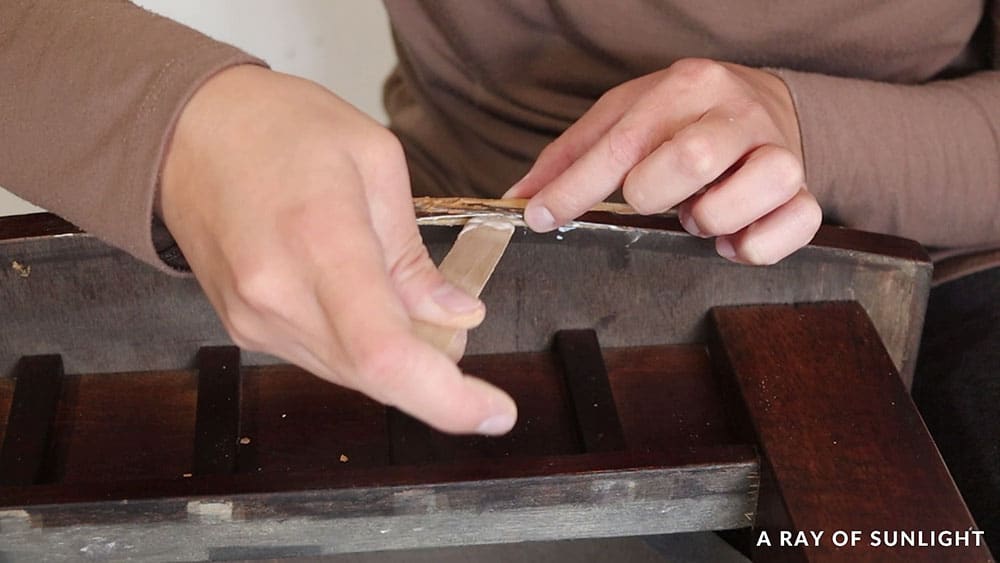
When I filled in these 2 bigger areas, I found out that the wood was loose. So I put some wood glue into the cracks, and then I taped them down with some painter’s tape while the glue dried. Here’s another post on how to fix damaged wood furniture before painting using the glue method.
How to Create A Wooden Dowel Furniture Look
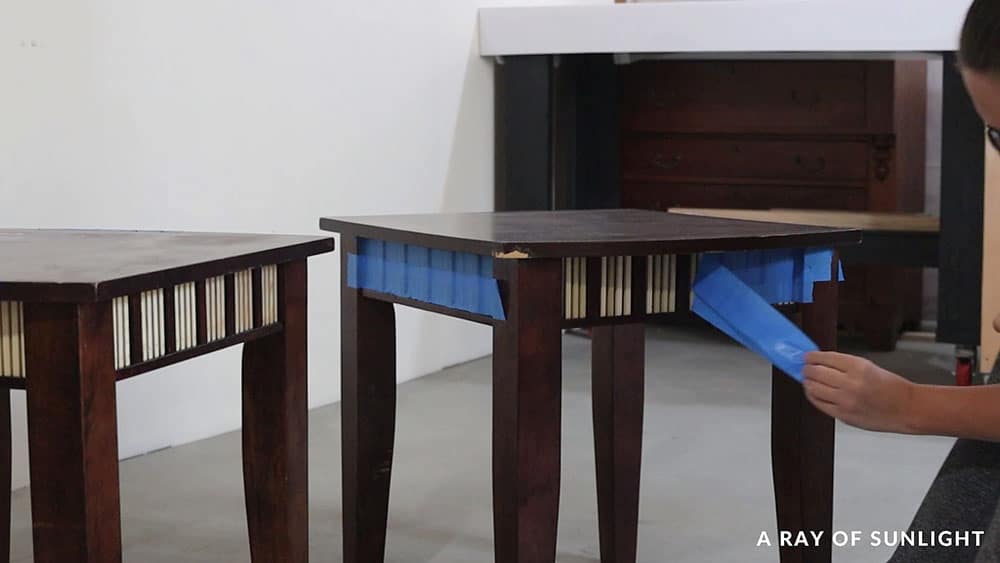
Since the sides all had wood slats, I thought I would add more to create a more trendy look. So I bought some ¼” square dowels, cut them to size, and played around with the spacing and amount of dowels. I ended up going with 4 dowels in each slot and just kind of eyeballed the spacing.
At first, I used my pin nailer to attach them… but after the first side, it was giving me fits. I ran out of nails, and then it kept getting jammed.

(I should have known it was going to give me fits. It did the same thing on this DIY slatted wood dresser makeover, too!)
So, I ended up just gluing the dowels and putting tape over them to hold them in place while the glue dried. Gluing and taping took a little longer than the pin nailer, except I didn’t have any fits with it. So it was probably faster in the end… at least, that’s what I’m telling myself. haha
The next day, I removed all of the tape… worried that the tape held the dowels in place. But they all were glued on well!
One or two shifted… or maybe that was just my bad placement. But… I’m honestly just choosing to ignore that. Haha It can be on the back. Right??
Fixing Chipped Veneer (Again)
But I couldn’t ignore that the wood repair wasn’t fully glued down. I had only glued from the bottom before, so I missed gluing from the top. So I filled those again, taped them in place, and waited 30 minutes.
While I waited for the glue to dry, I sanded the dry filler down flush with the surface with 220 grit sandpaper. Read this post to learn about the best sandpaper for furniture!
The filler on the top of one table didn’t feel like it was filled in all of the way, so I filled those spots in again. Since wood filler shrinks when it dries, I wasn’t surprised at all that I needed to do that again.
After the glue had dried for 30 minutes, I removed the tape, sanded the filler, and filled that spot again. Annnnd then I waited for that all to dry again before I sanded it back down flush again.
Sanding End Tables
And then I continued all over the tables. This step was just to lightly rough up the surface to help with adhesion. 220 grit sandpaper is my favorite for this. Read this post to learn more about the importance of sanding before painting furniture!
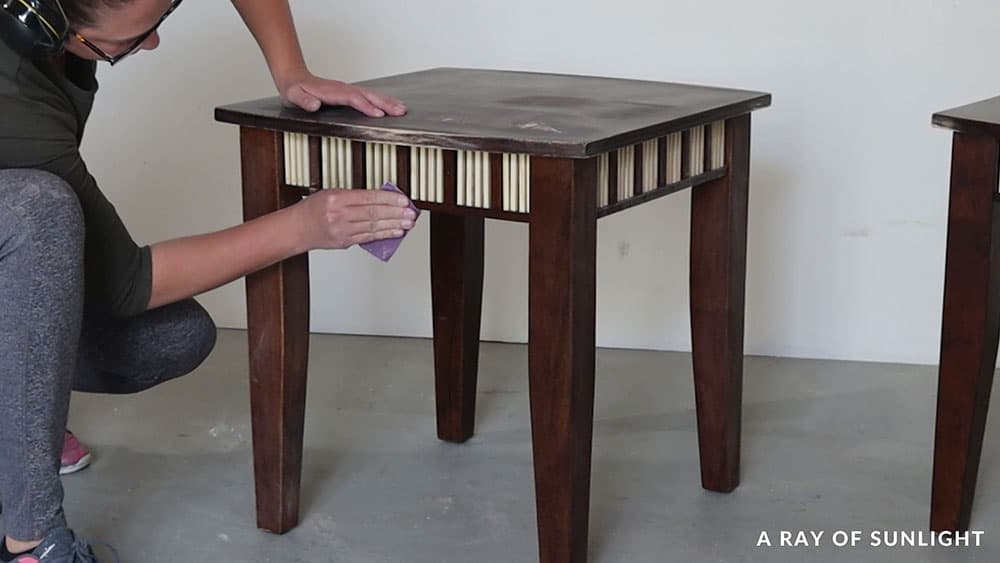
For all of the dowels, I used a fine grit foam sanding sponge since it was easier to hold onto for that area.
Technically, the paint and primer I’m using have amazing adhesive properties, so I probably didn’t HAVE to sand everything. But it will always help these two stick better. Before I moved on to the next step, I cleaned up all of the dust with a vacuum and a tack cloth.
Priming With BIN Shellac
Then we took them outside and sprayed a coat of BIN shellac based primer all over them. These 2 little tables took 1 whole spray can.
Would you like to save this?
I used this primer to help cover up the grain on the raw wood dowels, but it also has excellent adhesion, and it is really, really good at blocking stains that come through the finish when working with wood.
For a comparison with another primer, here’s Cover Stain VS BIN Shellac Primer. You can also check out the best primers for painting furniture here and the best primers to stop tannin bleed here.
Here’s a closeup of what it looked like when it was drying. There were a couple of spots where I sprayed too much in one area, and it looked pretty spotty.
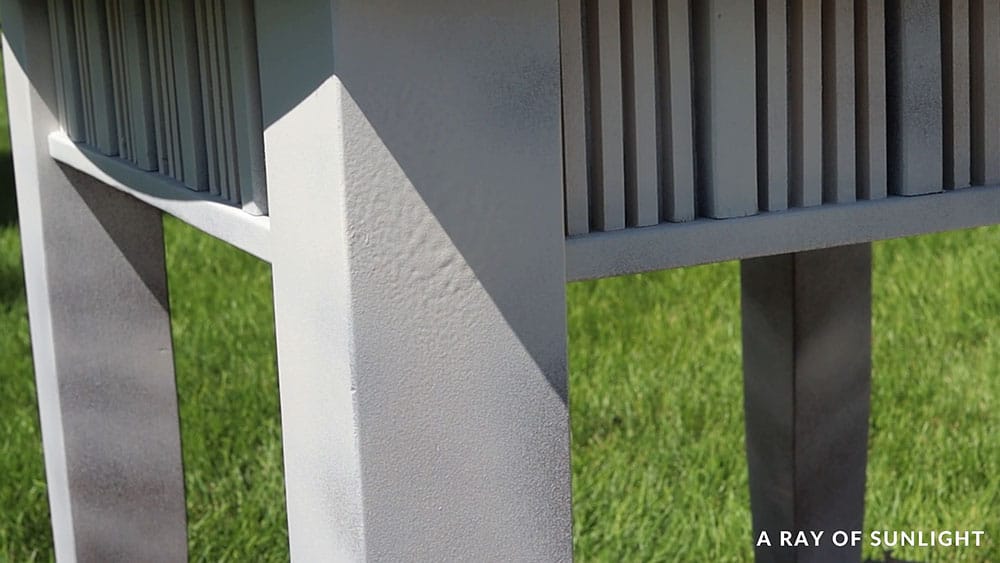
After an hour, the primer was completely dry. But one of the most annoying things about spraying this is that it dries with a really rough texture. So, I ran through it all with 220 grit sandpaper wrapped around a sanding block.
This made it feel smooth, but I was also easily able to sand out the spots where it puddled because I applied too much primer. Even though it’s annoying to have to do this, this stuff is so easy to sand. It doesn’t clog up your sandpaper when you try to work on it an hour later, and it becomes fine powder instead of gumming up.
After I ran through everything, I vacuumed up the dust and wiped everything down with a tack cloth.
Painting End Tables with Heirloom Traditions Paint
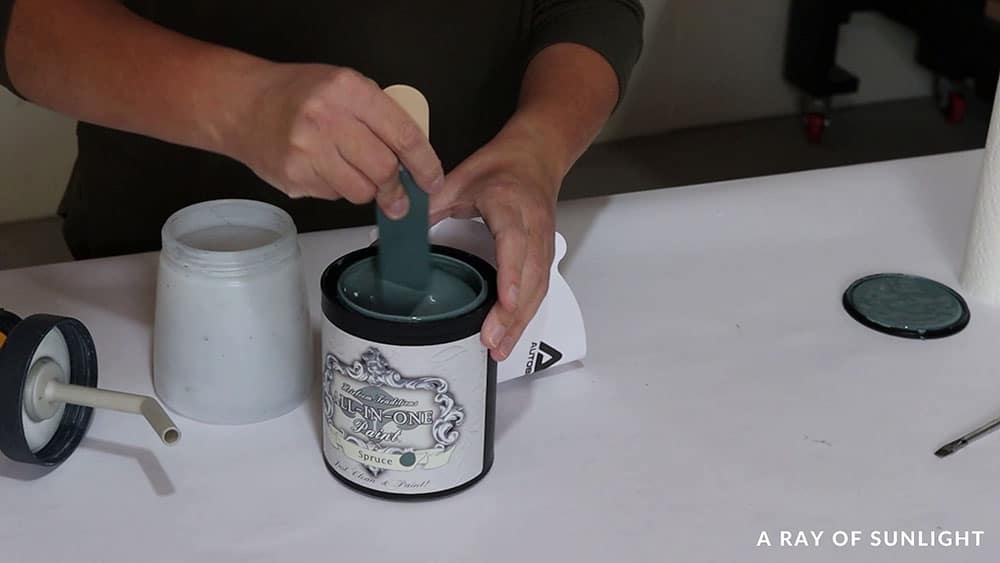
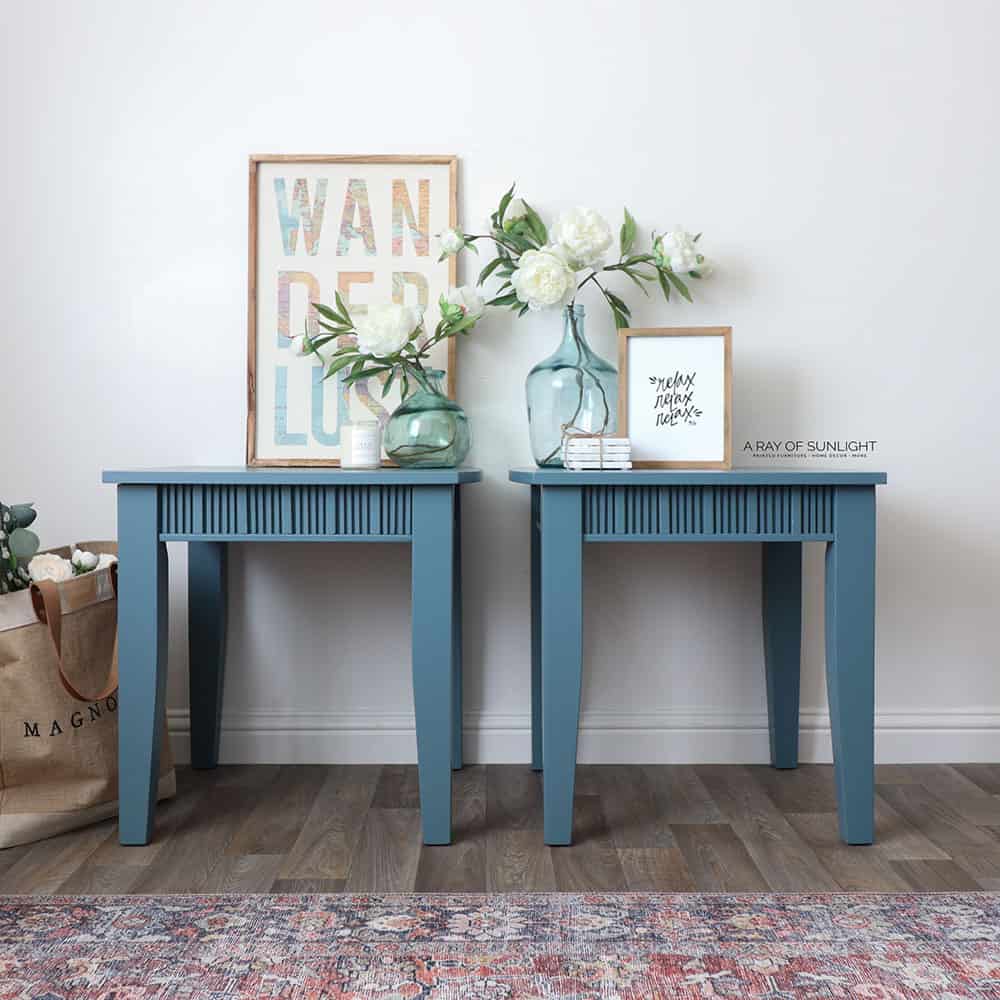
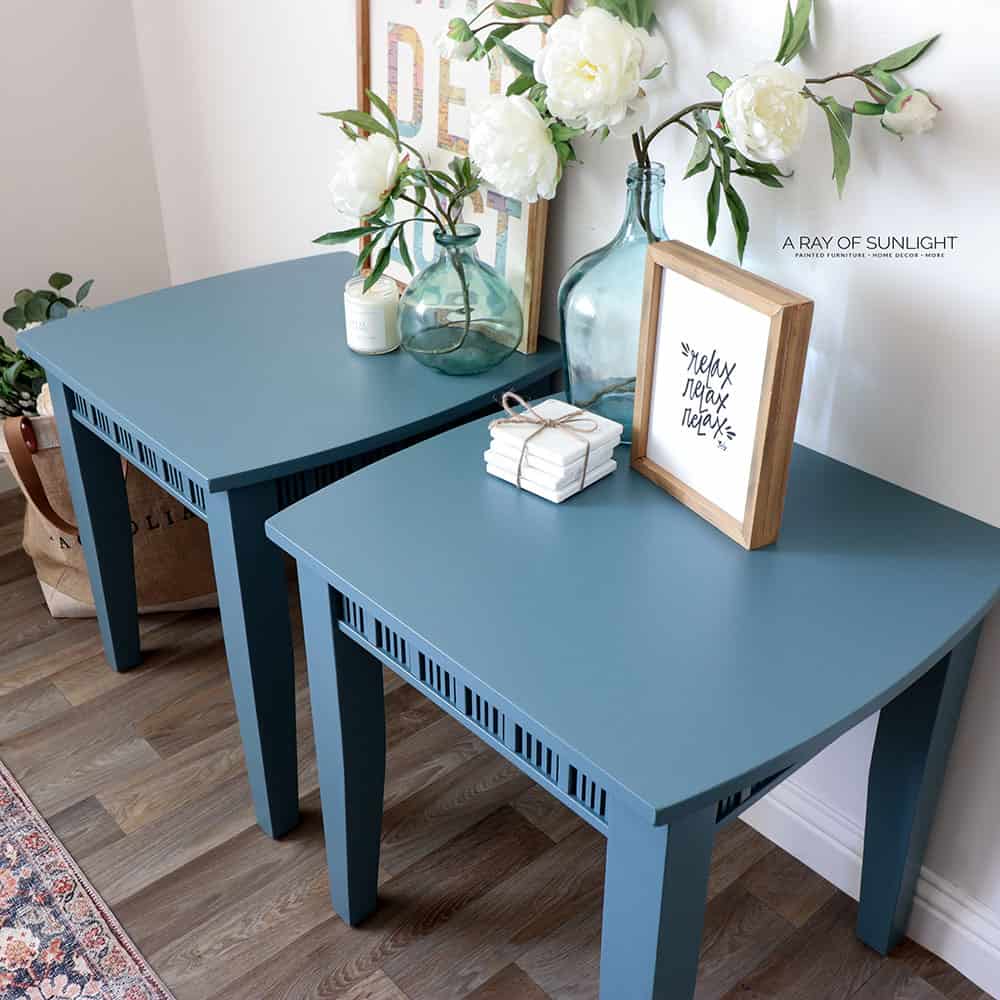
Then, it was time to add some color! I used Heirloom Traditions Paint in the color Spruce. I really wanted to make these black, but I thought the wood details would be lost, so I went for this shade of blue instead.
Check out this guide for painting furniture with Heirloom Traditions Paint. Check out our Beyond Paint vs Heirloom Traditions Paint comparison if you’re considering the two.
I poured it through a filter so nothing would clog my Wagner sprayer. And then, I added a couple of ounces of water to thin out the paint so it would look better when sprayed. Learn more about how to thin paint for Wagner FLEXiO sprayer here.
If you plan on brushing or rolling it instead, see how in this post about painting furniture without sanding or priming. If you want to try to use one, here’s my list of the best HVLP paint sprayers.
I tested out the spray on a piece of cardboard to make sure it was right, and then I applied the paint onto the actual project. With the dowels, I had to spray in every direction so I could get color in between them all. So, I did it a little lighter than I typically would.
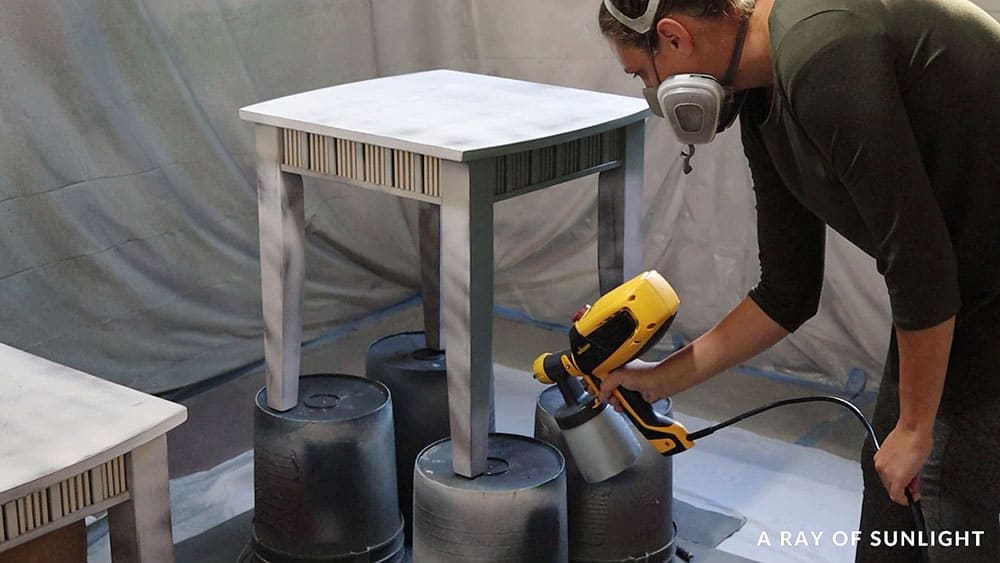
But, I also didn’t want to apply too thin of coats because there needs to be enough paint for all of the speckles to melt together and create a flawless texture free finish. I left the finish for a little over an hour. They were nice and dry, and they looked awesome!! And they felt really smooth, too!
Sanding Between Coats
Just to be sure that the tops were going to feel nice and smooth when they were done, I sanded them lightly to remove any texture that was there.
Technically, this can help the paint adhere better, too… but I mostly just do this so that the final coat feels smooth to the touch. I cleaned off the dust, and then I added another blue coat.
Does Heirloom Traditions Paint Need a Topcoat?
Nope! Heirloom, in particular, doesn’t need a topcoat. It is really durable on its own, and it dries to a satin sheen. So there is no need. That’s one thing I LOVE about it.
Learn more about its pros and cons in my Heirloom Traditions All In One Paint review. Also, check out Heirloom Traditions Paint before and afters for more inspiration! Check out more best all in one paints for furniture here.
So, after the 2nd coat, I let it dry overnight. And then they were done! And here is what they look like now! Get more tips on how to paint end tables here. For similar projects, check out these painted sofa table ideas.
More Before and After Makeovers
See All >
Click any of these “before” photos below to view the “after” of that makeover.


For more of the fluted style, here’s our list of DIY fluted furniture ideas. You can also update this piece with these end table refinishing ideas.
Super cute, huh? A little trendy, but not overly trendy, right? What do you think of this color? It’s a little bold, but it’s muted, so it’s not too in your face. Let me know what you think in the comments and I’ll catch you next time!


What Color to Paint End Tables
If you don’t like the shade we used in this makeover, you’re totally free to choose a different one! You can go classic with white, black, gray, or neutral tones like these neutral furniture paint colors. There are also bold furniture paint colors if you want a more vibrant look.
If you’re not sure what to use, I suggest looking at the existing colors in your room and using those as inspiration. For example, if your room has a lot of green accents, using a complementary shade would tie everything together nicely.
Or, you could try a contrasting color to make things more visually interesting. This works great if your pieces are meant to stand out. Just be careful not to make the space feel too busy or overwhelming unless that’s what you’re going for.
If you want to know the popular options, here’s our list of the best painted furniture colors! Remember, the most important thing is to pick one you love that fits your style and decor. Or if you can’t choose one, you can always use two or more for a fun, eclectic project!


Painting Wood End Tables
Add a little extra flare to your old and outdated pieces with wood slats and fresh color. Here are the steps for painting wood end tables.
Materials
Tools
Instructions
- Clean the furniture to prepare the furniture for paint. Fix any chipped and damaged areas by filling them in with wood filler and wood glue.
- Cut up wooden dowels to size and play around with the spacing to where you want to put them. Glue the dowels in place on the dresser and tape over them to hold them while they dry.
- Once the glue is dry, lightly scuff sand the dresser all over with 220 grit sandpaper. This is for the paint to stick to the dresser better. Clean up all of the dust from sanding with a vacuum and tack cloth.
- Now, Apply a coat of primer all over the end tables. The primer can dry with a really rough texture so you should sand everything smooth again. Vacuum all the dust as well.
- Pour Heirloom Traditions Paint into a filter and into your paint sprayer. Add a couple of ounces of water to thin the paint. Then spray paint onto the tables. Sand between coats to make sure everything's smooth.
- Let the end tables dry overnight.
Recommended Products
As an Amazon Associate and member of other affiliate programs, I earn from qualifying purchases.


More End Table Makeovers
- End Table Makeover
- Gray Chalk Painted End Tables
- Redoing End Tables
- Chalk Painted End Tables
- Hexagon End Table Makeover
Follow us on YouTube to get more tips for painting furniture. Or share your project with us on our Facebook Group and be part of our community. See you there!
Love the color. Sometimes we just need to get out of our comfort zone. That’s when create the coolest things!
You make everything seem so easy. I love, love, love your web site
Thank you.
Lynn
This is so beautiful and I just love the color
Thanks so much for participating and sharing at SSPS 292. See you again next week!
I love the way these end tables turned out. The color is great! I redoing our bedroom right now and could definitely use them. Heirloom’s factory/showroom is a few miles from our home. I may have to pop by and check out the colors.
Ahh thanks! So glad you love how these wood end tables turned out!