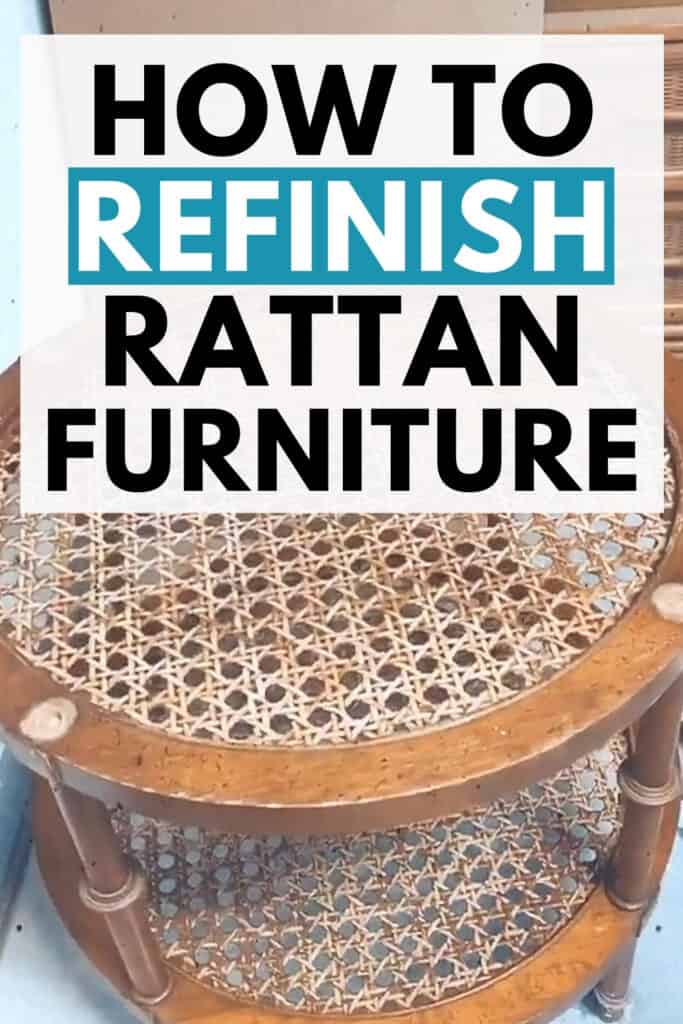
How to Refinish Rattan Furniture


If you have old rattan furniture that needs a little TLC, then you should definitely learn how to refinish rattan furniture! Rattan furniture is known for its durability and beauty, but over time it can start to look dull and worn out.
But with the right tools and refinishing furniture techniques, you can update your rattan furniture and give it a brand new look. Whether you want to restore your old rattan furniture or give it a modern makeover, this guide is all about refinishing rattan furniture like a pro.

Refinishing rattan furniture is a great way to give your furniture an updated and stylish look. In this post, we’ll provide easy step by step instructions for how to paint rattan to look natural, for any type of rattan furniture.

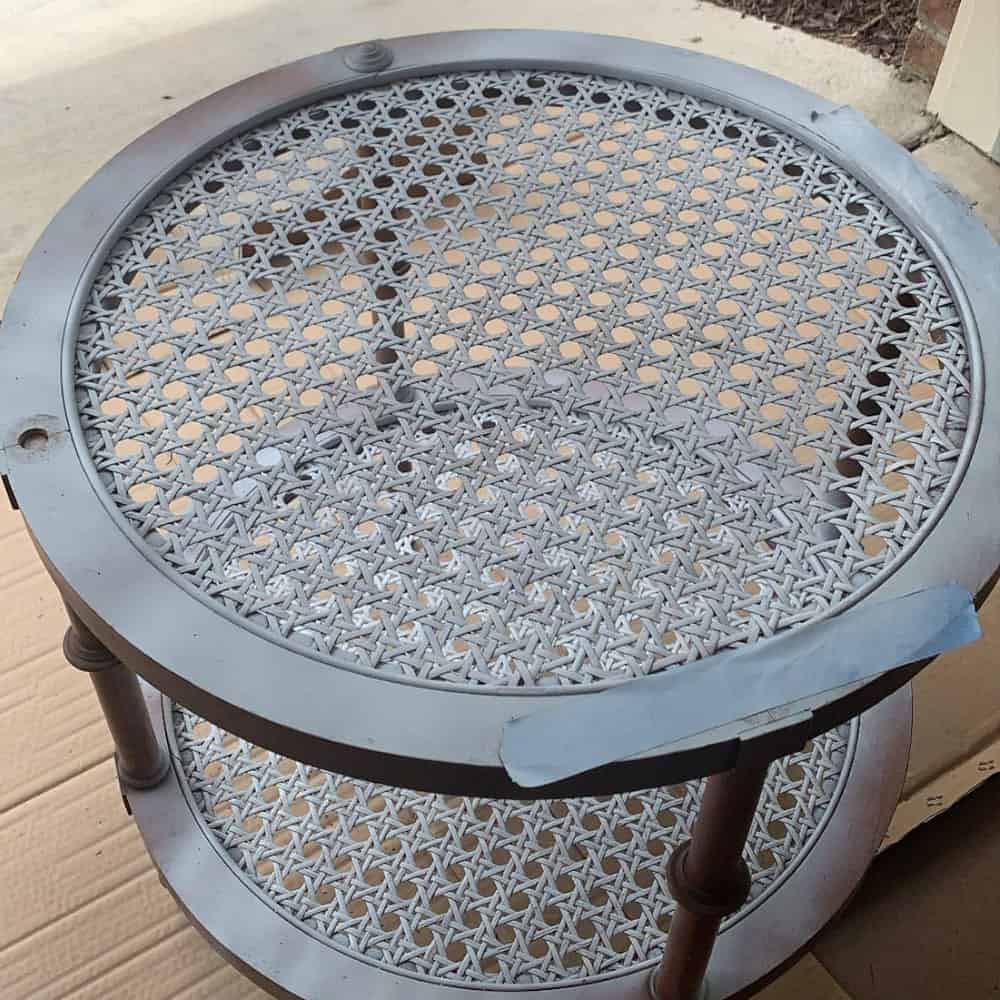
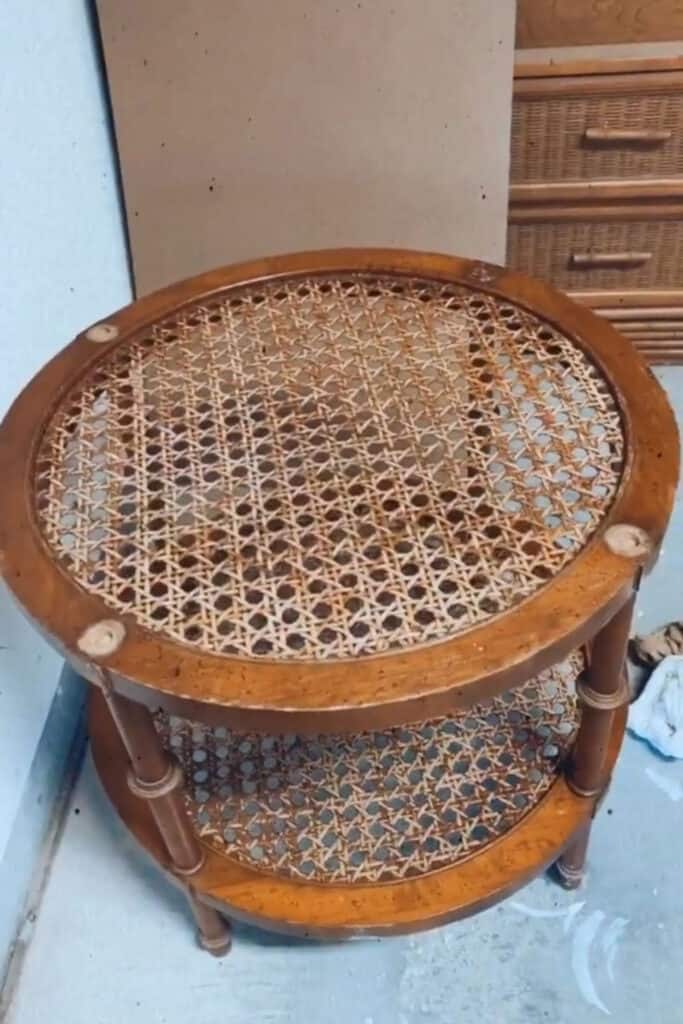
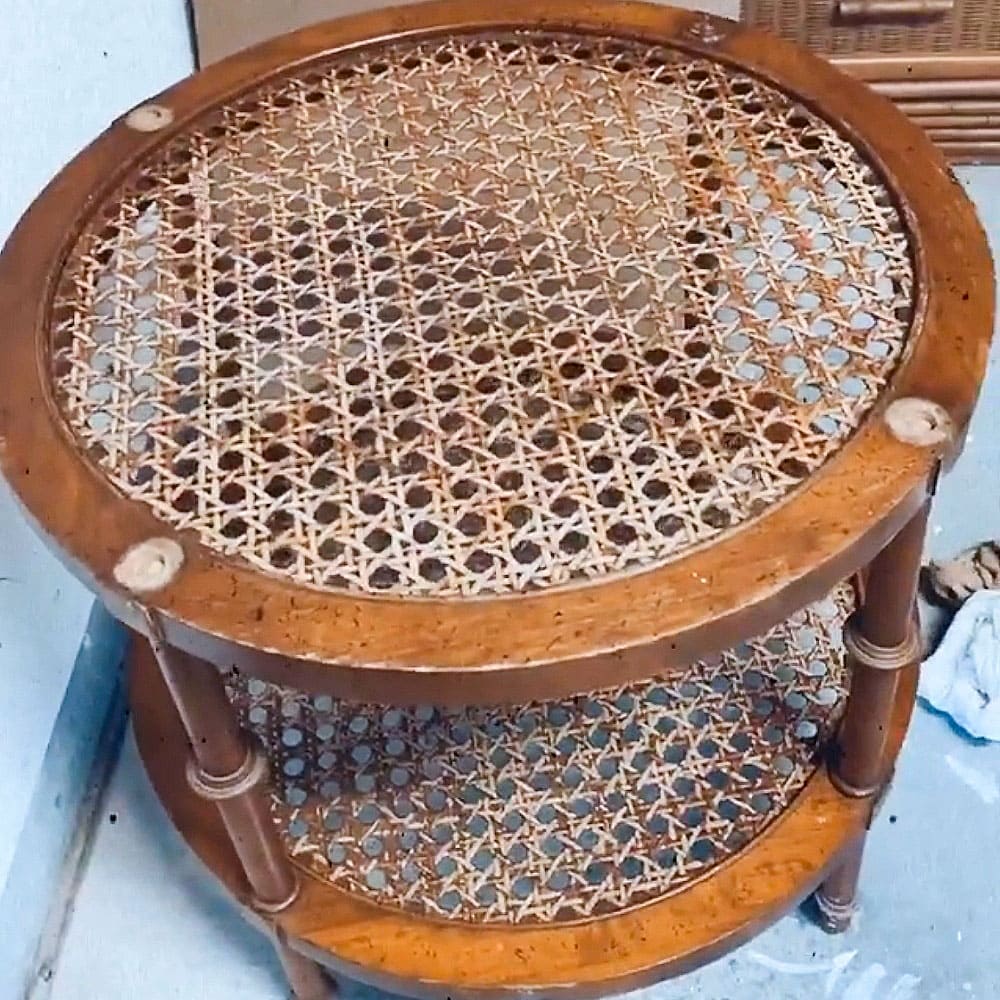
I’m not joking when I say I dug this unassuming table out from underneath a pile of junk in a warehouse and paid only $10 for it. The rattan wasn’t damaged, but certainly had seen better days. I’ll be honest, I’m typically not a huge fan of painted rattan and really wanted to keep it natural, but how?
I figured chemical strippers were way too harsh for fragile, aging rattan. So I wasn’t going to risk attempting to strip it. I tried giving it a gentle sand, but didn’t get far before small pieces began flaking off. You can learn more ways how to remove wood stain here.
So, what’s the secret to bringing rattan back to its natural beauty? I almost guarantee it’s way easier than you think! And would you believe it if I told you this Serena & Lily-Esque table makeover cost me about $30 total? After reading these easy steps, you’ll never be intimidated by rattan pieces in need of love!

Supplies Used for Refinishing Rattan Furniture
As an Amazon Associate, I earn from qualifying purchases. I also may earn from other qualifying purchases with other companies or get free product to review and use. All opinions are my own.
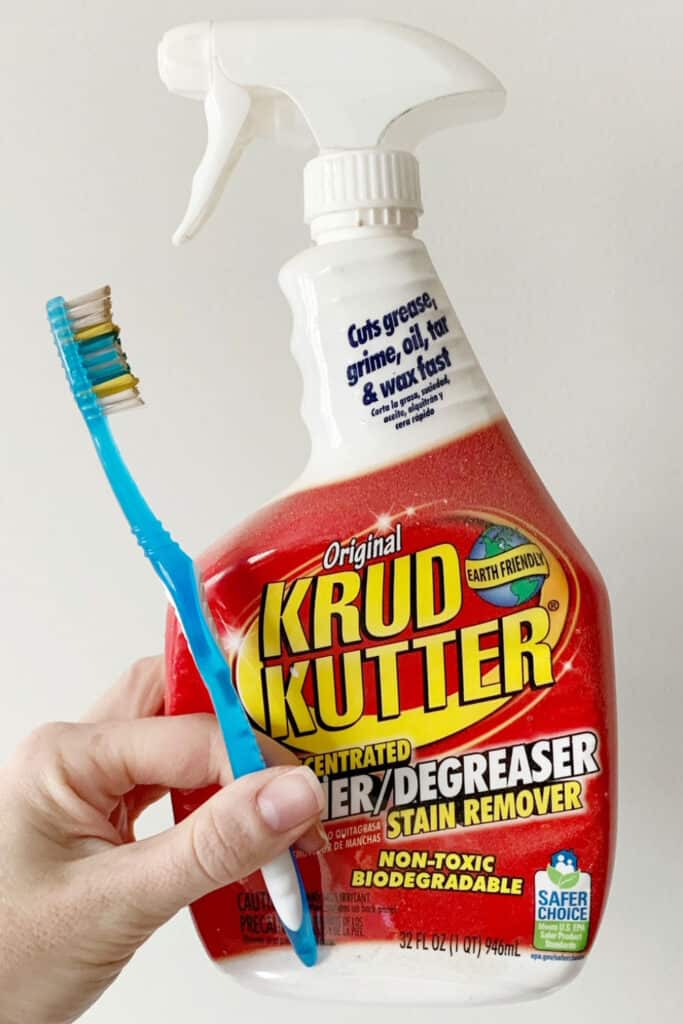
- Cleaner (I used Krud Kutter. Dawn Dish Soap would also work)
- Old Toothbrush
- Rag
- Painters Tape (optional)
- Rust-Oleum Spray Primer
- Rust-Oleum Fossil Spray Paint
- Rust-Oleum Khaki Spray Paint
- Drop Cloth or Large Piece of Cardboard
Get my list of 10 best painting furniture supplies that you must have handy when tackling any next DIY project!
how to Clean Rattan Furniture
Using your cleaner & toothbrush, give the rattan a good scrub. This will act as both a cleaning step, and in a way, a light sanding step to remove any previous residue or flaking rattan. Here’s how to clean furniture before painting for detailed steps.
Wipe it down with the rag and allow it to dry before moving to step two. Learn more on how to prepare furniture for paint here, including cleaning furniture before painting or refinishing.
If your rattan is damaged, this is the best time to fix it. Check out this post on how to repair rattan furniture! Here’s cane furniture repair and how to repair rattan wrapping for other guides on fixing your rattan pieces.
Prevent Overspray When Painting Rattan
If needed, this is when you will tape off anywhere you don’t want the natural rattan color to go. For my table, I planned to paint the base black, so taping it off wasn’t necessary. Get more information on how to prevent overspray when painting furniture here!
Prime Rattan Furniture
In a well ventilated space, over drop cloth or cardboard, it’s time to get spraying! First, using the spray primer, apply 1 coat allowing to dry per instructions on the can. Check out the best primers for painting furniture (and how to choose the right one) here.
(Keep in mind paint will dry slower in cooler temperatures or humid conditions.)
Spray Painting Rattan Furniture
Next, take your Fossil color of spray paint. Apply 2 full coverage coats allowing to dry in between. You’ll notice it almost has a greenish hue and should appear quite matte. In my opinion, it isn’t the prettiest color in this step, but that’s what we want!
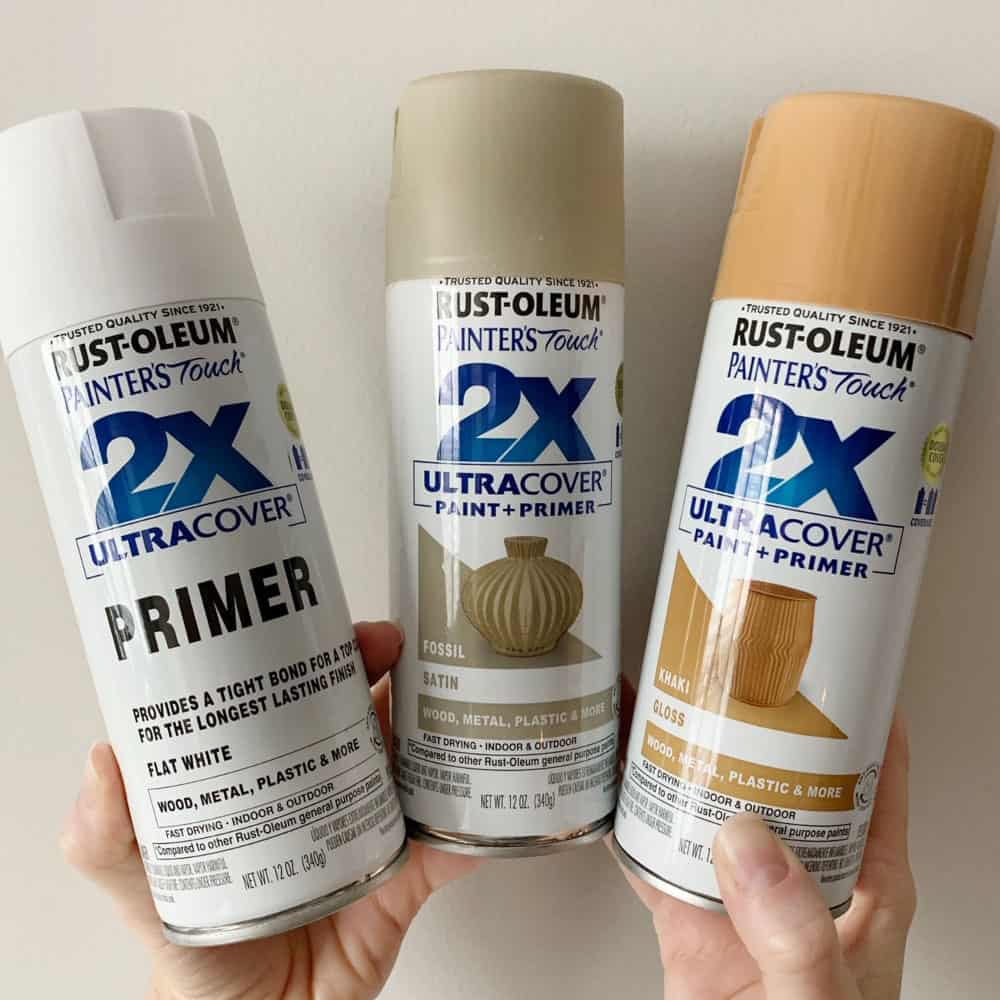
Once dry, get shaking on the Khaki spray can. Standing a little further away than the Rust-Oleum can recommends (approx 2 feet) and moving a little more quickly in the sweeping motion, apply a lighter coat over the Fossil.
This will bring back some of the warmth that is naturally occurring in cane. You aren’t going for full coverage with this color, more of a dusting.
*** CAUTION: Try not to layer the Khaki on too thick. This spray paint, unlike the Fossil, has a much glossier finish. Ideally, you want to avoid a glossy look as this will make the rattan look less natural.
I also used this spray paint layering approach on a previously painted rattan shelf and was equally happy each time. So I know it’s reproducible! Check out more spray painted furniture ideas here for more inspiration.
Check out this post to learn what spray paint is the best spray paint for furniture! (I was shocked by the results!!) You can get all the tips for spray painting furniture here as well, especially if you’re new to using spray paint.
How to Seal Painted Rattan Furniture
This particular table came with a glass top that fits over the rattan, so I did not topcoat it. However, if your piece will be in a heavier traffic area, I would recommend the addition of a topcoat. Check out this post to learn all about the many different topcoats for painting furniture!
Would you like to save this?
Whatever your favorite brand, I would make sure it is matte! Again, you want to avoid any glossy or satin finishes, which will take away from that natural, earthy rattan look.
Another caveat … it will need to be sprayed. Learn how to spray polyurethane topcoat here. If you don’t own a paint sprayer (or don’t feel like getting it out, prepping and cleaning), then an easy alternative would be topcoat in a spray can.
The best spray can topcoat is Minwax’s waterbased polycrylic. You can learn why it’s the best spray polyurethane here, plus we have a full feature on the Minwax Polycrylic Spray here.
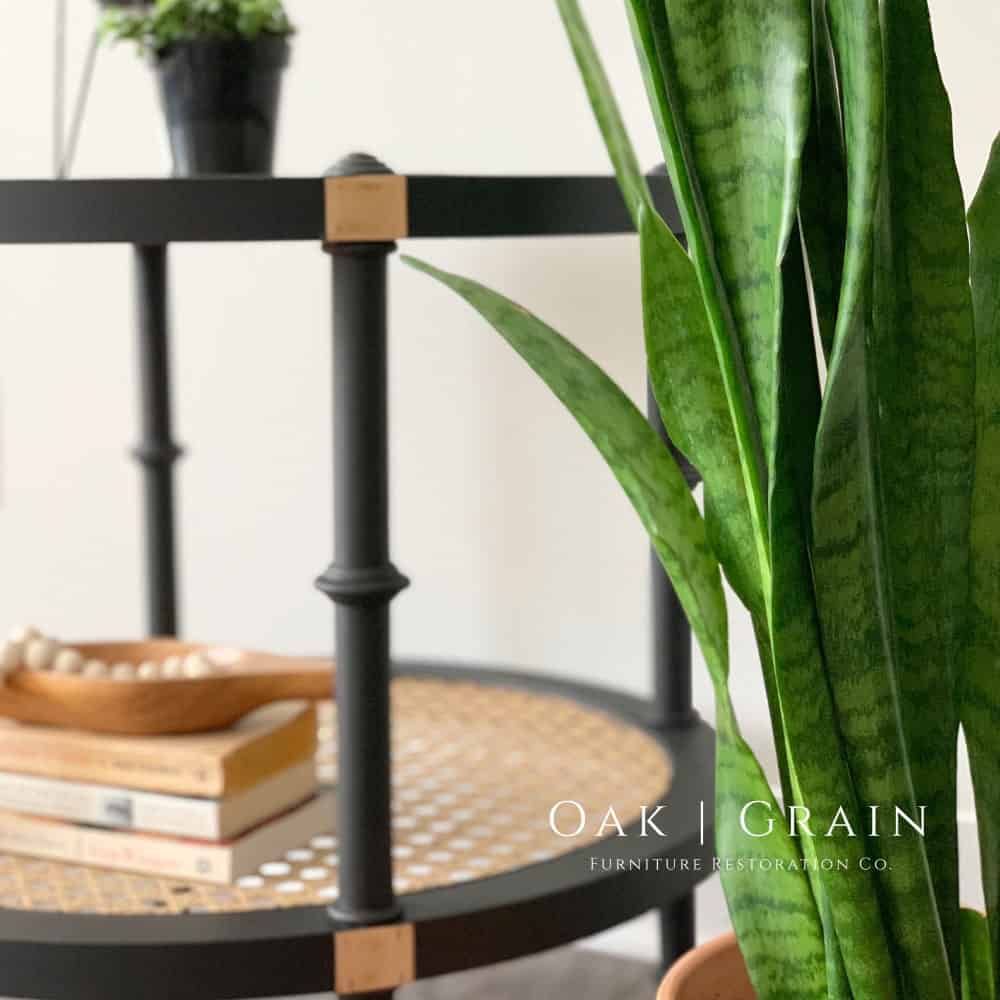
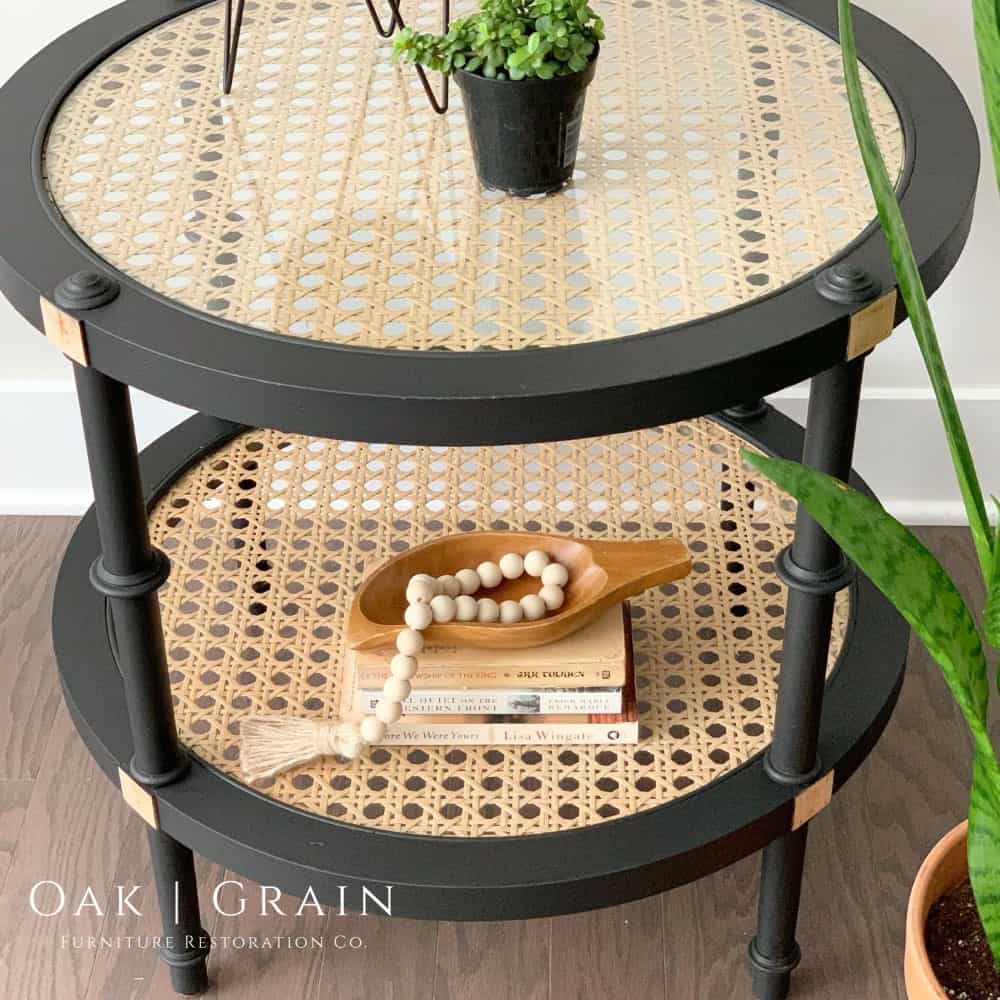
Now you have beautiful, natural looking rattan! (It can be our secret that it’s actually painted).
Painting Table Black
After the rattan was back to its most natural color I believe you can achieve with paint; I sanded down the body of the table using 120 grit sandpaper.
Learn about the importance of sanding before painting furniture here, and the best sandpaper for furniture painting so you don’t ruin your furniture with the wrong kind. If you need a sander, here are the best sanders for furniture you can invest in!
I paid extra attention to the rectangles on the side of the legs with plans to keep them natural. Check out how to refinish wood furniture legs to learn other techniques to create a wooden finish for your furniture legs.
This piece was one of my earlier projects (while I was still on a very tight budget), so fancy, expensive furniture paint wasn’t really a feasible option. To keep it budget friendly, I mixed up my favorite DIY homemade chalk paint recipe using an $8 Sherwin Williams Color-To-Go sample quart in the color Caviar.
Finally, I sealed with my go-to Trewax…. Voila! A literal soon to be garbage warehouse find turned Serena & Lily magazine cover!

More Before and After Makeovers
See All >
Click any of these “before” photos below to view the “after” of that makeover.


How to Lighten Rattan Furniture
Now, if you want a lighter rattan furniture piece, you can use the same spray painting technique as mentioned above. However, you will want to choose a lighter color, such as white or cream, instead of khaki. This will help create a brighter look for your rattan furniture.
Another option is to strip the current color off of your rattan furniture. You can use any of these best wood stain removers to get the current finish off of your furniture. Once you have a clean slate, you can proceed to applying whitewash.
You can make a whitewash stain by mixing equal parts of white paint and water. This will create a semi transparent look that will show the natural texture and color of the rattan. You can also experiment with different ratios to create your desired level of lightness.
Apply this stain with a brush or rag – the number of coats will depend on how light you want your rattan furniture to be. Once the stain is dry, you can seal it with a topcoat for added protection. Check out our post on how to lighten cane furniture to guide you through this process in more detail!


Now you know how to paint rattan furniture to look natural! To refinish rattan furniture, you can use spray paint to create that natural rattan look – you can even use a whitewash stain for a lighter finish. Just remember to properly seal the piece after for long lasting results.
Here are more furniture refinishing ideas, and these end table refinishing ideas will surely inspire you, too!
This makeover was created by Jess with Oak and Grain Restoration. She currently lives in North Carolina where she works full-time in an emergency room. She loves dipping into her creative side by transforming furniture and in the process, keeping her sanity.
Follow her on Instagram to see more action behind the scenes!!


Refinishing Rattan Furniture
We'll walk you through the steps for refinishing rattan furniture and give your worn piece a clean, updated look.
Materials
- Krud Kutter
- Old Toothbrush
- Rag
- Painters Tape (optional)
- Rust-Oleum Spray Primer
- Rust-Oleum Fossil Spray Paint
- Rust-Oleum Khaki Spray Paint
- Drop Cloth or Large Piece of Cardboard
Instructions
- Using your cleaner & toothbrush, give the rattan a good clean scrub. Wipe it down with the rag and allow it to dry.
- Tape off (if needed) anywhere you don’t want the natural rattan color to go.
- In a well-ventilated space, over drop cloth or cardboard, apply 1 coat of priming spray paint, allowing to dry per instructions on the can.
- Next, take your fossil color of spray paint. Apply 2 full coverage coats allowing to dry in between.
- Seal your rattan furniture with a matte topcoat. (optional)
- Sand down the body of the furniture using 120 grit sandpaper then paint and seal it to complete your rattan furniture makeover.
Recommended Products
As an Amazon Associate and member of other affiliate programs, I earn from qualifying purchases.


More Rattan / Cane Furniture Makeovers
- How to Install Cane Webbing to a Door
- Cane Back Chairs Makeover
- Painting Furniture White
- Painting Cane Furniture
Learn the Art of Updating Furniture!
If painting furniture feels overwhelming or your past attempts didn’t go as planned, this course will guide you step by step.

Follow us on YouTube to get more tips for painting furniture. Or share your project with us on our Facebook Group and be part of our community. See you there!
I am not getting the pretty natural color now than I’m using the khaki. I’m sweeping, but it’s just showing the darker color of the khaki on top, not the lighter natural look.
Any suggestions? I even painted back over it with fossil in the spots where the khaki was obvious and tried again, but it’s not working.
Hey Lisa! I’m sorry to hear that it’s not working for you. I’m wondering if you go very, very lightly with the khaki so that the coverage in super thin if it will help the lighter natural look to show through better? I hope it works out for you! Here is another one of our posts about about how to lighten cane furniture that might have some helpful tips! How to Lighten Cane Furniture
I wasn’t expecting much and couldn’t imagine how that table could be refinished. This is absolutely stunning!
So true! It is absolutely stunning! Jess did such a fantastic job, right??
Your pic shows Satin and Gloss. Yet, you state, “Whatever your favorite brand, I would make sure it is matte! Again, you want to avoid any glossy or satin finishes, which will take away from that natural, earthy rattan look.”
Please advise.
Great question! Ideally, we do want to be using matte. At the time, these were the only ones available to use. The satin was close enough to matte that it worked. Hope that clarifies things up for you!
This came out beautiful, giving me some great ideas!
Yay I love hearing that! Can’t wait to hear what you create!