Painting Cane Furniture


If you’re looking to freshen up your home decor, these painting furniture ideas are easy and inexpensive ways to do that. And if you have cane furniture in particular, it can be a fun project to transform its look and give it new life. Painting cane furniture is not only a great way to update its appearance, but it also helps protect the cane from wear and tear.
Let’s go over the tips and tricks for painting your cane furniture for a successful and satisfying DIY project!
Welcome to Furniture Fixer Upper day, where we join 4 of our talented furniture friends and bring you brand new makeovers! I’ll link to my friend’s makeovers after our after photos at the bottom of this post! Don’t forget to check out their masterpieces!! Okay, back to our makeover!

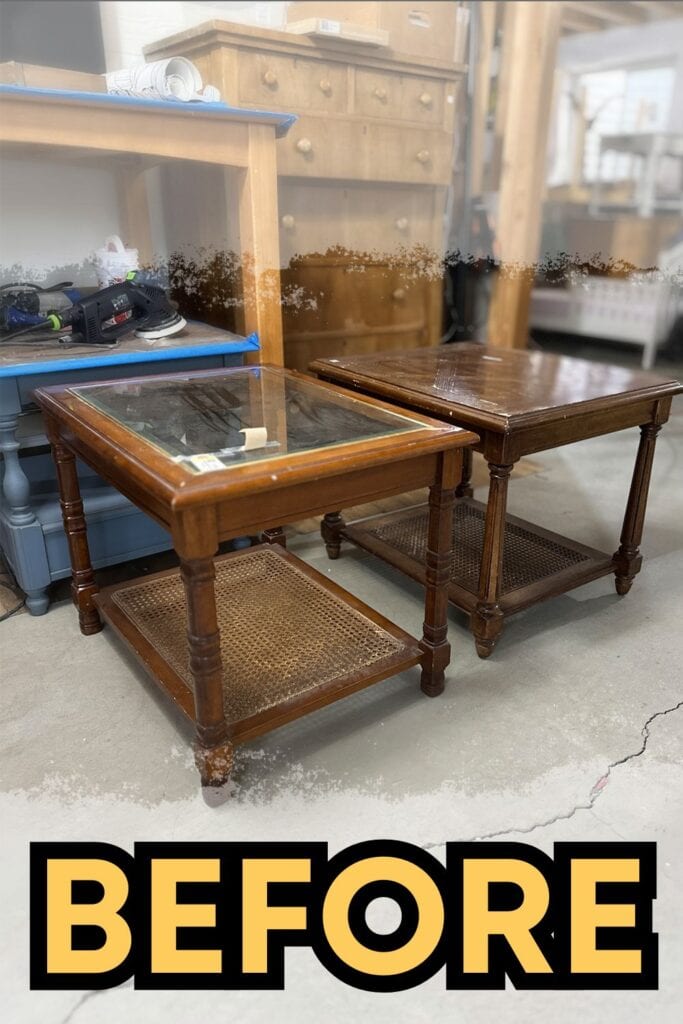
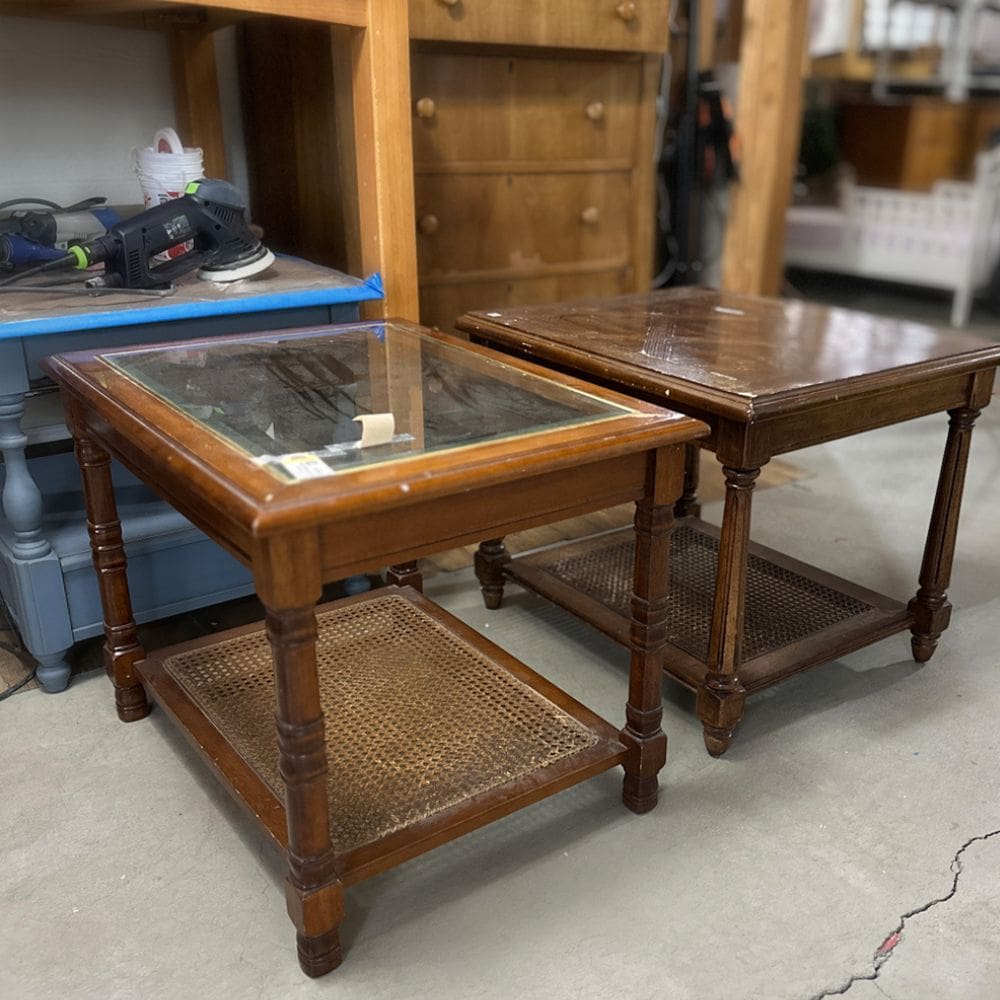
These 2 end tables were bought at different thrift stores but both have a cane shelf. The cane reeding was messed up and missing on one end table, and on the other, the finish on the top was bubbled up a bit.
These cane furniture pieces were perfect candidates for a simple and budget-friendly makeover. With some paint and a few easy steps, they went from outdated and worn to stylish and refreshed.
Let’s make these end tables match and fix the damaged finish on them!

Supplies Used for Painting Cane Furniture
As an Amazon Associate, I earn from qualifying purchases. I also may earn from other qualifying purchases with other companies or get free product to review and use. All opinions are my own.
- Stripwell QCS (Use code SUNLIGHT10 to get 10% off your order of Stripwell QCS!)
- Cane Reed
- Hammer
- Stain
- Zibra Round Brush
- Fusion Mineral Paint in Algonquin
- Frog Tape
- Plastic Sheet/Covering
- Power Sander (Use code RAY10 to get 10% off your order)
- Pro Foam Pads (Use code RAY10 to get 10% off your order)
- 120 and 220 Grit Sanding Screens (Use code RAY10 to get 10% off your order)
- Wood Filler
- Tack Cloth
- Clear Shellac Primer
- Red Paint (Sherwin Williams Emerald Urethane Trim Enamel in Sommelier)
- Wagner FLEXiO 595 Paint Sprayer
- 120 Grit Sandpaper
How to Make Cane Furniture Lighter
First I tried to lighten the cane by removing the old finish. I sprayed on a coat of Stripwell QCS and let it sit for 15 minutes, then applied another coat and let it sit again. We have a review of the Stripwell QCS if you haven’t tried it yet and want to learn more. And you can use code SUNLIGHT10 to get 10% off your order of Stripwell QCS!
The finish came off easily when I scrubbed it a bit with a toothbrush. Ahh I love when that happens. Look at how satisfying it is!
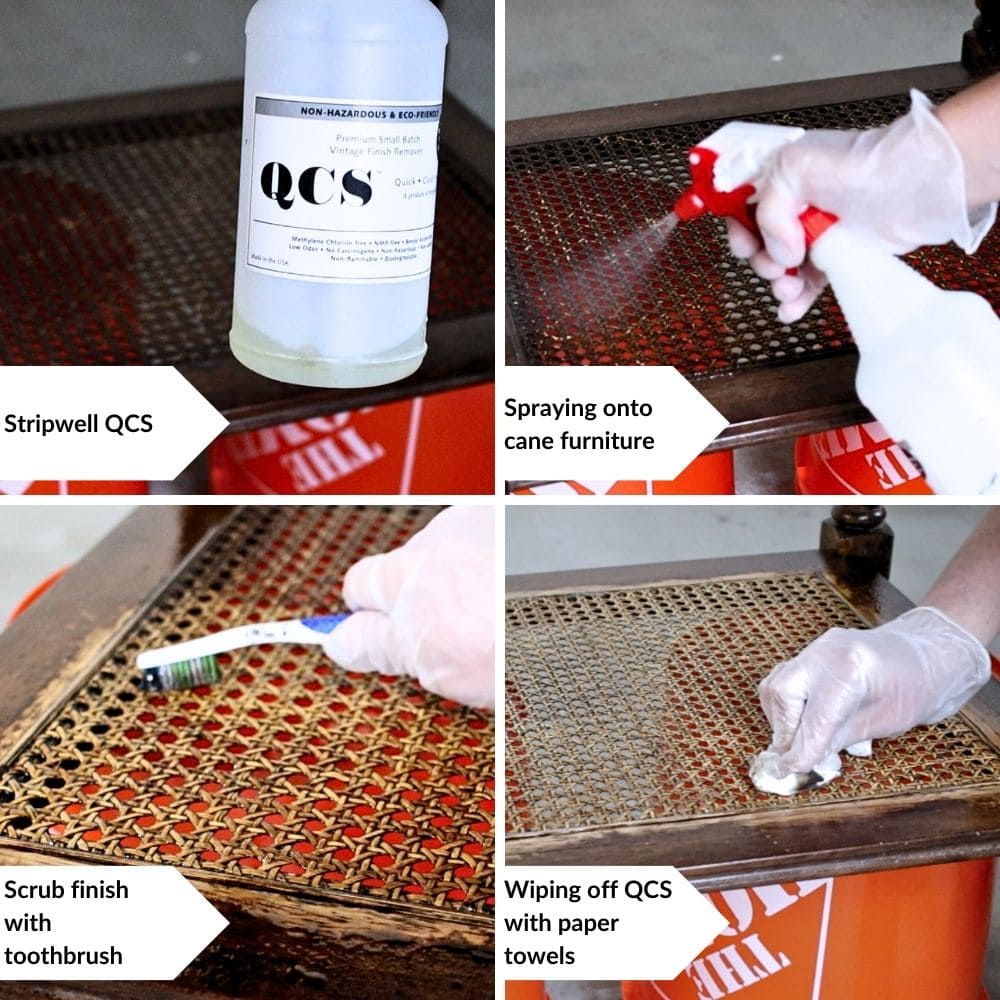
I scraped off most of the finish from the border as well so I didn’t have a hard line where the finish was removed. Then I wiped off the excess stripper with a paper towel and water. The other end table was another story, the finish wasn’t coming off. So I sprayed another coat of Stripwell QCS on and let it sit.
But after 15 minutes, the finish was very hard still. I scrubbed with the toothbrush but it didn’t seem to remove much. So, I gave up and wiped off the QCS with more paper towels and water. Then I let it dry overnight. Our post on how to lighten cane furniture tackles this process in more detail so check it out.
Here’s what they looked like the next day when dry. They definitely did not look the same color, so we’re gonna have to do something about that.
Repairing Cane Reed on Furniture
But first, we had to fix the cane reed. I bought a similar size of the reed off Amazon and then cut enough of it to fix the missing area. Then I soaked it in some water for about 30 minutes to soften it up.

After 30 minutes it was much more pliable and I was able to hammer it into the groove where the old reed was. Not sure that this is the best method, but it worked! We have another way for cane furniture repair you can easily follow.
Then I used some stain I had on hand to stain it a little darker. It wasn’t an exact match, but that’s okay. I just needed it to be a darker brown color.
Painting Cane Furniture
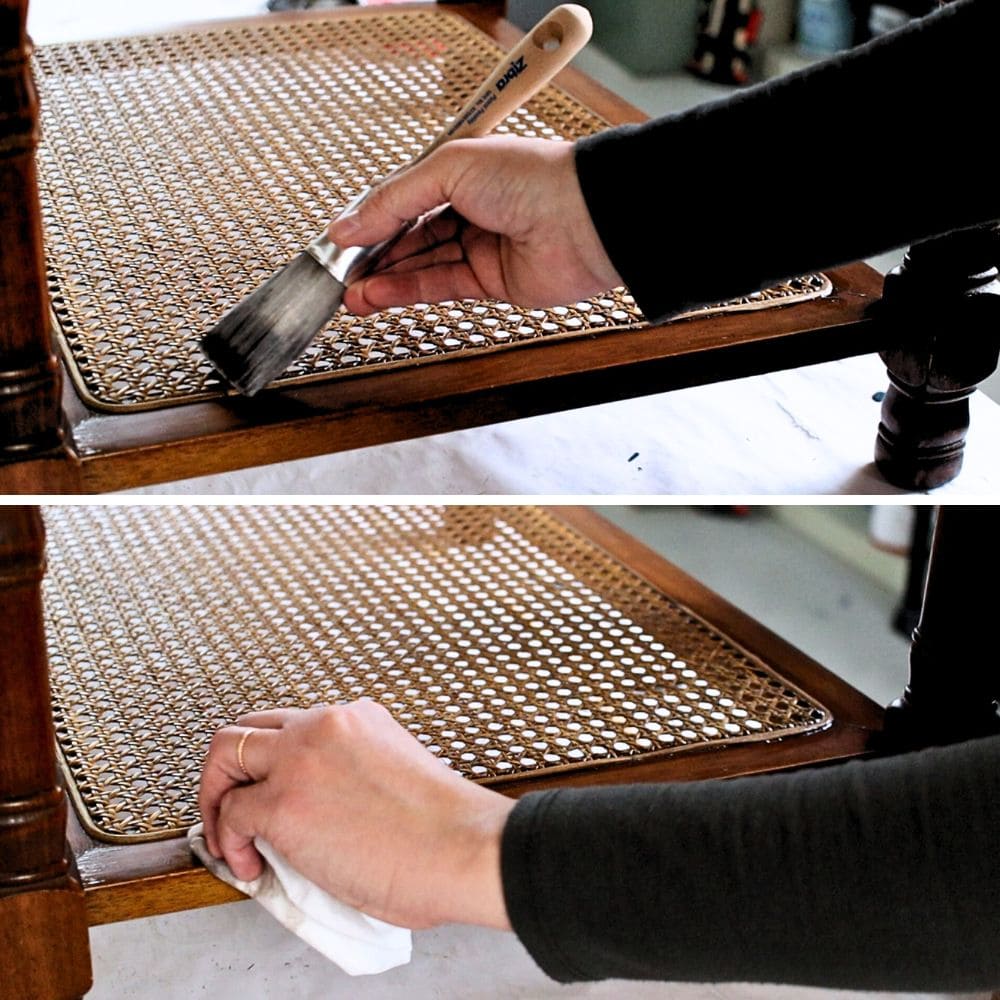
After that all dried, I needed to make all of the cane look similar, so I gave it a beige paint wash. I mixed a little water with Fusion Mineral Paint in Algonquin. If you haven’t used this paint before, here’s our honest Fusion Mineral Paint review to give you some background on it.
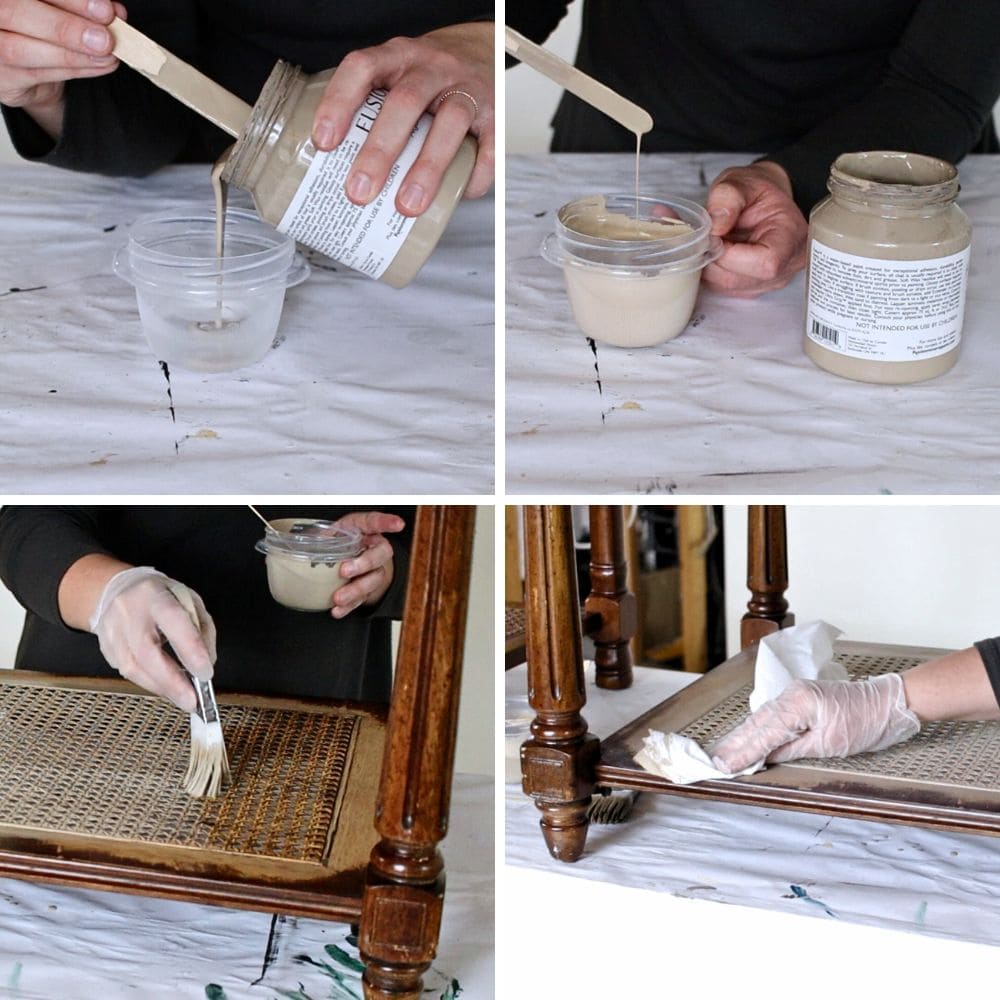
I mixed up the paint with the water to make a paint wash and brushed it on, and immediately wiped it back off. This left the natural wood grain peeking out a bit, but it made the cane look very similar. I ended up with 2 coats to make the cane look the same on both end tables.
The next day, when it was all dry, I taped off the cane with some delicate Frog tape, since I just painted this surface. I cut the tape around the edges, and then I placed plastic on top to cover all of the cane. You can learn how Frog tape is the best painters tape that doesn’t bleed here.
Prepping Furniture for Paint
Before I could paint, I scuffed up the finish on each of the end tables – sanding helps the paint stick. I used the pro foam pads to easily sand all of the curves and details, and then I used 220 grit screens to sand the flat surfaces. You can learn why they are the best sandpaper for furniture painting here, and here’s more on sanding for paint prep.

Would you like to save this?
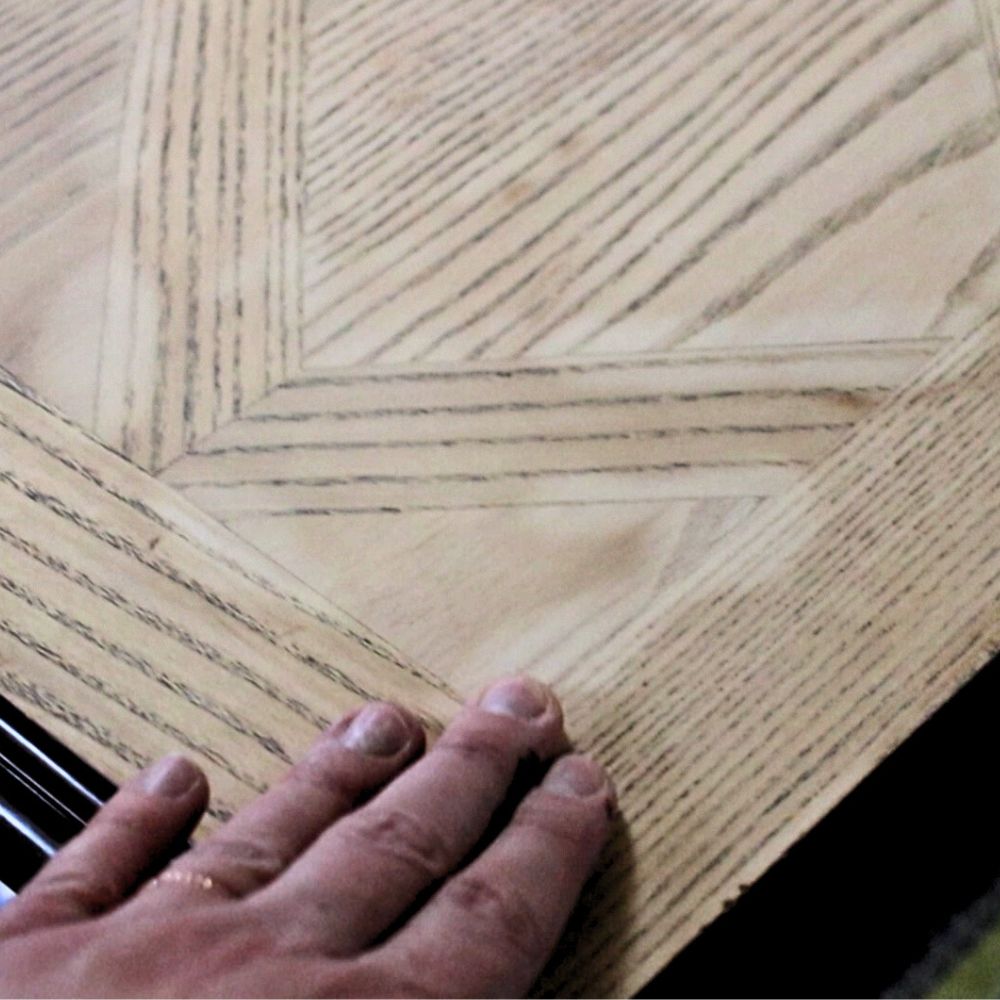
I also sanded the finish off completely on the top of the one end table. I was nervous about this part, and I’ll explain why in a second, but I sanded the finish off of the top with 120 grit sanding screens, hoping to not sand through the veneer.
The top of this one end table had bubbles in the finish and I was nervous that the veneer had bubbled up… Nervously, I sanded the finish off of the top with 120 grit sanding screens, hoping to not sand through the bubbled veneer.
Thankfully the bubbles sanded out, and I never sanded through the veneer! Here’s our post on can veneer be sanded to learn more about the technique on how to sand veneer properly.
While doing this I saw some dings, so I filled them in with plastic wood filler, and then let it dry. The next day, my husband sanded the wood filler down for me, then vacuumed up all of the dust from sanding, and then wiped the tables down with a tack cloth to remove any remaining dust.
Priming Before Painting
He took them outside and sprayed on 2 coats of clear shellac. Clear shellac is one of the best primers for painting furniture that we recommend, and it helps to prevent bleed through stains from coming through paint and to help the paint stick even better. We let them dry overnight and then brought them back inside our workshop to warm them up.


Painting Furniture Red
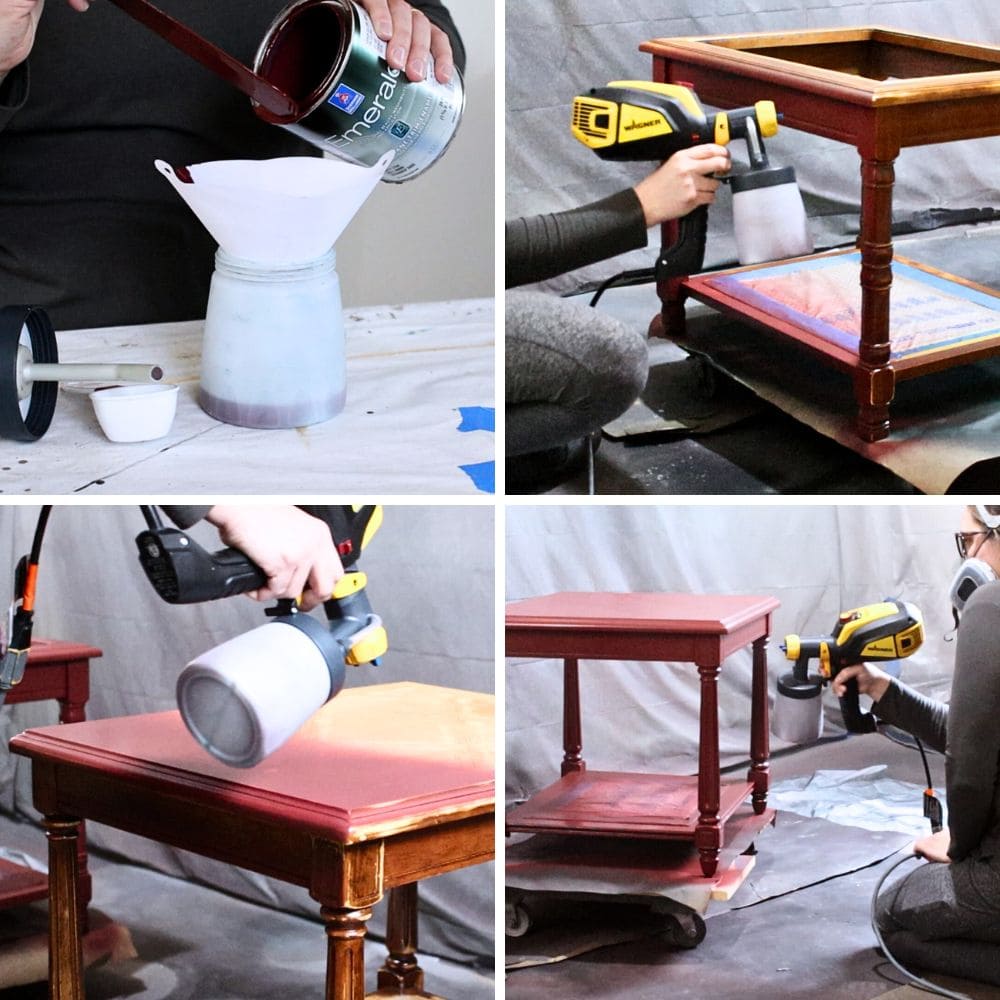
Finally time to paint the rest of the end tables! In the end, I chose a deep moody red paint color called Sommelier in Sherwin Williams Emerald Urethane Trim Enamel. Here’s how to repaint furniture where we also used Sherwin Williams Emerald Urethane Trim Enamel in Sommelier.
I mixed it with 20% water into my Wagner FLEXiO 595 paint sprayer (also known as the 3500 paint sprayer). We also have a Wagner 3500 paint sprayer review and a guide on how to use Wagner FLEXiO 3500 so feel free to check them out.
I sprayed on 2 coats of paint, letting it dry for 4 hours between coats of paint. While spraying the paint on though, I saw the tape move a little bit here and there and I thought ohhh crap, I’m gonna have to do a lot of touch up painting on the cane!
The next day, I removed the tape, and it wasn’t terrible, but it could have been better. I sanded the edge of the cane with some 120 grit sandpaper to remove the red paint here and there and touched up some of the paint.
Read our Sherwin Williams Emerald Urethane Trim Enamel review here to know the pros and cons of this paint. And check out our best enamel paint for furniture post, where we also feature the Emerald Urethane Trim Enamel, to help you decide which enamel paint to use for your next project.
Watch the whole process in our YouTube video below:
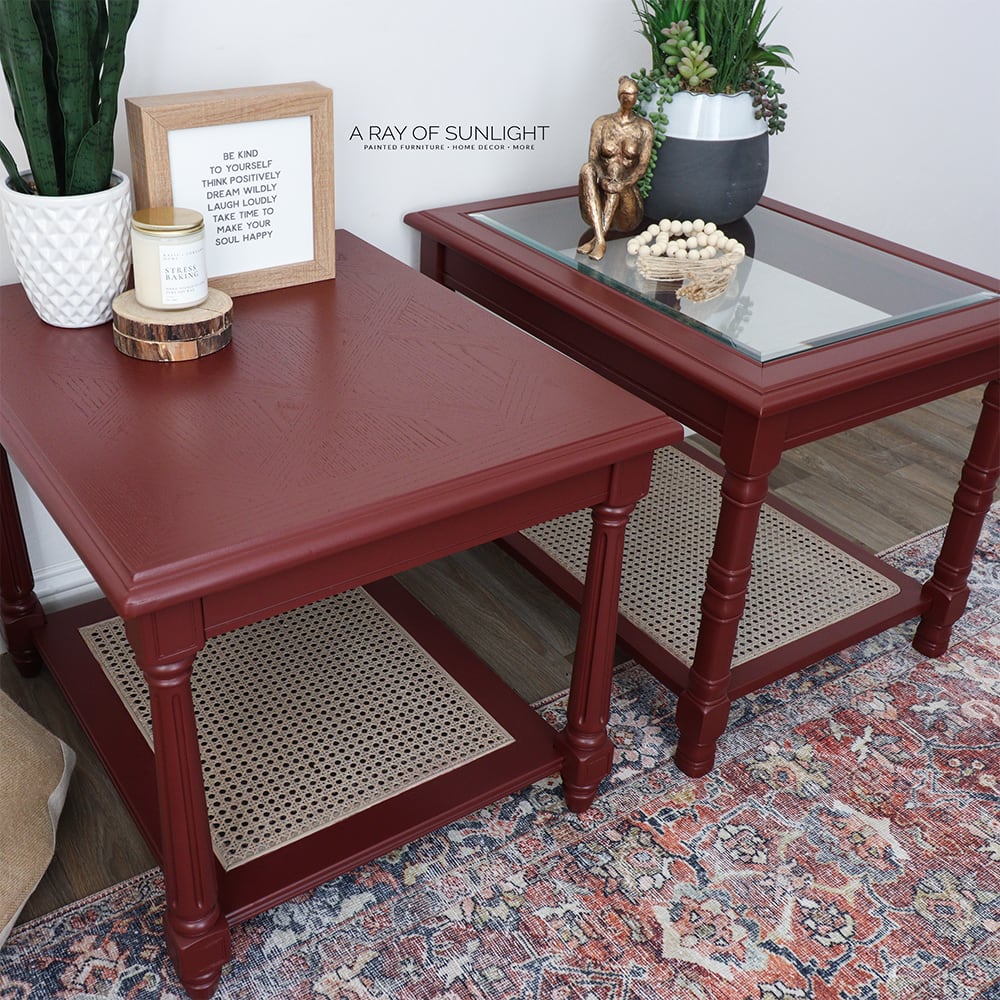
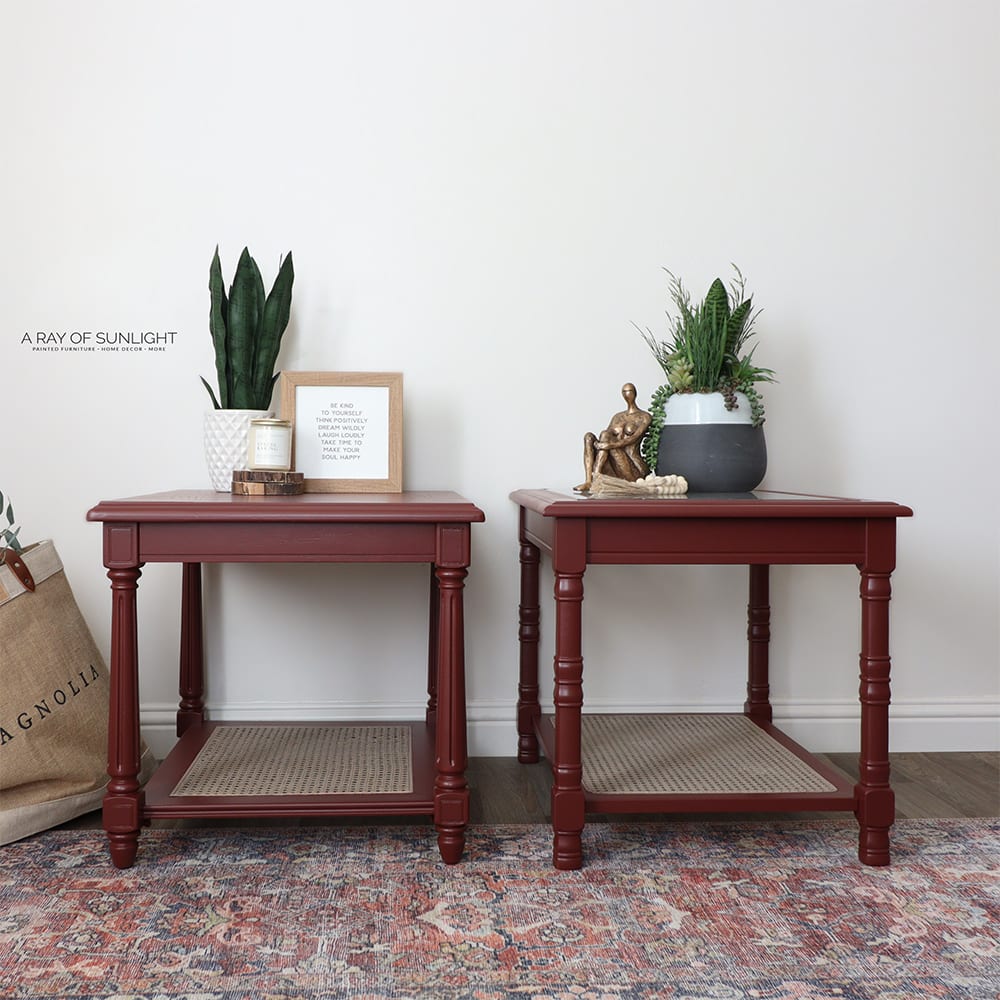
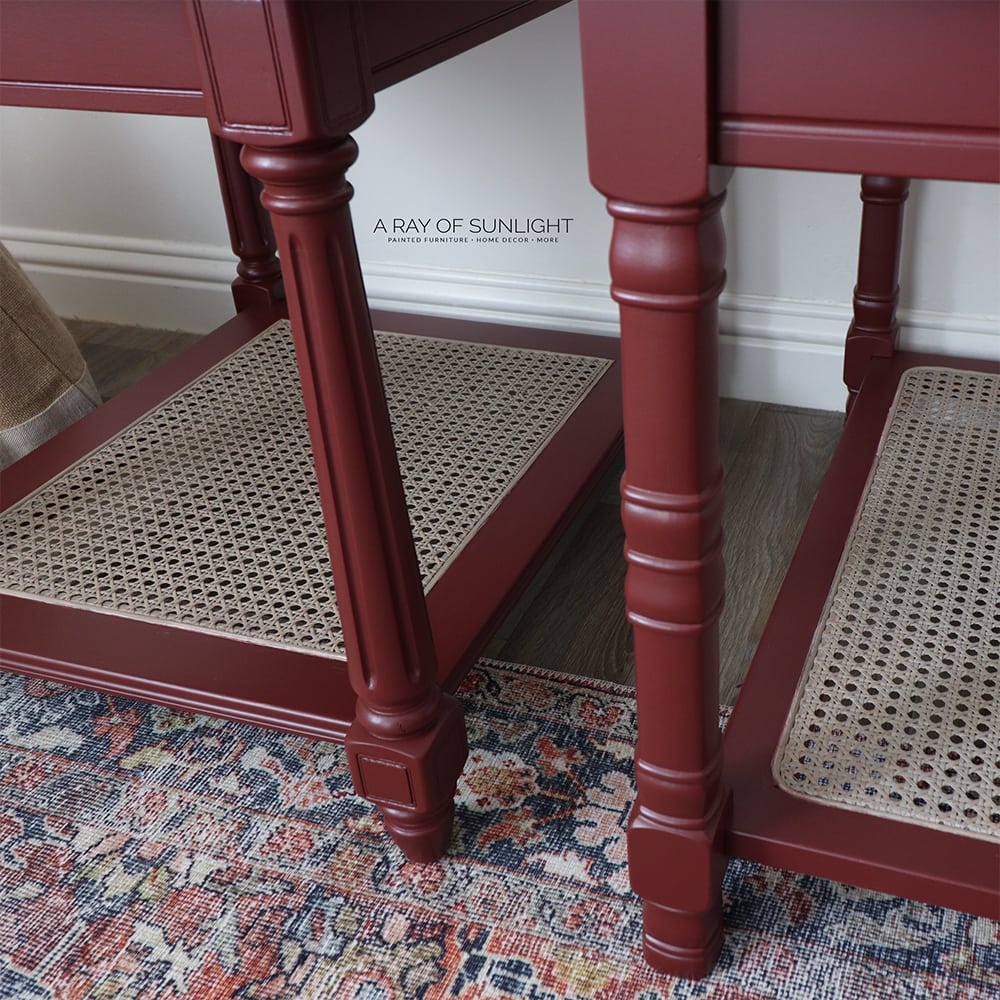
And here’s what these end tables look like now!! I love this deep red color, which is shocking to me because I’ve been against red for a while now. These tables match, but they are different, and I just think they’re perfect! What do you think of the color? Let me know in the comments!
More Before and After Makeovers
See All >
Click any of these “before” photos below to view the “after” of that makeover.


Don’t forget to check out these other awesome before and after furniture makeovers from my Furniture Flipping friends!! (Click the links below the photos!)

- Cedar Chest Makeover from Petticoat Junktion
- Mirror Makeover from My Repurposed Life
- Bedside Table Makeover from Salvaged Inspirations
- Cabinet Makeover from Confessions of a Serial DIYer


Painting Cane Furniture
Painting cane furniture is not only a great way to update its appearance, but it also helps protect the cane from wear and tear.
Materials
- Stripwell QCS (Use code SUNLIGHT10 to get 10% off your order of Stripwell QCS!)
- Cane Reed
- Stain
- Fusion Mineral Paint in Algonquin
- Frog Tape
- Plastic Sheet/Covering
- Pro Foam Pads (Use code RAY10 to get 10% off your order)
- 220 Grit Sanding Screens (Use code RAY10 to get 10% off your order)
- 120 Grit Sanding Screens (Use code RAY10 to get 10% off your order)
- Wood Filler
- Tack Cloth
- Clear Shellac Primer
- Red Paint (Sherwin Williams Emerald Urethane Trim Enamel in Sommelier)
- 120 Grit Sandpaper
Tools
Instructions
- If you have any damaged cane, now is the time to repair it. Get enough cane to cover the damaged area, soak it in warm water for 30 minutes, and then use a hammer to gently pound it into place.
- Once your cane is repaired and dried, you can stain it with a darker color if needed. Don't worry about an exact match, as long as the color is similar enough to blend in with the rest of the furniture.
- To make all the cane look similar, create a paint wash by mixing water with Fusion Mineral Paint in Algonquin. Brush it on and then immediately wipe it off to leave a natural wood grain peeking out. Do 2 coats for a consistent look.
- Tape off the cane with delicate Frog tape and place plastic on top to protect it.
- Use foam pads to easily sand all of the curves and details of your furniture, and then use 220 grit screens to sand the flat surfaces. This will help the paint adhere better.
- Fill in any dings or imperfections with plastic wood filler and let it dry before sanding it down.
- Apply 2 coats of clear shellac as a primer to prevent stains from bleeding through and help the paint stick better.
- Mix Sherwin Williams Emerald Urethane Trim Enamel paint with 20% water and spray it on with your Wagner paint sprayer. Let each coat dry for 4 hours before applying another.
- Remove the tape carefully and use 10 grit sandpaper to gently remove excess paint from the edges of the cane. Touch up any areas that need it.
- Admire your beautifully painted cane furniture!
Recommended Products
As an Amazon Associate and member of other affiliate programs, I earn from qualifying purchases.


More End Tables Makeover Ideas
Follow us on YouTube to get more tips for painting furniture. Or share your project with us on our Facebook Group and be part of our community. See you there!
Hello. Your “red” end tables look AMAZING. And, that’s coming from someone who is very much against painting anything red. But, the red you used is beyond beautiful!! Maybe I need to rethink red. Thank you for sharing your project and your expertise.
Kathy
Thank you so much Kathy!!
“I’m a lover of wood grain and my grandkids think I’m a little nutty about it. I’m always shocked at the transformations I see on the internet and for some I wished they hadn’t painted the piece. These end tables are stunning painted in the deep burgundy. I inherited my childhood end table and it is the same deep burgundy shade. It makes my want to redo it for the grandkid’s bedroom. Thanks for the inspiration.
Thank you for the love Ellen! I’m so glad you love the color!!
Okay, I wasn’t expecting red but I LOVE it! These make such a beautiful set now! Pinned!! XOXO
You’re so sweet! Thank you so much Denise!
They look amazing now, Natalie!! I love that they match but they don’t lol. And, I’m impressed with your cane repairing skills! XOXO
Thanks for the love Christy! One of my favorite things to do is make furniture match when they don’t. haha
I like the color of the end tables. I have seen so much painted white and stressed. It is nice to see a little color. You did a great job on them.
Thanks for the love! I do love white, but color is nice as well.
Both tables turned out just great! What a good idea to remove the original cane color! I never knew you could do that. Good job!
Thank you for the love Caye! I didn’t know if it would work, but I’m glad it did!
Gosh, I am rethinking red, too! These may be my favorite of your furniture, makeovers yet. Beautiful!
Oh wow, what a compliment! Thank you so much!
They really look great! I love the red color. I just used that same color to paint the top of my cedar chest. There was a lot of damage to the top of the chest. but the sides were in much better shape, so I stained them mahogany. As always love watching you.
These tables are exceptional! This red is absolutely gorgeous!
Thank you so much Wayne!