How to Repair Rattan Furniture


Rattan and cane furniture are all the rage! If you’re lucky you can find some rattan furniture at a thrift store to makeover, but it might need some repair. So, here’s how to repair rattan furniture! Repairing old furniture is a great way to save money and give new life to old pieces.
We’ll cover everything you need to know about bringing your rattan pieces back to life, including tools and materials you’ll need and common repairs to make.
Who doesn’t love rattan? It’s totally in right now! The downside? It’s fragile stuff and repairs often look intimidating. If you’re in the refinishing business, you probably know that boho beauties are selling like hotcakes and at a high dollar price point. Yet, oftentimes, the fix is fairly inexpensive and simple, just takes some patience.

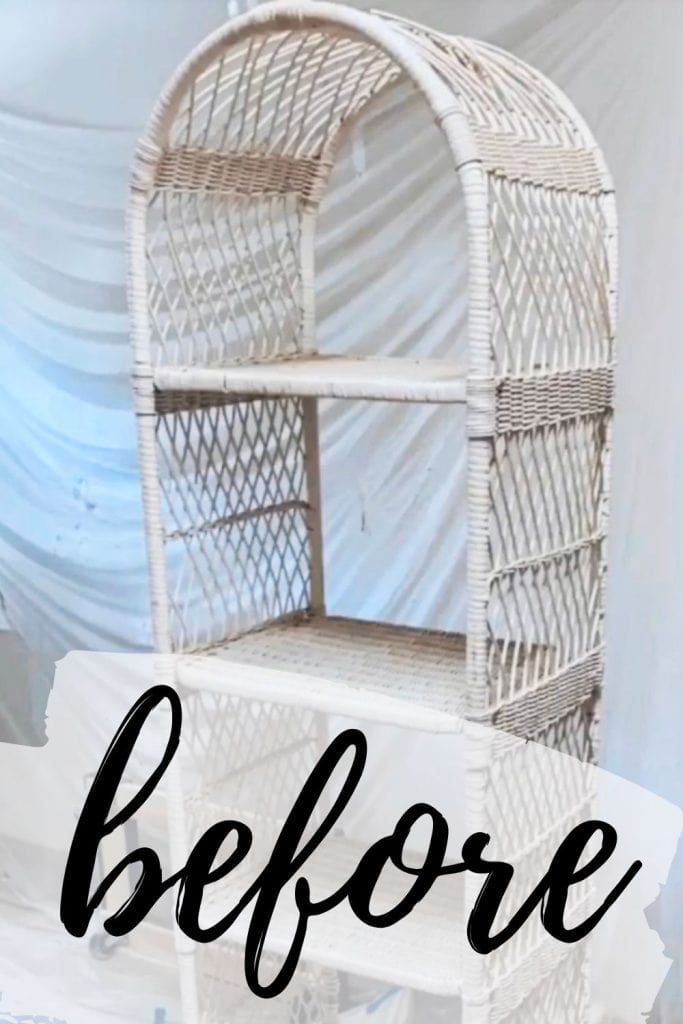
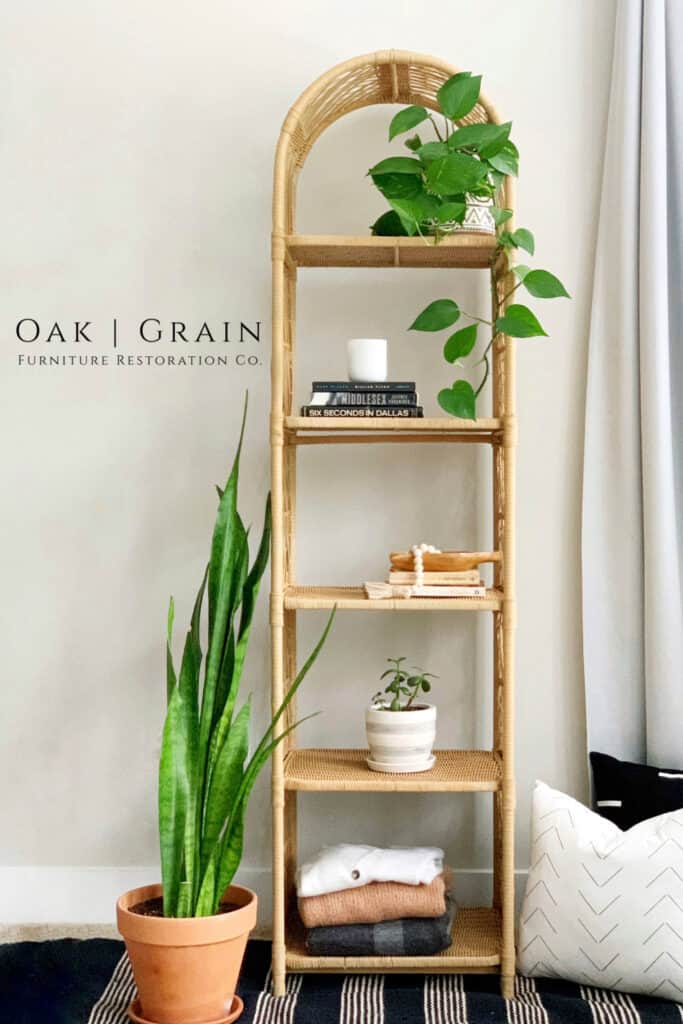
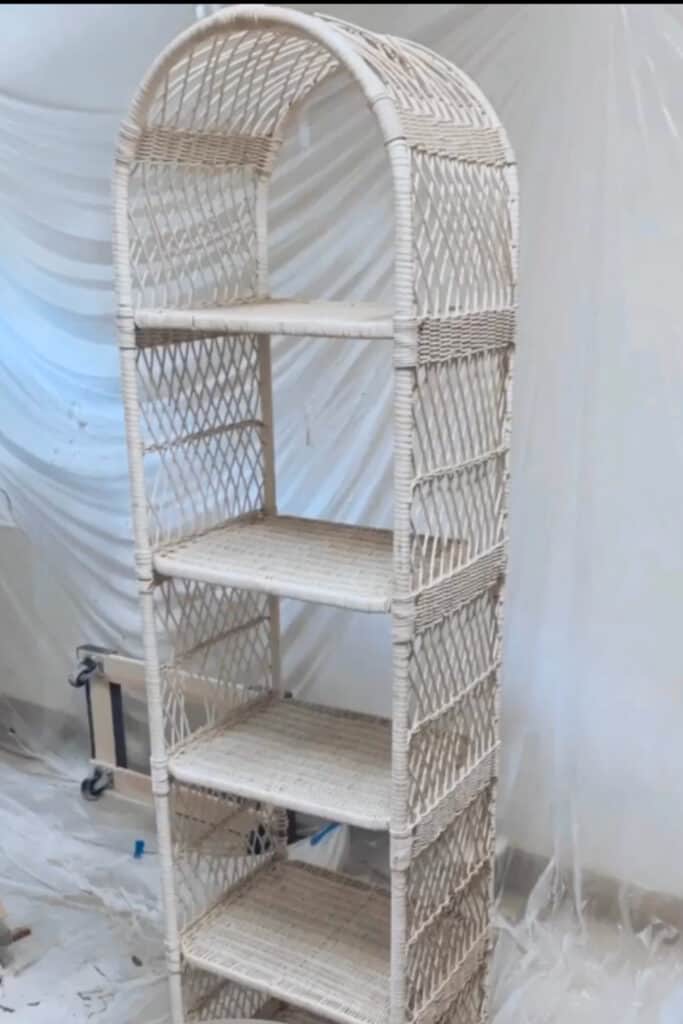
I spotted this rattan shelf in a warehouse and immediately thought it resembled a $350 Urban Outfitter look-a-like I’ve had my eyes on.
While I am no basket weaving master – though there was an underwater basket weaving class offered at my college that I regret making fun of instead of enrolling in – I do have some simple techniques on how I repaired this wicker wonder in need of love.

Supplies Used to Repair Rattan Furniture
As an Amazon Associate, I earn from qualifying purchases. I also may earn from other qualifying purchases with other companies or get free product to review and use. All opinions are my own.
- Dawn Dish Soap and Water
- Scrubbing Brush for thicker reed or a Toothbrush for finer
- A Coil of Reed Cane (measure your cane for exact measurements!)
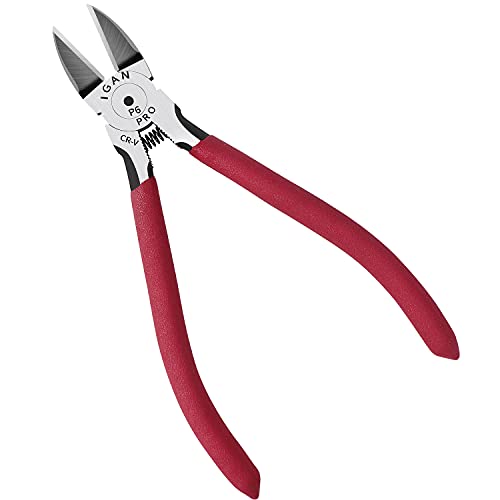
- Sharp Scissors or Wire Cutters
- Wood Glue
- Small Clips or String (wood clips, chip clips, etc.)
- Spray Paint (optional, see below for the exact paint used!)
How to Repair Rattan Furniture
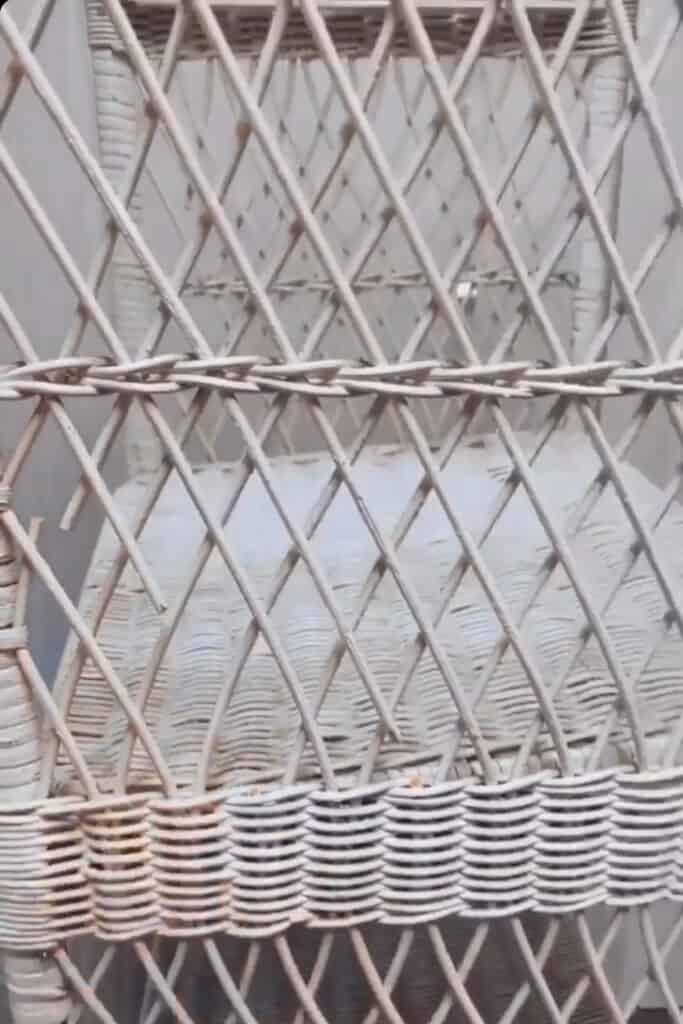
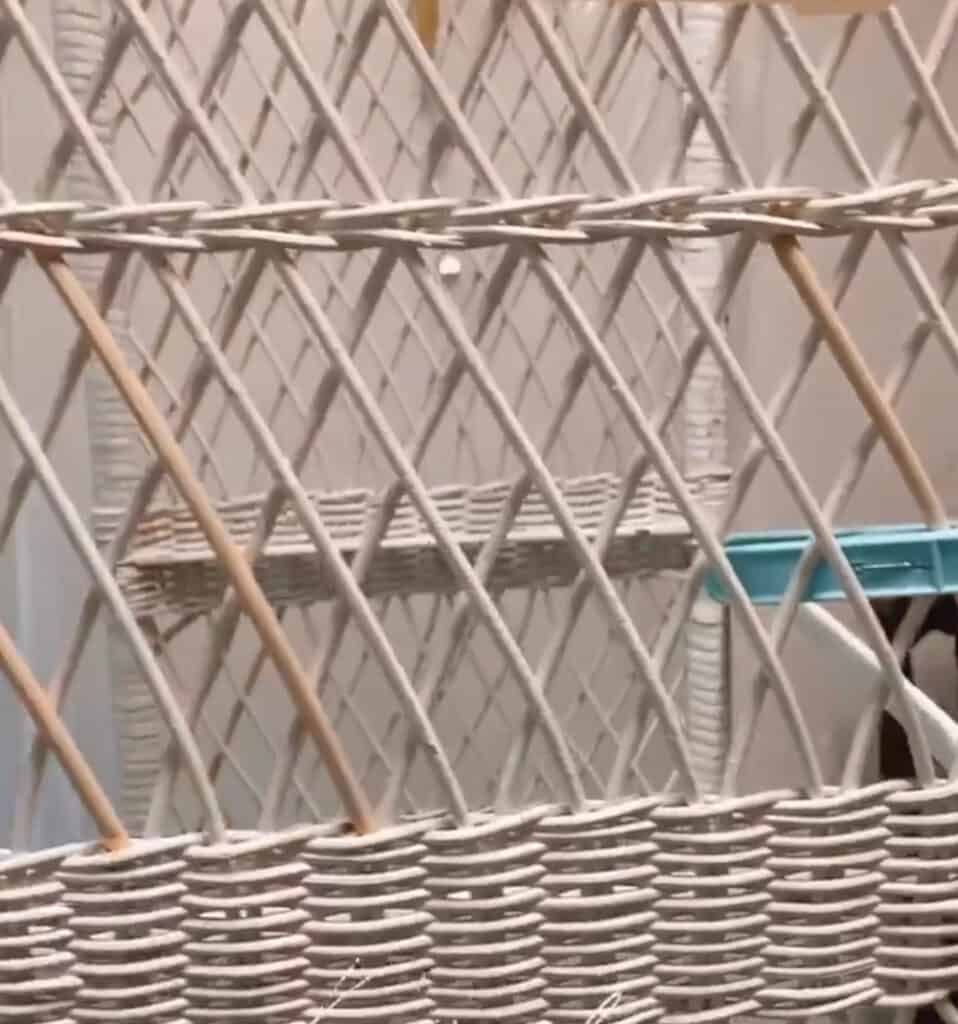
Get started by using your soap and brush to give the rattan a good scrub. For thinner, more fragile cane I would recommend a soft toothbrush. The rattan on my shelf was pretty sturdy so I used a larger, scrubbing brush.
This will act as both a cleaning step, and in a way, a light sanding step to remove any previous residue or flaking rattan.
Clip Off Broken/Damaged Rattan
Using your scissors or wire cutters, trim away any damaged or broken rattan. This will give you a clean slate for your new rattan.
*TIP: Take a picture before doing this so you can recall the patterns.
Here’s our guide on how to repair rattan wrapping for more detailed tips and tricks on fixing damaged rattan.
Choose Rattan Replacement and Soak In Water
Using the rattan that you trimmed away, measure the diameter to determine what millimeter size rattan you will need to replace it with.
There are flat and round types. I purchased mine from Amazon, but basketweaving.com also has a lot of options.
Once your rattan is purchased, soak the coil in water for 20 minutes. If you omit this step your rattan will be very stiff, brittle, and difficult to work with.
I used a large bowl of water and kept it nearby while working with the rattan to prevent it from drying out.
Measure and Cut Rattan
Next, it’s time to measure and cut the rattan! No rulers or measuring tape required.
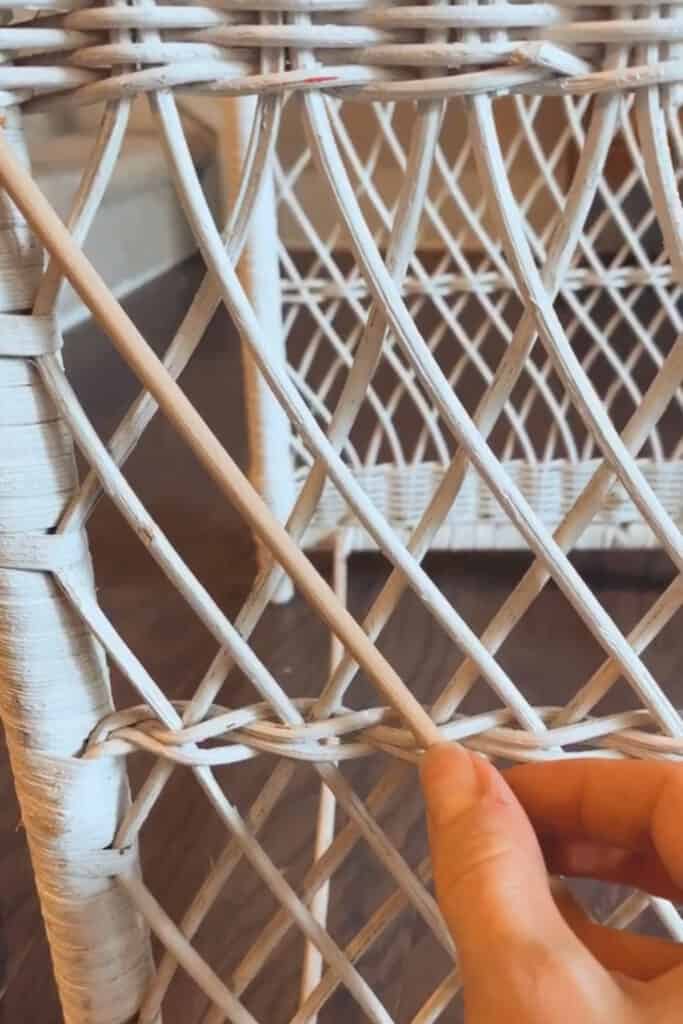

Simply cut the starter end of the rattan at an angle so you can easily wedge it into the space of the previous rattan and estimate the length.
Allow for some extra tucking room on the other end and cut (if it’s too long you can trim it later).
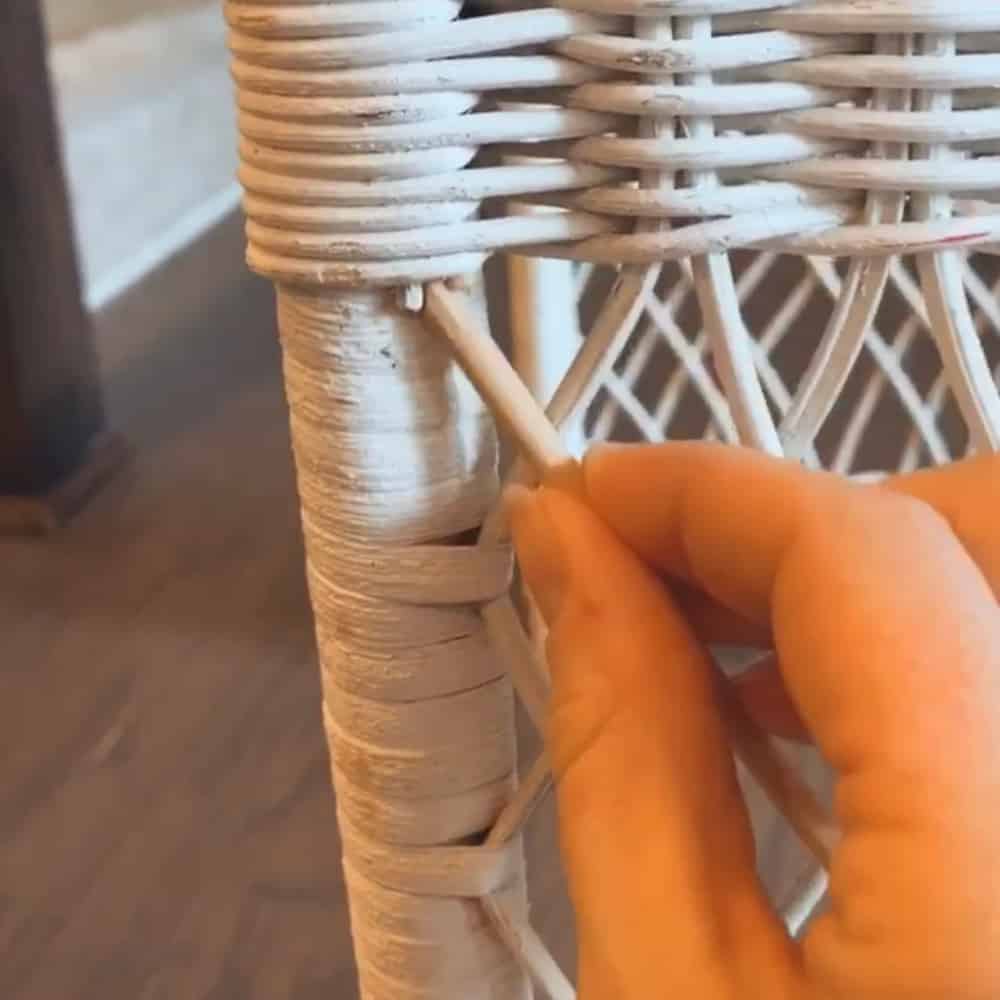
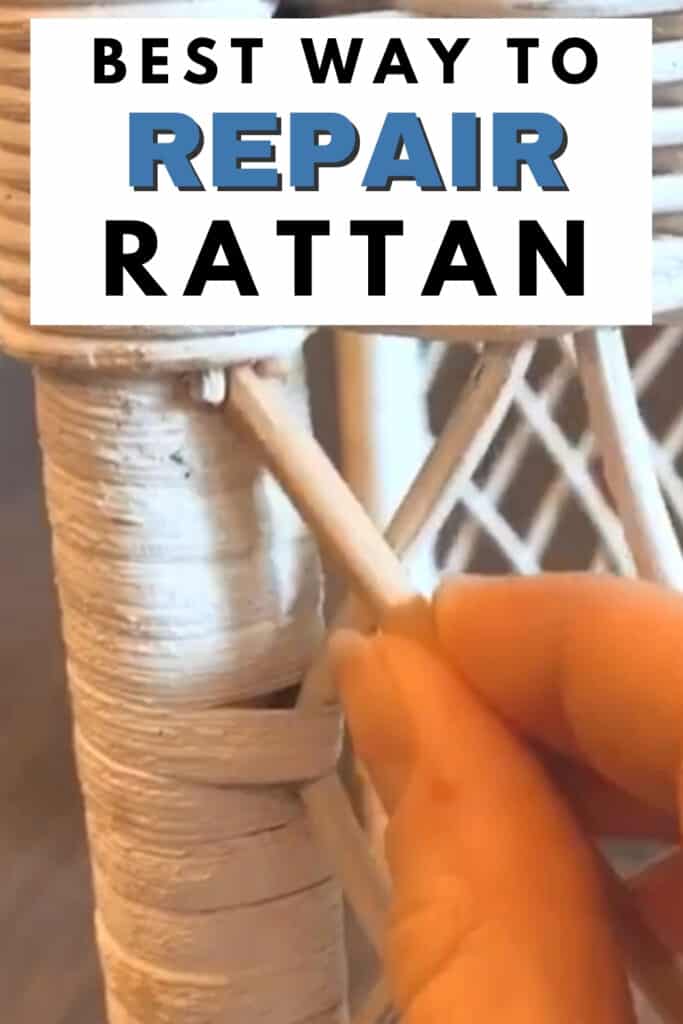
Tuck and Glue Rattan
Using your wood glue, simply dip each end of the rattan into the glue and tuck it into the space you just measured.
Would you like to save this?
Until the glue dries, you may need something to hold it in place and at the angle desired to keep the pattern consistent while the rattan and glue dry.
Wood clips or even string would work well, but in my case, I used IKEA chip clips. (Hey! Sometimes you have to get creative.)
Paint Rattan (optional)
Once your glue is dry, remove the clips. You can stop here if you love the look of the natural rattan. Isn’t repairing rattan furniture easy!?
If your new rattan clashes with your existing rattan – which in my case, did because it was previously painted – you can apply spray paint. Head over to this post to learn more about spray painting furniture! For more painting cane tips and tricks, here’s painting cane furniture!
Use any color of your choosing, but if you are aiming for a natural rattan look, please refer to my how to refinish rattan furniture post.
I completed my look by applying my custom blend spray paint lined out in my “How to refinish rattan furniture” post (linked in the paragraph above).
More Before and After Makeovers
See All >
Click any of these “before” photos below to view the “after” of that makeover.


If you want this rattan detail on your furniture, here’s how to install cane webbing to a door for your furniture. Or if you just want to lighten your cane furniture here’s our guide on how to lighten cane furniture. Check out more ways to do cane furniture repair here to restore your cane’s natural charm and character.
That’s it! This trendy little shelf was sold within 5 minutes on Facebook Marketplace!! If you want to know how to properly do pricing, learn from my handy furniture painting price list guide here. For similar makeovers, here are painted bookshelf ideas.


How do I know what size rattan to use for my furniture repair?
To figure out the size you need to fix your rattan furniture, start by measuring the diameter of the rattan that needs replacement. You can easily do this with a ruler or measuring tape.
Just remember, there are both flat and round types, so choose the right shape when buying replacement rattan.
It’s also a good idea to have some extra rattan handy, just in case you make any mistakes or need to replace more sections than you expected.
Can I skip the step of soaking the rattan in water before using it for furniture repair?
Yes, you can technically skip the step of soaking the rattan in water before using it for furniture repair. However, we highly recommend to soak the rattan beforehand as it will make it easier to work with.
Soaking the rattan makes it more flexible and less prone to breaking or cracking during the repair process.
If you choose to skip this step, be prepared for a more difficult and time-consuming repair process.
Dry rattan can be very stiff and brittle, making it harder to fit into tight spots or shape it the way you want. Soaking will also help prevent the rattan from drying out too fast once you start the repair.
This makeover was created by Jess with Oak and Grain Restoration. She currently lives in North Carolina where she works full-time in an emergency room. She loves dipping into her creative side by transforming furniture and in the process, keeping her sanity.
Follow her on Instagram to see more action behind the scenes!!


How To Repair Rattan Furniture
Do you have rattan furniture to makeover but need some repair? Here’s how to repair rattan furniture!
Materials
- Dawn Dish Soap and Water
- A Coil of Reed Cane (measure your cane for exact measurements!)
- Wood Glue
- Spray Paint
Tools
- Scrubbing Brush
- Toothbrush
- Sharp Scissors or Wire Cutters
- Small Clips or String (wood clips, chip clips, etc.)
Instructions
- Give the rattan furniture a good scrub using your soap and brush. For thinner, more fragile cane, use a soft toothbrush.
- Trim away any damaged or broken rattan using scissors or wire cutters. This will give you a clean slate for your new rattan.
- With the rattan that you trimmed away, measure the diameter to determine what millimeter size rattan you will need to replace it with.
- Soak your new rattan in water for 20 minutes. If you omit this step your rattan will be very stiff, brittle, and difficult to work with.
- Measure and cut the rattan by simply cutting the starter end of the rattan at an angle. This is so you can easily wedge it into the space of the previous rattan and estimate the length. Do allow for some extra tucking room on the other end before cutting.
- Dip each end of the rattan into the glue and tuck into the space you just measured. Hold it in place and at the angle desired with clips to keep the pattern consistent while the rattan and glue dry.
- Once the glue dries, you can remove the clips and proceed to paint the repaired rattan furniture.


More Repairing Furniture Resources
- How to Repair Broken Trim on Furniture
- How to Repair Bubbled Veneer
- How To Fix A Missing Chunk Of Wood
- How To Fix Old Dresser Drawers From Falling Out
- How To Repair Cracks In Antique Wood Furniture

Follow us on YouTube to get more tips for painting furniture. Or share your project with us on our Facebook Group and be part of our community. See you there!

Hi! Thank you for this great post! I am also refinishing a similar rattan shelf. I was wondering if you had any tips for tucking the rattan into the tight spaces? Most of my pieces are broken off inside the place where the rattan would get tucked. I would love any tips! Thanks
Will this painting technique work on dark rattan as well? I’ve got two dark rattan swivel egg chairs – one new and one old that are darker brown…would love to look more like a “natural” rattan color!!
once you soak the reed and fix it in place where you need it, won’t it shrink when it’s dry?
It does very slightly. But it’s a little bit loose when it’s wet, even when you stretch it into place. It works beautifully.