Remove Stain From Wood Without Sanding


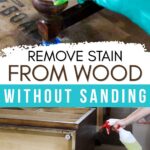
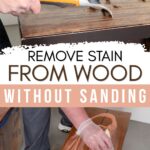
With the right tools and techniques, you can easily strip away old stain and years of built-up grime – all without having to sand it away. In this post, we’re sharing how to remove stain from wood without sanding by using a chemical stripper or scraper, as well as some tips for success.
Removing the old stained finish from wood is a major step in refinishing furniture if you want to update the old worn out finish. So if you’re looking for tips to make updating your wooden furniture or other wooden items around the house, read on!
Removing stain from wood without sanding is a great way to refinish furniture and other wooden objects around the home. The benefit of avoiding sanding is a cleaner work environment with no dust getting on everything, as well as less physical work.

Chemical strippers make this process much easier, allowing you to remove the old stain quickly and effectively. And carbide scrapers take a lot of elbow grease, but they get the job done quicker in most cases.
But not all chemical strippers are the same. Some are very toxic, but work quickly, while others are way less harmful to your health, but take a little longer to cut through the finish. So let’s dive into the nitty gritty details of removing stain from wood without sanding so you know exactly what to expect!
supplies used to remove Stain From Wood Without Sanding
As an Amazon Associate, I earn from qualifying purchases. I also may earn from other qualifying purchases with other companies or get free product to review and use. All opinions are my own.
- Carbide Scraper
- Cardboard Flooring
- Chemical Resistant Gloves
- Respirator
- Glasses
- Stripwell QCS (Use code SUNLIGHT10 to get 10% off your order of Stripwell QCS!)
- Plastic Putty Knife
- Stiff Brush
- Mineral Spirits
- 220 Grit Sandpaper
- Wood Stain
- Topcoat
Using a Carbide Scraper
One great option to remove stain from wood without sanding is to use a carbide scraper. It does give you a workout, but it is very sharp and will remove layers or stain and paint pretty easily.
Here’s our list of the best tools for removing paint (and stain) from wood to learn more about how to remove an old finish from wood.
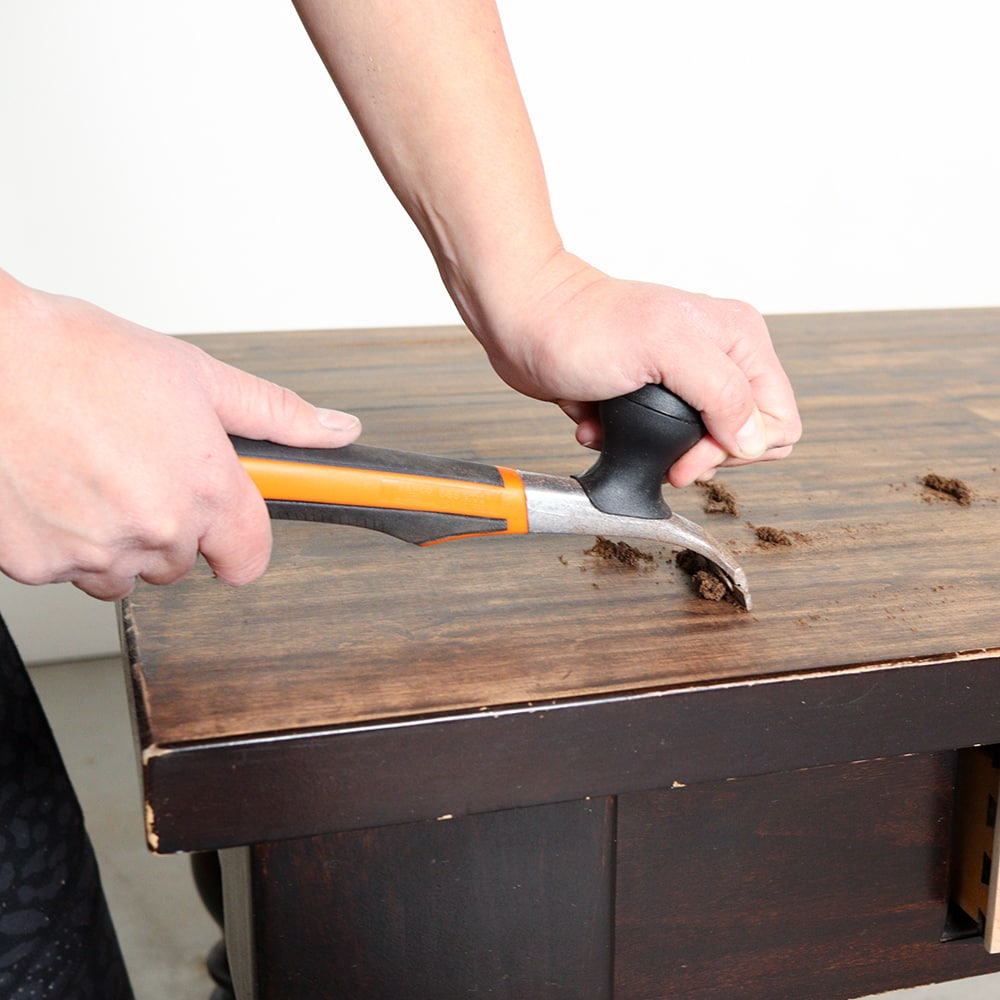
It takes a few scrapes of practice to figure out what angle to hold it at to get the best results, but then you’re off to the races.
Compared to chemical strippers, a carbide scraper can remove your stained finish so much faster. Unless the stained finish has a very thick topcoat on it. Then, a chemical stripper is so much easier and faster to use.
We used the carbide scraper in these projects. Check them out to see this option in action.
Learn more tips on how to scrape paint off wood here. The other option is to use a chemical stripper to remove the stain and topcoat.
Setting Up for Using a Chemical Stripper
There really isn’t much that you need to do in order to prep the wood for a chemical stripper.
If there is a lot of dirt, dust, or grime on the surface, it would be best to remove it so the stripper can cut through the really tough stuff. Simply wipe off or vacuum up the dust or debris, and use a damp cloth to clean off anything else that will easily come off.
Then set up your work area. Chemical strippers don’t cause a lot of dust, but they do create a goopy substance that can easily drip onto the floor and get all over your hands.
To make cleanup easy, I lay down a layer of cardboard on the floor, and then put my project on buckets on top of the cardboard. I buy a roll of cardboard flooring that is made for this type of thing, but with all the packages we get these days, you can break down some used shipping boxes to use here.
I like the cardboard to extend at least 6 inches past the edges of my project so the goop doesn’t have a chance to get on my concrete or nice flooring.
And then to protect yourself, wear chemical resistant gloves, a respirator (especially for the more toxic strippers), and glasses for eye protection. Last but not least, if there is hardware on your project, like drawer pulls, knobs, or hinges, remove them so you don’t have to work around them, and possibly damage them with the stripper.
Speaking of hardware, if you want to clean it up to make it look new before putting it back on your project, here is how to clean furniture hardware.
Using a Chemical Stripper
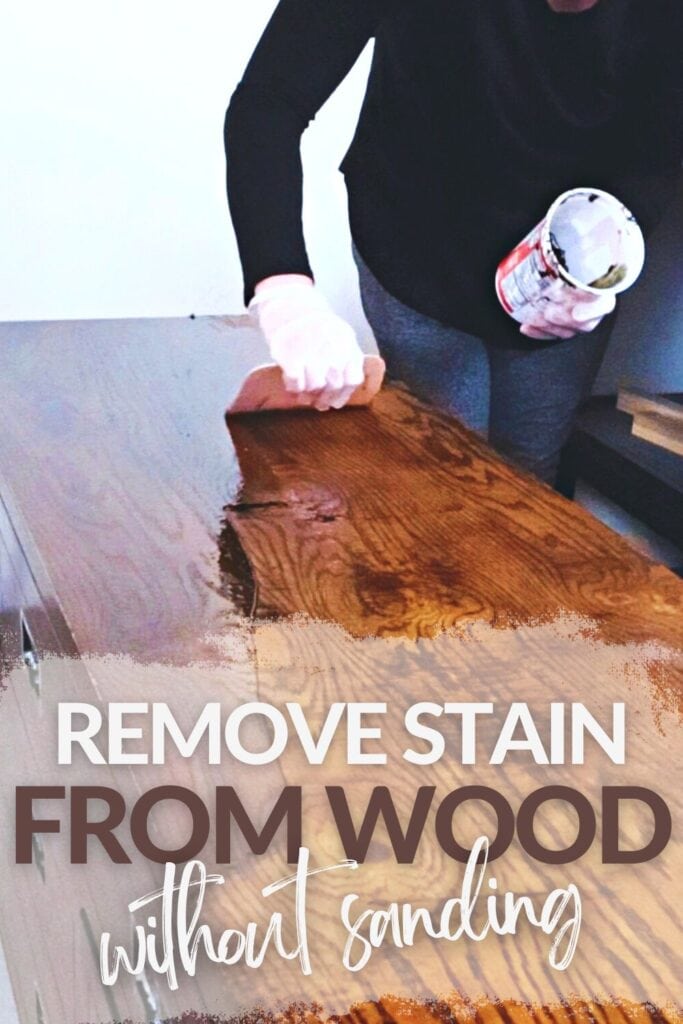
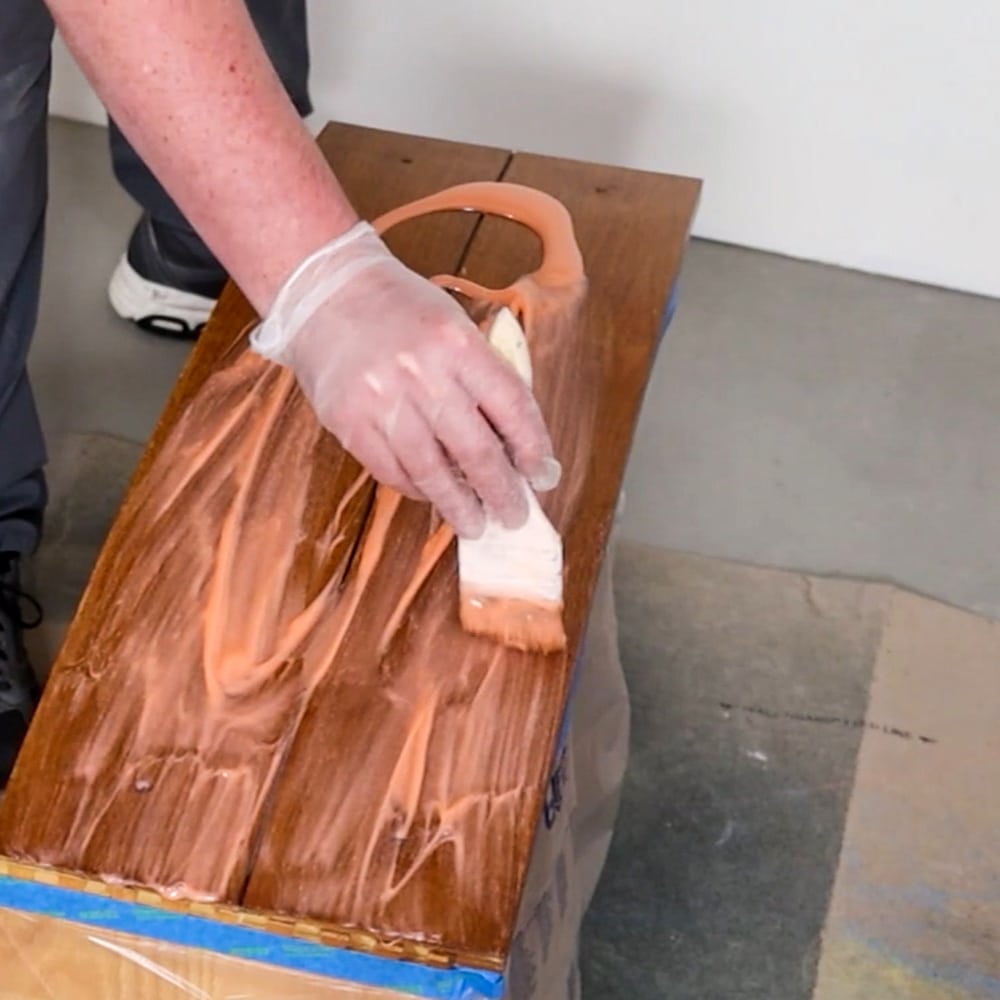
Now it’s time to dive into the project! Read the product directions for the chemical stripper you are using and follow them carefully. Generally, it will say to apply a thick layer of the stripper onto the wood surface with a brush or roller and let it sit for 15-30 minutes, depending on how thick the old finish is.
Note: To make your life easier, work in small sections at a time. Apply the stripper to 1 or 2 drawers, or the top and side of a dresser. Or 1 turned leg at a time.
Remember, if the section has a lot of detail like a fancy turned leg, then it will take you longer to get all of the stain scrubbed off.
While you are working, the stripper on the other parts of your project will start to dry out and make it harder for you to strip those other parts.
After the required time, start to scrape off the old finish with a plastic putty knife or other non-metal scraping tool. The stripper will have softened up the old finish so that it can be easily scraped away. If the stain and finish isn’t coming up easily, let the stripper sit for a little longer and then check it again.
Removing Stain from Detailed Surfaces
For details, curves, and basically non flat surfaces, you can use a toothbrush or stiff brush to get into the details and scrub off the stain instead of scraping it off. You can also use a toothpick to get into really tight cracks. Or use the edge of your scraper to get into tight spots.
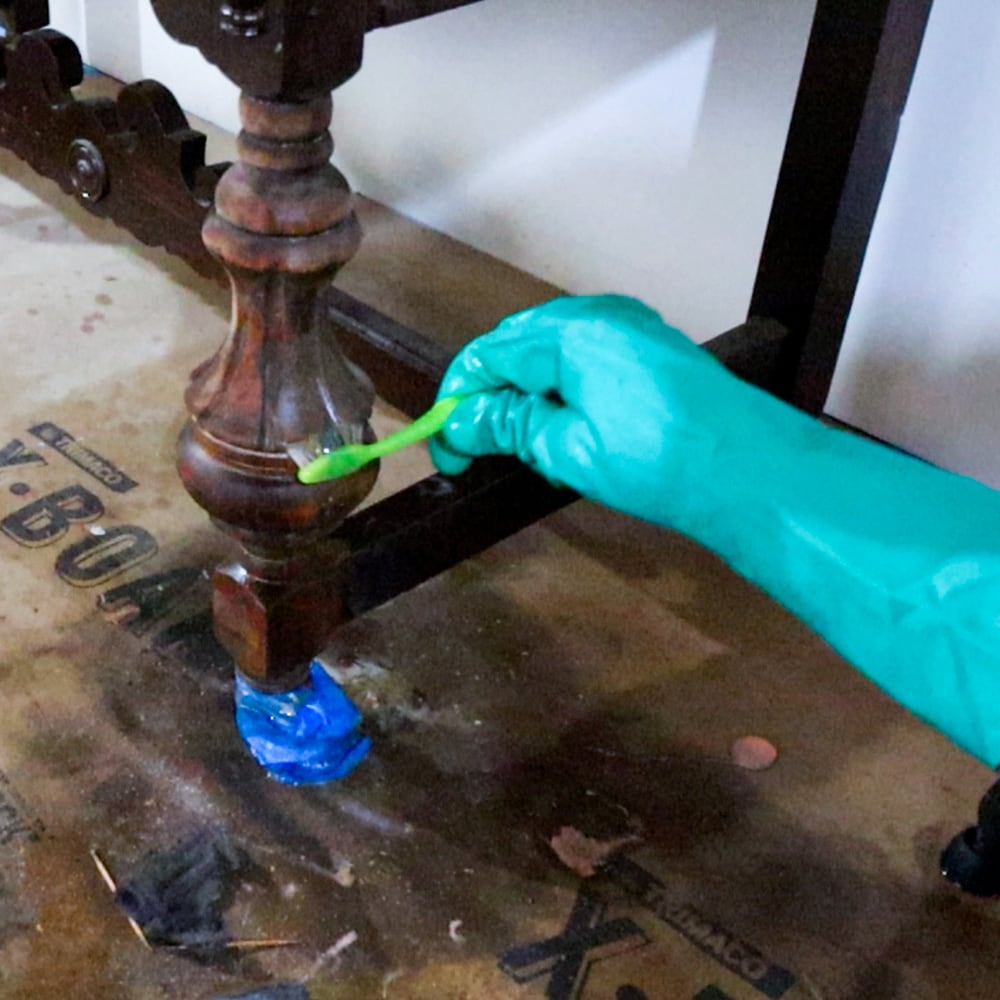
Keep in mind that you don’t need to use excessive force here, as this could scratch the wood surface. Scrape or scrub with the lines in the wood, if you can see them. Work slowly and patiently, and you’ll be rewarded with a beautiful unstained wood surface.
Cleaning Off the Wood After Using a Chemical Stripper
Once all the stain is removed, clean off the project with whatever product that your stripper recommends to use.
Usually this is mineral spirits or an afterwash. The stripper will usually leave a sticky substance behind that cannot be wiped off with water. After you have washed off most of it, you might be able to use a damp rag to clean up the last remaining goop.
Then, let your wood dry completely. This usually will take a day or so, but in very humid areas, it can take a few days.
Would you like to save this?
Best Chemical Strippers to Remove Stain from Wood
I personally prefer to use chemical strippers that don’t have harsh fumes or toxins so I can use them indoors and not worry about my family’s health. I also am really loving the non flammable chemical strippers so I don’t have to worry about more things going wrong with my project.
For more information about each of these chemical strippers, read our best wood stain removers post.
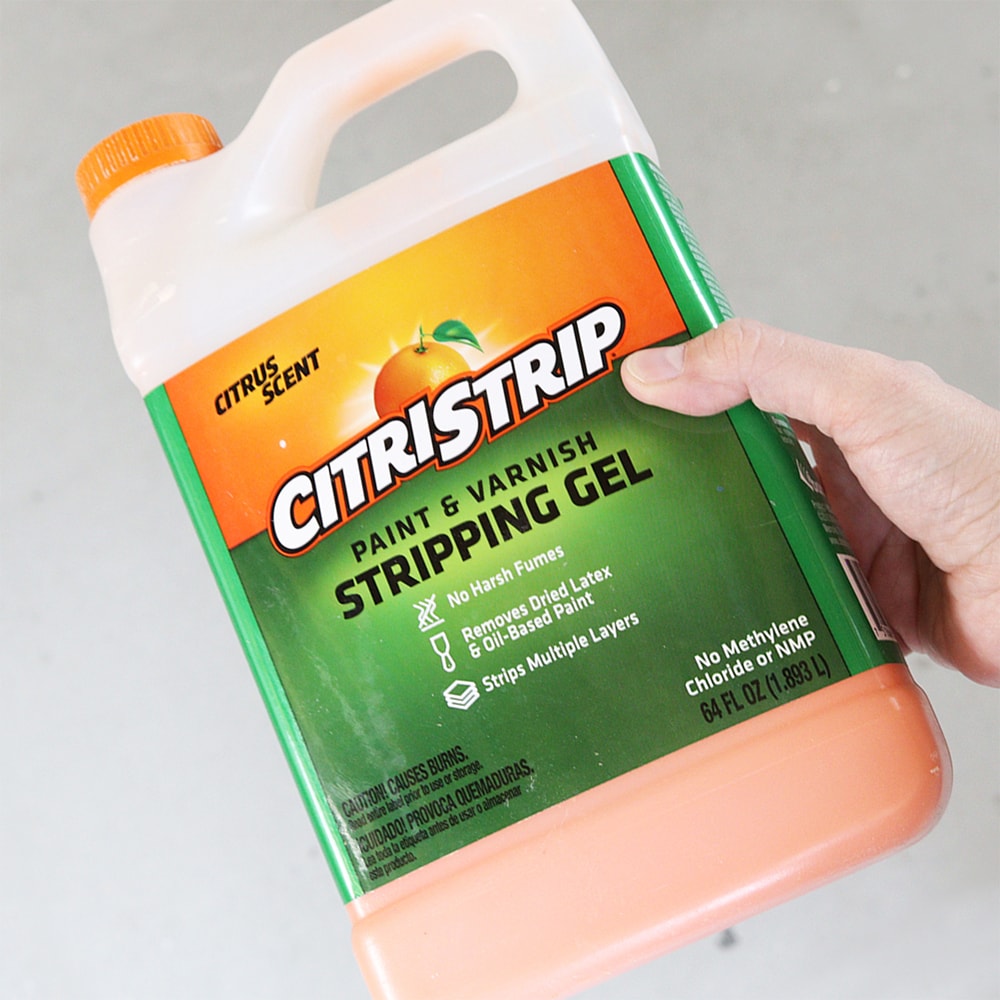
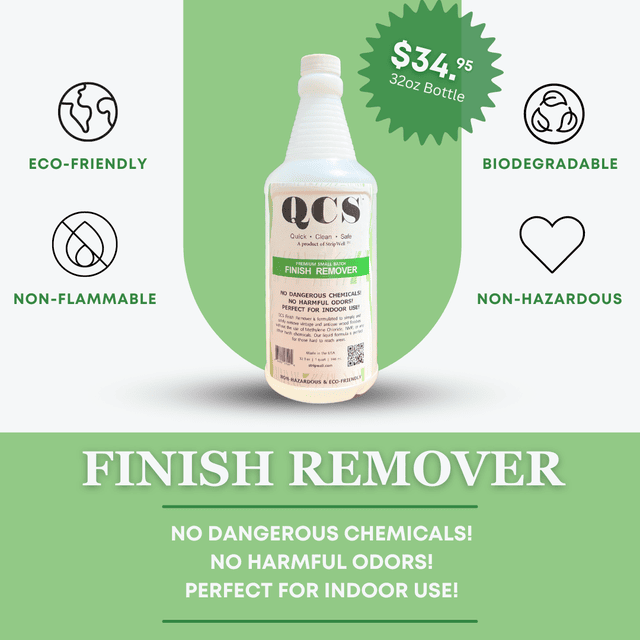
Stripwell QCS
My personal favorite is this new Stripwell QCS (Use code SUNLIGHT10 to get 10% off your order of Stripwell QCS!). It is technically marketed as a vintage finish remover, but I have used it on a couple of different modern finishes and it works great no matter what!

It doesn’t take more than 30 minutes to cut through a thick layer or finish, and it is almost 100% nontoxic and it’s non-flammable! It also doesn’t need an after wash product.
Check out our Stripwell QCS review to have an overview of what Stripwell QCS is and how it works. You can cut through the goopy residue that is leftover after stripping with more of the stripper. And then you can wipe everything down with some paper towels and water.
Here are some projects where I used Stripwell QCS.
CitriStrip Stripper
My favorite chemical stripper used to be Citristrip.
It doesn’t have harsh fumes (though I do still open windows and turn on fans when I use it indoors) and I don’t see anything on the product that tells me it’s flammable.
It works well to remove stain and paint, but personally, to me, it needs to sit for at least 3-4 hours to cut through the finish. But, that has been worth it to me to avoid other very toxic chemical strippers.
Here are some projects where I used Citristrip.
GreenEZ
This one I haven’t personally tested, yet, but I did buy some and I plan to use it soon! I have heard great things about GreenEZ from my friends who refinish furniture.
It is also non hazardous, and doesn’t have the harsh or toxic fumes. I can’t see anywhere that is is flammable like other strippers can be, and it looks like it works quickly, though I read in their tech data sheet that 3-4 hours offer the best result.
It also comes with an afterwash to use to clean your surface after using the stripper. Check out this how to strip furniture safely Youtube Video to see GreenEZ in action. They actually are using the cleaner and steel wool to remove the stain! And then using the stripper for thick painted surfaces. Crazy!
Sanding the Wood After Stripping
For best results, sand the wood once it is dry again to remove any remaining stain and smooth out the raised grain from any water you used.
Obviously, you can skip this step if you want to! But your final results won’t be as good as if you took a little bit of time to lightly sand your wood before staining it again.
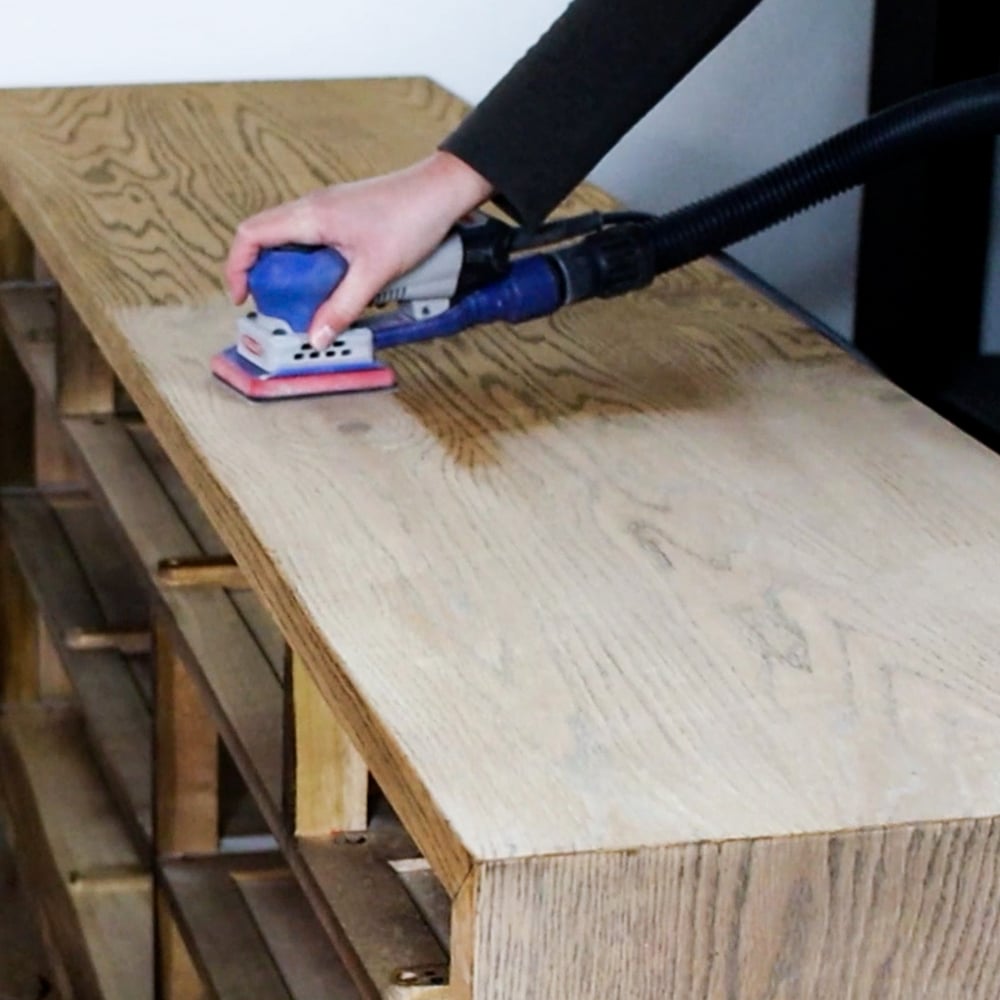
Just rub 220 grit sandpaper on the wood sanding in the direction of the lines in the wood to avoid unsightly scratches in your wood. Here is our list of the best sandpaper for furniture to help you choose what is best for your project.
Then you can stain your wood again if you would like! Here’s my step-by-step guide on how to stain wood furniture. To help you with restaining your wood, here is how to stain wood with a rag, and here are the best wood stains for refinishing furniture.
Last but not least, to protect your stain, you’ll need to topcoat it. Here is our post on polycrylic vs polyurethane to help you pick the best topcoat for your project. Learn all the steps to refinishing furniture in this post.
Will stripping damage my wood furniture?
Stripping can potentially damage your wood furniture but only if it is done incorrectly or if you do not follow the instructions in using the product.
It is important to choose the right type of stripper for your specific wood surface and to follow safety precautions such as wearing protective gear and working in a well ventilated area. Additionally, overstripping or leaving the stripper on for too long can also cause damage to the wood.
Before stripping, it is best to test a small inconspicuous area first before applying the stripper to the entire surface. This will help you determine how long to leave the stripper on and if it is safe to use on your specific wood type.
It is also important to remove all residue of the stripper after using it, as any leftover chemicals can cause damage over time. Gently sanding the wood after stripping can also help remove any remaining residue and smooth out the wood surface.


How many layers of stripper should I apply?
When it comes to applying stripper, more is more. It is best to start with a solid layer of stripper covering one small section, then let it do its thing.
If one thick layer of stripper does not fully remove the finish, it is best to wait for the recommended time on the product instructions before applying a second layer. Overall, it is best to start with a thick layer of stripper and then apply more layers as needed.

Remove Stain From Wood Without Sanding
Do you want to update your furniture's worn out finish and want to easily strip away the old stain? Here's our step by step guide on how to remove stain from wood without sanding.
Materials
Instructions
- Use a carbide scraper to remove stain from wood without sanding, but you can also use a chemical stripper.
- If you are using a chemical stripper. First, remove dust and debris with a damp cloth, lay cardboard on the floor, and place the project on buckets.
- Wear chemical-resistant gloves, a respirator, and eyeglasses for safety.
- If there is hardware on your project, like drawer pulls, knobs, or hinges, remove them.
- Apply a thick layer of chemical stripper to the surface using a brush or roller, and let sit for 15–30 minutes, depending on the old finish thickness.
- Scrape off the old finish using a plastic putty knife or non-metal scraping tool after the required time. Use a toothbrush or stiff brush to clean non-flat surfaces with details and stains.
- After removing the stain, use a stripper-recommended product like mineral spirits or an afterwash to clean off the project. And use a damp rag to remove any remaining goop. Allow the wood to dry completely, usually for a day or two.
- Optional, but for best results: After drying, sand the wood to remove the stain and smooth out the raised grain for best results. To avoid scratches, rub 220 grit sandpaper along the lines.
- Stain the wood again if desired, and apply a topcoat for protection.
Recommended Products
As an Amazon Associate and member of other affiliate programs, I earn from qualifying purchases.


more Paint Removing Tips
- Best Sanders to Remove Paint
- How to Remove Chalk Paint Easily and Quickly
- How to Strip Paint from Wood Furniture
- Best Sandpaper For Removing Paint from Wood
- How to Remove Paint from Wood Without Sanding

Follow us on YouTube to get more tips for painting furniture. Or share your project with us on our Facebook Group and be part of our community. See you there!