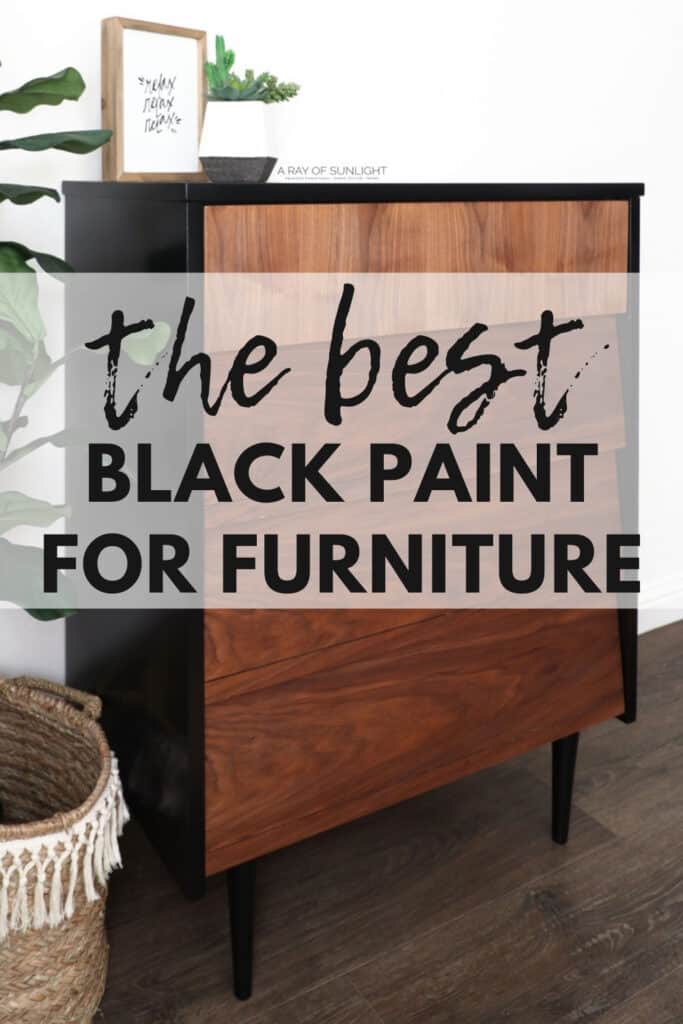
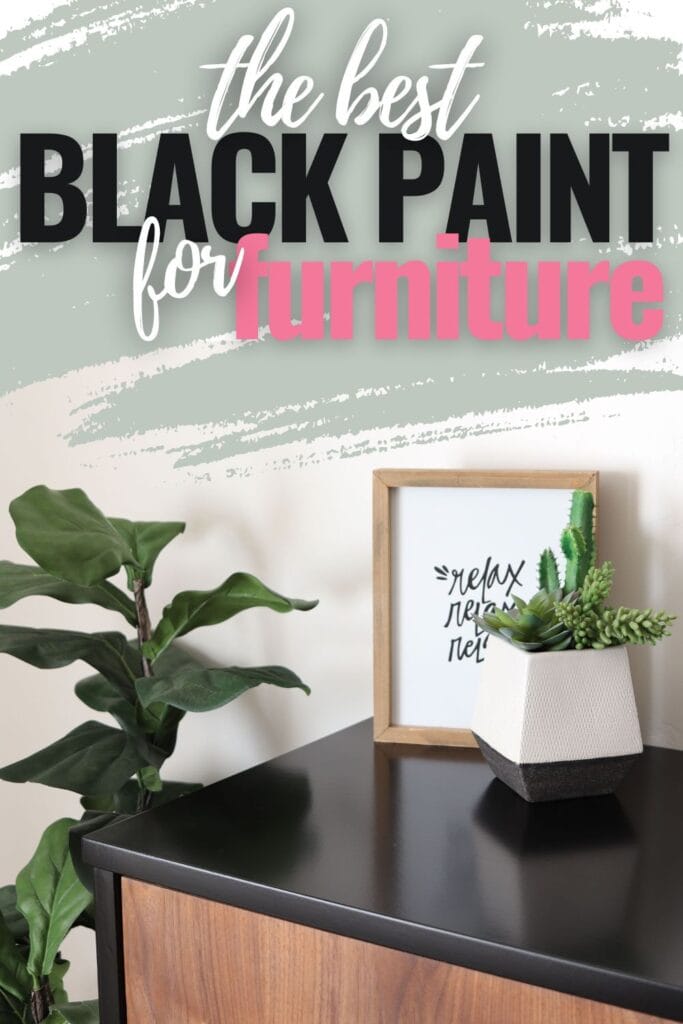
The Best Black Furniture Paint
Don’t mess around with chalk or milk paints that are a pain to topcoat! This is the best black furniture paint option if you want a nice, smooth satin finish on your wood pieces! Using it on these black painted furniture ideas will give your pieces a modern, sleek look, and it’s also perfect for those who love a classic, timeless style.
That’s right, no need for a topcoat. This will allow you to wrap up your project faster and enjoy the stunning results sooner. So, keep reading to find out which product it is!
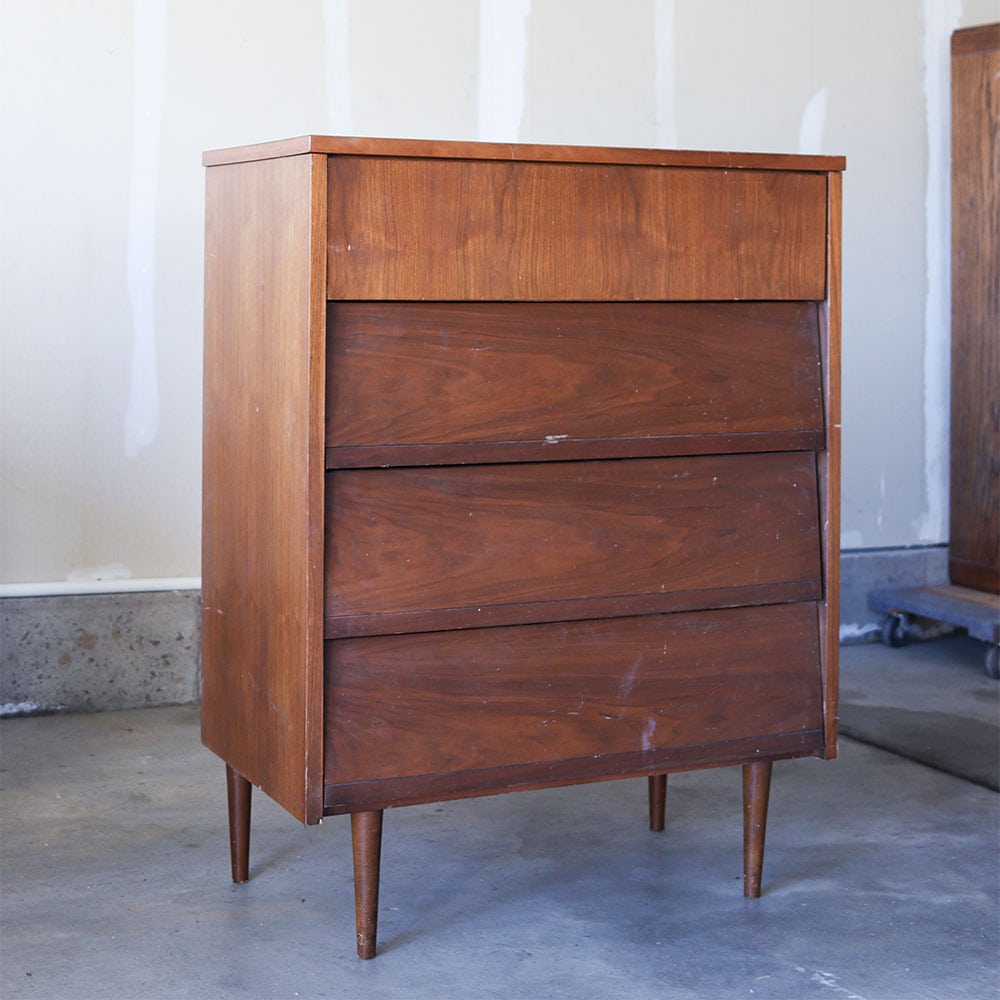
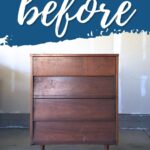
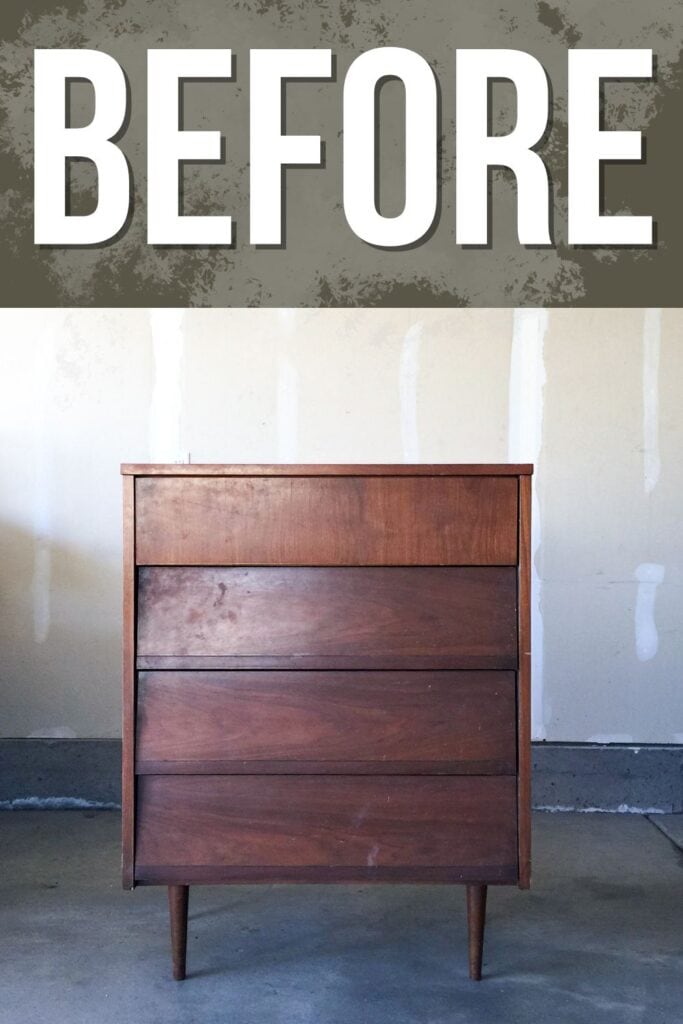
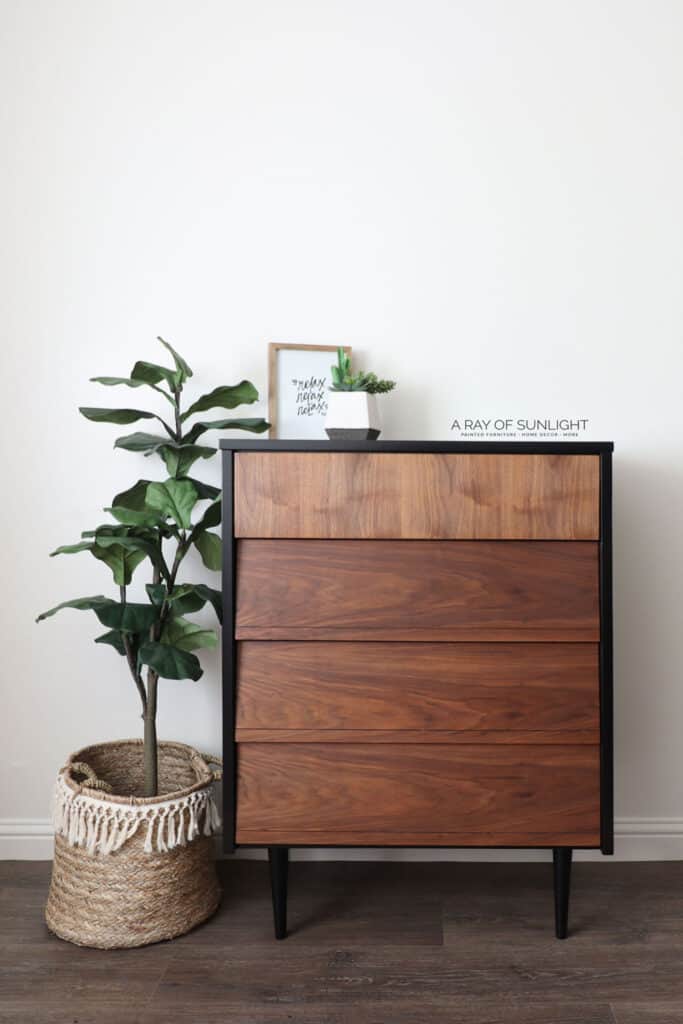
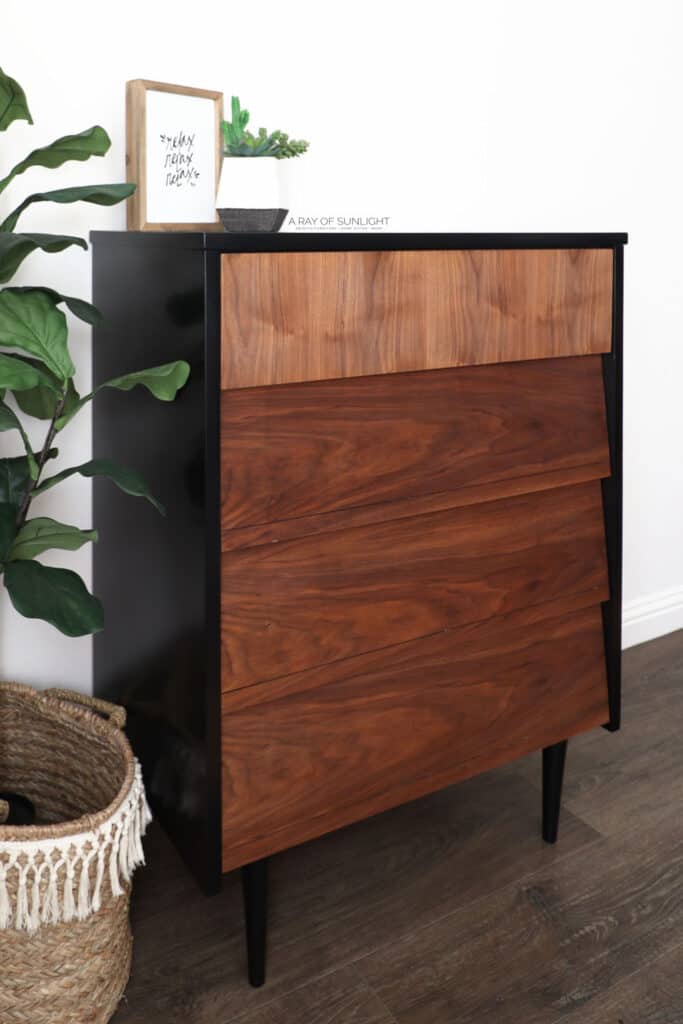
My husband picked this dresser up at our local thrift store for only $30! It was a little dinged up, but for the most part, it was in pretty good condition. The old, worn out finish needed some love, though.

For this makeover, I used my favorite, and the very best black furniture paint (because painting with black is typically a major challenge!)
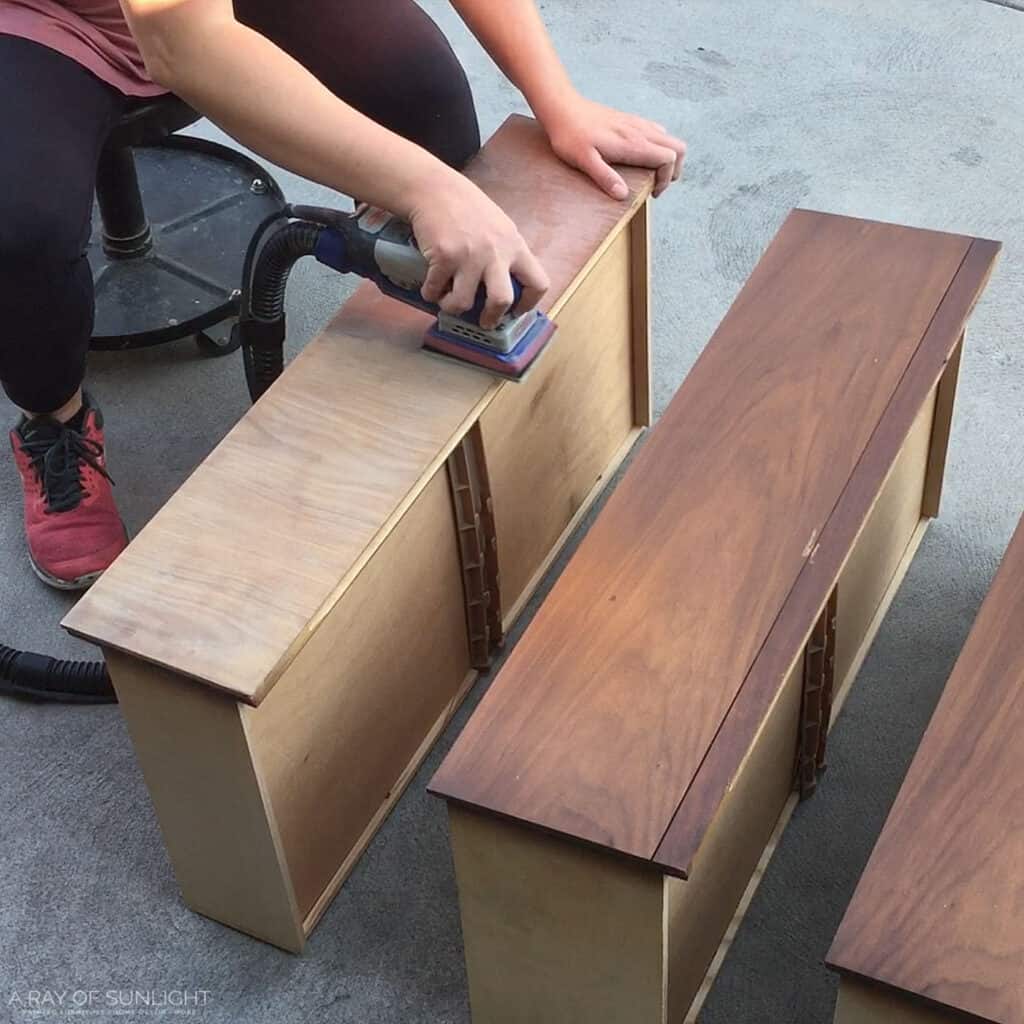
I also decided to try my hand at refinishing the drawers instead of matching them with the rest of the piece. I’m so glad I did!! Those natural drawers are the center of attention.
Painting Furniture with Black Paint
If you have ever used black chalk or milk paints, you know how big of a pain they can be! It’s nearly impossible to get the perfect dark finish when you have to topcoat them with wax or polyurethane.
- Oil based polyurethane is a little bit easier to get that perfect streak free finish with, but it’s still not perfect.
- Waterbased poly either shows streaks or can come out foggy.
- And wax is the hardest to work with on dark colors if you want a streak free finish.
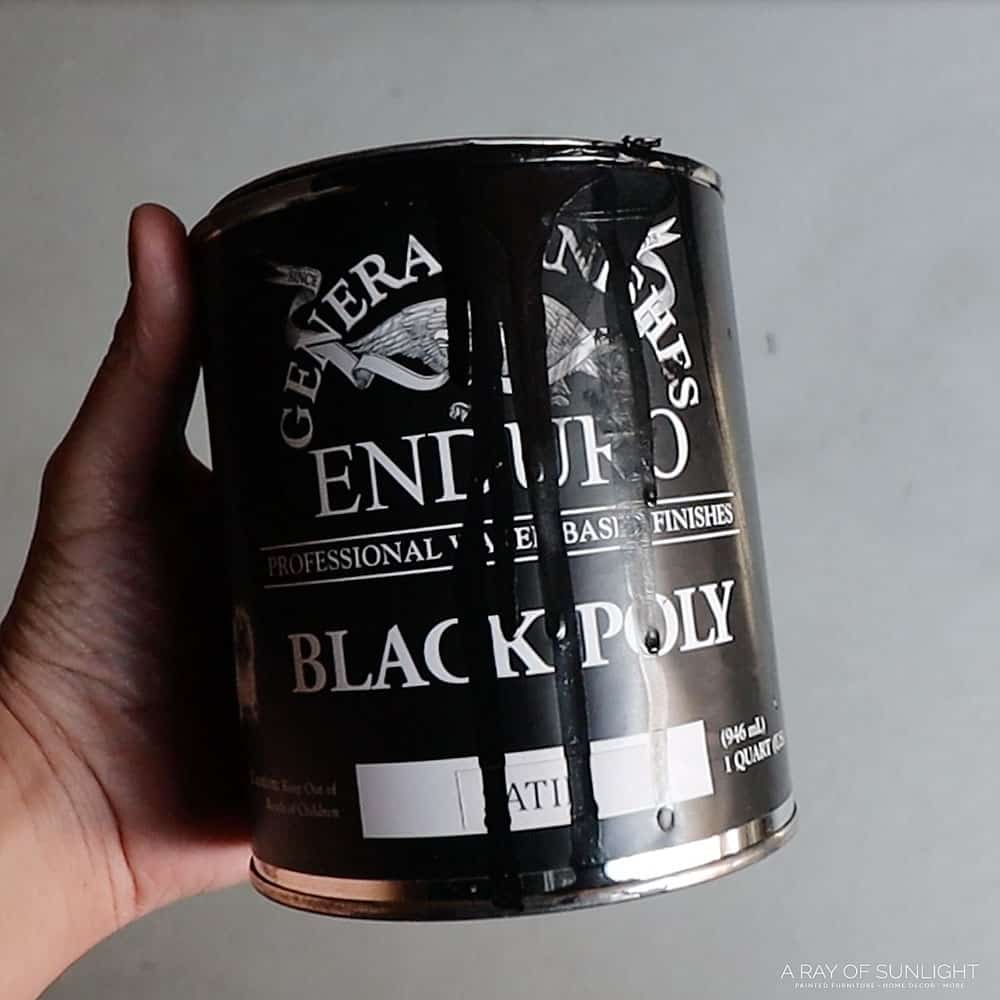
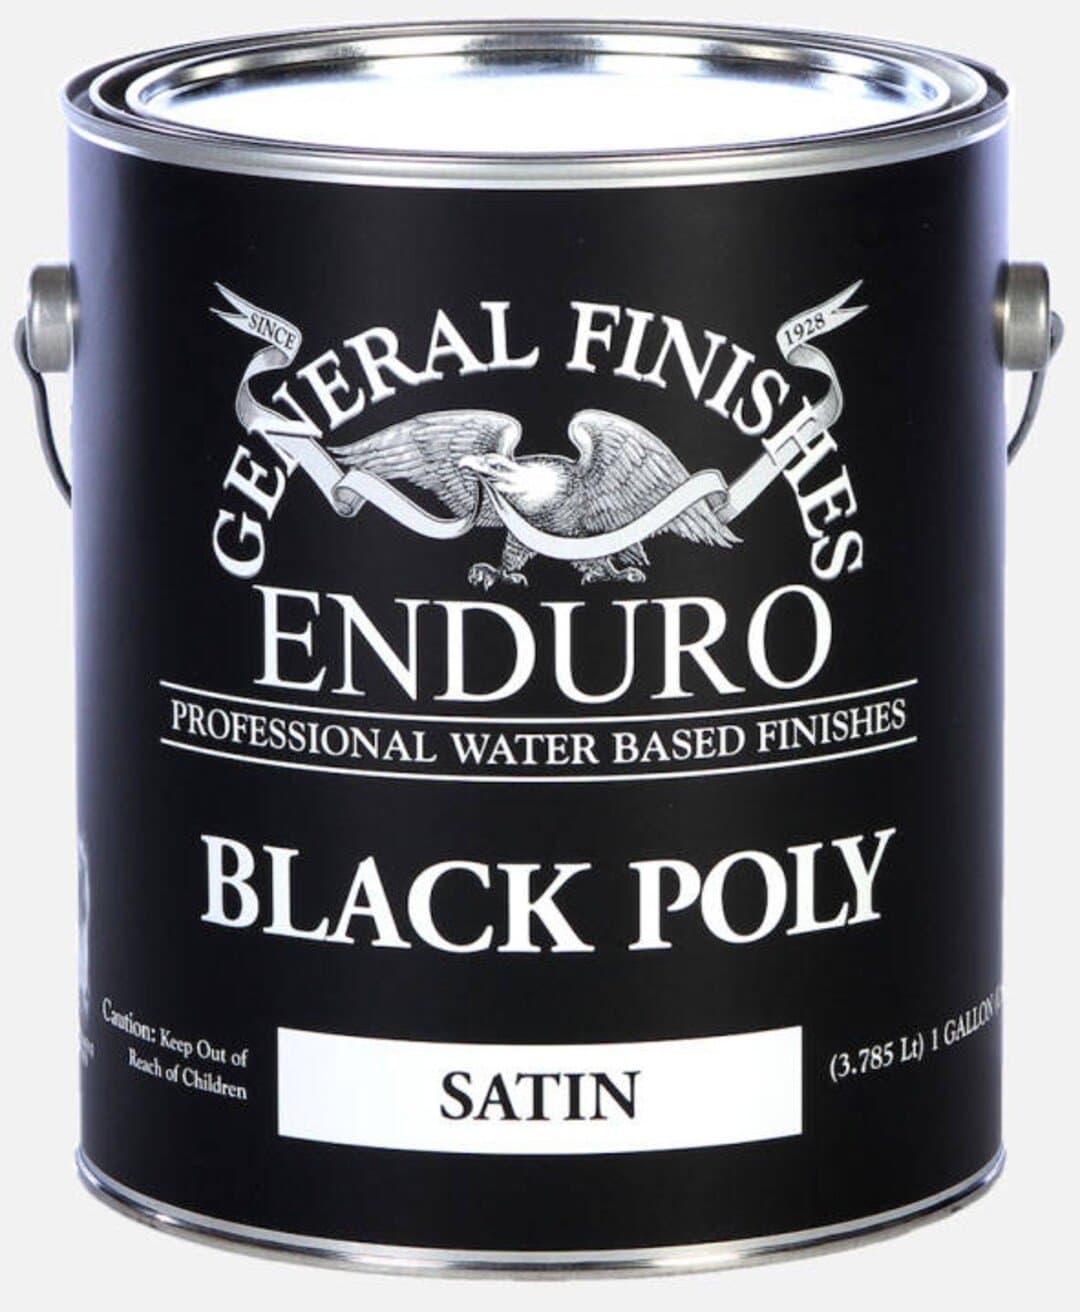
Even applying waterbased poly with a pro grade sprayer can create a foggy looking finish. I struggled until I ran into this new product called General Finishes Enduro Poly.
As an Amazon Associate, I earn from qualifying purchases. I also may earn from other qualifying purchases with other companies or get free product to review and use. All opinions are my own.
What is General Finishes Enduro Poly?
It’s technically tinted polyurethane. It’s waterbased, so the clean up is easy, and it doesn’t stink! The one and only downside to it is that it has to be sprayed with an HVLP gun.
(I tried to brush it on a whole entire piece a few months ago and it was SO HARD because it’s so thin AND dries really fast.)
It comes in black, white, and clear that can be tinted in any color. The enduro poly goes on fast. You don’t have to thin it for your sprayer, it only requires 3 quick coats, with a very fast dry time in between coats at only an hour!! That’s seriously fast!
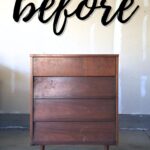
Let’s dive into this dresser makeover and how to use General Finishes Enduro Poly! This is what the Mid Century Modern dresser looked like before the makeover.
Did I mention that this WHOLE makeover only took a day!? Yep, it only took a day! I started at 8 am and I finished around 8 at night, only because I was waiting for it to cool down outside. Check this post about painting furniture without sanding or priming to see another quick 1 day dresser makeover!
(If this paint dries too quickly, it ends up being rough. And it was in the 90’s most of the day.)
So I waited to apply the last couple of coats when the sun was going down and it had cooled off a bit. If I didn’t have to wait for it to cool down, I would have had it done by 6 pm EASY!

Supplies Used for Painting A Dresser Black
- Old Dresser – Thrifted
- Krud Kutter
- Wood Filler
- Tack Cloth
- Minwax Fast Drying Polyurethane
- BIN Shellac Based Primer
- 3/8″ Nap Paint Roller
- Shop Vac
- SurfPrep Sander (Use code RAY10 to get 10% off your order)
- 100, 150, 220, 400 Grit Sandpaper
- Paint Filters
- General Finishes Enduro Poly
- Fuji Q4 Paint Sprayer
- Paint Sprayer – (Hobby paint sprayer I used to use)
- Respirator
Prepping A Dresser
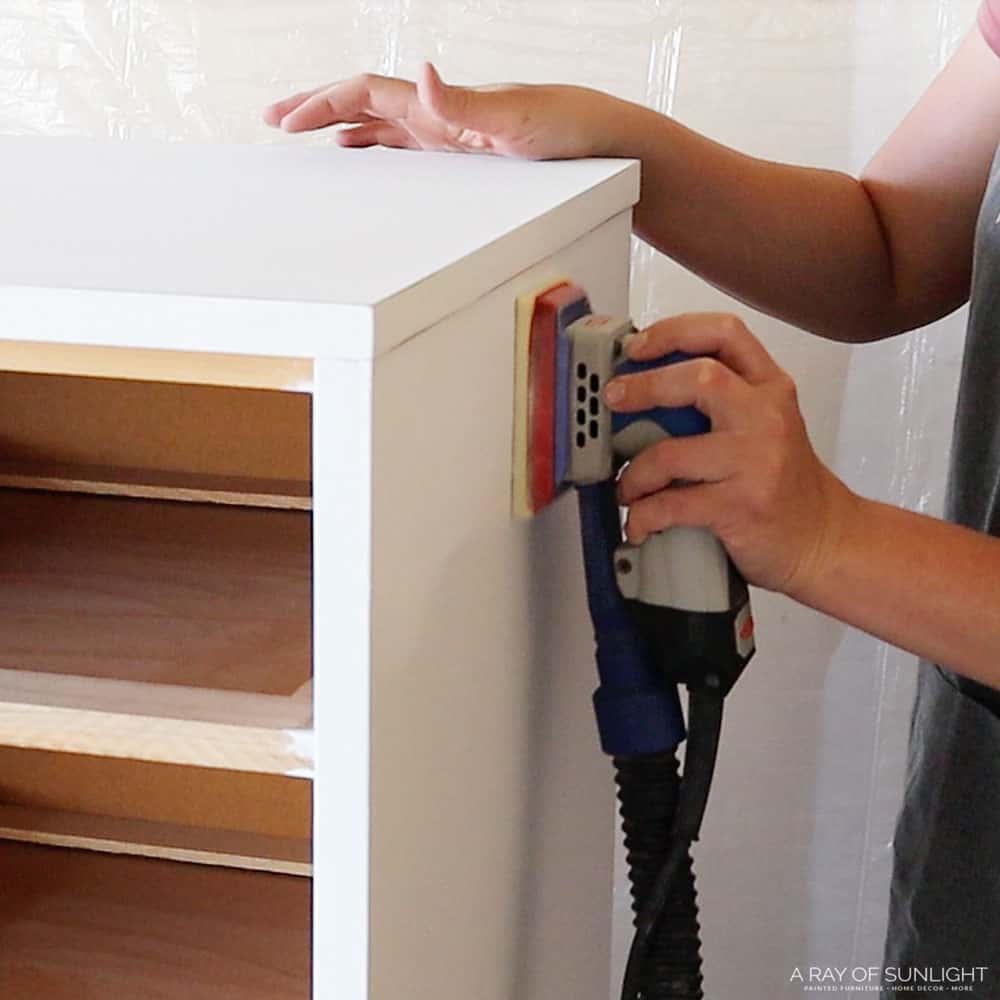
First, I cleaned the dresser really well with Krud Kutter and an old damp rag. Then, I filled in the few chips and dings with my go-to basic wood filler. After it dried (when I was done sanding the drawers), I sanded it down. I also sanded the laminate top really well with 220 grit sandpaper.

Then I scuff sanded the rest of the piece just a bit. But I definitely didn’t sand it down as much as I did the laminate. Learn about the importance of sanding before painting furniture here.
I don’t usually love laminate pieces, but I’ve learned that a dresser with a laminate top isn’t all bad! Actually, it’s pretty nice because the slick surface doesn’t end up scratched like wood. But it needs a lot more attention than wood does, JUST to make sure the new coating sticks.
Since it had a laminate top, I had to make sure that the coating I used would stick to the slick and shiny surface.
((Laminate needs a bit more prep than wood – learn more about how to paint laminate furniture here! Get more tips on how to paint a laminate dresser in this post.))
After I finished scuff sanding, I removed all the dust with a vacuum and a tack cloth (tack cloths are AMAZING for getting off all the last bits of dust!)
Sanding Dresser Drawers
While the wood filler dried (remember that part a little bit ago??), I sanded the drawers down to bare wood.
((Obviously, this step is optional if you’re only interested in updating your piece to black. But I wanted to include it because it’s part of what I did to this project. ))
I sanded each of them down with my pro-grade 3×4 vacuum compatible SurfPrep sander. But they could have been sanded down with a regular ole one. Check out the best sanders for furniture here, and see my SurfPrep sander review here to see if it’s worth buying one!
I sanded the drawers with
Learn more about the best sandpaper for furniture painting here.
I moved my sander slowly and didn’t apply much pressure to it to help avoid those nasty swirl marks. Slowly moving through the grits was a huge help, too! It took about a half hour for each drawer front. But holy moly, that wood is absolutely gooorgeous!!
**Note: I sanded the drawers first so I could stain them and let them dry while I worked on the rest of the piece. Stain takes about 8 hours to dry, and I really wanted to get this project done in one day. But the drawers were sooo pretty without any stain, so I opted to seal them up and leave them natural.
Sealing Dresser Drawers
((This step is also optional!))
Would you like to save this?
Before I sealed the drawers, I vacuumed up any dust left on them and then I used a tack cloth to remove the last little bits of dust. Then I sprayed 3 coats of Minwax’s fast drying oil based polyurethane on them. Learn more about the features, pros and cons, and how-to’s of Minwax polyurethane spray here.

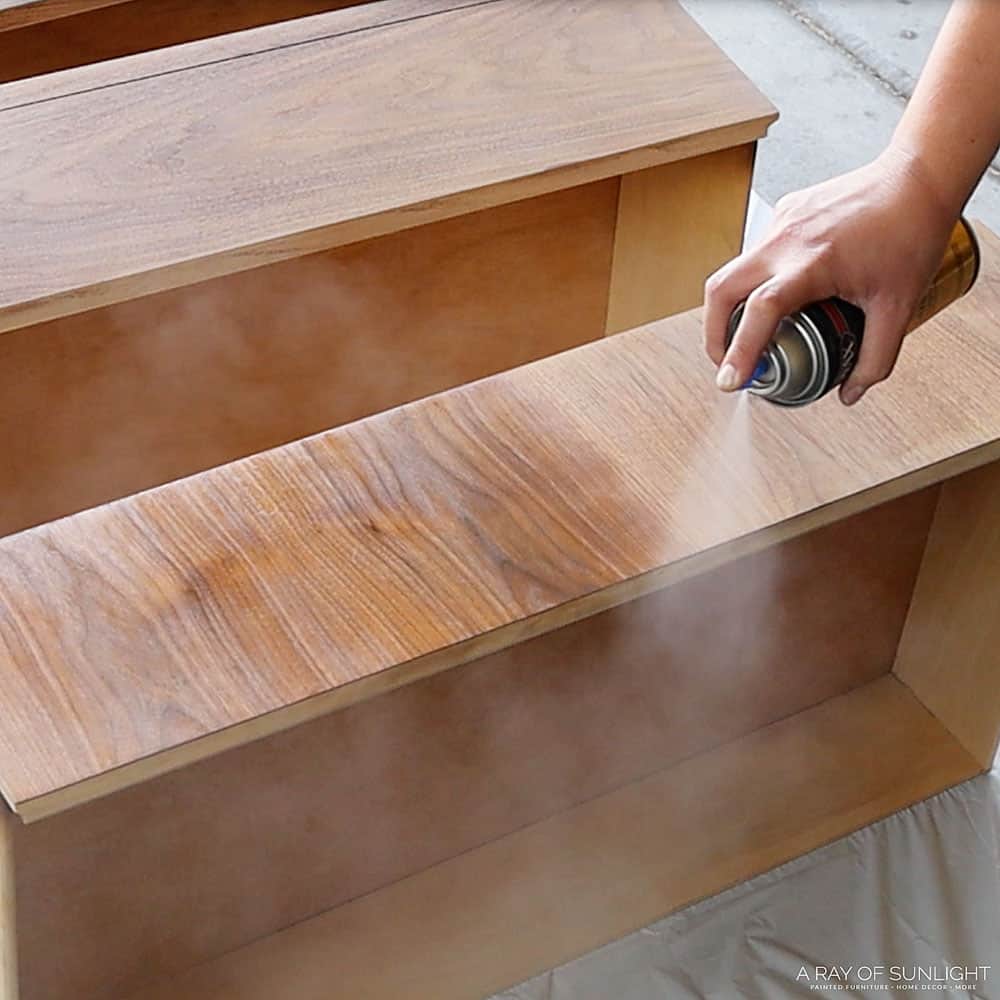
I let them dry for about an hour and a half before moving on to the next coat since the back of the can says to recoat within 2 hours or wait 72 hours. I also kept them in an area that wouldn’t get any dust on them while I worked on the rest of the piece.
Setting Up A Paint Booth
Then, I got my little booth set up in my garage so I would be ready to spray the Enduro Poly. I laid down some plastic on the floor, then I hung up a 9 foot x 12 foot piece of plastic from some screws in the wall. Then I laid down some cardboard to make sure I didn’t get splatters anywhere!
Then we put the dresser on a few 5 gallon buckets to get it off the ground, and I stuck the screws on the legs into a piece of wood.
This might seem a little bit overkill, but Enduro Poly HAS TO BE sprayed. That’s the biggest downside to it. But between how much time is saved and how amazing this finish is (plus how easy it is to get!), it’s totally worth buying a sprayer for. Especially if you do a lot of DIY projects!
Priming Dresser Before Painting Black
I primed the dresser with BIN shellac based primer. This is my absolute favorite white based primer.
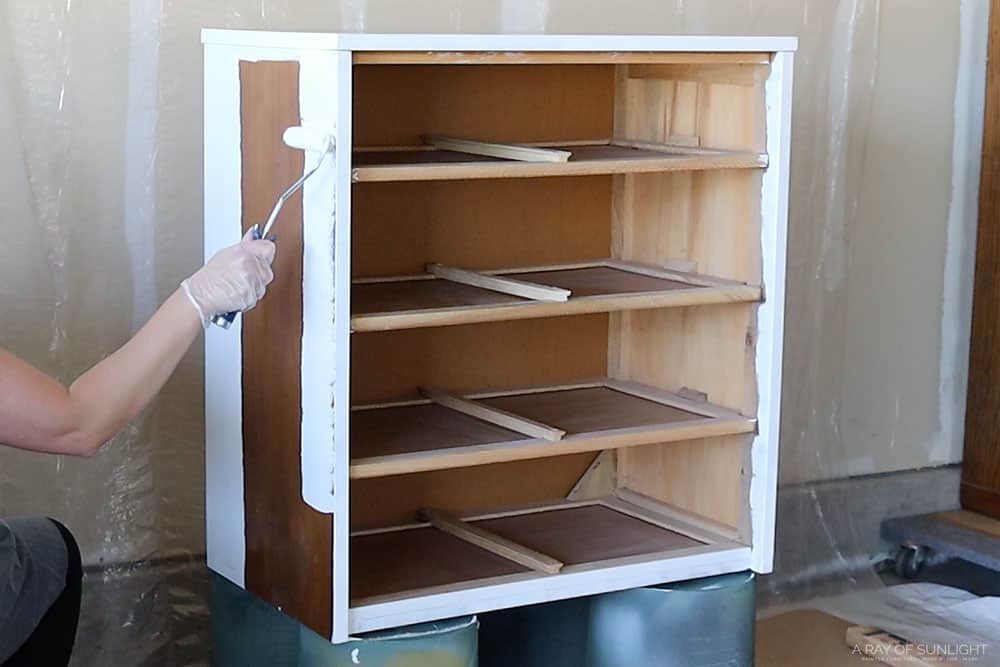
It has EXCELLENT adhesion, it sands well, and mainly it is one of the very few that will actually block wood tannin bleed through. Learn more on how to stop stains from coming through paint here.
I used the BIN primer as a bonding primer to help the new color stick to the slick surface and to the wood, plus help the finish have an even sheen.Don’t skip the primer. Promise! You’ll regret it! Check out the best primers for painting furniture (and how to choose the right one) here.
**It is shellac based and it smells a bit, so I wore a respirator to protect my lungs.
Using a small 3/8” nap roller, I applied two coats, letting it dry for 45 minutes between coats. You shouldn’t need more than a quart size of the primer for a project this size or a bit larger. You could also use a couple of the BIN shellac in spray cans if you don’t want to roll it on!
Then I sanded it all down smooth with 220 grit sandpaper, vacuumed up the dust, and then wiped it all down with a tack cloth.
Spraying The Best Black Furniture Paint
Like I said earlier, I chose to use General Finishes Black Poly on this dresser. I love how easy this is to use, it’s honestly the very best black paint for furniture!! No joke!!
So, after the primer was sanded smooth, I loaded my sprayer with the Enduro Poly. I always recommend pouring it through mesh filter just to make sure no clumps clog the HVLP gun. It doesn’t need to be thinned because it’s pretty thin to begin with (that’s one reason why you can’t brush it on).
A couple of years ago, I upgraded to the Fuji Q4 paint sprayer, and I wish I had upgraded sooner! It was definitely a bit of an investment, but holy cow, this thing sprays like a dream.
If you’re looking for a budget tool or you’re just starting out, I totally recommend the Wagner Double Duty. I used it for 3 years, and it was a great starter! (It has been discontinued, but the newer model, the Wagner Control Spray 250, is very similar.)
The Homeright Super Finish Max is another budget friendly option I have recently discovered that does a great job! We used it on this homemade chalk paint dresser makeover. Check out more of the best HVLP paint sprayers for furniture here, and read through this post for a step by step tutorial on painting furniture with a sprayer.
I applied 3 coats of this Enduro Poly onto the dresser, letting it dry for an hour between coats. This brand dries SO FAST!!
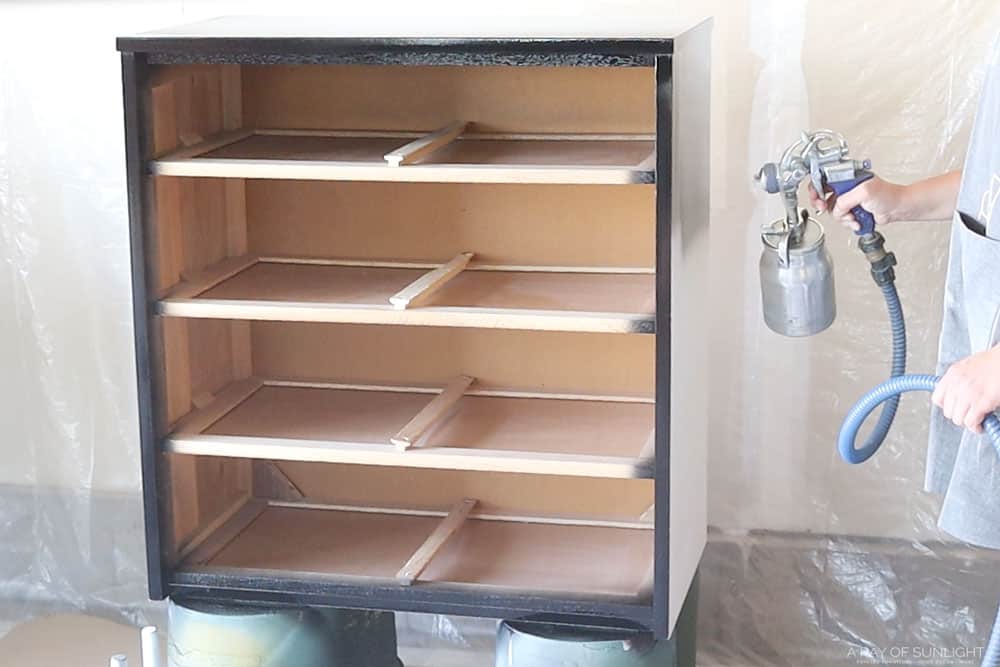
After 30-40 minutes, the dark color is ready to scuff sand, and after an hour, you can put another coat on! That’s another huge reason I love this! After it dried, I scuff sanded it down smooth with 400 grit sandpaper just to make the final finish super smooth.
I waited to add the last coat or two when it was cooler outside, right at dusk. It was in the 90’s most of the afternoon, which made it dry even faster, which made it feel rough.
But applying it when the sun wasn’t as strong and when it cooled off a bit made the coating take a bit longer to dry, which made it dry a lot smoother. Then, I put the drawers back in and let the piece dry for at least 24 hours before I did anything with it.
Paint takes about 30 days to cure into how durable it will actually be, so be sure to be really careful with it for at least 30 days after applying.
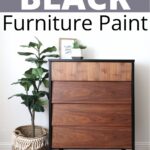
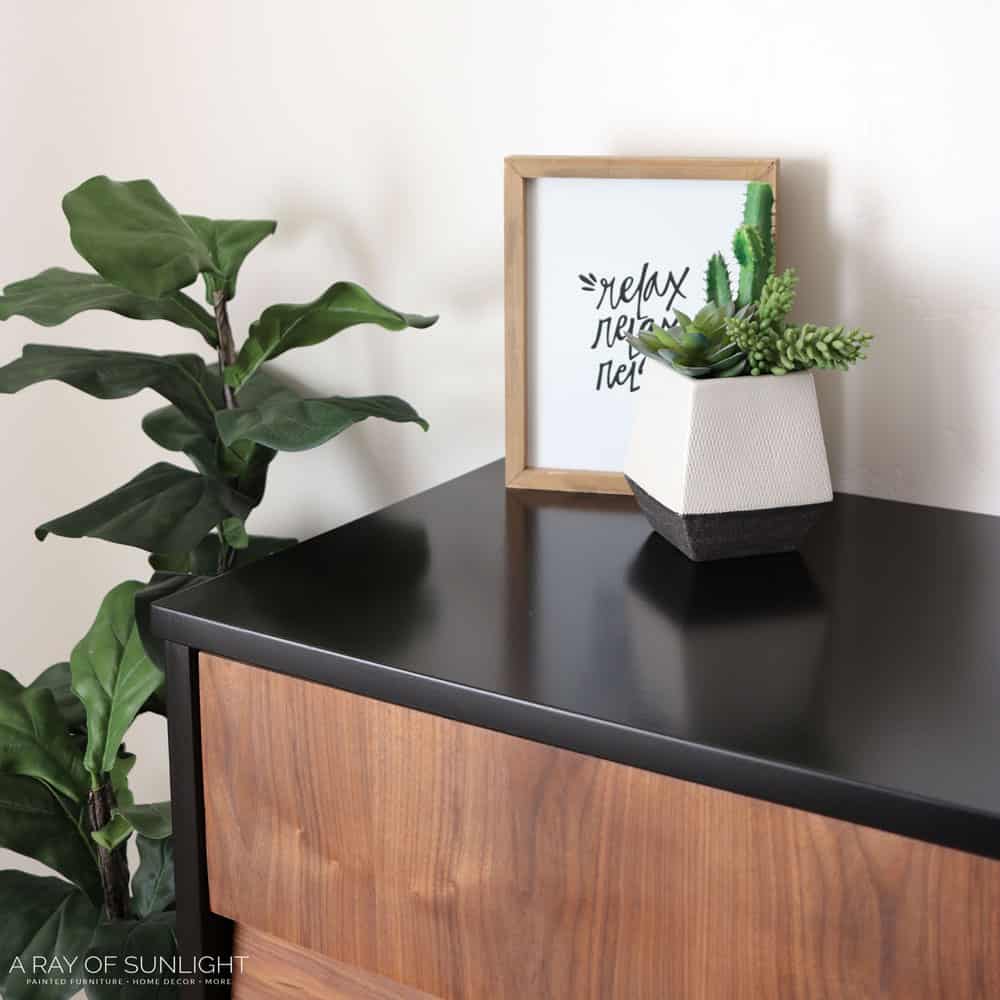
That’s it! Seriously, this makeover was pretty simple and super fast!! I couldn’t believe how fast it went, actually! Here is what it looks like now!
More Before and After Makeovers
See All >
Click any of these “before” photos below to view the “after” of that makeover.


If you’re wondering is two-toned furniture in style, get some answers here! Check out these mid century modern painted furniture ideas for more inspiration.
Painting Over Black Furniture
If, after some time, you want to update your dark piece to a lighter color, it’s no problem! You can easily cover the finish with a new color. The key is to make sure you prime the piece first beforehand. If you don’t, then the dark color could show through and ruin your new look. You can learn all about the importance of priming wood for painting here.


As always, do the prep work from cleaning to sanding to priming. After the primer dries, you can then apply your chosen lighter color on top. It may take a few more coats to get full coverage over the existing black, so apply as needed. Here’s painting over black furniture to guide you on this!


Painting a Dresser Black | The Best Black Furniture Paint
We'll be using the best black furniture paint for a nice smooth satin finish. Here's how to paint a dresser black.
Materials
Tools
Instructions
- Clean the dresser, fill in chips and dings with wood filler, and sand the filler. Then sand the laminate top with 220 grit sandpaper.
- Scuff sand the rest of the dresser just a bit and not as much as the laminate. Remove all the dust with the vacuum and tack cloth.
- Sand down the dresser drawers to bare wood with a sander. Move the sander slowly and don't apply much pressure to the sander to help avoid nasty swirl marks.
- Spray oil based polyurethane onto the drawers. Let them dry for about an hour and a half before moving on to the next coat. Spray 3 coats.
- Set up a little paint booth by laying down some plastic on the floor, then hanging up a 9 foot x 12 foot piece of plastic from some screws in the wall. Lay down some cardboard to make sure to not get paint anywhere! Then put the dresser on a few 5 gallon buckets to get it off the ground, and stick the screws on the legs into a piece of wood.
- With the 3/8” nap roller, paint on two coats of primer to the dresser, letting it dry for 45 minutes between coats. Then sand it all down smooth with 220 grit sandpaper, vacuum up the dust, and then wipe it all down with a tack cloth.
- Put black paint into the paint sprayer using a mesh filter, just to make sure there are no clumps. Spray 3 coats of this Enduro Poly black paint onto the dresser, letting the paint dry for an hour between coats.
- After the paint dried, scuff sand the paint with 400 grit sandpaper to make the final paint job super smooth. Then put the drawers back in and let them dry for at least 24 hours before doing anything with them. Remember that paint takes about 30 days to cure as well.
- Enjoy your new black painted dresser!
Recommended Products
As an Amazon Associate and member of other affiliate programs, I earn from qualifying purchases.


More Black Painted Furniture Makeovers
- Painting a Desk Black
- How to Paint Furniture Black
- Painting Oak Furniture Black
- Painting a Dresser Black
- Painting a Kitchen Table with Chalk Paint
Follow us on YouTube to get more tips for painting furniture. Or share your project with us on our Facebook Group and be part of our community. See you there!