Painting a Dresser Black


Welcome to our step-by-step guide on painting a dresser black. This easy-to-follow tutorial will walk you through the entire process of transforming an old, thrifted dresser into a sleek, modern piece of black painted furniture, complete with new legs and hardware.
Whether you’re a seasoned DIYer or a beginner eager to give your furniture a fresh look, this guide is designed to make the process as simple and enjoyable as possible. Let’s start your furniture makeover journey together!
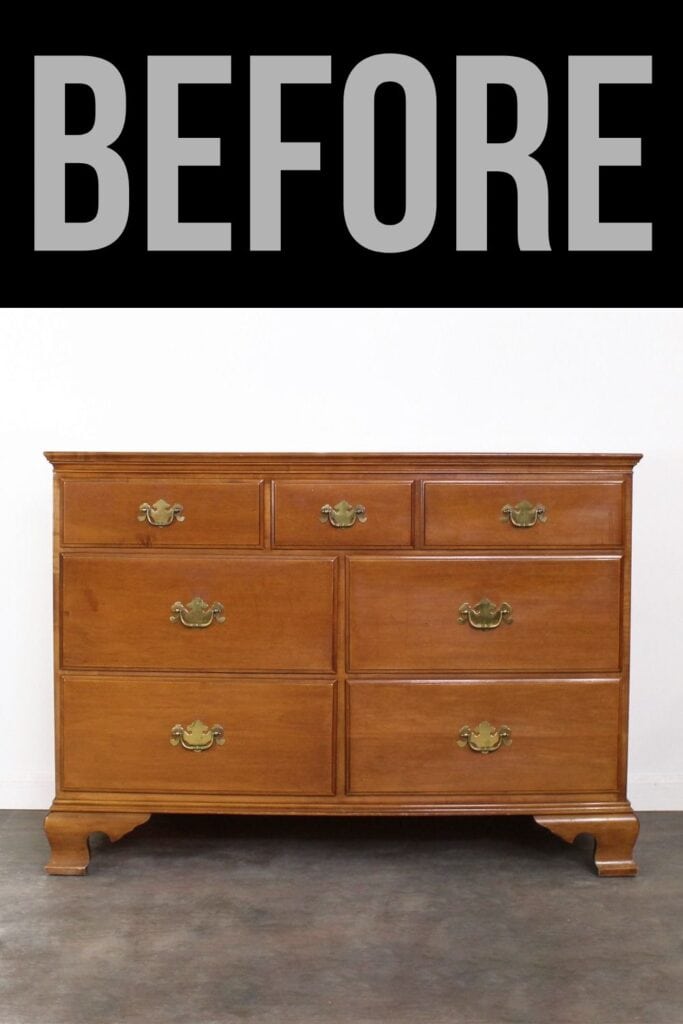
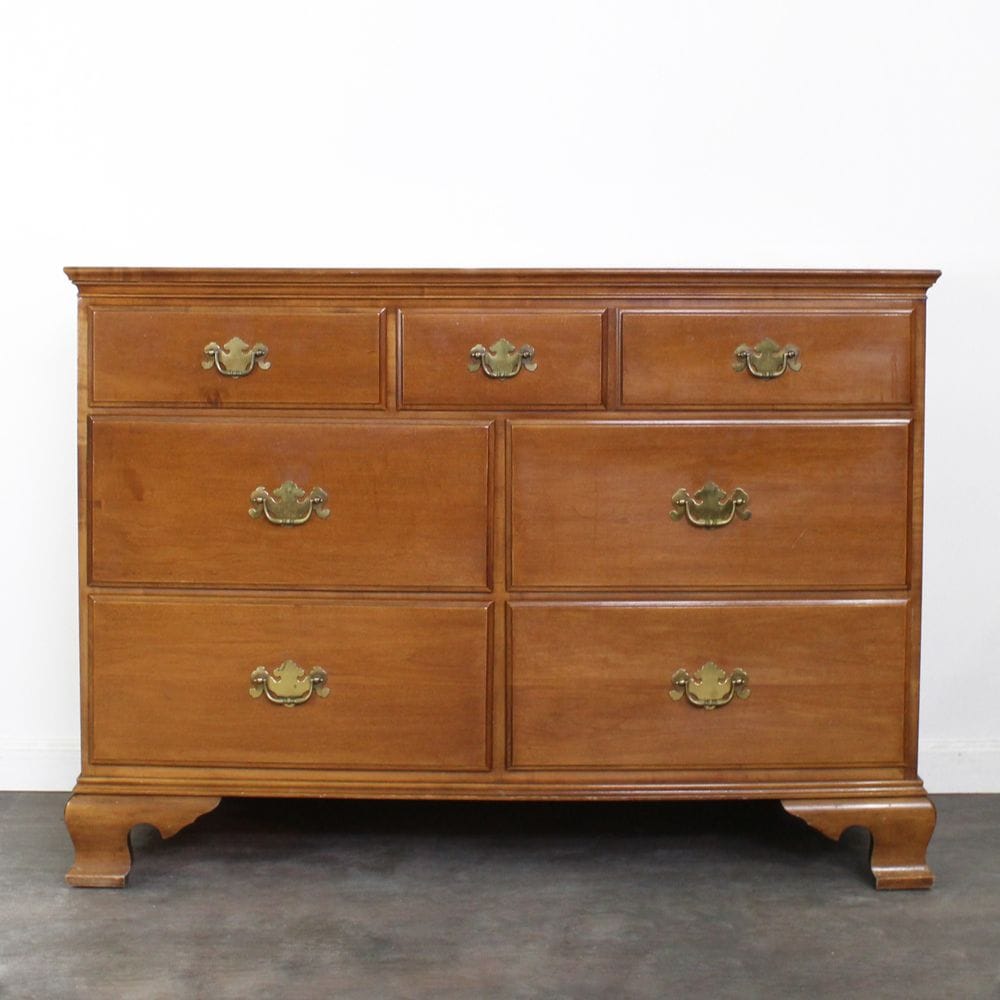
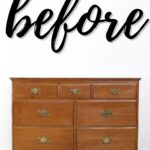
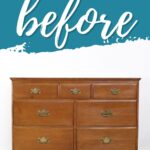
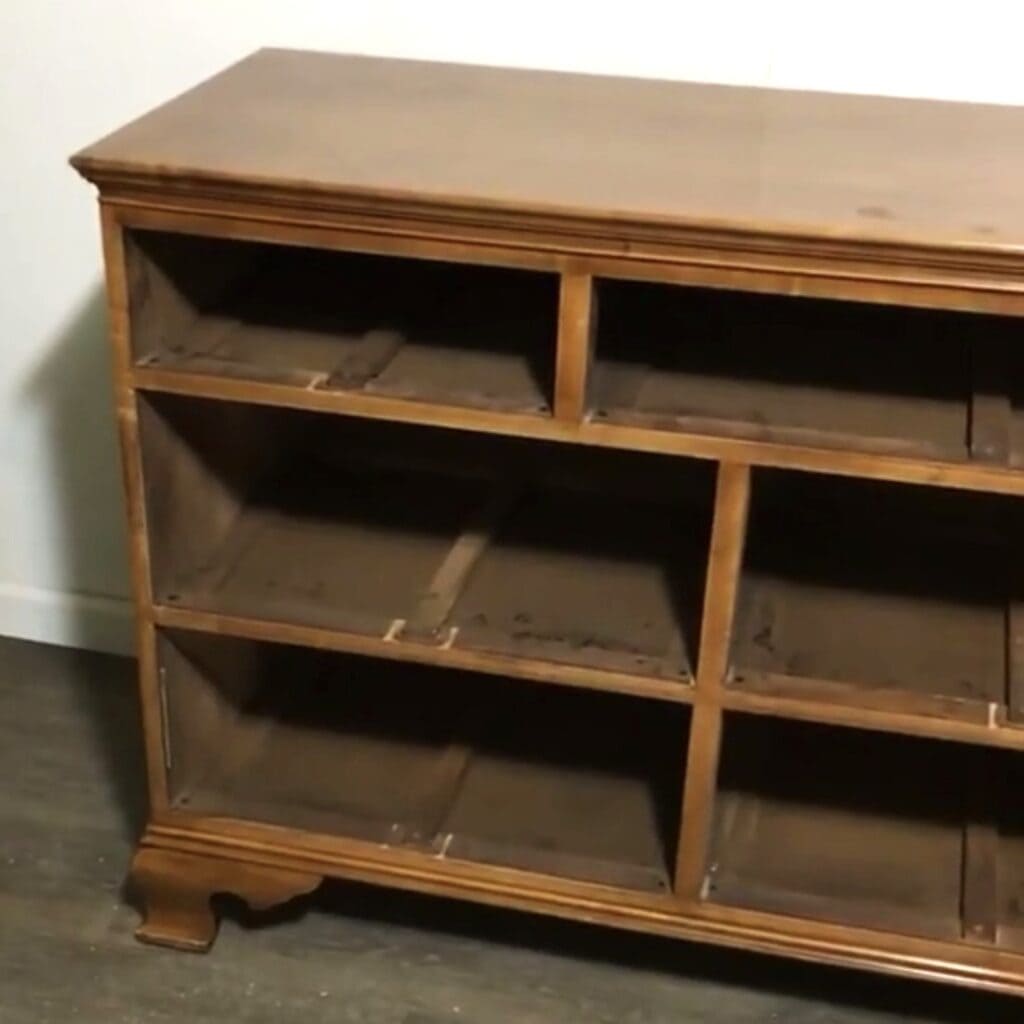
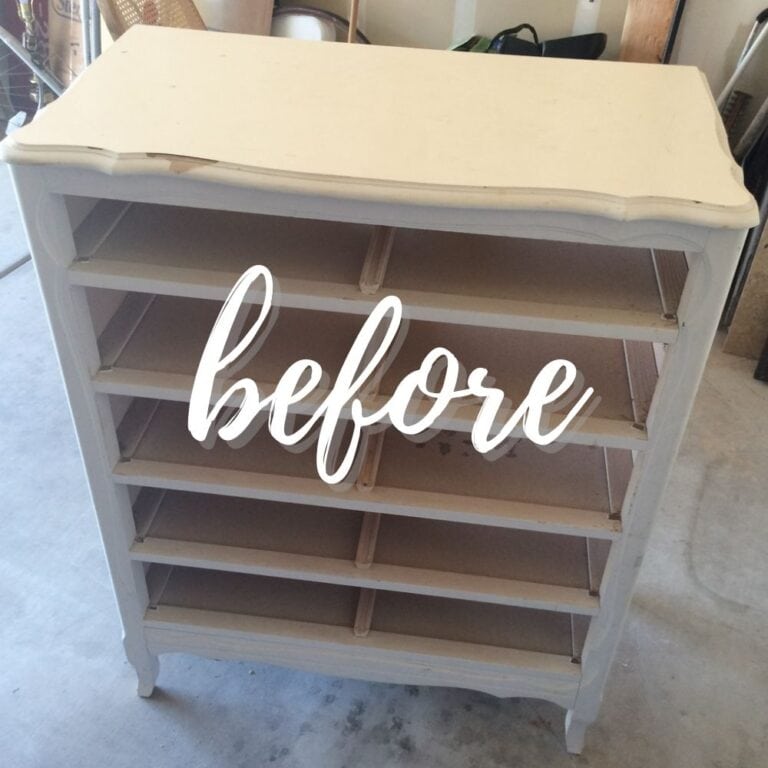
Here is what the dresser looked like before. It has 7 drawers, is very well built, but it had these ugly bat wing drawer pulls that had to go.
With this guide, you’ll learn how to properly prep, paint, and finish your dresser, as well as how to replace hardware and legs for a completely fresh look.

Don’t know what to do with your dresser? Check out this post on how to get rid of a dresser in the best ways.
This is more than just a DIY project. It’s a chance to bring new life to an old piece, and to add a bit of your own personality to your home. You’ll be amazed at what a little bit of time, creativity, and black paint can do! Let’s roll up our sleeves and get started, shall we?

Supplies for Painting a Dresser Black
As an Amazon Associate, I earn from qualifying purchases. I also may earn from other qualifying purchases with other companies or get free product to review and use. All opinions are my own.
- Electric screwdriver
- Krud Kutter
- 220 Grit Sandpaper
- Aqua Lock primer in black
- Black General Finishes Enduro Poly
- Shop Vacuum
- Tack Cloth
- 400 Grit Sandpaper
- Wagner FLEXiO Sprayer
- Leg Hardware
- New Legs
- Hanger Bolts
Prep the Dresser for Paint
First, I removed those ugly bat wing drawer pulls with my electric screwdriver. I love using an electric screwdriver because it makes removing and putting on hardware so much faster than a regular screwdriver. If you are doing many projects, do yourself a favor and get one!
We removed all the hardware first so it makes it easy to clean the wood and so when we paint it the finish will look extra professional. This simple task will make a huge difference in the end results.
And yes, I totally threw the ugly hardware away. Not a fan of it at all.
Then I cleaned the dresser with Krud Kutter to remove any grease or grime on the surface so the paint can stick better. I just use an old damp rag in combination with the Krud Kutter to remove all of this stuff.
For more information on cleaning furniture before painting or more ways to clean furniture, visit our cleaning furniture before painting post.
After the surface was dry, (within 10 minutes or so) I lightly sanded the dresser with 220 grit sandpaper to help the paint stick to the finished wood surface. It doesn’t take long to scuff sand, and you don’t need to sand all the way through the finish.
But this step will make a huge difference in how well the paint sticks to your furniture. Here is more information on the importance of sanding before painting furniture and how exactly to sand before painting. You can also use one of the best black paint for furniture without sanding options if you want to skip the sanding process.
Do I have to Prime Before Painting Furniture?
Technically you could paint without priming first, but your furniture will look so much better and last so much longer if you prime before painting. For this makeover, prime with 2 coats of Aqua Lock primer in black.
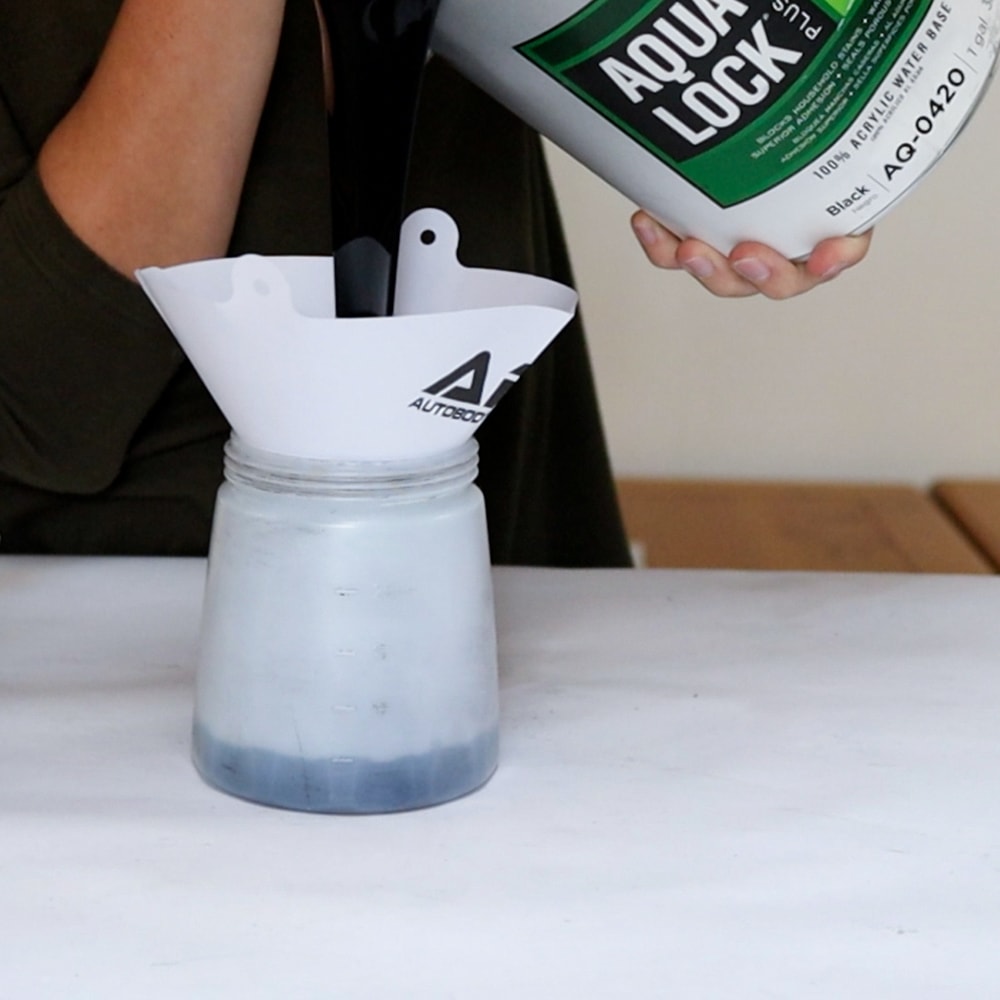
This primer is already black, so it’s easier to paint black paint over it, than if the primer was white. This primer also helps the paint adhere better and it helps the paint have a completely even coverage.
If you skip the primer with this paint, some areas on your furniture might look foggy or look like it has a different sheen on it. But, if you have a primer like this before the paint, your finish will look all the same sheen and it will look so much better!
This primer can be brushed, rolled, or sprayed with a sprayer that can spray thicker paint, like the Wagner FLEXiO sprayers. Here is our list of the best Wagner sprayers for furniture.
But if you just want to brush or roll on the primer, here is our list of the best paint brushes for furniture and the best rollers for furniture.
Let the primer dry between coats, according to the instructions on the can, and then make sure it is dry before moving onto the next step.


Painting a Dresser Black
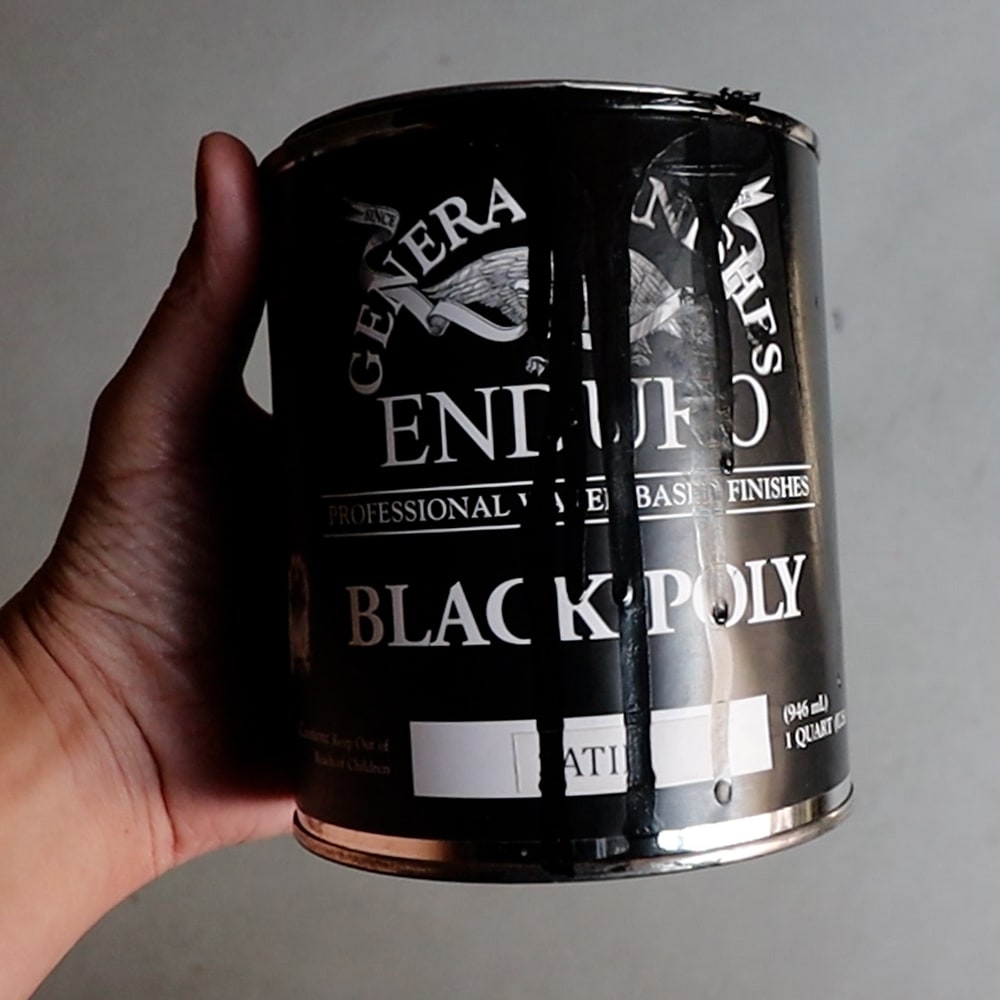
Next up, paint the dresser black with General Finishes Enduro Poly in the color black. This paint can only be sprayed, but it doesn’t need a topcoat, so it makes it really easy!! And, you don’t have to thin the paint to be able to spray it, so you don’t have to worry about messing things up.
We also used it in this post on how to paint furniture black. For more options, check out our list of the best black paint for furniture here.
Would you like to save this?
Just put a paint filter over the sprayer’s container, pour the paint through the filter to catch any debris that might be in the paint, and then put your container on the sprayer. Adjust your settings, and test the spray out on some cardboard to make sure you’re comfortable with it.
Then paint your dresser! Here are the best HVLP sprayers for furniture, if you don’t already have a sprayer. These sprayers don’t need an air compressor, so they are easy to use right out of the box, and very portable. You just plug them into an extension cord and then you’re good to go!
Get more tips and tricks on how to paint a dresser to make the process stress-free. If you’re worried about getting paint all over, here is our post on how to prevent overspray when painting furniture.
Dry time between each coat of paint is an hour, so it is fast too! Apply 3 coats of Enduro poly to the dresser, letting it dry between coats. I also like to lightly sand with 400 grit sandpaper between 1 of the coats to make the paint even smoother.
Then of course, I vacuum up the dust and wipe it all down with a tack cloth to make sure I cleaned up all of the dust.
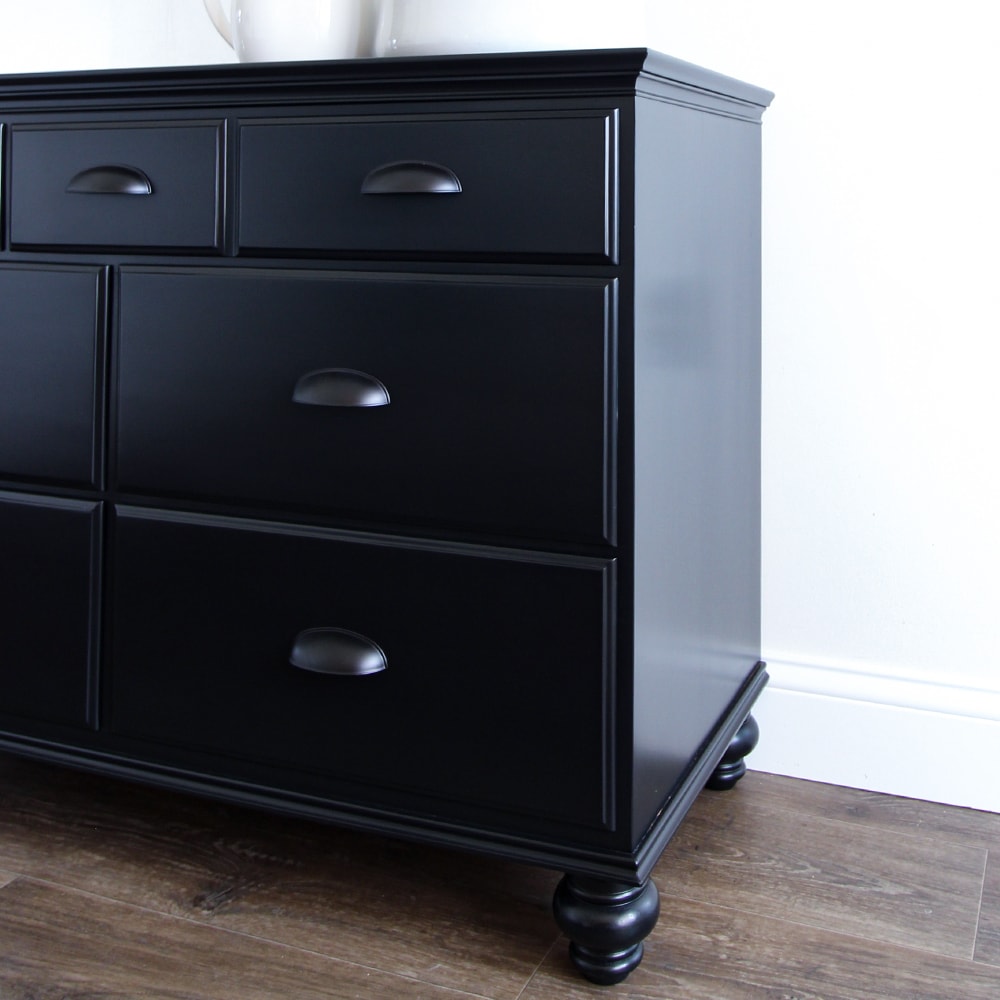
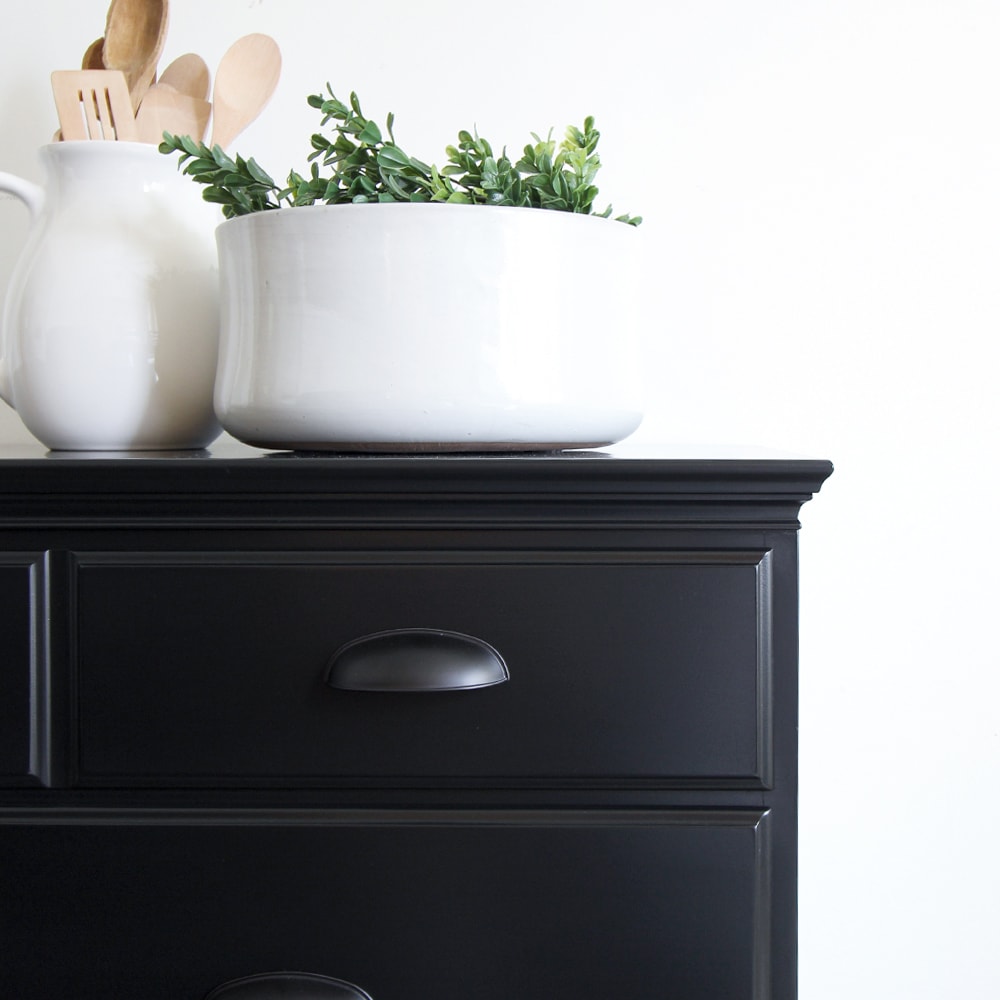
After 24 hours, attach new hardware. I went with some basic black cup pulls that fit the holes that were already on the drawers. If you need to replace your hardware but the new hardware doesn’t fit the old holes, you’ll have to fill in the hardware holes before painting.
Here is more info on how to change hardware on a dresser.
Adding Legs to a Dresser
After it was all painted, I didn’t care for the dresser with the legs it had. So, after a month or so, I flipped the dresser over on a soft surface so I wouldn’t scratch the paint.
I waited to do this for a month or so to make sure the paint was cured and able to withstand me flipping it over on a soft surface.
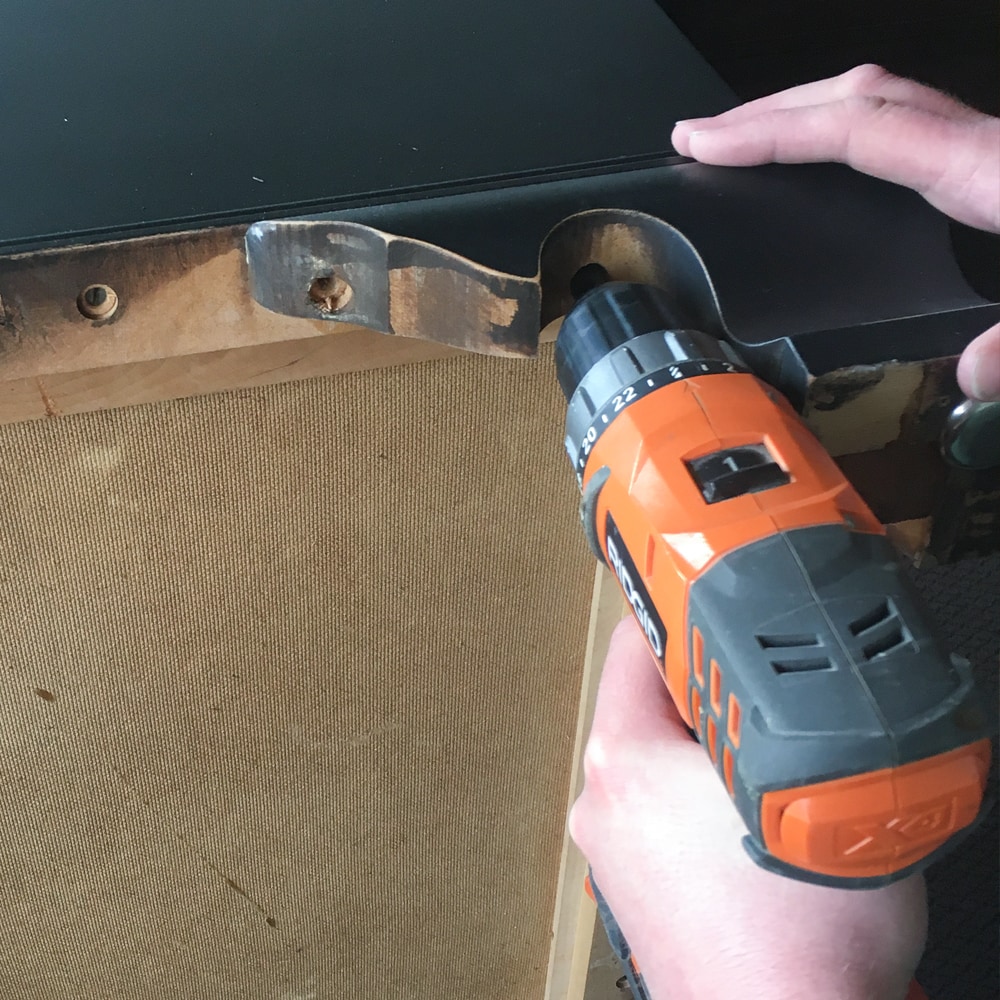
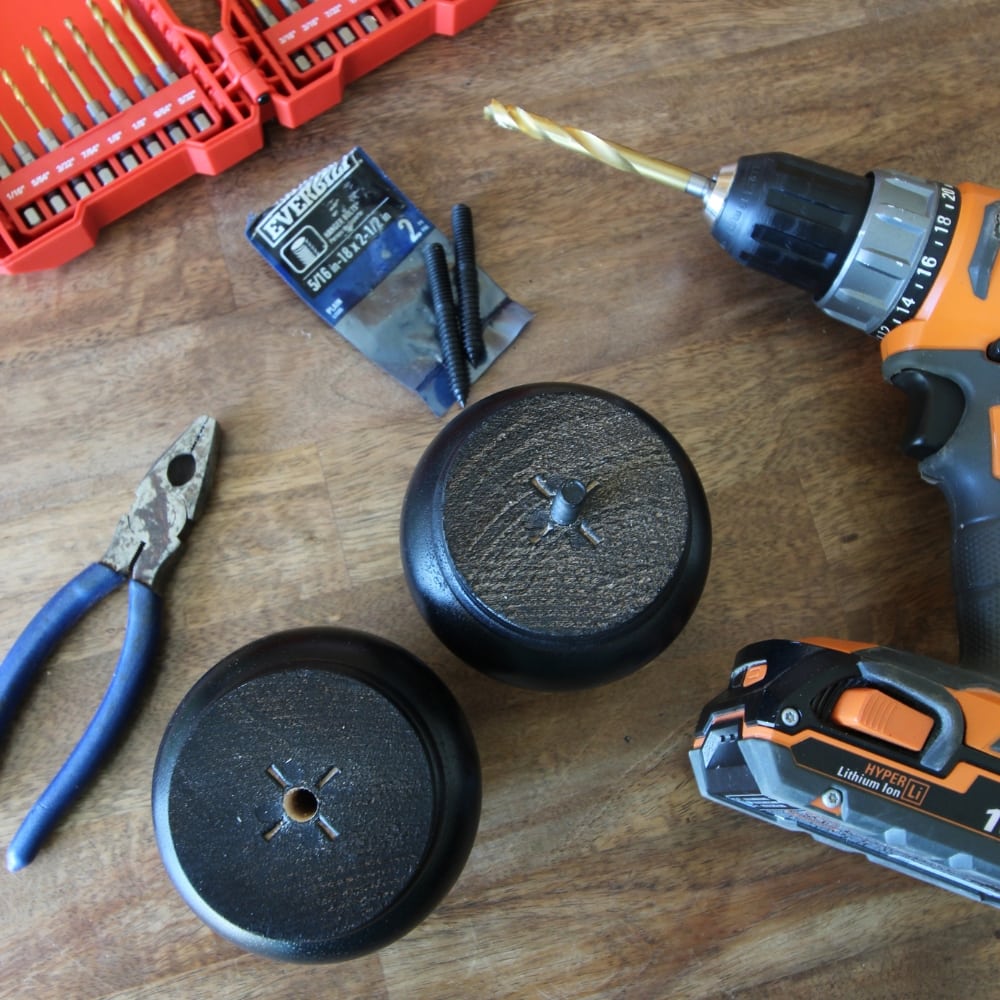
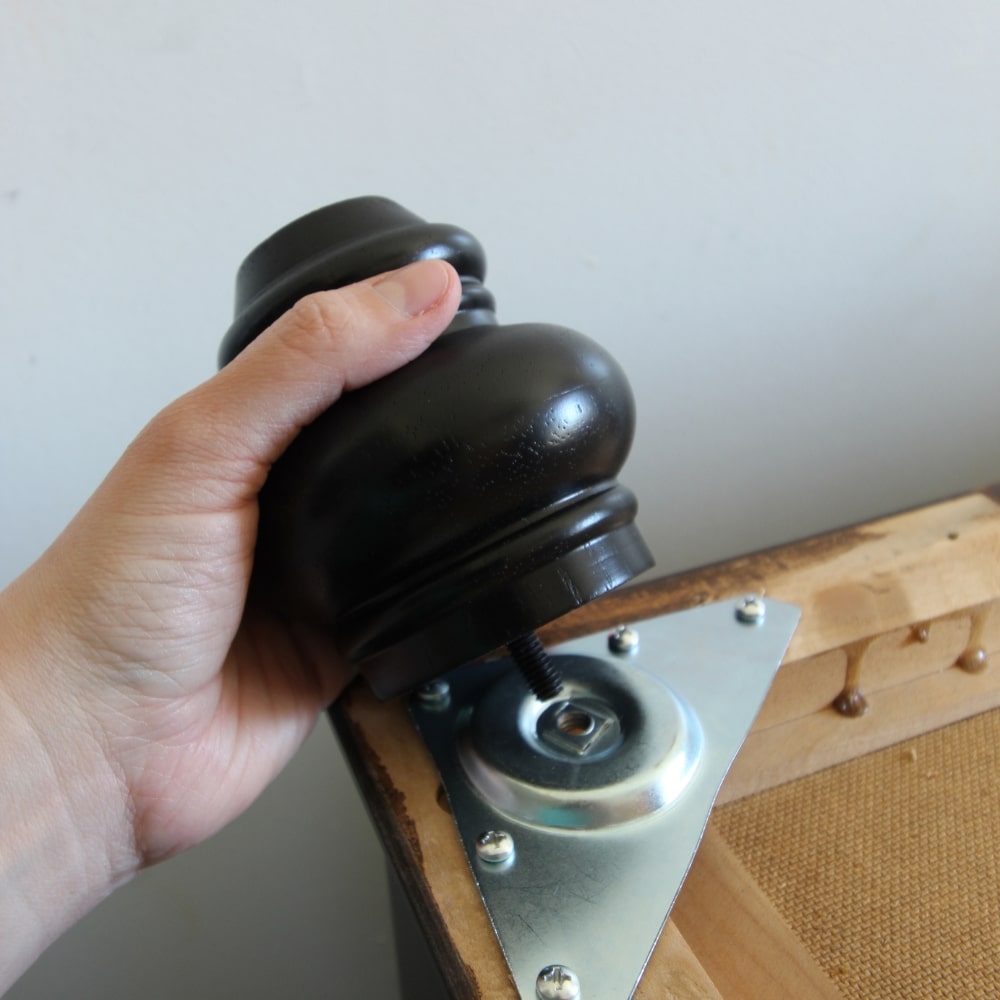
These old legs were easy to unscrew, with just a couple of screws on each leg. Then I added some heavy duty leg hardware plates to each corner of the dresser. These new legs came unfinished, so I had to paint them with the same method I used for the dresser.
Learn more on how to remove the bottom of a dresser just by removing screws in this post about how to add feet to a dresser.
And then they also didn’t come with the screws to attach them to the hardware, so I had to drill a hole in the middle of each leg and screw in a hanger bolt. Then I screwed the legs into the hardware.
For more information on this process, visit our adding legs to a dresser post, or our adding legs to a cedar chest post. These two posts give a lot more detail on how to actually go about adding legs to furniture.
We’ve also listed the best wood legs to add to furniture to help you find the perfect leg for your project.
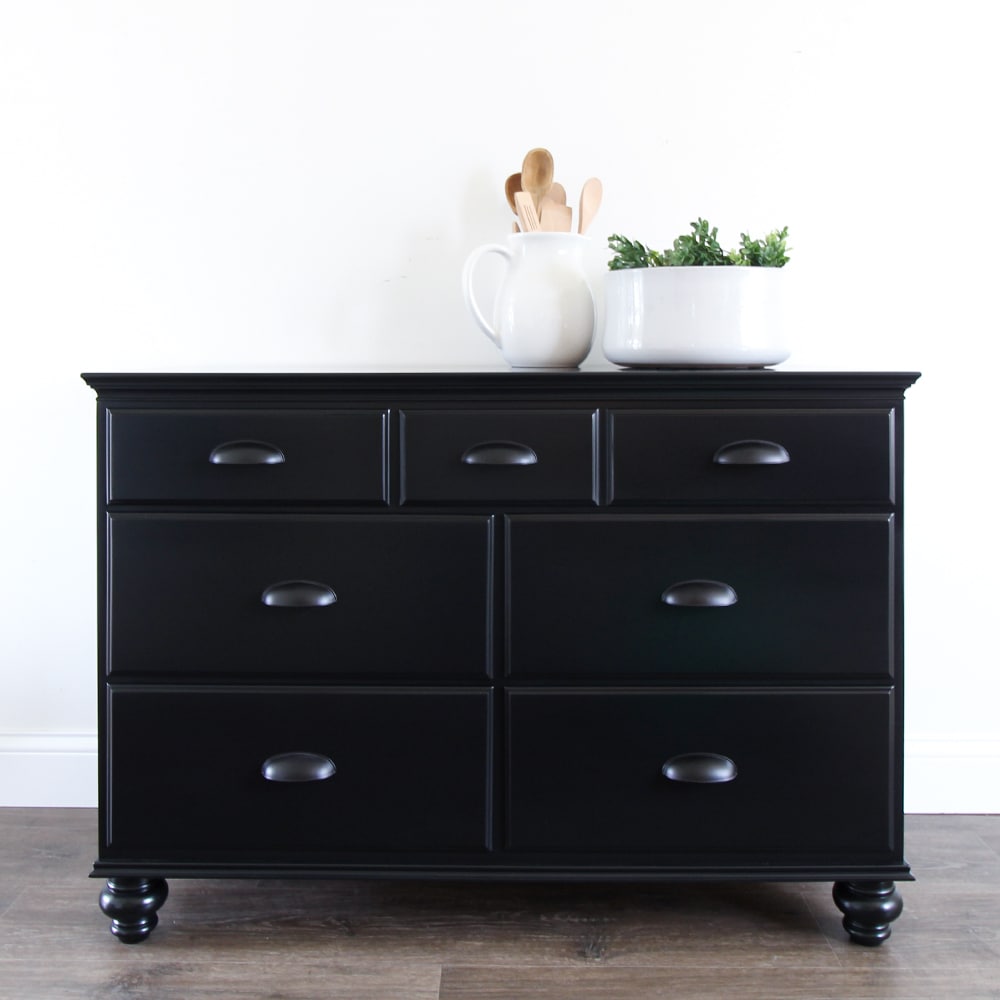
Here is what this dresser looks like now! A cute farmhouse dresser with cup pulls that looks sleek and modern at the same time. Pair this up with the perfect DIY farmhouse drop cloth curtains to complete the look.
More Before and After Makeovers
See All >
Click any of these “before” photos below to view the “after” of that makeover.


Get more ideas for your next DIY project with these black painted dresser ideas and modern dresser ideas! Matching black with white creates a timeless look – check out these black and white dresser ideas for inspiration.


Painting a Dresser Black
Update your room by painting a dresser black! You'll be amazed by how much it does for your home. This guide walks you through how to paint a dresser black and how to add new legs to your dresser.
Materials
Instructions
- Remove the old hardware, then clean the dresser with Krud Kutter to remove any grease or grime.
- Lightly sand the dresser with 220 grit sandpaper.
- Prime the furniture with 2 coats of Aqua Lock primer in black. Let the primer dry according to the instructions on the can.
- Paint the dresser black with General Finishes Enduro Poly. Apply 3 coats of Enduro poly, letting it dry between coats. Lightly sand with 400 grit sandpaper between one of the coats. Vacuum up the dust and wipe down with a tack cloth.
- Attach new hardware after 24 hours.
- If desired, add legs to the dresser. Remove the old legs by unscrewing the screws that hold them on. Paint the new legs with the same method used for the dresser. Add hanger bolts to the legs and attach hardware to the dresser so you can attach the legs to the dresser.
- Enjoy your masterpiece!
Recommended Products
As an Amazon Associate and member of other affiliate programs, I earn from qualifying purchases.


more black painted furniture makeovers
- Painting Oak Furniture Black
- Painting a Coffee Table
- Painting a Bed Frame Black
- How to Make Furniture Look Rustic
- How to Add Legs to a Cabinet
Follow us on YouTube to get more tips for painting furniture. Or share your project with us on our Facebook Group and be part of our community. See you there!