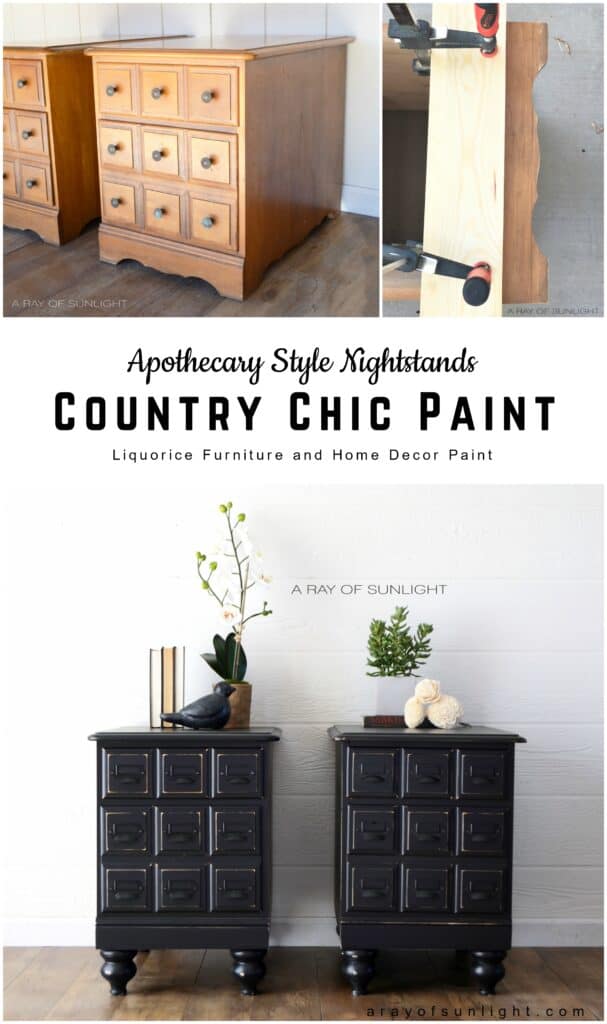
Apothecary Style Vintage Nightstands Makeover

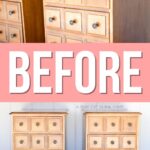


From thrift store finds to trendy apothecary style nightstands, learn how we transformed these apothecary style vintage nightstands with the help of adding legs and some chalk paint. If you’re looking for some painted nightstand ideas, this makeover is sure to inspire you.
These stylish pieces of furniture not only serve as functional bedside tables, but also make a statement with their vintage appeal. Keep reading to find out how you can recreate this look in your own home.
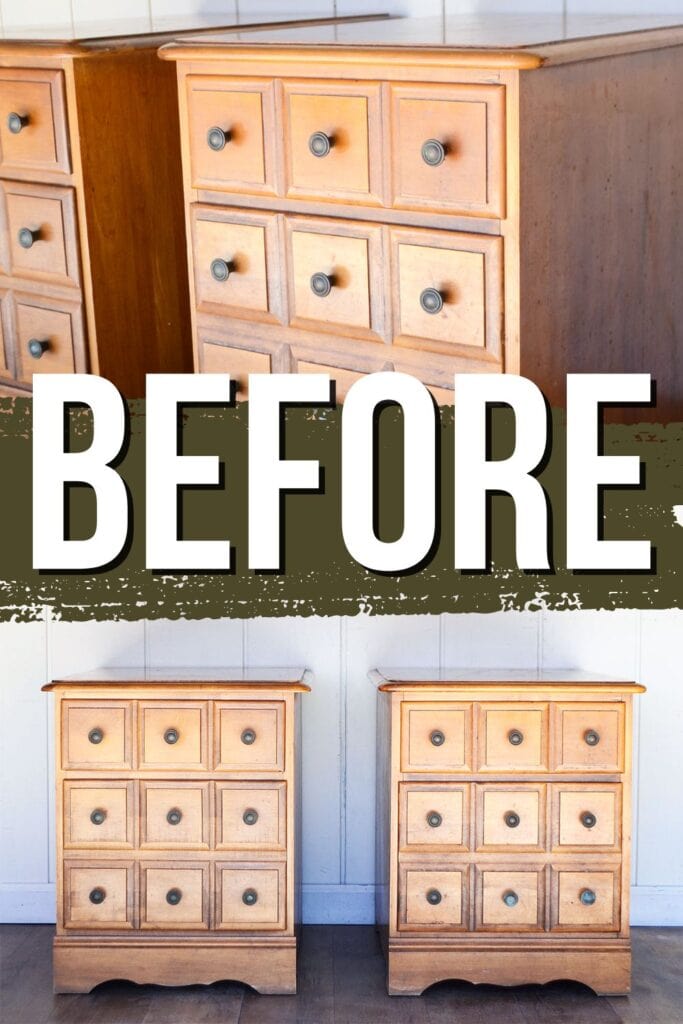
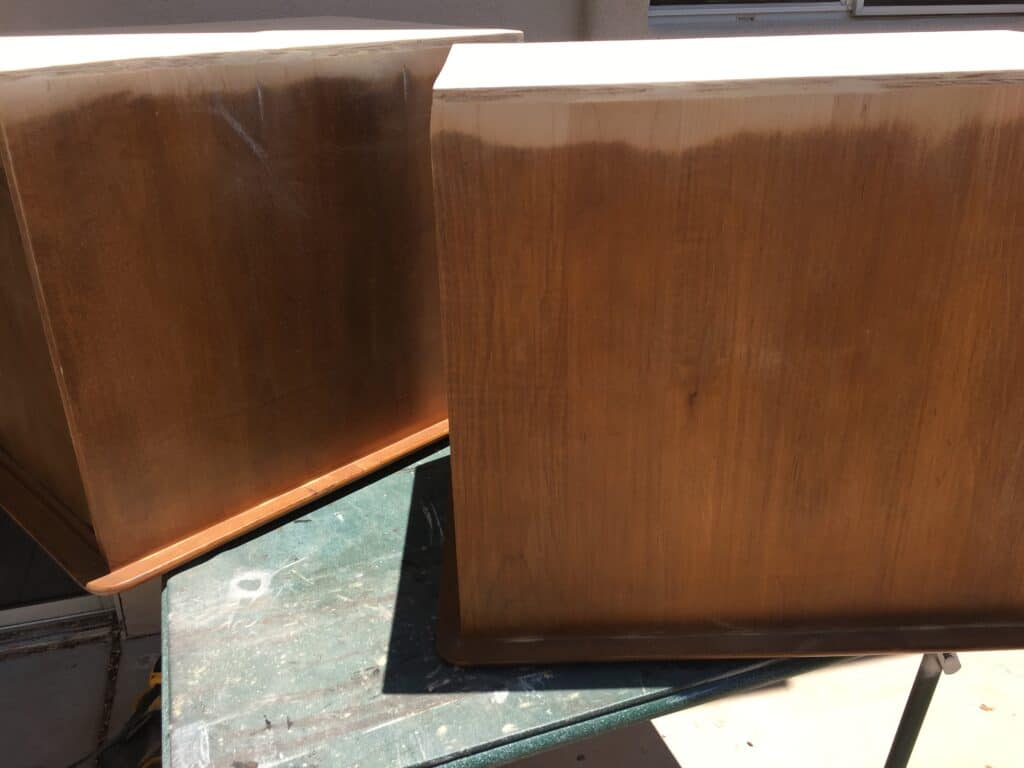
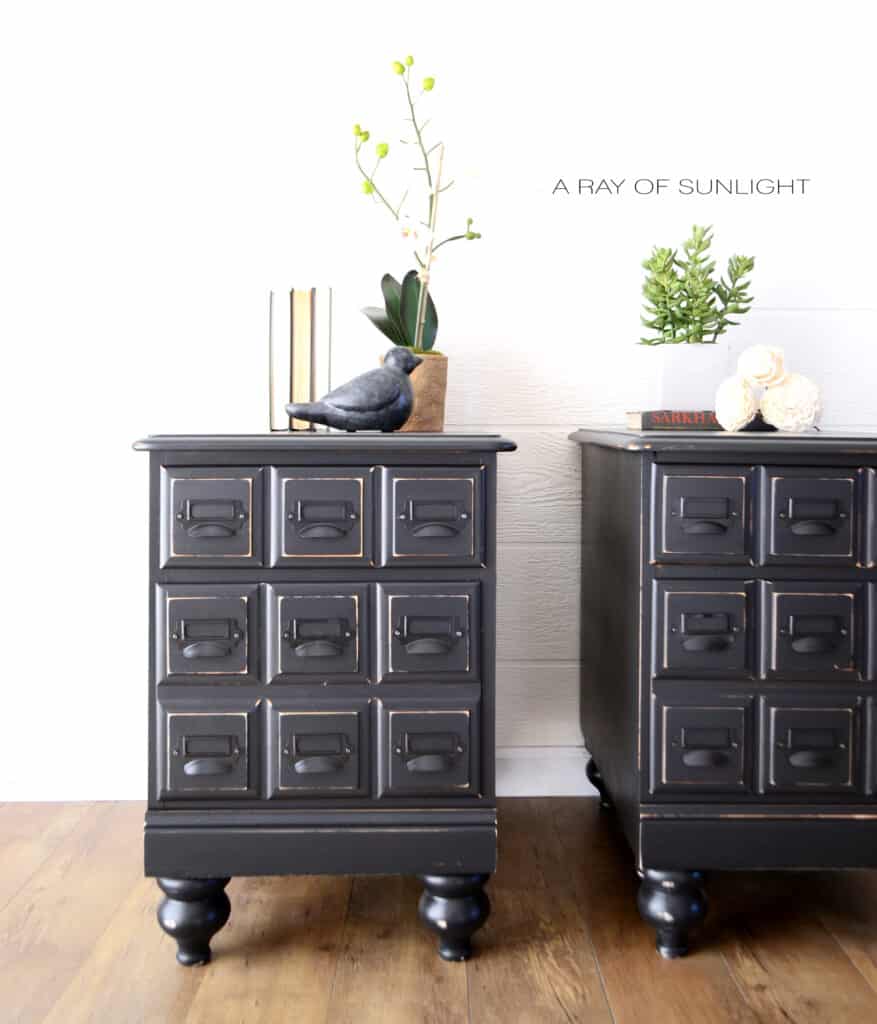
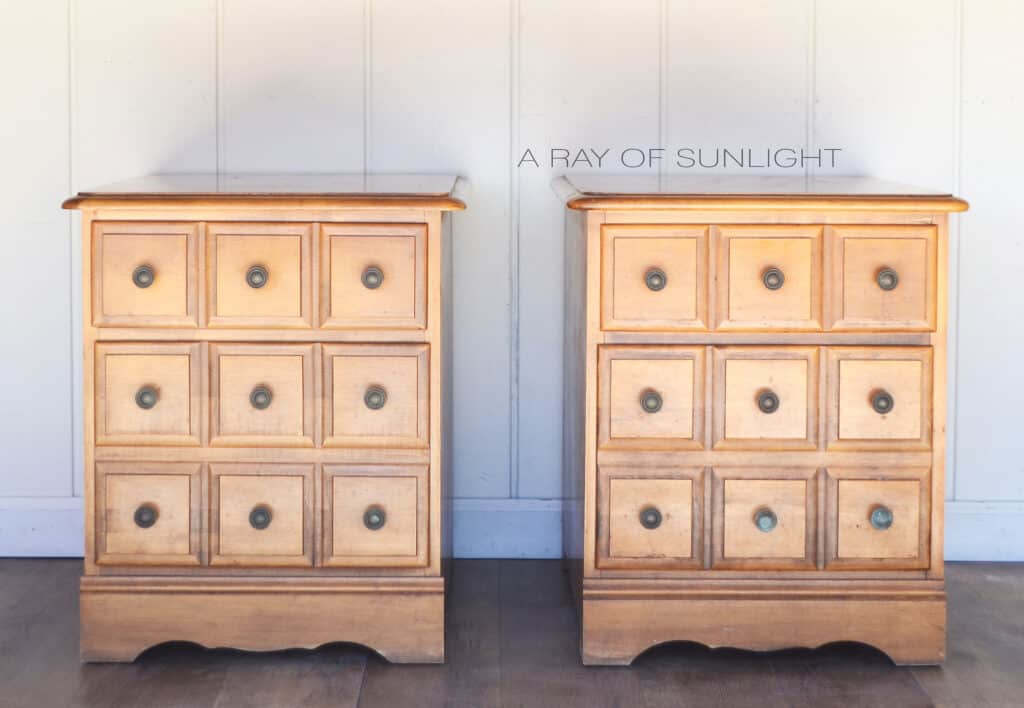
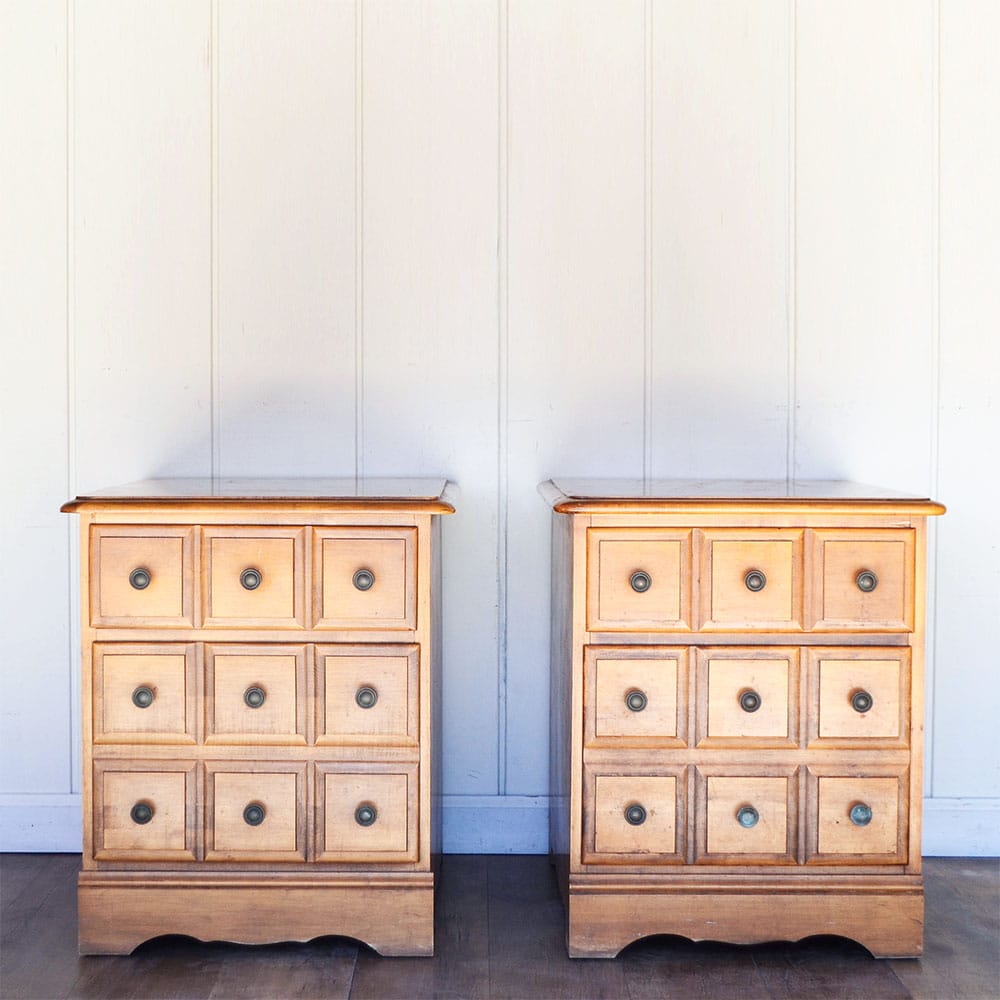
We found these vintage nightstands with amazing drawer fronts that resemble the ever so popular apothecary or card catalog style. We knew that we had to have them just because of that!

But they came with one downside, they were pretty short! Bummer. So we added some height with some new legs, and completely transformed them with paint. Let’s dive in!

Supplies Used For Apothecary Style Vintage Nightstands Makeover
As an Amazon Associate, I earn from qualifying purchases. I also may earn from other qualifying purchases with other companies or get free product to review and use. All opinions are my own.
- Wood Filler / Bondo
- Tape Measure
- Circular Saw
- Straight Wood Board
- Clamps
- Nail Gun
- 1 1/2″ Brad Nails
- Orbital Sander
- 220 Grit Orbital Sandpaper
- 3/4″ Plywood
- Leg Plates
- Legs
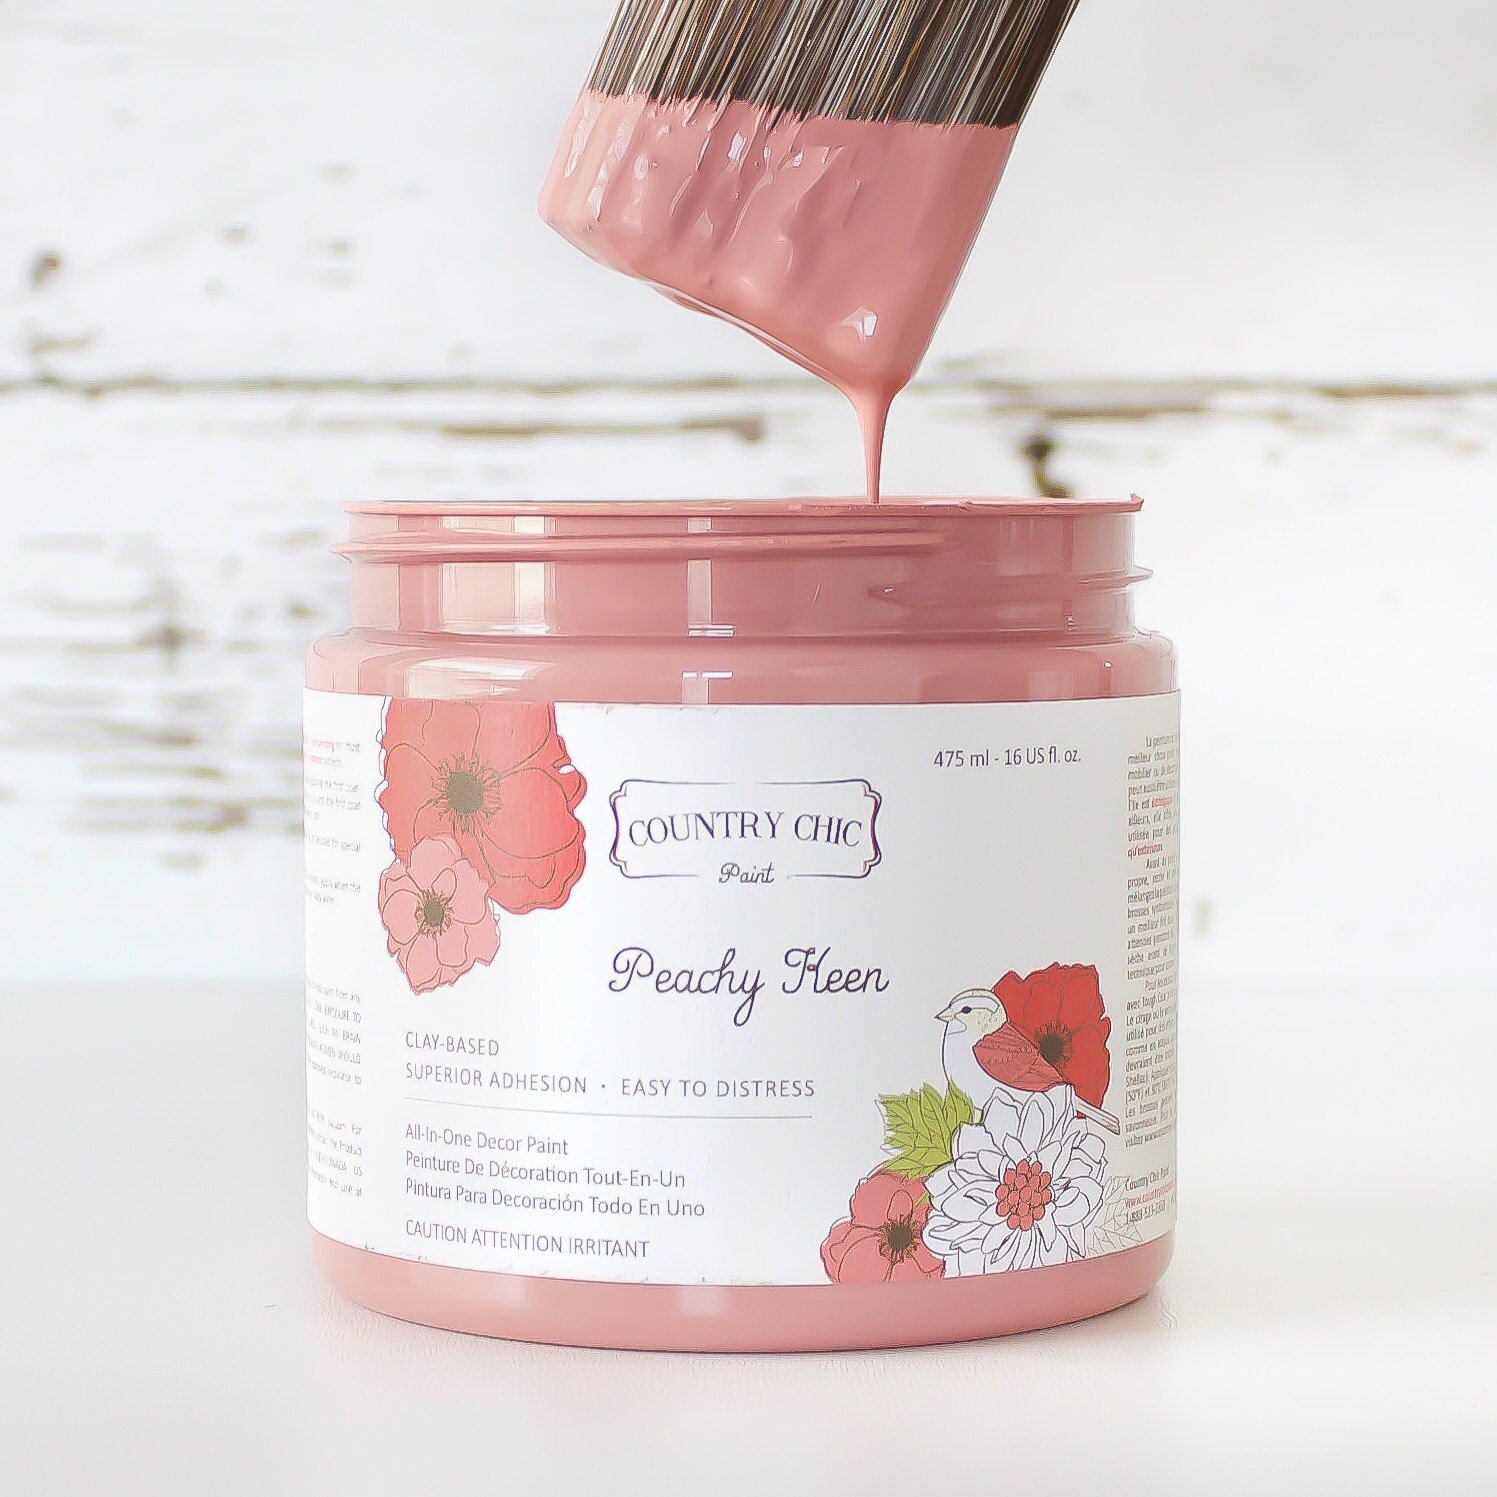
- Country Chic Paint in Liquorice
- Varathane Polyurethane
- Label Pulls
Get the 10 best painting furniture supplies here!
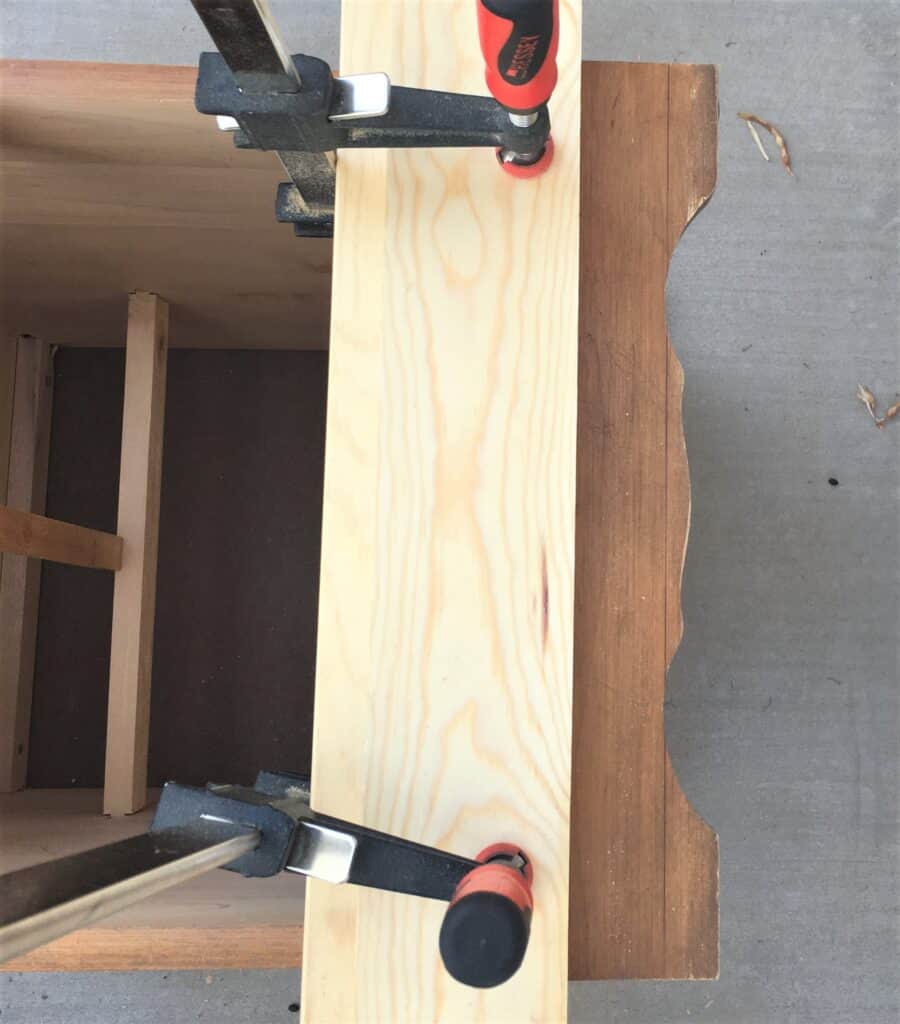
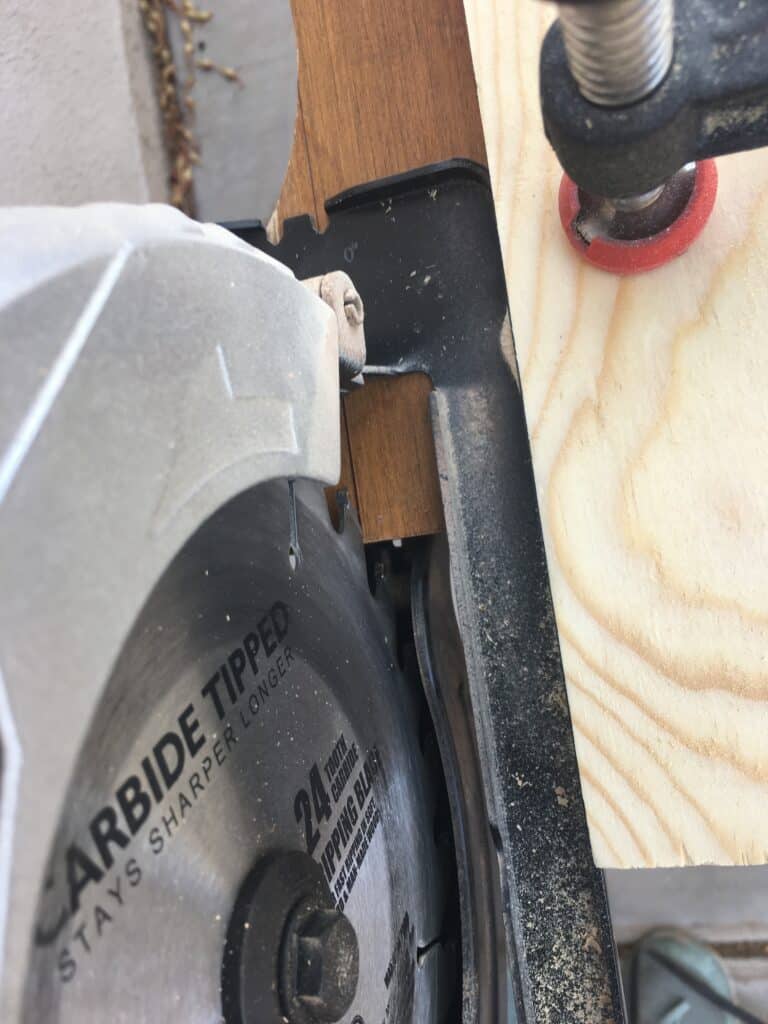
Removing Curved Bottom Trim
We started out by cutting the bottom portion of the trim to get rid of the curves. We wanted a straight clean look. Plus, the way we wanted to add legs wouldn’t work with the curved trim.
If your piece has old legs that just unscrew and come off, check out the process here on our post about how to add feet to a dresser.
We measured, double-checked, and grabbed our circular saw to cut away the bottom trim. We used a straight piece of wood with some clamps to make sure we got a straight cut.
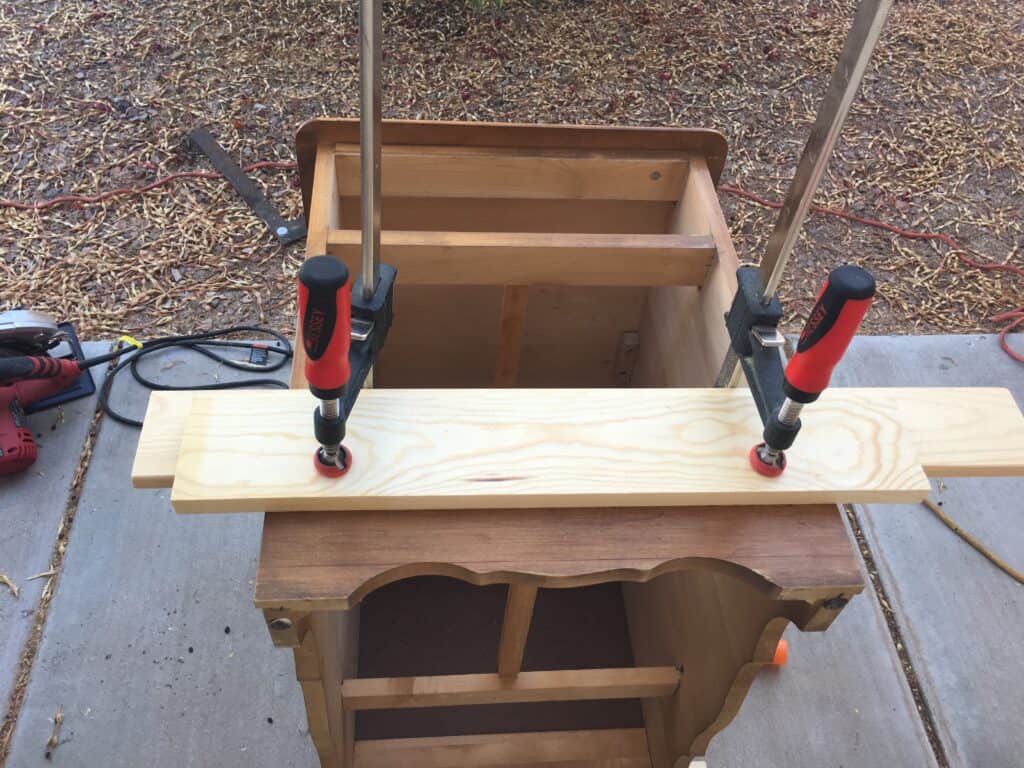
Attaching New Legs to Nightstands
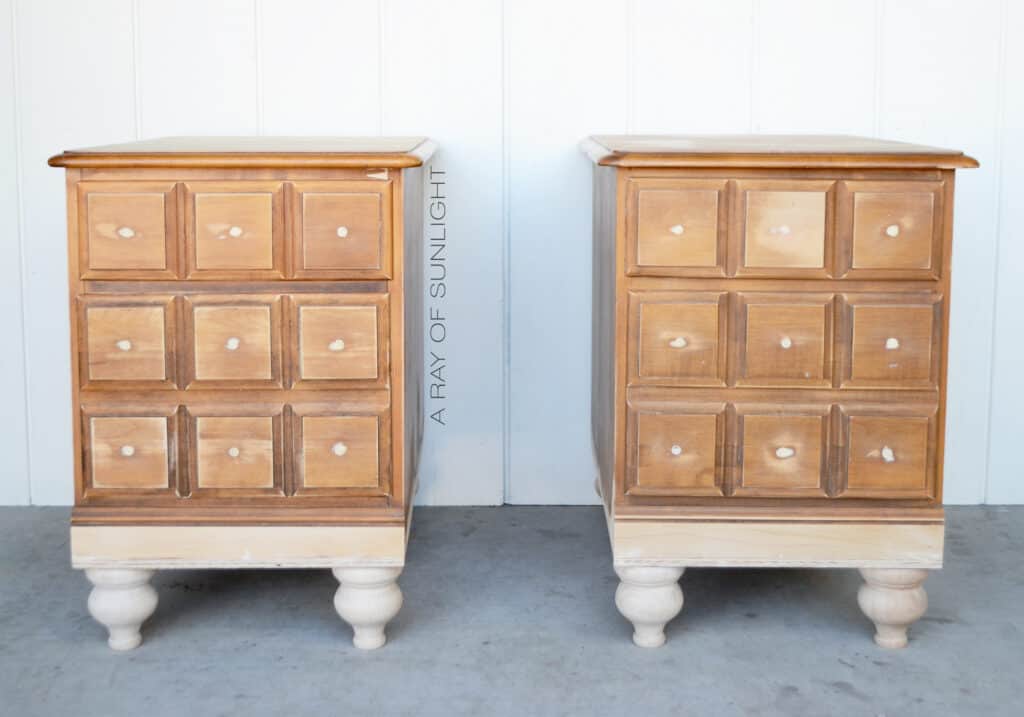
We needed something to attach our new legs to, so once we had fresh new straight trim, we added 3/4″ plywood to the bottom of each nightstand.
We attached the plywood with our nail gun using 1 1/2″ brad nails, making sure the wood was flush with each side of the nightstand.
This also helped give us back some of the height that we took off in the first step. Once the wood was attached, we sanded the edges smooth with our orbital sander.
Learn more about the best sanders for furniture here!
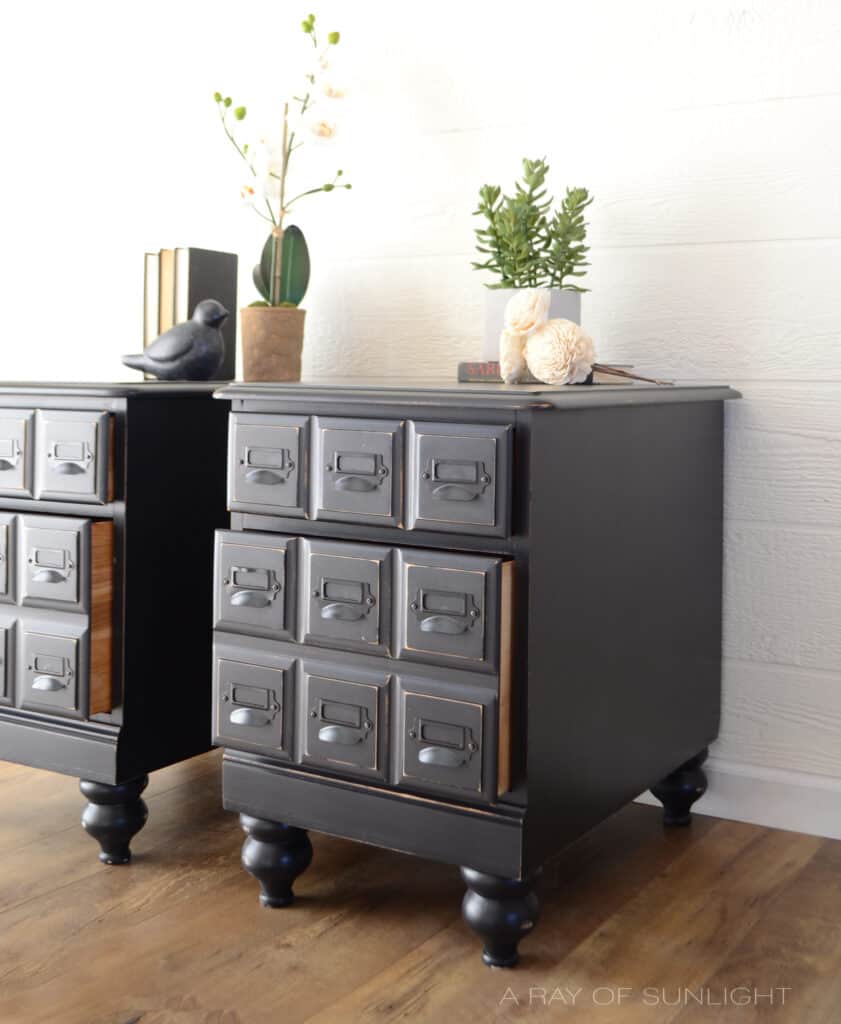
We attached leg plates to the plywood on all four corners, and then simply screwed the legs into those. Check out this tutorial on adding legs to a nightstand to see more of this process.
We’ve also listed the best wood legs to add to furniture to help you choose the best for your project.
Filling In Old Hardware Holes
Since we wanted to update the hardware, we filled in all of the old hardware holes with Bondo and let them dry before proceeding.
Learn more about filling holes when replacing cabinet or furniture hardware here and how to change hardware on a dresser here.
Now for the fun part!
Painting Nightstands with Chalk Paint
We lightly hand sanded everything with 220-grit sandpaper then cleaned them by wiping everything down with a damp rag. Read this post to learn more about how to prepare furniture for painting.
And then we taped off the drawers to avoid overspray inside of them. Here’s more about how to prevent overspray when painting furniture.
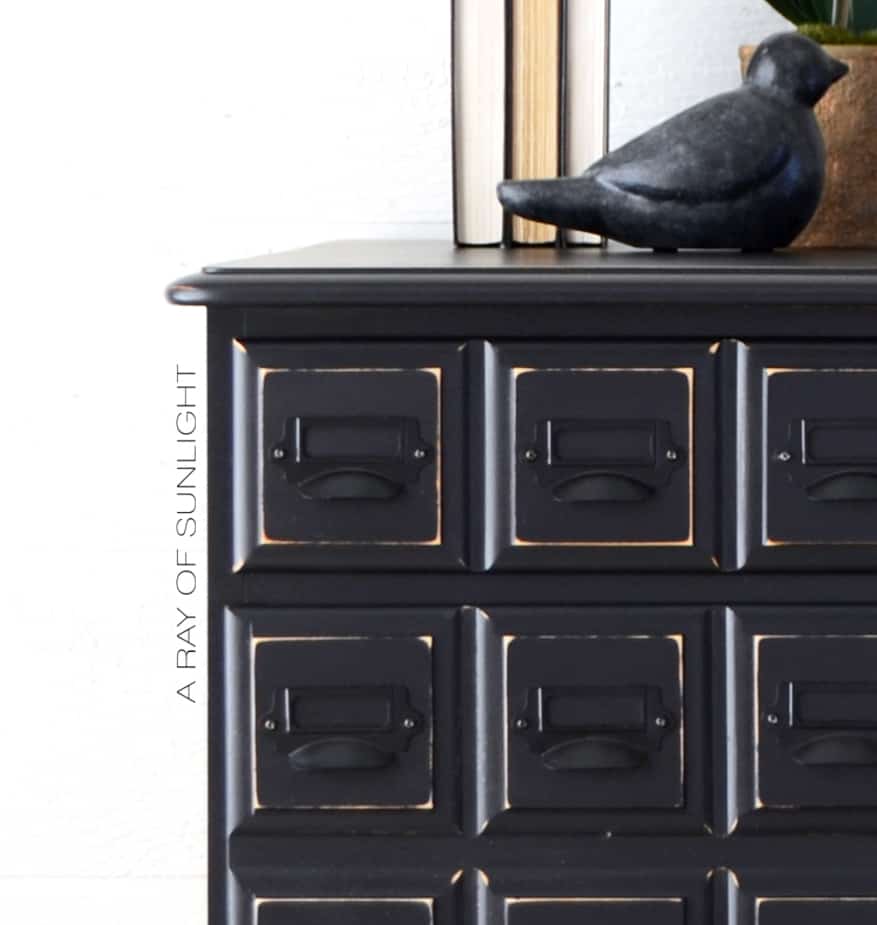
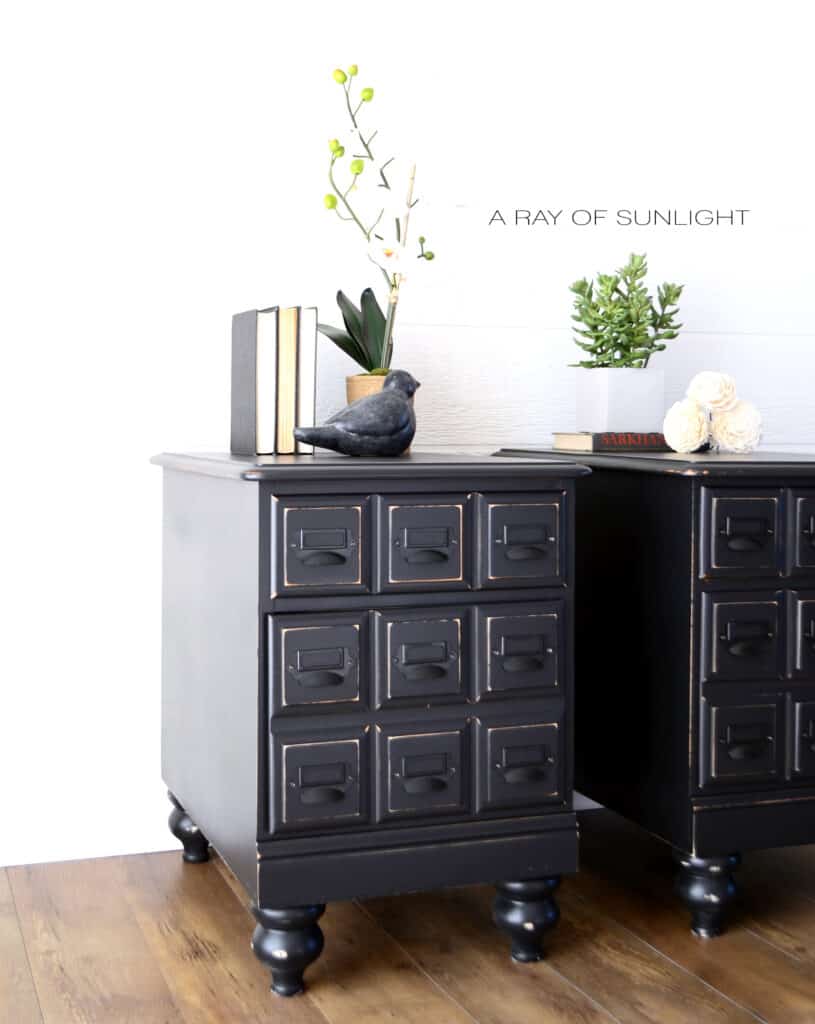
Then we sprayed on two coats of the beautiful Black Liquorice chalk paint for full coverage. Learn my tips and tricks on painting furniture with a sprayer here.
Would you like to save this?
And then distressed the edges with 220 grit sandpaper. Learn more about the 6 best distressing furniture techniques here! Check out this guide on how to make furniture look rustic for more information.
Note: A really good option is to paint the legs before attaching them to the furniture. It makes it so much easier to paint all the sides of the legs.
((If you haven’t tried Country Chic Paint, you’re missing out! It’s my favorite pre-mixed chalk-style paint on the market! It’s easy to work with, sticks so well, sprays amazingly, distresses like a dream, and I just love their special finish products!))
Sealing Chalk Painted Nightstands
To seal the paint, and add extra durability, we sprayed on 3 coats of Varethane polyurethane!
Learn ALL of my tips and tricks on how to spray polyurethane here! And read all about the many topcoats for painting furniture options here.
Adding Card Catalog Pulls
We also switched out the old hardware with new black label pulls from D. Lawless Hardware to complete the apothecary look.
The new legs completely changed up the style of the nightstands and the stunning Liquorice chalk based paint finished off the high end look we were going for.
For similar projects, check out this DIY card catalog dresser makeover and these 30 amazing faux card catalog makeovers. These tall nightstand ideas and refinishing nightstand ideas are also easy to recreate! Check out more black chalk painted furniture here.
More Before and After Makeovers
See All >
Click any of these “before” photos below to view the “after” of that makeover.


Can I add legs to any piece of furniture?
Adding legs to furniture is a fantastic way to give it a fresh and stylish look. But not all furniture pieces can handle that upgrade.
Before you go ahead, consider the weight and balance of the piece. If it’s too top heavy or lightweight, adding legs might compromise its stability.
Also, some furniture pieces might have structural elements that make it tricky to attach legs.
So, before you try adding legs, make sure to assess the construction of the piece. If you’re not sure, it’s a good idea to consult with a pro or do some research first. Get more tips on how to add legs to a dresser in this post.


How do I know what height of legs to use for my piece of furniture?
The height of your furniture legs should be determined by the overall size and function of your piece.
For example, if you’re adding legs to a dresser, think about how tall or short you want the final piece to be – using taller legs can give a piece a more modern and elevated look, while shorter legs can create a more traditional or vintage feel.
Ultimately, it’s up to personal preference and the design aesthetic you’re going for.
Another factor to consider when choosing the height of your furniture legs is the surrounding furniture and decor.
If you have a couch or chairs in the same room, you may want to choose legs of a similar height to create a cohesive look. On the other hand, mixing different leg heights can add visual interest and create a more eclectic design.


Apothecary Style Vintage Nightstands Makeover
Learn how we transformed these apothecary style vintage nightstands with the help of adding legs and some chalk paint.
Materials
Instructions
- Cut the bottom portion of the trim on the nightstands to get rid of the curves. Use a straight piece of wood with some clamps to make sure to get a straight cut.
- Attach new plywood base to the bottom of each nightstand. Sand the edges smooth with the orbital sander. Now, attach leg plates to the plywood on all four corners, and then simply screw the legs into those.
- Remove hardware and fill in old hardware holes with Bondo. Let the Bondo dry.
- Prepare the nightstands for paint by lightly sanding everything with 220-grit sandpaper then clean by wiping everything down with a damp rag.
- Now, tape off the drawers to prevent overspray. Then spray two coats of the black Chalk Paint for full coverage. Distress the edges after with 220 grit sandpaper.
- Spray 3 coats of polyurethane to seal the chalk paint and add extra durability.
- Attach new hardware to the nightstands.
Recommended Products
As an Amazon Associate and member of other affiliate programs, I earn from qualifying purchases.


More Nightstand Makeovers
- Vintage Nightstands Makeover
- Pink Painted Nightstand
- DIY Dark Green Nightstands
- Chalk Painted Nightstand Makeover
- French Blue Dressers turned Nightstands
Follow us on YouTube to get more tips for painting furniture. Or share your project with us on our Facebook Group and be part of our community. See you there!
I love the black distressed look. It is a favorite of mine.
They turned out nice , I like how it changed the style of the night stands into tables .
Thanks for the love!