How to Prevent Paint Bleed Through Painters Tape
Painting can be an exciting and rewarding project, but when you’re making stripes or fun designs, one of the most common issues is how to prevent paint bleed through painter’s tape. The paint bleed not only looks unappealing, but it can also ruin the overall look of your piece.
Fortunately, if you learn the correct painting techniques for furniture, you can prevent mistakes like this from happening. In this post, we will explore how to use painter’s tape and other ways of preventing bleedthrough so that you get a beautiful finished product every time!
Paint bleed through tape can be a frustrating and discouraging issue when painting furniture. Not only does it detract from the overall unique look, but if not addressed, it can make your design look sloppy and unprofessional.

It’s especially annoying when you’ve spent so much time and effort, only to see those supposed clean, crisp lines smudged or uneven. But thankfully, there are steps you can take to stop this from happening.
In this post, we’ll share exactly what to do to prevent this bleed issue from happening when you’re using painter’s tape. First up, the type you use is actually pretty important. Keep reading for more of this in detail!
supplies used on How to Prevent Paint Bleed Through Painters Tape
As an Amazon Associate, I earn from qualifying purchases. I also may earn from other qualifying purchases with other companies or get free product to review and use. All opinions are my own.
How to Use Painters Tape Without Bleeding
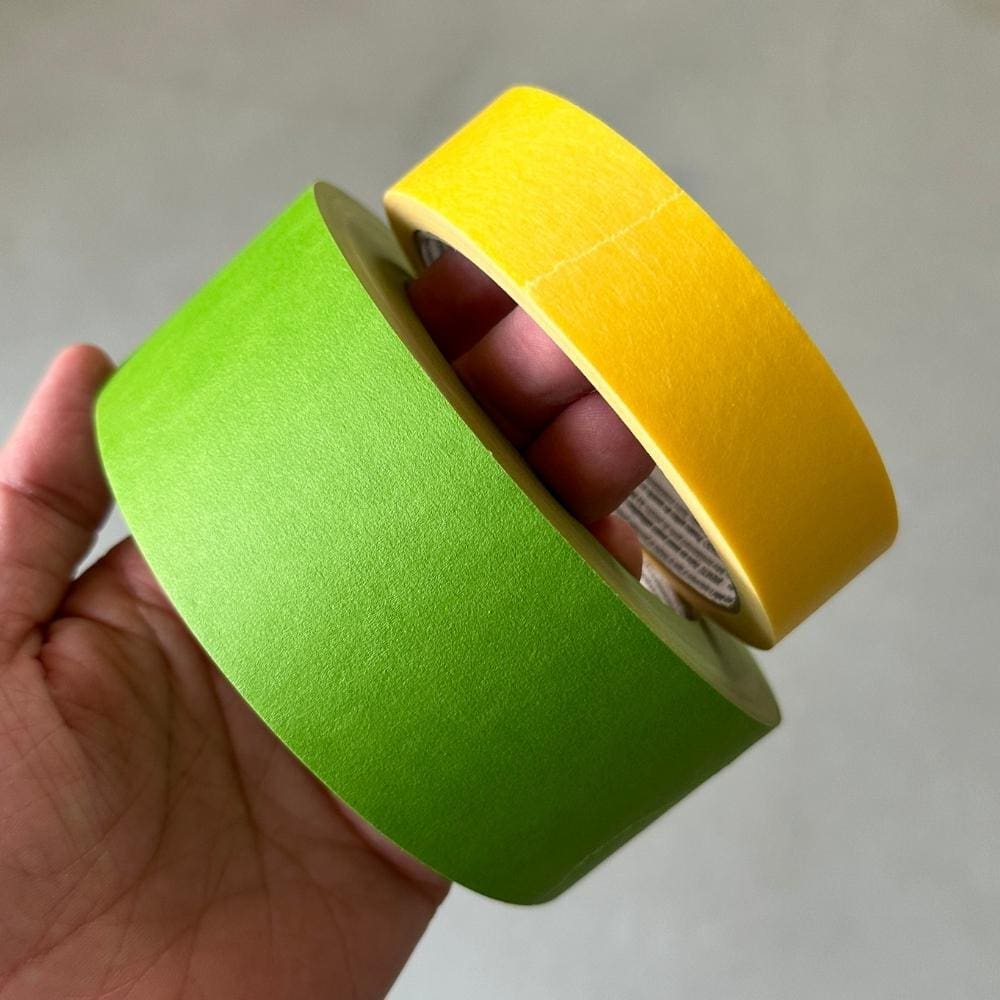
Yep, the type you use can make a difference in how much bleed through you have! The primary benefit of using Frog Tape is its paint block technology. This advanced adhesive formula helps to create a seal between the tape and the surface, preventing any paint from seeping underneath it.
First, clean the surface with a damp cloth before applying it in order to remove any dirt or dust particles that could interfere with adhesion.
Then, make sure the edge of the tape is firmly pressed down against the surface, especially around corners and curves, in order to create an effective seal and prevent any bleedthrough. You can go over the edge of it with a plastic putty knife or gift card to make sure it is firmly in place.
You can test a small area first before committing fully to make sure that there are no issues with adhesion or bleedthrough once you begin your project.
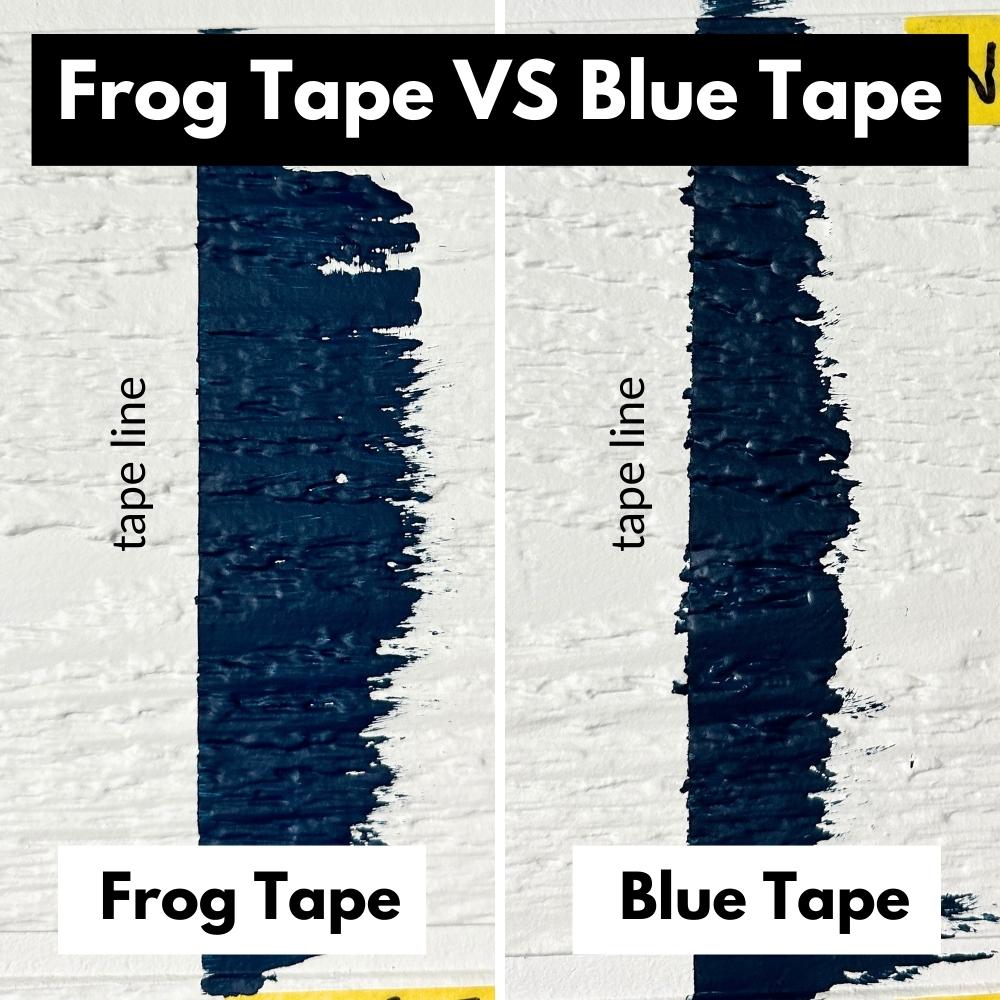
Check out this difference between using Frog Tape and regular painter’s tape on a rough surface. We didn’t use anything other than these two in this photo.
Wondering what’s the best painters tape that doesn’t bleed? Head on over to this post to find out!
Pushing Down the Edge of the Tape
If you can’t use Frog Tape and you just have regular painters tape on hand, then you can still do some things to prevent bleedthrough. After you put it on, use a plastic tool like a plastic putty knife or gift card to make sure the edge is securely in place and pushed completely against the surface you’re painting.
Pushing down the edge is a super important step to prevent bleedthrough when using any type of painters tape. This helps create a tight seal between the tape and the surface, which helps keep any paint from seeping underneath.
If there are any gaps or spaces between, then the paint can easily seep through and create unwanted splotchy lines.
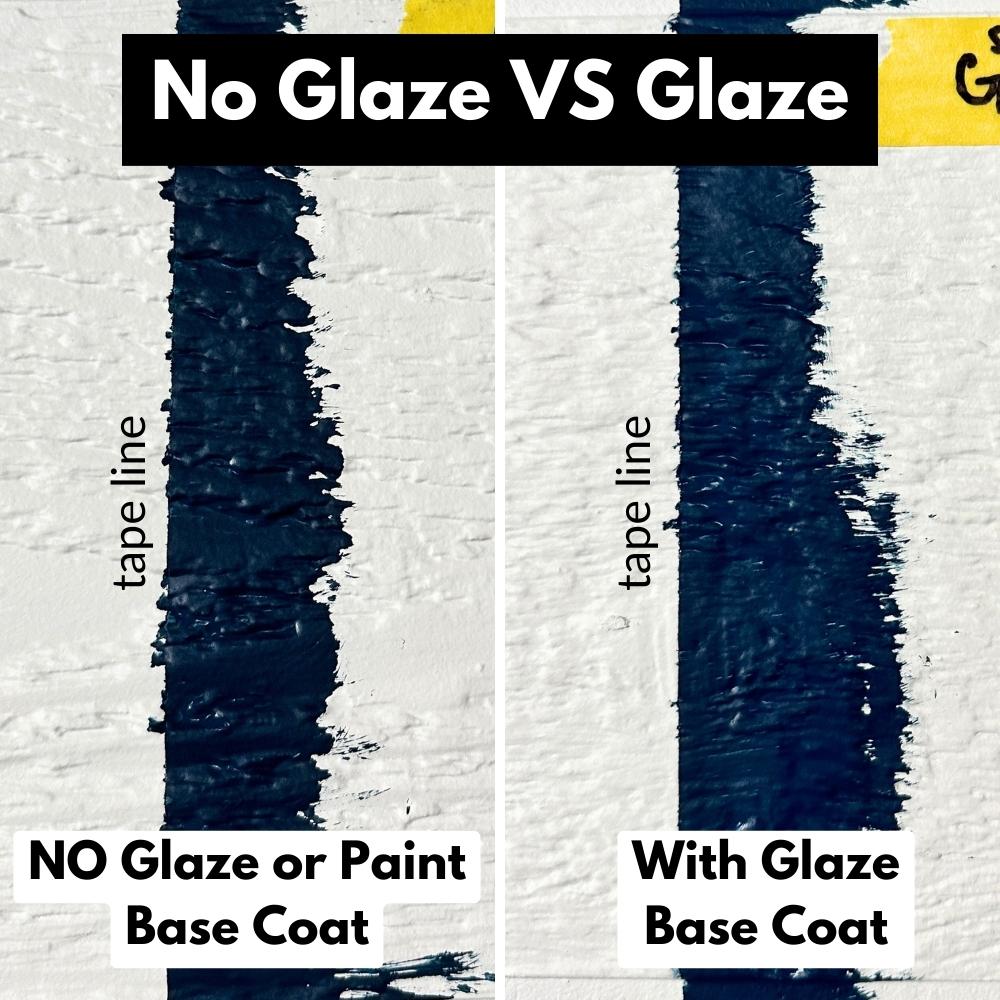
Applying Clear Glaze or Undercoat Paint Color
Another great way to prevent paint bleedthrough is to apply a coat of clear glaze or undercoat paint color before you apply your new color over the top.
This helps to seal any gaps that could otherwise be filled with your new color.
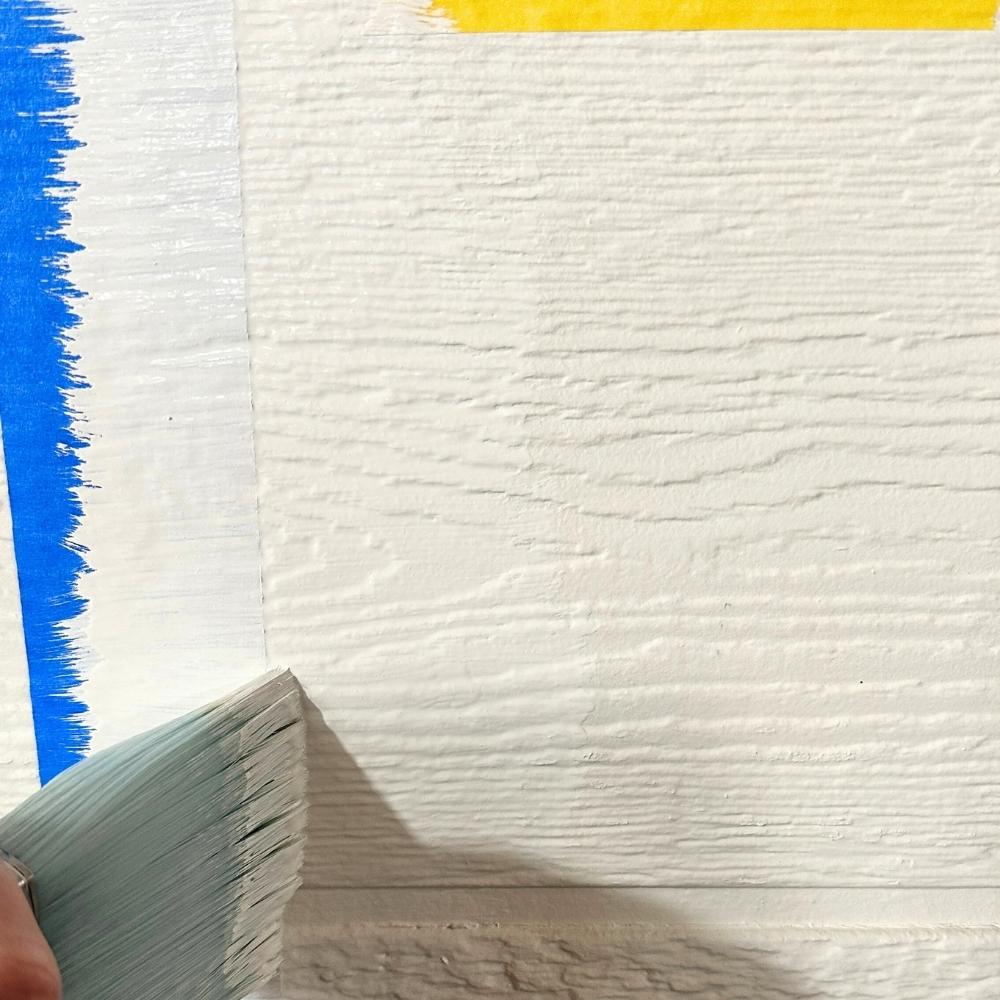
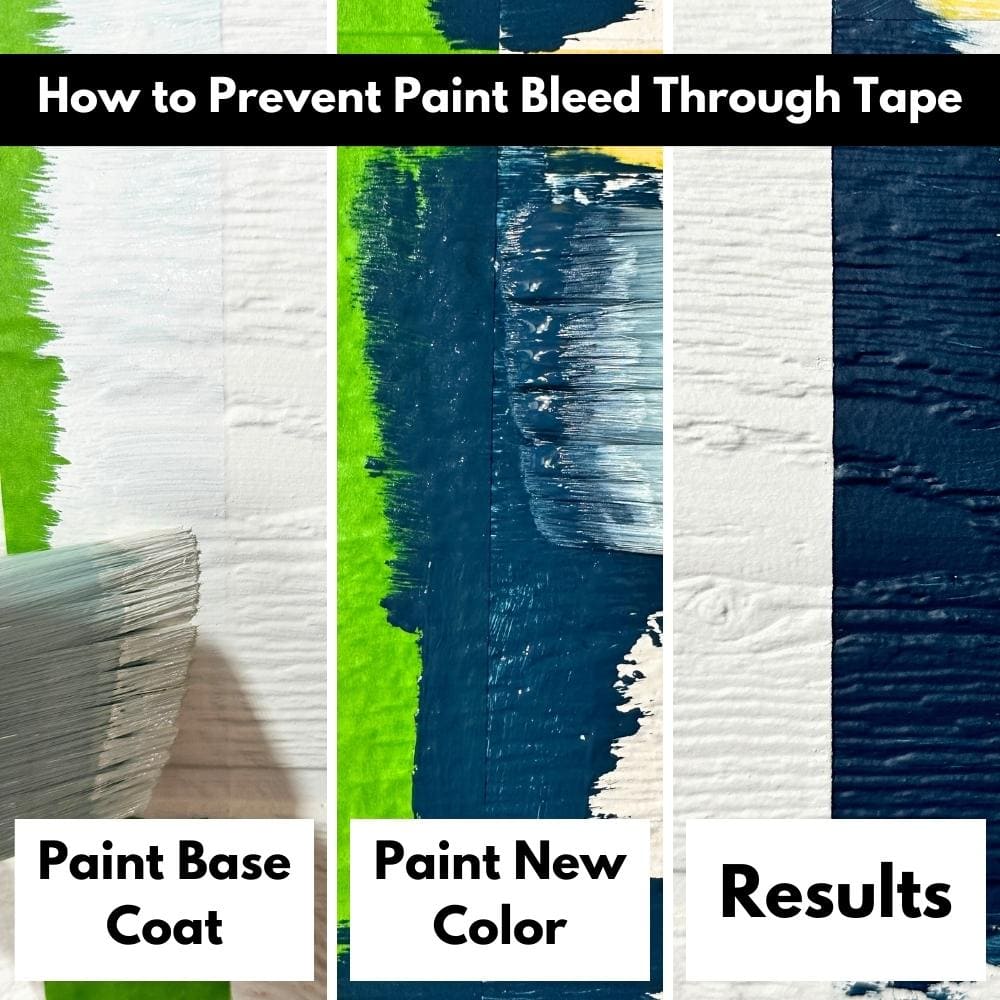
For example, let’s say that you have white as the base coat or the 1st color, and then you want a new blue color to come up against it. First, apply your painters tape where you want to start applying the blue color.
Then, apply a white coat over the edge where you want to paint the new color. Let it dry.
Would you like to save this?
This first white coat will fill in the gaps where the blue would have seeped through the tape, but it will fill those gaps in with the white paint that is already there. When the white paint is dry, then you can paint over it with the blue.
When you pull back the tape, the blue and white paints will meet at a crisp line! Here’s a visual of the steps. This will help regular painter’s tape, and even Frog Tape, create crisp lines on very rough surfaces.
If you don’t have the base color on hand, or if you’re working with stained wood, you can use a clear glaze to paint over the painters tape first before adding your new color. Note: The clear glaze doesn’t work as well in my experience, but it’s better than nothing.
Be sure to use high quality tools and products to get the best looking and most durable finish. Here is our list of the best brushes for painting furniture, and here is our list of the best paints for furniture you can use.
You can find more information about all of the specific supplies and tools to make your project the best in our furniture painting tools and supplies post.
Peeling Back Tape When Paint is Wet
Last but not least, after you have added the last coat, let it start to dry, but don’t let it dry completely before peeling the tape off. When you do, pull it at a 45 degree angle to help it peel off in a cleaner line as well.
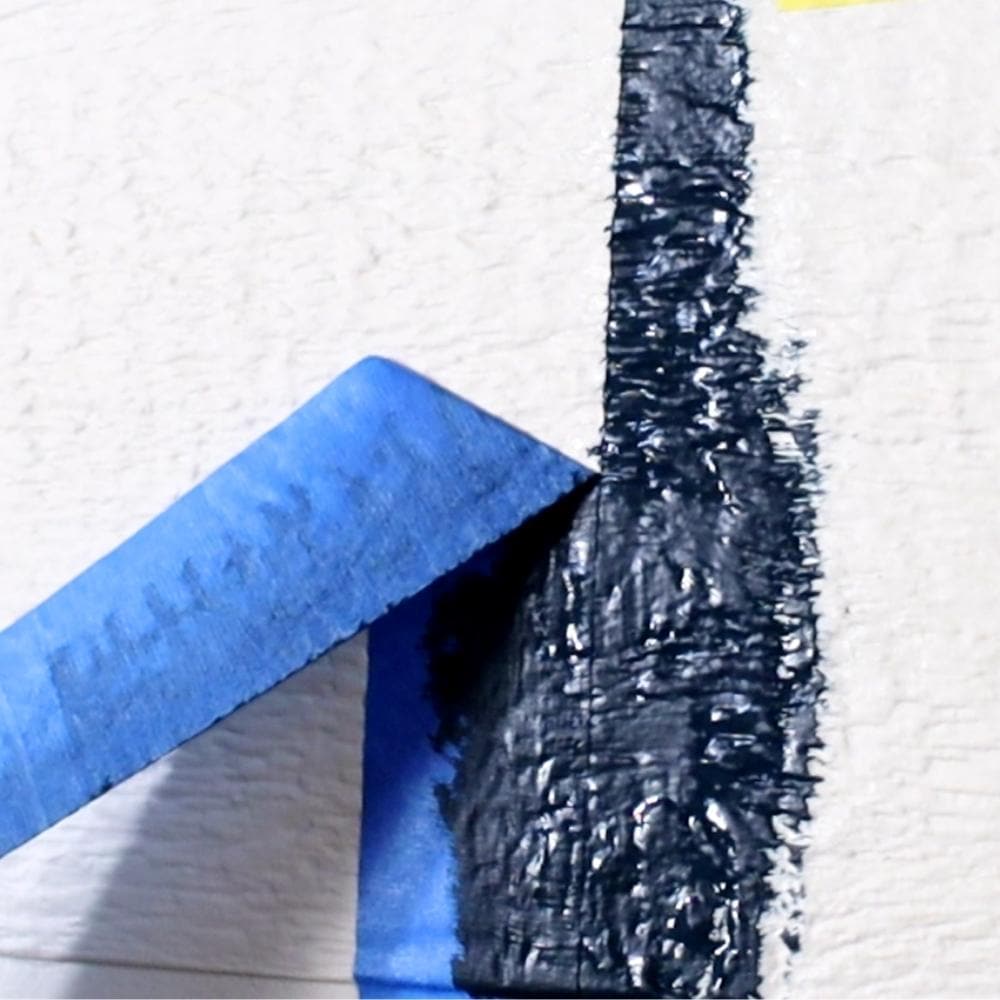
These tricks will help the tape not pull off any paint from your surface, and it will make it easier for it to peel off in longer pieces. If you implement these tricks, you’re sure not to have any paint seep under your tape! Happy painting!!
Frog Tape vs Blue Tape Results
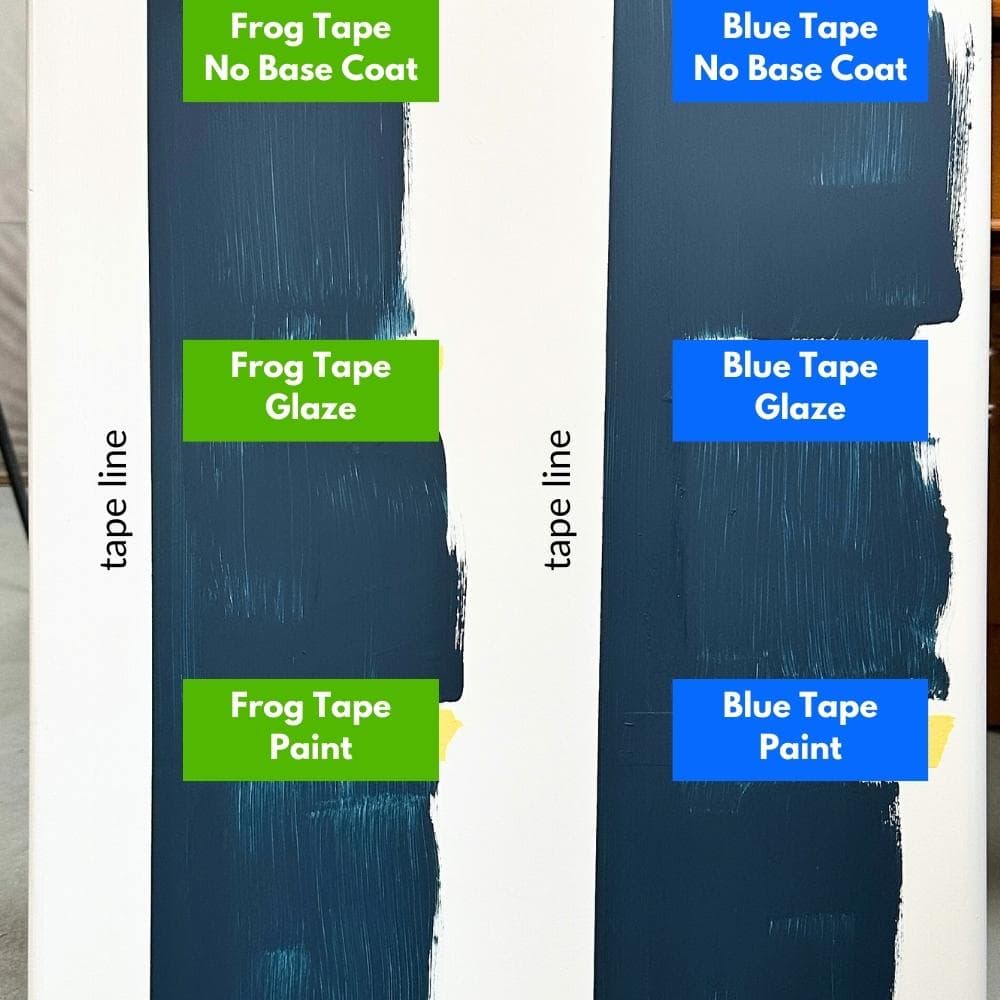
Here are the final results of my test that shows the different variations mentioned in this post.
First up, we have a rough wall that was sectioned off. In this photo, we used Frog Tape. From left to right, we have the results of no base coat, glaze base coat, and then the paint base coat.
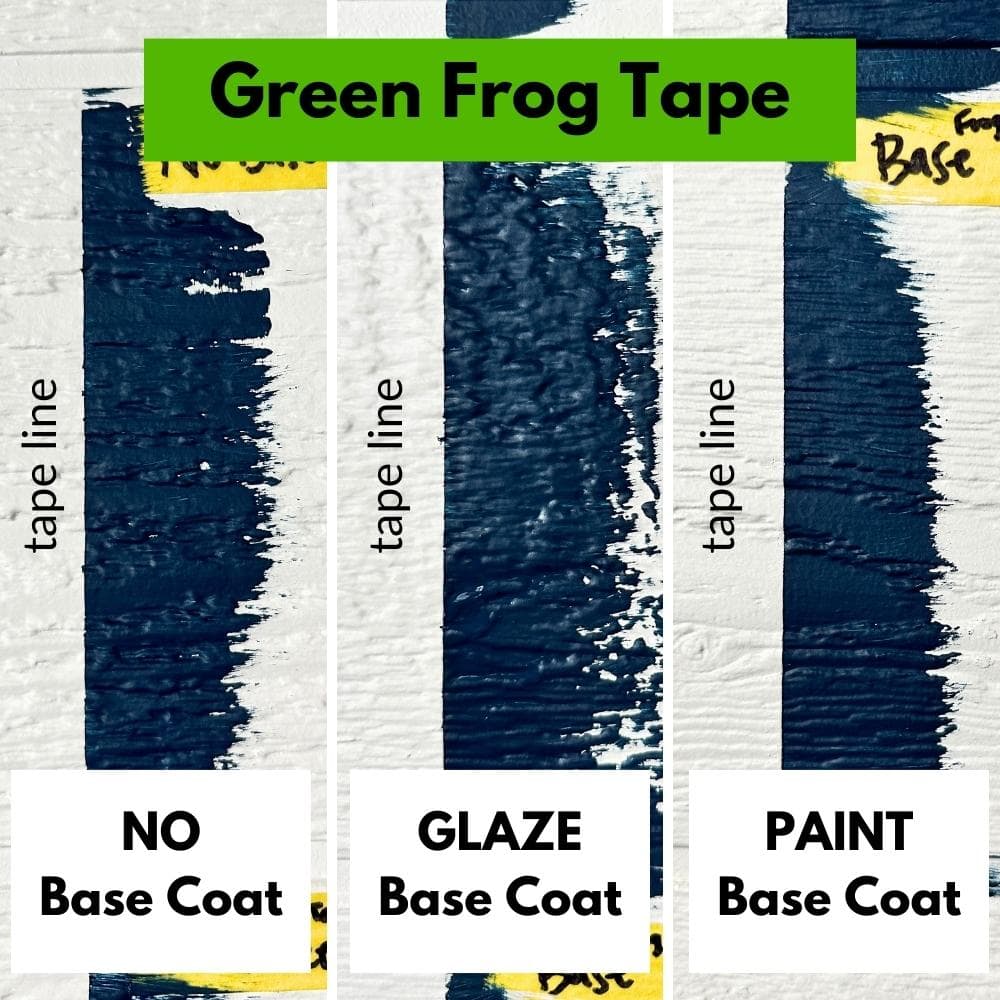
All of the results look decent, but the paint base coat had the best results.
In the below photo, we used regular blue painter’s tape. From left to right, we have the results of no base coat, glaze base coat, and then paint base coat.
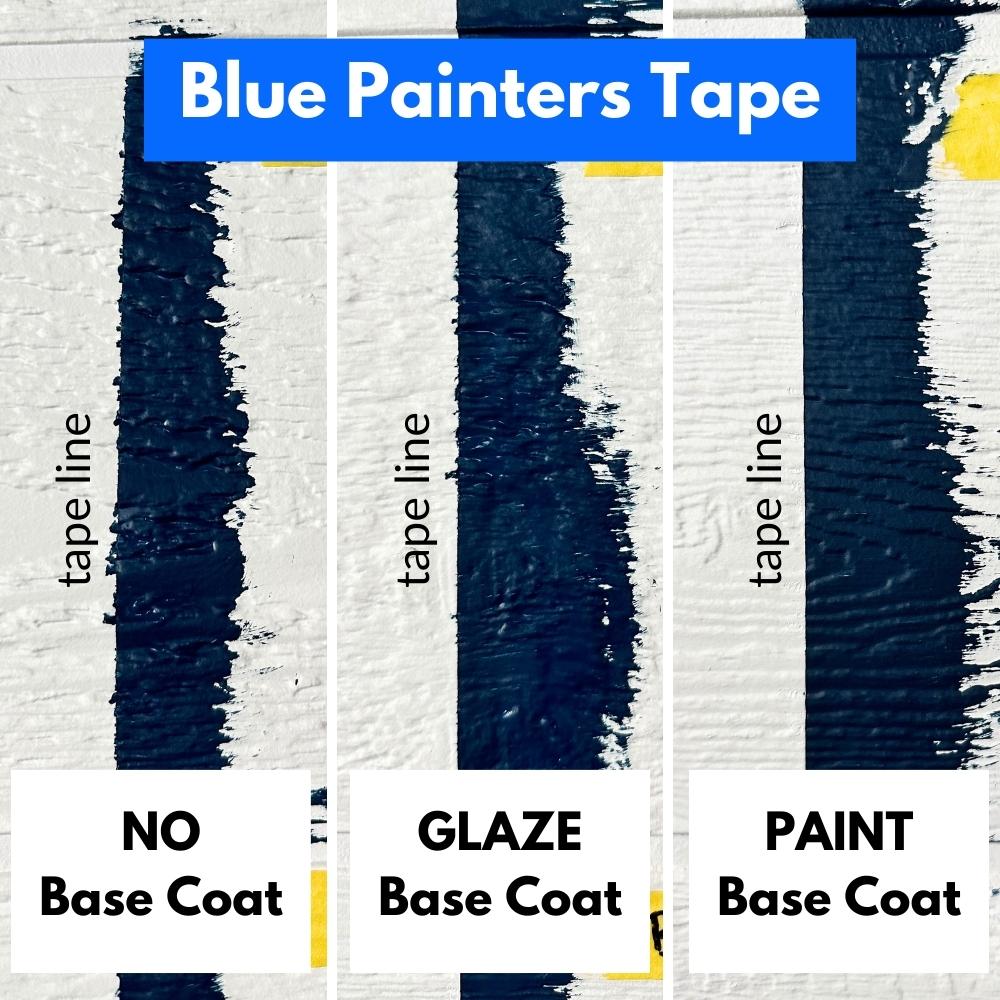
It’s crazy to see the difference the Frog tape makes, or the combination of the painters tape and the paint base coat to prevent the bleed through!
On a very smooth wood surface, here are the results of the same Frog Tape vs Scotch Blue test. The differences weren’t very noticeable, but the Frog Tape had no bleed through spots, while the regular one had a few here and there.
How to Fix Paint Bleed Under Tape
This happens to the best of us! The simplest fix would be to use a small, fine brush. Dip it in the original base color and carefully go over the areas where the other color leaked through. It’s basically like erasing your mistakes but with paint!
Be sure to use a steady hand and take your time to touch up the messy edges to bring back that neat, professional look you were going for. You don’t want to accidentally paint over the areas that were supposed to be a different color and fix one mistake by making another.

How to Prevent Paint Bleed Through Painters Tape
Do you want to paint stripes or fun designs on your furniture surface, but there's always a paint bleed that ruins your project? Here's our guide on how to prevent paint bleed through painter's tape.
Materials
- Frog Tape
- Regular Painter's Tape
- Damp Cloth
- Clear Glaze
Tools
Instructions
- Clean the surface with a damp cloth before applying Frog Tape or regular painter's tape to remove any dirt or dust.
- For best results use Frog Tape.
- Firmly press the edge of the tape against the surface to create an effective seal. Then, go over the edge of the tape with a plastic putty knife or gift card.
- Test a small area first to check that there is no adhesion or bleed through problem.
- Apply a clear glaze or undercoat paint color to the edge of the tape before applying a new paint color over the top.
- Pull off the tape before it dries. Pull at a 45-degree angle to create a cleaner line.
Recommended Products
As an Amazon Associate and member of other affiliate programs, I earn from qualifying purchases.


more Bleed through Prevention tips
- How to Stop Wood Knots from Bleeding Through Paint
- How to Stencil Without Bleeding
- How to Stop Stains from Coming Through Paint
- Zinsser Cover Stain Primer Review
- How to Paint Stripes on a Wall Without Bleeding
Follow us on YouTube to get more tips for painting furniture. Or share your project with us on our Facebook Group and be part of our community. See you there!