How to Chalk Paint Furniture | Step by Step For Beginners

Let’s go through the very basics of how to chalk paint furniture and how to topcoat it with wax. If you already know the basics, stick around, because after that, we’re going to dive into some of the things you might want to do to make your chalk painted furniture even better.
Knowing these techniques will give you a solid foundation to create these amazing chalk paint furniture ideas. Let’s dive in!
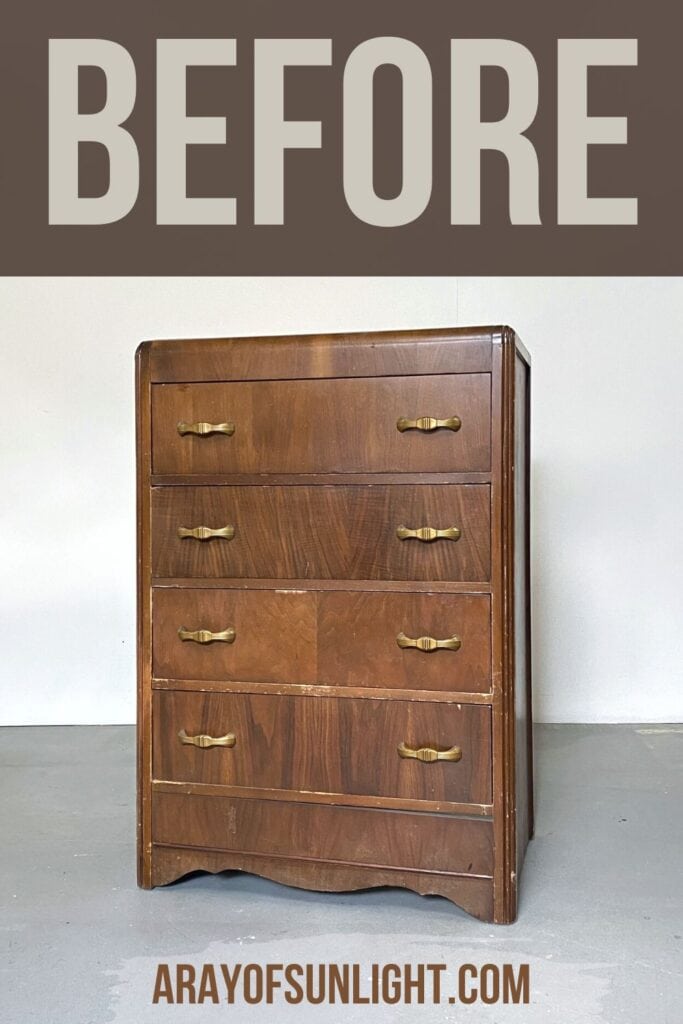
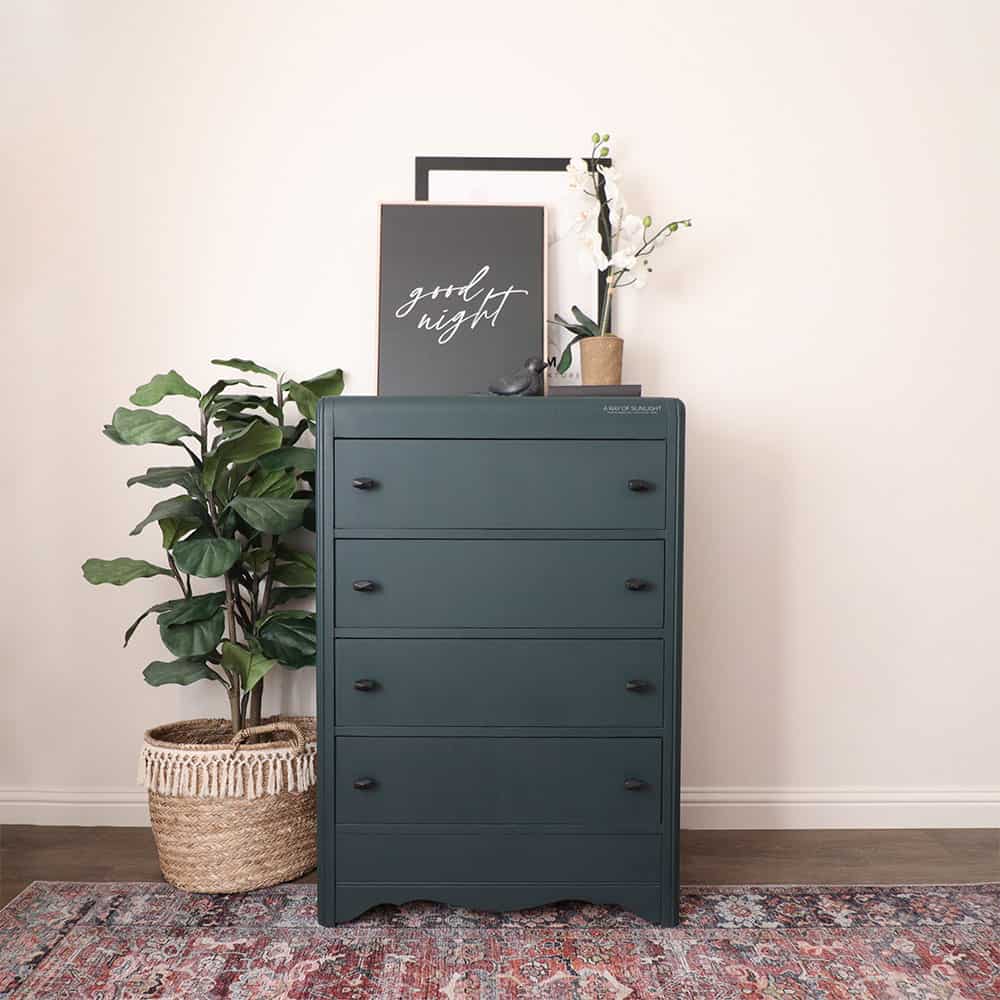
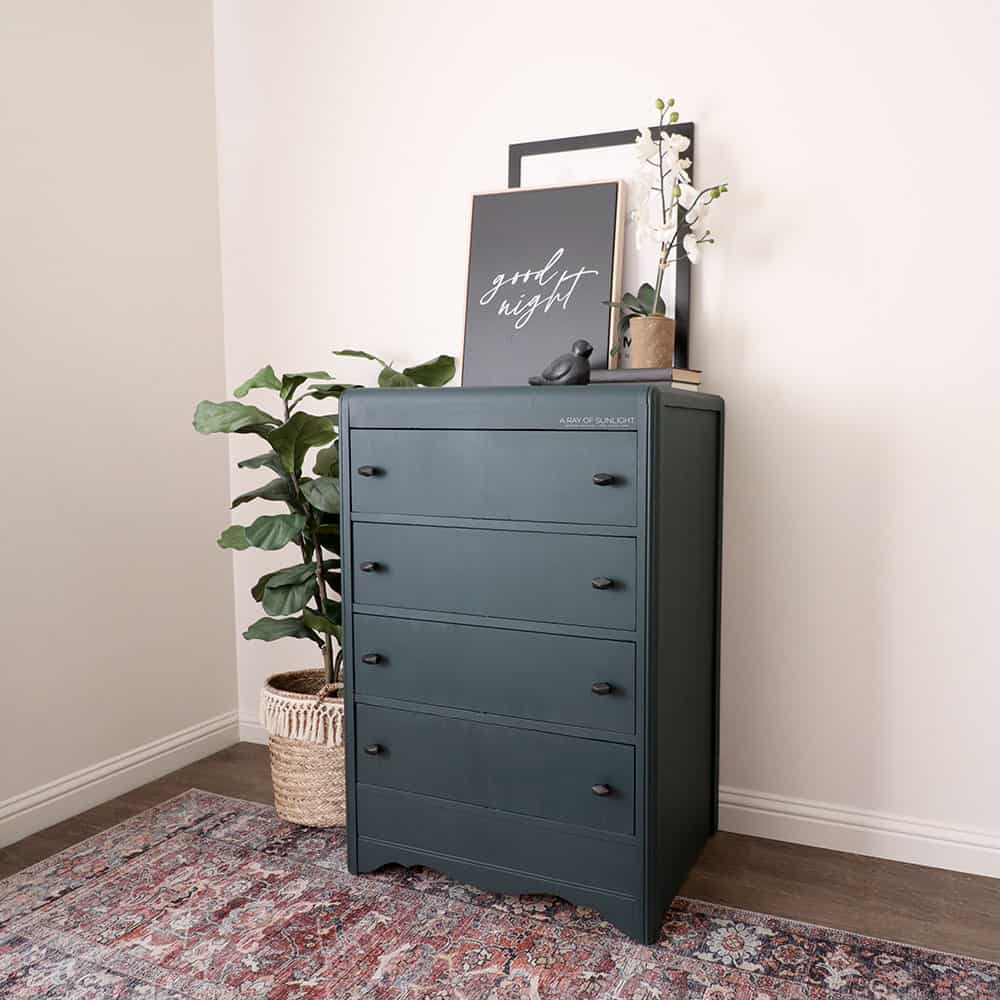
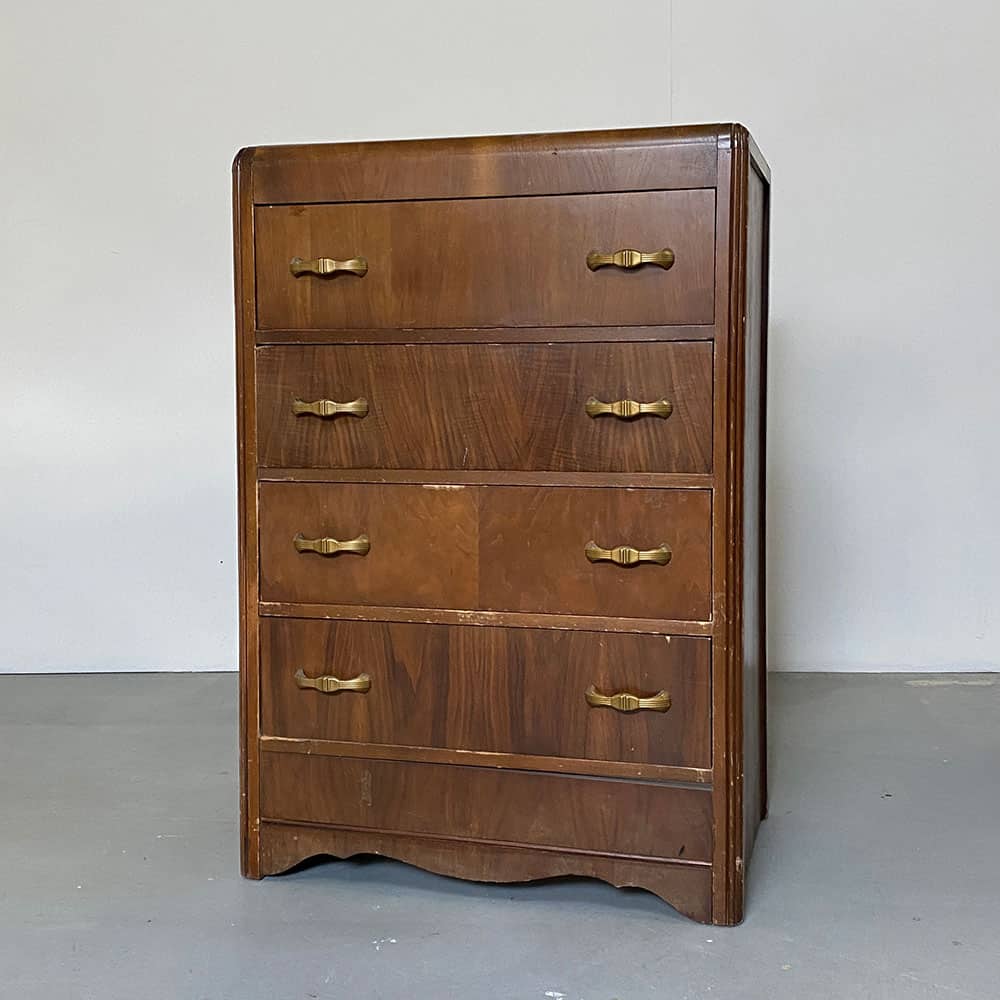
Above is the dresser we’re going to transform today. When you get up close to it, it might look similar to your own. Beaten up, damaged a little bit… But that’s okay. We’re going to give it a new life with a new coat!

Chalk paint is a great way to revamp old pieces and give them a fresh, unique look. It’s also a budget friendly option compared to buying new pieces. Plus, you can customize the color and finish to match your personal style.
If you’re new to DIY projects, don’t worry! We’ll walk you through the process and give you tips and tricks along the way. Wondering what is chalk paint exactly and why it’s popular? – check out the post to learn more.

Supplies Used to Learn How to Chalk Paint Furniture
As an Amazon Associate, I earn from qualifying purchases. I also may earn from other qualifying purchases with other companies or get free product to review and use. All opinions are my own.
- Krud Kutter
- Chalk Paint
- Paint Brush – This one is becoming my fav
- Wax
- Wax Brush
- Kwikwood
- 220 Grit Sandpaper
- Clear Shellac OR BIN Shellac Primer
Remove Hardware and Clean Dresser
First up, we removed the hardware. Knobs and pulls are usually held on with screws from the inside of the drawers, so we just need to loosen those screws to remove the hardware. Learn more about how to change hardware on a dresser here.
Then, we need to clean our dresser with some sort of degreasing cleaner and a wet rag. I personally use Krud Kutter, but you can use dish soap mixed in warm soapy water, or TSP. We want to remove everything that will mess with adhesion.
I personally like to rinse the surface with a clean wet rag after I clean it with a cleaner, just to make sure there isn’t residue left that will repel the paint as well. Then we let it dry completely. Read this post to learn more about how to clean furniture before painting.
Make Repairs / Fill Hardware Holes (Optional)
If your piece is anything like mine, it probably has scratches, dings, and even broken corners and chipped-up wood. If things like this don’t bother you, you can totally skip past this step.
But, if you want to fix them, I have a really quick and easy trick for you. You can use this stuff called Kwikwood to fill in and fix the damage that’s bigger than a scratch. Check out the best wood fillers for furniture, including Kwikwood, here.
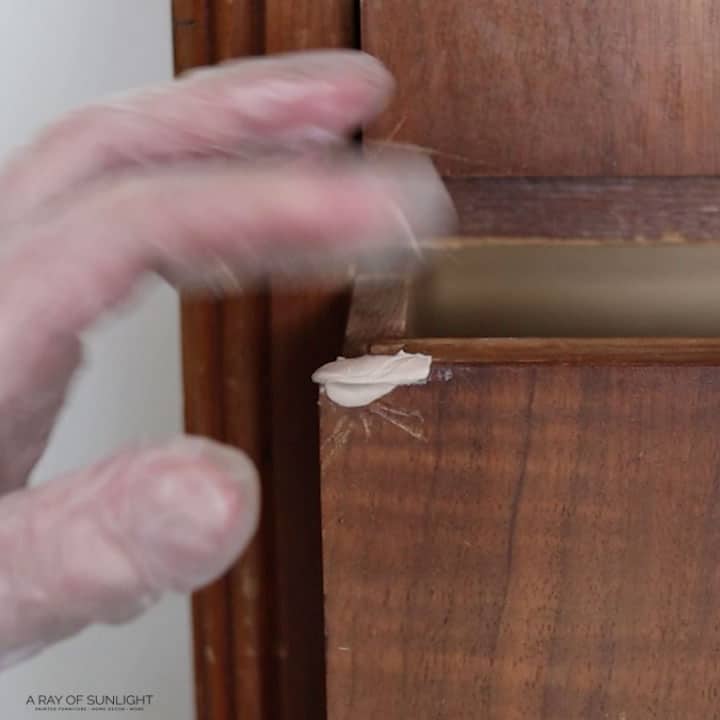
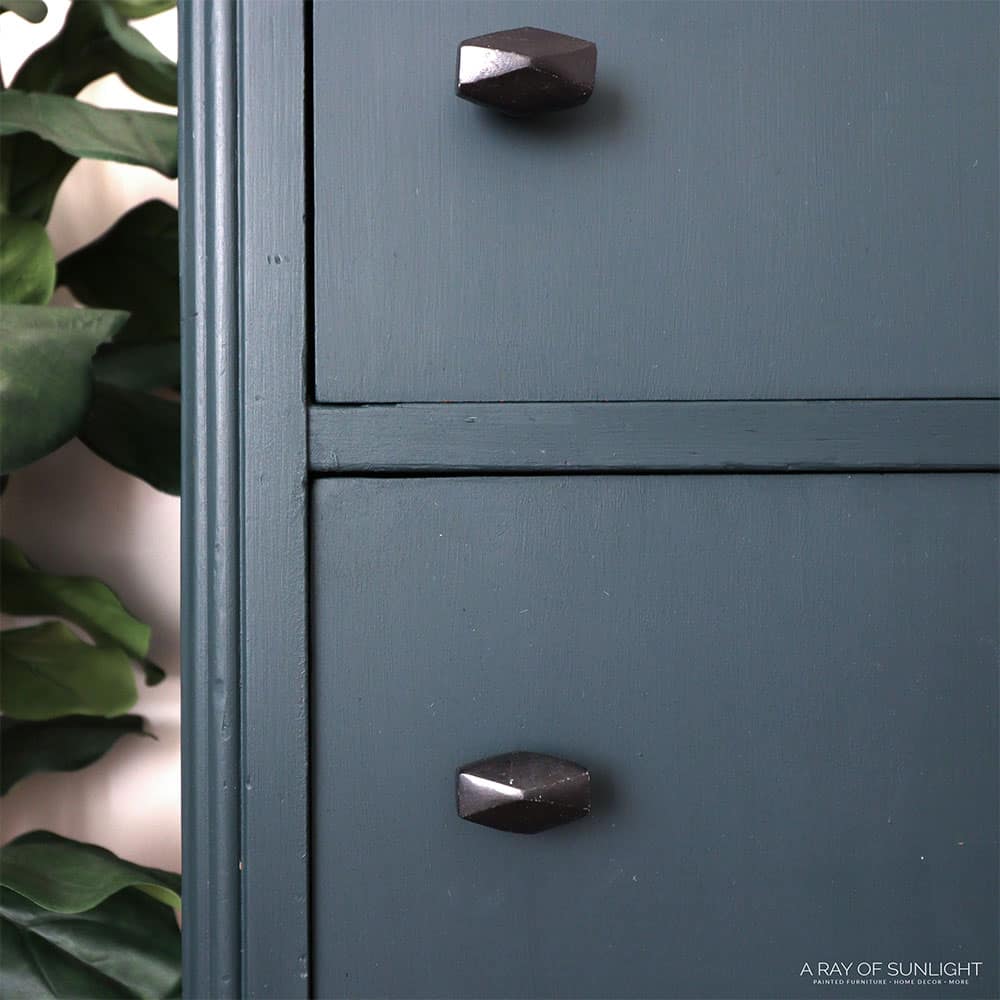
It feels kind of like clay, so you can shape it easily. It also is the best way of filling holes when replacing furniture hardware. For this piece, I wanted to change the drawer pulls to knobs, so I just filled in one hole from each of the hardware.
Kwikwood dries in an hour, so you can sand it down flush and get on your way with the rest of the project pretty quickly. Learn more about how to use KwikWood here. After I’m done, I can easily replace that hardware with new knobs now.
Steps to Chalk Painting Furniture
You don’t need to sand or prime beforehand. That’s true, but not every time and for every single piece. I’ll talk more about that later and how you can know if it will work for you.
If you want to skip these steps, learn more about painting furniture without sanding or priming here. Or check out the best paints for furniture without sanding here.
I used Country Chic Paint’s chalk paint, which has excellent adhesion, just like Annie Sloan’s. Check out my list of the top chalk paint brands for your future DIY projects.
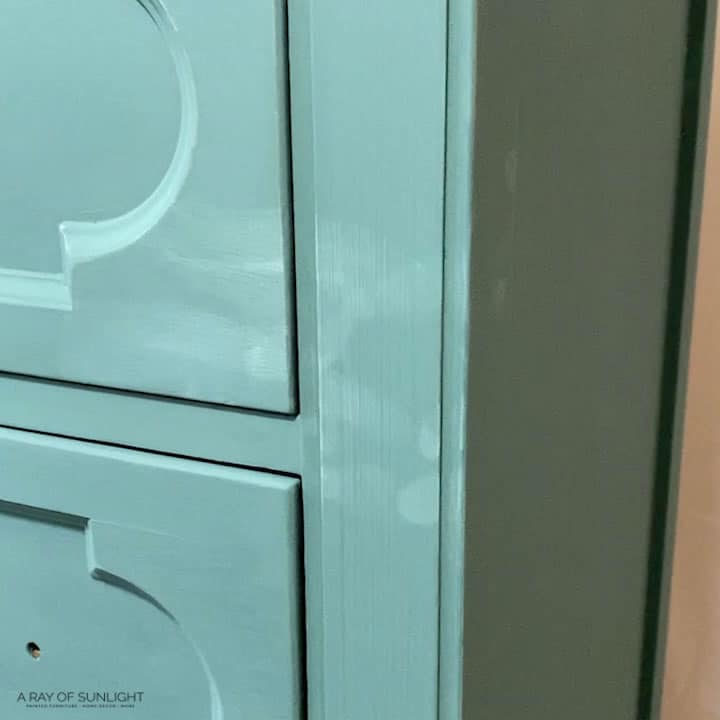
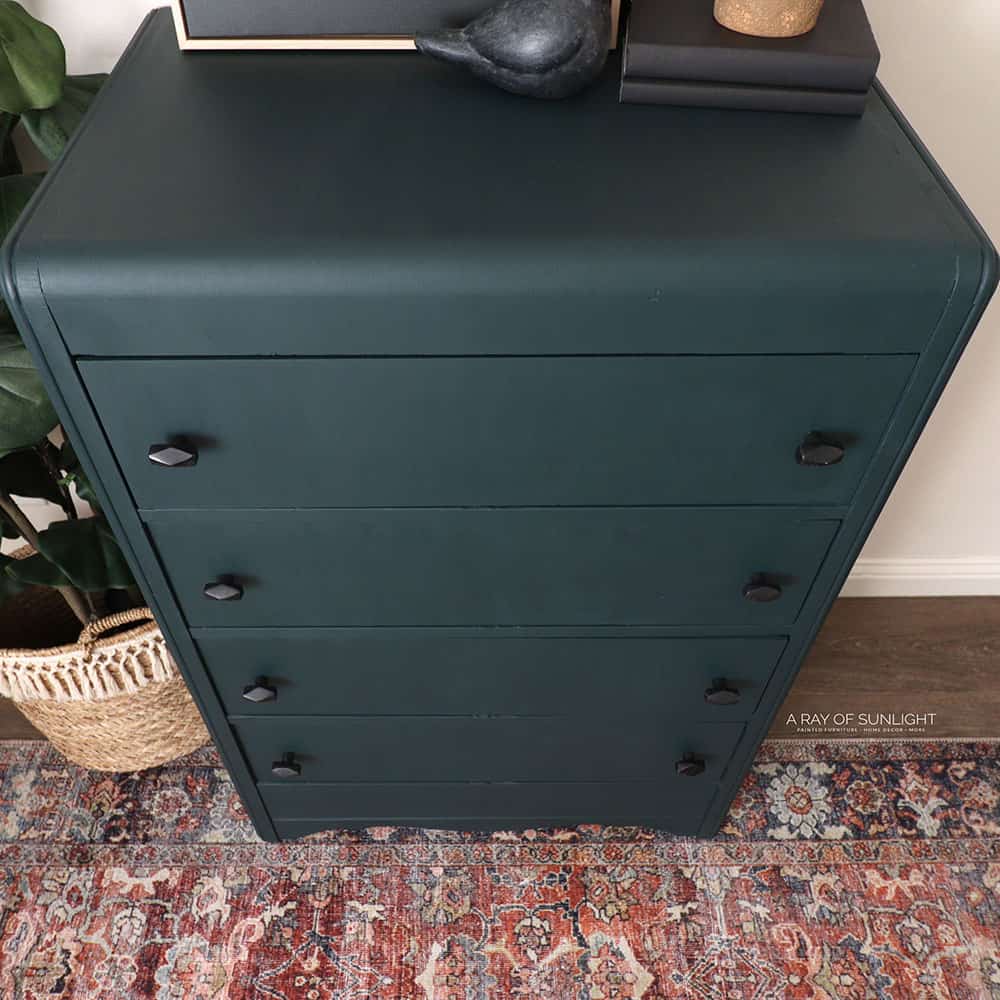
I ended up mixing a few different colors to create this color. Peacoat, Paint the Town, and Mustard. It was maybe a cup of Peacoat, with a Tablespoon of Paint the Town and a quarter cup of mustard. Somewhere around there haha.
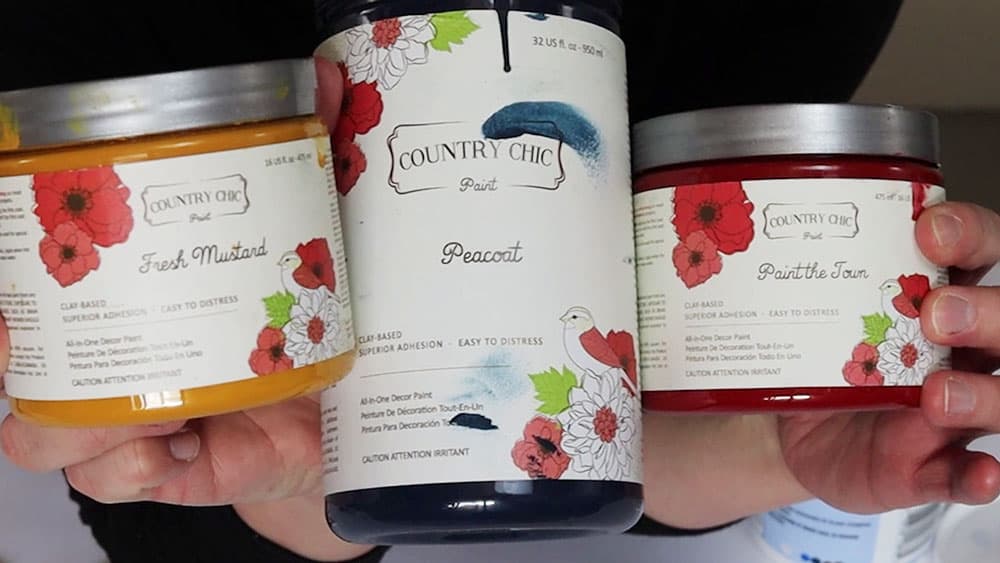
I love the colors from this brand! It’s also no VOC, waterbased, and has great coverage. Check out my honest and detailed Country Chic Paint review here. If you want to know the popular options, check out our list of the best chalk paint colors for furniture here.
Best Chalk Paint Brush
And then, I applied it using Country Chic Paint’s oval paint brush.
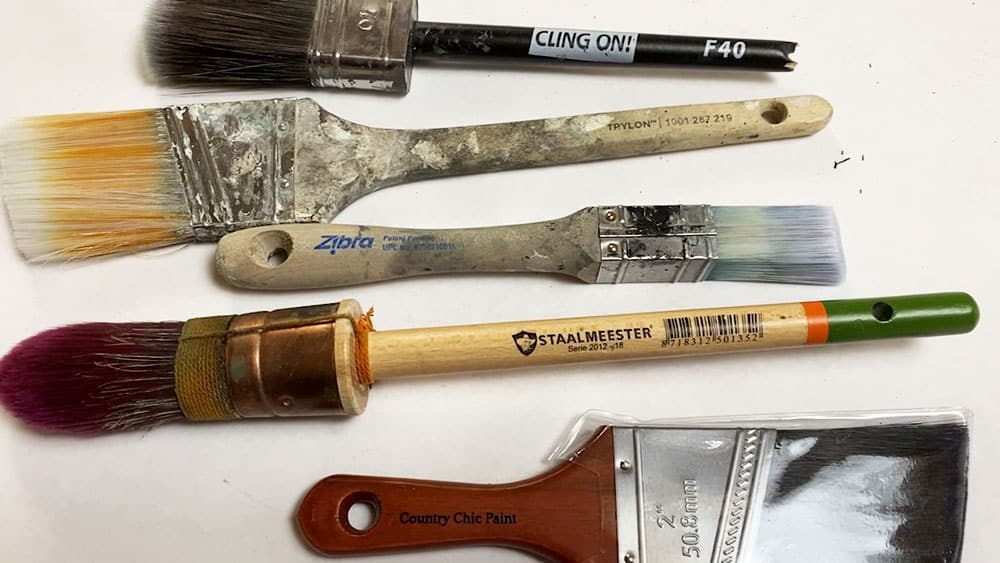
You can use whatever brush you want. When I started DIY projects, I honestly just used the brushes from the dollar store! There is a reason I don’t use those anymore, but if you just need something cheap, they work!
Zibra paint brushes are my go-to now, because they are so affordable, but they are much better quality than dollar store ones. But this Country Chic paintbrush is absolutely amazing! If you want to splurge, I’d splurge for this.
The better quality brush you use, the better your finish will look! Check out the best chalk paint brushes here and the best paint brushes for painting furniture here.
You can also spray or roll the coating on if you want. Read this post to see how to spray paint a dresser with chalk paint, or check out the best rollers for painting furniture here! The great thing is that you can use whatever tool you prefer!
Chalk Painting Tips
- Apply the coating following the direction of the wood grain. This helps hide the brush marks a little bit. (If you want a textured look, you can go in all different directions.)
- Have fun with it!
- Try not to overload your brush. The coating dries faster and adheres better if applied in thinner layers.
- Be on the lookout for drips. They happen when you apply too much in one area.
- If you see a drip, brush it away with a brush that isn’t full of paint already. Drips are easier to get rid of when they are wet.
- But if you see them after they dry, you can sand them out with 220 grit sandpaper or scrape it off with a sharp razor blade.
How to Chalk Paint a Dresser
You can leave the drawers in or pull them out and put them on the ground. I like to do a mixture of both. It’s easier on my back to work on them while they are inside. Then, after they are coated, I remove them and set them on the ground. If you push them back in when they’re still wet, they will get stuck! So be careful of that!
You can use painter’s tape to tape off the sides of the drawers and make sure you don’t get coating where you don’t want it to be. Learn more tips on how to prevent overspray when painting furniture here.
I just work carefully with a brush that doesn’t have much coating on it to try not to get it on the sides of the drawers. You can apply it to sides, too, if you want…It’s just more to work on. If I get anything inside the drawers, I sand it away after the finish is dry.
When I’m done with the first coat, and I’m just waiting for it to dry, I put the lid back on my paint, and I wrap my brush in either tin foil or plastic wrap to keep it from drying out. You can also just wash it out with warm, soapy water between coats.
How long does it take chalk paint to dry?
It should be dry in about 30 minutes to 1 hour, depending on the temperature and humidity where you are. And once it’s dry to the touch, you can start on the next coat. The second coat goes on the same as the first coat. This covers very very well, another reason I love it.
Then, I put the drawers back in so I could see what it would look like with the drawers in. Can you see all of that wood that’s still showing? That’s because I didn’t coat the inside of the dresser at all.
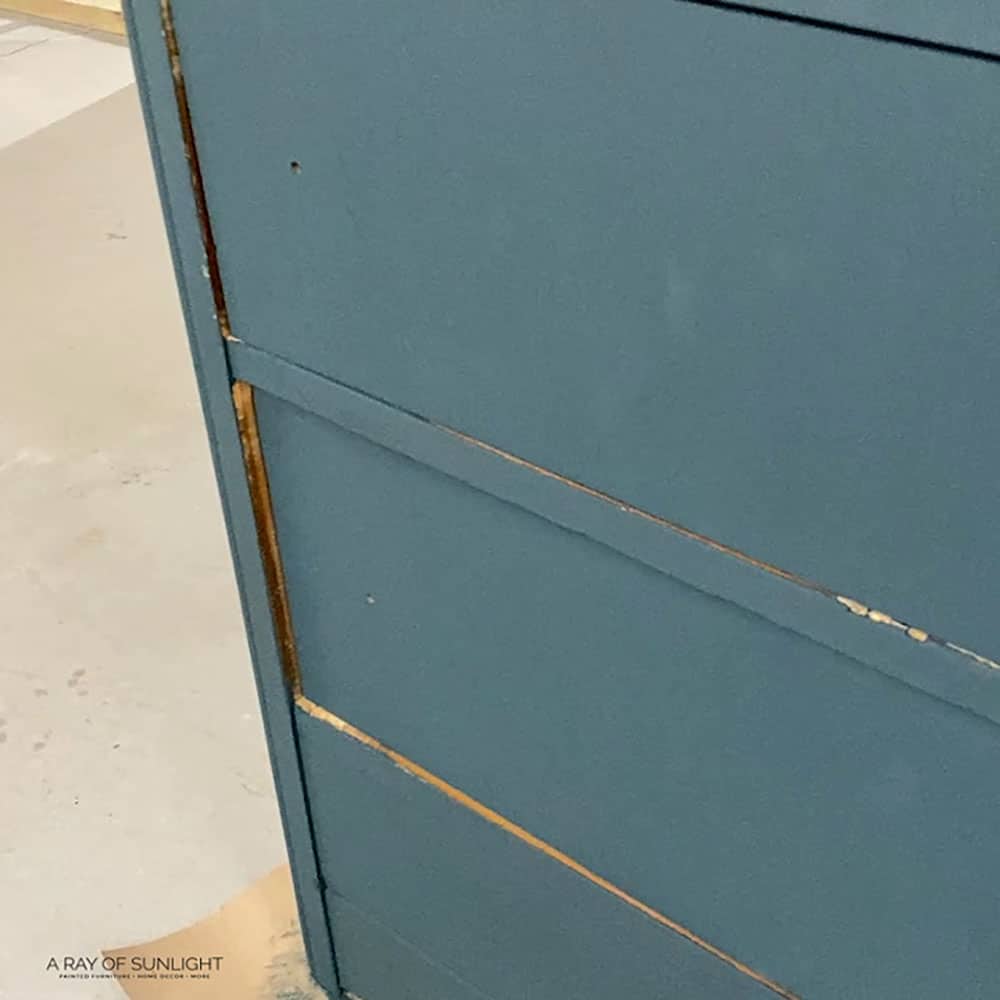
With drawers that are sitting flush with the front of the dresser, there’s always a very good chance that you will see the inside of the dresser a little bit. So, it’s a good idea to put the drawers back in after they are dry so you can make sure you covered everything that you need to.
So, I just left them in, and then I coated those areas. And then I pulled out the drawers, finished applying the second coat.. and then set them down on the floor to dry.
If you don’t like the texture of the finish, you can sand it when it’s dry with 220 grit sandpaper. Just sand it by hand, just enough to remove the texture from the brush. You don’t need to sand it down a lot. Learn more about the best sandpaper for furniture painting here.
I didn’t sand this dresser between coats because I wanted to show you what kind of look you can get without sanding.
Distressing Paint (Optional)
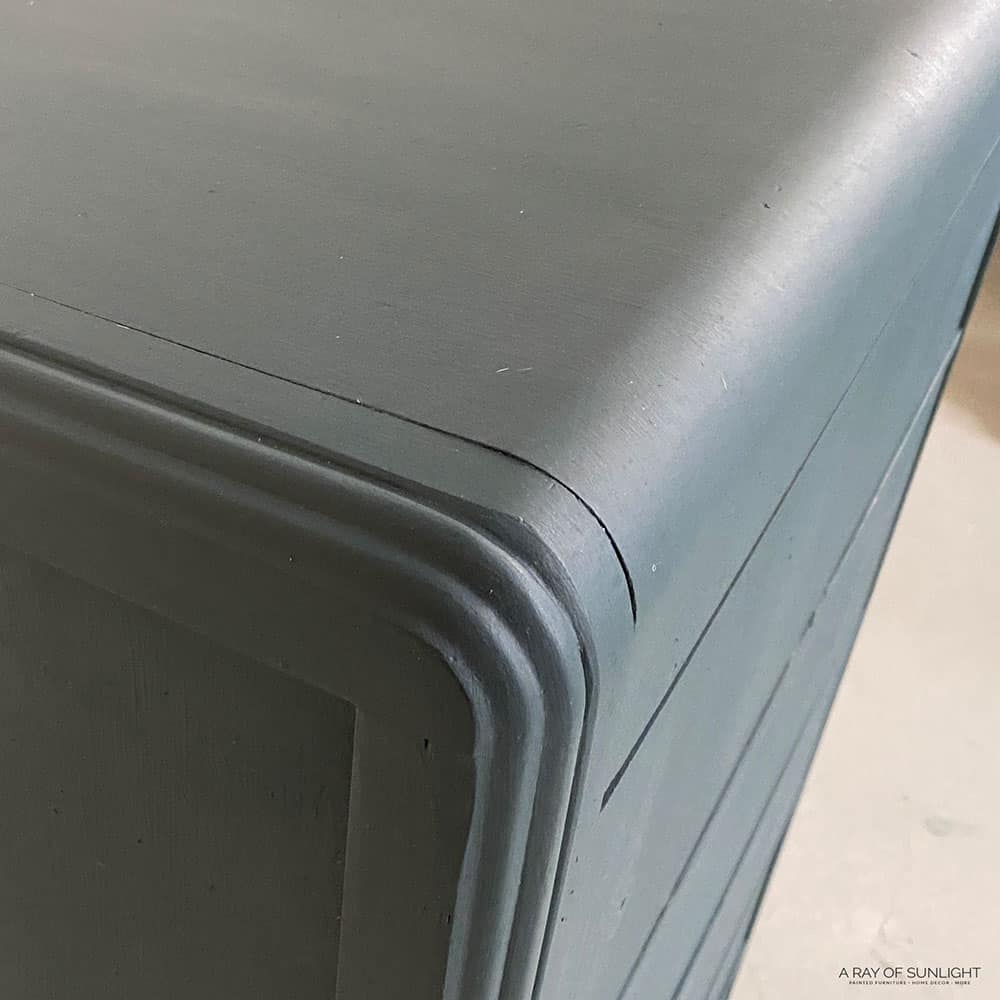
Also, if you want to go for a distressed look, now is a good time! (Or you can wait until after the wax.) Either way! Use 220 grit sandpaper to sand the finish down on the edges or any details that you want the wood to show. Here are the 6 best distressing furniture techniques… including ways without sanding!
On some pieces, I just rub the sandpaper over the edges to make the wood show again. Then, I cleaned up the dust before moving on to the next step. I used a vacuum to suck up the dust and then wiped away any remaining dust.
How to Seal Chalk Paint
The next step is to add a topcoat. But let’s talk about why we topcoat first.
Do you have to seal chalk paint?
Yeah… Unfortunately, it really needs to be sealed. It’s very porous, meaning that it’s kind of like a sponge and will soak up anything that gets on it. So it’s not water resistant at all, and you can’t just wipe off whatever gets on it.
When you touch it with even clean hands, it gets a white residue that looks kind of like dust, and you can’t just wipe it away.
And honestly, by itself, especially if there wasn’t any sanding or priming before, it’s just not very durable. It can scratch and ding pretty easily. So, we need a topcoat to seal the coating in.
The original way of top coating it is with wax. So that’s why I’m sharing it with you. It’s really easy to use, too. You can check out more topcoat for painting furniture options here!
How long should paint dry before applying wax?
It’s best to let it dry for at least a couple of hours first. Applying the wax right away can rub off the finish in some areas, so we want to let it dry more before we topcoat it. Unless you want a rubbed, distressed look. Then, you can start applying wax once the finish feels completely dry.
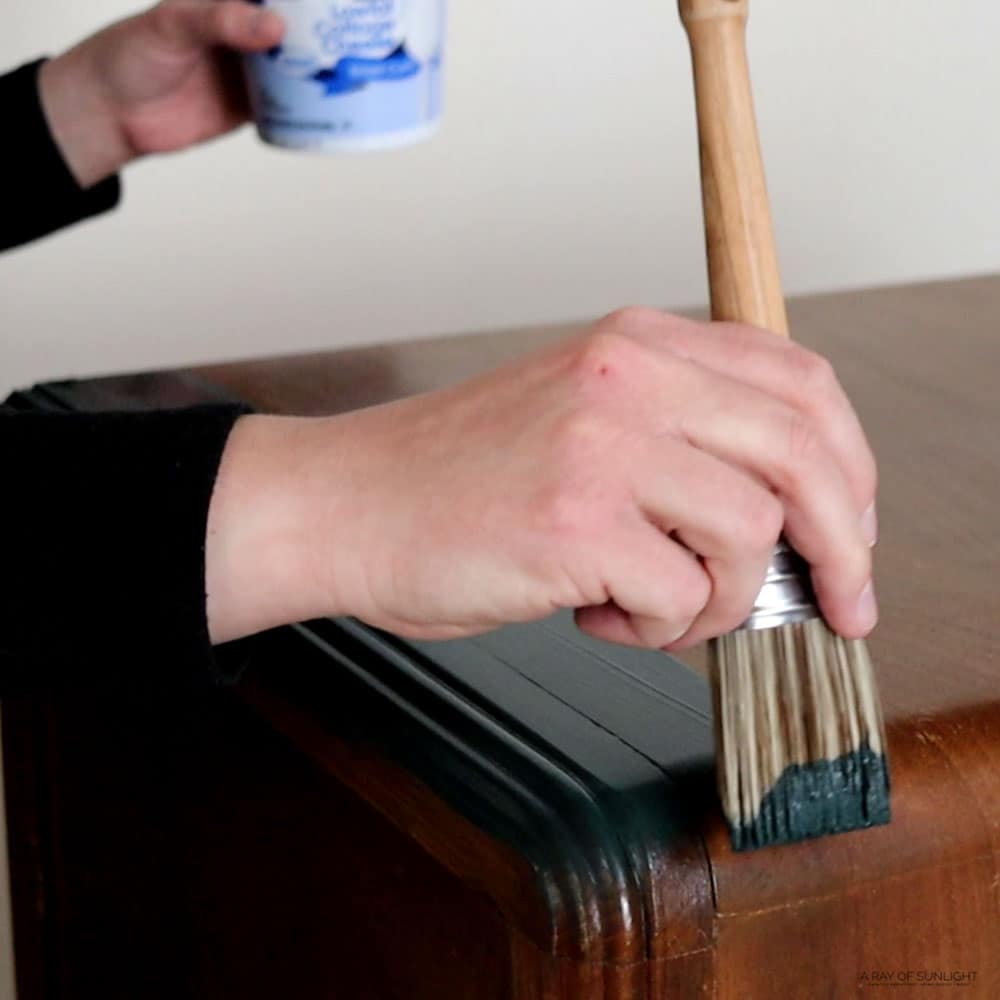
How to Topcoat with Wax
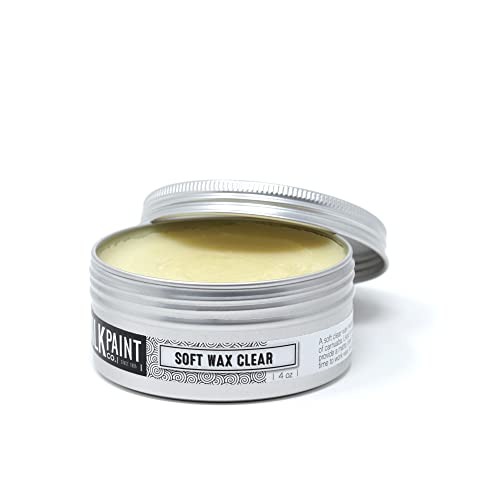
You can use a stiff bristled brush, or you can even use a lint-free cloth like a T-shirt… or even an old sock! My very favorite is this soft wax by the Real Milk Paint Company. It doesn’t stink, and it is so soft and buttery.
You know the saying, wax on.. wax off. And that’s exactly how you apply it.
- Brush or wipe it on in a small section.
- And then wipe the excess off with a clean cloth.
The more you rub it, the glossier it will get. So, if you want less sheen, don’t rub it as much when you’re removing the excess. And if you want it to look glossier, buff it out more.
Then, move on to the next section. Check out my guide on how to apply Waverly Wax over chalk paint for another option. And here’s wax for chalk paint to learn more about the pros and cons of using it as a topcoat.
Waverly also has a chalk paint product – here’s chalk painting furniture black to see it in action.
How long does wax take to dry?
It feels dry usually within 30 minutes, but it stays very soft for what seems like a week or so. It should be completely cured after 30 days.
How many coats of wax?
2-3 thin coats is best, letting it dry for a day or two between coats.
What happens if you don’t wax chalk paint?
If you don’t seal it, it is really matte and porous. It will scuff and mark up, even when you lightly touch it with clean hands. The topcoat also helps it to be more durable.
How to Topcoat with Polyurethane
Top coating with a waterbased polyurethane is probably the next most popular method. Poly and wax each have their pros and cons, and some people prefer one over the other. I’ll share more about the differences in the FAQ section below.
Here’s how to apply polycrylic to painted furniture. If you have a sprayer, here’s how to spray polyurethane. (The same method can be used on any color.)
Put New Dresser Hardware On
Then, you can put your hardware back on. I changed out the old hardware and put these black knobs on. I think it completely changes the look of the dresser!
Would you like to save this?
Now, you just need to let everything cure. It usually takes about 21-30 days to cure, which means that it can still scratch easily until it has fully dried after 30 days.
So you might want to be extra careful with setting things on the surface and when you use your dresser until that curing time is over. After 30 days, the finish will be as hard and durable as it’s going to get!
Here’s how to chalk paint nightstands for a similar makeover with a different kind of piece.
More Before and After Makeovers
See All >
Click any of these “before” photos below to view the “after” of that makeover.


Taking Care of Your Chalk Painted Furniture
You can dust it off with a dry cloth, and if you spill anything on it, clean it up immediately. And don’t let moisture get to it. So put a coaster under your drinks. 😉 If it gets scuffed up, you can put more wax on it, too!
Now you’re ready to transform your pieces! If you want to learn even more, stick around for these Frequently Asked Questions.
Does chalk paint scratch easily?
If you don’t properly prep, then yes, it can scratch easily.
If you haven’t applied a topcoat, it will be able to scratch easily, too. If you have taken the steps to prepare your surface, it shouldn’t scratch easily, even without a topcoat on it. Learn more about how to prepare furniture for painting in this post.
How to Prep for Chalk Paint
For best results:
- Clean with a degreasing cleaner
- Then scuff sand with 220 grit sandpaper, just to dull the finish, but also help sand out scratches.
- Then prime the dresser with a shellac-based primer or clear shellac.
- Paint
- Then topcoat with your choice of topcoat.
Do you have to sand before using chalk paint?
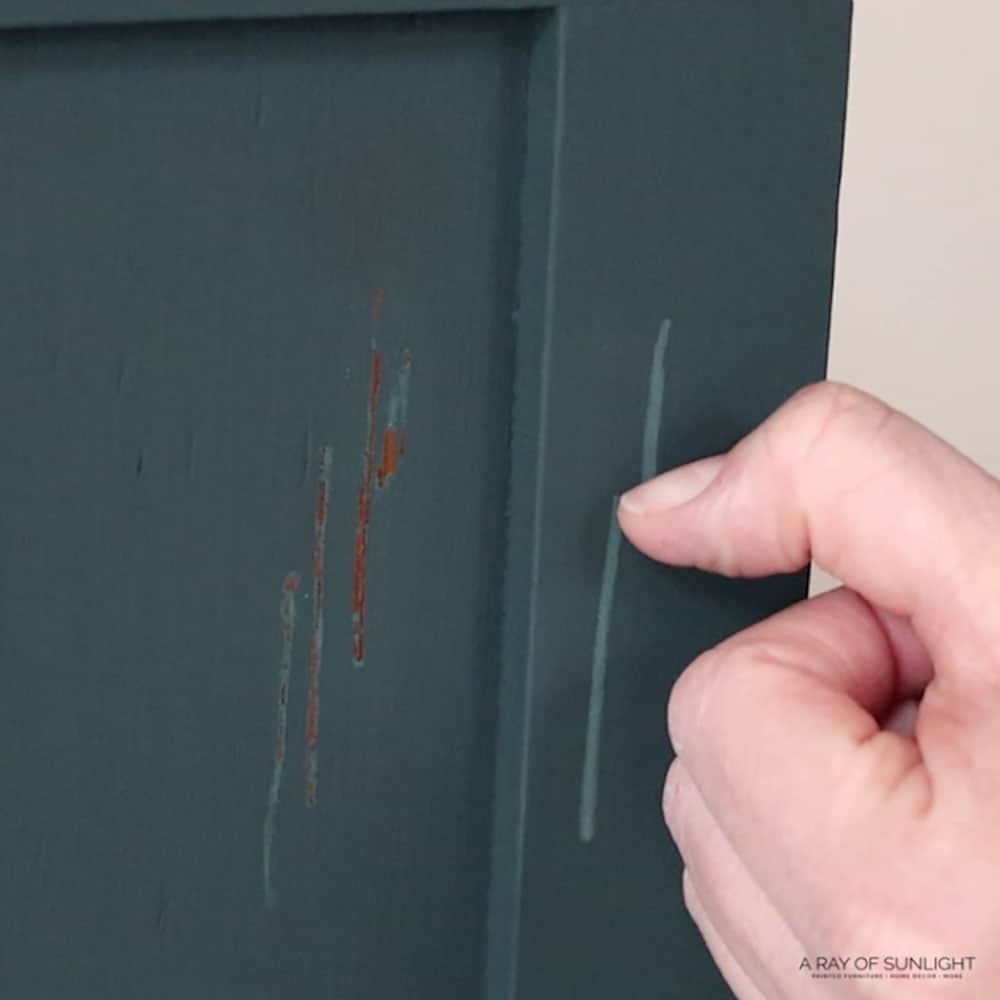
Like I mentioned earlier, for some pieces, you can get away with not sanding. This piece didn’t really have a slick surface, so I proceeded without sanding or priming.
24 hours after, I tested the strength of the chalk finish, and it easily scratched off the sides of the dresser. It did hold onto the drawers really well though.
But, a week after top coating it with wax, it didn’t scratch as easily anymore… on any part of the dresser. It still wasn’t perfect, but if I would have scuff sanded beforehand, (or primed) then the finish would have stuck way better!
Learn more about the importance of sanding before painting furniture here and what happens if you don’t sand before painting here.
How to Chalk Paint Without Sanding
If you don’t want to have to sand, but you don’t want to worry about adhesion, I recommend priming with a shellac based primer. It’s easy to apply! I love this clear shellac in a spray can.
Shellac blocks bleedthrough (if you don’t know what bleedthrough is, head over to my post about how to stop stains from coming through paint), but it also makes finishes, especially chalk paint, stick to the surface SO well!
Just spray the clear shellac and let it dry for an hour. I love the clear shellac because it dries clear, so you can’t even tell that it’s there when you apply and distress it.
If you are using white, BIN shellac based primer is a white primer that has shellac in it. So it not only helps with adhesion very very well, but also makes it so you don’t have to apply as many white coats.
Both versions come in a regular can as well, so you can brush or roll it on instead of spraying it on.
If you don’t want to use shellac because of its smell, then the white, water-based 123 primer works alright. But it won’t block bleedthrough stains. Check out more of the best primers for painting furniture here.
How to Repaint Chalk Furniture that was Waxed
Some people say that you can just apply a new layer right over. You can try that! Or you can even test it in an inconspicuous area to see if it just scratches right back off after 24 hours.
Wax repels water… and waterbased coatings. So the chalk finish will most likely just scratch off super easily. For best results, remove the waxed layer with mineral spirits and an old rag. After the surface is dry, you can paint it again. And then topcoat it again.
Wax vs Polyurethane
They’re two of the most popular ways to topcoat chalk paint. Waterbased is better than oil based because oil based polyurethane will tint your color yellow.
| Wax | Water Based Polyurethane |
| Typically, wax isn’t as durable as polyurethane is. | Polyurethane is a more durable finish. |
| Technically should be reapplied every 6 months or so. | Doesn’t need to be reapplied. |
| Wax stays kind of soft for at least a few days but cures in about 30 days. | Polyurethane dries within a couple of hours and is fully cured in 30 days. |
| To repaint, you need to remove the wax first. | To repaint, simply scuff sand beforehand. |
| Looks streaky over dark colors | Looks streaky over dark colors, but you can spray dark colors or use oil based polyurethane to make it not look streaky. |
| Deepens the color | Deepens the color |
| Has to be applied by hand | Can be applied by hand, or sprayed |

How to Get Smooth Finish with Chalk Paint
There are a couple of things you can do to get smooth results:
- Add some water to it, so it doesn’t go as thick, or with as many brush marks.
- Brush in the direction of the wood grain. The lines in the wood grain will help hide the brush marks.
- Sand the finish with 220 grit sandpaper once it’s dry. Sand until you see that the brush marks are gone. If you didn’t thin beforehand, you’ll be sanding for a longer time than if you did before brushing it on. Then apply another coat with the thinned out coating.
- Spray instead of brushing or rolling it on.
How to Spray Chalk Paint
Yes! Spraying creates a really nice, brush free finish. You just have to thin it out with water so then the sprayer can spray it. Check out this post on how to use the FLEXiO 3000 for a tutorial.
This paint comes in spray cans, too. Here’s our guide on how to use spray chalk paint, and you can read through our chalk spray paint review for our comparison of different brands.
How to Thin Chalk Paint
Pour the amount of paint you think you’ll use into a separate container. Then add some clean water to it. Mix them together until it’s fully mixed.
If you are thinning for brushing, a 3 part paint to 1 part water should be plenty thin. If you’re thinning for spraying, adding about 15% water to the amount of paint you are using is usually about right.
But it really depends on your sprayer. Here’s how to thin paint for a Wagner sprayer and how to thin paint for Wagner FLEXiO Sprayer if you have these models.
How to Distress Chalk Painted Furniture
My favorite method way is to rub 220 grit sandpaper on the edges of the furniture, before top coating. If you are waxing, you can distress after applying it. But if you’re top coating with poly, you’ll need to do it before you topcoat. For a more detailed guide, here’s how to distress chalk paint!
How to Make Homemade Chalk Paint
Homemade is one of my favorite versions. I personally like the calcium carbonate recipe (it’s basically chalk, and you can order it online from Amazon.) Check out this post to get the homemade chalk paint recipe that I use.
How to Chalk Paint Laminate Furniture
Laminate surfaces need to be primed beforehand. Here are some primers that are really good for this kind of material:
Let it dry according to the directions of the primer you use, and then you can apply the new color over it. Here’s a great video where I tested different primers on laminate furniture. Learn more about how to chalk paint laminate furniture here.
How to Fix Bleed Through
If you’ve done the final coat, and probably even top coated, but now you’re seeing bleedthrough, don’t worry! If it’s only in one area, you can prime that area to seal the bleedthrough in. Or you can spray primer on the entire piece so you don’t have any more problems.
Shellac based primers are the best to block bleed through. I use clear shellac, but BIN shellac primer is really good, too! For a more detailed guide, here’s how to fix paint bleed through. And here’s how to stop wood knots from bleeding through paint for next time.
What Are the Pros and Cons of Chalk Paint?
Pros:
- It sticks better than regular paint.
- It’s beginner friendly, and you might be able to get away without sanding or priming beforehand.
- If you like a distressed look, it sands beautifully!
- You can spray it, brush it, or roll it.
- Topcoat it with whatever sheen of topcoat you want!
- It’s waterbased, low or zero VOC, and cleans up very easily.
- It can be layered and blended easily.
- It’s versatile – you can get almost any look with it.


Cons:
- It isn’t very durable without a topcoat.
- It has to be top coated with either wax or polyurethane.
- For the most durable finish, you still need to prime/scuff sand.
Well, that’s it! If you have more questions, let me know how I can help! Good luck with your project!


How To Chalk Paint Furniture
This step-by-step guide will help your first painting project go smoothly. Here's how to chalk paint furniture.
Materials
Tools
Instructions
- Remove the hardware then clean the furniture with a degreaser and a wet rag. Let the furniture dry completely.
- Repair any damages and fill in any scratches with KwikWood. Sand it down flush after it dries.
- Paint 2 or more coats of chalk paint. Wait for each coat to dry to the touch before painting the next coat. If you don’t like the texture in the paint, you can sand the paint when it’s dry, with 220 grit sandpaper.
- Distress painted furniture with 220 grit sandpaper. (optional)
- Let the chalk paint dry for at least a couple of hours before you seal it with wax. Brush or wipe wax on in a small section and then wipe the excess off with a clean cloth. Do 2-3 thin coats, letting it dry for a day or two between coats.
- Put hardware back on. It can be old or new!
- Let the paint and wax cure. It usually takes about 21-30 days for paint and wax to cure, so be extra careful with setting things on the surface, and when you use your furniture until that curing time is over.
Recommended Products
As an Amazon Associate and member of other affiliate programs, I earn from qualifying purchases.


More Chalk Paint Makeovers
- Dark Green Chalk Painted Dresser Makeover
- Teal Painted Dresser Makeover
- How To Paint Fabric With Chalk Paint
- Black Coffee Table Makeover Idea
- DIY Pink Dresser
Learn the Art of Updating Furniture!
If painting furniture feels overwhelming or your past attempts didn’t go as planned, this course will guide you step by step.

Follow us on YouTube to get more tips for painting furniture. Or share your project with us on our Facebook Group and be part of our community. See you there!

Please share the kind of sander you prefer.
Here are the Best Sanders for Furniture
Unfortunately no. The wax has to come last. But you could put polyurethane on the chalk paint and then put dark wax on the polyurethane. The wax won’t soak in like normal though. But it’s possible to do. I’ve done it.
Hi Natalie! Love your blogs. And after reading this one I started doing my first chalk paint project on my bathroom vanity. Using Forlkart chalk paint in ‘Oatmeal’. However, after the first coat I feel the color is not what I was looking for and is light. Just to try, I mixed little of this one with my black acrylic and it came out to be beautiful greenish grey. Do you think I can use this new version as a second coat. P.S. I am not looking to layer it to distress it.
Thanks
Preet
yes I would paint the new color over the 1st color.
Thanks so much, I’ve learned so many things that I have had questions about. You guys are a Godsend!!!!!!!!!!!!!!!!!!!!!!!!!!!!!!!!!!!!!!!
Aww we’re so happy to know we were able to help you out!