Turning a Dresser into a TV Stand


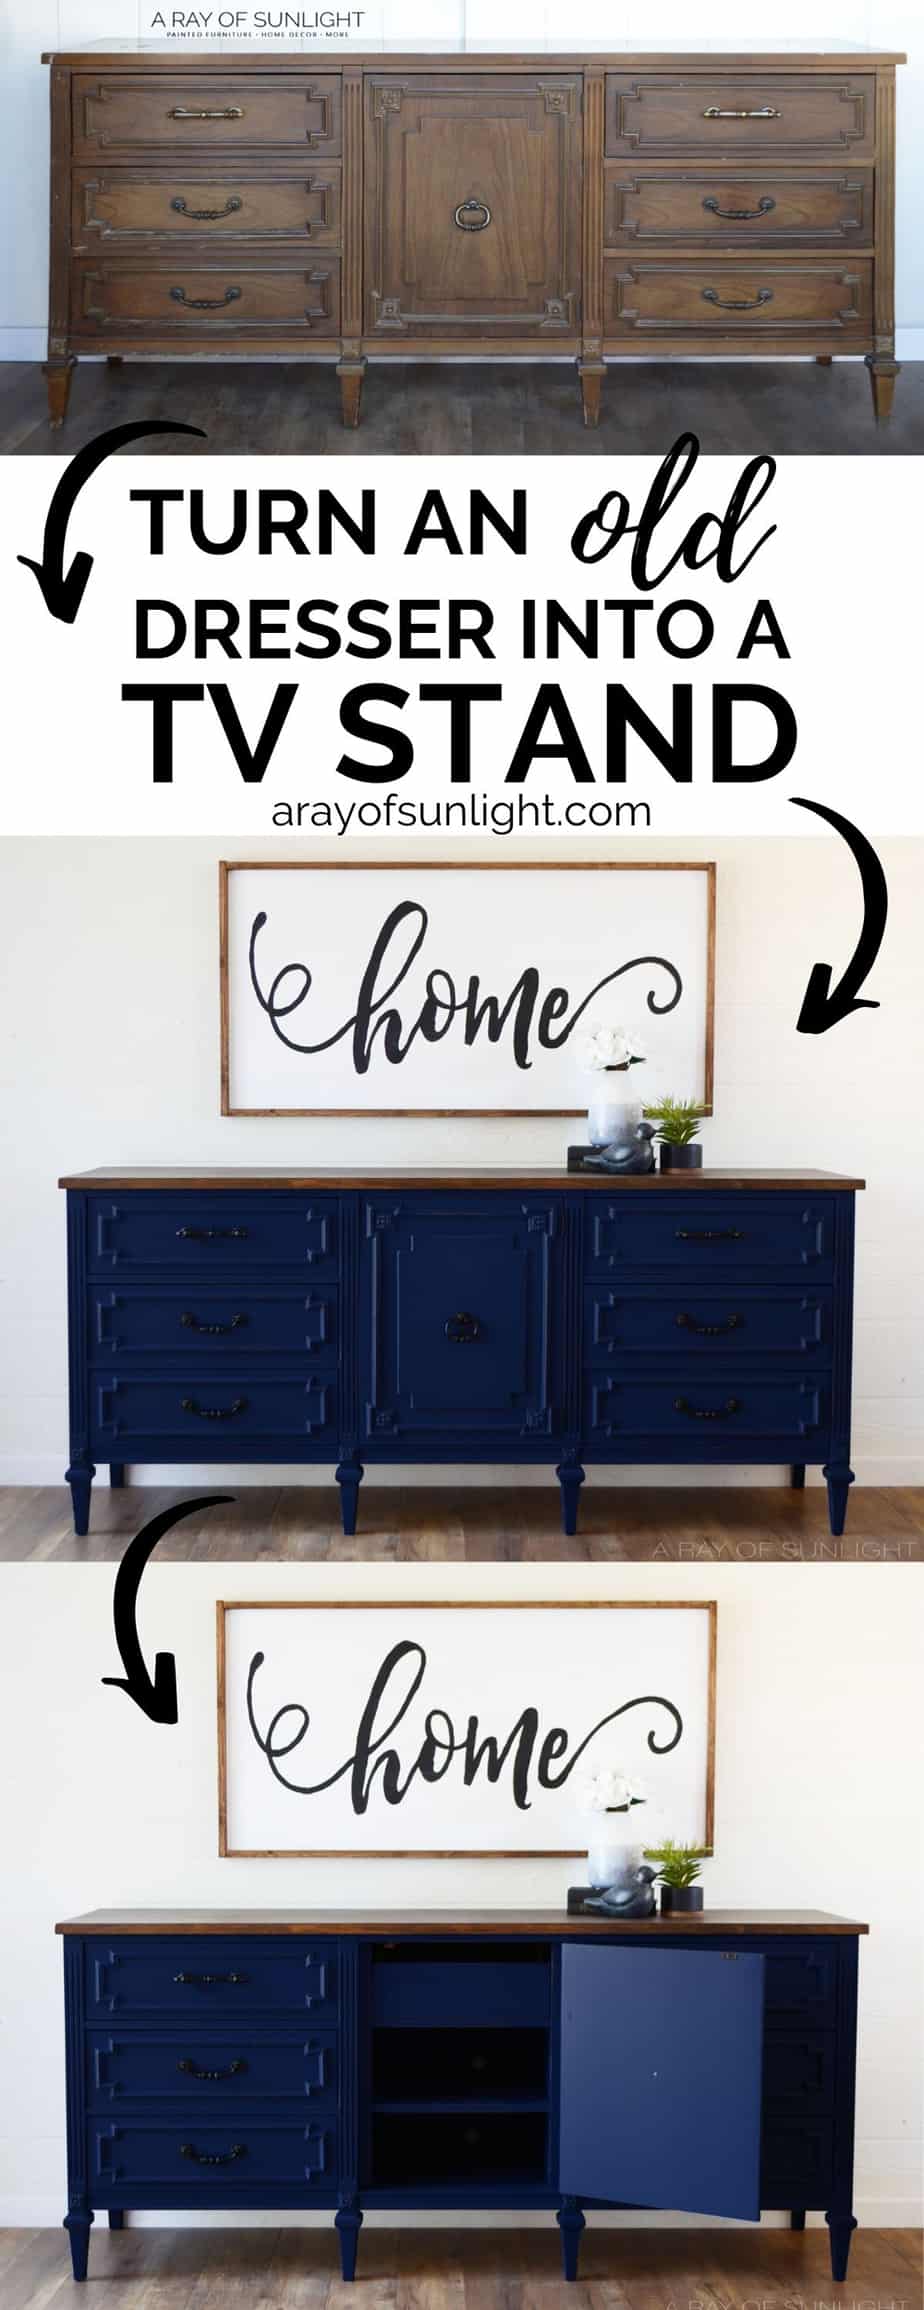
I’m so excited to share the process of turning a dresser into a TV stand for your farmhouse style living room. (We removed some of the drawers and made them into shelves for the electronics!) Then, I’ll show you how to use glaze over your painted piece for a unique, antiqued look. We also refinished the top in a fresh wood finish!
Keep reading to learn how to turn a dresser into a TV stand, plus check out plenty of other DIY dresser makeover ideas to transform your old pieces.
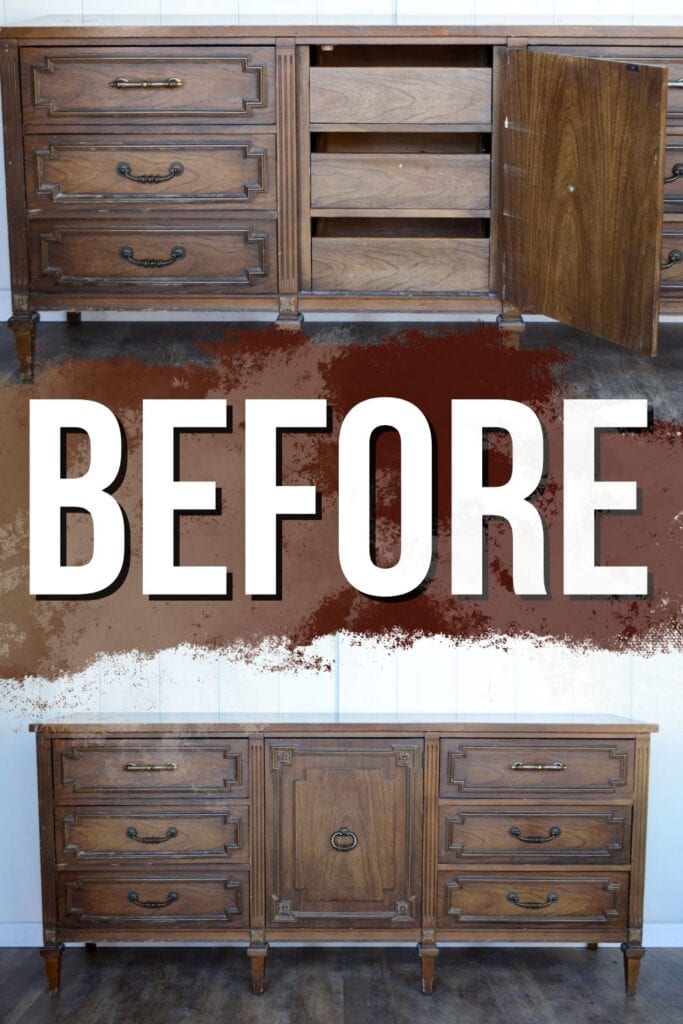
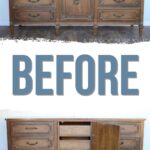
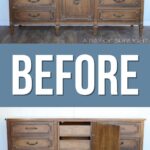
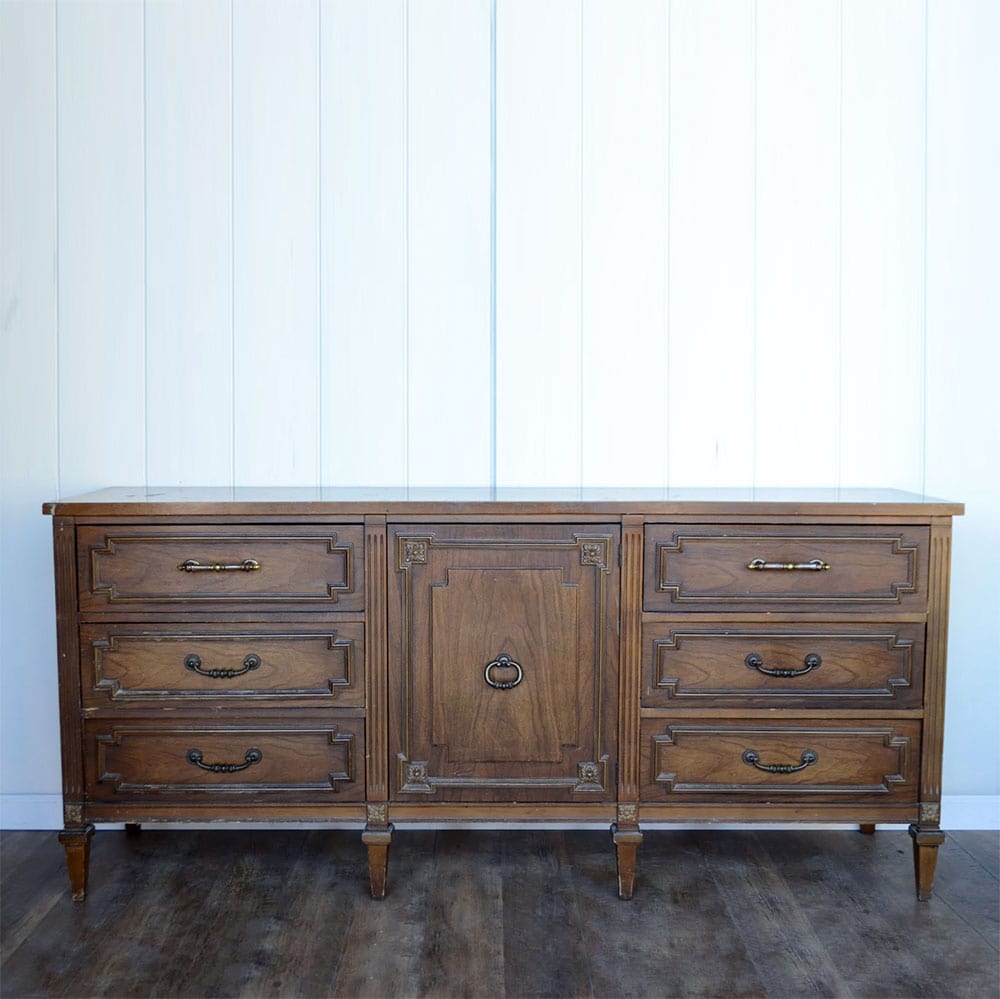
Above is what it looked like when we brought the dresser home from a local estate sale. When we found it, it was a worn out, scratched all over, and dinged up piece that you can find on Facebook Marketplace, Craigslist, yard sales, etc.

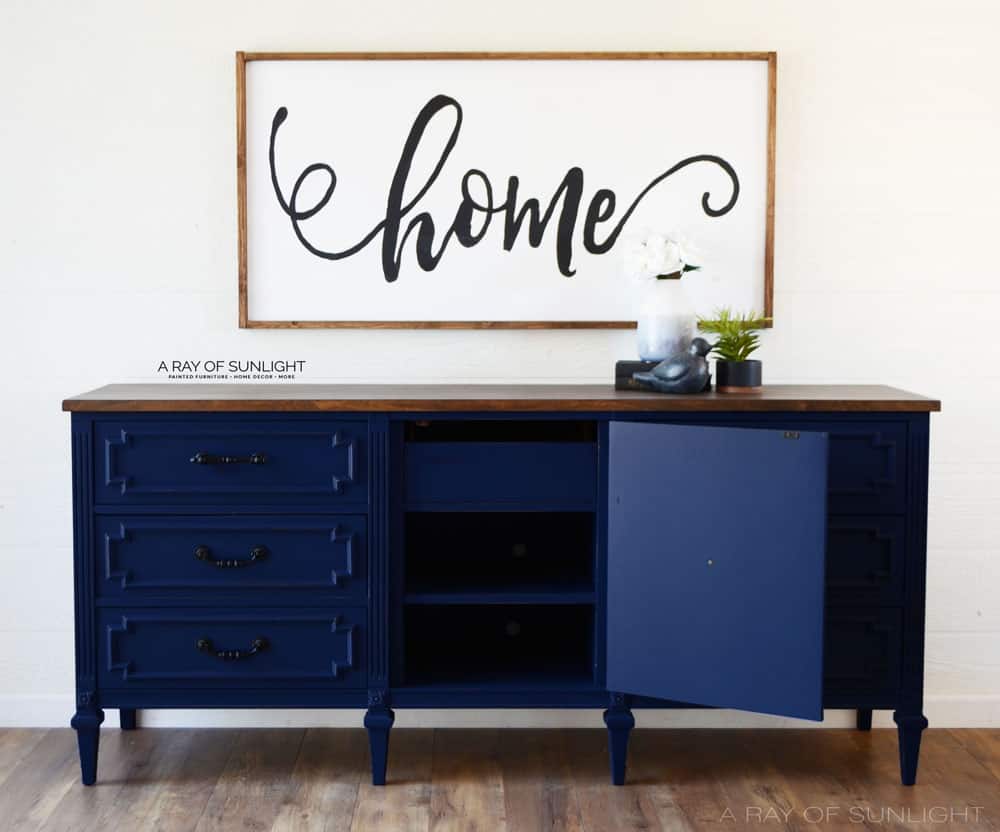
I love to flip furniture and make it new again by updating its color and sometimes even recreating what its purpose is. This time, it was turning a dresser into a TV stand and painting it navy blue.
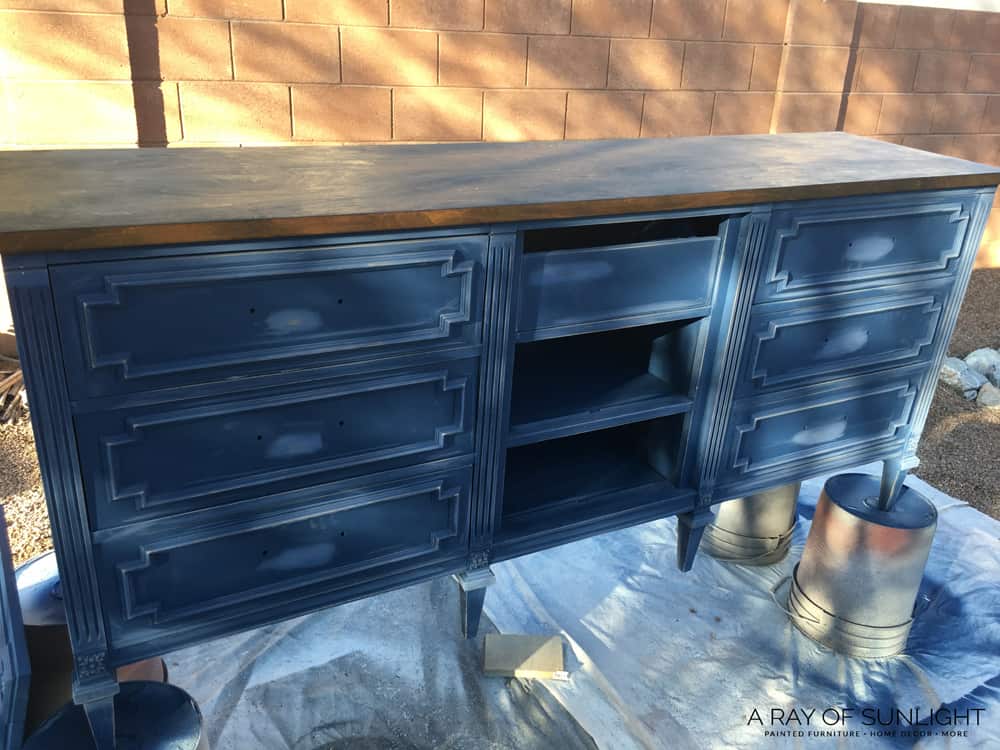
Inside the middle cabinet were 3 drawers that were about to have a different purpose. I wanted to use the piece as a TV stand and needed a place to put the electronics that always go with a TV. This was the perfect place to make shelves. When needed, you could close the door to hide the cords and cable boxes. But they would be easy to get to.

Supplies Used for Turning a Dresser into a TV Stand
As an Amazon Associate, I earn from qualifying purchases. I also may earn from other qualifying purchases with other companies or get free product to review and use. All opinions are my own.
- Thin Plywood
- Wood Glue / Brad Nail Gun and Brad Nails
- 220 Grit Sandpaper
- Large Drill Bit
- Inked Behr Paint
- Paint Sprayer
- Black Glaze
- Baby Wipes
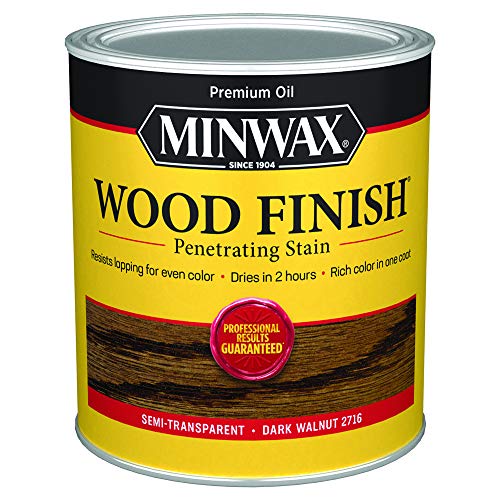
- Dark Walnut Stain
- Waterbased Poly
How to Turn a Dresser into a TV Stand
We removed 2 of the drawers and their tracks (the wooden things in the middle that help the drawers open and close properly. Then, we added thin plywood to the bottom and sides of each cubby to create a space for the electronics. We used brad nails and glue to hold everything in place.
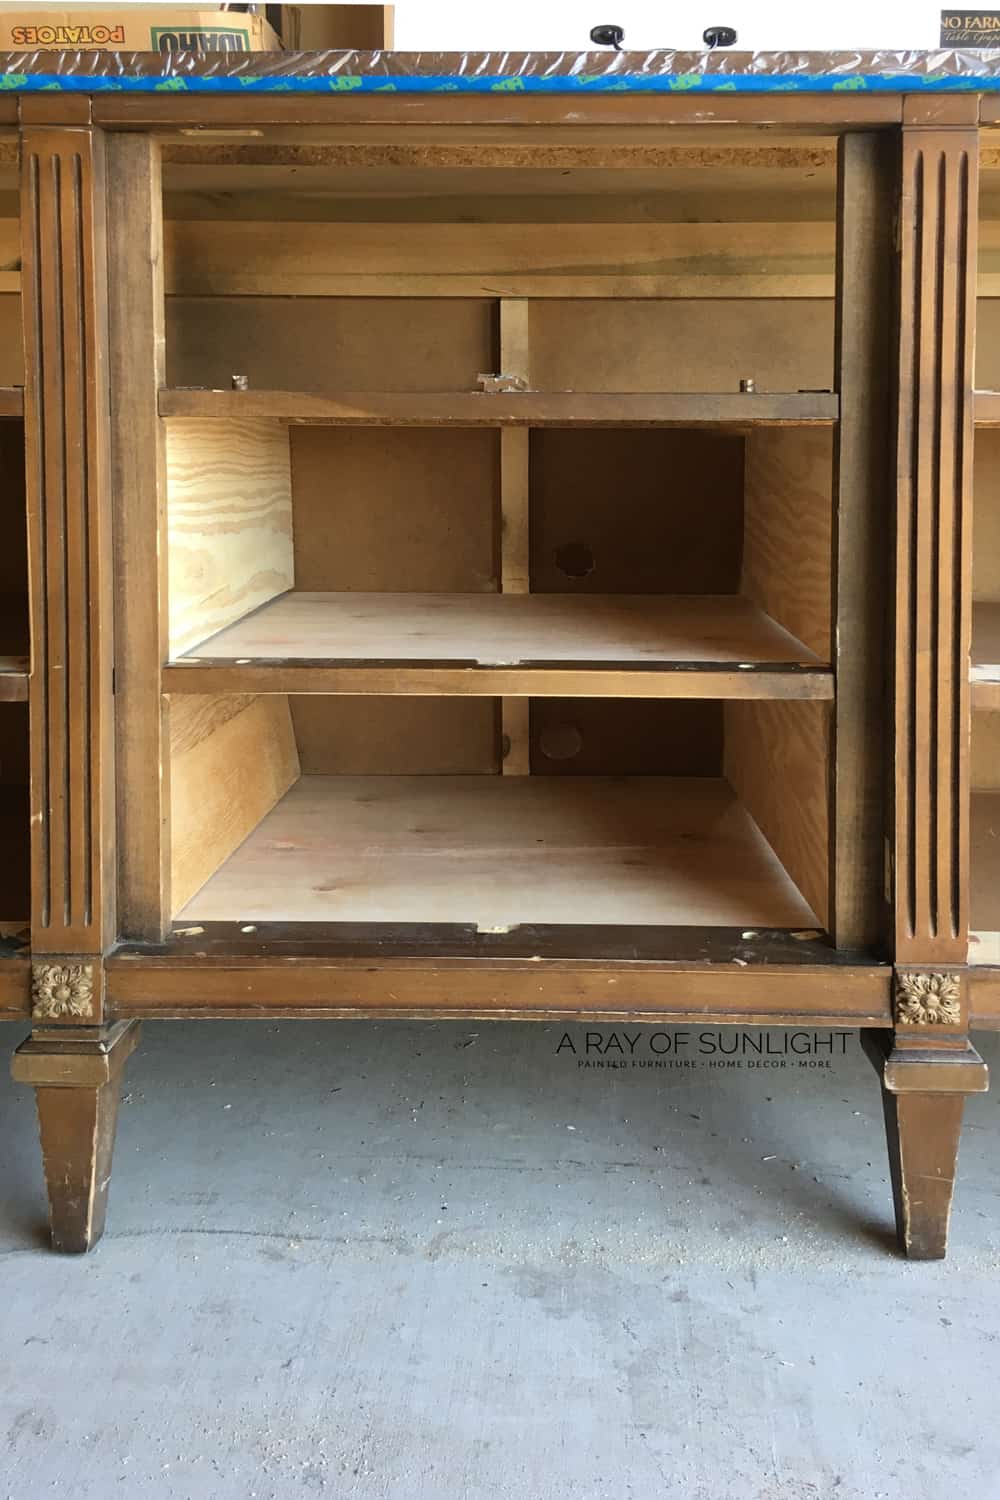
I also drilled holes into the back of each of the shelves with a large drill bit. This just makes it easy for the cords to go back behind the TV stand.
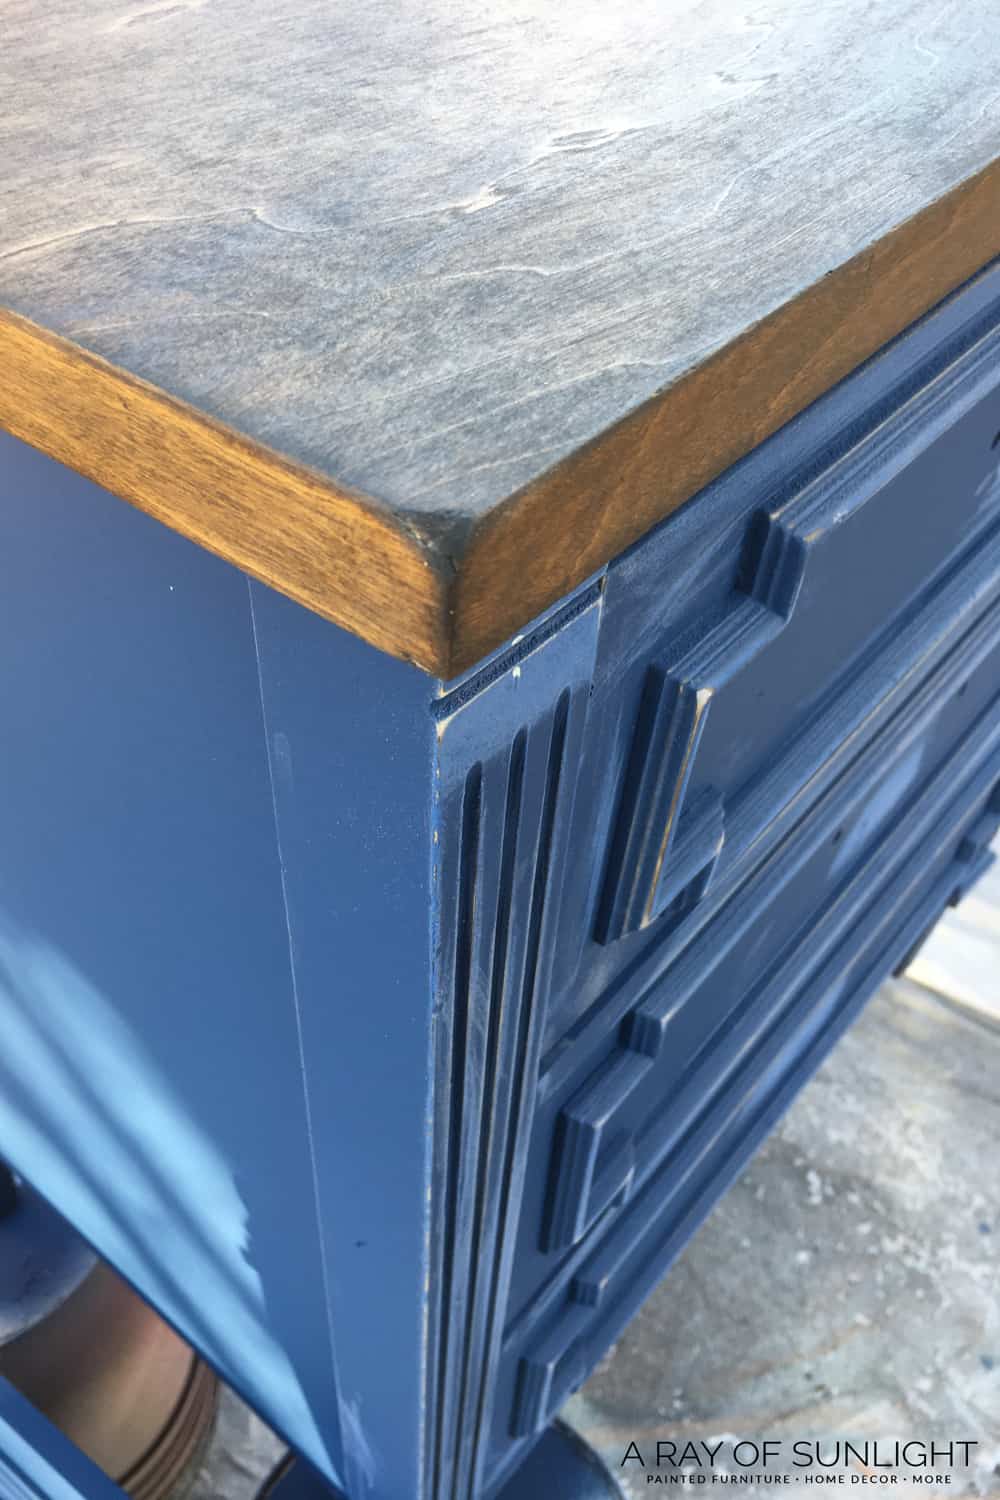
How to Refinish Dresser Top
First, we stripped the old finish off of the top so I could restain it with a nice, deep stain. Stripping a flat surface like this is super easy!
Plus, if it’s made with a wood veneer, it’s easy to sand straight through the thin veneer and into the wood underneath. If that happens, the wood underneath usually takes the stain differently and makes the finish spotty.
So, I’ve learned the hard way to just strip off the old finish with a chemical stripper instead of sanding it off. Read this post to see the best way to remove stain from wood.
Then I stained the top in dark walnut, let it dry completely, and then taped it off so the blue color couldn’t get onto it. Check out how to restain wood furniture here for more tips!
Paint TV Stand Navy Blue
I applied this really pretty navy blue called Inked onto the bottom of the piece with our favorite little hobby paint sprayer. (The Wagner Double Duty has been discontinued, and the newer model is Wagner Control Spray 250.)
*Update: We have since used many other sprayers and have put together a list of the best HVLP paint sprayers for furniture here!
I made the Behr Paint into homemade chalk paint using this recipe. Our Wagner sprayer made the application super quick, and it left us with a brush free finish! Something my customers and I love!
Learn more about painting furniture with a sprayer here. But don’t worry if you don’t have one; you can still get a brush mark free finish using the tips and tricks here on how to paint furniture without brush marks.
After the final coat of navy blue, I took off the plastic on top and distressed the edges and some of the color with sandpaper. Here are more distressing furniture techniques you can do aside from sanding.
To seal the chalk finish, I used my very favorite water-based polyurethane, which gives it a durable long lasting satin finish. Learn ALL of my tips and tricks on how to spray polyurethane here! And learn all about the best topcoats for painting furniture here.
I take my navy piece outside in the yard with plastic and 5 gallon buckets underneath. The overspray stays on the plastic, and the buckets help make it taller, so I don’t have to bend over as much while working on it. Learn more about how to prevent overspray when painting furniture here!
Then I put the door and hardware back on and thought I was done.
Would you like to save this?
More Before and After Makeovers
See All >
Click any of these “before” photos below to view the “after” of that makeover.


Now, here’s the twist. You’ll see that the last image looks like it’s a different piece almost! I promise it’s the same one. But here’s what happened.
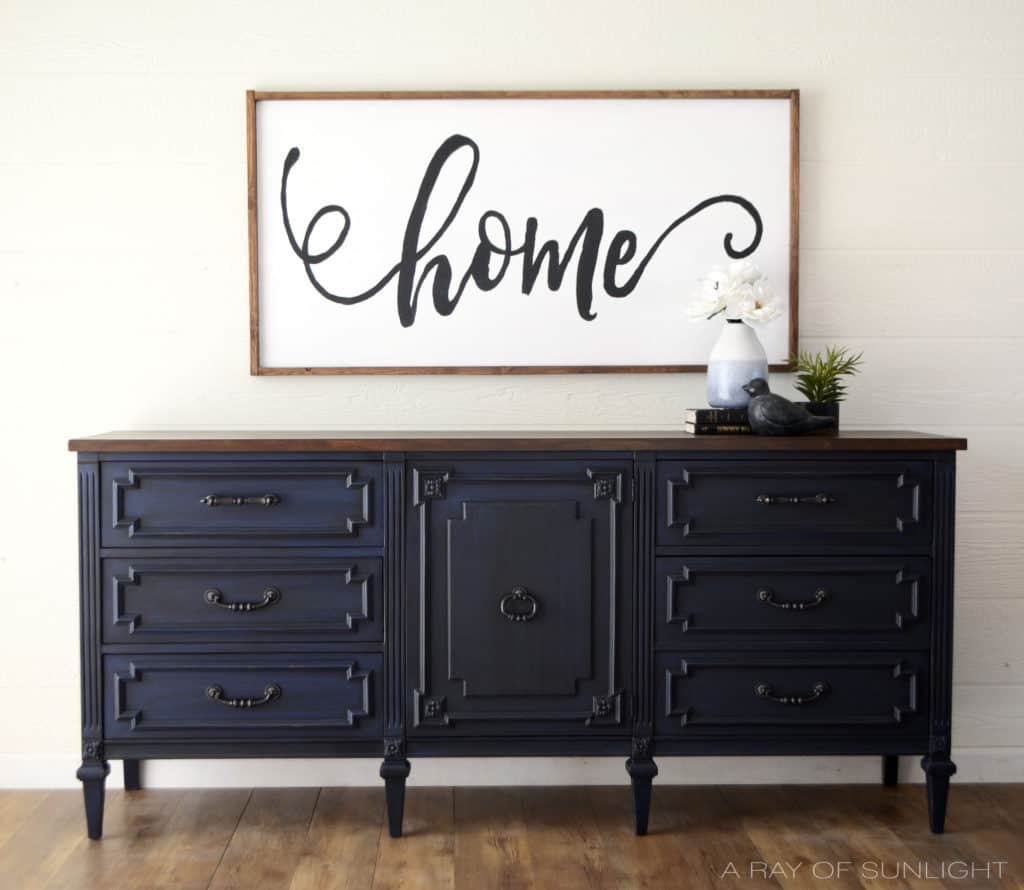
My customer contacted me after seeing the navy blue piece on Etsy (the one above). She loved it but was worried that it would be too bright for her home. After messaging back and forth, we came up with a way to create a deeper, darker finish without having to redo the whole thing.
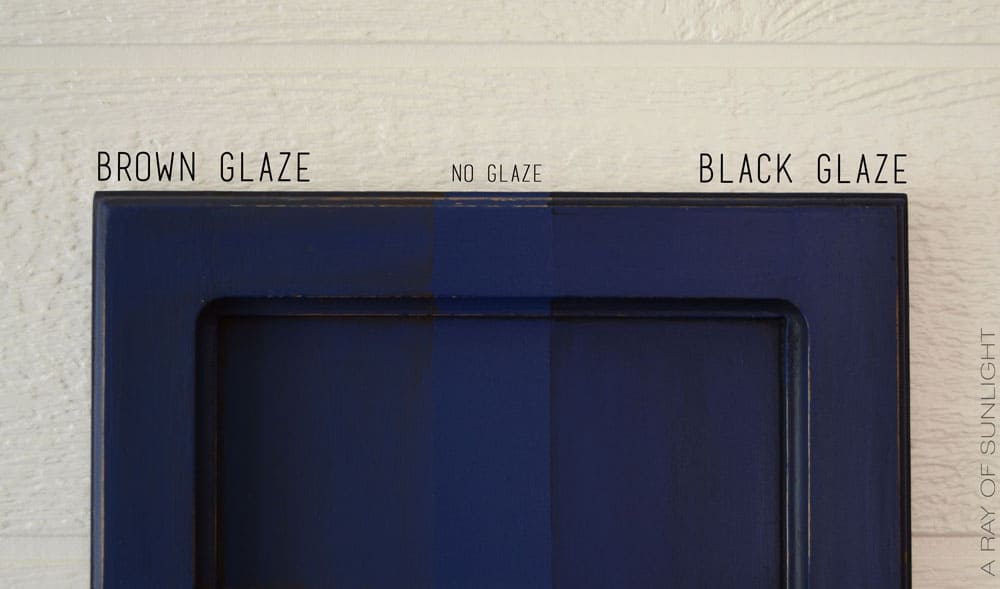
Glaze Blue Dresser Turned TV Stand
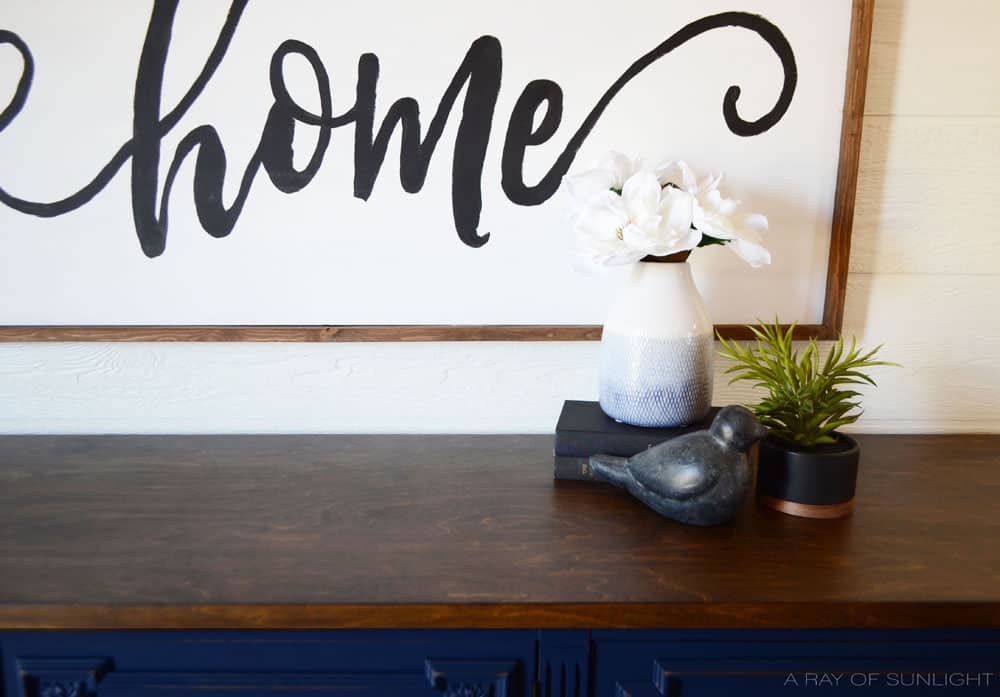
So we coated the whole thing with black glaze, and then sealed it all up again for extra durability. This was such a better alternative to giving the piece a fresh color all over, which would have been almost like starting from the beginning.
With the glaze, we were able to create a deeper look in less time and create a unique finish at the same time. Here’s our more detailed guide on how to glaze over chalk paint, and check out my comparison between glaze vs wax over chalk paint if you’re considering the two methods.
Furniture Glaze Tips
- It’s always best to have a coat of poly on your paint before glazing. This way, the glaze won’t soak into the chalk finish and become super hard to work with.
- Let the finish start to cure for at least 24 hours.
- Then, brush the glaze into the details of the piece with a cheap chip brush.
- Work in small sections and work quickly.
- Wipe off the excess with wet baby wipes, making sure to wipe in the same direction every time.
- Let the glaze dry. If you want it darker, go back with another coat.
- Seal it with waterbased poly for the best protection.
(Check out this tall dreamy blue painted dresser to see how we made a similar antique look!)
To finish off this makeover of turning a dresser into a TV stand, I kept the original hardware on this but gave it a rubbed bronze finish. For similar projects, check out our DIY TV stand and our list of painted TV stand ideas.
A short while later, we shipped our customer’s new TV stand to her, completely across the country. It arrived safely, and she LOVED it!! Yay!! Check out how to ship furniture across the country here, plus how to offer free shipping and still make money here.
So, if you’re looking for a TV stand to put in your living room, check out your local listings or thrift stores to see if there is a dresser that you can makeover! Learn how to make money painting furniture in this post, and check out how to price flipped furniture here.
Get more upcycled old dresser ideas here to give your thrifted piece a unique look. For more repurposing inspiration, here are repurpose tall dresser ideas and repurposed ideas for old dressers without drawers.
Which way do you prefer for the navy blue TV stand?? With or without the black glaze?


More Dresser into TV Stand Ideas
One popular idea is to still remove a few drawers like we did in this project, then swap them for wicker baskets. This is a simple way to add a rustic farmhouse vibe while keeping things practical with extra storage.
If your piece needs some height, you can add legs or feet to it! These come in different styles and sizes, so you can pick out the perfect fit for your home decor. Here’s adding legs to a dresser to guide you, and check out the best wood legs to add to furniture in this post. Another fun twist on this idea is to use hairpin legs for a more industrial look!
If you have two matching ones, you can place them side by side to create a long TV stand! To cover the gap in the middle, you can add a long wood plank on top. You can attach it if you want, or just place it on top so it’s easy to remove later if you decide to use the two separately.
Then, you can refinish the top like we did here or coat it with a color that complements the piece. We have a guide on how to make a plank top dresser here you can follow.
Repurposing like this is not only a practical and budget friendly option, but it also allows you to get creative and personalize your decor. Turning a dresser into a TV stand is just one of the many cool ways you can upcycle furniture.


Turning a Dresser into a TV Stand
Repurpose your old furniture and paint it perfect for your farmhouse style living room. Here's how to turn a dresser into a tv stand.
Materials
- Old Dresser
- Thin Plywood
- Wood Glue
- Brad Nails
- 220 Grit Sandpaper
- Inked Behr Paint
- Black Glaze
- Baby Wipes
- Dark Walnut Stain
- Waterbased Polyurethane
Instructions
- Remove 2 drawers and their tracks then add thin plywood to the bottom and sides of each cubby to make space for electronics.
- Remove the old finish off the dresser top.
- Stain the top, let it dry completely, then tape it off to prevent it from getting painted.
- Mix paint with some calcium carbonate powder and water to make homemade chalk paint.
- Paint a few coats of chalk paint onto the bottom of the dresser.
- Lightly distress the edges and some of the paint with sandpaper.
- Seal the chalk paint with some waterbased poly for a durable long-lasting satin finish.
- Brush some glaze into the details of the dresser with a cheap chip brush, then wipe off the excess with baby wipes. Seal the glaze with some more waterbased poly.
- Attach hardware and enjoy your new TV stand!
Recommended Products
As an Amazon Associate and member of other affiliate programs, I earn from qualifying purchases.


More Navy Blue Furniture Makeovers
- Painting Furniture Navy Blue
- Antique Desk Makeover
- Antique Blue Sideboard Buffet
- DIY Navy Blue Bedroom Dresser
- DIY Painted Hallway Cabinet
Follow us on YouTube to get more tips for painting furniture. Or share your project with us on our Facebook Group and be part of our community. See you there!
I love the color even more with the black glaze, what kind of glaze did you use? I am doing a whole office furniture set and want to give it this classy look.
I used a clear glaze and tinted it black with black paint. Not sure which glaze I used, but it was either Country Chic Paint or Valspar.
This is beautiful. I have a dresser just like this, with a tad difference to the middle door, that I plan on using as one as well. This is great inspiration for me.
This one sold for over $300, plus shipping, and it was shipped to Pennsylvania I believe.