Chalk Painted End Tables


Today, I’ll take you on a journey through my chalk painted end tables makeover – turning them into vibrant, charming furniture pieces. This step by step guide is filled with valuable tips and tricks on using a sprayer when creating these chalk paint furniture ideas.
So, no matter if you’re an expert DIYer or a beginner, strap in as we dive into this fun and rewarding process of giving a new lease of life to discarded furniture. Let’s get started!
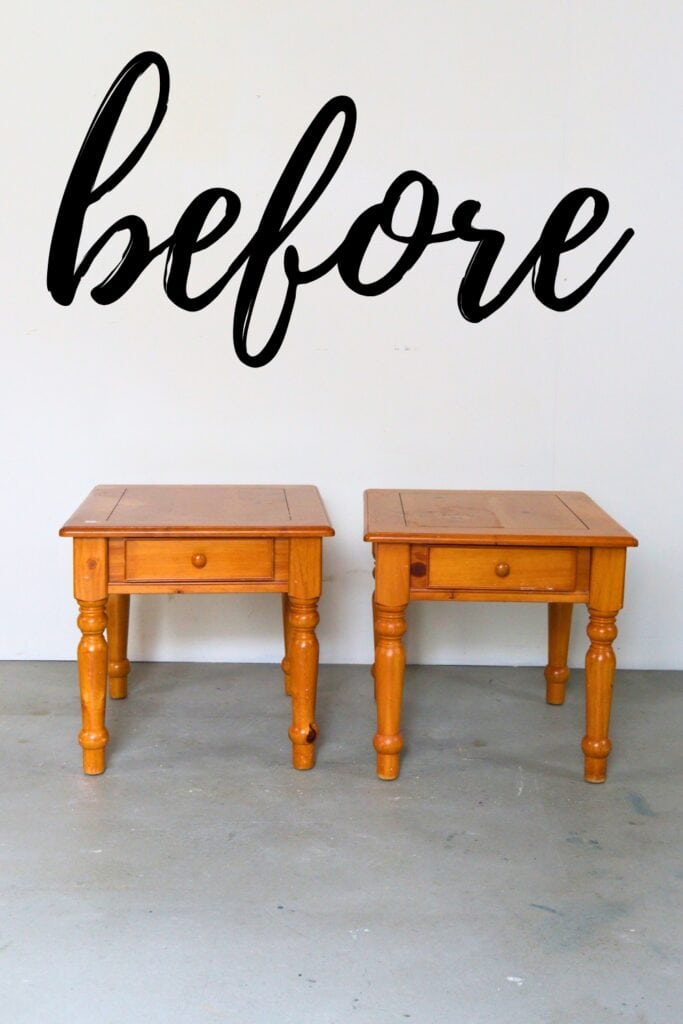
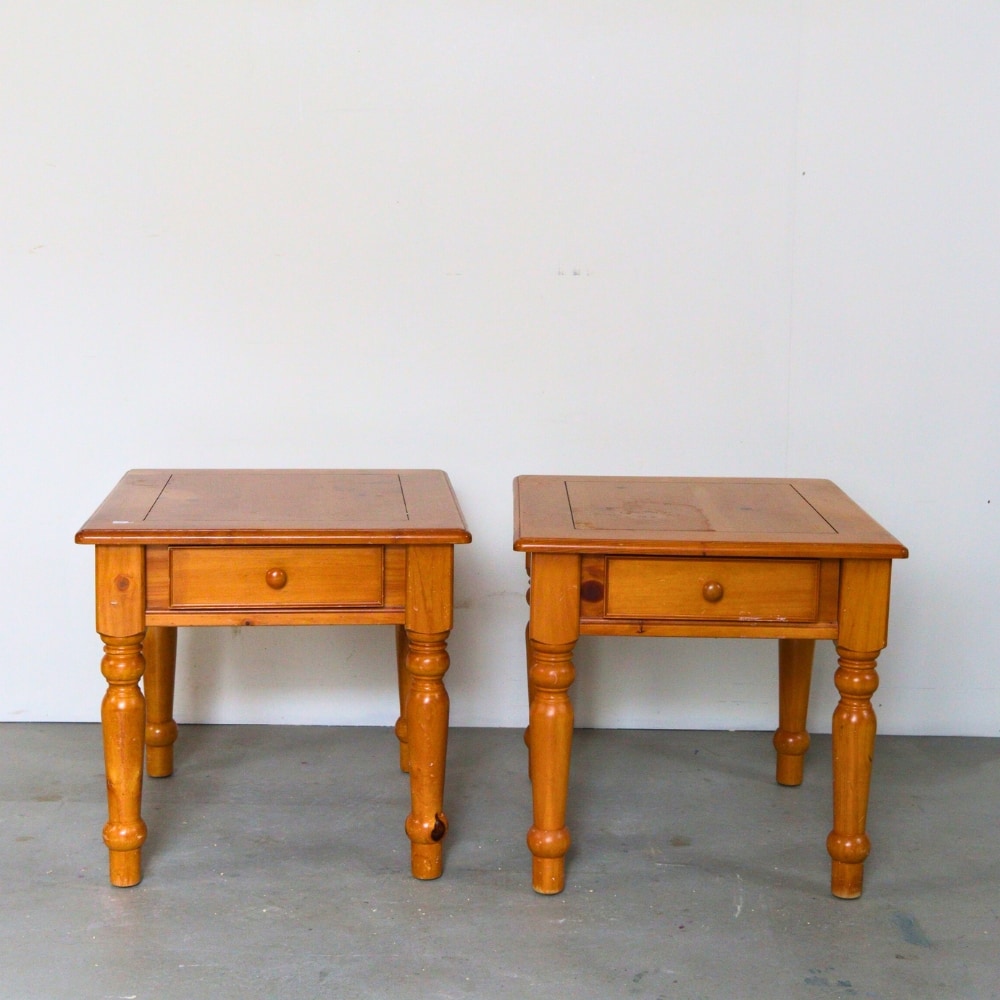
Before we jump in, let’s set the stage. Picture this: you’ve stumbled upon a couple of old end tables that have seen better days. They might be scratched, chipped, or just plain outdated. But you see potential.

You imagine them in a fresh, vibrant color, jazzed up with trendy new hardware, taking pride of place in a cozy living room. Well, that’s exactly what we’re tackling today. With a bit of patience, the right tools, and some good old DIY spirit, we’re going to transform these pieces from drab to fab.
Trust me, it’s easier than you might think, and the results are oh so satisfying! Oh, and a little shoutout: thank you, Dixie Belle Paint, for sponsoring this post and giveaway!
Scroll Down to Enter the $250 Dixie Belle Giveaway!

Supplies Used for Chalk Painted End Tables
As an Amazon Associate, I earn from qualifying purchases. I also may earn from other qualifying purchases with other companies or get free product to review and use. All opinions are my own.
- Krud Kutter
- Metal Scraper
- Nail Gun
- Electric Screwdriver
- SurfPrep’s Sanding Screens (80, 100, 150, 220) (Use code RAY10 to get 10% off your order)
- SurfPrep 3×4″ Sander (Use code RAY10 to get 10% off your order)
- Shop Vacuum
- Tack Cloth
- Clear Shellac
- Wagner FLEXiO 5000 Sprayer
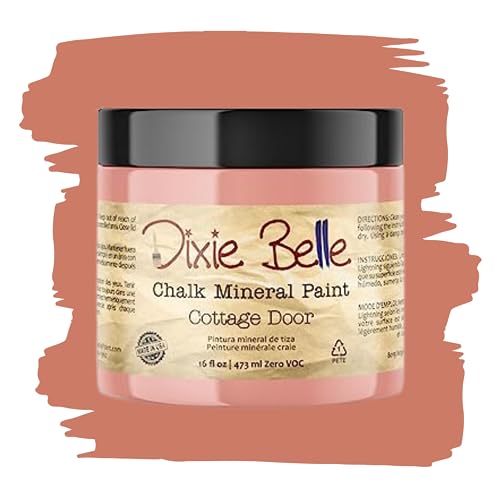
- Dixie Belle in Cottage Door
- Wagner Cup Liners
- Paint Filter
- Respirator
- Pre Taped Plastic
- Painters Tape
- Plastic Wood Filler
- 220 Grit Sandpaper and Sanding Block
- Dixie Belle Topcoat
- Dixie Belle Brush
Remember, your specific project might require additional or different supplies depending on the furniture and finish you’re working with.
Preparing End Tables
Did you see what these pieces looked like before? They have scratched tops and loose, wobbly legs. They have a cute style, though!
First, I cleaned them with Krud Kutter and removed the hardware. There were some stickers and tape left from the previous owner, so I scrubbed them off. Here’s how to clean furniture before painting to learn more about the step by step process.
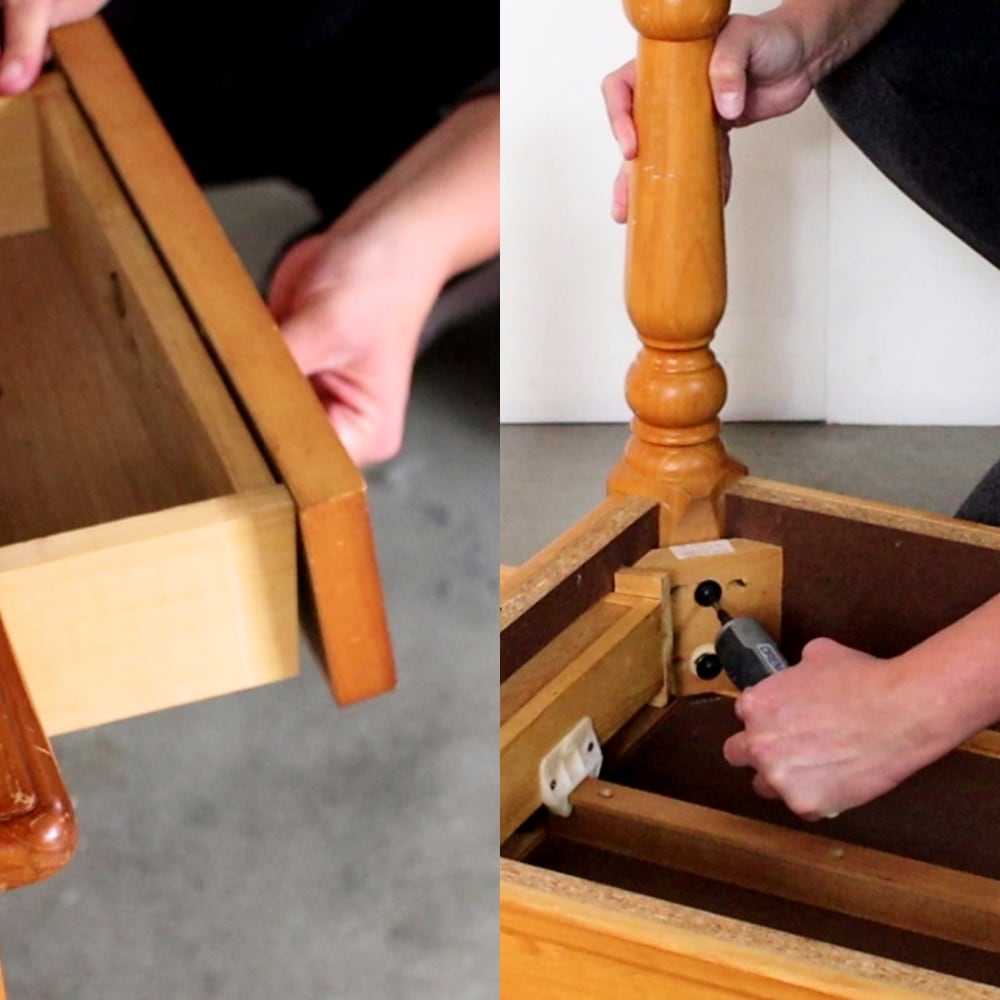
The drawer on one table was loose, so I pulled it off, removed the nails, and then glued and nailed it back in place. I flipped the tables over and tightened the screws that hold on the legs. The legs are much more sturdy and tight in place now. Here’s how to fix a broken table leg for a more detailed guide.
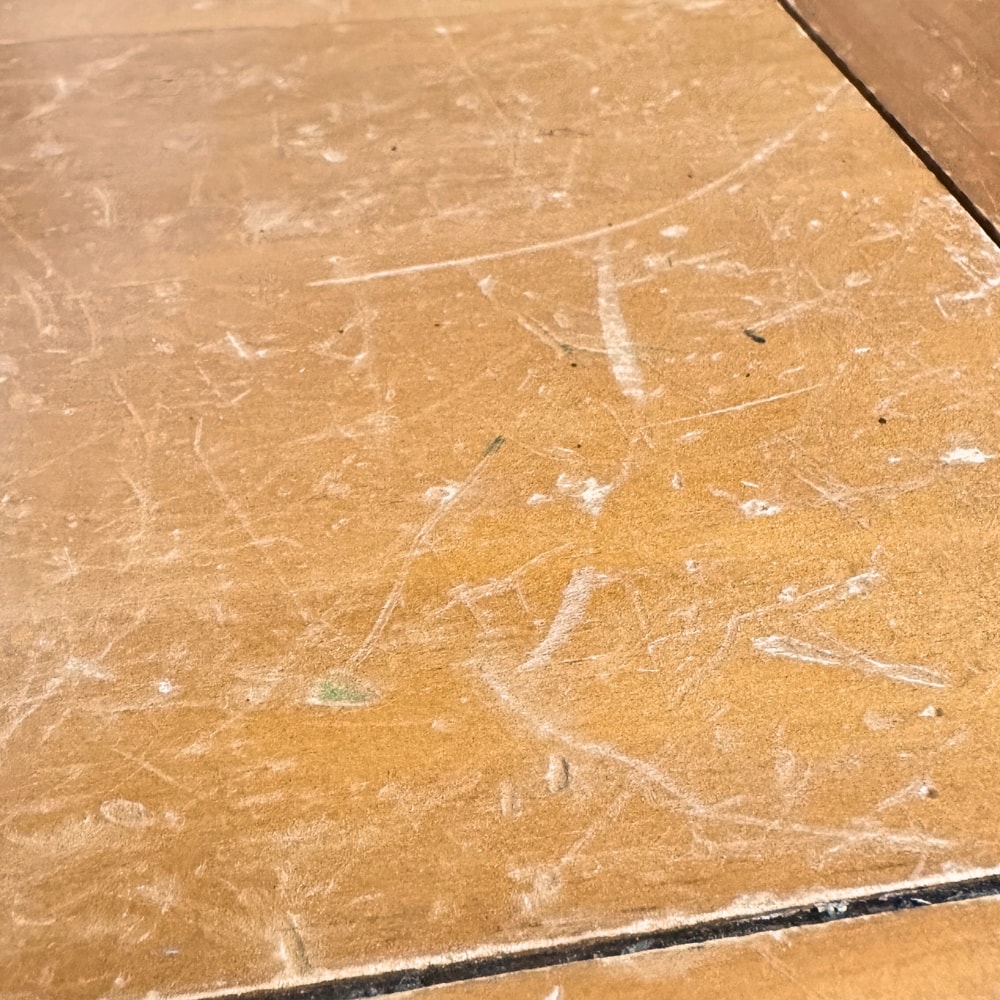
Sand the top to remove the scratches. Start with 80 grit sandpaper, and I am trying not to sand too much because this is for sure veneer over pressed wood. But I almost sanded through the veneer in one spot. I don’t think I can stain the tops without this spot showing up as a different color. But I got most of the scratches out, so that’s good enough.
Then, smooth the tops with 100 grit, then 150 grit, and then 220 grit sandpaper. Moving through the grits like this helps prevent sanding swirls from showing up, even if you paint the wood. Check out our blog post about sanding before painting furniture to learn more about why it is important. Remove the dust after with shop vacuum and tack cloth.
I took the pieces outside and sprayed clear shellac on them. The clear shellac blocks bleed through and helps with better adhesion of the new paint. That’s why I didn’t have to scuff sand the rest of the piece beforehand.
Let the primer overnight to help it block stains as much as possible. Here’s how to stop stains from coming through paint and how to fix paint bleed through to learn how to prevent this issue from happening and how to tackle it when it’s happened.
Chalk Painting End Tables
I got a new sprayer, the Wagner FLEXiO 5000, a model just above the one I use all of the time (the FLEXiO 3500.) The 5000 has the motor in this case, so this is like the air compressor. And then you don’t have to hold the motor in your hand.
It’s an electric sprayer, so you just plug it in and put paint in it. It’s one of the best paint sprayer for chalk paint! Check out our Wagner FLEXiO 5000 paint sprayer review to learn more about its features, pros, cons, and overall performance.
For this makeover, Dixie Belle sent me a package of supplies. I used their new cottage line color, Cottage Door. Check out my honest Dixie Belle Paint review and this list of best Dixie Belle Chalk paint colors for more about this brand.
While we chose a lighter shade, you can choose a dark one for a bold and dramatic look. Here’s chalk painting furniture black for inspiration.
I am testing out the Wagner sprayer cup liners to see if they are worth it to use. I poured Cottage Door into a paint filter to prevent any clogging – here’s a guide on how to unclog a paint sprayer if you ever run into this issue.
How to Thin Dixie Belle Chalk Paint
Then, I added water to thin out the paint so I could get a perfectly fine finish on my piece. This paint is thick, so I’m thinning it with 20% water. Gotta mix them together really well to make sure it is all mixed in. Learn more about how to thin paint for Wagner FLEXiO sprayer here.
The Wagner FLEXiO 5000 just clicks together, and then you just flip a couple of switches to turn it on. I tested it on a piece of cardboard so I could make sure it worked right.
Then I painted the piece.. and this sprayer was spraying AMAZING. Less overspray, and it definitely was lighter in my hand than the other model. Learn more about how to use Wagner FLEXiO 5000 paint sprayer here.
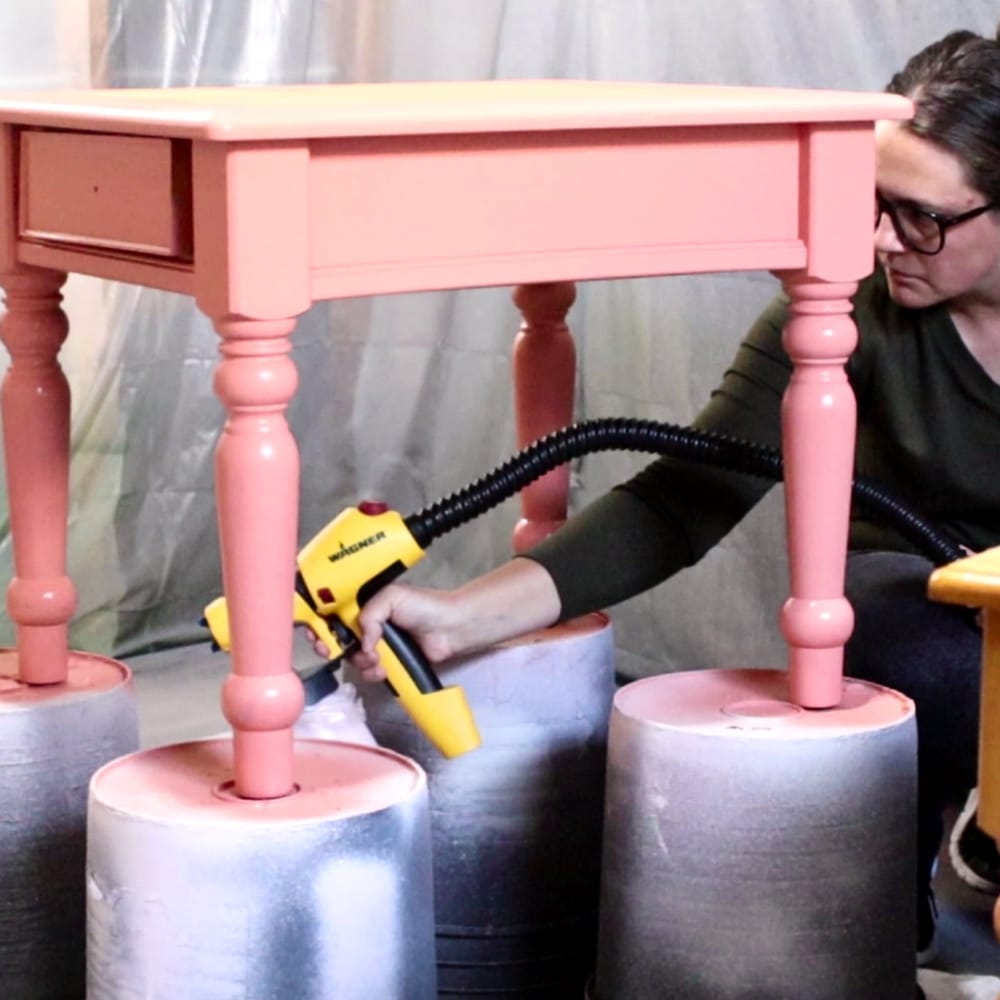
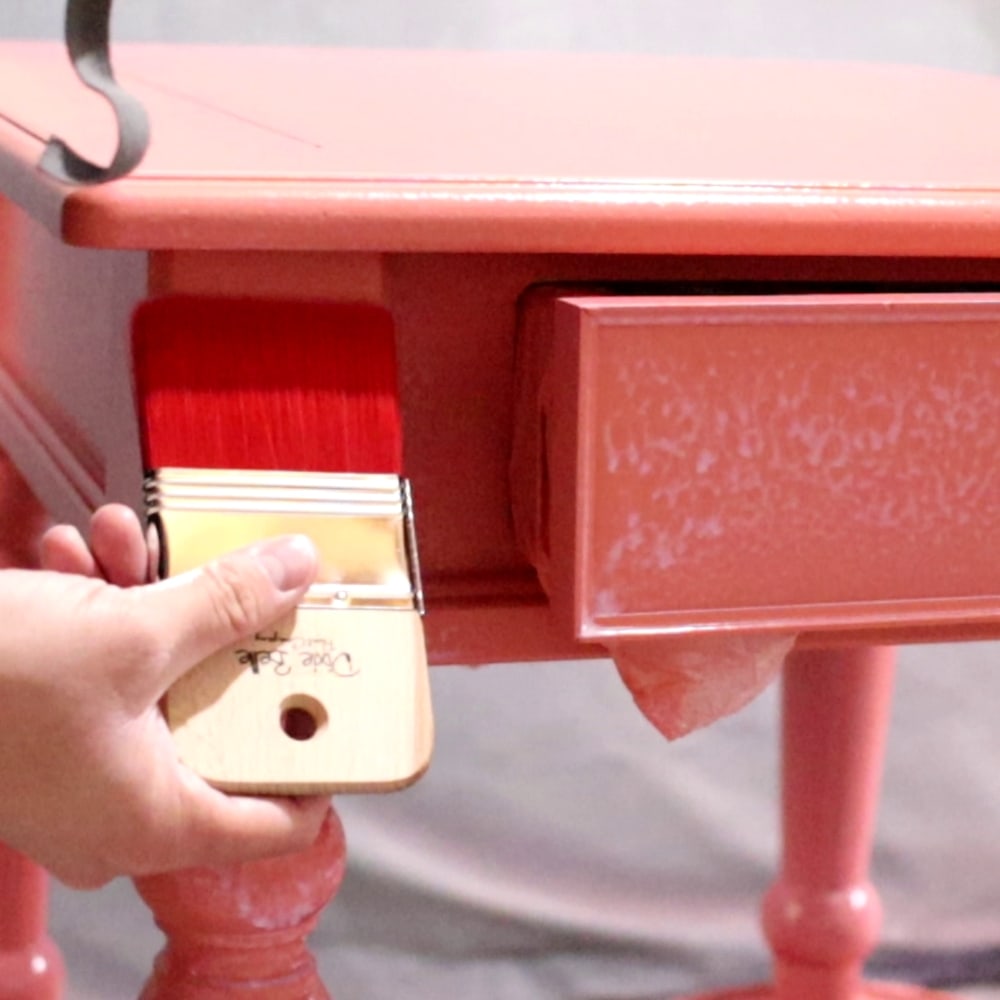
Look at how well it sprayed on my first coat!! Hardly any texture at all here! Here’s how to fix lumpy chalk paint if you get any lumps.
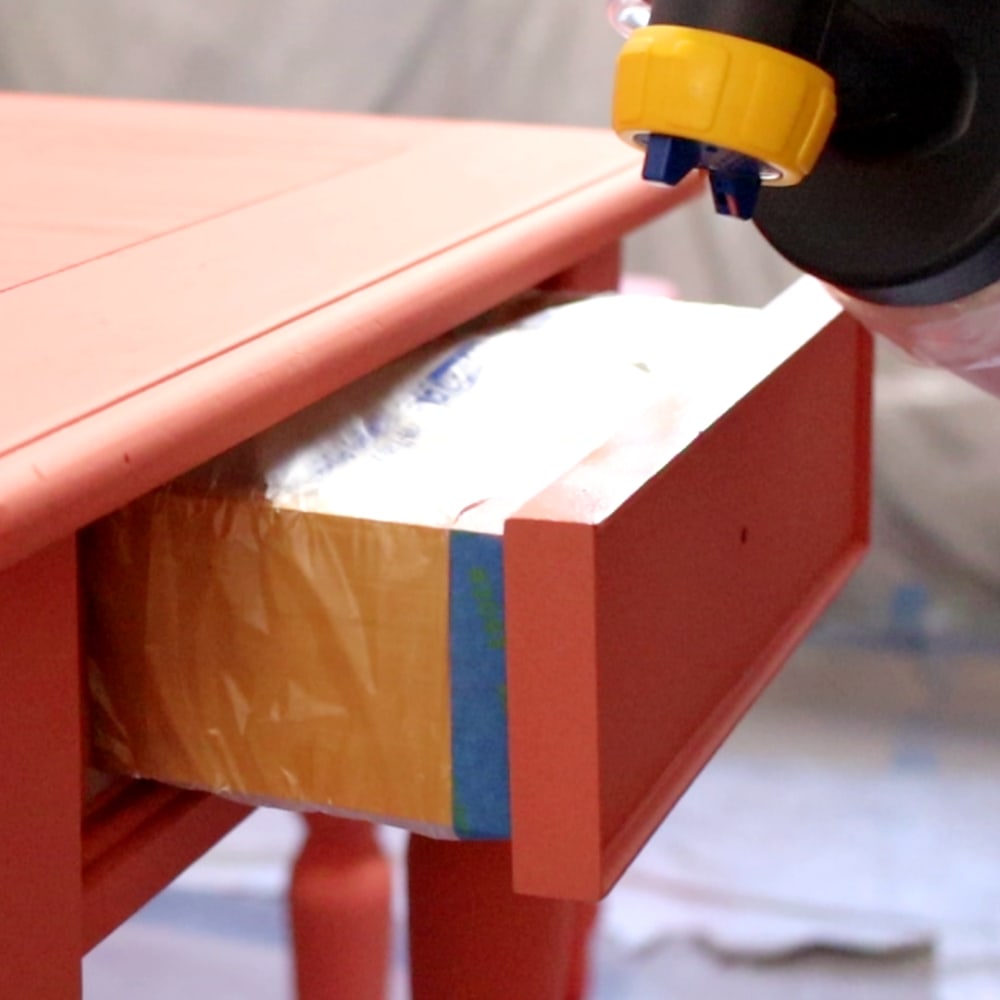
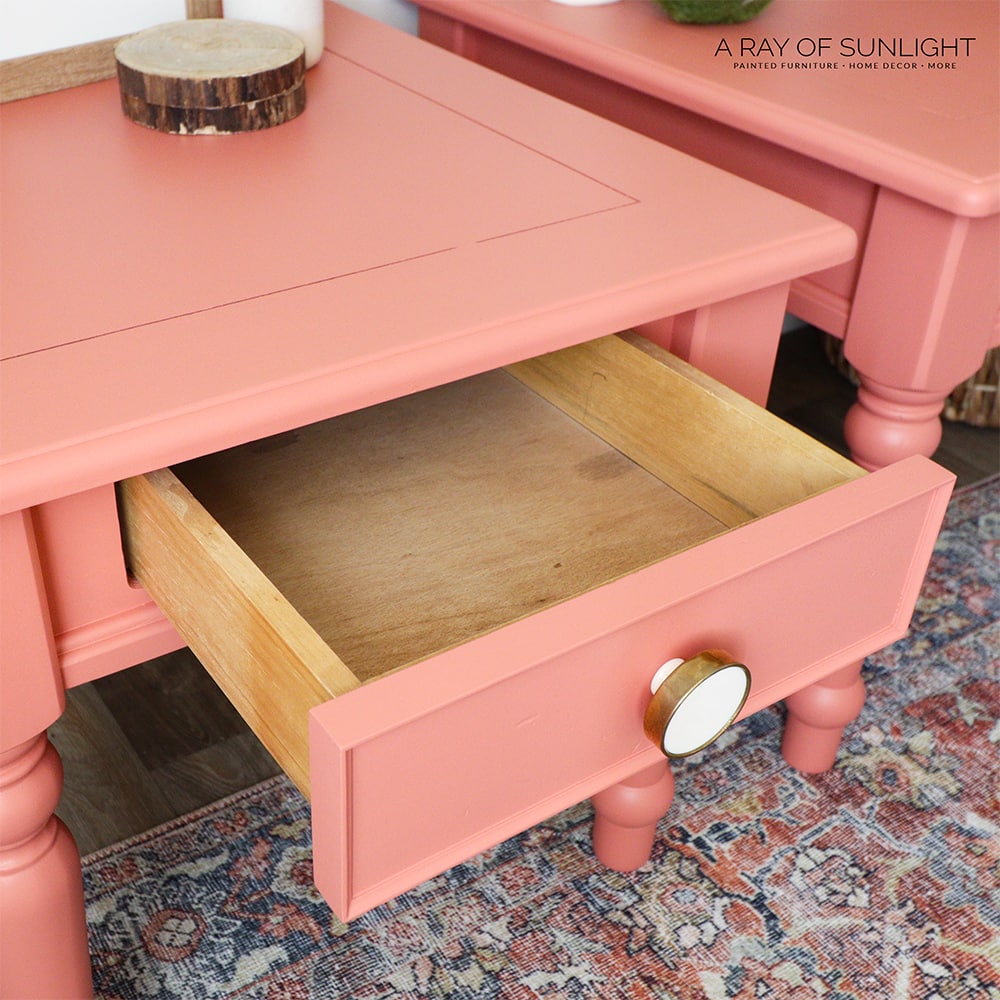
I also pulled the drawers out so I could coat the edges of the drawers. And yep, that’s plastic around my drawer, so I don’t get paint inside them.
Filling In Cracks
I let the coat dry for maybe an hour, but then, looking at it, I could see cracks on the top, so I needed to fill them in with wood filler. I like this plastic wood filler, and I just used my finger to apply it in the cracks. Then, I let it dry for an hour or so.
Would you like to save this?
Check out our list of the best wood fillers for furniture to learn more about the different options. And here’s a detailed guide on how to fix cracks in wood before painting.
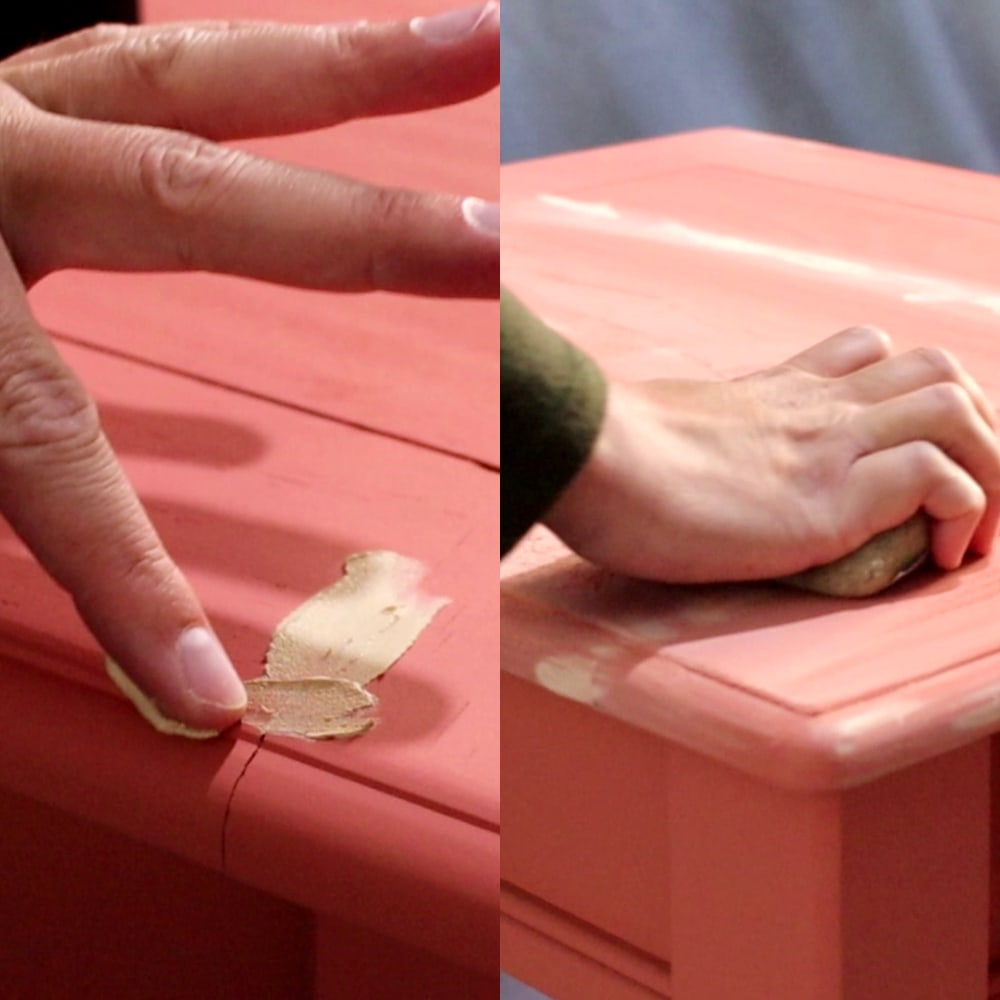
Then, I had to sand the filler flush using 220 grit sandpaper, so you can’t tell that I filled these areas. I created a bunch of dust, so I vacuumed it up and then used a tack cloth to make sure it was all gone. And yeah, I use the same tack cloth over and over again until it won’t pick up dust anymore.
I had to cover up the wood filler, and while I was at it, I sprayed everything just to make sure I had full coverage all over. I really didn’t think I would like this Wagner model, but I’m liking it more and more as I use it.
I think this was my last coat, so I was going to clean my HVLP gun and get it ready for topcoat. I do think that I was able to get more paint back out of it since I used the liners. I was able to squeeze it back in instead of washing it down the drain.
Then, I cleaned the nozzle. I just rinsed it out and then sprayed some soapy water through it to make sure the paint was cleaned out of the inside. While the finish on the tables dried overnight, it was drying out, too! Here’s a more detailed guide on how to clean a Wagner FLEXiO paint sprayer.
Topcoating Chalk Painted End Tables
The next day, I mixed my topcoat into the sprayer. I’m doing basically the same thing that I did with the paint. But as I was applying it, it was not going on right.
There was too much coming out, and I wondered if I thinned the topcoat too much because I had never used this one before. I had my settings basically all the way down, and it was still spraying way too much.
So, I had to brush it out so it doesn’t drip everywhere before it dries. I used a Dixie Belle brush to do so and hoped for the best, honestly, because it was everywhere! Here’s how to apply polycrylic to painted furniture by hand so you can learn the tricks that we use to get a streak free finish!
But once it dried, it looked so good!!! I’m impressed! No brush marks in it or anything.
For the next coat, I was still not sure what to do and guessed I’d just brush out the drips again… But halfway through, I ran out of topcoat, so I had to fill it up again.. and as I was testing the sprayer again, I realized that my tip wasn’t screwed on tight!!
Ugh! That was my issue this whole time with the topcoat! Because after I screwed it on tight, I had to adjust my settings and turn them way up, and it was spraying normal again. Ooops!
Learn more about different options of topcoats for painting furniture here.
Final Touches
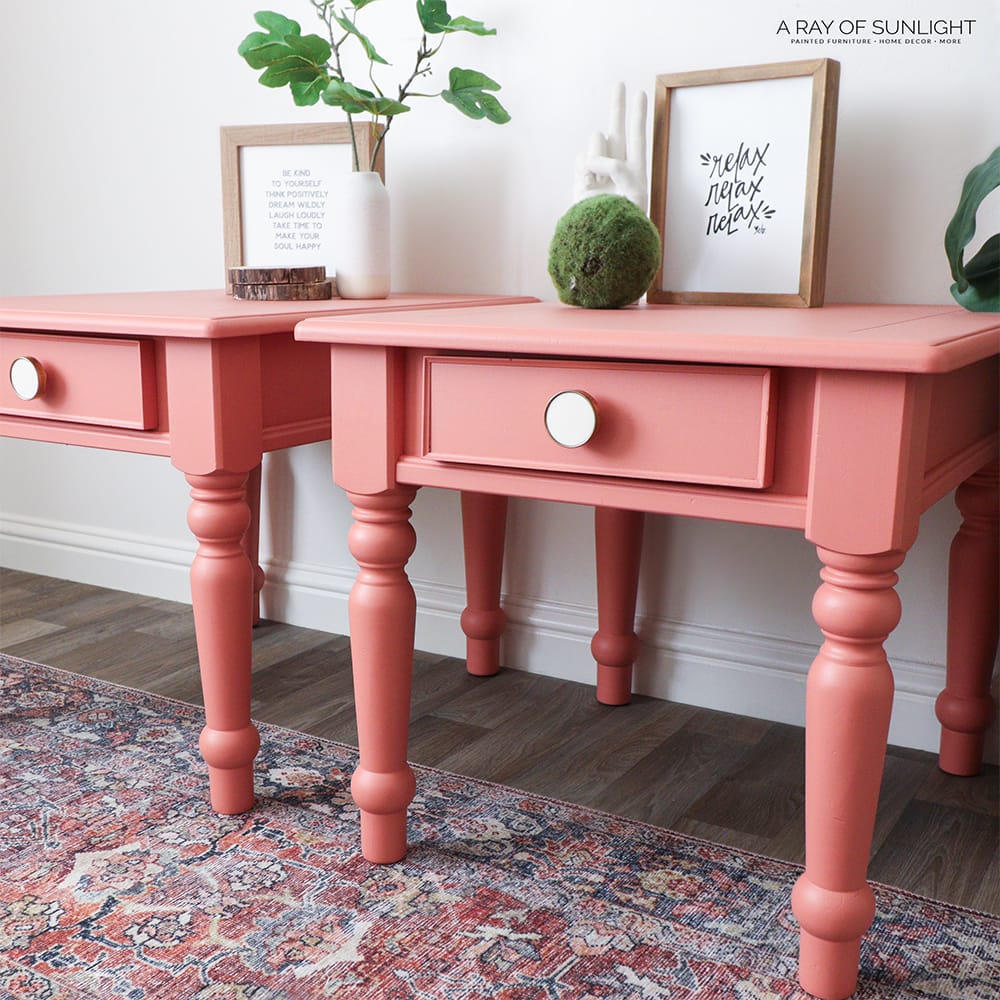
The next day with the topcoat dry, I was trying to decide between a couple of knobs, but I think I liked how fun these white and gold knobs were, so that’s what I went with.
Watch the full makeover on our YouTube video below, or keep scrolling to see the after photos!
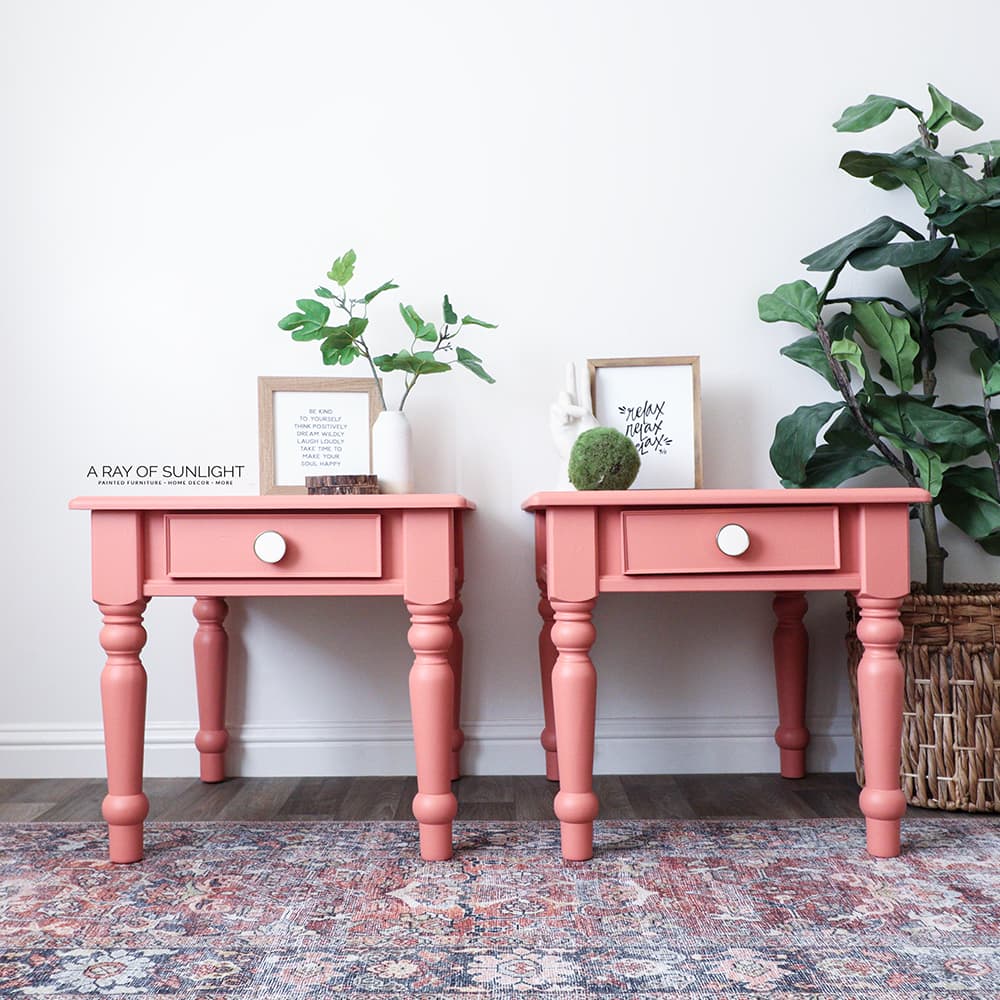
Here’s what it looks like now! These cute peach chalk painted tables are going to be so much fun for someone! What do you think of the color and the hardware? Get more tips on how to paint end tables here.
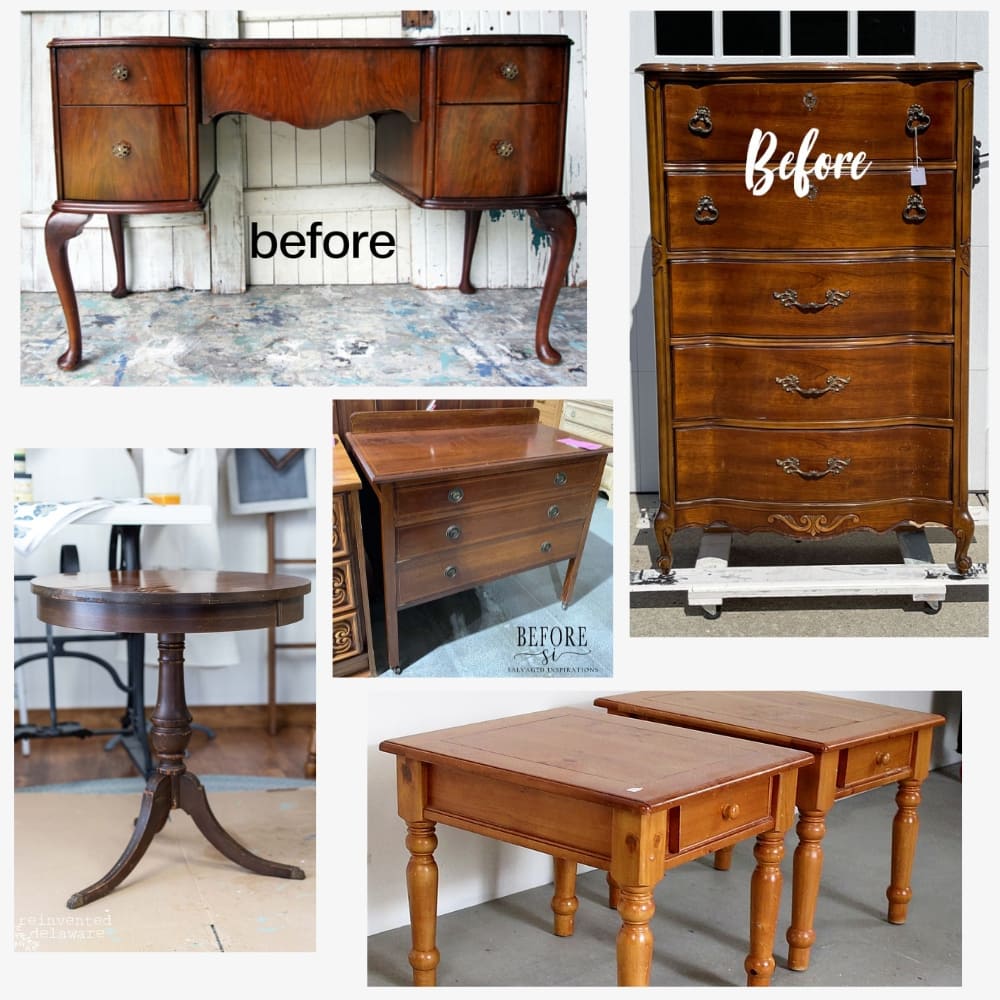
More Before and After Makeovers
See All >
Click any of these “before” photos below to view the “after” of that makeover.


Pink is a similar color – you can also try out these pink chalk painted furniture ideas! For more color inspiration, check out these nightstand color ideas. You can also update your pieces with these end table refinishing ideas!
Now, without further ado, it’s time for some fun!
Enter the $250 Dixie Belle Giveaway here!
a Rafflecopter giveawayVisit these other furniture makeovers for 4 more chances to win the $250 Dixie Belle Giveaway!


Chalk Painted End Tables
A step-by-step guide to transforming dull furniture into vibrant, chalk painted end tables using a paint sprayer and Dixie Belle paint.
Materials
Tools
Instructions
- Prepare the tables by cleaning and sanding the tops to remove the scratches. Remove the dust.
- Apply clear shellac and let it dry overnight.
- Thin the chalk paint with 20% water and mix thoroughly. Using a sprayer, apply the paint to the tables and let it dry.
- Fill any visible cracks with wood filler and sand to a smooth finish. Remove the dust again.
- Apply a second coat of paint for full coverage.
- Apply 3 coats of topcoat using the sprayer and allow it to dry between coats. Use a paint brush to brush out drips if needed, before each coat of topcoat dries.
- Attach new knobs to finish off your freshly chalk painted end tables.
Recommended Products
As an Amazon Associate and member of other affiliate programs, I earn from qualifying purchases.


More end Table makeovers
- Redoing End Tables
- Gray Chalk Painted End Tables
- Painting Wood End Tables
- The End Table Makeover
- Hexagon End Table Makeover
Follow us on YouTube to get more tips for painting furniture. Or share your project with us on our Facebook Group and be part of our community. See you there!
Beautiful work!
Perfect for a girls room!!
Love the color!
I love Dixie Belle products! I use White Lightning and Dixie Belle Mud in most all of my furniture fix ups!
I love the color of peach! So happy!
I appreciate the small tips you give as you explain the process.
Nice little update!
It’s always something, right? glad you figured out what the problem was. I have a Wagner sprayer but I’ve never used it! Now, although this color isn’t for ME in MY house, I do like it and I think those tables look fabulous. Good job! I’m really liking the Cottage Colors, but I need some White Lightening and Gator Hyde….
Loving the colour so fresh looking against the white and green for the staging
So cute. I love them.
So cute! I think they’d look great in a little girl’s room.