How to Apply Furniture Transfers
Want to add floral designs to your painted furniture without all the hassle of actually painting?? Check out how to apply furniture transfers – it’s super easy, can completely transform any piece, and there are so many different designs and styles to choose from!
It’s also one of the painting techniques for furniture that doesn’t require any artistic skills or special tools. So, keep reading to learn the step by step process and start creating beautiful, unique pieces for your home!
Most DIYers shy away from previously painted pieces for fear of the unknown. With a little patience and some creativity, you can turn it into a multi layered, one of a kind gem!
If you’re looking for a quicker and easier way to add some personality to your pieces, furniture transfers are the perfect solution. They allow you to easily add designs and patterns to any piece without having to draw them yourself.

Plus, these come in a wide variety of styles and colors – from vintage florals to modern geometric shapes – so you can find the perfect one to match your personal style and home decor. You can even mix and match them to create your own unique look.
And applying furniture transfers is a simple and straightforward process that anyone can do, even if you’re a beginner. So, let’s dive into the steps and learn how to do it yourself!

Supplies Used to Apply Furniture Transfers
As an Amazon Associate, I earn from qualifying purchases. I also may earn from other qualifying purchases with other companies or get free product to review and use. All opinions are my own.
- TSP Substitute Cleaner
- Blue Shop Towels
- Electric Sander
- 150 Grit Sandpaper
- Green Chalk Paint
- Blue Chalk Paint (Seaside by Mudpaint)
- 220 Grit Sandpaper
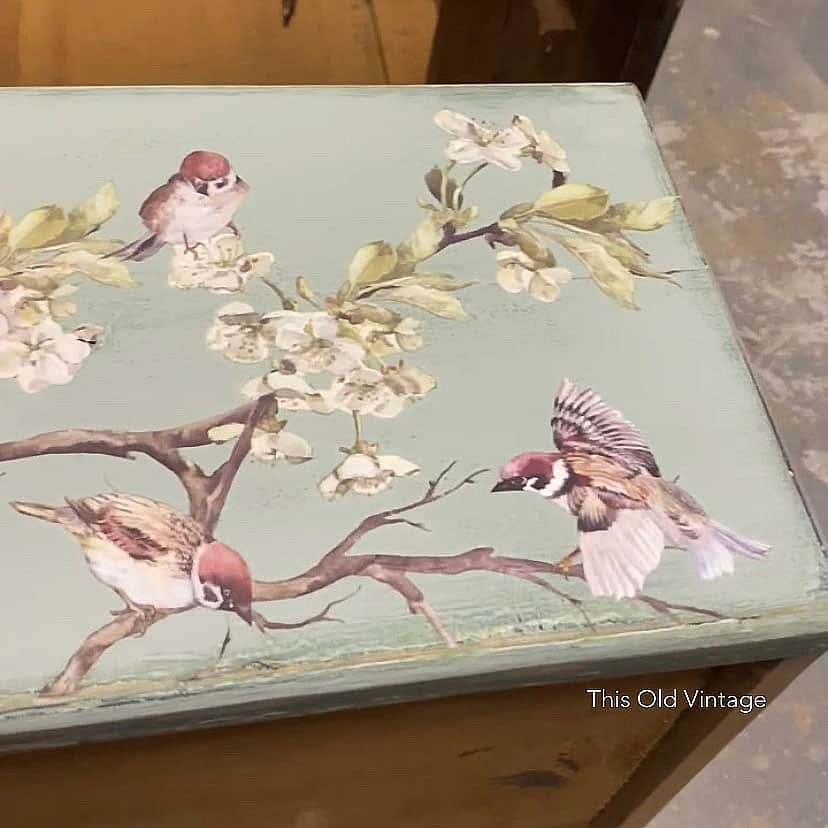
- Redesign by Prima Furniture Transfer (Blossom Flight)
- General Finishes Flat Topcoat
- 2 Rustic Black Handles (Menard’s)
- Furniture Salve (Wise Owl Citrus Mint)
Grab our list of 10 best painting furniture supplies, too!
Prep Before Applying Furniture Transfers
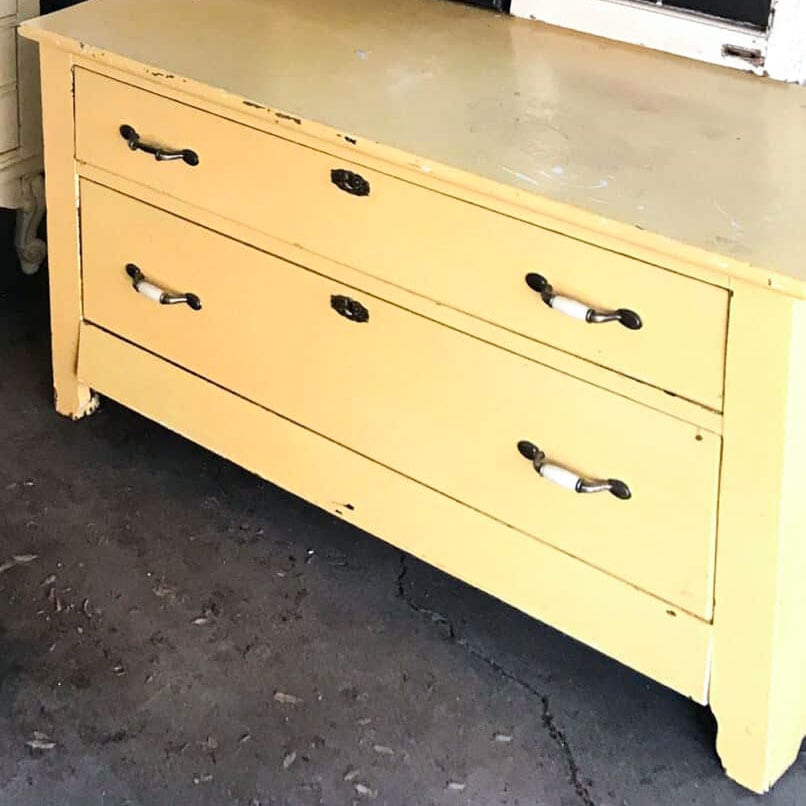
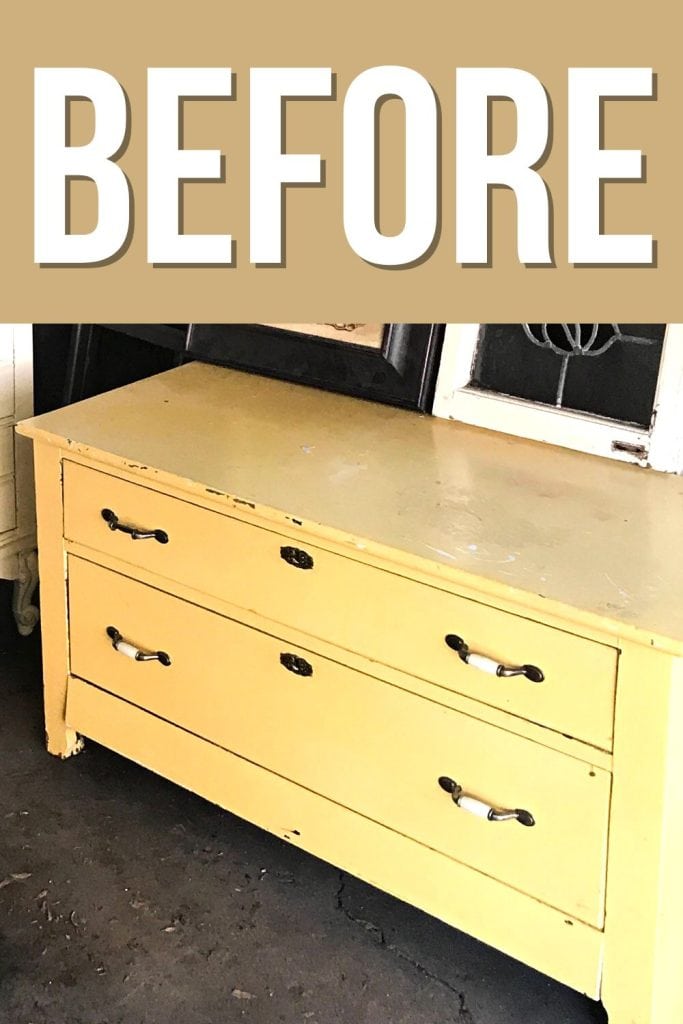
Since I found this yellow beauty at the curb, I cleaned it very well with the TSP substitute. Learn more about how to clean furniture before painting here.
Then I had at it with my fancy sander. I used 150 grit sandpaper because I needed to break through the yellow layer and expose some of the wood. Learn all about the best sanders for furniture here! Now we are ready for a new layer of color! Check out how to prepare furniture for painting for more tips.
Paint and Distress Furniture
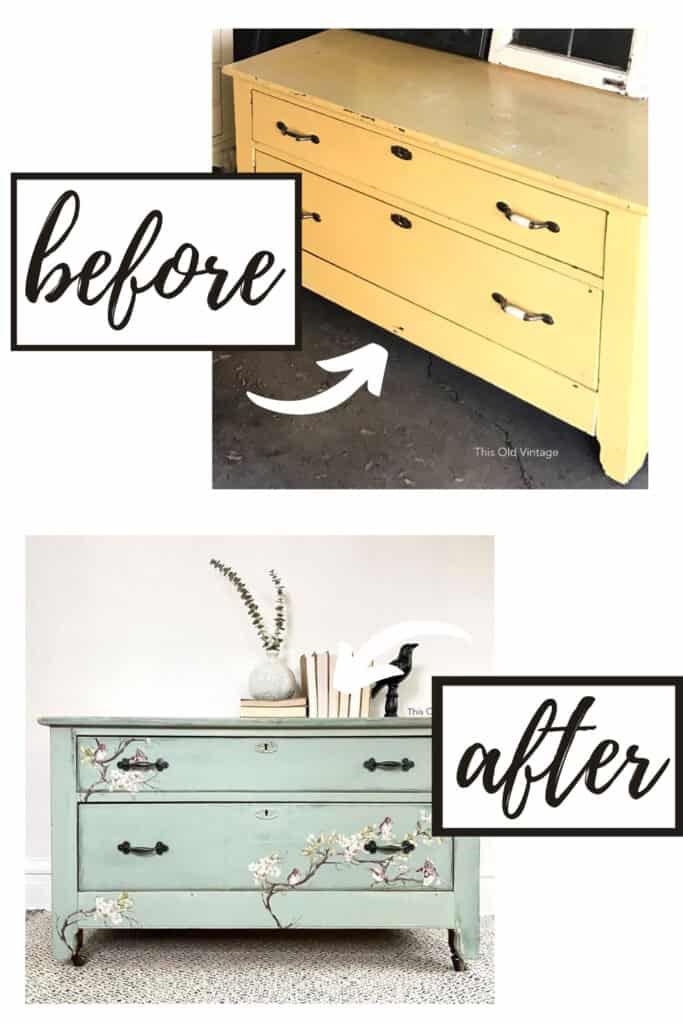
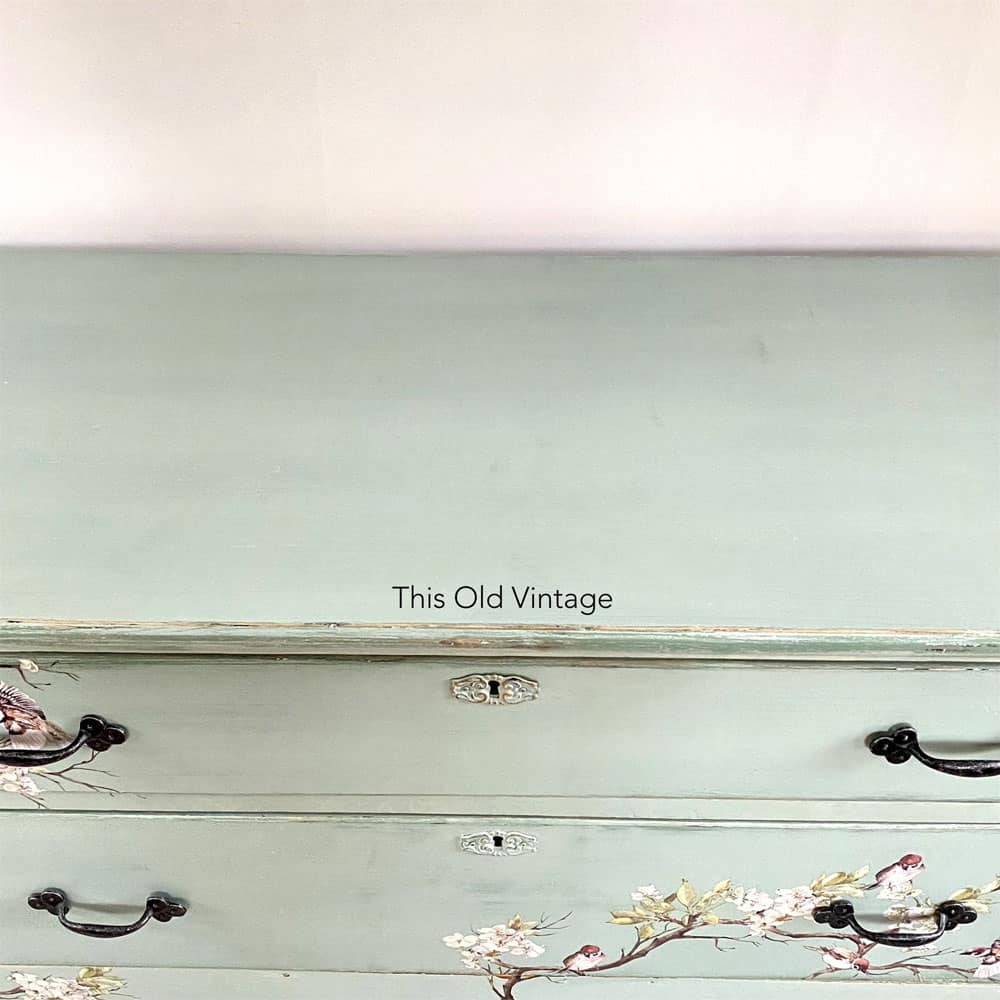
I applied a coat of leftover green chalk paint and let that dry for about an hour.

I was going to stencil a portion of this, so I made a couple of sections white…but then changed my mind on the stenciling. So next, I applied a blue green layer using Mudpaint called “Seaside“.
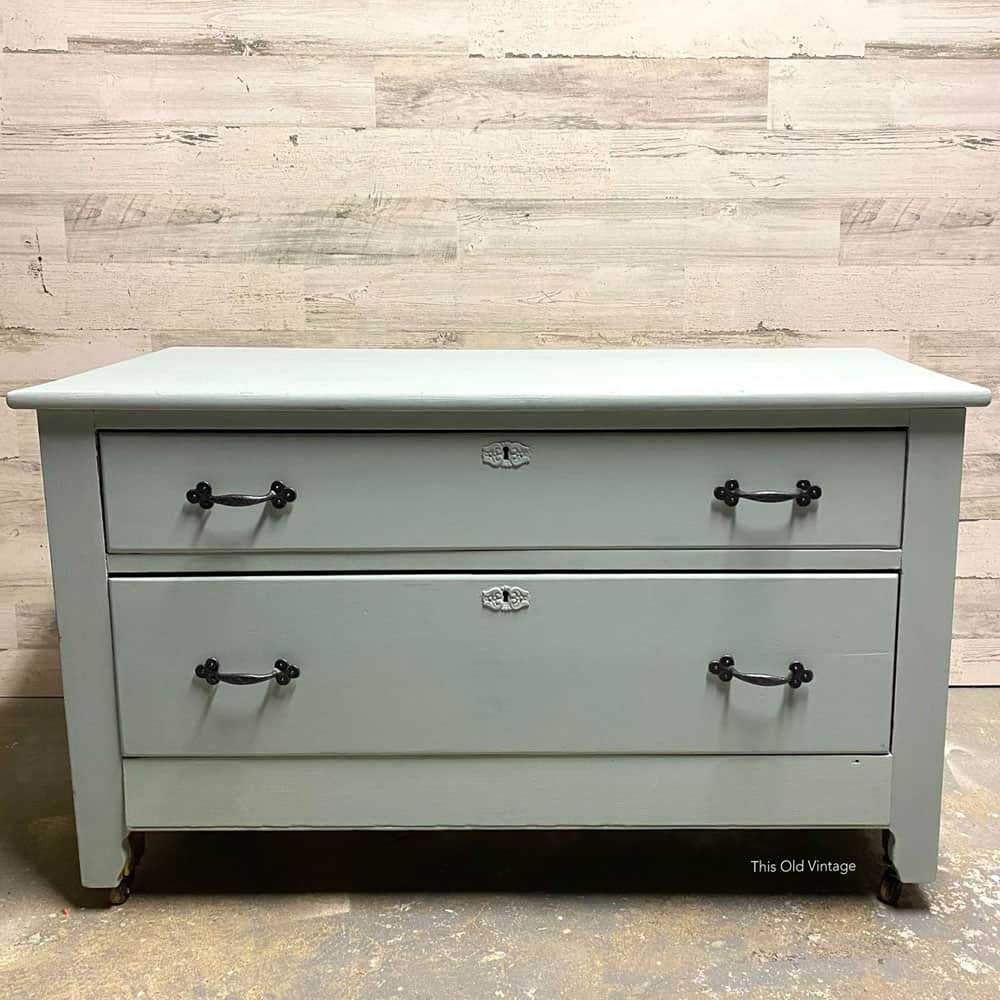
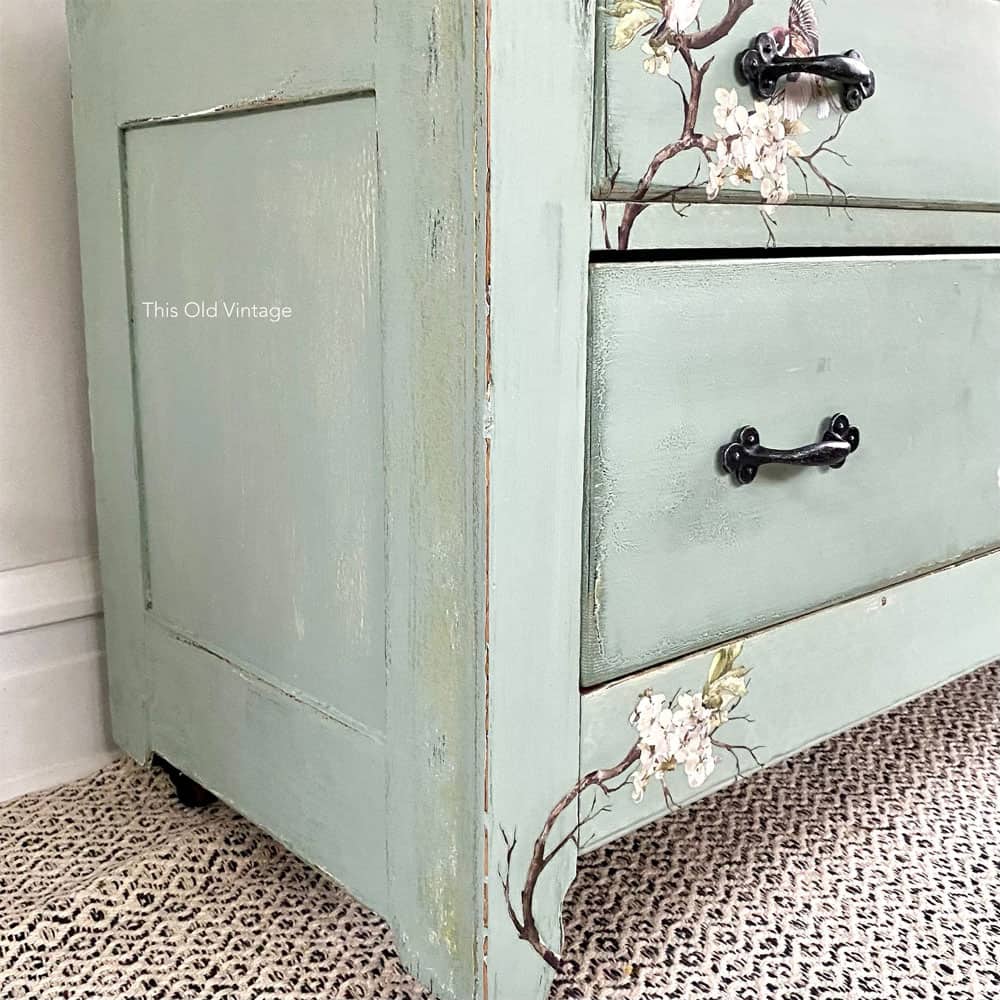
After another hour of dry time, I was ready to distress. With my fancy sander in hand and 220 grit sandpaper, it was so easy to gently distress the blue down to the green, and with just a bit more pressure, I was able to get to the “original” yellow in spots.
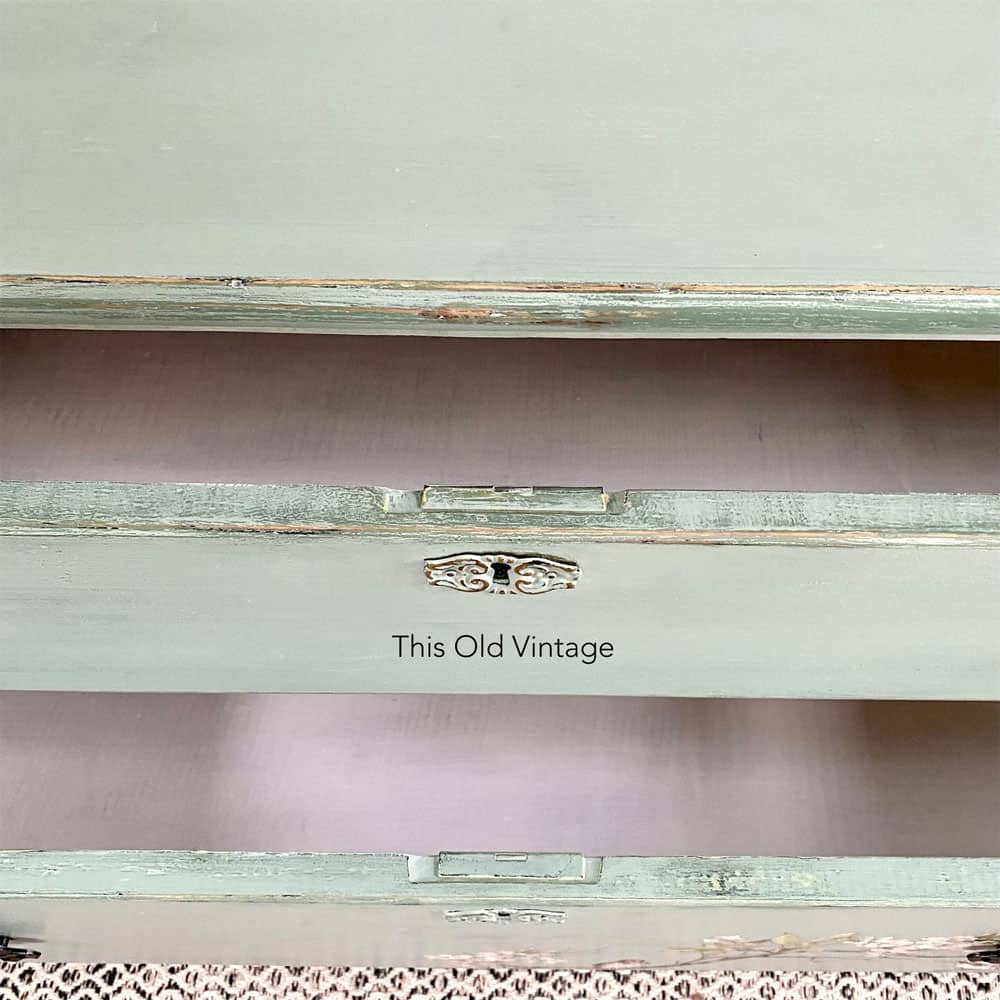
Learn the 6 best distressing furniture techniques here, including sanding. Get more tips on how to distress chalk paint in this post.
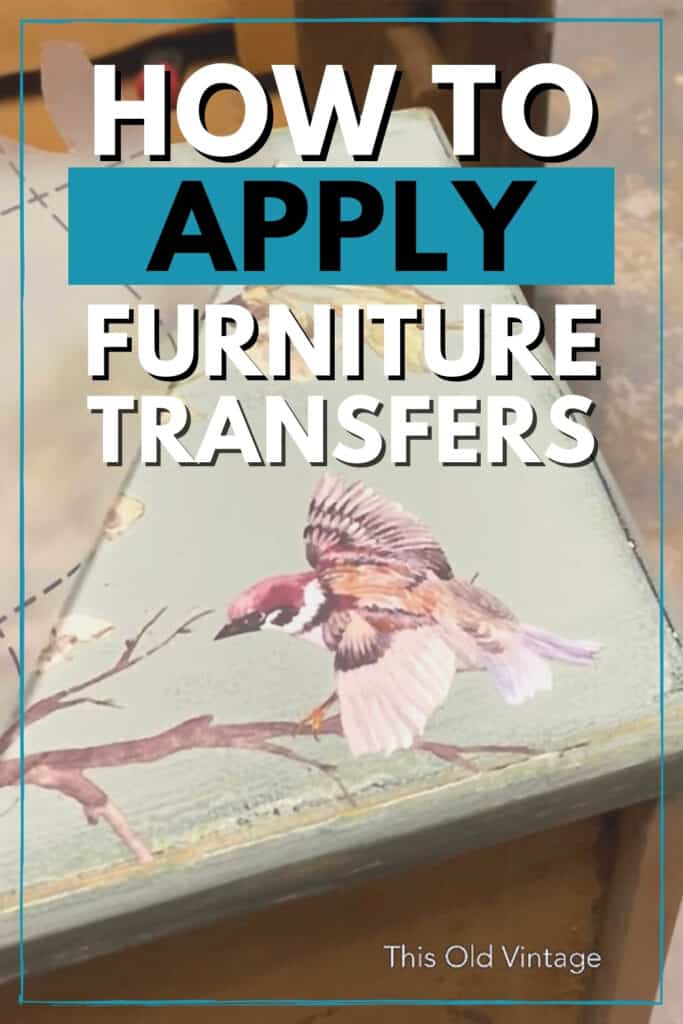
How to Apply Furniture Transfer
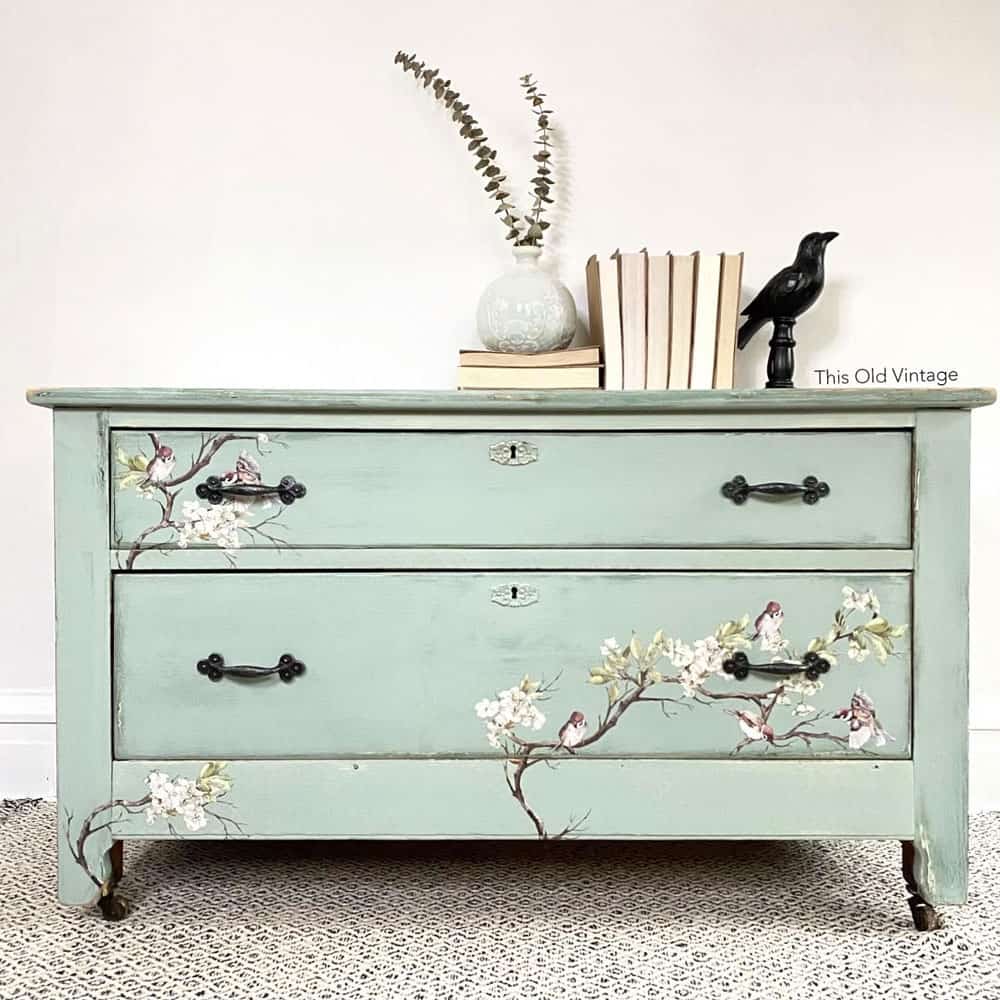
The hardest part of adding a furniture transfer will be deciding just where to put it and how much or how little of it to use. My personal preference is to use them sparingly, but I’m not sure if I followed my own advice with this little lady because the birdies are definitely the star of the show!
Since I already used my sander to distress this piece all over, it was very smooth and ready. I decided on opposing ends for my placement. I cut out the sections I wanted and pulled off the backing and then immediately placed it onto the dresser.
Important to note: Once you place it down, you cannot readjust it, it’s already begun to adhere.
Also, after removing the backing, take care not to let the design touch itself…because it will stick together. Then using the supplied wedge tool, start lightly rubbing it on.
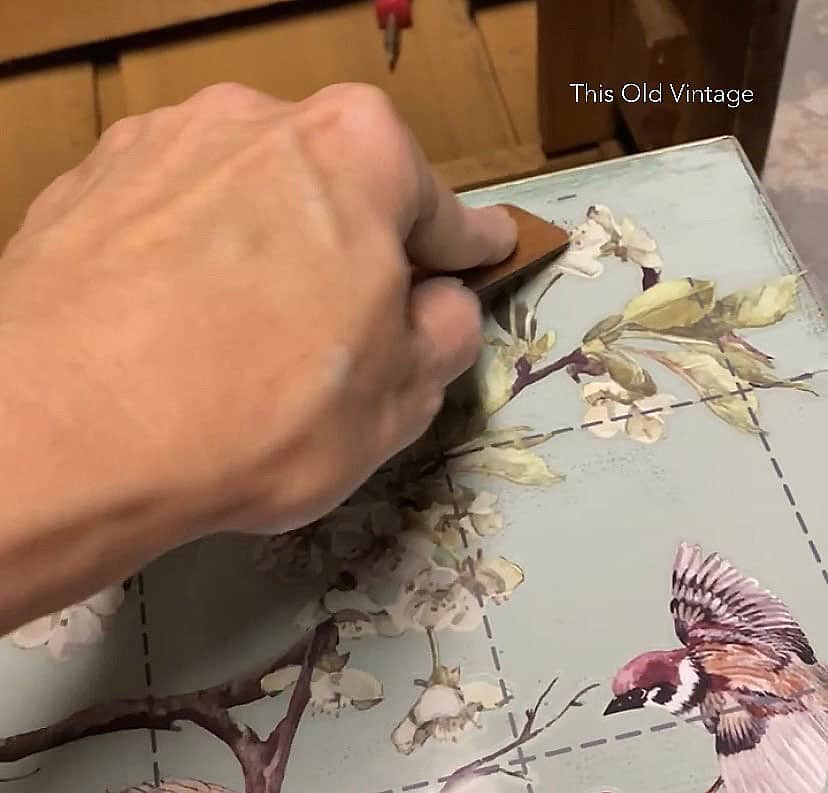
If you think you’ve got it, you can start to pull the clear sheet, and your design should stick to the piece. But if you’ve missed a spot and it didn’t get rubbed onto the surface, simply lay it back down and try again. It usually takes a good couple of minutes to rub it on completely.
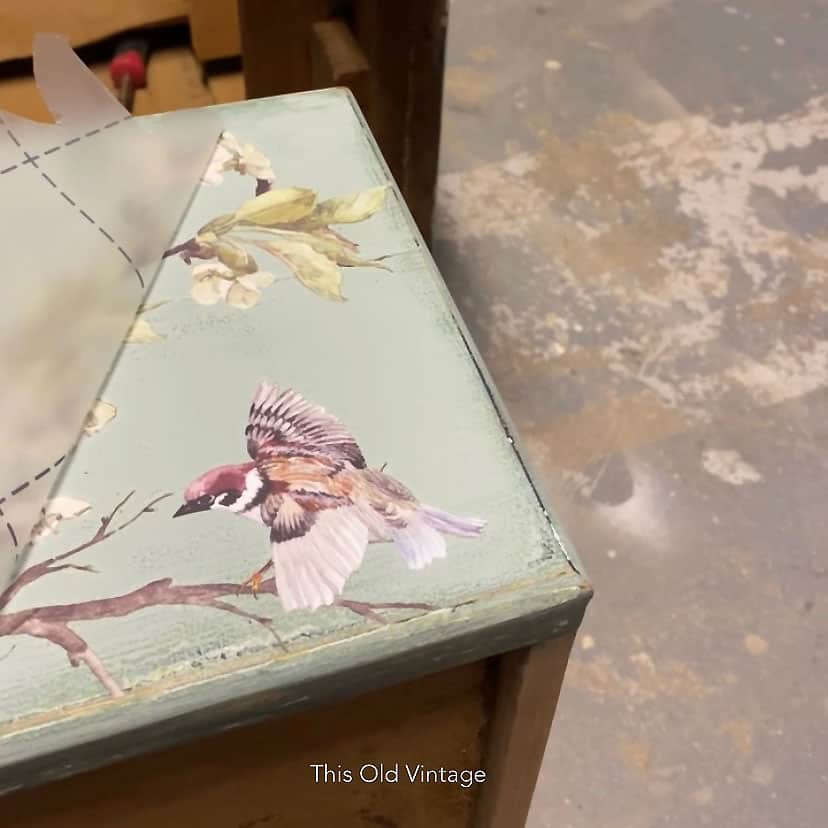
Once you have finished this step, take a piece of the backing and kind of rub that all over the design as if you’re rubbing it in again. This step is called “burnishing”. You’re just making sure that the edges have completely adhered.
Would you like to save this?
For a similar project, check out this easy DIY teal dresser with floral transfer. Now, you are ready for your topcoat.
Topcoat After Applying Furniture Transfers
I like to have dedicated brushes for just top coating. One of my favorite brushes to use for this task is the Zibra fan brush. And since I am only using it for clear finishing, it always stays nice and clean. Check out more best paint brushes for painting furniture here.
I used General Finishes High Performance Topcoat in their Flat finish and I waited the recommended time between my two coats. Learn more about topcoats for painting furniture here.
Now, we were ready to add the new handles.


Add New Hardware
When I spotted these handles at Menards, I instantly fell in love with them and bought about 30 in total! It’s always so much easier to use the existing holes from the original handles, and that’s exactly what I did here.
Sometimes the center spacing isn’t the most common size, so then you’ll have to hunt on Amazon since they have everything.
Refresh Furniture Interior
Now it’s time to moisturize the drawer bottoms and the interior of the cabinet. For this, I used Wise Owl’s furniture salve. It is an oil based product and is available in a multitude of fresh scents.
I dip a thick wax brush right into the can and rub it into the dry wood surface. It will bring back the dryest, most dull wood right back to life.
I also add this to the bottom of the drawers to help them glide better. This is not like a traditional wax – no need to wipe it off. Just think of it as applying moisturizing lotion to your skin.
So now you can see this sweet little lady in all her glory. Don’t you just love those birdies? Get more floral painted furniture ideas here. And get more creative ideas for transforming your plain dresser with these fun dresser paint ideas!
More Before and After Makeovers
See All >
Click any of these “before” photos below to view the “after” of that makeover.


Furniture Transfer Ideas
As we mentioned, there are many styles you can choose to use. You can go for a more subtle look, or you can go all out. If you’re unsure about using a large design, you can start small and then work your way up from there.
One fun idea is to use multiple smaller designs instead of a large one. This allows you to create your own pattern and adds more visual interest to the piece. You can also layer different designs on top of each other.
But you also don’t want it to look too busy or messy, as that could ruin the final look. So, choose a design that complements the overall aesthetic of your piece. For example, if you have a more traditional looking dresser, some vintage flowers could really bring out its classic charm.
Be sure about the placement before sticking it on. You don’t want the hassle of peeling it off and redoing it. Take your time, play around with different spots, and pick the one you like best before committing.
You could also try applying it in unexpected spots, like the sides or back of a dresser. It’s a fun way to add a surprise element and make the piece unique. For inside your drawers, you can try these dresser drawer liner ideas, too.
This makeover was created by our guest, Donna! “Hi, my name is Donna and I am the artist behind This Old Vintage. There’s not much more I love than finding a forgotten piece of furniture and transforming it into something you can proudly display in your home for years to come. When I’m not tending to my daughter, our dog, or our bird, you’ll find me in the basement sanding, priming, or painting something wonderful. I’m not an expert but I am learning every day and am enjoying the journey.”
Go check out this piece on my Instagram and Facebook Page and give us a Like/Follow to see what’s next!


How to Apply Furniture Transfers
Want to paint floral designs on your painted furniture, without all the hassle of actually painting?? Here's how to apply furniture transfers.
Materials
- TSP Substitute Cleaner
- Blue Shop Towels
- 150 Grit Sandpaper
- Green Chalk Paint
- Blue Chalk Paint
- 220 Grit Sandpaper
- Redesign by Prima Furniture Transfer (Blossom Flight)
- General Finishes Flat Topcoat
- 2 Rustic Black Handles (Menard's)
- Furniture Salve (Wise Owl Citrus Mint)
Tools
Instructions
- Prep your furniture by cleaning it very well with the TSP substitute. Sand with 150 grit sandpaper to break through the existing paint and expose some of the wood.
- Apply a few coats of paint. After the paint dries, heavily distress and sand smooth with 220 grit sandpaper to reveal different layers.
- Apply furniture transfer by pulling off the backing and then immediately placing it onto the furniture. Rub it on lightly with the supplied wedge tool. If you think you’ve got it, you can start to pull the clear sheet and your design should stick to the piece. But if you’ve missed a spot and it didn’t get rubbed onto the furniture, simply lay it back down and try again.
- Now, seal the paint and furniture transfer with 2 coats of topcoat.
- Add new hardware to the furniture then refresh the furniture interior by brushing on furniture salve.
Recommended Products
As an Amazon Associate and member of other affiliate programs, I earn from qualifying purchases.


More Adding Design to Furniture Makeovers
- How to Stencil Painted Furniture
- Stenciling Furniture
- How to Stencil Without Bleeding
- How to Paint Stripes on a Wall Without Bleeding
Follow us on YouTube to get more tips for painting furniture. Or share your project with us on our Facebook Group and be part of our community. See you there!