Painted Sewing Machine Table

If you’re a fan of DIY projects, then you’re in for a treat! In this blog post, we’ll be sharing our experience and one of the best painted furniture ideas for transforming a thrift store find into this painted sewing machine table with the help of Rethunk Junk paint.
From dingy and worn out to a beautifully refurbished piece, this project was both satisfying and cost effective. So, come along and find out how we gave it a new life!
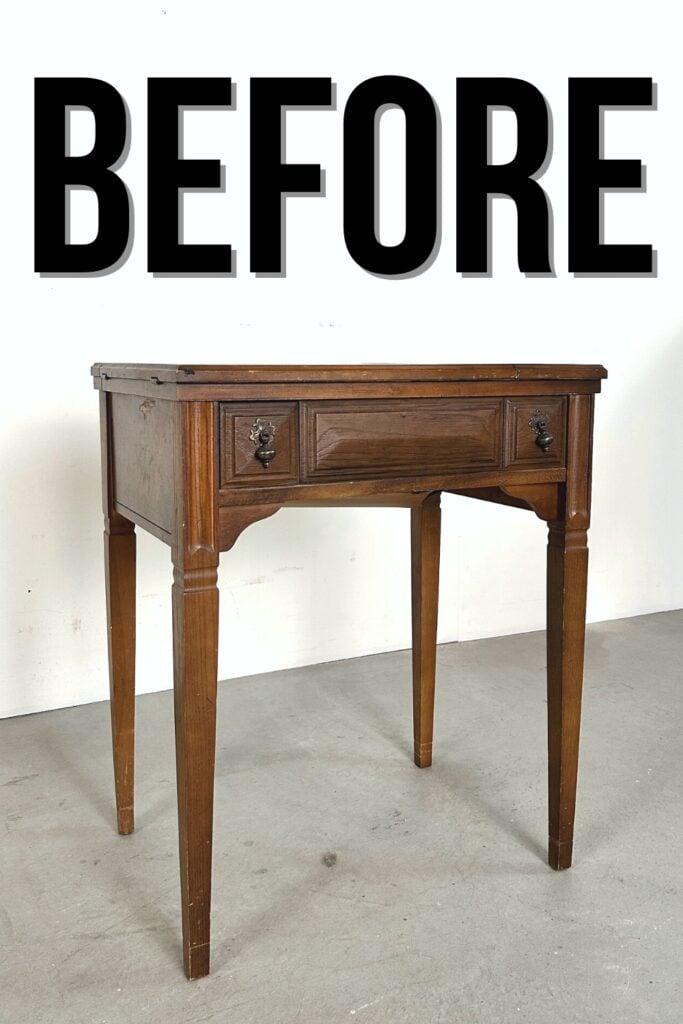
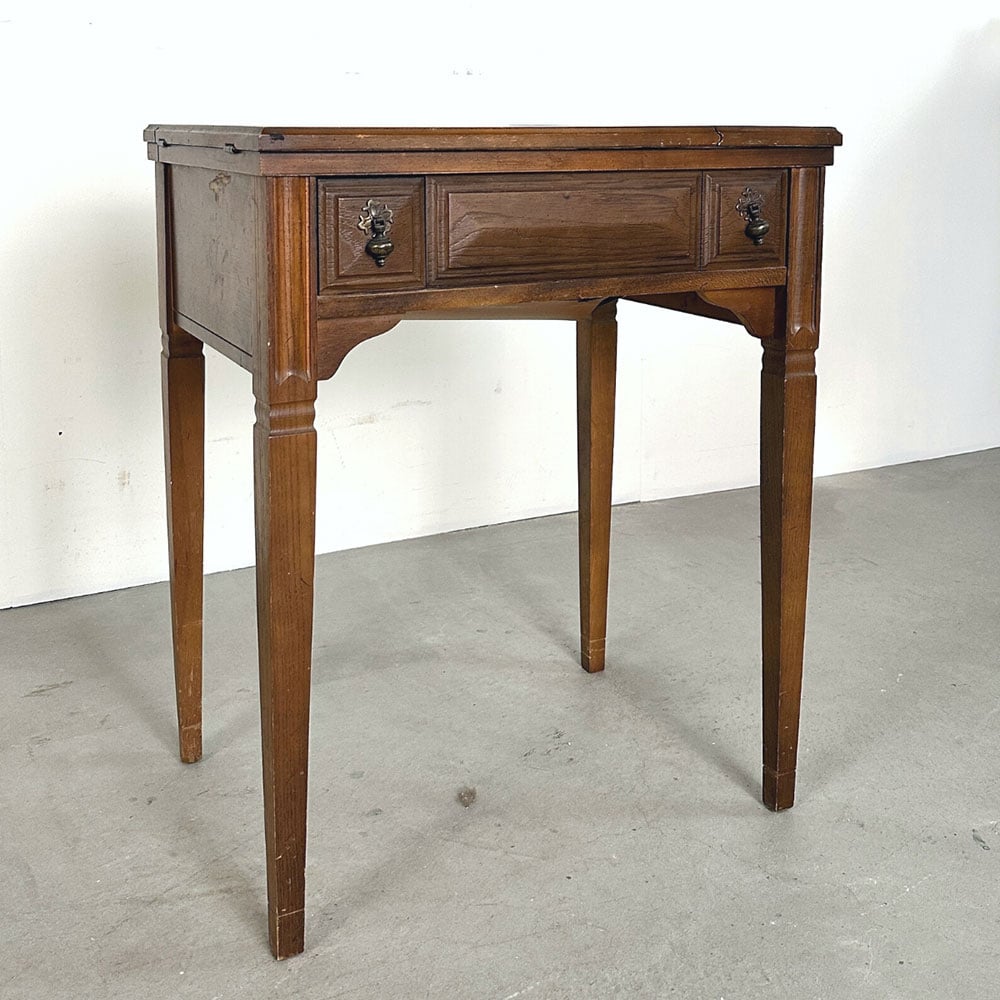
Above is what the table looked like before. It actually had a working sewing machine in it, and I decided to leave it inside this time around. It was a promising thrift find but definitely needed some TLC.

Painting this old piece is a fun little project, so I decided to try something new with this one. Many people from our Facebook audience have told me to try Rethunk Junk Paint, and so I finally tried it out on this project.
If you have your own sewing table that needs a makeover, or you want to see how Rethunk Junk performs first before you give it a go, then let’s dive into this project together! Here’s how it all went down.

Supplies Used for Painted Sewing Machine Table
As an Amazon Associate, I earn from qualifying purchases. I also may earn from other qualifying purchases with other companies or get free product to review and use. All opinions are my own.
- Electric Screwdriver
- Tin Foil
- Painters Tape
- Rethunk Junk Prep Cleaner
- An Old Rag
- Rethunk Junk Paint in Wildberry
- Zibra Round Paintbrush
- Fine Grit Pro Foam Pad (Use code RAY10 to get 10% off your order)
- Tack Cloth
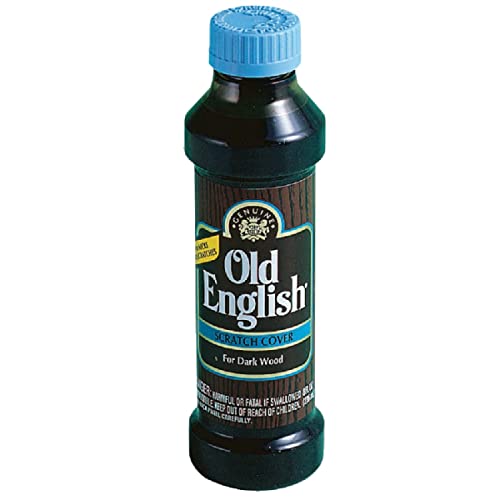
- Old English
- Bar Keepers Friend
Find out what my top 10 best painting furniture supplies you must have here.
Prep Wood Sewing Machine Table
This was a pretty simple makeover. We unscrewed the 2 pieces of hardware… one was attached inside a little drawer, and the other inside of the table.
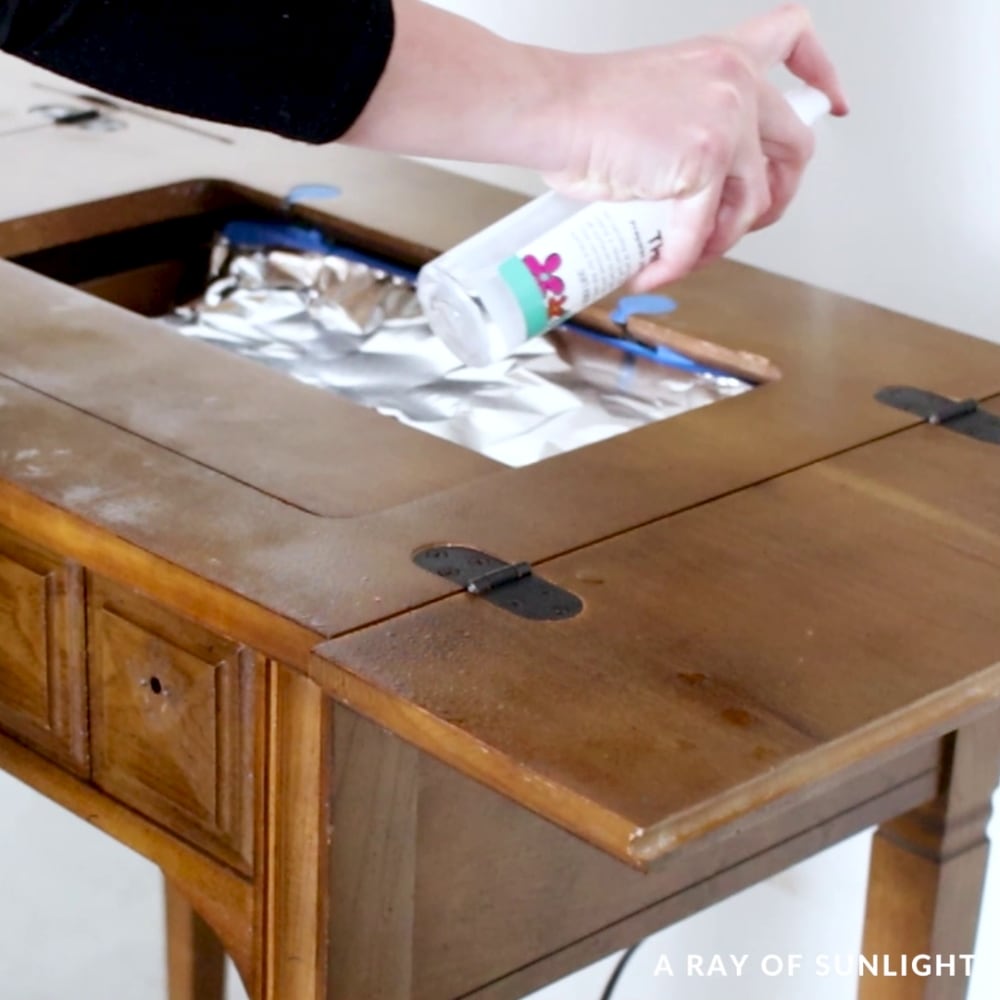
And then I covered the sewing machine with some tin foil so I wouldn’t accidentally get coating on it. I thought I would paint this inside part, so I also taped off the hinges so I wouldn’t have to remove them.
So Rethunk Junk says to clean the piece with The Prep cleaner first. So, I sprayed The Prep all over, letting it sit for a minute or two before I wiped it all down.
Honestly… I hated this little pump spray bottle. By the time I was done spraying this little desk down, my finger was so tired. Haha Next time I would totally put it in a better spray bottle instead. A few minutes later, the surface was all dry, so I got started with the new color.
Sewing Table Makeover with Rethunk Junk Paint
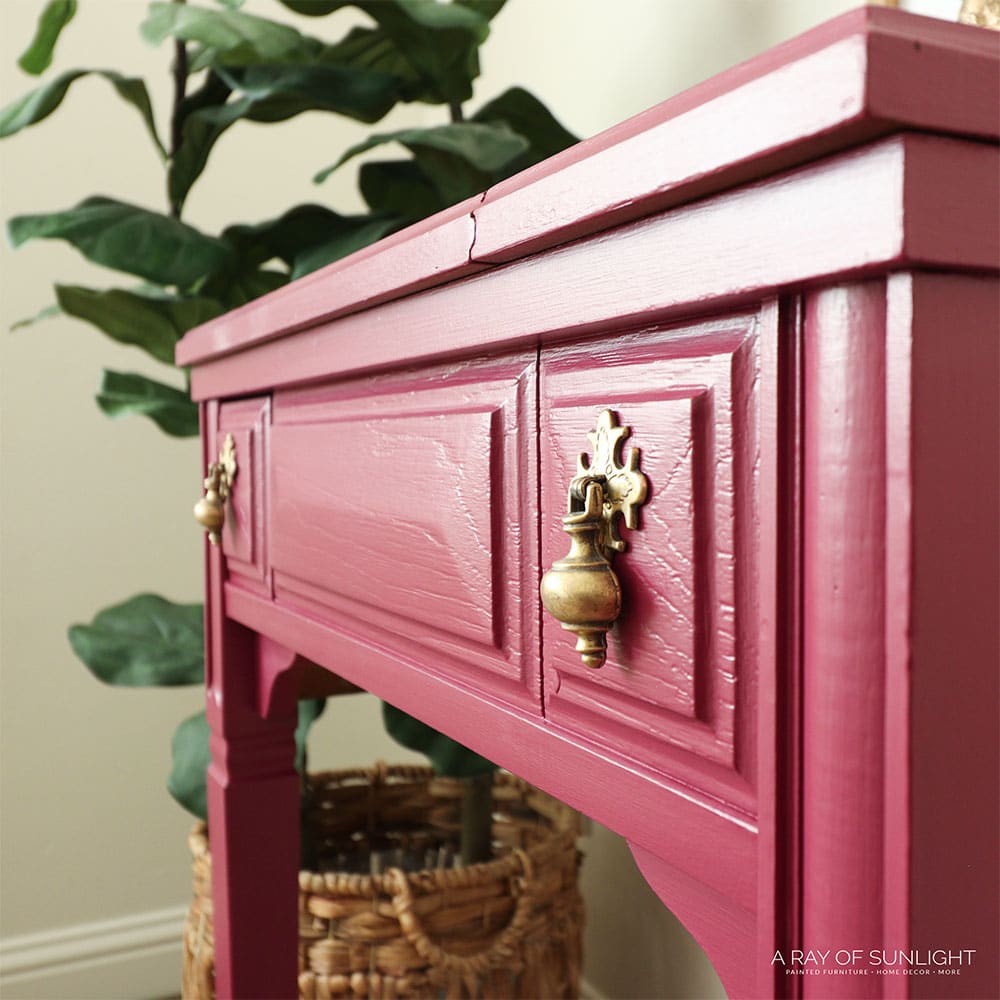
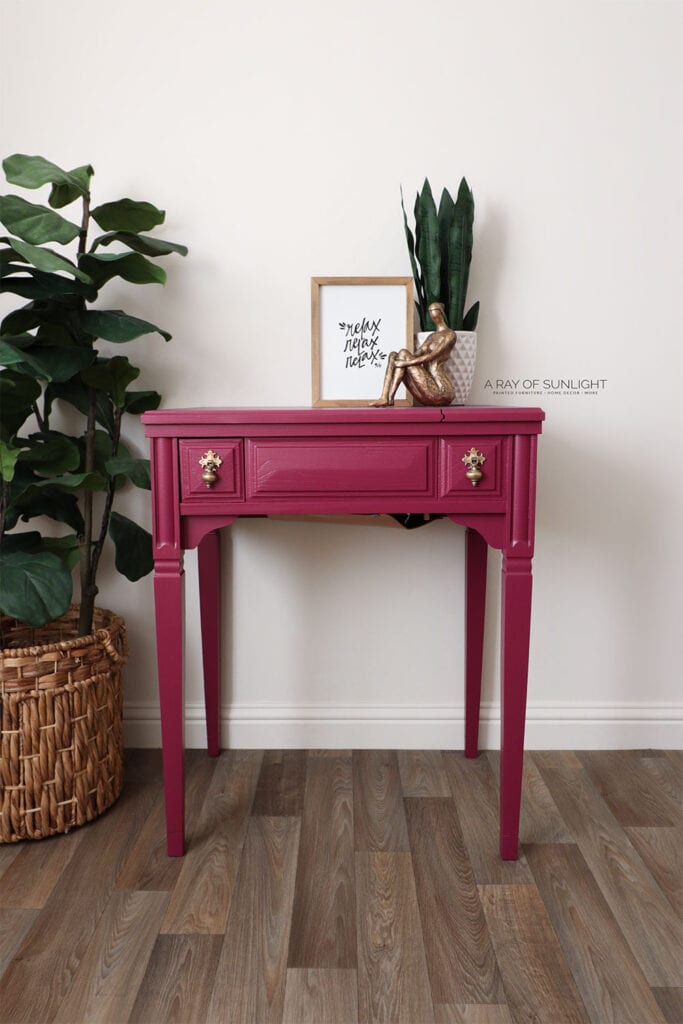
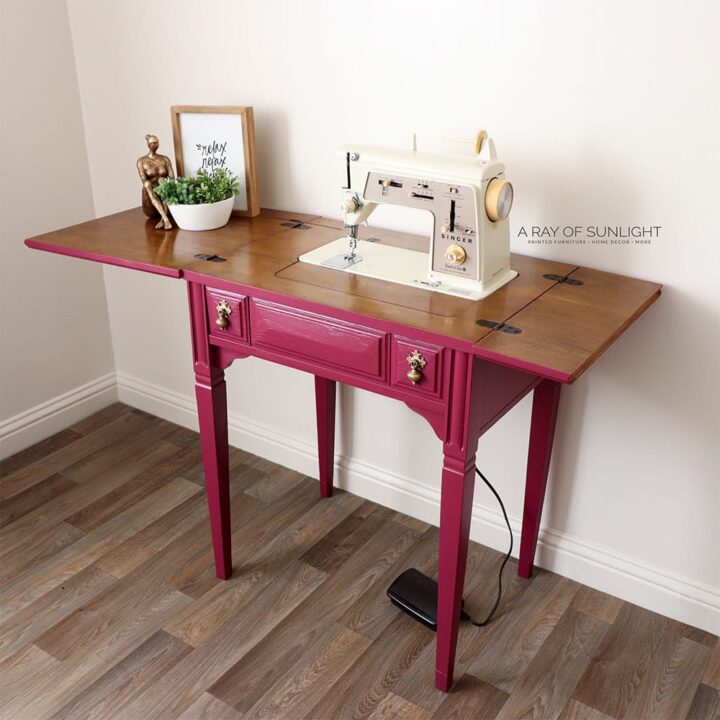
I used the color Wild Berry to make this a fun little statement piece. The consistency was great! But the coverage, that was another story. Honestly, I’m not surprised, though. These bold warm colors always have terrible coverage, no matter the brand.
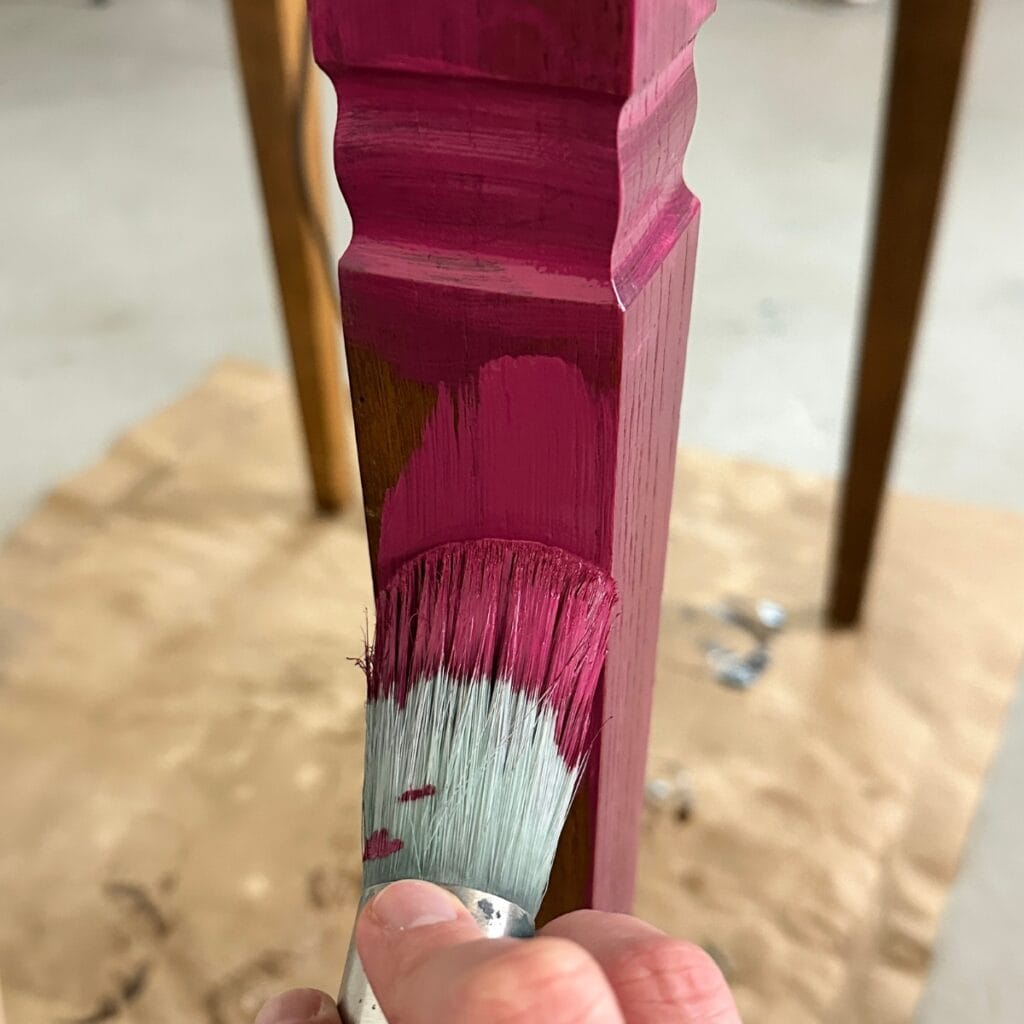
And I used a Zibra round brush, one of my favorites. The round brush made it easy to get the coating in all of the details on the laminate front, but it worked well on all of the flat surfaces, too. Check out more best paint brushes for painting furniture here.
It took me, what, 20 minutes for this little desk, and then I let it dry.
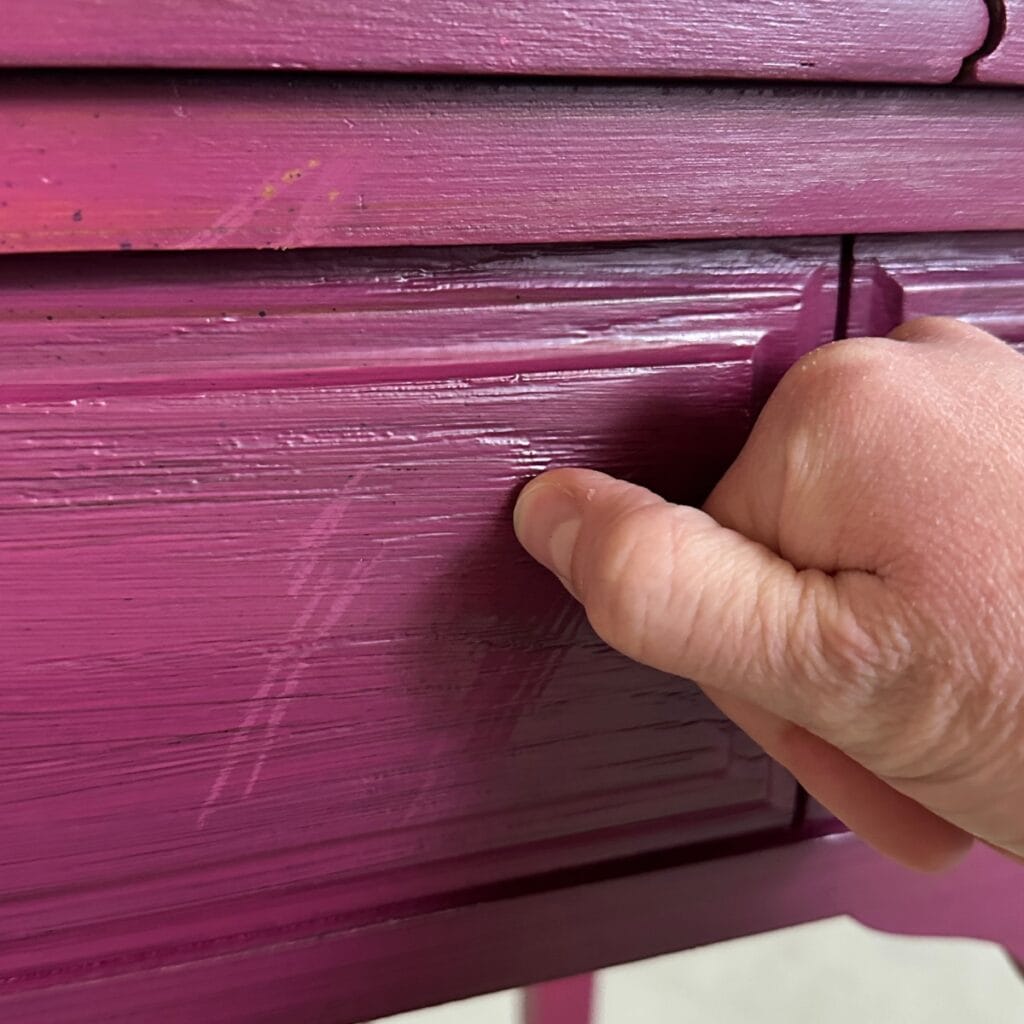
When I came back, I did a little scratch test, and it seemed to hold up really well, even on the plastic laminate front. So that’s awesome. And then, the finish felt a little gritty, so I sanded it all with a fine grit pro foam pad to remove that texture.
I wiped off the dust with a tack cloth, and then I applied another coat on… I ended up with 4 pink coats total to get full coverage. And unfortunately, the gritty texture was still there after each coat, so I had to keep sanding to remove that.
For the last coat, I just left it. It is what it is, and this desk will go to someone for cheap anyway. I let the piece dry for a couple of days, and then I worked on the finishing touches.
Rethunk Junk Paint Review
Overall, my experience with Rethunk Junk was a bit mixed. The color turned out beautifully, and I love the satin sheen it gives off, but again, I had to do more coats for full coverage. Every coat also left behind a gritty texture. You’ll just need to sand that down smoothly, but this adds extra work and time to the process.
It’s not self leveling, so there will be brush marks in the finish. They don’t leave as many marks as some other thick chalk paints, though. Get more tips on how to paint furniture without brush marks here.
When it comes to durability, it would be better to prep by sanding or priming the surface beforehand, then topcoating with waterbased polyurethane. Here’s a detailed guide on how to prepare furniture for painting you can follow! Learn all about sealing painted furniture here.
Check out our Rethunk Junk paint review here for more information on what to expect when you use this product.
Would you like to save this?
How to Refresh Old Wood
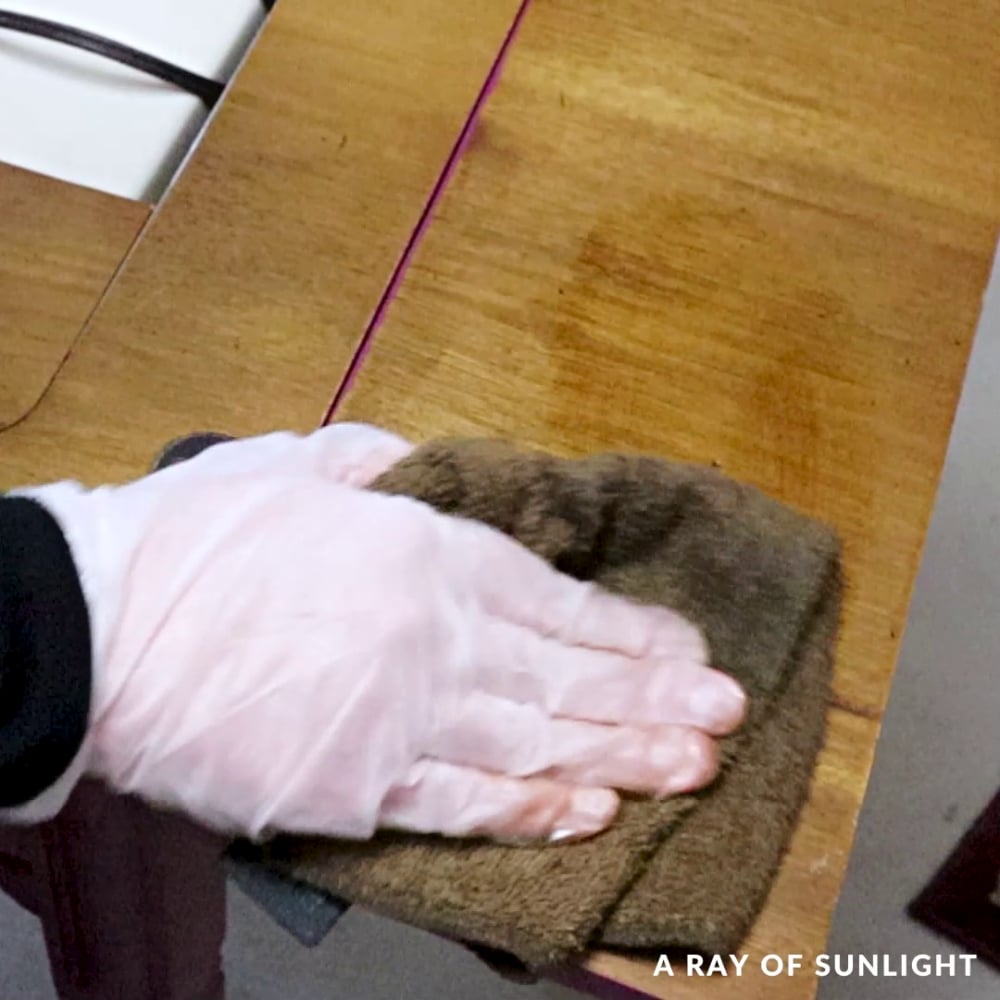
After that first pink coat, I taped off the inside so I could just leave it wood… whoever sews here will probably have needles that could scratch up the finish… wood would be better in here. Learn how to prevent paint bleed through painter’s tape here.
To freshen up the inside, I wipe on a light coat of Old English. It’s a dark, tinted oil that gives the finished wood a nice sheen, but it also soaks into scratches and darkens them, making the scratches blend in with the rest of the surface.
I have major memories of using this stuff as a kid to make the wood around our house look fresh. For more about this product, here’s what does Old English do to wood, and here’s our antique dresser makeover where we used it so you can see it in action.
If you’re looking to cover any damage, check out this wood stain repair tutorial. Another technique is to use gel stain – learn more about it on how to restain wood furniture here. But Old English is easy for very minimal scratches.
Learn more about the different methods of wood surface repair here, from basic scratch to more intensive refinishing.


Cleaning Old Hardware
Last, but not least, I polished the old hardware. I boiled it in water for a few minutes, and then I poured it into the sink to clean it… annnnnd one piece fell down into my garbage disposal. Ooops. So that was fun.
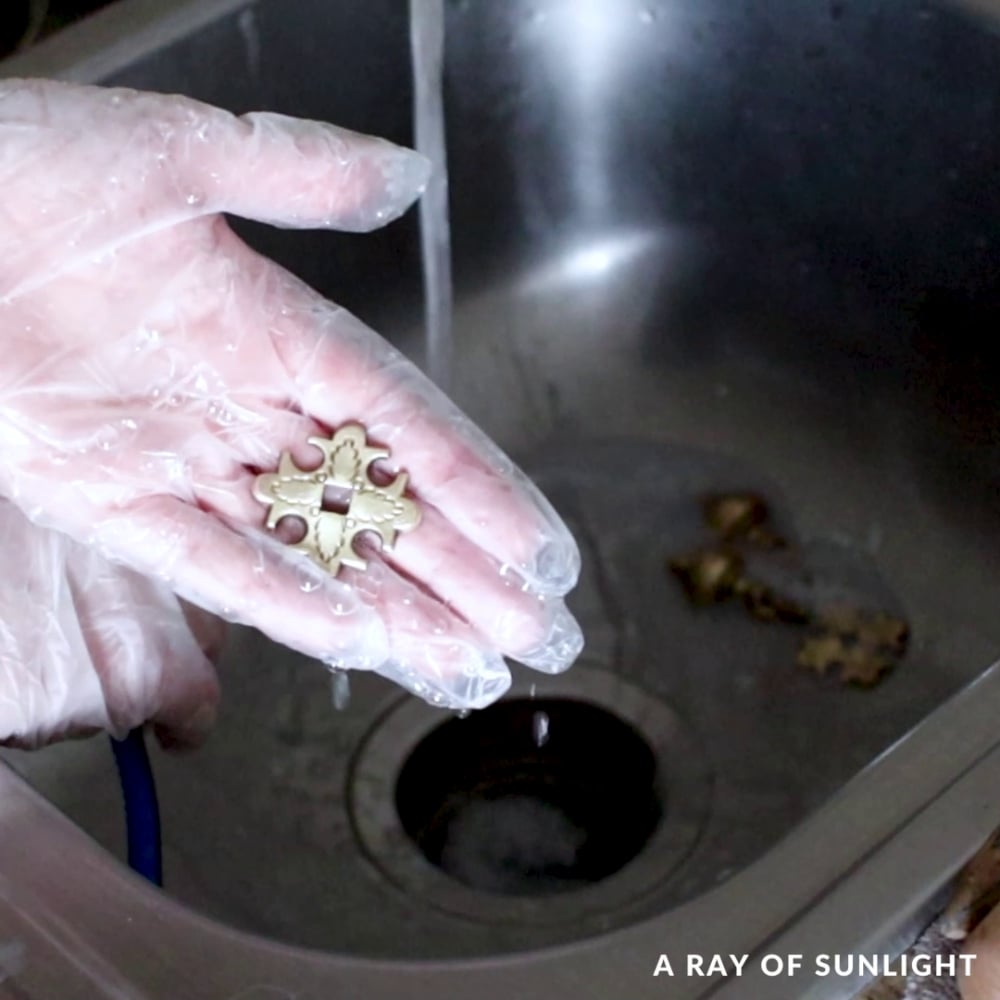
I ended up fishing it out with a pair of pliers. Thank goodness! And then I cleaned it with some Bar Keepers Friend. Look at how shiny they look now! I also used it on the hardware on this old trunk makeover. Here’s a more detailed guide on how to clean old furniture hardware.
Watch the full makeover in our YouTube video below, or scroll down to see the after photos!
More Before and After Makeovers
See All >
Click any of these “before” photos below to view the “after” of that makeover.


I love the pop of color!! I would have loved to have something like this when I was a teen! For similar makeovers, check out these old sewing machine table ideas.
If you want to use more vibrant and bold colors, check out these pink dresser ideas and purple painted furniture ideas. Or, if you love yellow, check out these yellow chalk painted furniture.
I hope someone will get to learn how to sew with this little piece… and let’s be honest, the sewing machine works well enough for someone to use it. Haha

Painting a Sewing Machine Table
Update your old sewing table with this painted sewing machine table makeover with the help of Rethunk Junk paint.
Materials
Instructions
- Remove the old hardware and cover the sewing machine with tin foil to protect it from paint.
- Clean the table with The Prep and an old rag. Spray The Prep all over, letting it sit for a minute or two before wiping it all down.
- Brush 2-4 coats of Rethunk Junk Paint onto the table, letting it dry between coats. Sand between coats if desired for a smoother finish.
- To freshen up the old scratched wood on the inside of the sewing table, wipe on a light coat of Old English.
- Clean the old hardware with Bar Keepers Friend then attach the hardware to your painted sewing machine table.
Recommended Products
As an Amazon Associate and member of other affiliate programs, I earn from qualifying purchases.


More Painted Furniture Makeovers
- Repurposed Sewing Machine Tables
- Repurposed Sewing Table
- Beyond Paint Review
- Modern Dresser TV Stand Makeover
- Painted Sewing Table With Silk All-in-One Mineral Paint
Follow us on YouTube to get more tips for painting furniture. Or share your project with us on our Facebook Group and be part of our community. See you there!
I love the way this turned out. I agree with you, I am not a fan of gritty paint either though. I think it would be cute as an entryway table too since I am not a sewer. The pops of the hardware turned out perfectly! Thanks for sharing with Whimsy Home Wednesday.
The sewing table makeover looks wonderful and I love the bold, fun color! Thanks for sharing at the #HomeMattersParty.