Repurposed Sewing Machine Tables


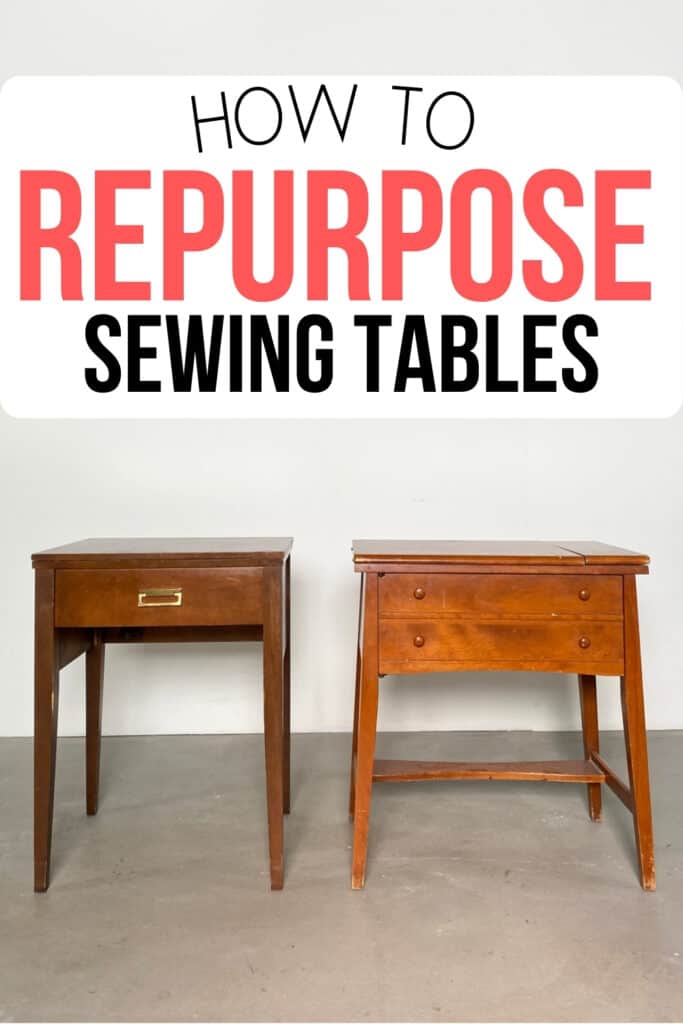
Old sewing machine tables are a dime a dozen at thrift stores! Don’t pass them by the next time you see them, and turn them into something new! These repurposed sewing machine tables can add a unique touch to your home decor and provide functionality at the same time.
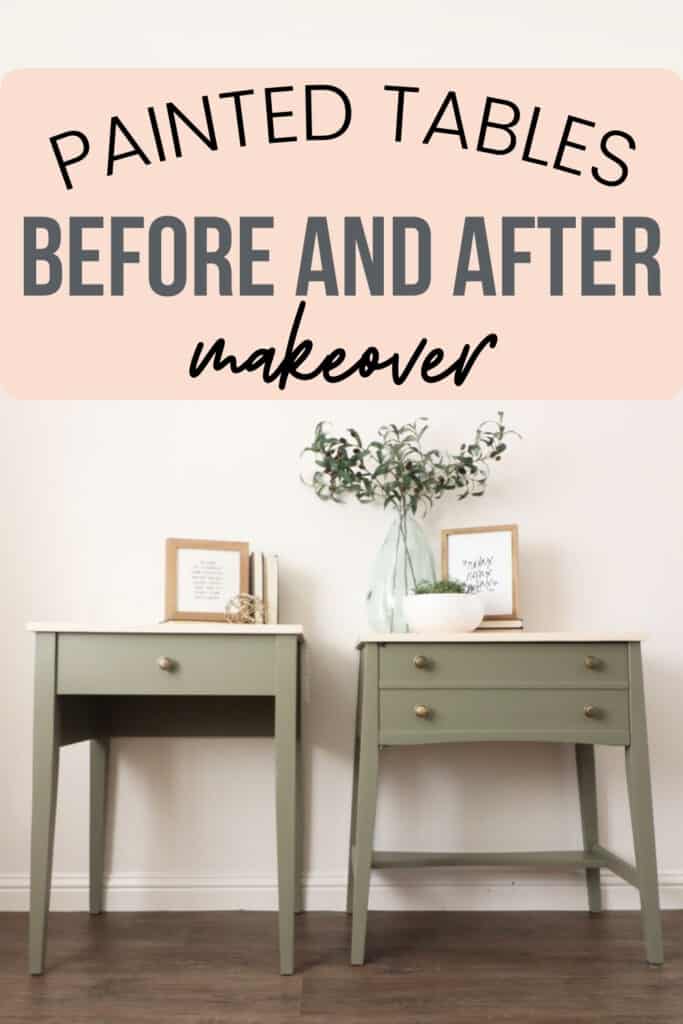
With these painted nightstands ideas, you can transform those tables into stylish and trendy nightstands. Not only will you save money by repurposing, but you’ll also have a one of a kind piece that shows off your personal style.
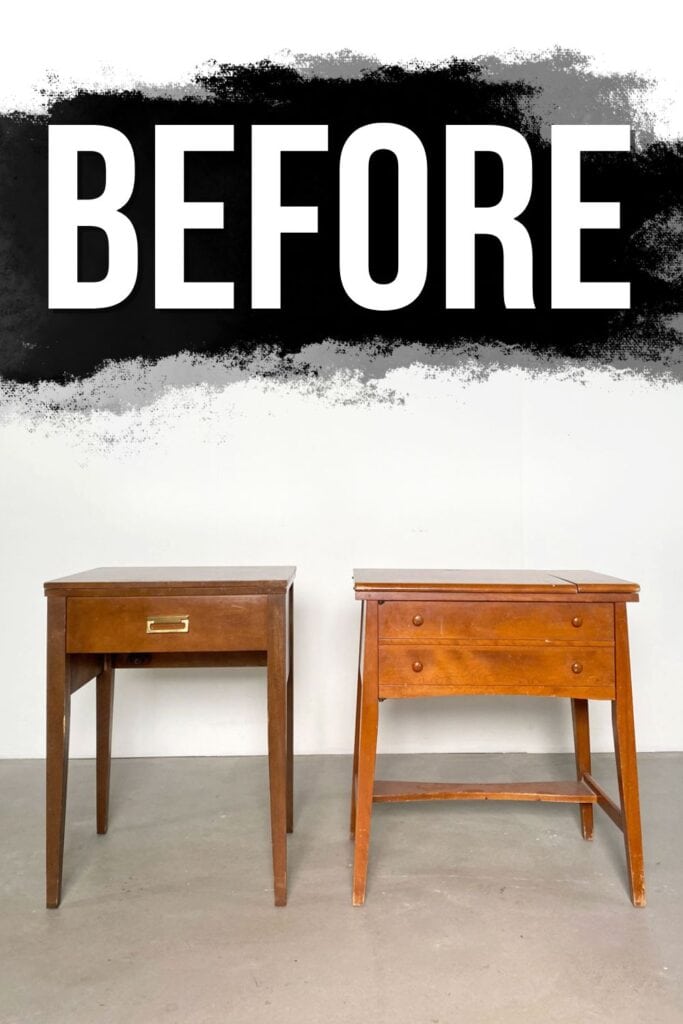
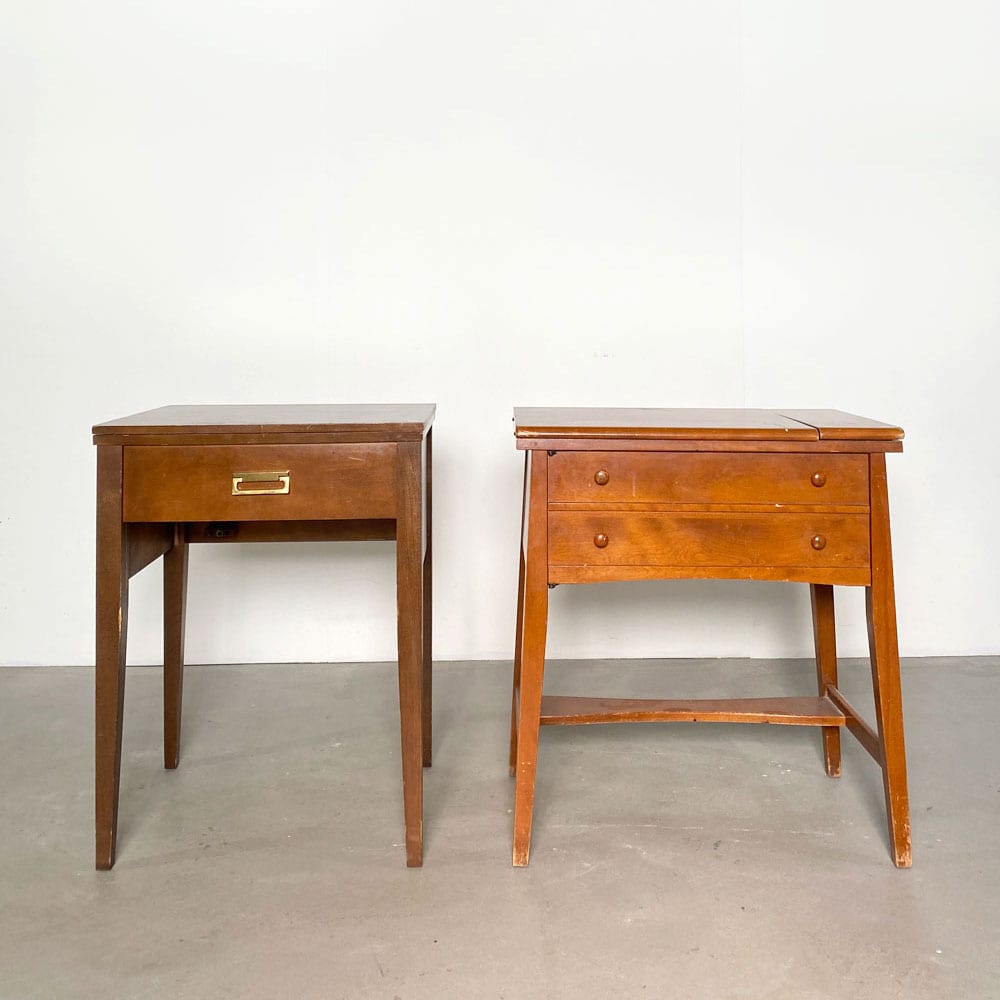
Today, I’m sharing a transformation with paint that I haven’t tried before. We picked these up from a thrift store at different times, and they were such a close match in height that I thought they would be great as a stunning mismatched pair.

Yes, while they were originally intended as sewing machines, they have found a new purpose! You can use them as nightstands, as desks, or even as entry or hallway pieces.
That’s the thing with repurposing – old furniture can have a new life and serve a different purpose. So, check out this tutorial for some inspiration to get started on your own repurposing makeover!

Supplies Used for Repurposed Sewing Machine Tables
As an Amazon Associate, I earn from qualifying purchases. I also may earn from other qualifying purchases with other companies or get free product to review and use. All opinions are my own.
- Dixie Belle Paint in Spanish Moss
- Mist Bottle
- Chiseled Wedge Paint Brush
- Easy Peasy Spray Wax (didn’t love)
- 3×4 Vacuum Compatible SurfPrep Sander (Use code RAY10 to get 10% off your order)
- Shop Vac with Hose and Brush Attachment
- Tack Cloth to remove the sanding dust
- The Best Waterbased Polyurethane
- Disposable Gloves
- White Paint for Whitewash
- Krud Kutter Cleaner Degreaser
- Favorite 220 Grit Sandpaper
- Fuji Q4 Paint Sprayer (my favorite)
- Paint Filters
- Electric Screwdriver
- KwikWood
- Wood Filler
- Clear Shellac – My favorite primer
- Lint Free Rags
- Respirator for spraying
- Fine Grit Foam Sponge
- 1″x12″ Pine Boards
- Table Saw
- Miter Saw
- Pocket Hole Kreg Jig
- Kreg Jig Screws
- Power Drill
- New Hardware
Removing Table Tops
First things first, I flipped each piece over and removed the tops and pieces that used to hold sewing machines. If you want to keep the sewing machines, though, here’s my painted sewing machine table to see how we did it.
Tops are usually just screwed in from the base with pocket holes, so I just had to find the screws and unscrew them.
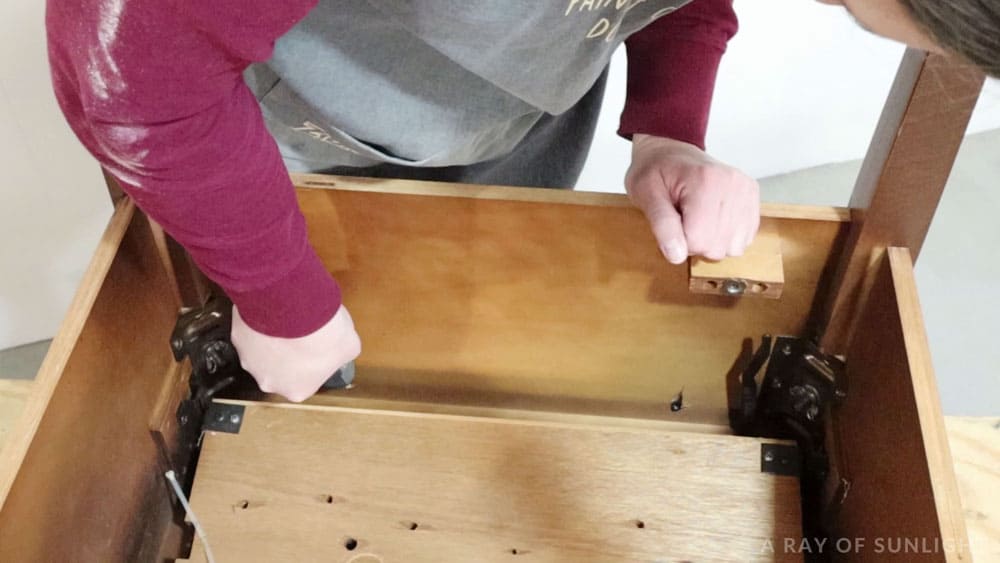
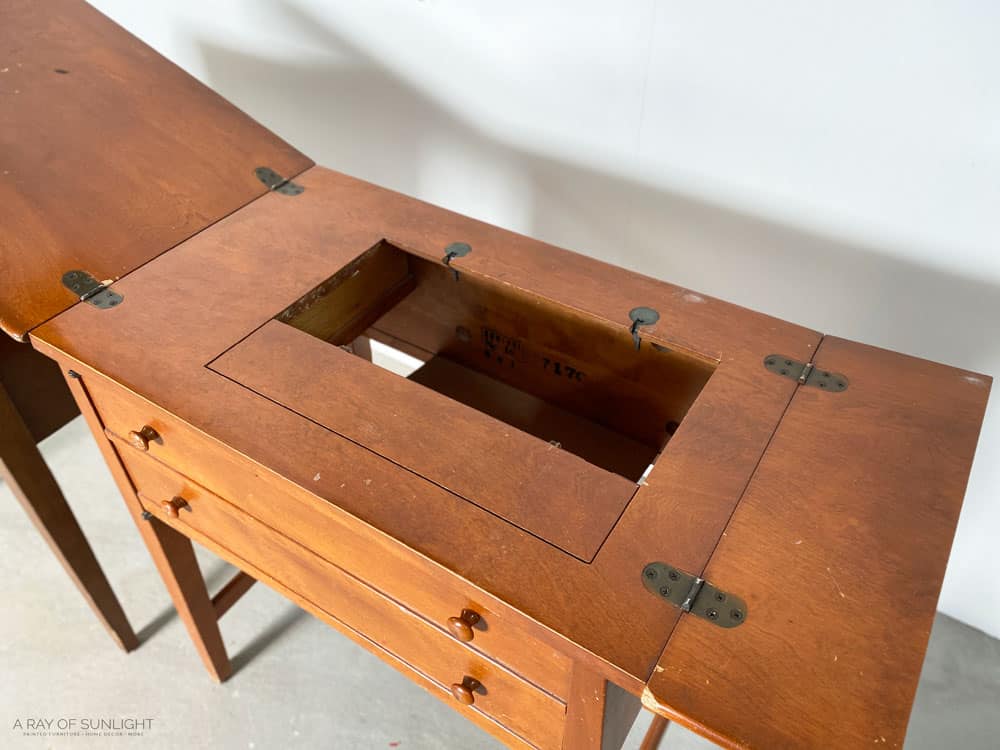
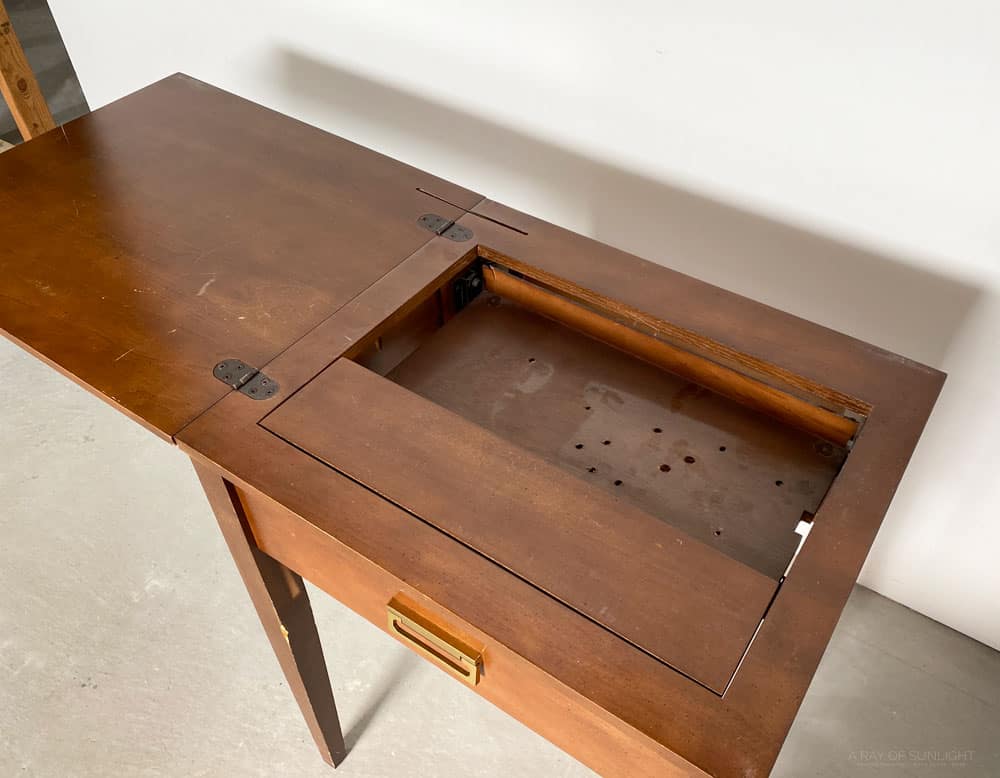
I typically would keep the top part of the top and just unscrew it from the part with a hole, as I did with this repurposed sewing table. But since the top of the bigger piece opened up both ways and had a split down the middle of it, I opted to just completely remove and get rid of the tops.
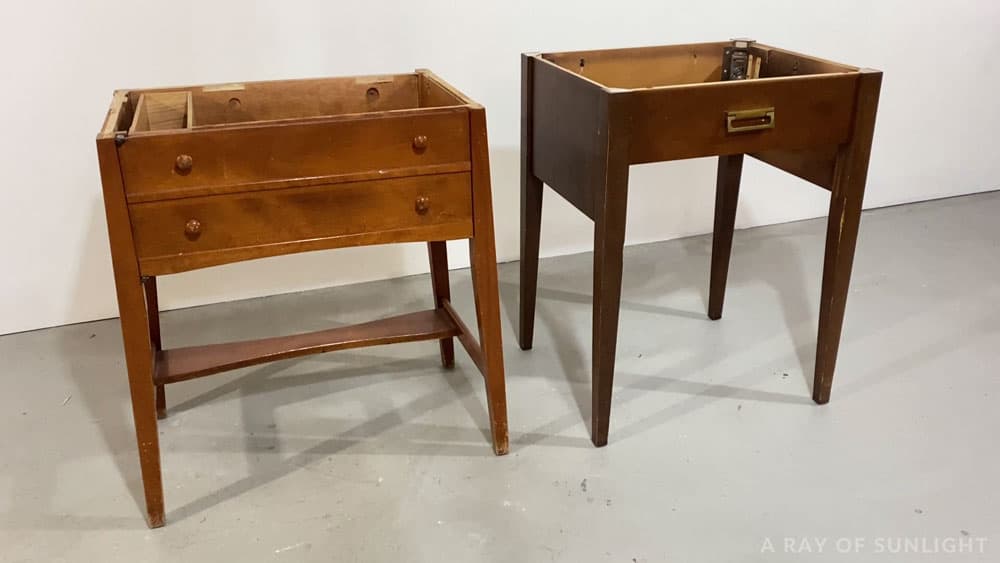
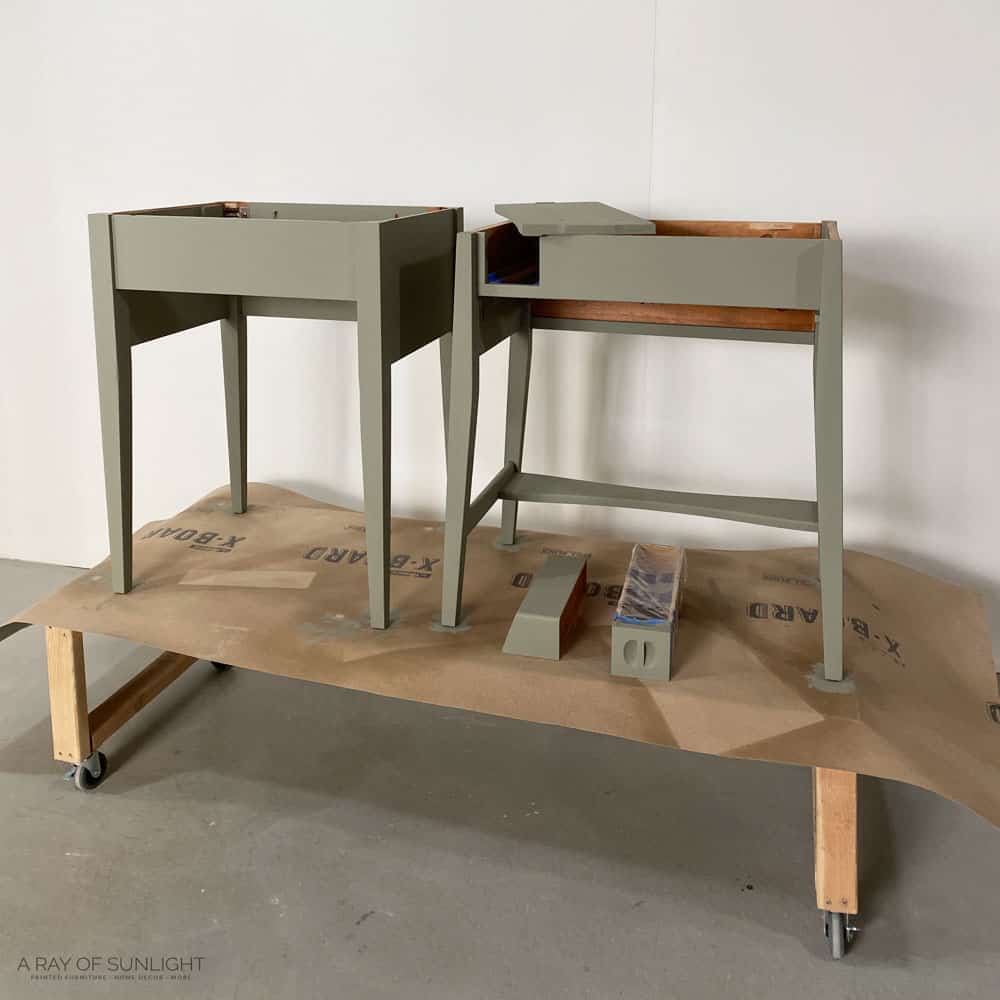
That way, I could put solid, matching tops on both of them. Here’s what they looked like after I removed the tops and all of the pieces inside.
Upcycling can turn even the most unexpected items into functional pieces. Check out more upcycled nightstand ideas here to spark your creativity!
Preparing Sewing Machine Tables
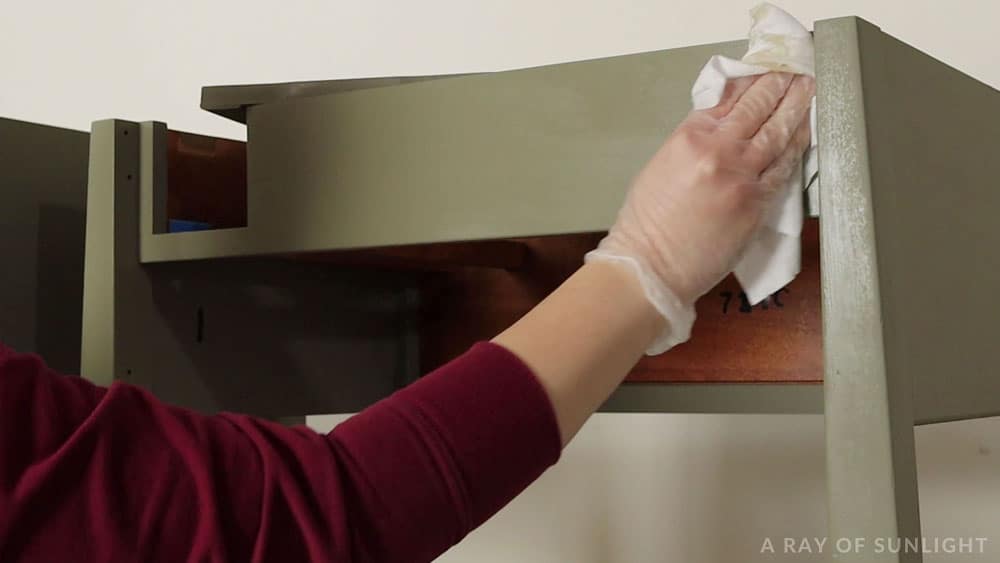
I removed and set aside the old hardware and the parts that I planned to keep, like this little holder on the inside of the door.
I also cleaned them really well with Krud Kutter to remove any dirt and grime that could affect adhesion. Get more of the nitty-gritty details on how to clean furniture before painting here!
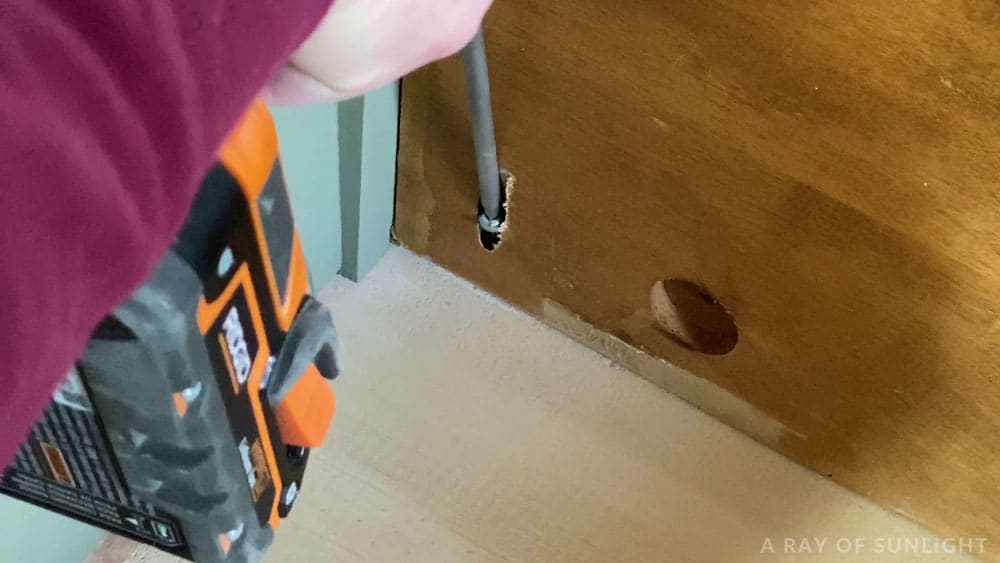
Then, I filled in all of the little holes left over from taking things apart, including the dings and scratches that were all over each piece. I just used regular wood filler for that.
I also filled in the old hardware holes on the one table since I planned to replace it with a single knob. I used my favorite KwikWood to fill in the old hardware holes. That stuff dries so hard in about an hour, and it’s really easy to use! Learn all about how to use KwikWood here.
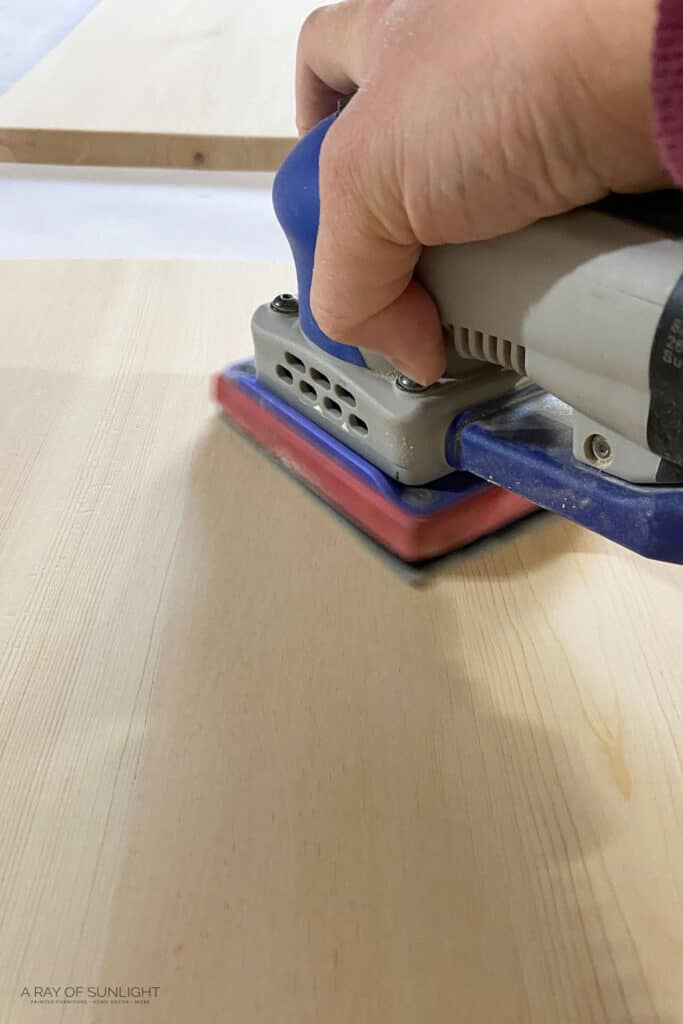
When the fillers were completely dry, I sanded them down smooth, and then I scuff sanded everything else. Learn about the different wood fillers and why we use them in our post about filling holes when replacing cabinet or furniture hardware.
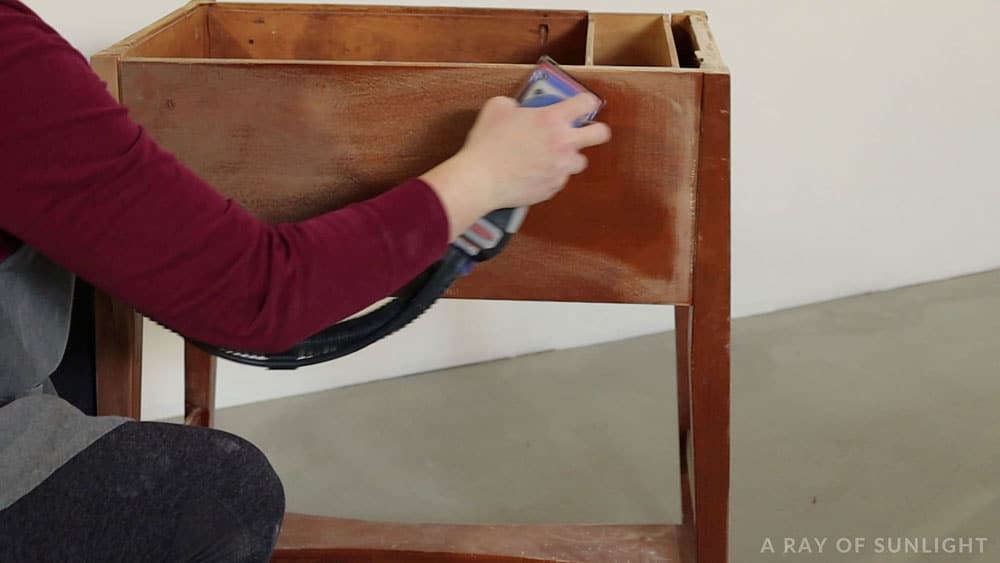
Scuff sanding is just a quick little sanding with 220 grit sandpaper, and it really helps finishes stick to the wood. Learn more about the importance of sanding before painting furniture here! I vacuumed off the dust and used a tack cloth to remove all the dust left behind.
And then, I sprayed them both with clear shellac. It’s my favorite clear, stain-blocking primer, that also helps with adhesion. Read more about it as one of the best spray paint primer for wood options here, and check out more best primers for painting furniture here!
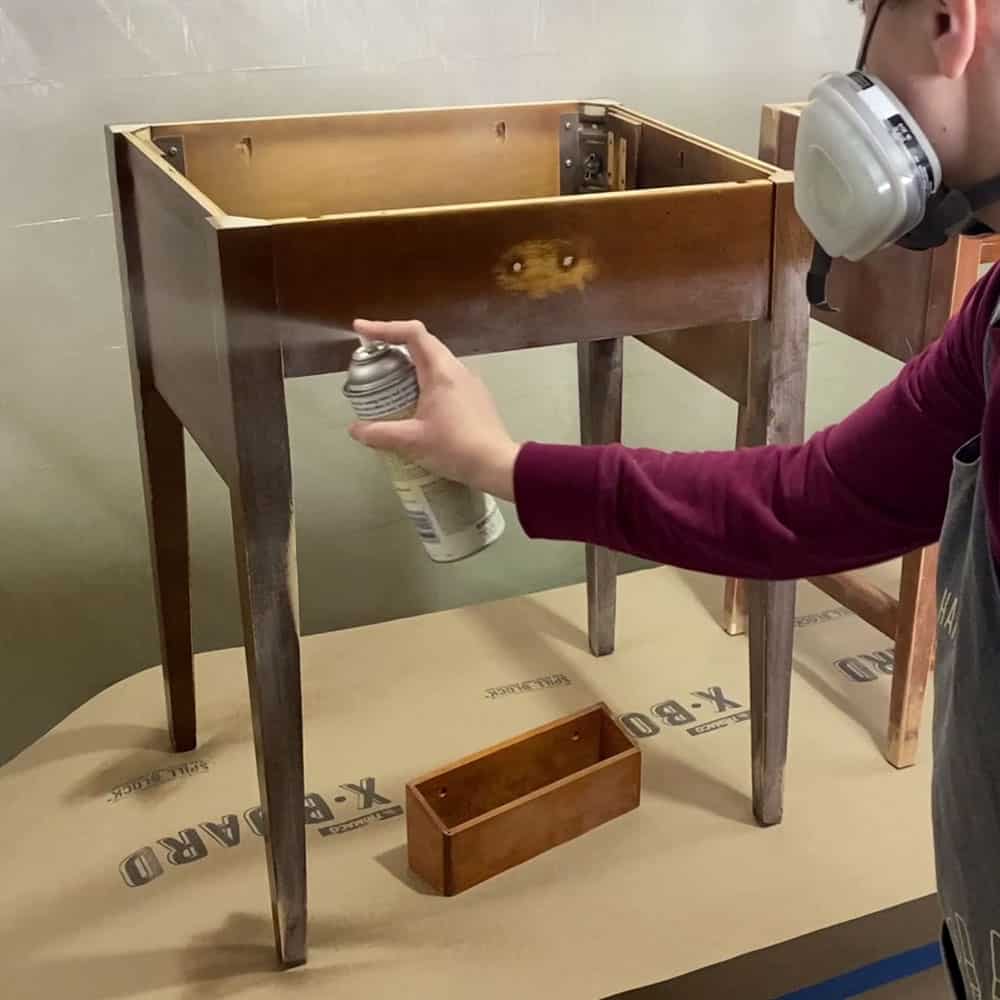
I let the clear shellac dry overnight, and then I was ready for the new finish!
Why Prep Work is Important
It might look like I go overboard with the prep work, but I want the new look to last as long as possible. Cleaning, scuff sanding, and priming are how I can make sure of that. Get all the tips on how to prepare furniture for painting here!
But there’s something that is called bleed through, that shows up as orange, yellow, or red spots in your finish. And if you don’t block them with a really good stain blocker, they won’t go away. So, I like to prevent it from happening before it can even happen. That’s where this primer is really important.
Here are more tips and tricks on how to stop stains from coming through paint! However, if you haven’t prevented the bleedthrough, here’s our guide on how to fix paint bleed through to help you out.
Painting Repurposed Sewing Machine Tables
It’s new to me, but I decided Dixie Belle Paint in this mossy green color. If you’re into green, know your options for the best green chalk paint for furniture here and the best green furniture paint here. For more color inspiration, check out these nightstand color ideas.
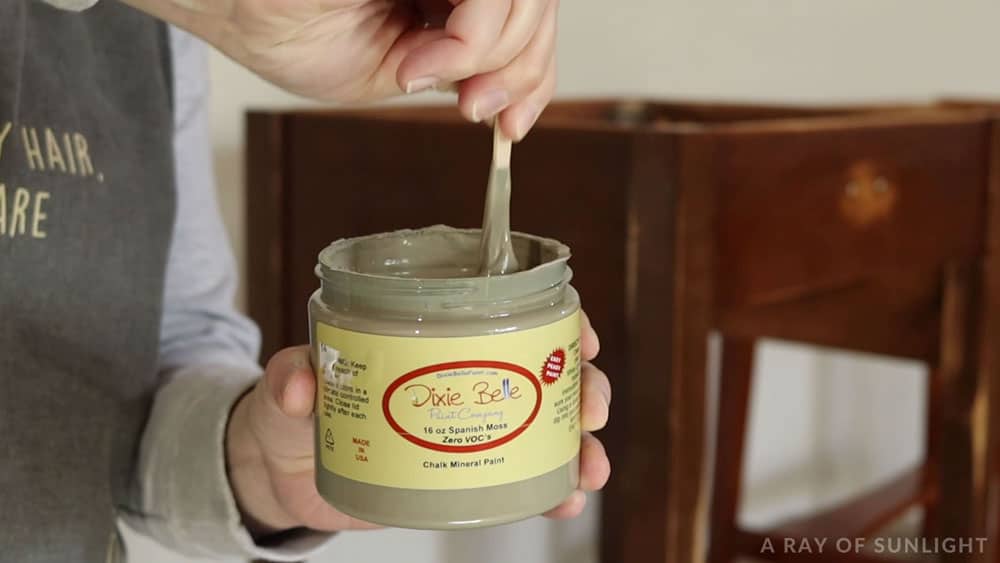
I’ve heard great things about it, and I wanted to see if all of the hype was true. I thought about spraying it on but decided to test out brushing it on these. Here’s my Dixie Belle Paint review for my honest thoughts on this product. And for more color options for this brand check out our list of the best Dixie Belle Chalk paint colors.
How to Prevent Brush Marks
So, I poured a little bit of it into a separate container and mixed in some water to thin it out a bit. Dixie Belle, like most of these top chalk paint brands, is very thick right out of the can!
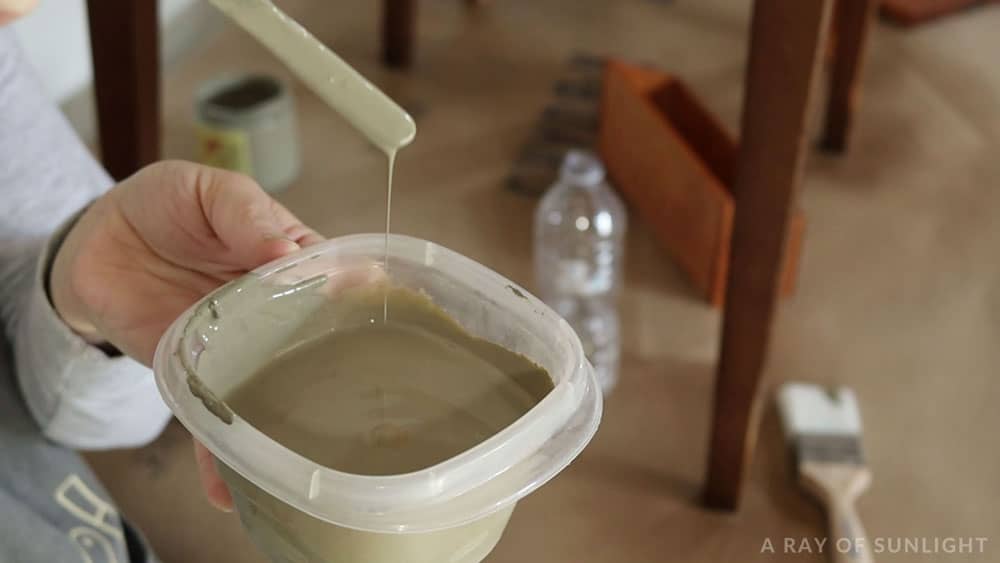
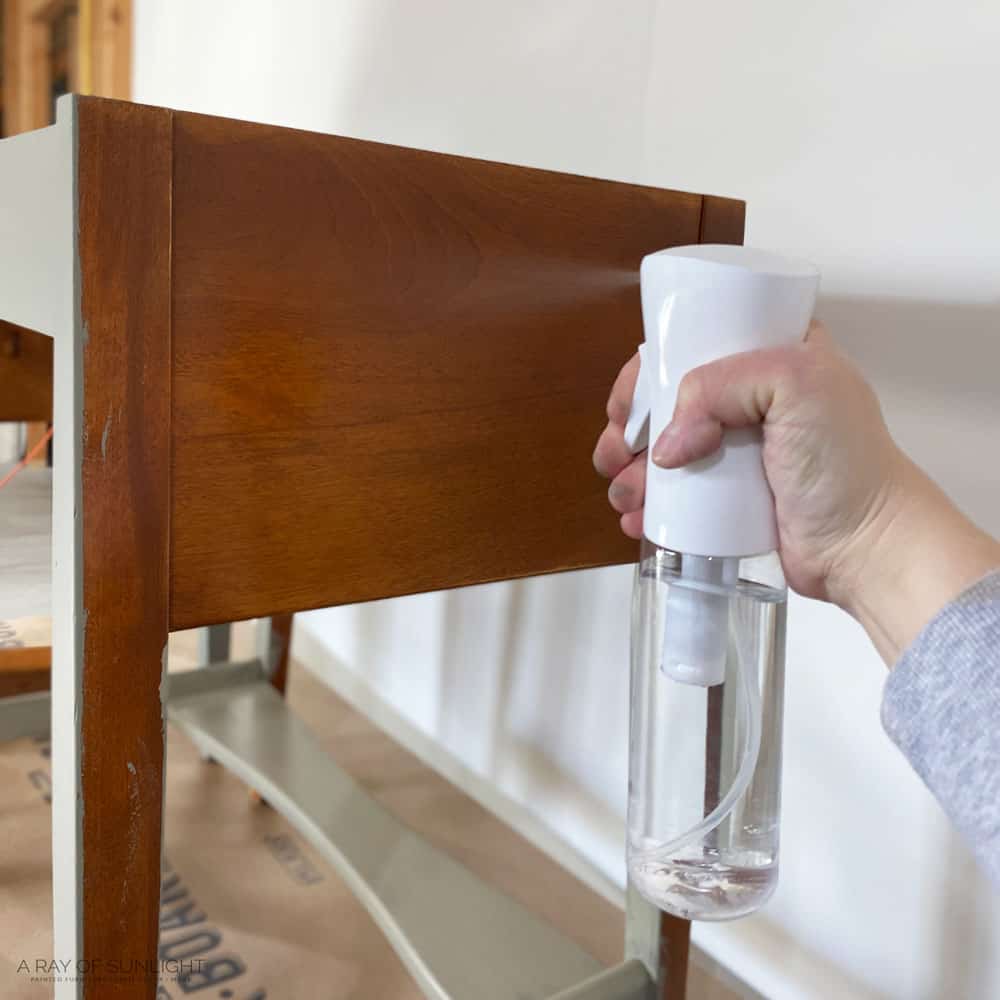
Once it was thoroughly mixed, I used a misting bottle with some water to lightly mist the surface first. I also sprayed my brush before dipping it into the paint. It was my first time using this technique to get a brush free finish, so I might have gone a little overboard on the water at first. So I wiped off some of the water and tried again.
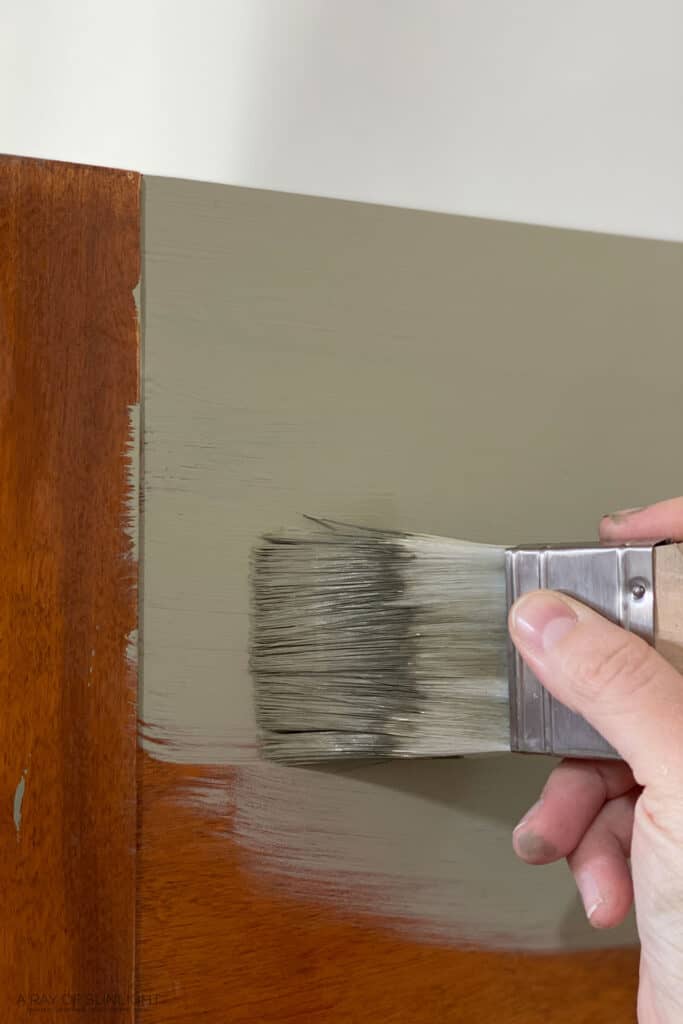
With less water on the surface, the first coat went on great! It was easy to brush on, and I could tell that brush marks wouldn’t be an issue when it dried!
I honestly can’t believe that I’ve waited so long to try out this technique to prevent brush marks when using a brush!! Here’s more about how to paint furniture without brush marks. You can also spray Dixie Belle like how I did it with these chalk painted end tables.
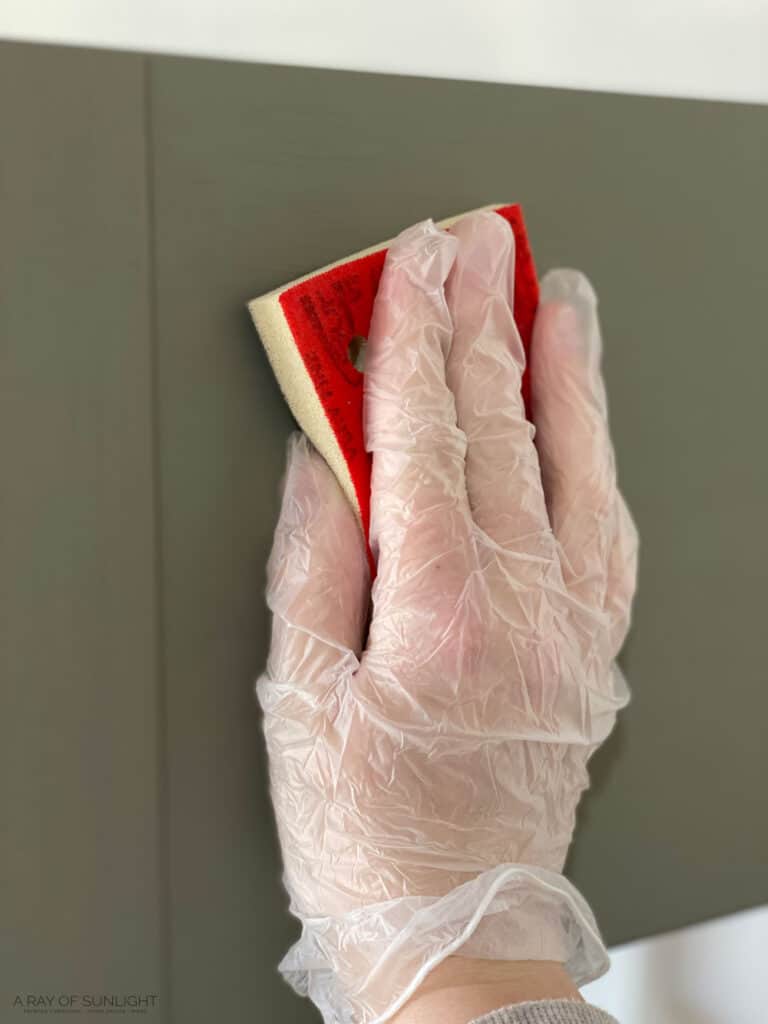
After everything was coated with the new color, I let it dry completely, which really took less than an hour. Then I sanded the finish with a fine grit foam sponge to make extra sure that I wouldn’t have any brush marks. Honestly, though, I don’t think I really needed to sand in between coats for a smooth finish!
Then I vacuumed and wiped off the dust and added the second coat, just like I did with the first coat. The coverage was great, with just two coats. That’s pretty typical, but I was happy that with all the extra water I used, I didn’t need a third coat.
Topcoating Repurposed Sewing Machine Tables
The next day, I came back to topcoat them. Instead of using waterbased poly like I usually do, I thought I would keep trying something new. So, I bought Dixie Belle’s Easy Peasy Spray Wax to try out.
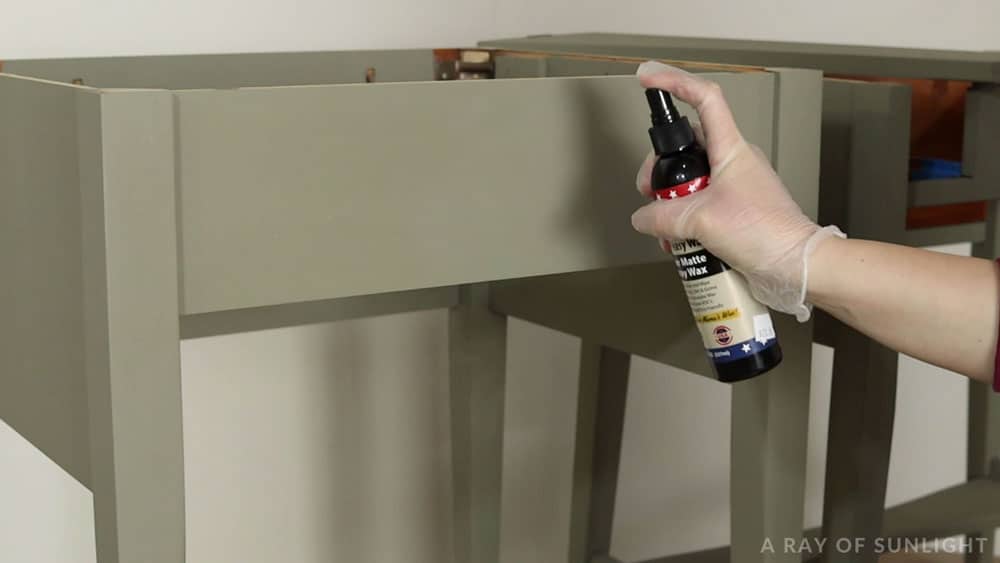
It’s waterbased, instead of oil based, like most waxes. So, if I didn’t like how it turned out, I knew I could easily go back to my waterbased poly that I love. Read more about some of my favorite polyurethane for furniture here!
I sprayed it on, let it sit for a few seconds, and then wiped it all over with a lint free rag.
Would you like to save this?
I love that it doesn’t stink and that it’s waterbased! It also dries pretty fast, in only 30 minutes, and they say that it is cured in 6 hours! It was pretty easy to spray on, but honestly, other soft waxes that I have used are just as easy to apply. And I kind of feel like they soak in more than this spray wax did.
My biggest fear, though, was if it was going to be as durable as I wanted it to be.
Easy Peasy Spray Wax Finish
I just wasn’t in love with the finish that the spray wax created. It was very matte, which meant that every speck of dust stuck to it. And I was worried about how durable it really was.
So, since it’s a waterbased product, I went ahead and sprayed a couple of coats of waterbased poly over it. Here’s how to spray polyurethane for all of my tips!
I just felt better about having a more durable finish on these, especially since I will be selling them. Next time, I might try Dixie Belle’s regular wax and see if I like it any better than this spray stuff. There are honestly so many topcoats for painting furniture, so explore your options from our post!
Making New Table Tops
Since lumber is harder to come by right now, I couldn’t find my usual edge glued boards that I love to use when I put a new top on things. So, I went with a couple of 1 x 12” pine boards instead. We ripped them down to half the size that we needed and then chopped them down to the length that we needed.
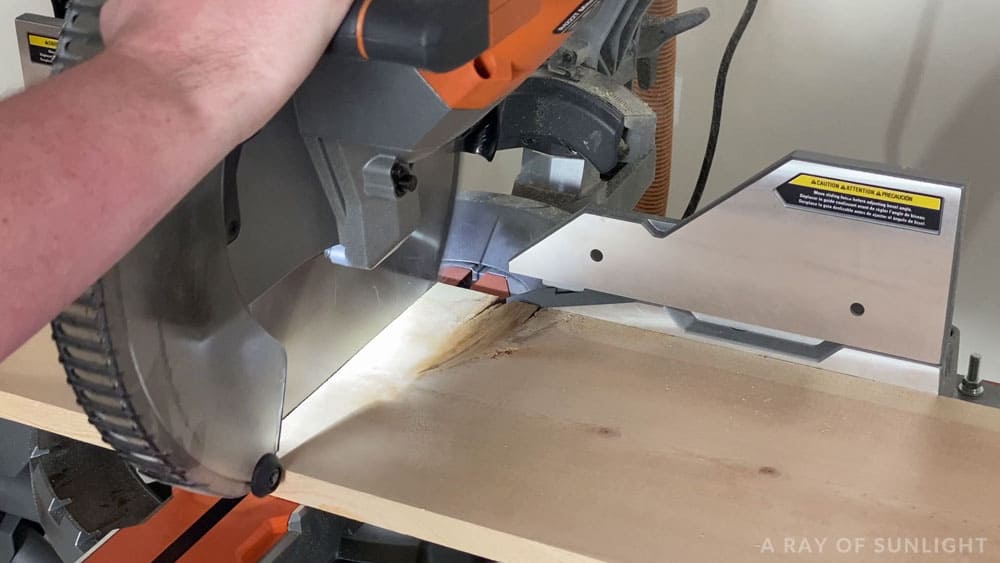
We basically just added an inch to each of their overall dimensions, so we would have a ½” overhang on every side. Then, I sanded all four pieces with 220 grit sandpaper to get rid of any splinters or rough spots.
And then we joined the boards together with our pocket hole Kreg Jig and screws. I wanted the tops to look as much like one solid piece of wood as I could, even though each top was really two pieces of wood. If you like a weathered look, learn how to make a plank top dresser here.
Whitewashing Wood Tops
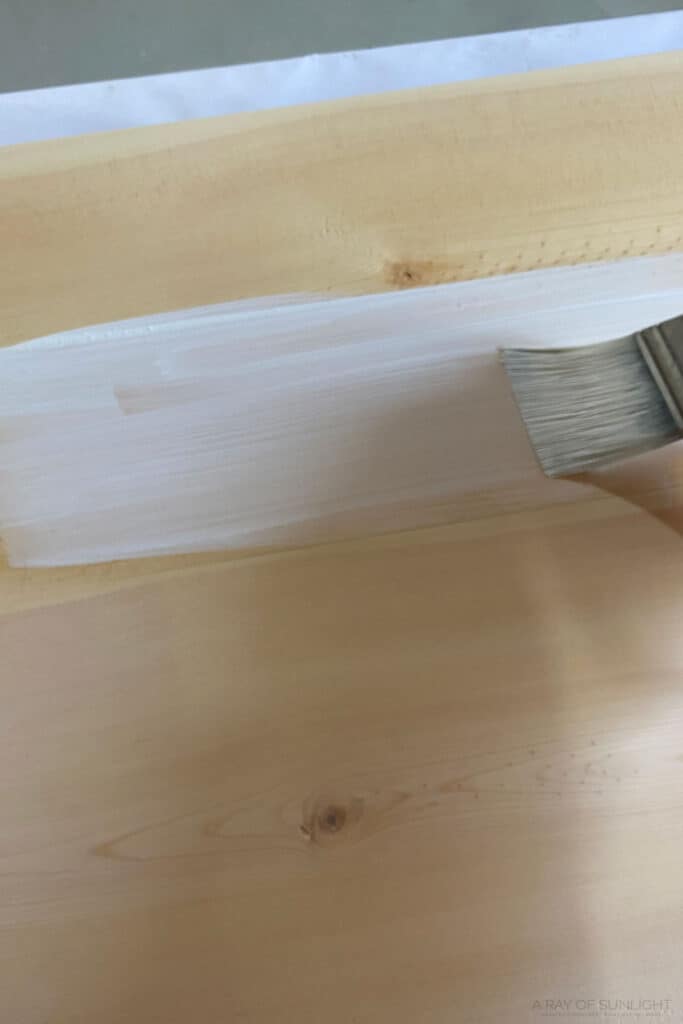
Then, I moved on to finishing the wood. I started by brushing on one coat of waterbased poly. The coat of waterbased poly before the whitewash helps the whitewash not soak into the wood so much, so I have a few more seconds to work with it. And so the wood wouldn’t end up super white.
How to Make and Apply Whitewash
After the poly was dry, I mixed up a batch of whitewash with some white chalk paint and water.
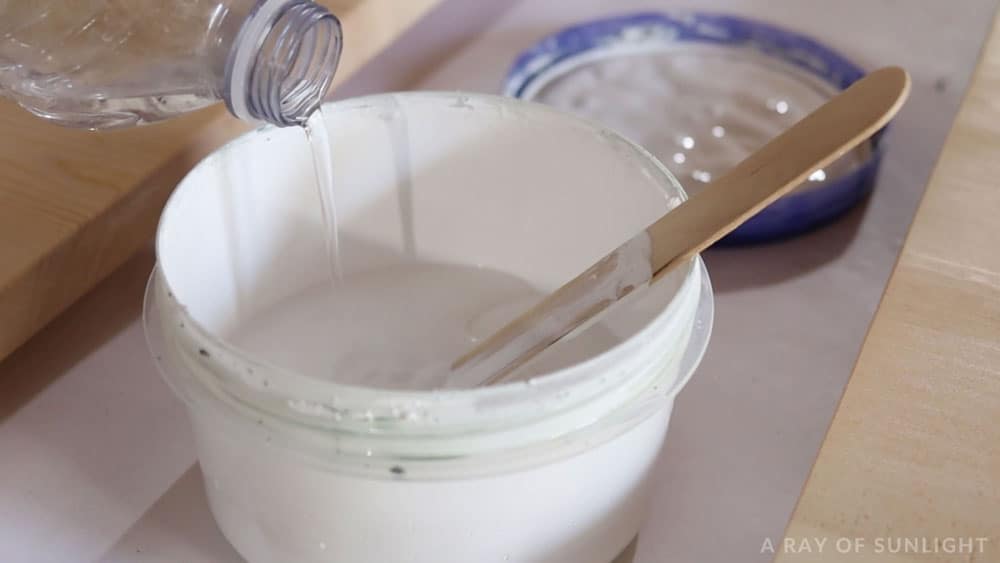
I honestly don’t measure how much water I add in, but I like it to be pretty thin, kind of like tinted water. Then, I quickly brushed on the whitewash and wiped the excess off with a lint free rag.
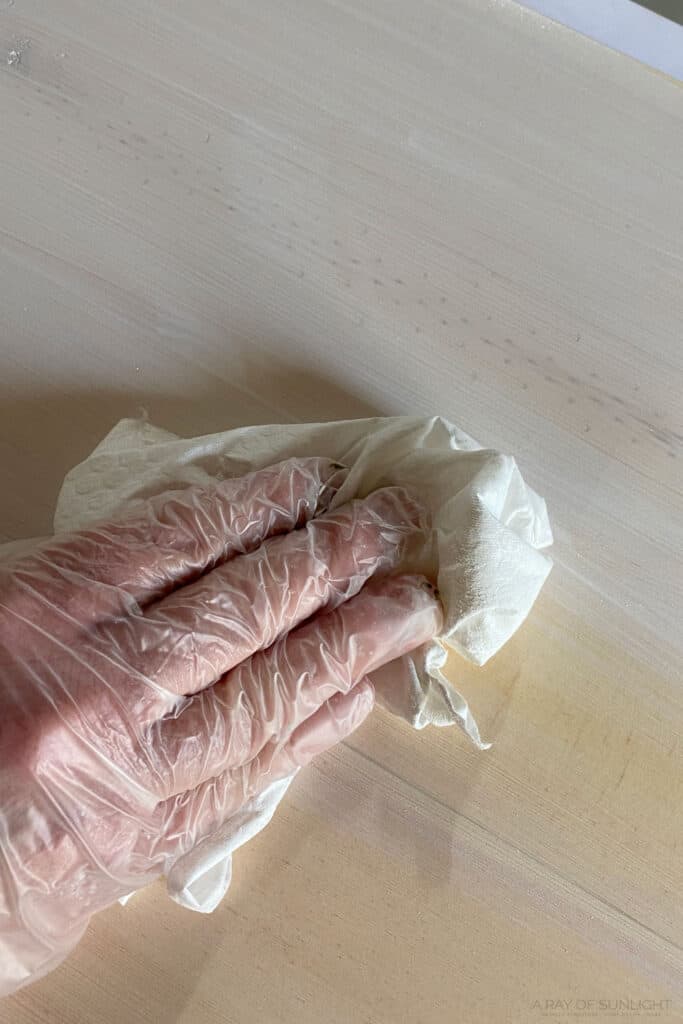
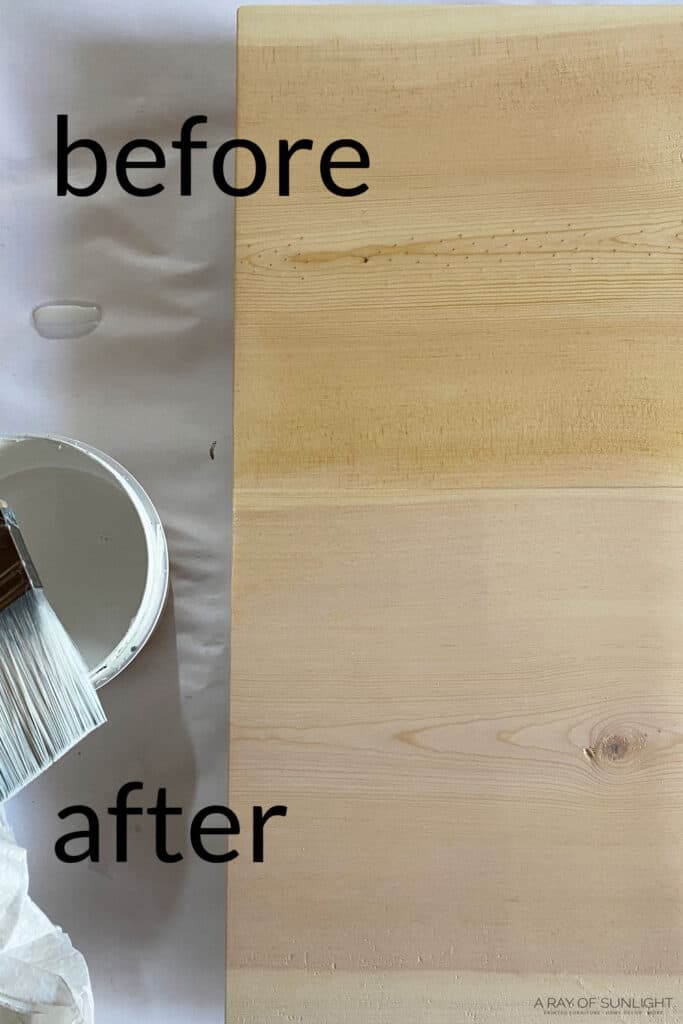
The point of the whitewash was basically to lighten up the pine so that it would look kind of like raw wood when I sealed it for the final time. So I really just wanted a really really light coat of white. When the whitewash was dry, I lightly sanded it with 220 grit sandpaper to smooth the wood down a bit.
See how we used this whitewash method in this DIY whitewash dresser makeover! Learn more about how to whitewash furniture here, and check out more whitewashed furniture ideas here for inspiration for this look.
And then, I sealed it with 3 coats of waterbased poly to protect the wood.
Attaching New Tops to Repurposed Sewing Machine Tables
The next day, we put the new tops. I laid down a blanket to keep the top from getting scratched, and I marked the back of the top so I knew where to place the bottom part.
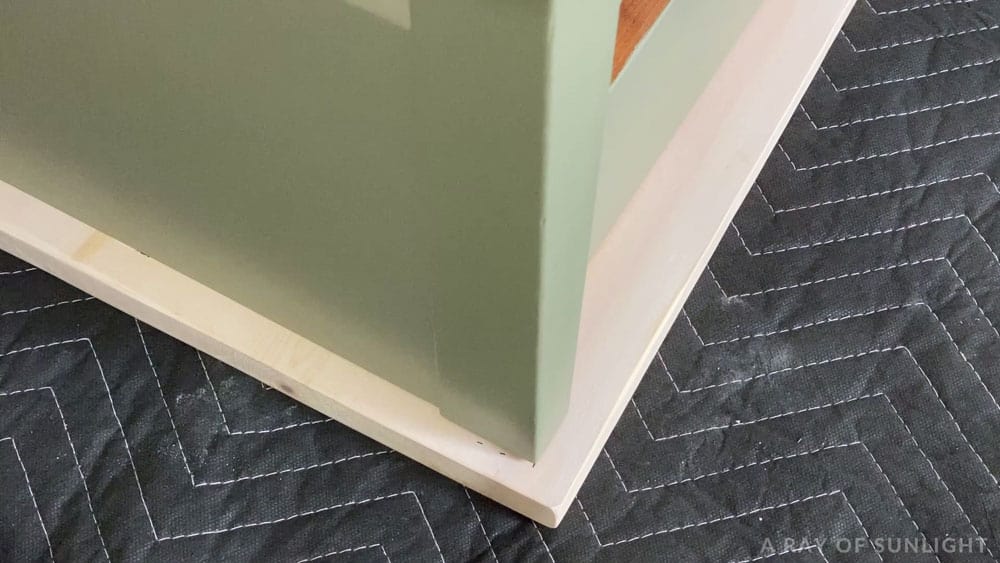
And then, while my husband put some weight on the table to hold it in place, I screwed some new pocket hole screws in the pocket holes and into the new top. Then I put everything back together and was done!
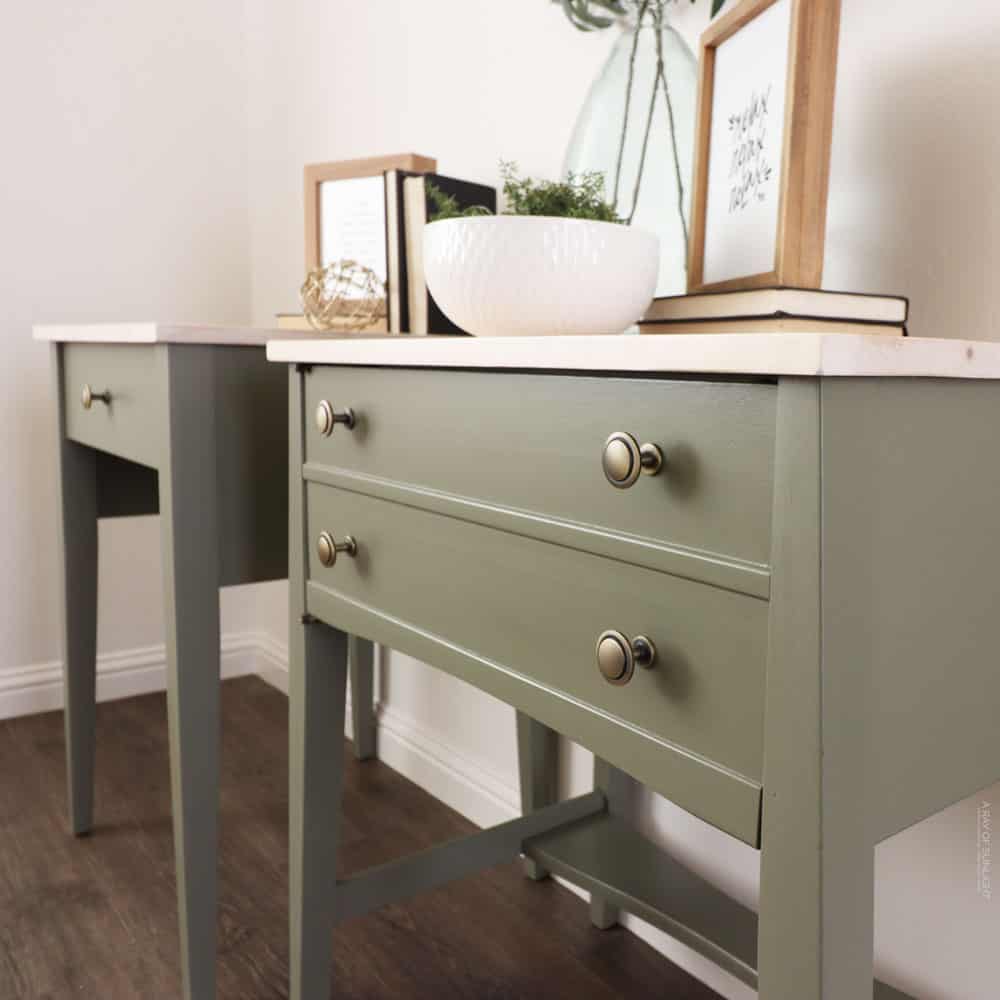
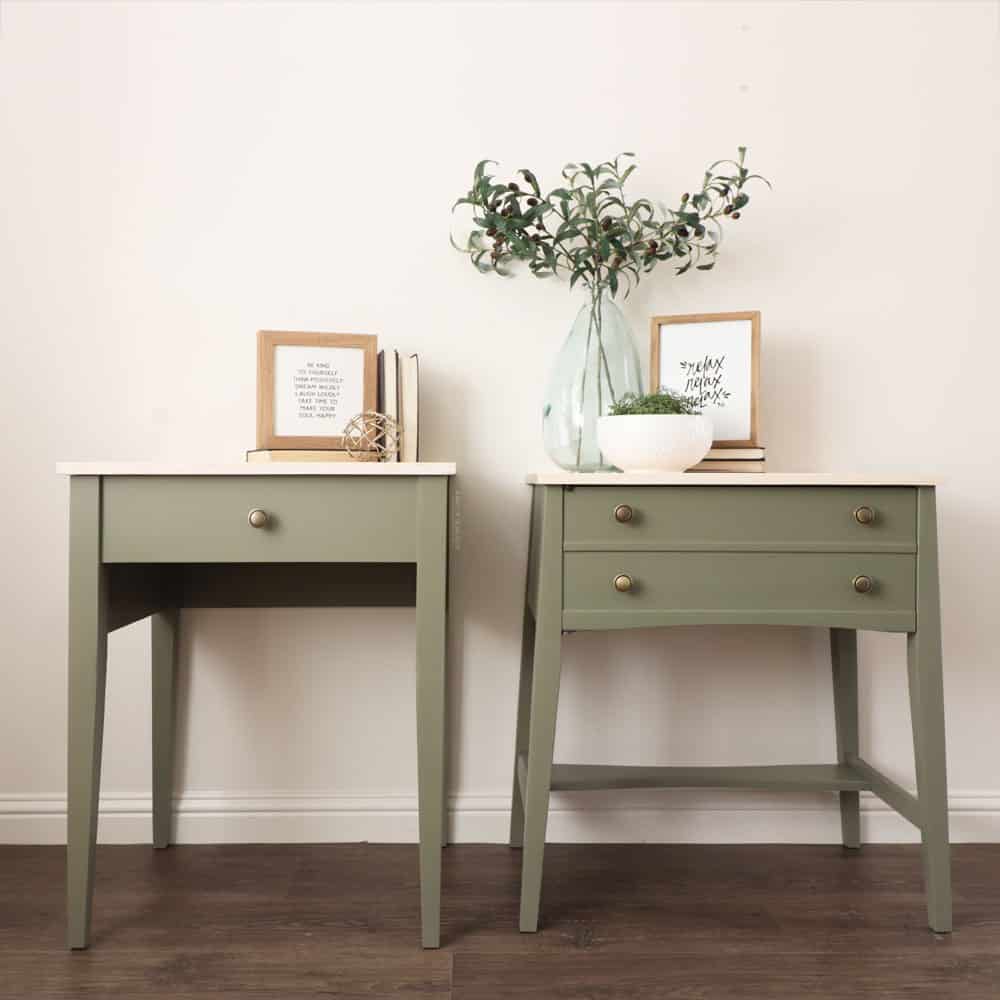
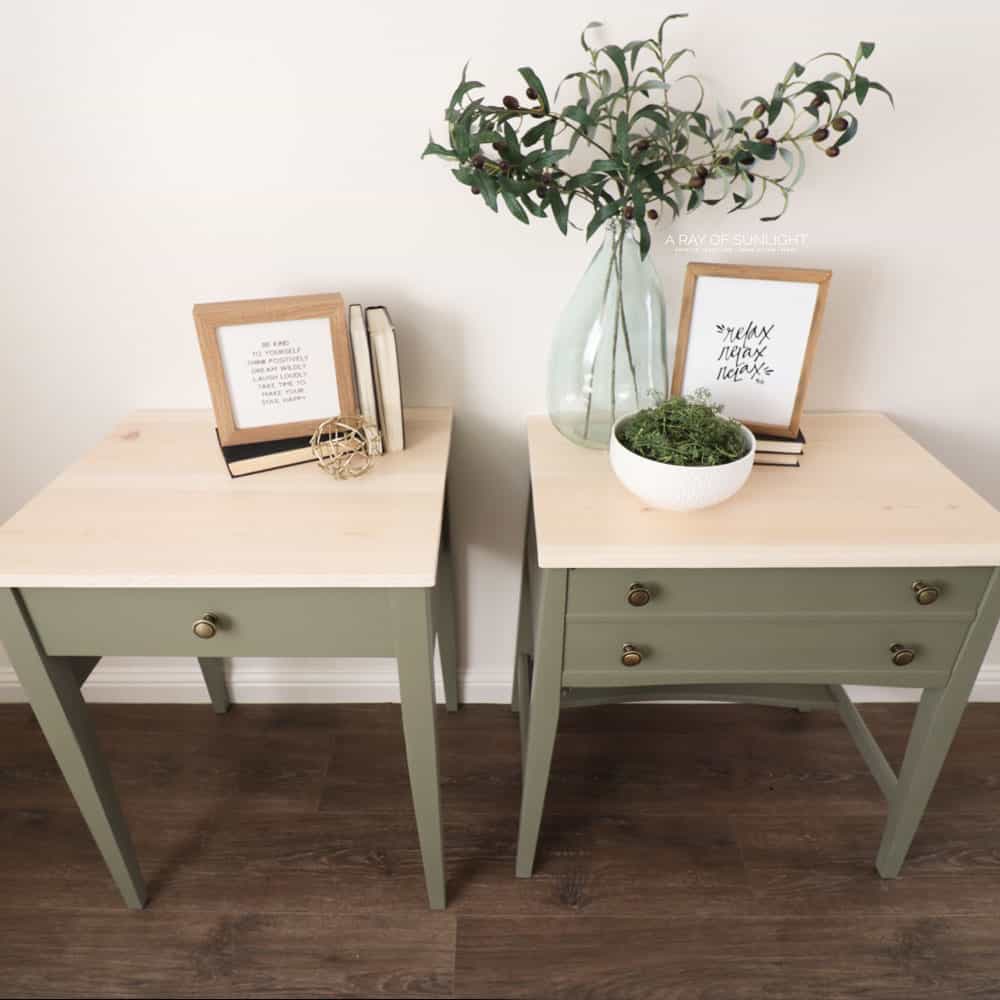
You can watch the full makeover on our YouTube video below, and check out the after photos below to see what they look like now!
More Before and After Makeovers
See All >
Click any of these “before” photos below to view the “after” of that makeover.


Check out more mid century modern painted furniture and modern chalk painted furniture ideas for inspiration here. For more tall nightstand makeovers, try out these tall nightstand ideas. You can also update your nightstand with these DIY repurposed nightstand ideas and DIY nightstand ideas.
Find more similar makeovers with these chalk paint nightstand ideas. If you have mismatched pieces you want to update, here’s our list of mismatched nightstands ideas. Dressers can also be repurposed into unique nightstands with these dresser as nightstand ideas!
They both started with a modern vibe but were completely different at the same time. Matching colors, tops, and hardware brought them on the same level to create a pair of beautiful upcycled pieces! Are you a fan of mismatched furniture?!
More Old Sewing Machine Cabinet Ideas
There are so many other creative ways to use these pieces in home decor:
You can turn them into a desk or even a vanity. You can match it to your room’s color scheme and use it as a statement piece in your home office or bedroom. The drawers and compartments are great for storage, too, so it’s both practical and stylish. These painted desk ideas should inspire you!
Another idea is to use it as a side or accent piece in your living room. Because of their compact size, they are also perfect for small spaces. Use a bold color like yellow or navy blue. This will give your space a unique and eclectic touch.
If it’s the larger type, you can transform it into a kitchen island! Add wheels at the bottom for easy mobility, and use the drawers to store kitchen items. This is another great way to repurpose an old piece while also adding functionality to your kitchen.
For more similar projects, check out these old sewing machine table ideas.


So, if you have an old sewing machine cabinet or you come across one at a flea market or thrift store, now you know you can give it new life and use it in a variety of ways. Your repurposed sewing machine table might just become your new favorite!


Repurposed Sewing Machine Tables
Old sewing machine tables are a dime a dozen at thrift stores. Here's how to repurpose sewing machine tables into nightstands.
Materials
- Dixie Belle Paint in Spanish Moss
- Easy Peasy Spray Wax
- Tack Cloth
- Waterbased Polyurethane
- Disposable Gloves
- White Paint for Whitewash
- Krud Kutter Cleaner Degreaser
- 220 Grit Sandpaper
- Paint Filters
- KwikWood
- Wood Filler
- Clear Shellac
- Lint Free Rags
- Fine Grit Foam Sponge
- 1″x12″ Pine Boards
- Kreg Jig Screws
- New Hardware
Tools
Instructions
- Flip each sewing table and remove their tops and all other pieces inside.
- Remove and set aside hardware and parts you plan to keep. Clean the tables with Krud Kutter and fill in old hardware holes and scratches. After the fillers dry, sand them smooth with the sander.
- Spray clear shellac on the tables and let this primer dry overnight before painting.
- Thin chalk paint by pouring a little bit of it into a separate container and mixing it with some water. Lightly mist the surface of the table as well.
- Brush paint onto the tables and let the paint dry completely for about an hour. Sand the paint with a sponge to make extra sure that there are no brush marks.
- Topcoat the painted table with spray wax or waterbased poly.
- To make new table tops, you can use pine boards and chop down to your needed size and length. Sand the boards to get rid of any splinters or rough spots.
- Join the boards together with pocket hole Kreg Jig and screws.
- To whitewash the wood top, start by brushing one coat of waterbased poly. Then mix a batch of whitewash with white chalk paint and water. Quickly brush the whitewash onto the table top and wipe the excess off with a lint-free rag.
- When the whitewash dries, lightly sand with 220 grit sandpaper to smooth the wood down a bit, then seal with 3 coats of waterbased poly to protect the wood.
- Put the new tops onto the tables and attach hardware.
Recommended Products
As an Amazon Associate and member of other affiliate programs, I earn from qualifying purchases.


More Repurposed Furniture Makeovers
- How to Repurpose Desks
- Repurpose a Desk into Nightstands
- How to Upcycle a Desk into a Pair of Nightstands
- How to Make a Bench from a Headboard and Footboard
- Turning a Dresser into a TV Stand
Follow us on YouTube to get more tips for painting furniture. Or share your project with us on our Facebook Group and be part of our community. See you there!
I have the same exact sewing table as the one on the left. I just might hold onto it instead of getting rid of it now that I have seen the possibilities!
This is a great idea! I have an old sewing machine that I don’t use anymore, and I could definitely use a new side table. I love that you can still see the sewing machine parts on the table – it’s a great
Love the mismatched look for the nightstands. I think it’s more interesting than matchy-matchy but cohesive at the same time! 😃
I completely agree with you with the mismatched nightstands look! Thanks for the love Kelli!
Natalie,
I love the makeover of these sewing machines. What a great update. Congratulations, you are being featured on TFT. I hope you stop by.
Hugs,
Bev
I so appreciate it Bev! Thanks so much. Will definitely be stopping by!
You know I love your posts!
Wondering if you have anything to share regarding “black washing” instead of white washing?
Dark paint diluted with water on raw wood….? Thanks either way.
Absolutely! You can do a black wash or use any darker paint the same way as whitewashing. Just water it down a bit and apply it over raw wood.