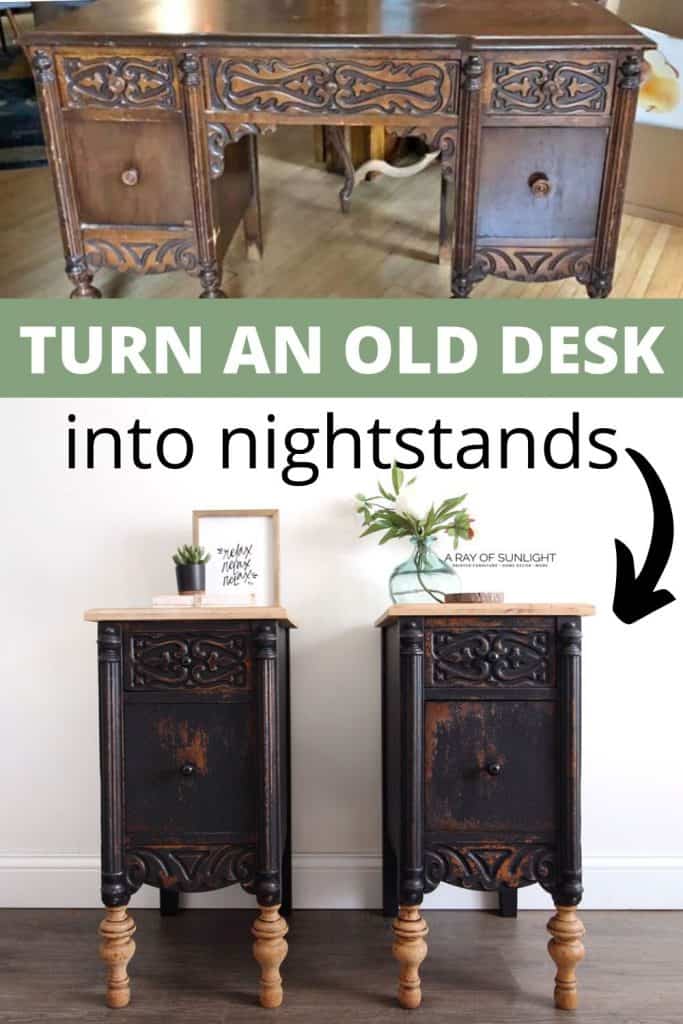
How to Repurpose Desks into Tall Skinny Nightstands


These old desk makeovers are THE BEST! You start with one piece of furniture and end up with two! So, if you’re wondering what to do with an old piece, here’s how to repurpose desks into tall skinny nightstands! Ohhh this is definitely one of my favorite makeovers yet!
Get ready for one of these awesome painted nightstand ideas, which will give your space some personality and function. Plus, you get to save money instead of buying new pieces. Let’s get started!
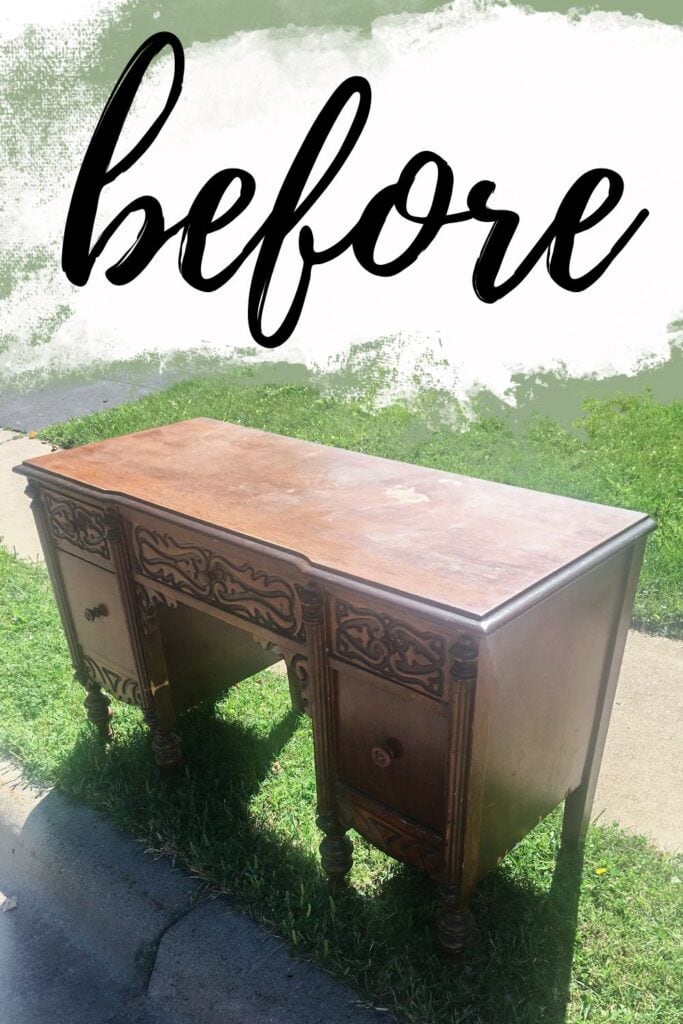
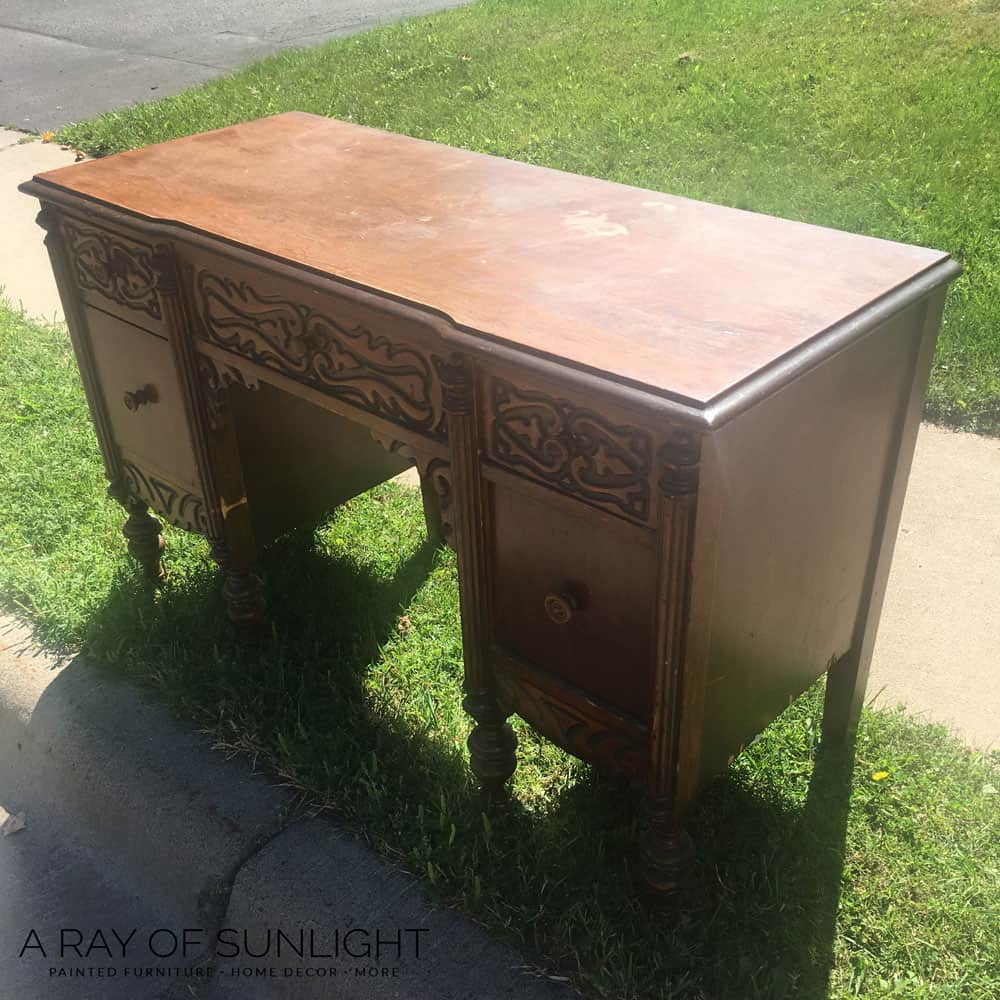
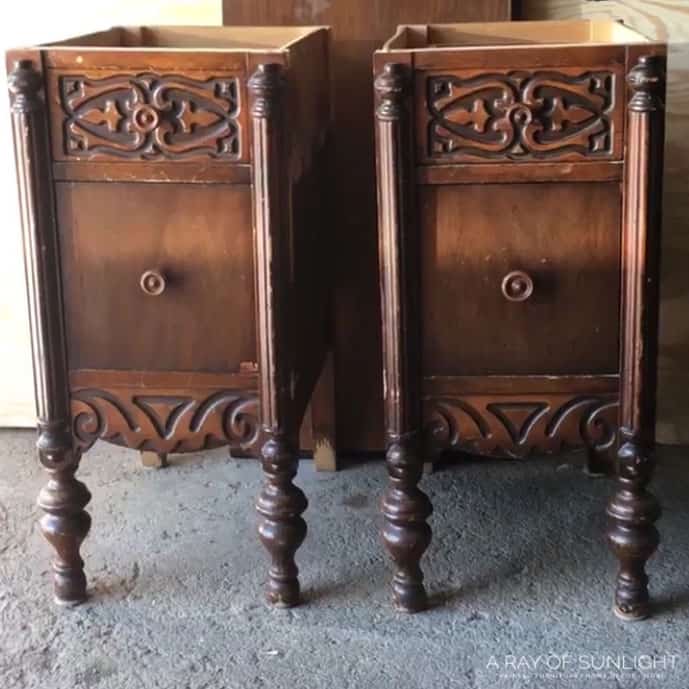
We found this little piece for FREE on the side of the road! The second I saw it, I knew I had to get it! I brought it home and immediately got to work on it.
Like most vintage ones, it was pretty short, so it would have been hard to use as a desk. BUT because I’ve repurposed desks before, I knew it would be perfect to turn into nightstands!
Get Our Secrets!
Grab this super convenient How to Repair Furniture Ebook with all of our secrets on how to repair furniture for only $14.
You can print it out and have instant access whenever you come across damaged furniture, and know exactly how to fix it!
Click on the picture of the book to purchase!

I’ll go through the exact process that I did on how to repurpose desks into these nightstands. Your piece may be a little bit different, but with this as a guide, I know you can figure it out. (At the bottom of this post, there are links to other similar repurposing makeovers, too!)

Supplies Used To Repurpose Desks Into Tall Skinny Nightstands
As an Amazon Associate, I earn from qualifying purchases. I also may earn from other qualifying purchases with other companies or get free product to review and use. All opinions are my own.
- Electric Screwdriver
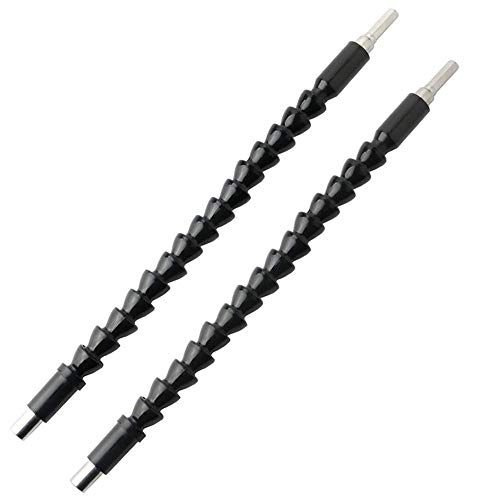
- Flexible Drill Bit Extension
- Chisel
- Hammer
- JigSaw
- Bondo
- Power Sander
- Table Saw or Circular Saw
- Router
- 100, 150, 220 Grit Sandpaper
- Black Beach by Shackteau Interiors Milk Paint
- Zibra Round Paint Brush
- Waterbased Polyurethane
How to Take Desk Apart
The first step is to take it apart.
Remove the Top
Usually, the top of any piece is held on with screws. Sometimes you can see these screws from the back like this:
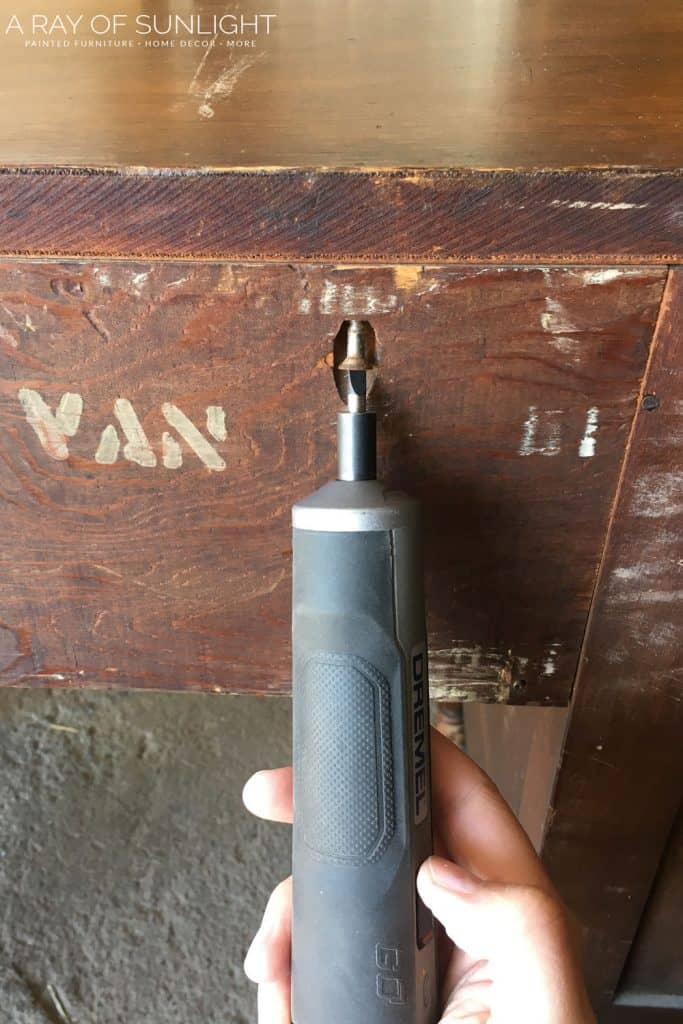
Other times, the screws are on the inside of the piece, making the process just a little bit more difficult. But! You can either remove the back panel to access them, or you can use this little bendable tool on your drill to reach them.
The screws for the front are usually right above the drawers. So all you have to do is remove the top row of drawers and then look up above where the drawers were. Like this!
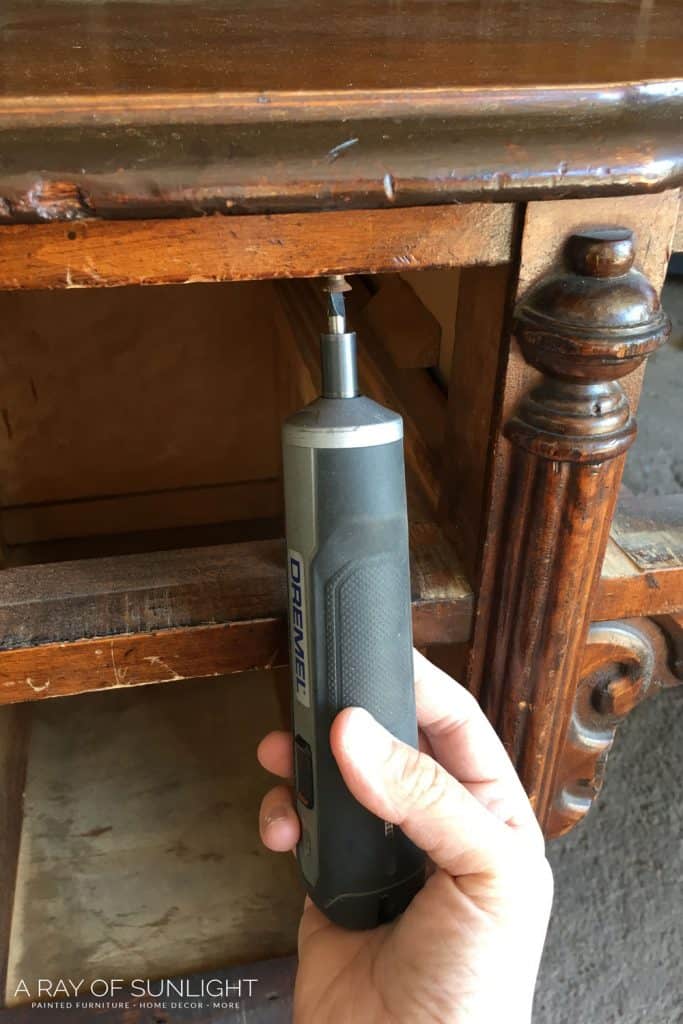
**Note: I absolutely love this little electric screwdriver! It’s fast and easy to remove screws and screw screws back in! All you have to do is push it in, and it turns for you! No more big bulky drill or trying to unscrew things by hand.
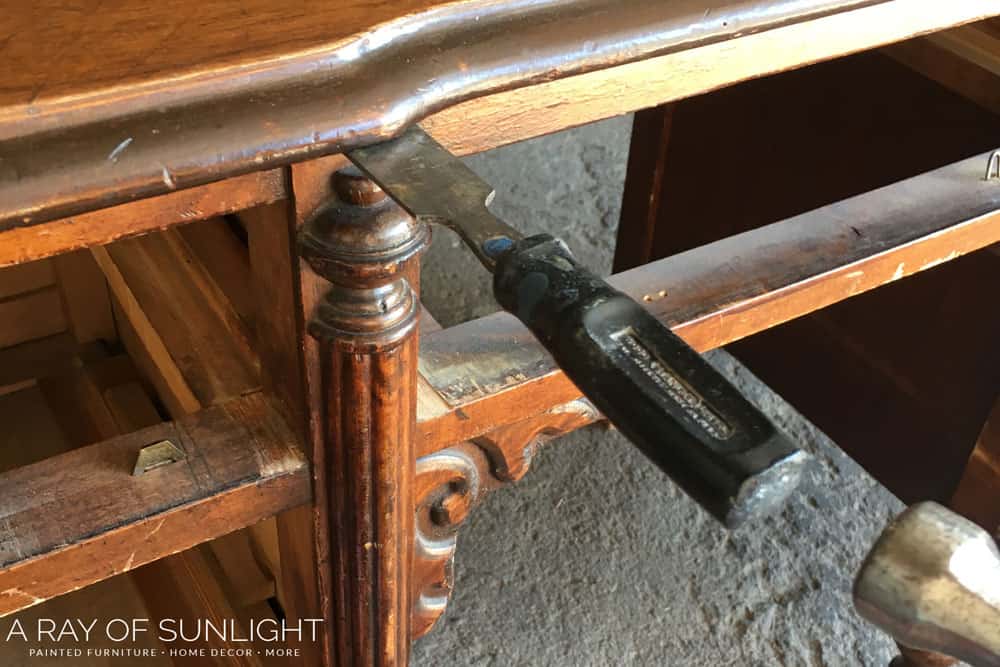
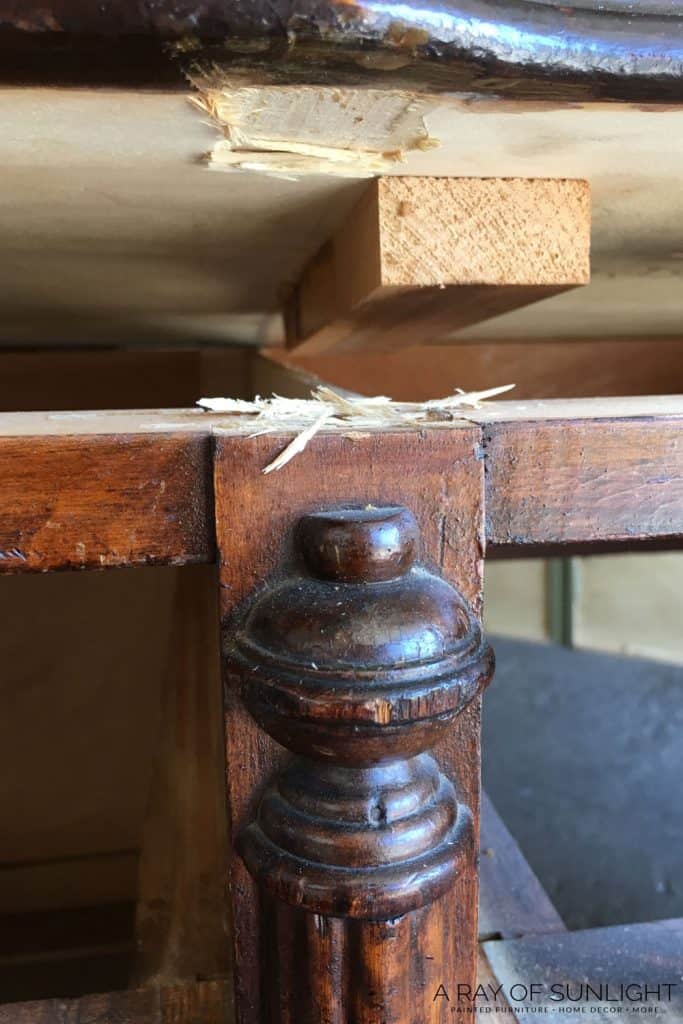
Sometimes, the top still won’t come off. Like with ours! So I used a chisel (you could use a pry bar if you have one!) and a hammer to pry the top off. Turns out, the top was glued to wood boards, that were glued to the desk.
Remove the Middle Drawer Supports
Once the top is off, the next step is to remove the middle area. This is usually where the middle drawer is. Remove that middle drawer if you haven’t already. And then grab your tool of choice!
A JigSaw is the fastest way to remove these support pieces. (Especially if the support on the back is one long piece that goes across the whole piece!)
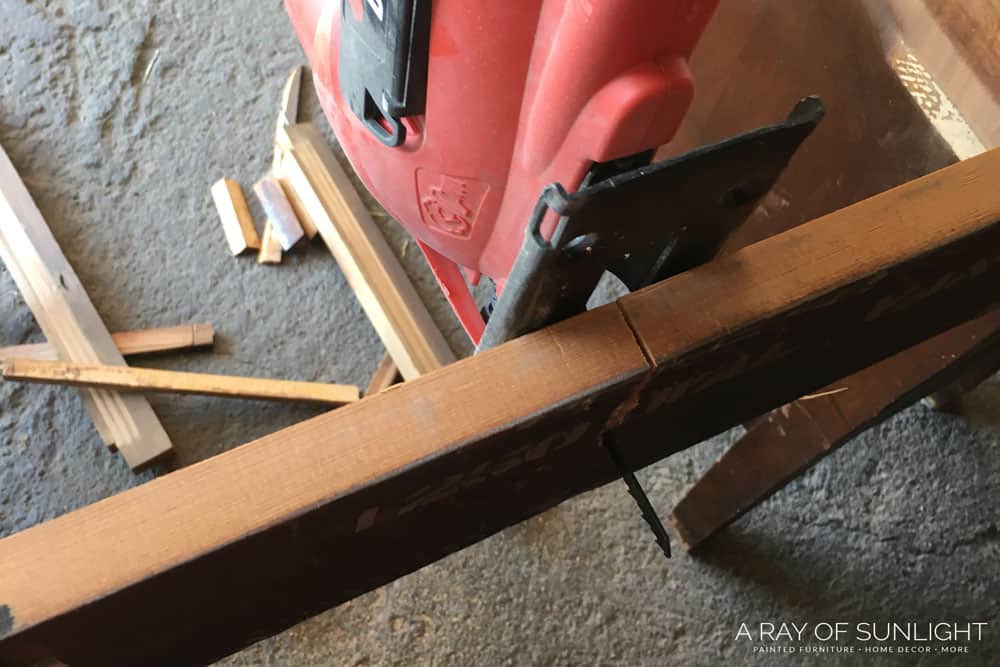
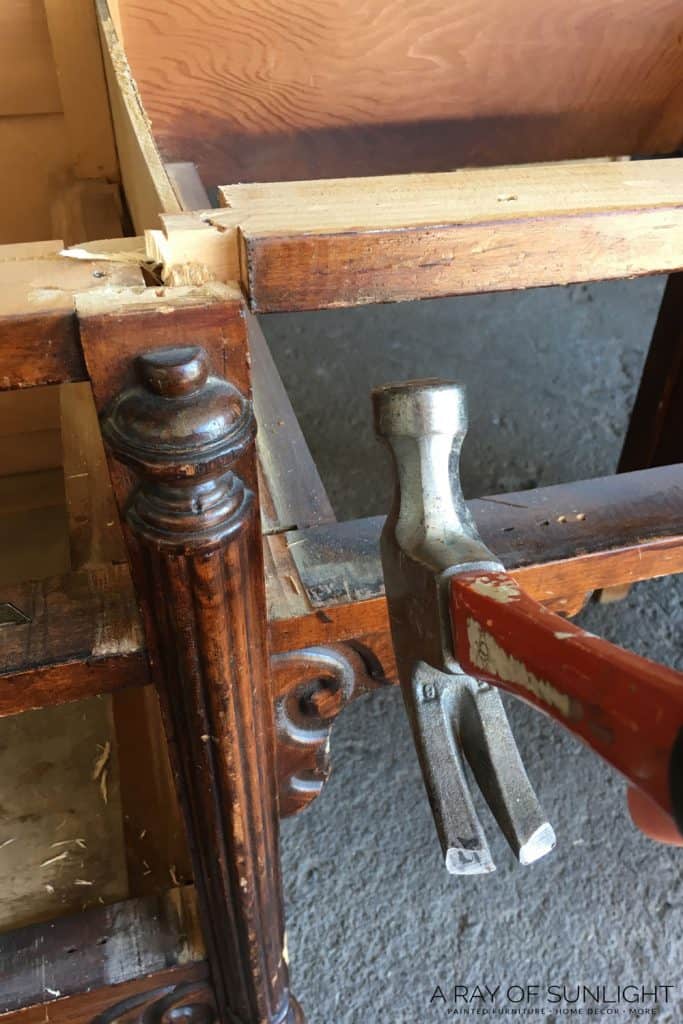
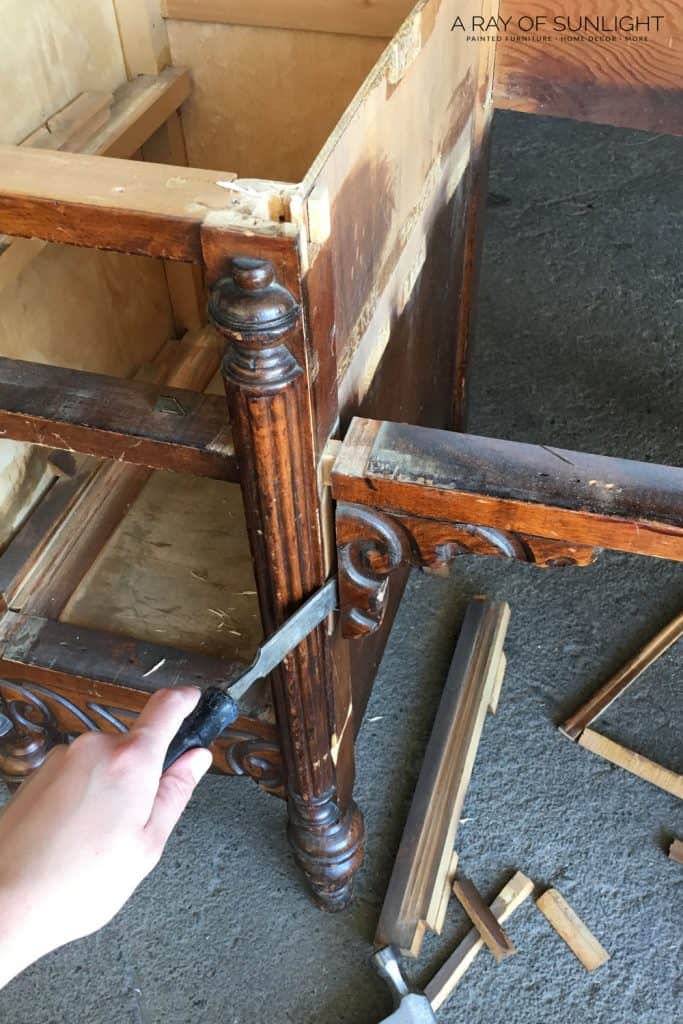
You can cut these support pieces in half, and then they usually pull right out of their holes. If you don’t want to ruin these pieces, you can also use the chisel or hammer again to pry them off. Like this!
Mission take the desk apart, complete!
How to Repair Damaged Wood
But, you might notice that there are these huge holes left behind (where the supports used to attach to each side). There might even be some extra damage from trying to get those support pieces out!
Don’t worry, though! It’s really easy to fill them in. But please, please don’t try to fill them in with regular old filler. Wood filler will shrink, crack, and take foooorrrreeevvveeerr to dry. Instead, use Bondo or KwikWood to fill them in!
Repair Damage With Bondo
I personally like to use this Bondo for these repairs.
If you aren’t familiar with Bondo, it’s one of my go-to, must-have products to have on hand. It’s a two part epoxy that you mix together, and it starts to harden rock hard in about 5 minutes. You can sand it after about 30 minutes.
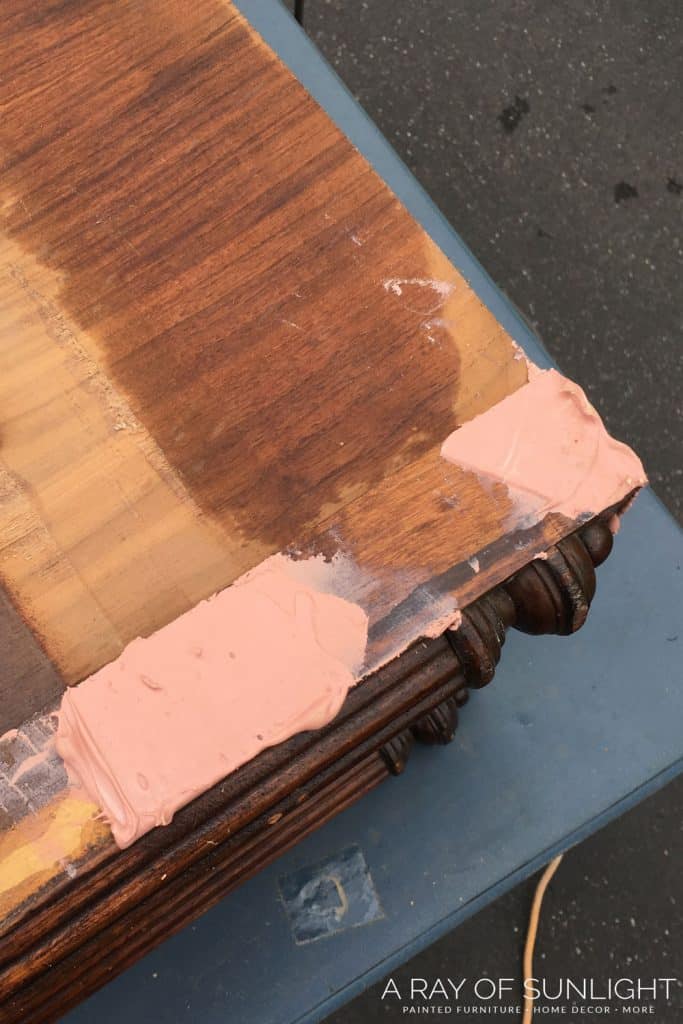
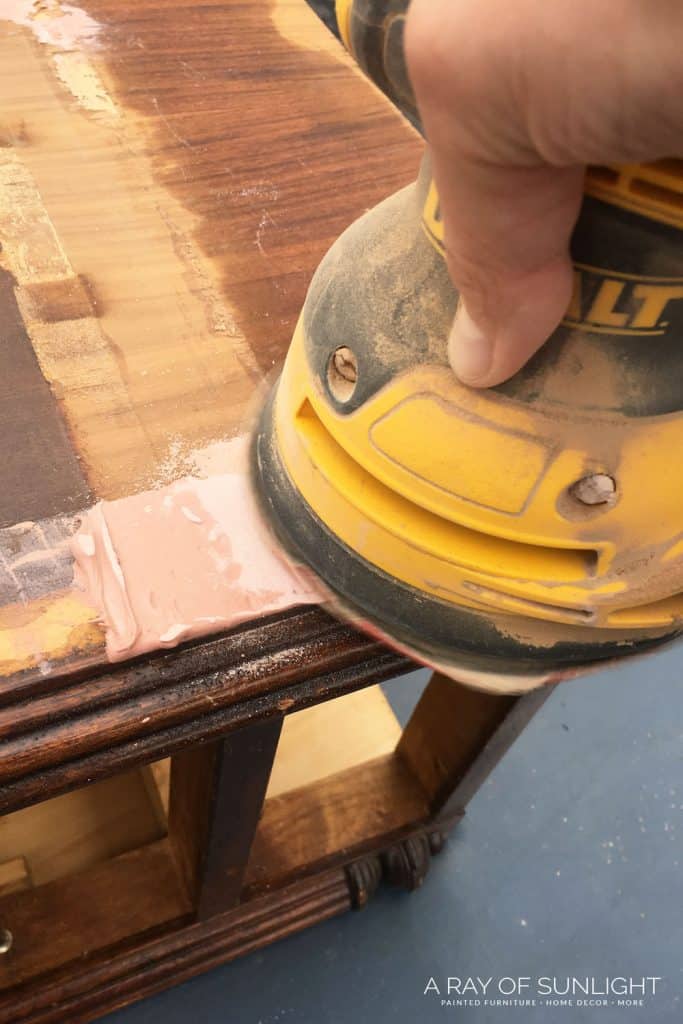
For these large holes, I usually use two applications. The first application is to fill in the majority of the damage. After it’s dry, I sand it smooth with my power sander. Here are the best sanders for furniture you can invest in.
Then, I apply one more coat to get any small places that I missed or places that had some air pockets from the first round. Check out this post to learn how to fix chipped wood furniture using Bondo.
Two applications are usually perfect! Just beware that this product is very, very stinky. And it can be time consuming to sand if you can’t use a power sander. But you can use my secret little trick in this post on how to repair damaged furniture to save some time if you’re stuck hand sanding!
Check out my Bondo wood filler review here to learn more about it.
Repair Damage with KwikWood
If you need to use a less stinky way to fill in the damage, KwikWood is a great option! It doesn’t stink like Bondo, but it dries just as hard in 1 hour or so.
But it’s a lot more expensive. So, filling these large holes can get a bit pricey compared to filling them with Bondo. Check out how to use KwikWood in this post on how to change hardware… It’s close to the bottom of the page.

Cutting New Tops
You can either go out and buy new wood for the tops, or you can reuse the old top!
Here’s how to use the old top! First, you need to know how big you need the new tops to be. Just measure the width and depth of the new nightstands and add at least 3/4″ overhang for each side (so at least 1 1/2″ to the width and depth).
I can’t remember exactly how much overhang I cut on these, but I bet it was around 1″ on each side. Once you have your measurements, you can cut your new tops out of the old one with your table saw or circular saw.
Would you like to save this?
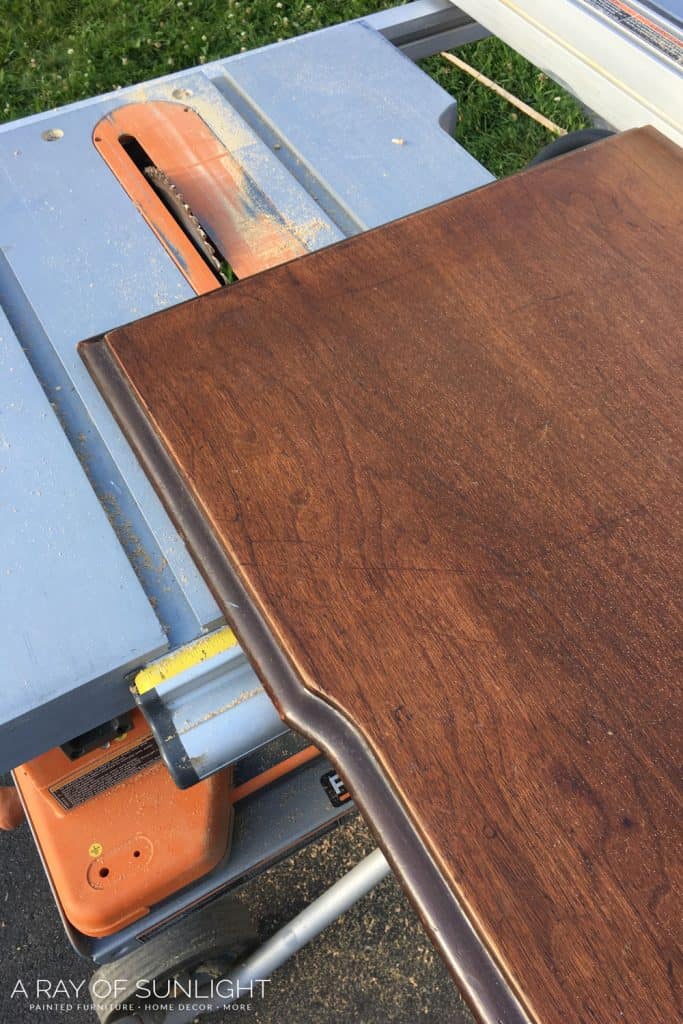
Now, you won’t be able to cut them the same way that it was sitting on the desk. If you do, you’ll have 2-3 edges that look professional and one edge (where you cut) that will be straight.
Sure, you can router that 1 edge with a router. But more than likely, you’re not going to have a router bit that is exactly the same!
So, I like to cut the top of the nightstands out going perpendicular to how the top was sitting on the desk. I was able to cut 2 new tops out of the old top. Now, the wood grain moves from front to back instead of side to side like it did on our piece.
Make Pretty Routered Edges
Then, I used my old router to put a simple detailing on the edges. Remember, most furniture doesn’t have any routered detail on the back edge of the top, though! So only router out 3 of the sides.
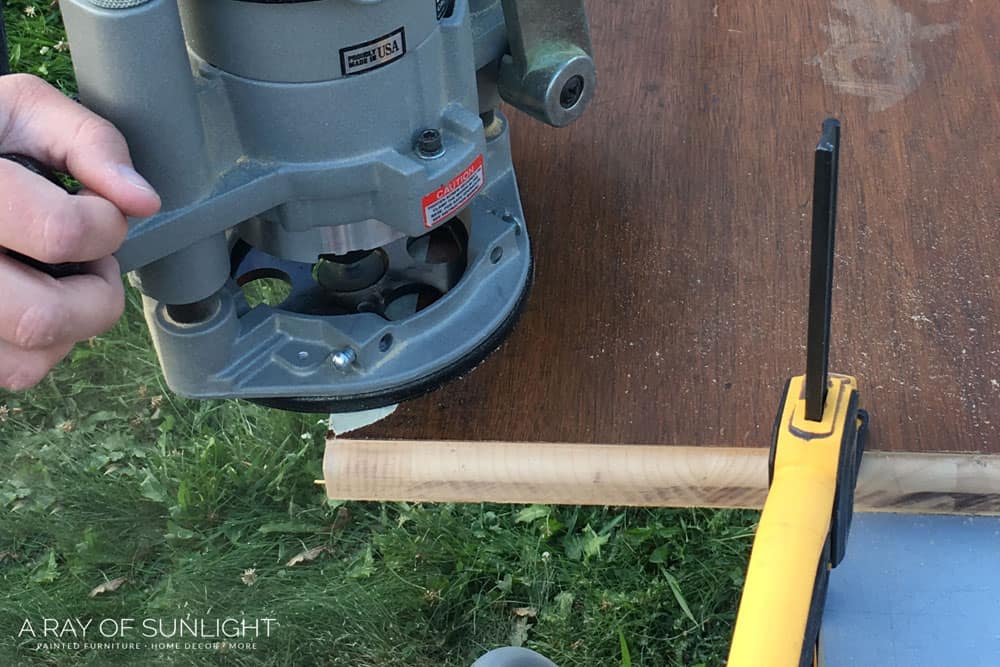
I goofed and routered all 4 edges. (Not the worst mistake ever, but I still wish I had remembered not to router the back sides.)
**Note: Since this top was made of wood and veneer, I put a little bit of tape along the edges to keep the router from chipping the veneer.
Then, I sanded both of the new tops down to bare wood. I loved the natural look, so I didn’t stain them! BUT…if you decide to darken up a little bit, read this post on how to stain wood darker!
How to Attach the New Tops
Simply line up the tops and use the old screw holes and screws to reattach the new tops to the two new nightstands.
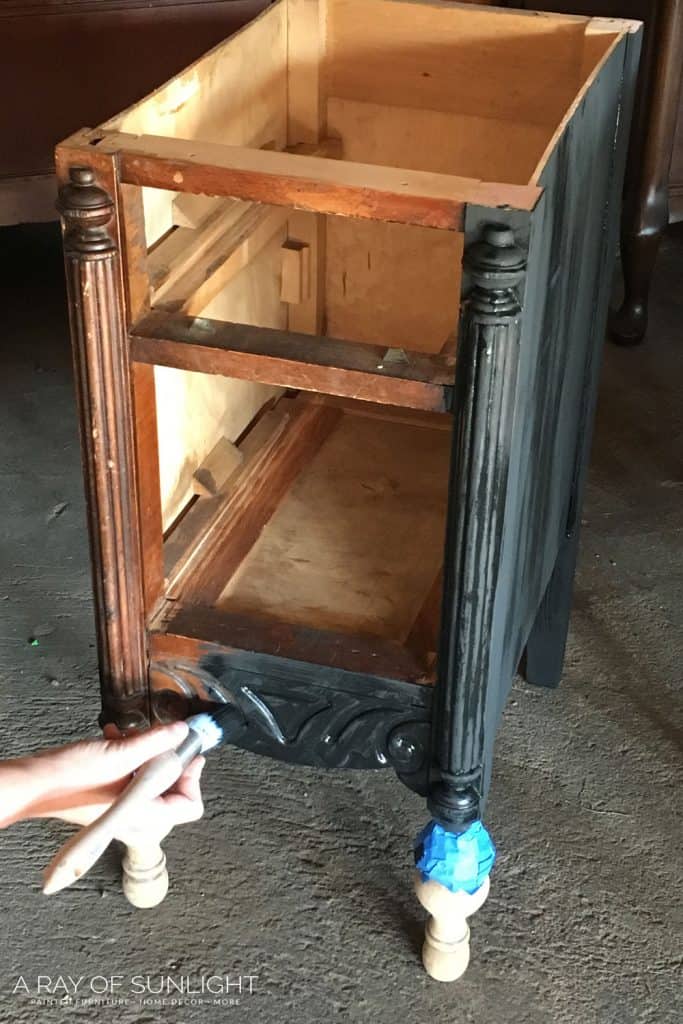
How to Sand Round Legs
When I saw the little legs, I knew that I wanted to do something special with them! With the tops staying a natural wood finish, I opted to sand the legs down bare, too. This was actually super easy, and the old finish basically flaked off for me.
I started with 100 grit sandpaper, rubbing the sandpaper around the curve of the legs. I used the edge of the folded sandpaper to get into the details of the legs, but I also wanted to leave just a little bit of the old finish in the details to make them stand out.

Once most of the old finish was off, I moved to 150 grit sandpaper to smooth the wood out and then to 220 grit sandpaper. I’ve found that the sandpaper that I linked above is the best sandpaper for legs. It doesn’t rip or tear easily like low quality ones, and it doesn’t lose its grit the moment it touches wood!
You definitely get what you pay for when it comes to sandpaper! Learn more about the best sandpaper for furniture painting here.
Sometimes, the old finish doesn’t easily come off, though. In those cases, I like to use Citristrip (the best furniture stripper!) to remove the old finish. Holy moly, it was totally worth the extra time spent to get natural legs! Check out this post on how to refinish wood furniture legs to see how!
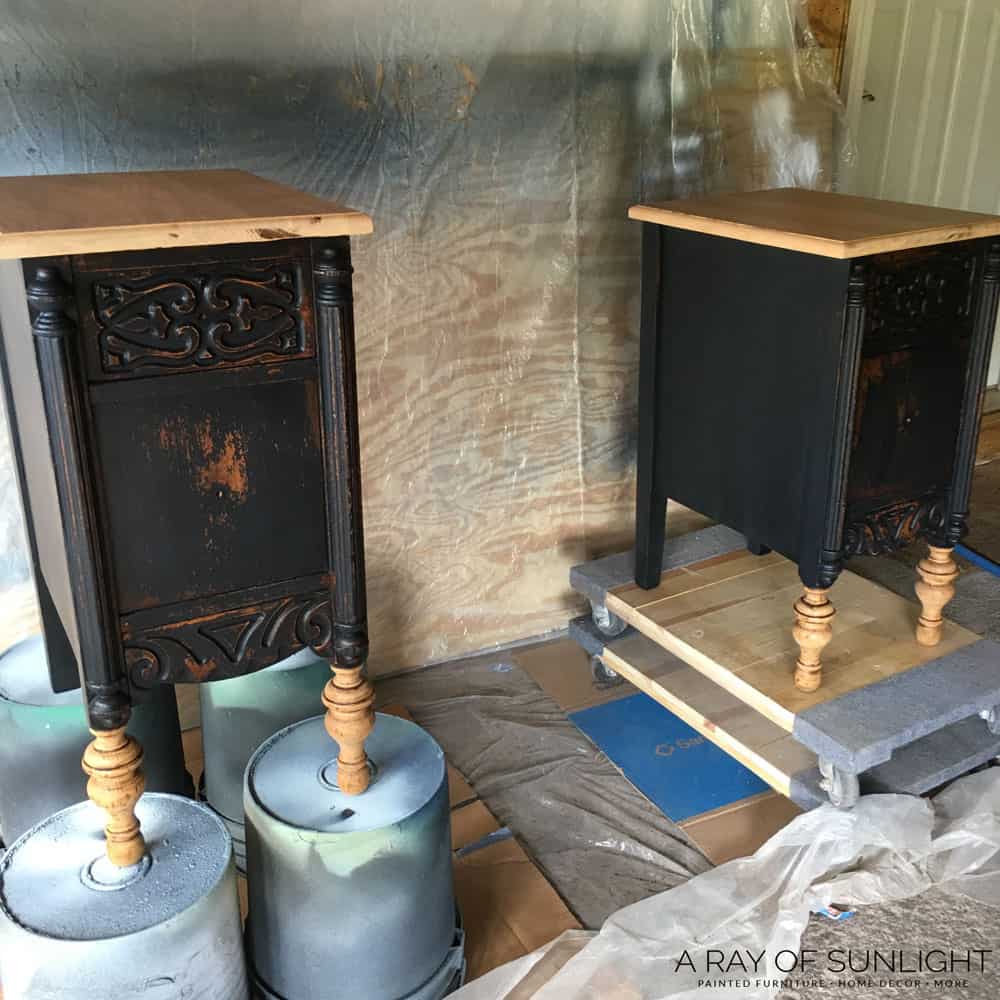
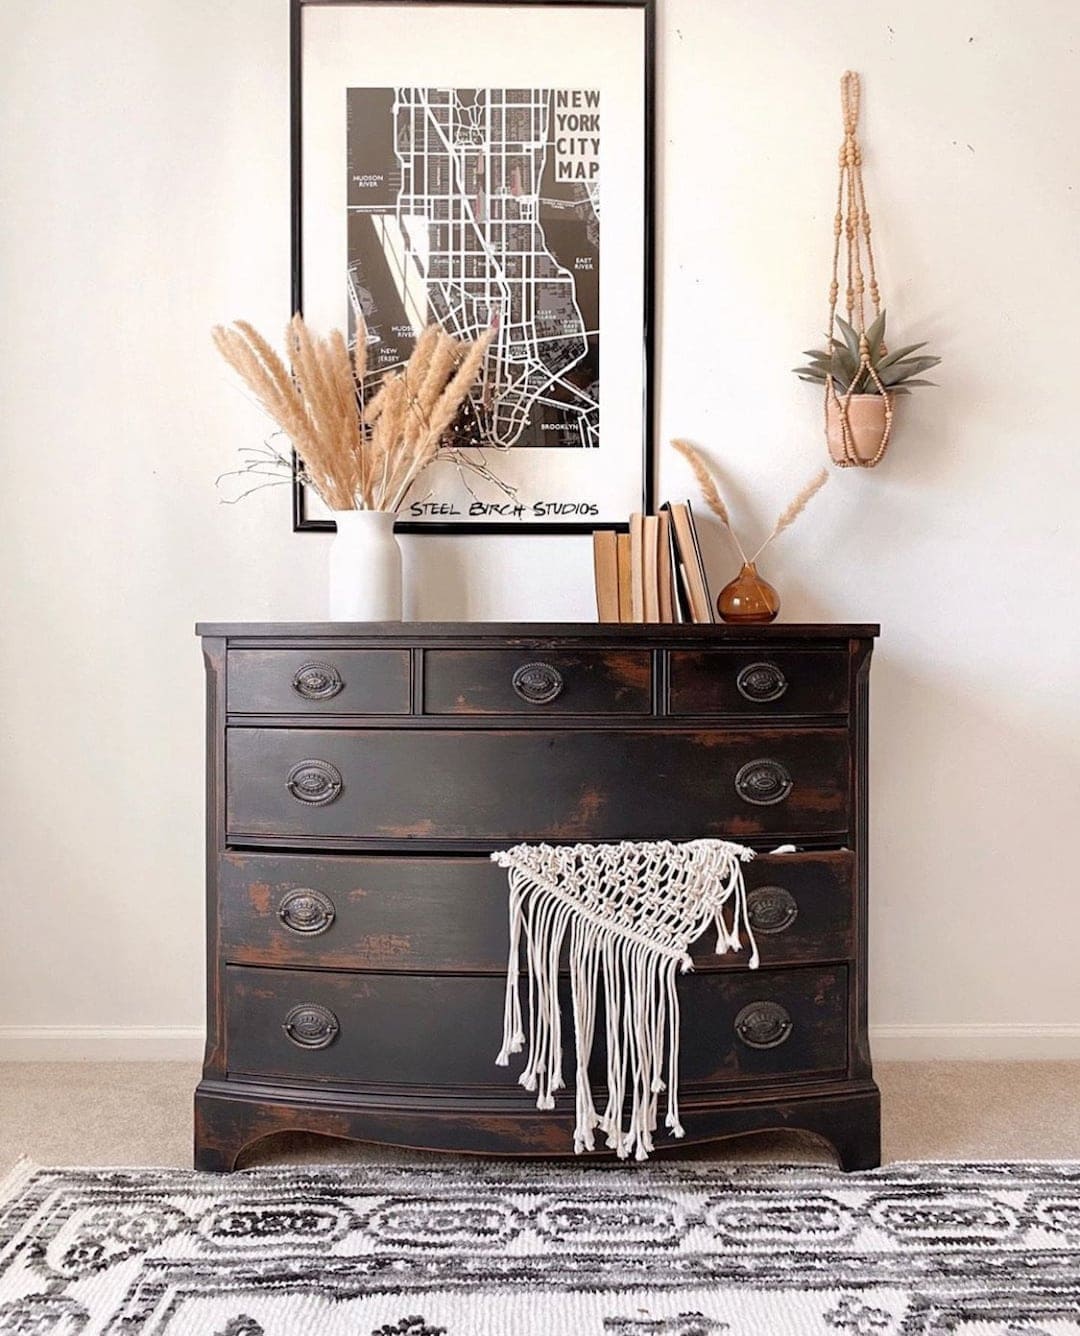
Paint Repurposed Desks Black
Finally, after the damage was repaired, the legs were sanded, and the tops were cut, I moved on to the new color! Since I was using black paint, I wasn’t worried about bleed through, but I did worry that the Bondo would make the coating look uneven.
For more on bleedthrough and how to prevent and tackle it, here’s how to stop stains from coming through paint!
So, a little trick with powdered milk paint is to apply a coat of this waterbased poly over the Bondo before applying any of it. It acts like a primer of sorts to make the colored finish look nice and even.
Then I applied 2 coats of Black Beach by Shackteau Interiors Milk Paint with one of my favorite Zibra round brushes. This brush is amazing for getting into all of the details on these nightstands! Check out more best paint brushes for painting furniture here!
I swear Shackteau Interiors Milk Paint and Zibra brushes were made for each other!
How much paint do you need? You can coat a large piece, like a 9 drawer dresser, or a buffet with 1 pint of Black Beach. For these nightstands, I only used a small amount of the pint!
I wanted the finish to look chippy and old, so I didn’t scuff sand (in my usual process on how to prep furniture for painting, I always scuff sand the old finish!) the front drawers.
The sides got completely sanded down to bare wood when I was removing the excess Bondo, so I knew those wouldn’t chip. But the drawers did exactly what I wanted them to do!
If you aren’t familiar with it, read this post to learn everything you need to know about painting furniture with milk paint!
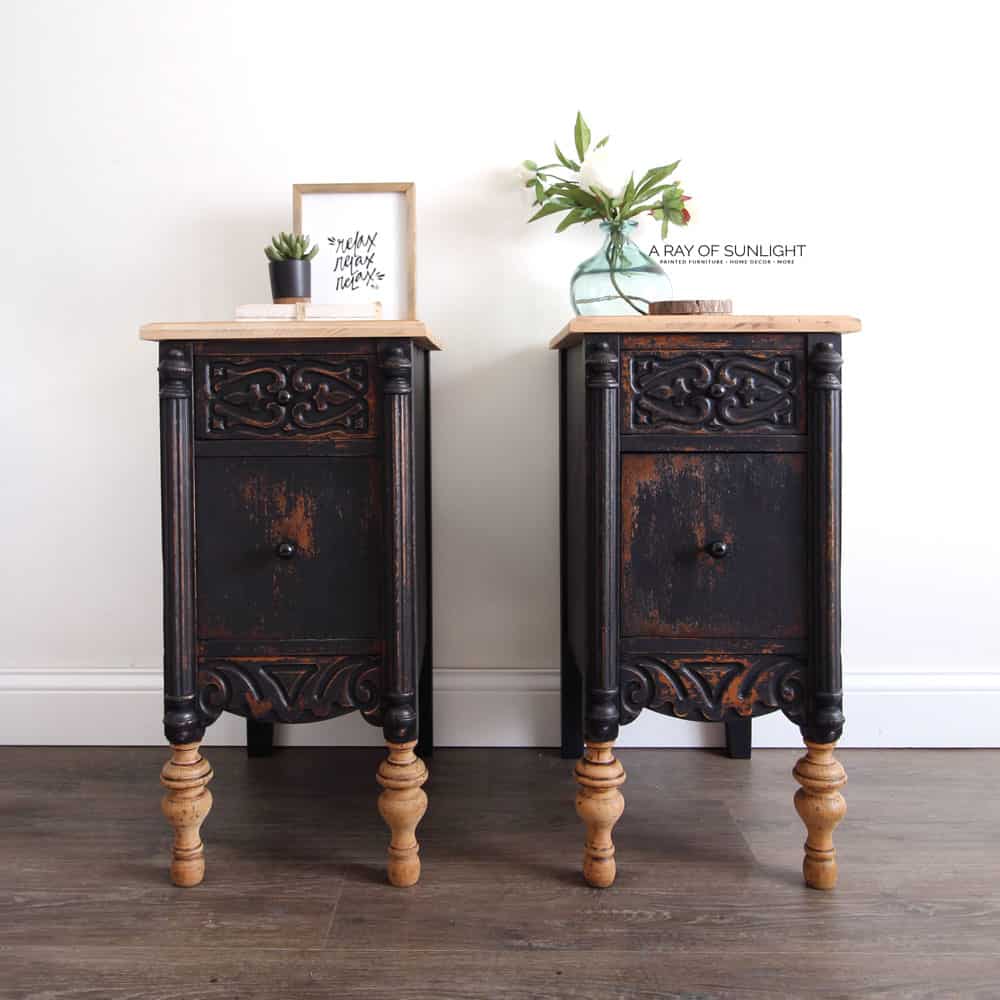
I love this milk coating because it’s super fast to use! And it creates a unique old looking chippy finish that only this powdered product can create. It really looks authentically old!
But if you don’t want a chippy finish, the one we used on this black vintage farmhouse dresser makeover is great to brush on, and the one from this post on how to paint furniture black is AMAZING to spray!
To finish them off, I sanded the finish a little to distress and help it chip. Here are 6 distressing furniture techniques you can do!
Then I sealed everything, including the natural legs and top, with 3 coats of my favorite waterbased poly. Learn ALL of my tips and tricks on how to spray polyurethane here!
More Before and After Makeovers
See All >
Click any of these “before” photos below to view the “after” of that makeover.


If you like how this rustic makeover turned out, check out more rustic painted furniture here. If you’re wondering is two-toned furniture in style – get answers here! Or, if you have a piece or two you want to give a new purpose, check out these upcycled nightstand ideas.
If you like tall pieces, here’s our list of tall nightstand ideas you can do. If you want them more unique and personalized, check out these DIY repurposed nightstand ideas and creative nightstand ideas.
If you just want to update the color of your piece, check out these painted desk ideas and painted secretary desk ideas.

Repurposed Desk Ideas
Aside from these nightstands, there are more ways to repurpose desks! One idea is to turn one into a vanity table. On top, you can place small shelves or organizers for makeup and beauty products.
To complete the setup, you can also add a mirror and a chair. Then, for a more personalized touch, you can update it with your favorite color. This repurposed vanity table will not only look stylish but also save space in your bedroom or bathroom.
Another idea is to use it as a craft station or workbench. You can add pegboards or shelves to hold supplies and tools. The spacious surface will provide plenty of room for all your DIY projects. Not just desks! You can repurpose old sewing tables, too – check out these old sewing machine table ideas for inspiration.
For those who love plants, why not turn it into a plant stand? The flat surface makes for a perfect display area for potted plants of different sizes. You can use the drawers as storage for gardening supplies and also add hooks on the sides to hang smaller plants or gardening tools.
Learning how to repurpose desks can give new life to old pieces. With a little creativity, you can transform it into something functional and unique that fits your style and needs. So next time you come across one that’s seen better days, think outside the box and give it a new purpose!


How to Repurpose Desks Into Tall Skinny Nightstands
Wondering what to do with an old desk? Here's how to repurpose desks into nightstands.
Materials
Tools
Instructions
- Locate the screws and/or nails that attach the top to the desk. Remove the top of the desk and set it aside for later.
- With a hammer and possibly a saw, remove the middle drawer supports.
- Repair the damage left behind with Bondo. Once dry, sand it smooth. You can also apply one more coat to get any small places that you missed or places that had some air pockets from the first round.
- Measure how big your new tops need to be then cut them out of the old top with a table saw or circular saw.
- Router out the 3 sides of the new tops to put simple detailing on the edges and sand them to bare wood.
- Attach the new tops onto the nightstands by simply lining up the tops and using the old screw holes and screws.
- Sand the nightstand legs to remove the old finish. Use the edge of folded sandpaper to get into the details of the legs.
- Prime waterbased polyurethane over the Bondo before applying any paint. Then apply 2 coats of milk paint all over the nightstands
- Once dry, distress the paint a bit to help it chip.
- Seal everything with 3 coats of waterbased polyurethane.
Recommended Products
As an Amazon Associate and member of other affiliate programs, I earn from qualifying purchases.

More Repurposed Furniture Makeovers
- How to Upcycle a Desk into a Pair of Nightstands
- DIY Black Farmhouse Nightstands
- Repurpose a Desk into Nightstands
- Vanity Turned into Nightstands
- Painted Sewing Table With Silk All-in-One Mineral Paint

Follow us on YouTube to get more tips for painting furniture. Or share your project with us on our Facebook Group and be part of our community. See you there!