Old Trunk Makeover – Bar Station

Transform an old trunk into a bar station or coffee bar for your home with one of these easy and creative furniture makeover ideas. Check out this step by step tutorial for inspiration for your own old trunk makeover!
Your worn trunk may be sitting in the attic or garage collecting dust, but you can definitely turn it into a stylish and functional addition to your home. Not only will this project save you money from buying new furniture, but it also adds a unique touch to your space. Let’s get started!

I hunt for used furniture online all the time! Some pieces are more traditional like a dresser or a buffet, but then other times I find pieces like this old trunk and instantly a light bulb goes off! My imagination wheels started turning in my head and I came up with a cool idea to repurpose this trunk.
I hope this post inspires you to think outside the box the next time you see something online, at a flea market, or on the curbside.

“Trust that little voice in your head that says, ‘wouldn’t it be interesting if…’; and then do it.” – Duane Michals.
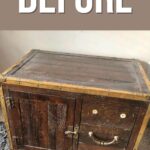
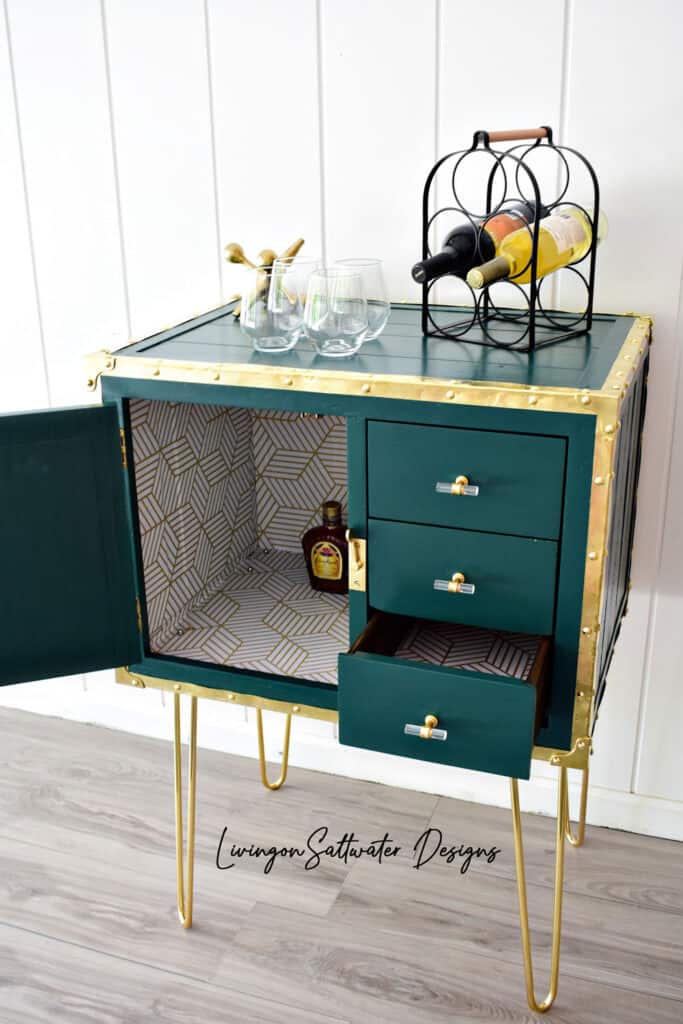
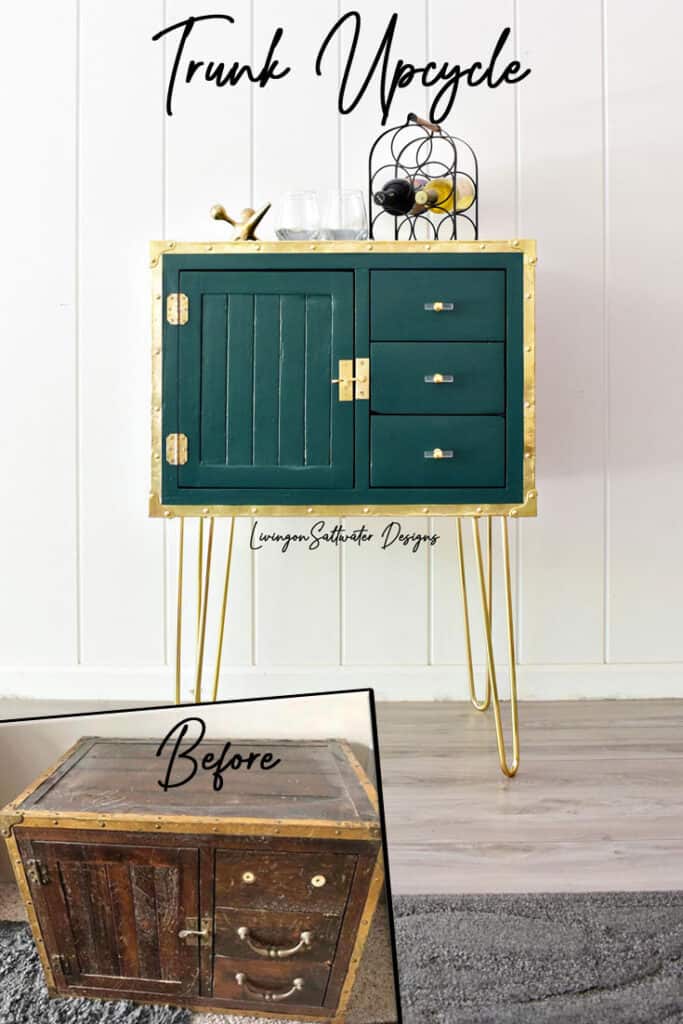
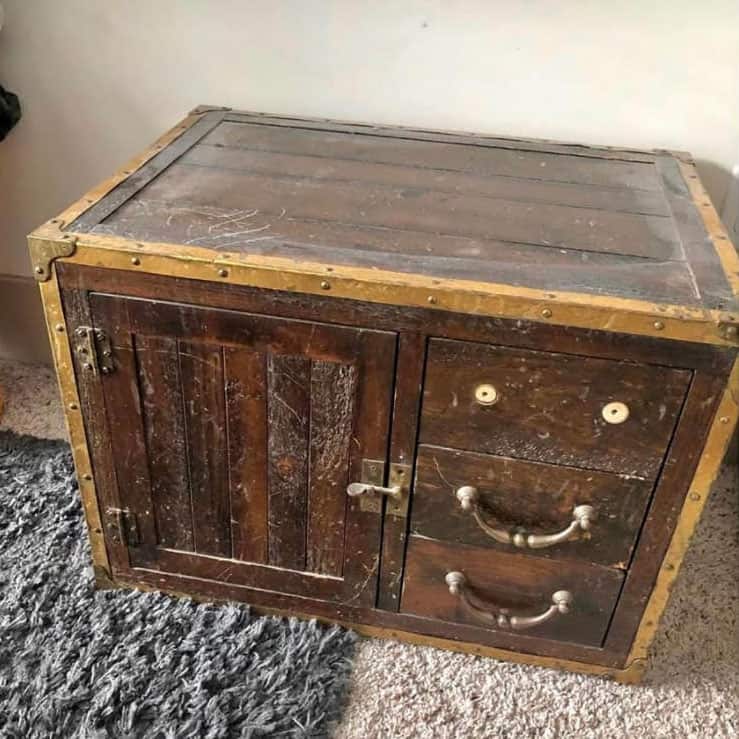
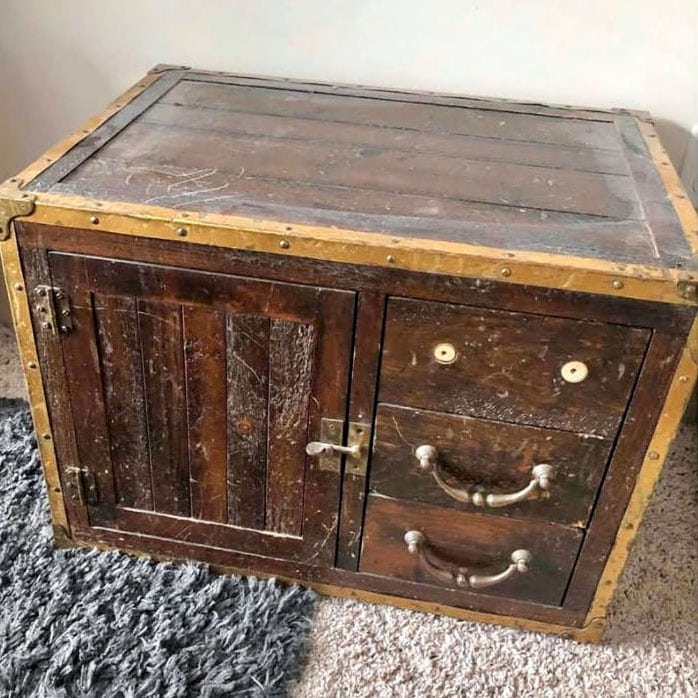
When I saw this old beat up trunk on Marketplace, I instantly thought that I’d never seen anything like it. I had this idea, wouldn’t this trunk be a great bar station!? Most trunks have a single lid with storage under the lid. This trunk was very different with a door and 3 drawers.
My thought was bottles and glasses could be stored behind the door and items such as cocktail napkins, straws, and other accessories could be stored in the drawers. I immediately scooped this piece up!

Supplies Used for this old trunk makeover
As an Amazon Associate, I earn from qualifying purchases. I also may earn from other qualifying purchases with other companies or get free product to review and use. All opinions are my own.
- Bar Keeper’s Cleaner Spray
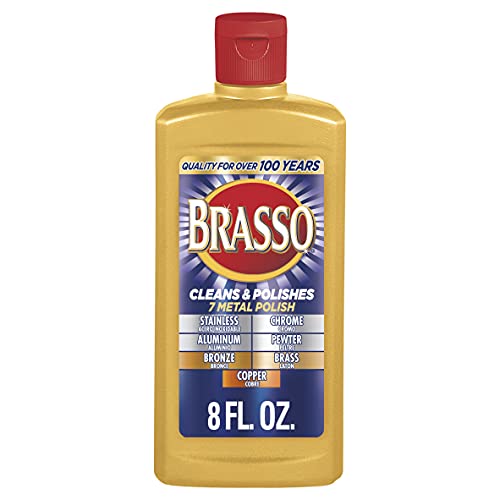
- Brasso Cleaner
- White Vinegar
- Fine Steel Wool
- Wood Filler
- 120 Grit Sandpaper & 220 Grit Sandpaper
- Tack Cloth
- Primer
- Paint – Dark Everglade by Behr
- BBFrosch Paint Powder
- Varathane Waterbased Poly – Satin Finish
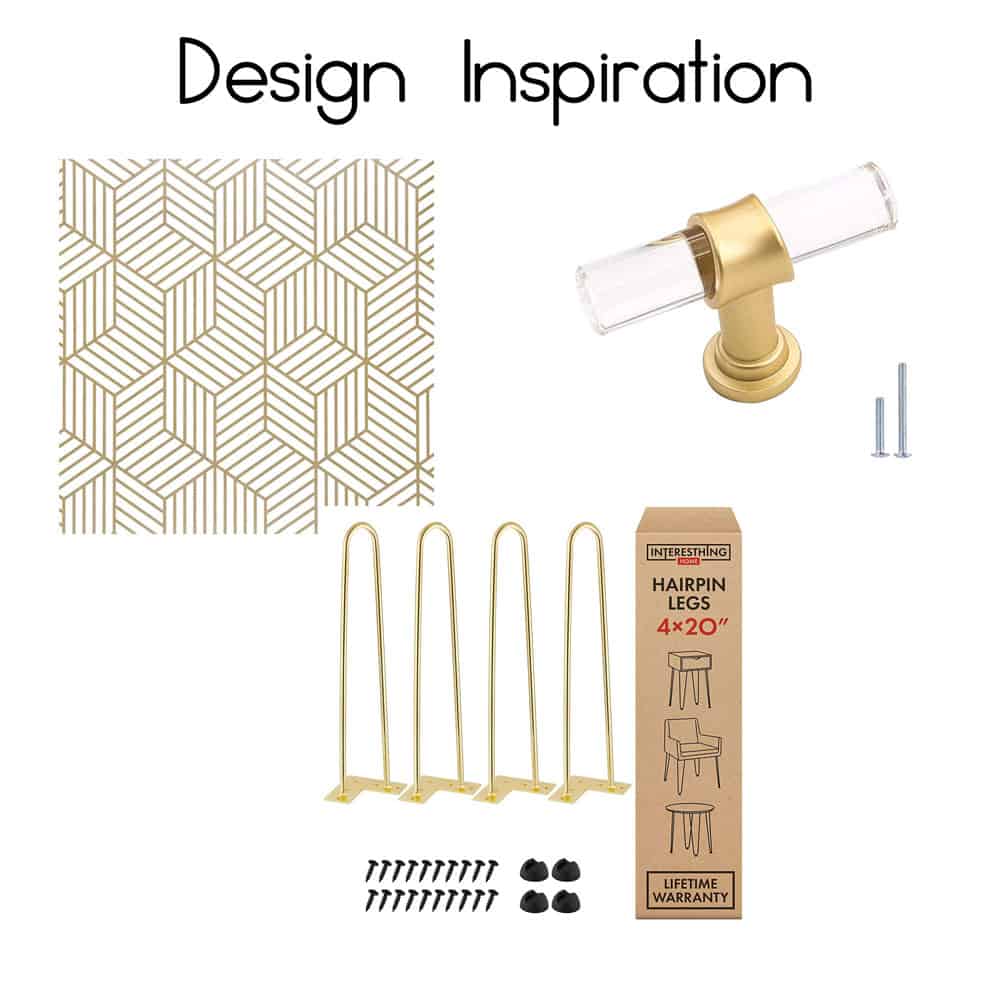
- Gold Hair Pin Legs
- Gold and Lucite Drawer Pulls
- Peel and Stick Wallpaper
Prepping for Old Trunk Makeover
The first step for this makeover was to remove all of the brass hardware covering all of the edges and corners. The hardware was very dirty and did not look shiny. I wanted to make this look like a high end piece and it would be easier to clean the hardware once it was removed.
How to Clean Old Hardware
After removing the hardware I shined it up in the bathtub. I let it soak in some hot water with vinegar for 20 minutes. I then sprayed some Bar Keeper’s cleaner spray on the brass pieces and used some fine steel wool to scrub the metal.
This part took a little more effort to get the pieces cleaned, but it was worth it. I alternated using Brasso and Bar Keeper’s Friend Spray with the steel wool to clean up the hardware. Learn about another way on how to clean old furniture hardware here.
New Hardware, Legs, and Wallpaper for Old Trunk Makeover
While I worked on cleaning the brass corner caps, I searched for new hardware, legs, and peel and stick wallpaper. I wanted to keep with the gold/brass theme and decided on some gold hairpin legs and gold and lucite drawer pulls. Check out some gold painted furniture ideas here for more of this golden look!
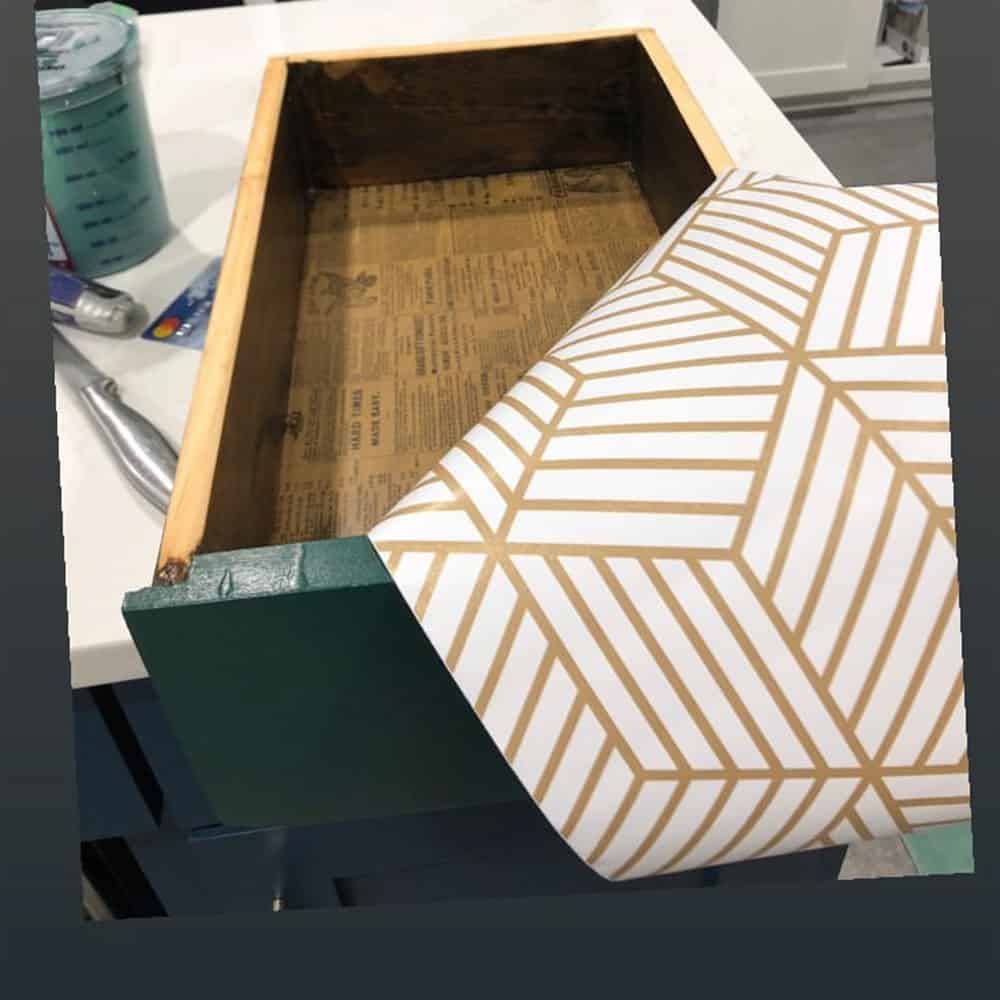
But I also got the idea that I would wallpaper the inside of the bar station, behind the door, versus painting the inside. So, I decided I would use the same wallpaper to line the 3 drawers. See our post on how to paint over oil based paint on how we used wallpaper on the inside drawers of this WW2 dresser. Check out the best material to line dresser drawers and how to install it yourself here.
Here’s a picture of the hardware, legs, and wallpaper I decided on.
Repairing and Sanding Old Trunk
I also worked on repairs and sanding while the brass edging was cleaned up. Before I could paint, I wanted to smooth out the surface of the trunk. If you look at the “before” picture, you will notice there were a lot of scratches and some parts of the wood had a rough texture.
I wanted to have a smooth surface for a more modern feel. I used wood filler to patch all the scratches and smooth out the rough spots on the wood.
Once the wood filler was dried, I sanded all the sides and the top with 120 grit sandpaper and then 220 grit sandpaper. Learn more about the best sandpaper for furniture painting here. I cleaned all the sanding dust off of the piece with a tack cloth.
**Note: Learn the best way how to change hardware and fill old hardware holes here.
Priming Trunk Before Painting
The trunk was ready for painting at this point, and I used the BIN shellac primer and applied 2 coats, letting the primer dry between each coat. Check out more of the best primers for painting furniture and learn how to choose the right one here.
I then sanded the trunk with 220 grit sandpaper before applying the next layer of paint.
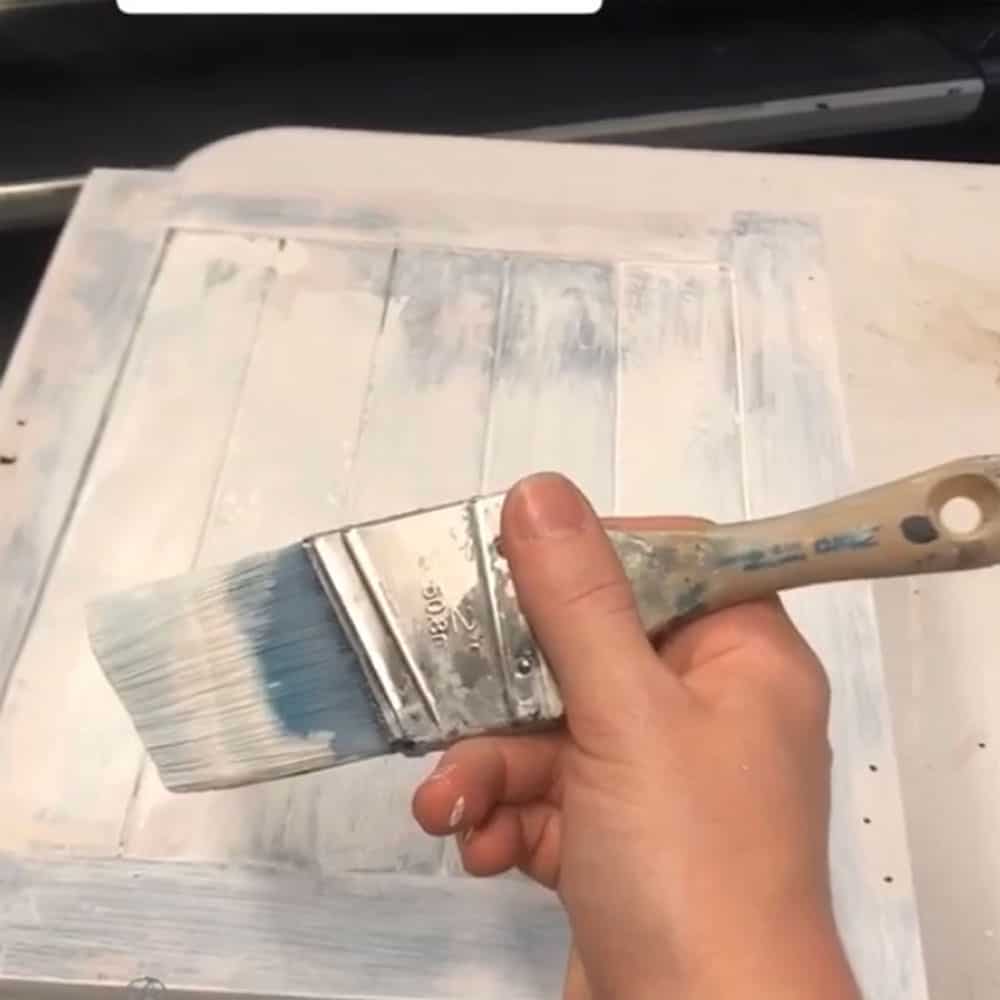
Painting an Old Trunk
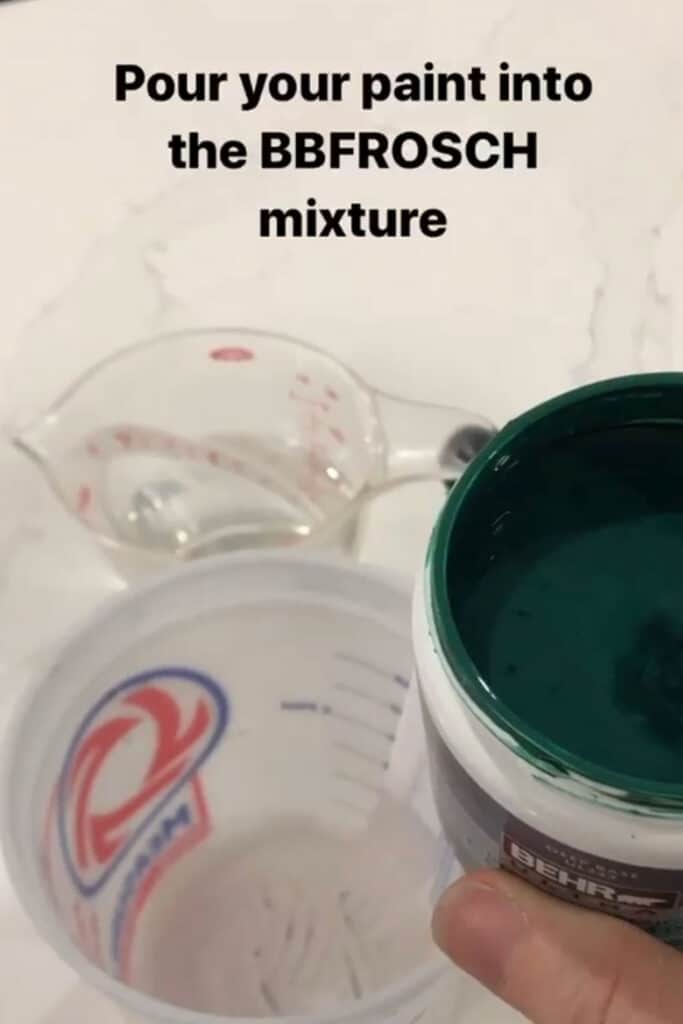
For my furniture pieces, I like to use BBFrosch Transformation Powder. BBFrosch allows you to use any latex paint on your furniture. I like that I can choose any color and I can create my own “chalk paint.” The BBFrosch powder adds durability and helps with the adhesion of the paint to your surface.
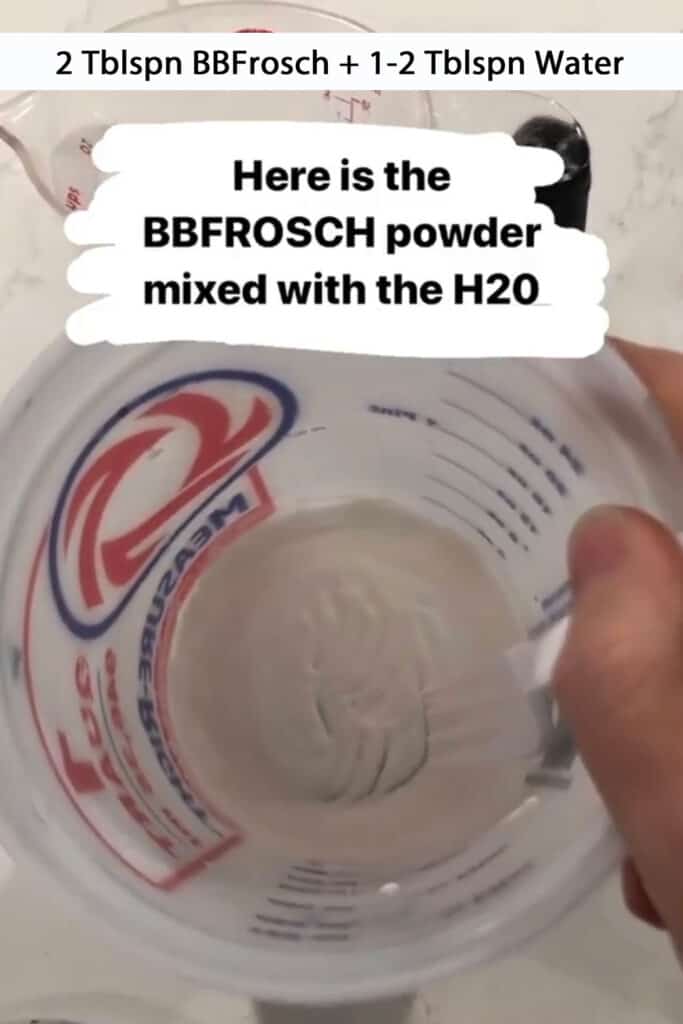
Check out my honest BB Frosch Paint Transformer review to learn more about the features, and pros and cons of this product. You can also create your very own chalk paint with this homemade chalk paint recipe.
For this old trunk makeover, I selected Behr’s Dark Everglade color in an eggshell finish and added the BBFrosch powder to my paint. Check out more green chalk painted furniture ideas here for inspiration on this color.
Would you like to save this?

It took three coats of paint to cover the white primer. You can have your primer tinted if you are using a dark color and then it will take 2 coats of paint.
Topcoating Old Trunk Makeover
After the paint dried completely, I applied a waterbased poly to help protect the finish from wear and tear. Learn more about different options of topcoats for painting furniture here.
Adding Hardware, Legs, and Wallpaper
Then I reattached the metal edging and corner caps with new rounded brass tacks.
How to Add Legs to a Trunk
The next step was to attach the hairpin legs. I secured the legs through the bottom of the trunk with some bolts and finish cap nuts. Learn more about how to add hairpin legs to furniture in this DIY dresser with hairpin legs project!


Use Peel and Stick Wallpaper
The last part of this old trunk makeover was to add the new hardware and put up the peel and stick wallpaper inside the drawers and the cabinet part. I used 2 rolls of the peel and stick wallpaper.
First, I measured the size of each wall and the “floor” of the cabinet and cut a piece of the wallpaper a little bigger than each size. I then started at the top of each wall and made sure the wallpaper looked straight and used an old credit card to smooth it out on the wall.
Once the wallpaper was smoothed out on each wall, I used a razor blade knife to trim around the edges for a clean look.

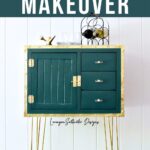
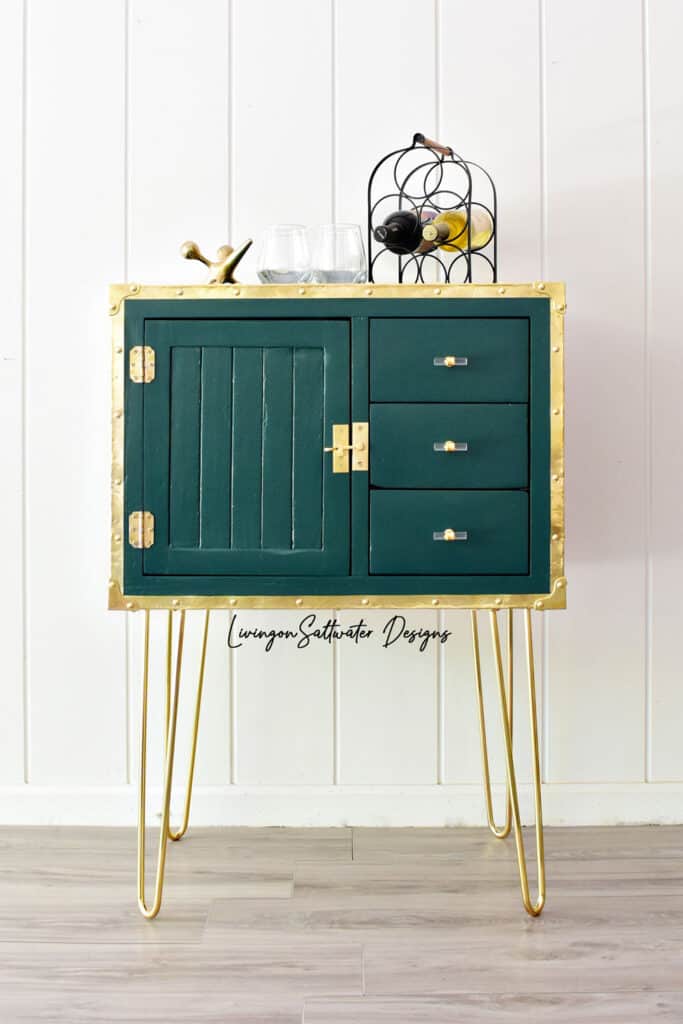
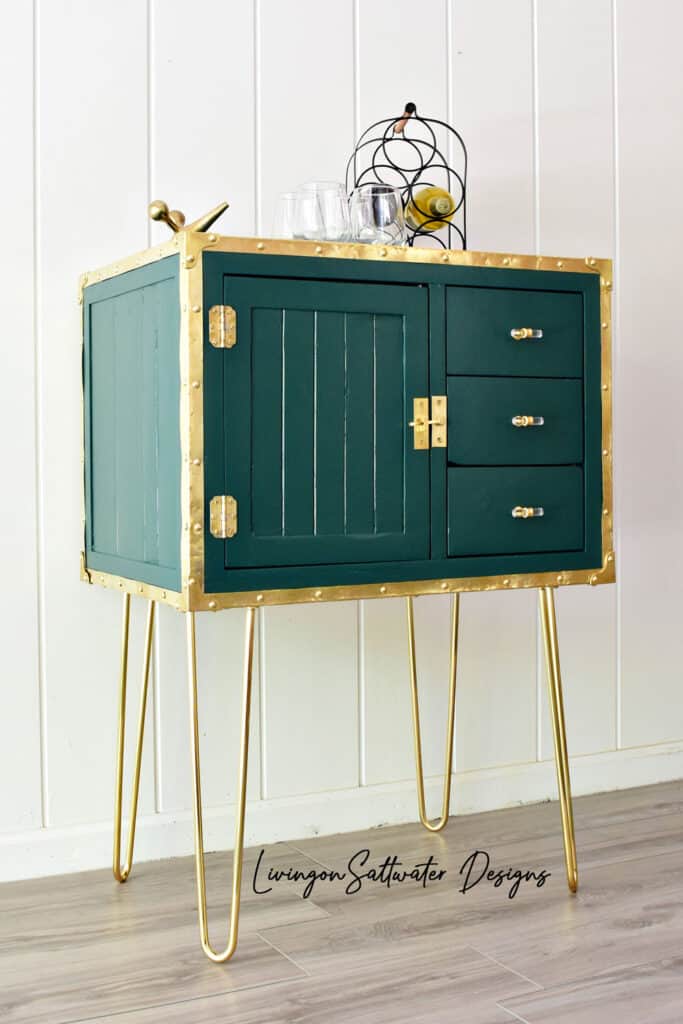
This trunk was completely transformed into a brand new piece of furniture! I love how the new paint color and hardware gives it a modern touch, while still maintaining its vintage charm. And with the added hairpin legs, it’s now the perfect height.
More Before and After Makeovers
See All >
Click any of these “before” photos below to view the “after” of that makeover.


Old Trunk Makeover Ideas
If this trunk transformation has sparked your creativity, then you might be interested in exploring more on how to repurpose an old trunk. There are plenty of upcycled trunk ideas out there that can turn your once forgotten or thrifted piece into something new and useful.
You can repurpose an old trunk into a storage bench you can use in your entryway or at the foot of your bed. It can also storage for your kids’ toys, painting it with a fun and colorful design to fit their playroom.
Or how about turning it into a coffee table for your living room? Paint it with a bold and vibrant color, add some legs or wheels for functionality, plus a glass top, and you got yourself a unique and functional piece of furniture!
You can check out our repurpose tall dresser ideas and DIY repurposed nightstand ideas for more inspiration on repurposing existing furniture.
Old Trunk Paint Ideas
If you already have a set design or color scheme in your room, you can use that as inspiration for painting your old trunk. This will tie everything together and create a cohesive look. If you’re not yet sure what paint to use, our post on the different types of paint for furniture will help you decide which one is best for your project.
For paint colors, if you have a lot of wood accents in your room, you can paint the trunk a similar shade to match. Or if you have a lot of bold colors, go for a neutral color like white or gray for the trunk. Check out more options for neutral furniture paint colors here!
You can still go bold and bright with your trunk paint. This is a great option if you want the trunk to be a statement piece in your space. Here are the bold furniture paint colors that would look great on furniture.
I hope this tutorial inspires you to look at items for sale in a new light that you can reuse into something different than its original purpose (kinda like this repurpose an MCM desk into nightstands makeover). You are only limited by your imagination!
This piece was transformed by Caroline of Living on Salt Water Designs! “I grew up in Eastern NC and I have a love for being out on the water. Equal to my love of the water is painting furniture and DIYing. Nothing makes me happier than a good before and after comparison. I love seeing a vision come to life and a complete transformation that brings life to a new piece.”
Follow Caroline on her Blog, Instagram and Facebook Page and give us a Like/Follow to see what’s next!


Old Trunk Makeover - Bar Station
Transform an old trunk into a bar station or coffee bar! Check out this step-by-step tutorial for inspiration for your own old trunk makeover.
Materials
Instructions
- Remove and clean the old hardware from the old trunk. Repair any damages, fill in old hardware holes and scuff sand the surface of the trunk.
- Prime trunk with 2 coats and let the primer dry between each coat. Then sand the trunk with 220-grit sandpaper before painting.
- Mix latex paint with the BBFrosch powder to make homemade chalk paint. The transformer powder adds durability and helps with the adhesion of the paint to your surface. Paint trunk with 2-3 coats.
- After the paint dries completely, apply a water-based poly to help protect the finish from wear and tear.
- Reattach the metal edging and corner caps. Attach the hairpin legs through the bottom of the trunk with some bolts and finish cap nuts.
- Add new hardware and stick the wallpaper inside the trunk drawers and cabinet.
Recommended Products
As an Amazon Associate and member of other affiliate programs, I earn from qualifying purchases.


More Furniture Makeovers
- Painted Cedar Chest Makeover
- Painted Hallway Cabinet Makeover
- Apothecary Style Vintage Nightstands Makeover
- Dark Green Painted Furniture
- Painting a Bed Frame Black
Learn the Art of Updating Furniture!
If painting furniture feels overwhelming or your past attempts didn’t go as planned, this course will guide you step by step.

Follow us on YouTube to get more tips for painting furniture. Or share your project with us on our Facebook Group and be part of our community. See you there!
I have never seen a trunk like this before…what a great find!!! Even better, what a beautiful makeover!! Love the green color and adding the hairpin legs was a great idea….she’s just so pretty with her brass trim all shined up…kudos for a great project!! Thank you for sharing!
Thank you so much for your love on this old trunk makeover! I agree, Caroline from Living On Salt Water did an incredible job with it!
Love it, it turned out Beautiful and the color choice is perfect!!!!!!!!!!!!!!!!!!
Yay! So glad you love this trunk makeover! Caroline did amazing, right??