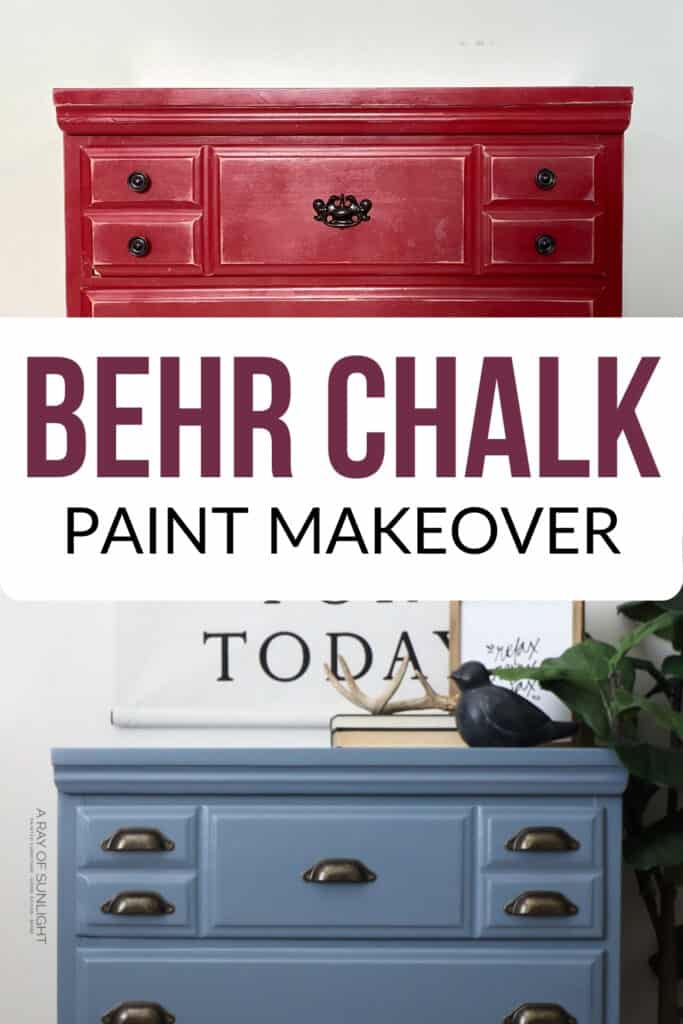
Behr Chalk Painted Dresser Makeover
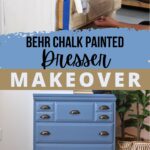

If you’re looking for a budget friendly and creative way to update your furniture, then this tutorial is for you! This week, we painted an unfinished wood dresser with Behr chalk paint and a Behr chalk paint brush. Here’s how this Behr chalk painted dresser makeover went down!
These DIY dresser makeovers are all the rage nowadays and it’s no wonder why – they are affordable, customizable, and can completely transform the look of a room.
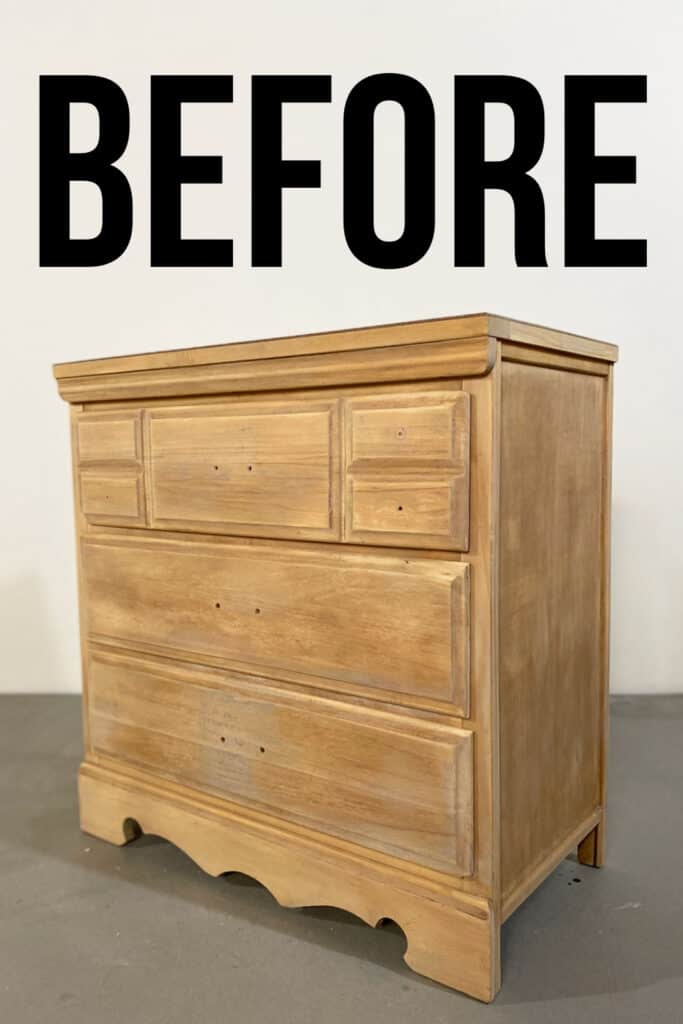
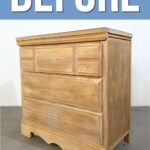
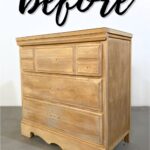
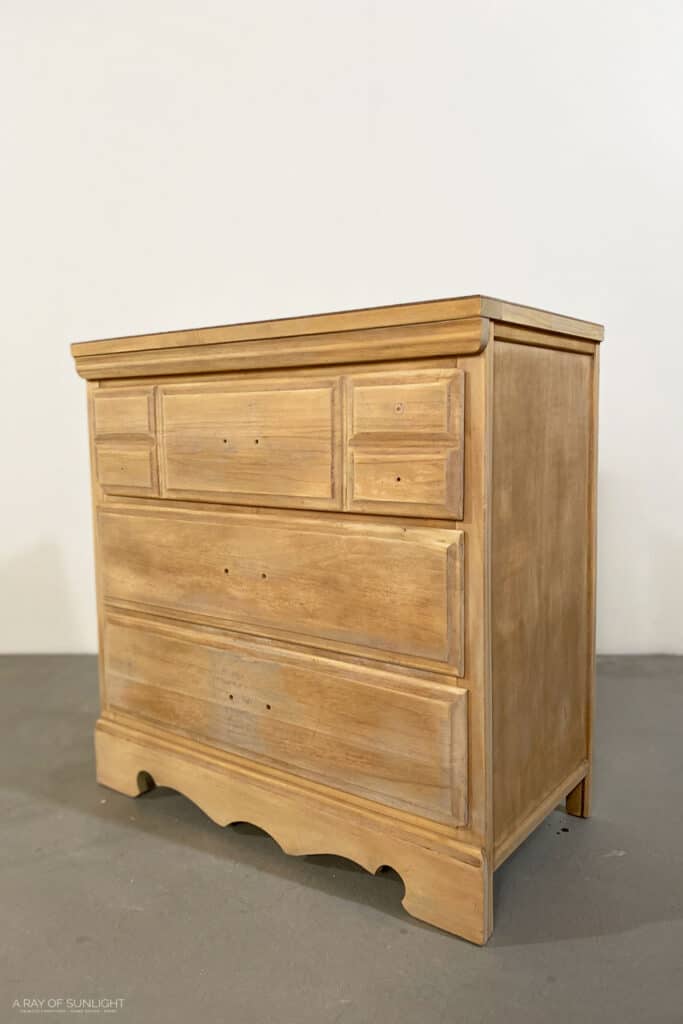
Today I’m making over this raw wood dresser that I stripped down to bare wood for another project in this post on how to strip paint from wood furniture.


Above is what it looked like before I stripped it down to bare wood. And you’ve seen above what it looked like after I finished stripping it down. It still had a little bit of primer here and there, but the biggest eyesore to me was the broken corners on the drawers.
I also hate the bottom of this dresser. The little curly cues are a little too much for me. So let’s dive into how we finished this dresser makeover.

Supplies Used for Behr Chalk Painted Dresser Makeover
As an Amazon Associate, I earn from qualifying purchases. I also may earn from other qualifying purchases with other companies or get free product to review and use. All opinions are my own.
- Screwdriver
- Power Drill
- Drill Bits
- Transfer Paper
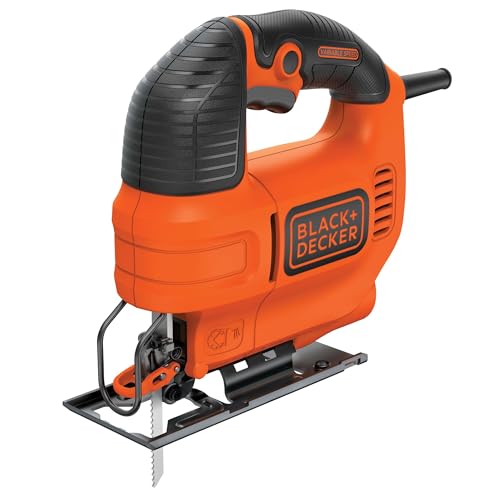
- JigSaw
- Clamps
- SurfPrep Sander (Use code RAY10 to get 10% off your order!)
- Shop Vac with Hose and Brush Attachment
- Tack Cloth
- 100, 150, 220 Grit Sandpaper
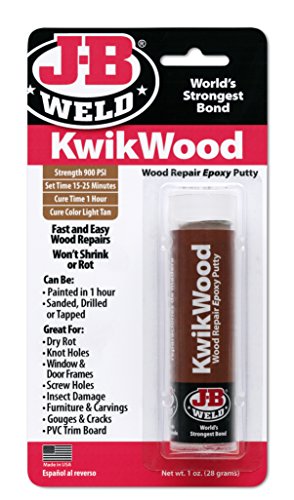
- KwikWood
- BIN Shellac Based Primer
- Mini 3/8″ Nap Roller
- Behr Chalk Paint in the color Adirondack Blue
- Behr Chalk Paint Brush
- Misting Bottle
- Minwax Polycrylic in Spray Can
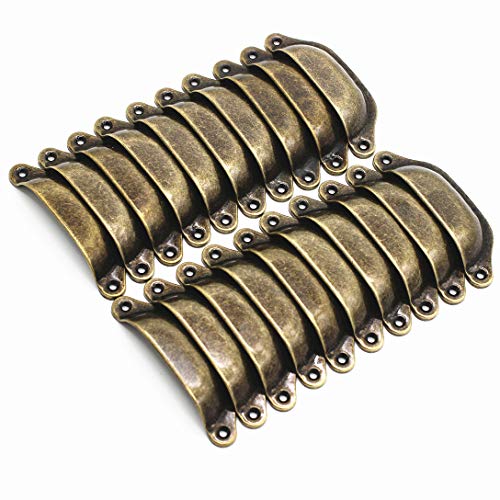
- Cheap Farmhouse Cup Pulls
Remove and Cut the Base of the Dresser
I got started with this makeover by removing that toe kick (or whatever you want to call it.) I flipped it on its front and was able to unscrew the screws that were holding it in place.
One screw gave me a fit though and wouldn’t come out.
So I grabbed a few drill bits and drilled them to pieces, to the point that I could remove the piece of wood.
I didn’t care for how it looked without the base though. And knowing that the price of lumber is so much higher now, I opted to cut a new design into the wood instead.
I freehanded the design that I wanted to cut, onto a piece of paper, and then I traced it onto the wood with some transfer paper.
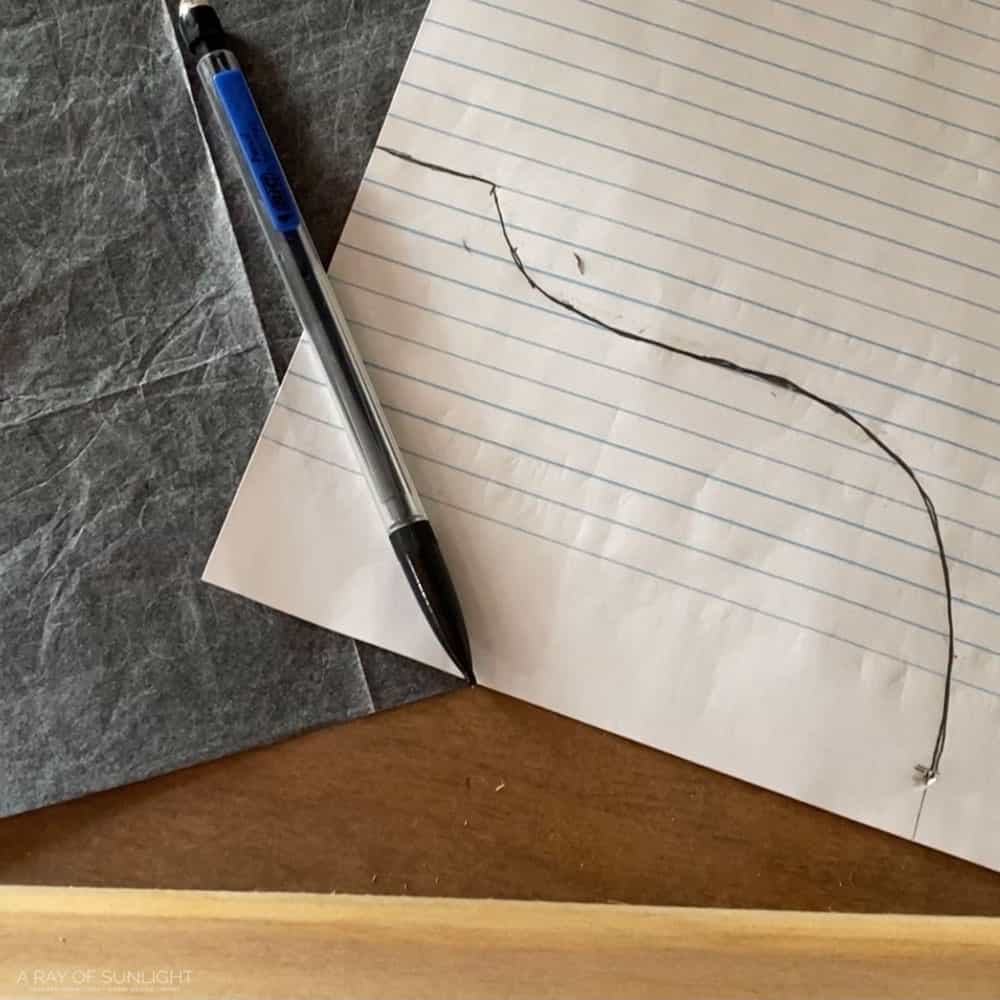
I went with a straight middle and a more modern curved edge. Actually, I got the idea by browsing Instagram and looking at the bottoms of the dressers I came across.
It was this gorgeous green dresser from the oh-so-talented Meg at Fig and Poppy Co that had the design I wanted to recreate on the bottom. Check out her amazing work on Instagram!
Then I clamped the wood to my workbench and used my cheap jigsaw to cut out the design.
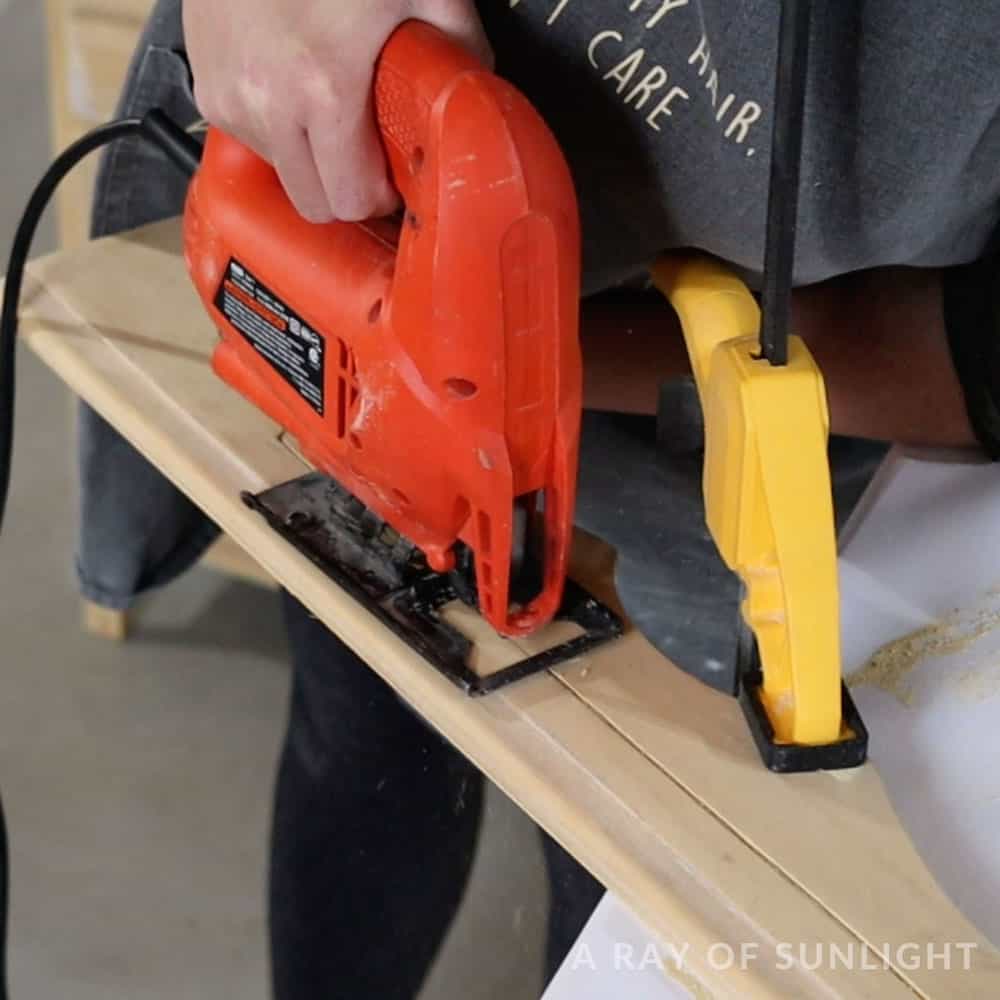
I cut halfway through and then flipped the wood around and reclamped it so I could cut the other half of the wood.
And then I sanded all of the edges smooth with my power sander and some 150 grit sandpaper. The first round helped sand out most of my flaws with the Jigsaw.
And then I came back with 220 grit to smooth it out more. It’s still not perfect, but I think it looks SOOOOO much better than all of those curves!
Repair Broken Corners and Fill Old Hardware Holes
Then I got to work, fixing the damaged corners on the drawers.
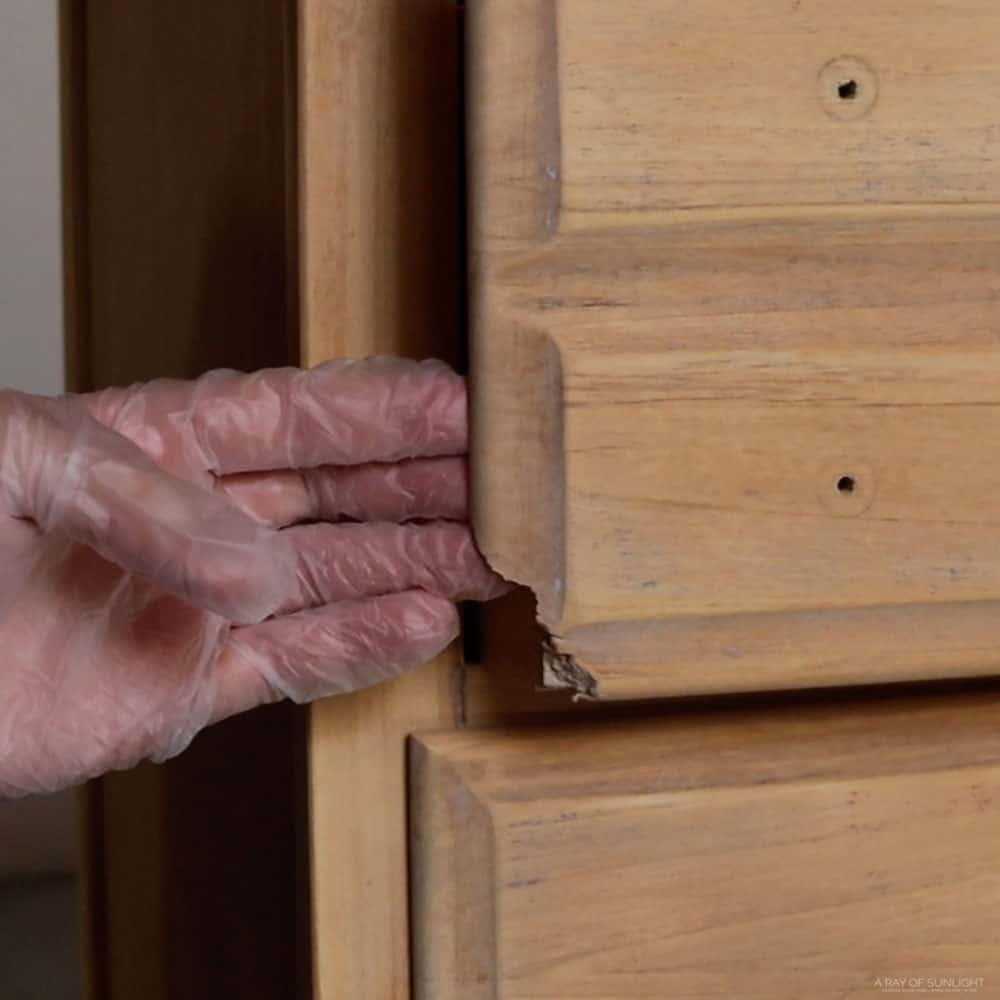
This one in particular was really BAD.
How to Repair a Broken Corner
I started by clamping a piece of wood that I had sprayed with cooking spray behind the edge of the drawer.
I needed something to keep the back of my repair flat and in line with the rest of the drawer, and this was the perfect little solution.
Then I mixed up my all-time favorite wood repair product, this KwikWood wood epoxy!
So you just break off however much you need, and then knead it together with your hands, and mold it in place. I loosely shaped it in the shape of the corner.
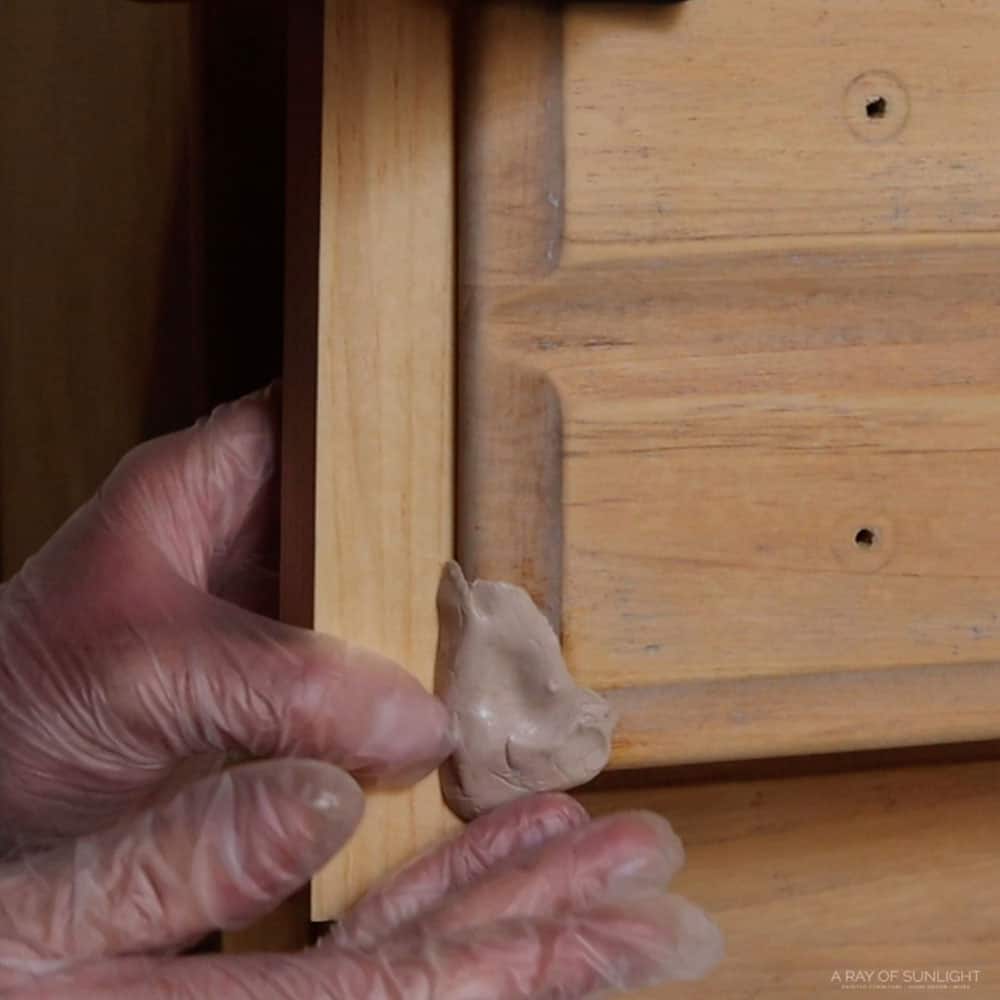
I left excess KwikWood there so I could sand it down smooth with the rest of the drawer, and so I was sure that it had enough surface area where it could hold onto the drawer and not fall off.
After it was shaped how I wanted it, I removed the clamped wood, just so I could make sure the back looked good, and that it wasn’t sticking to the KwikWood.
Then I clamped it back on so it could help support the KwikWood while it dried. You can also use Bondo to fix a chipped wood corner.
Get Our Secrets!
Grab this super convenient How to Repair Furniture Ebook with all of our secrets on how to repair furniture for only $14.
You can print it out and have instant access whenever you come across damaged furniture, and know exactly how to fix it!
Click on the picture of the book to purchase!

Fill In Hardware Holes
I also filled the hardware holes with KwikWood so I could put new hardware on. Learn about three different ways you can fill hardware holes in this post on how to change hardware on a dresser.
Sand and Shape KwikWood
After everything was dry, I removed the clamp and used both my sander and 100 grit sandpaper to sand the KwikWood down smooth to the shape of the dresser drawer.
This stuff dries hard. Harder than the wood actually.
So it takes a few minutes to get it all sanded down, especially with this much excess. But I think there is something super satisfying about sanding and shaping it.
And it looked so good after fixing those broken corners!
Why I Love Kwikwood For Furniture Repairs
It’s the consistency of soft clay, so you can mold it into whatever shape you need it to be.
You have about 15 minutes to work with it before it gets too hard, and then it’s completely dry in about an hour. And it’s way less stinky than Bondo. Check out my honest Bondo wood filler review here.
Don’t get me wrong, Bondo still has its place in repairing furniture, but KwikWood has stolen my heart for most of my repairs because of how easy it is to use.
It’s hands down my favorite way of filling holes when replacing cabinet or furniture hardware too! Learn more about how to use KwikWood in this post.
Prime Raw Wood Dresser and Laminate Top
Not only is this piece now raw wood, it also has a slick laminate top. Both of those things warrant a need for a primer!
The slick laminate needs a little something-something to help the paint stick. Learn about painting laminate furniture here.
And the raw wood needs something to block stains. Learn about how to stop stains from coming through paint right here. Also, check out how to stop wood knots from bleeding through paint here.
This BIN shellac-based primer does both of those things. But it also creates a nice base for the paint and helps the paint have an even sheen in the end.
I rolled on two coats of primer, letting it dry in between coats for about 45 minutes.
I honestly hate brushing on primer. I would rather spray it from a spray can, but I had a lot of primer left in this gallon that needed to be used.
So I opted to roll this one on since it has straight lines. Learn more about the best rollers for priming and painting furniture here.
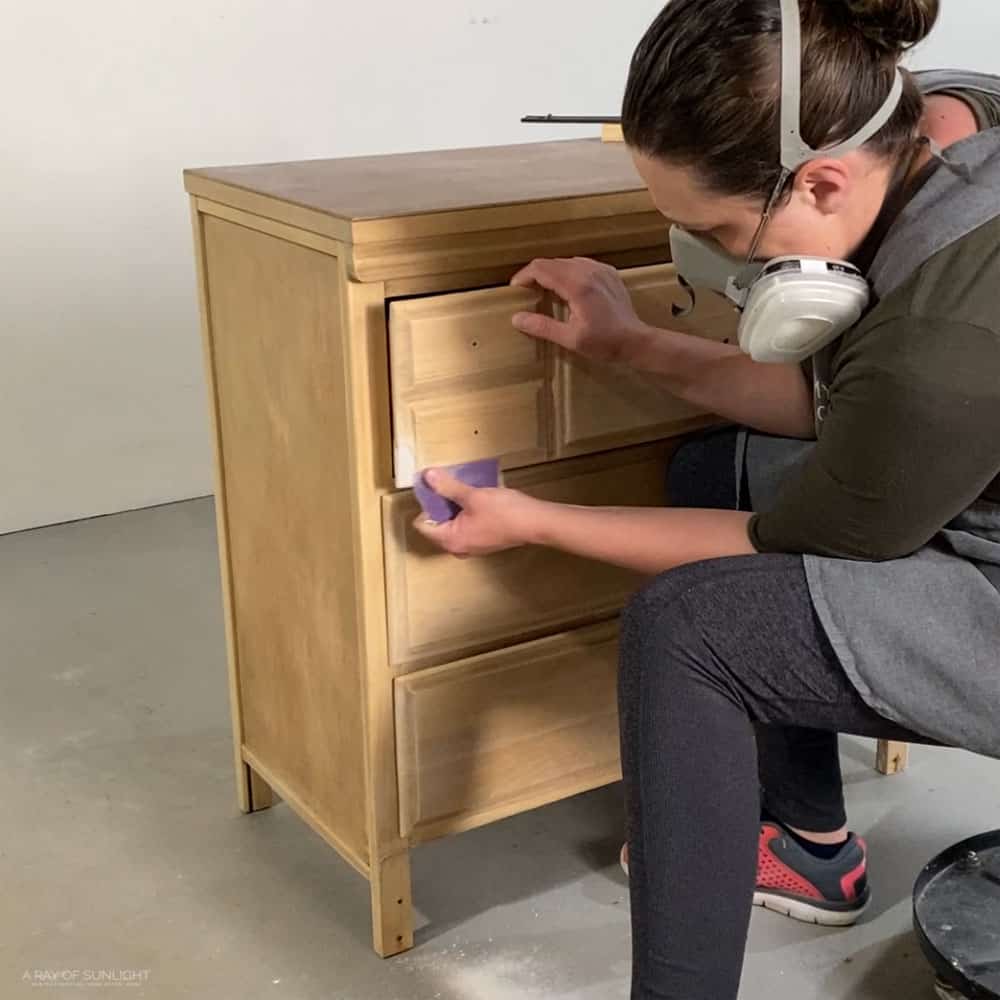
Rolling on the primer leaves behind a lot of texture, so before I started to paint, I sanded the BIN primer down with 220 grit sandpaper.
BIN shellac primer sands down into a powder, kind of like chalk paint does, so it’s really not bad to sand. After it all felt smooth, I vacuumed up the dust and used a tack cloth to pick up any remaining dust.
Brush Behr Chalk Paint onto Dresser
For this piece, I decided to try my hand with Behr chalk paint again.
But last time I sprayed it in this Behr chalk paint review, and I had a few questions about how it would brush on… So this time I decided to brush it on.
I also decided to splurge on the Behr chalk paintbrush and see if it’s really worth $30!
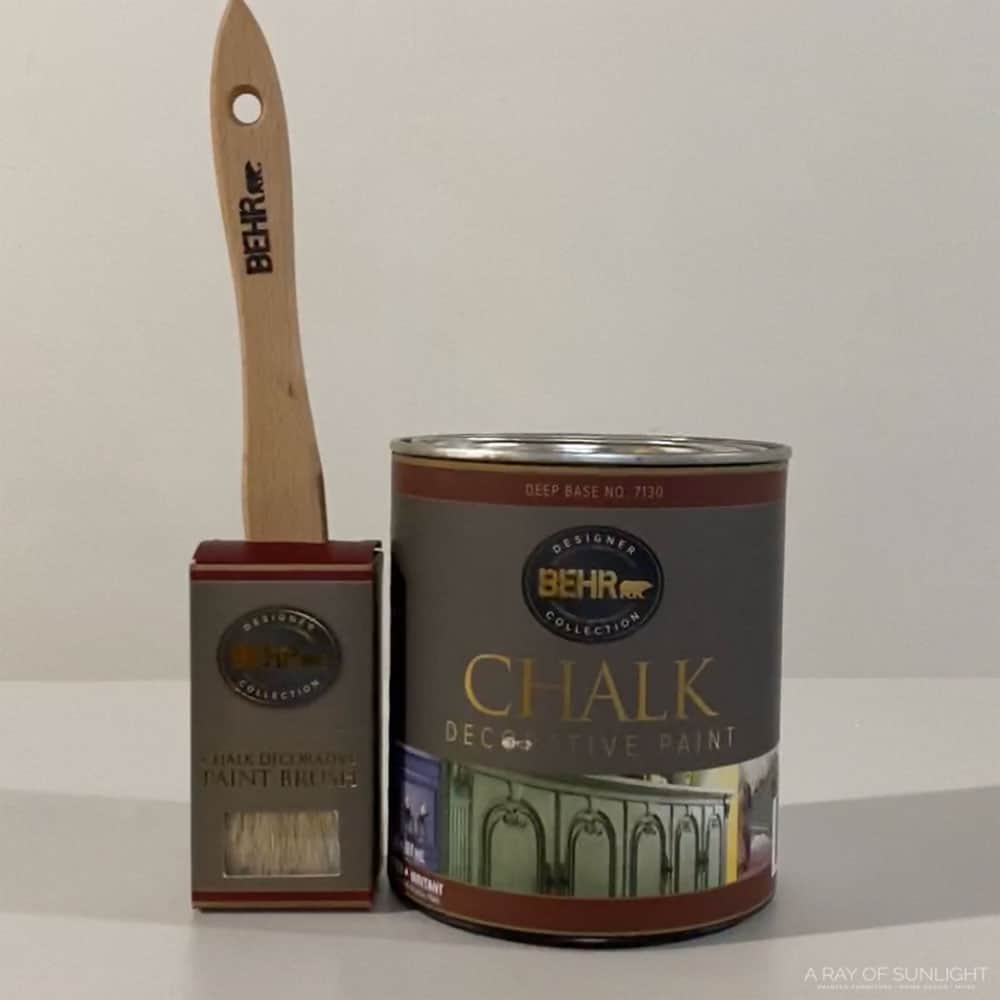
My favorite paint brushes for painting furniture are around $10 each, so $30 seems a bit crazy. But I love trying out new products, so here we are. Read my review of the Behr chalk paintbrush down below!
Then I had Home Depot mix the Behr chalk paint in the Adirondack Blue color, from one of their Behr color pamphlets. Check out the best blue chalk paint for furniture here.
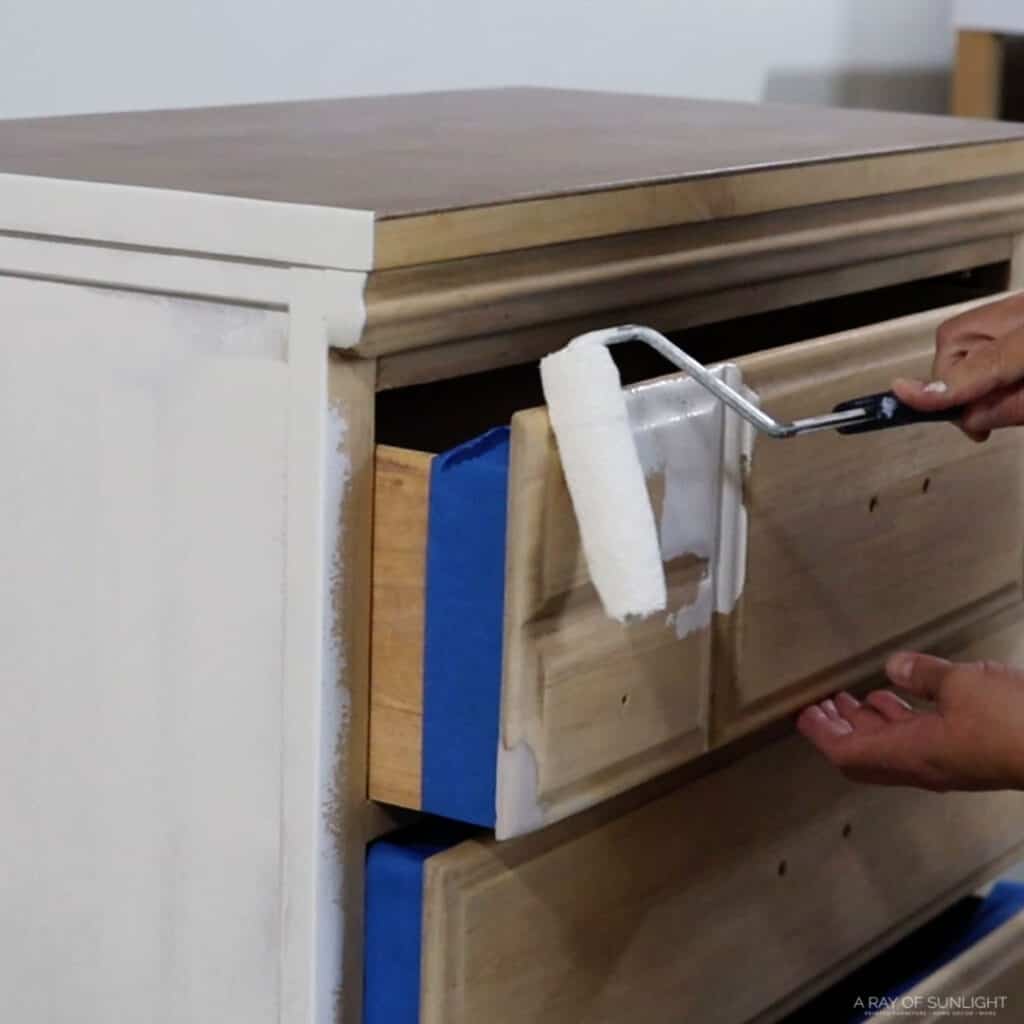
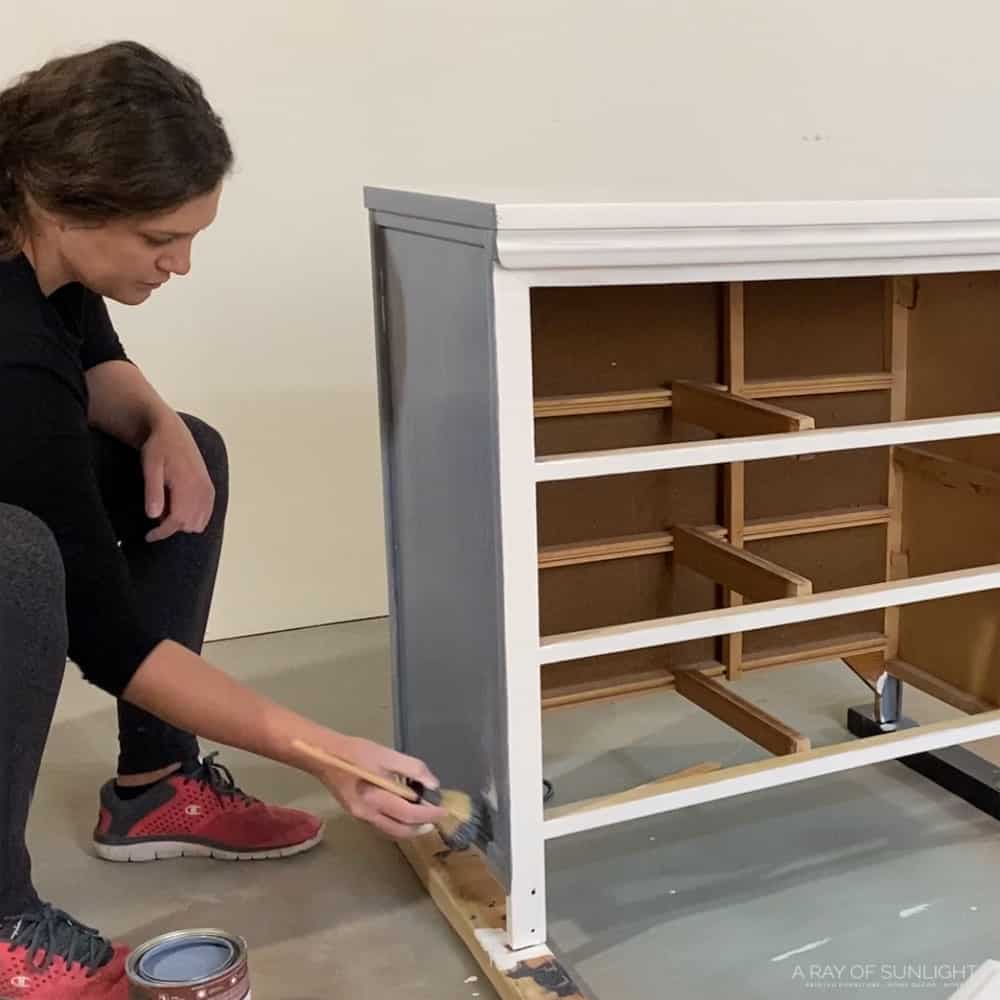
Since I hate brush marks, I sprayed the side of the dresser and the brush with some water before I started painting. If you’re also tired of brush marks, this fix changes everything! Read more about how to paint furniture without brush marks here.
And then I went to town, working in small sections and brushing the paint in the same direction to help prevent brush marks.
Would you like to save this?
I watched for drips along the way and applied a lighter coat of paint. When I was done with the first coat, I wrapped my paintbrush in plastic wrap to keep it from drying out in between coats of paint.
And then I let it all dry for the recommended 2 hours before I painted on the second coat of paint.
Sanding Brush Marks Down
After the second coat of paint was dry, I wasn’t really happy with it. It still needed at least one more coat of paint, and I hated how many brush marks I could see in the finish.
So, I busted out my SurfPrep sander and some 220 grit sandpaper and sanded the brushmarks down. Check out this post for more info on my SurfPrep sander.
Thinning Out the Chalk Paint
Then I poured some of the paint into a different container and I added a little bit of water just to thin it out a little bit.
Usually thinning out the paint, and misting the paint while you paint can make it so you don’t see the brush marks.
So I wanted to try and see if thinning the paint would help this paint go on without brush marks.
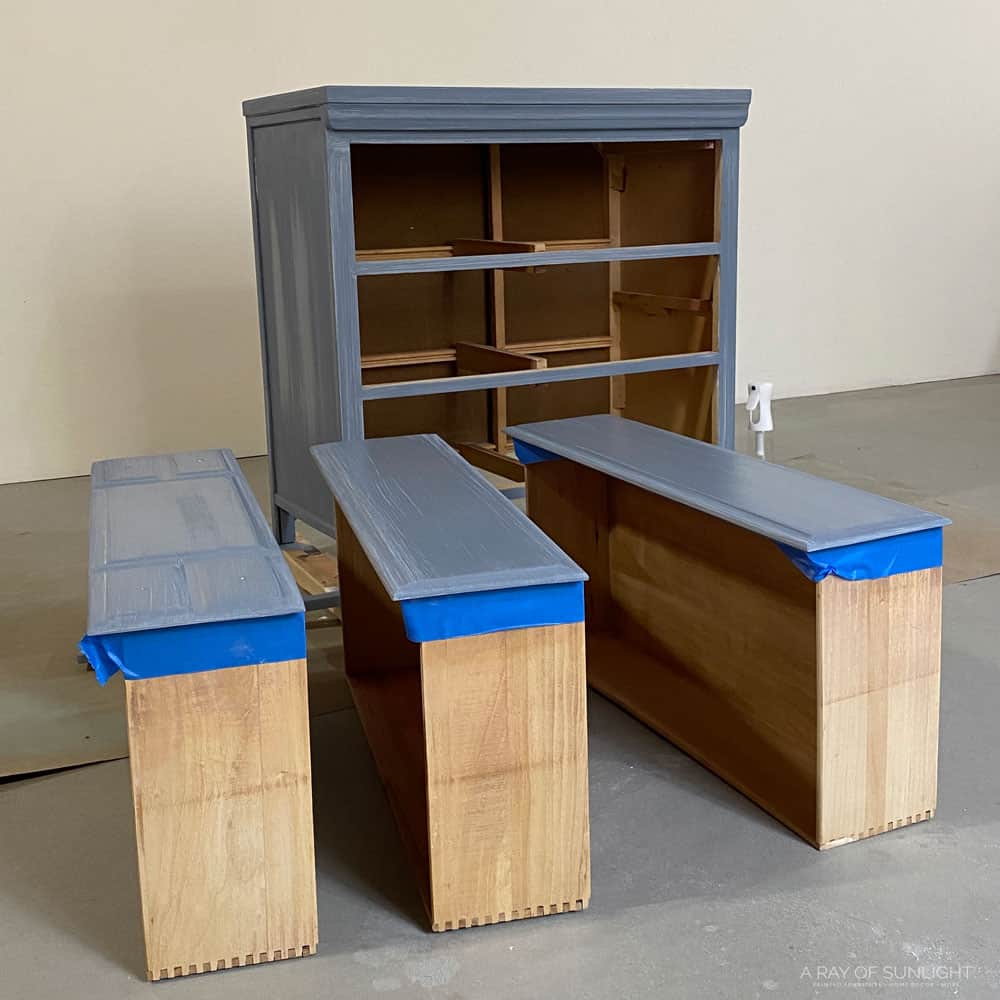
After the 3rd coat of paint was dry, I ended up painting 1 more coat on the edges, just where I could still see the white primer showing a little bit underneath.
Topcoat Painted Dresser with Polycrylic Spray
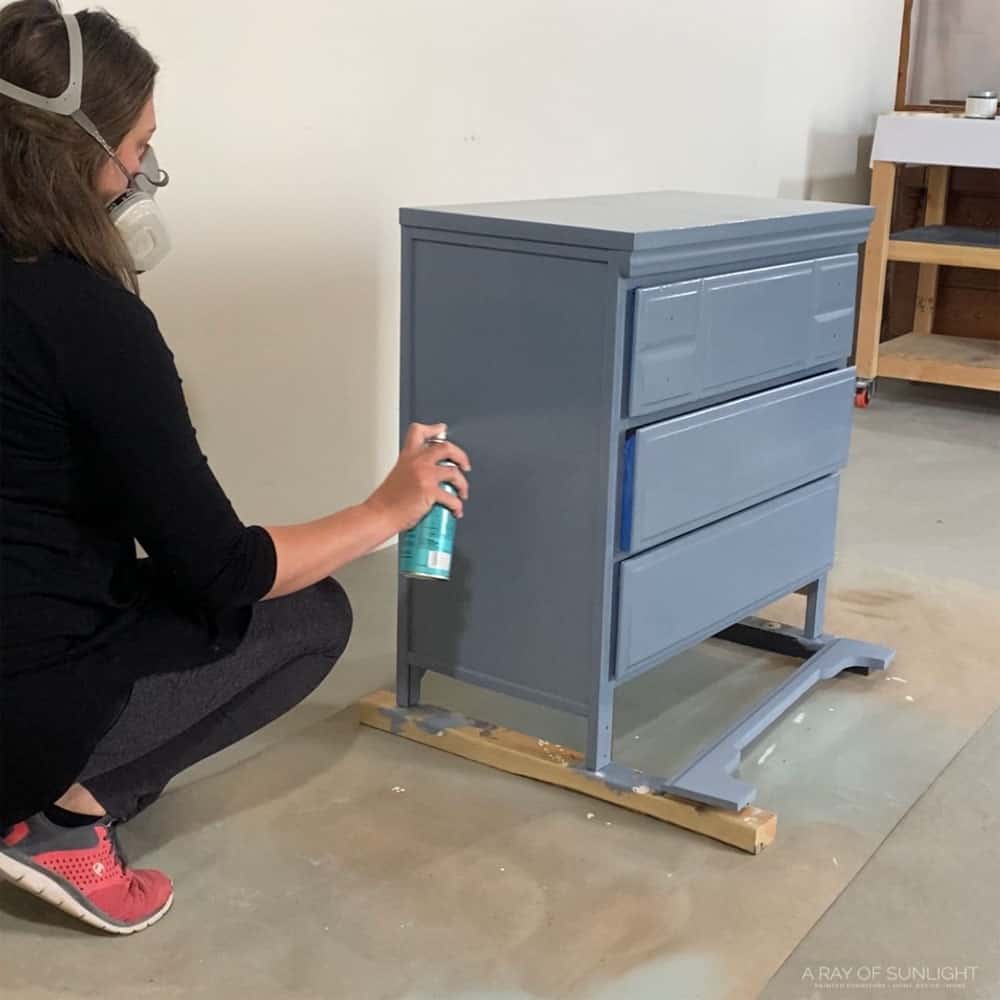
Once the 4th and final coat of paint was dry, I sealed the paint with 3 coats of Minwax polycrylic in a spray can.
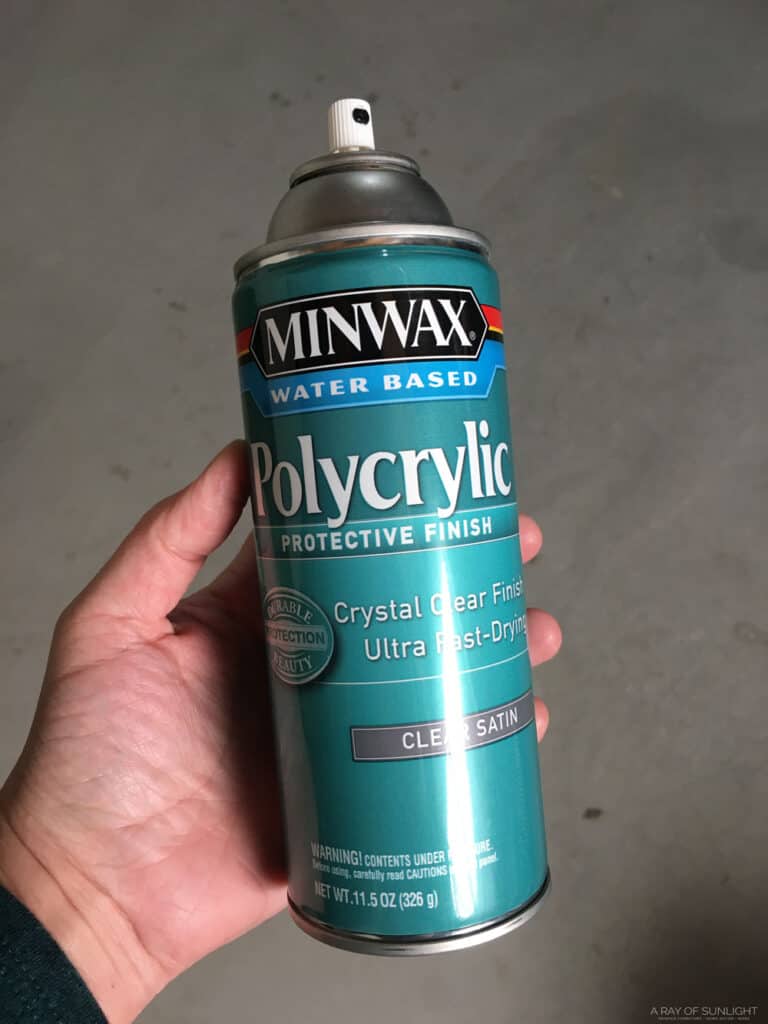
I have tried this stuff before, and I liked the results I had, so I thought I would try it again to really make sure it’s a good alternative to spraying the poly topcoat.
Spoiler alert: Yep, I think it’s a great alternative!
If you’ve watched my YouTube videos before, you’ve probably seen me spraying the poly topcoat with my paint sprayer. And that’s still my favorite method to topcoat furniture.
But, obviously, not everyone has access to or wants to have a paint sprayer. So I’ve been trying to figure out other easy ways to topcoat paint and get a flawless finish.
Check out more topcoats for painting furniture options here.
Minwax Polycrylic VS. Varathane Polyurethane
The Minwax polycrylic is water-based so it won’t turn your paint yellow like oil-based poly will. If you haven’t used polycrylic over chalk paint before, learn all about it in our post on can you put polycrylic over chalk paint?
But honestly, I still wouldn’t recommend using this exact product on white paint because I’ve had it turn my white paint a little yellow in the past.
That’s why I usually use and love the Varathane brand of water-based poly. That’s actually what I spray in my paint sprayer.
But I have also tried the Varathane Polyurethane spray can version… and let’s just say that I wouldn’t use it again.
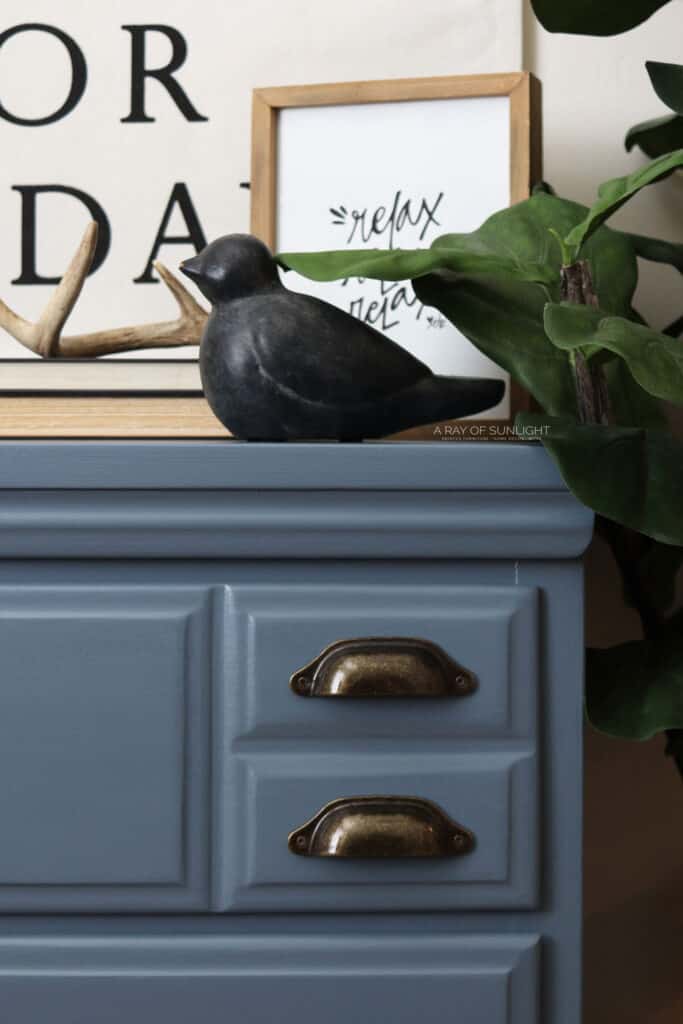
Attach New Hardware to Dresser
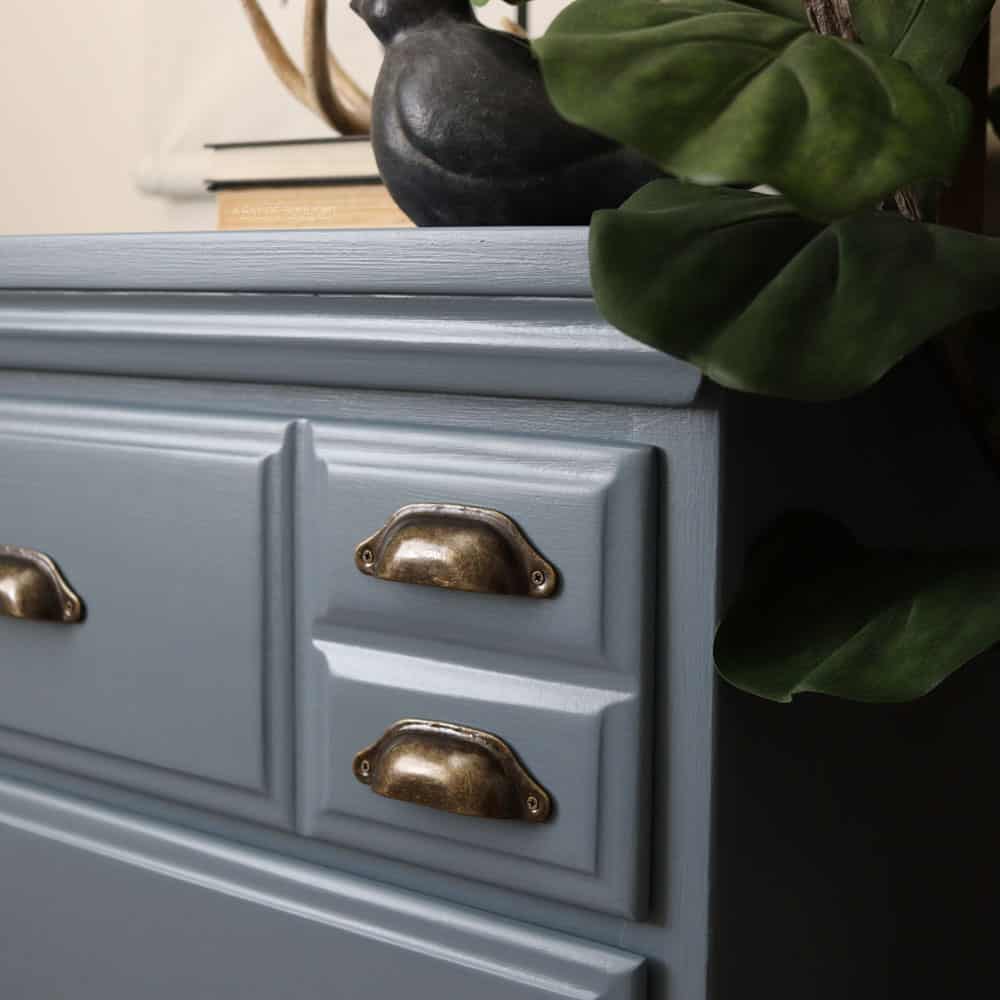
After the 3 coats of poly were dry, my husband helped me put the hardware on. I chose these cheap farmhouse cup pulls, and we put them on every place that looked like a drawer front.
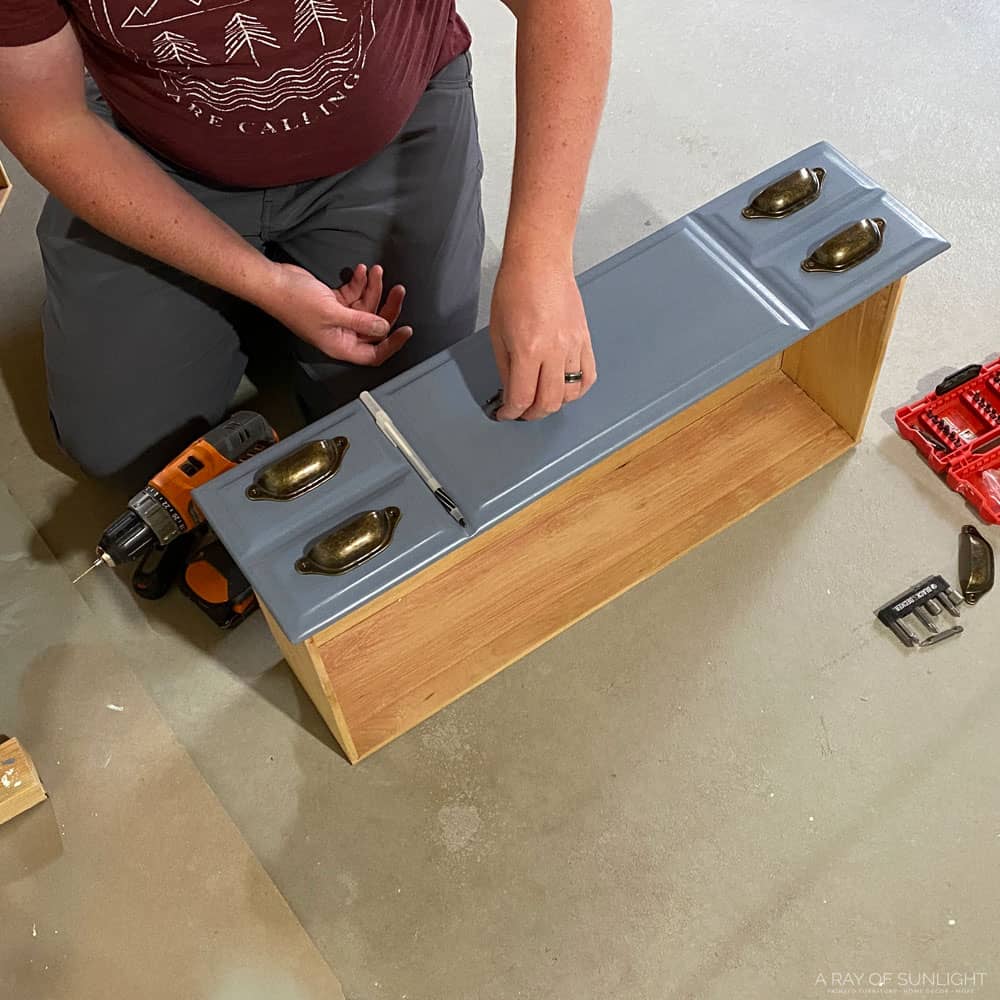
We also lined the hardware on the bottom two drawers up with the hardware on the top drawer.
Attach the Base of the Dresser Back on
And then we flipped the dresser onto its front so we could screw the base piece back on.
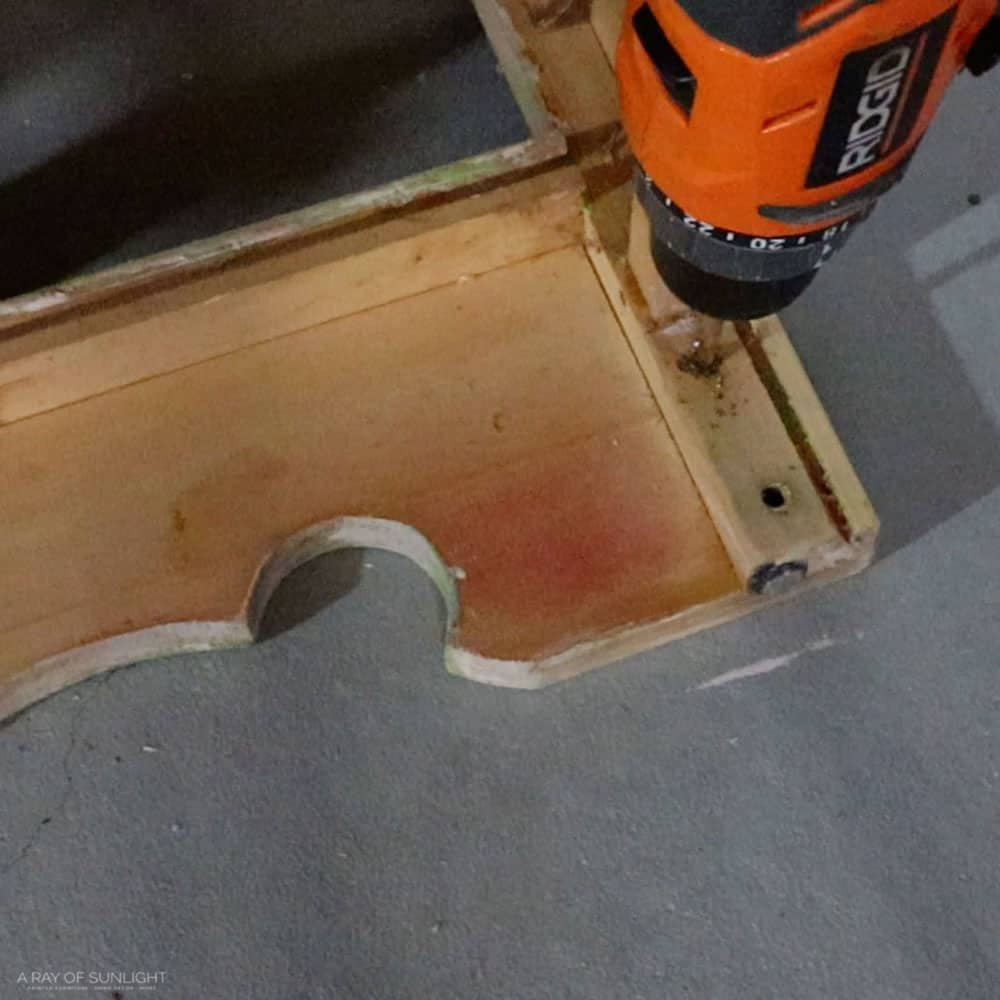
I just reused the old screws and the holes that held it on before. We also drilled a new hole for a new screw since the broken screw was still on there.
Watch the makeover video here!
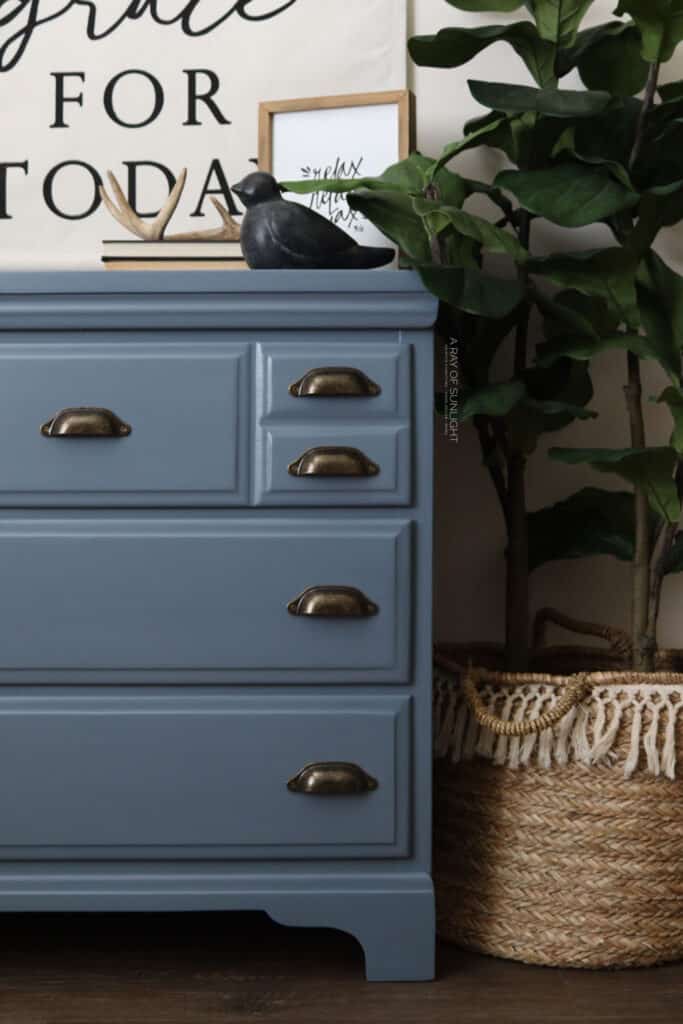
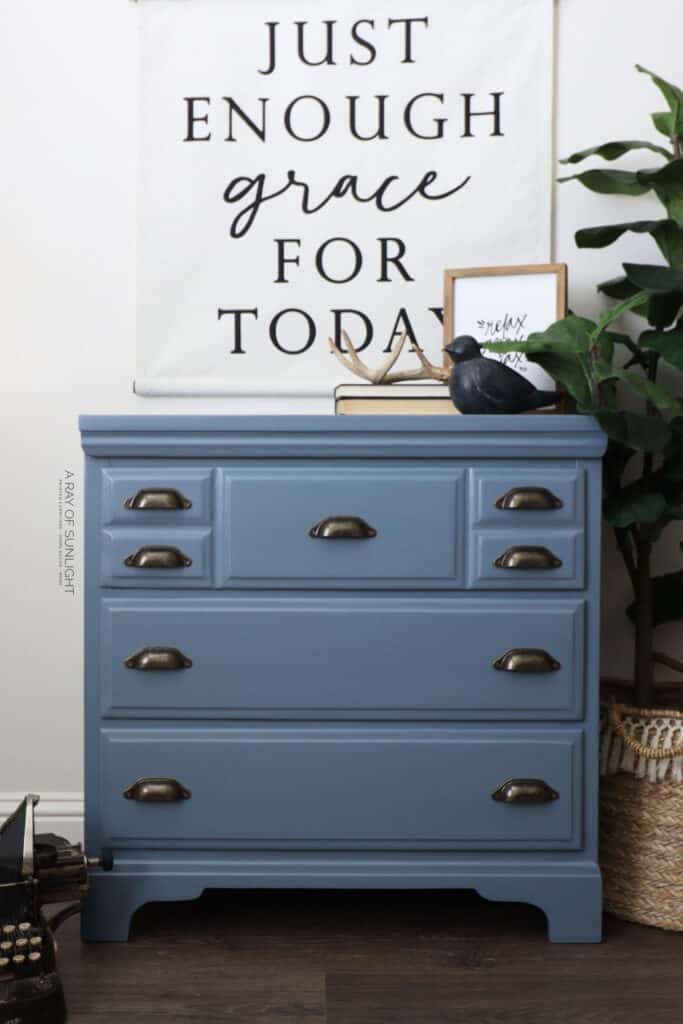
And here’s what it looks like now! Check out more of our favorite chalk paint dresser makeovers with these chalk paint dresser ideas! And for more ideas for updating your dresser, here are repainting dresser ideas.
More Before and After Makeovers
See All >
Click any of these “before” photos below to view the “after” of that makeover.


Behr Chalk Paint Review
Honestly, I’m not sure that I will ever brush Behr chalk paint on again.
I was a little disappointed with the coverage of the paint, but it’s also cheaper than other chalk paint that I use, so I guess you get what you pay for?
Check out my list of the top chalk paint brands for your future furniture makeovers.
(I had heard feedback from some of my social followers that the coverage on some of the colors isn’t very good, so I wasn’t completely surprised. I’m not sure if it’s the color, color matching, or what.)
As for the brush marks, they are still there… I personally don’t like brush marks, but I know it doesn’t bother everyone that same way, so I guess it’s alright. Haha
I love that I can pick it up locally at a Home Depot, and that I can have it color-matched to any color I want!
So, I’ll still probably use it, but it’s not my top pick of paint. And when I do use it, I’ll be spraying it instead of brushing it on.
Check out the best HVLP paint sprayers for furniture here. And here’s all about using a paint sprayer to paint a dresser.
Behr Chalk Paint Brush Review
As for the Behr chalk paint brush, I don’t think it was anything special. Especially for $30. If you want a lot of texture on your painted pieces, it might be for you!
But I don’t like it as much as my Zibra paintbrushes which are a third of the price!
I actually painted half of the dresser with a Zibra round brush and the other half with the Behr paintbrush for the 3rd and 4th coats.
I couldn’t really tell much of a difference with the brush marks between the two.
I think it will become a wax brush for the few times when I wax my painted furniture instead of sealing them with poly.

Is Behr chalk paint good for beginners?
While some people find success with Behr chalk paint, it may not be the best choice for beginner furniture painters due to its coverage and brush marks.
This paint may require multiple coats to get full coverage, which can be frustrating for those new to these painting furniture ideas.
The brush marks left by this paint can also be difficult to manage for beginners who are still developing their technique. Some may find the texture it adds to be desirable, but others may not like the uneven finish.
It’s important for beginners to experiment with different paints and brushes to find what works best for their personal style and preferences.
For those who still want to try Behr chalk paint as a beginner, we would recommend investing in a good quality brush or using a paint sprayer instead. This can help minimize the appearance of brush marks and make the painting process smoother.
But don’t be discouraged if it doesn’t turn out perfectly on your first try! While Behr chalk paint may not be the most beginner-friendly option out there, it can still produce beautiful results with some practice and patience.
Is Behr chalk paint suitable for large projects?
While Behr chalk paint can be used for larger projects, the amount of coverage and number of coats needed may make it more time consuming and expensive compared to other paint options.
It may be better suited for smaller furniture pieces or accents rather than entire rooms or large items.


Behr Chalk Painted Dresser Makeover
Give your furniture a professional and durable painted finish with chalk paint. Here's how to use Behr Chalk Paint.
Materials
Tools
Instructions
- Remove the base of the dresser by unscrewing the screws that are holding it in place. Then trace the new design you want onto the wood with some transfer paper. Clamped the wood and use the jigsaw to cut out the wood design. Sand all of the edges smooth with the power sander and some 150 grit sandpaper.
- Now, fix any broken corners and fill hardware holes from removed hardware. Get some Kwikwood, knead it together with your hands, and mold it in place. Then sand the KwikWood down smooth to the shape of the dresser drawer.
- Apply two coats of primer onto the raw wood dresser and laminate top. Let it dry in between coats for about 45 minutes. Sand the primer down then vacuum all the dust and use a tack cloth to pick up any remaining dust.
- Paint the dresser with blue Behr chalk paint using the Behr chalk paint brush and then let it all dry for the recommended 2 hours before painting the second coat of paint.
- For any brush marks, sand them down with the sander. You can also thin out the next coat of paint by adding a little bit of water.
- Once the 4th and final coat of paint dries, seal the Behr chalk painted dresser with 3 coats of polycrylic spray.
- After the poly dries, attach new hardware. Then screw the base back onto the dresser.
Recommended Products
As an Amazon Associate and member of other affiliate programs, I earn from qualifying purchases.


More Chalk Painted Furniture Makeovers
- Grey Chalk Paint Dresser
- Blue Chalk Paint Coffee Table
- Grey Painted Dressers
- Painting a Bed Frame Black
- Chalk Painted Black Dresser
Follow us on YouTube to get more tips for painting furniture. Or share your project with us on our Facebook Group and be part of our community. See you there!

Another beautiful makeover!