Painting Furniture Black – No Topcoat!


My husband’s second ever furniture makeover takes us through painting furniture black with no topcoat needed and no sanding required with a thrifted cedar chest. The final result using Heirloom Traditions Paint goes to show that you don’t always have to stick to all the traditional steps to pull off a great project.
If you’re curious to see how to get a beautiful and long lasting finish in no time, then keep reading!
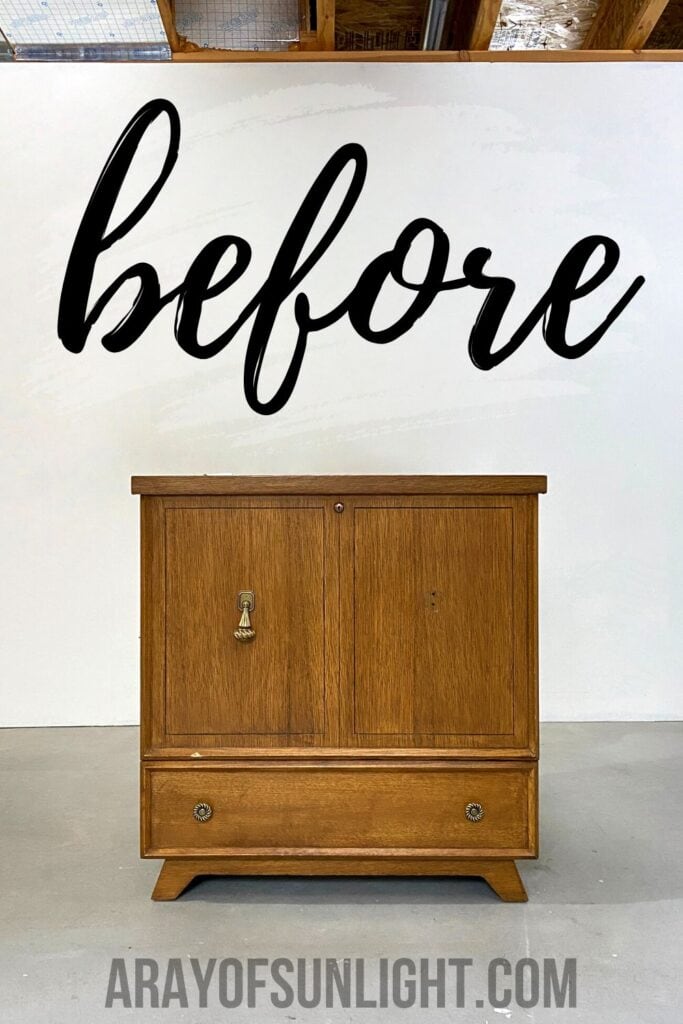
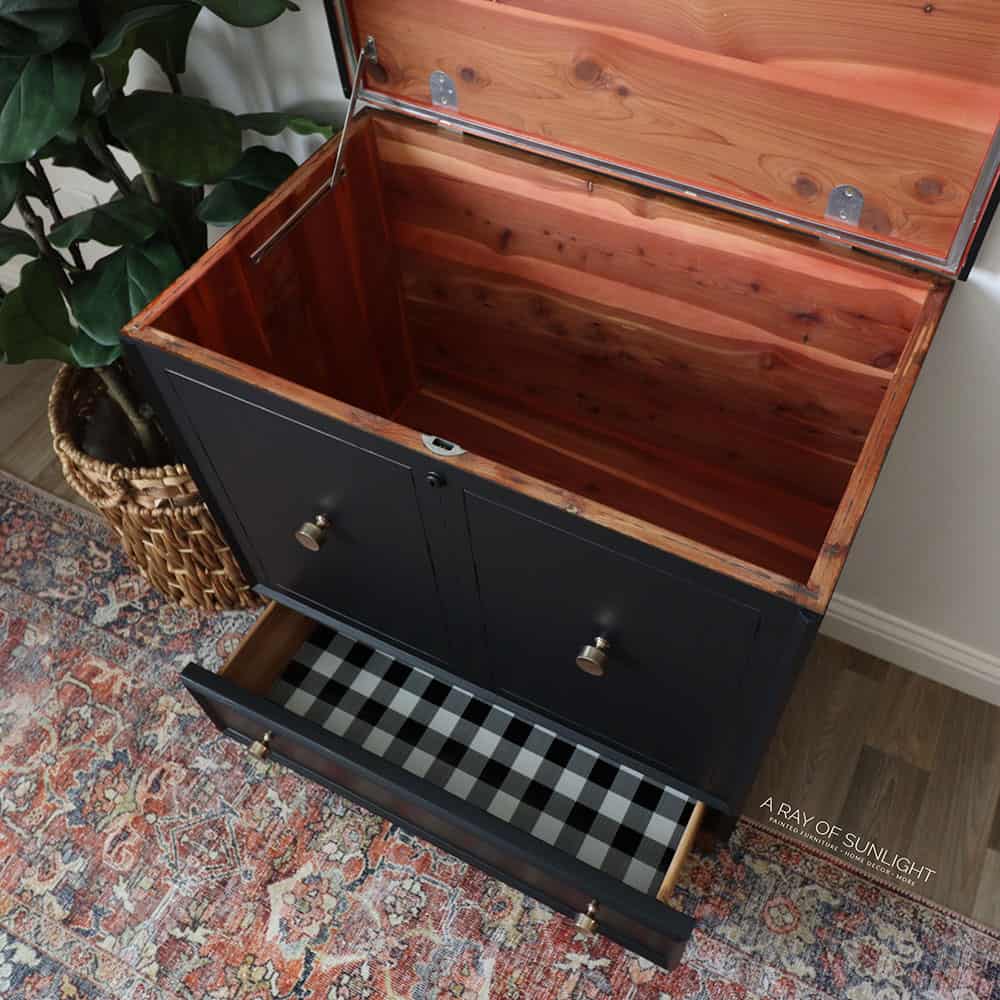
I (Natalie’s husband, Taylor) am back with my second makeover, this tall Virginia Maid, Lane Cedar Chest!

I found this piece at our local thrift store for $70, which is a little higher than I probably should have spent on it, but I personally love cedar chests so I couldn’t pass it up! And it was in great shape too, so I knew that this would be a good piece for a newbie like me.
And for beginners out there, this project comes with a simpler process – you don’t have to worry about sanding and topcoating, which means fewer steps but you still get a durable finish. Let’s get started!

Supplies Used for Painting Furniture Black
As an Amazon Associate, I earn from qualifying purchases. I also may earn from other qualifying purchases with other companies or get free product to review and use. All opinions are my own.
- Electric Screwdriver
- Krud Kutter
- KwikWood
- Painter’s Tape
- Pre-Taped Plastic
- 220 Grit Sandpaper
- Heirloom Traditions Paint in Iron Gate
- Paint Filter
- Wagner FLEXiO 3000/595 Paint Sprayer (updated version of the sprayer I used)
- Wood Filler
- 123 Primer
- Lint Free Rags
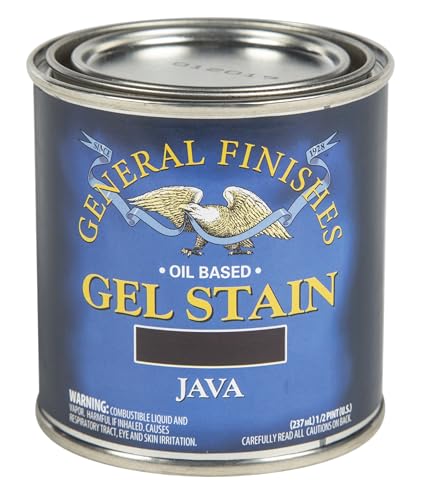
- Java Gel Stain
- Shop Vacuum
- Tack Cloth
- Respirator
- Waterbased Polyurethane
- Disposable Gloves
Check out this list for more furniture painting tools and supplies that will make your DIY projects easier.
Prep for Painting Furniture Black
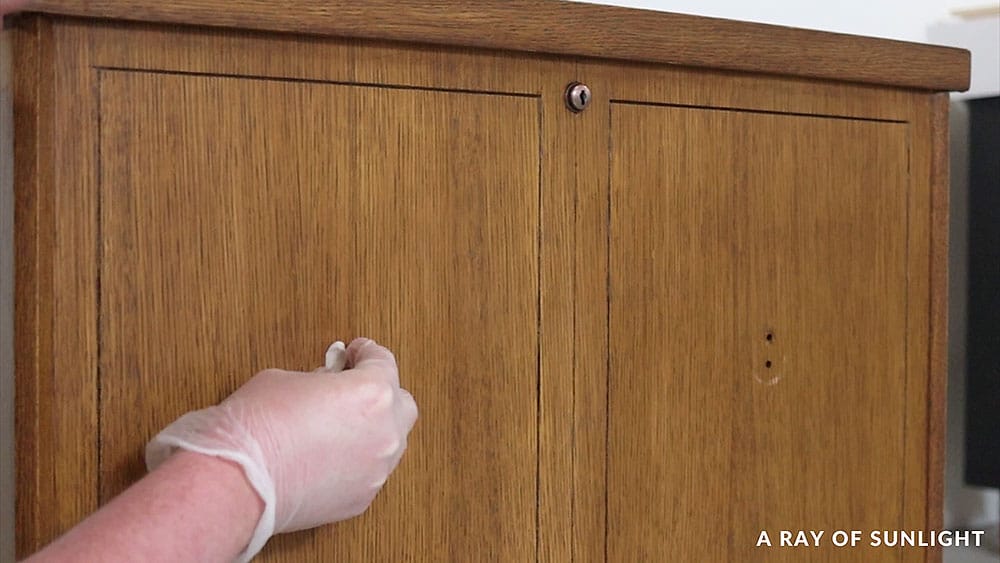
Before anything else, we needed to prep the piece for its new color. Right when we got it home, I unscrewed the lock on the top. Lane has a recall on these locks because of kids getting locked in the chests, and with kids in our house, that had to go.
Remove Hardware and Clean Cedar Chest
Next, I removed the old hardware. And cleaned the chest with some Krud Kutter to remove all the dirt, grease, and grime. Learn more how to clean furniture before painting in this post.
Fill Holes and Make Repairs
Then I filled the extra hardware holes and a minor gouge with KwikWood. We have a guide on how to use KwikWood here. And see here how we used it in filling holes when replacing cabinet or furniture hardware.
Remove Velvet from Drawer
While the KwikWood dried, Natalie removed what was left of some old velvet drawer liner. While Natalie stood back and watched me do most of this project, I did ask for her advice a lot, and this was definitely one of those times.
She sprayed water on the velvet and used a razor blade and a rag to remove the felt. She had removed velvet from drawers before by saturating it with warm water and it came up easily. But this drawer had an MDF bottom so we didn’t want to saturate it, or it would have gotten damaged.
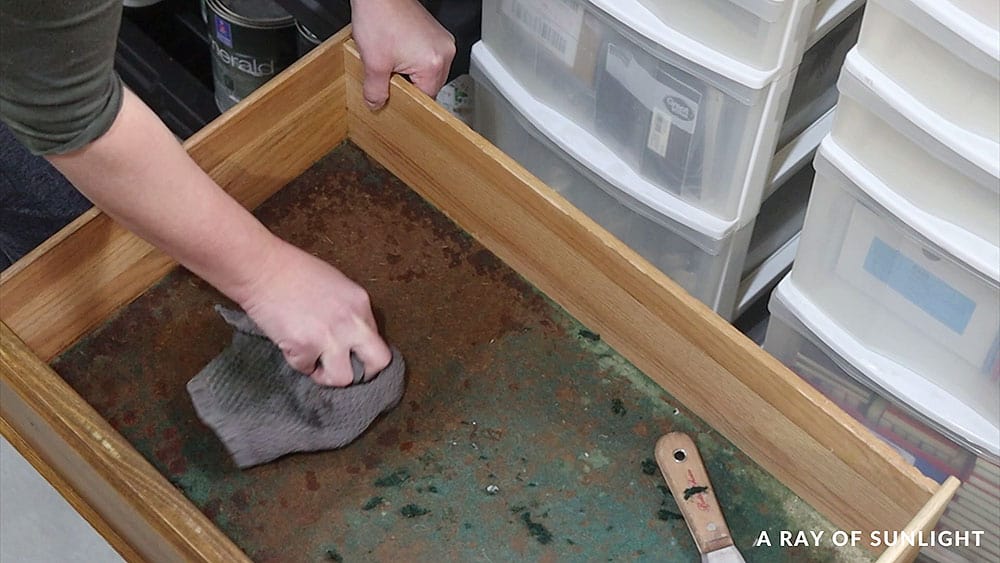
Because of that, we weren’t able to get all of the velvet up, but it looks a lot better than it did before! Learn more on how to remove felt from wood drawers here. If your drawer was lined with contact paper, here’s how to remove contact paper from wood.
You can also replace the liner to make it look better and protect the inside of the drawers. Check out the best material to line dresser drawers here.
Then I taped off everywhere that I didn’t want any of the new paint to get. Learn more about how to prevent overspray when painting furniture here.
Sand KwikWood and Other Imperfections
Once the KwikWood was dry, we sanded it down with 220 grit sandpaper. And then there were some drips in the old topcoat that I sanded down as well. Other than that, we didn’t do any more sanding.We usually do, so learn how important sanding before painting furniture is in this post.
Learn all about how to prep furniture before painting here!
Paint Furniture Black
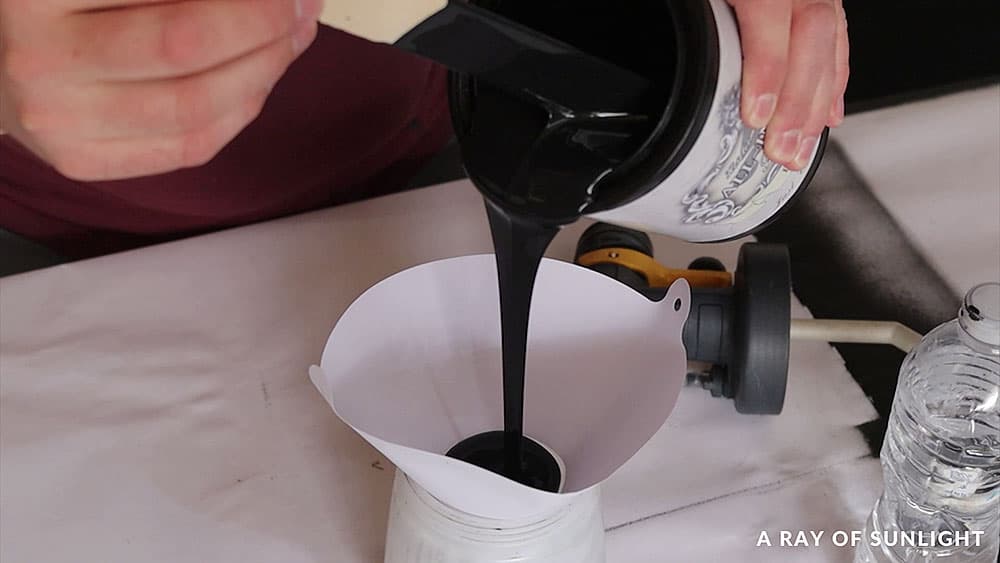
Then I mixed Heirloom Traditions All In One Paint in the color Iron Gate and then poured it through a filter into our Wagner sprayer. Check out our list of the best black paint for furniture here, including Iron Gate.
I personally love applying paint with an HVLP gun, but if that is not an option for you, see how we brushed and rolled Heirloom Traditions Paint in this post about painting furniture without sanding or priming.
Learn more about Heirloom Traditions All in One Paint here and check out this guide for painting furniture with Heirloom Traditions Paint. Also, get more inspiration from these Heirloom Traditions Paint before and afters!
I also mixed in 20% water to thin the paint so it would create a less textured finish. Learn more about how to thin paint for Wagner FLEXiO sprayer here.
Before I sprayed the cedar chest, I double checked the settings and once I got it to where it looked good, I applied the first coat. Get my list of the best HVLP paint sprayers here. (Spoiler alert… the Wagner FLEXiO 3000 is one of my favs!)


Learn more about how to use the Wagner FLEXiO 3000/595 in this DIY blue painted nightstands makeover.
At first, I was nervous because it looked like there was going to be a lot of texture, but when it dried, it leveled out, and it looked really good!
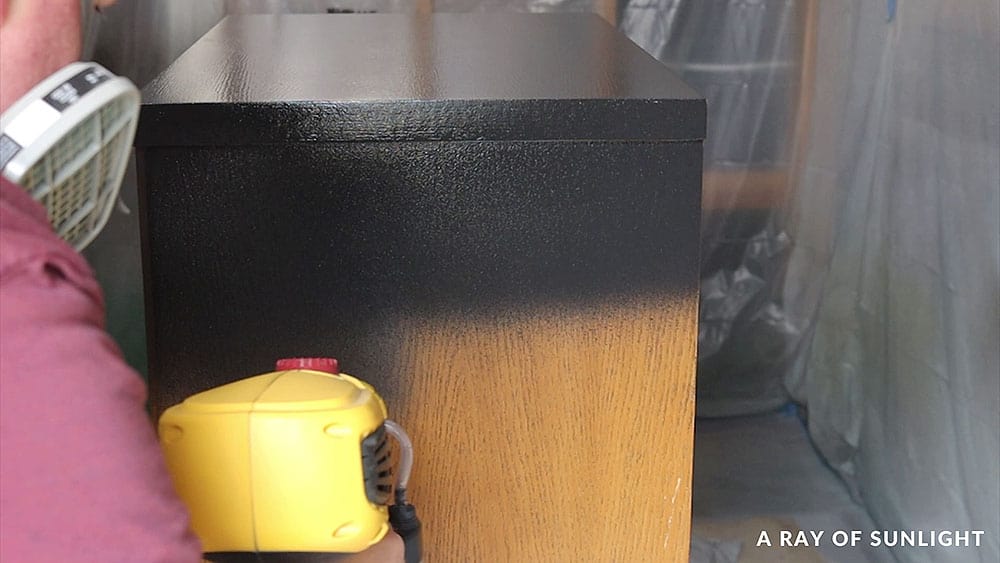
I’m seeing why Natalie has grown to love this brand!
Check Wood Base Contrast
Then we uncovered the base to see if we liked the contrast of the wood on the bottom with the black. Annnnd…Natalie convinced me that the wood was a little too orangey, so we were gonna have to do something about that after we finished the painting process.
Check out this tutorial on how to tone down orange wood furniture.
Would you like to save this?
Fix Scratches and Spot Prime
With the first coat on, we could see a few problems that we couldn’t see before. We had to fill in a scratch with wood filler, and the color was a different sheen in a few spots. Here’s my list of the best wood fillers.
So, I mixed some grey tinted 123 primer with a little bit of water and brushed it onto the spots that had a different sheen in hopes that it would create an even looking finish. Here are more of the best primers for painting furniture you can use.
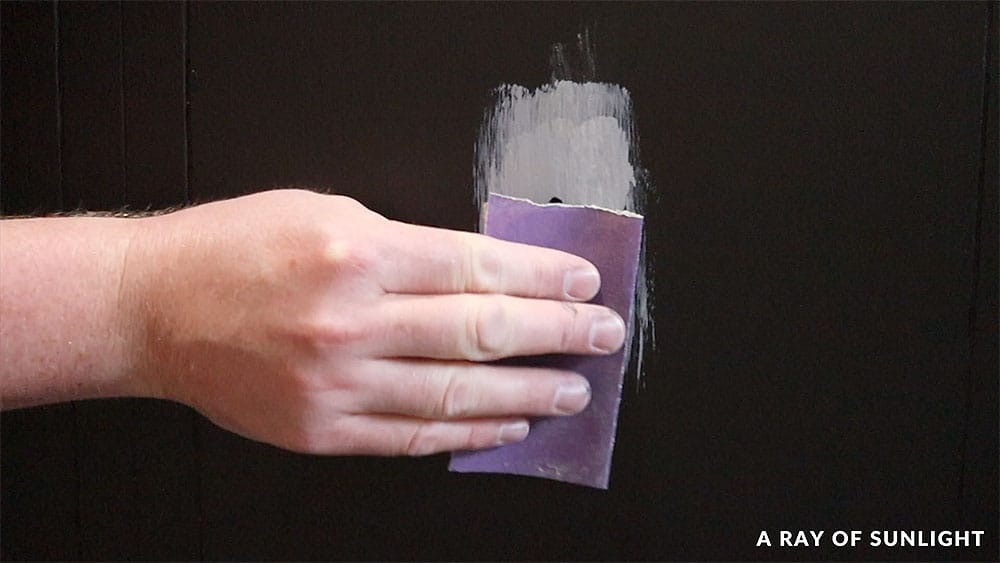
When that was all dry, I sanded those spots smooth and cleaned all the dust off again. Learn how to choose the best sandpaper for furniture painting here!
The second coat went on just as good as the first and looked so good again! But I could see the primer still, so I sprayed another coat and crossed my fingers that it would cover those spots up. And guess what!? It finally worked!
Attach Hardware to Cedar Chest
So, we moved on and screwed some new knobs on. Learn how to change hardware here.
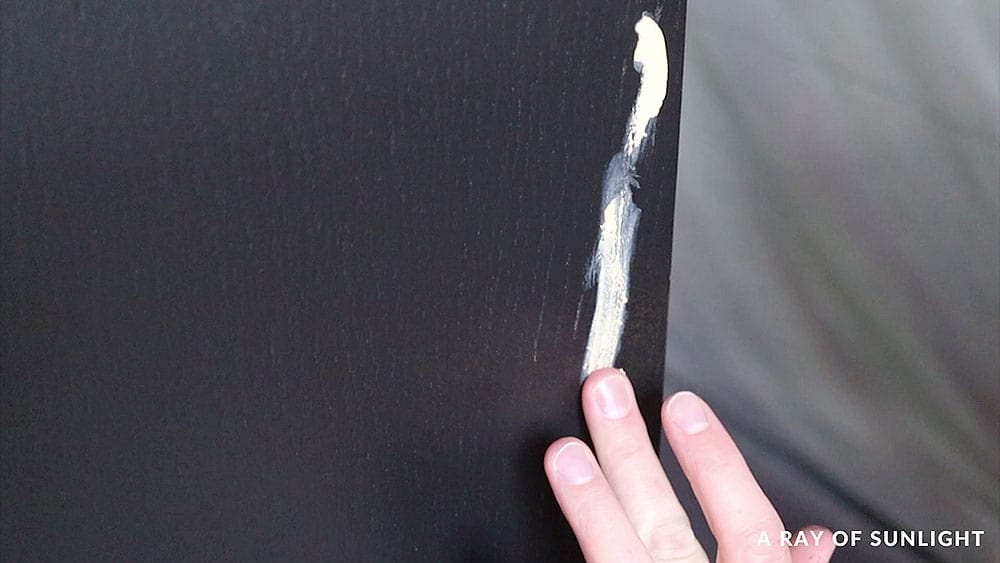
And of course, the last piece of hardware slipped out of my hands and scuffed the finish!! Natalie tried rubbing it out, and it kind of disappeared. So I moved onto the base.
Staining with Gel Stain
I lightly scuff sanded the base with 220 grit sandpaper. Then I used a lint free rag to wipe some General Finishes Java gel stain onto the wood. Check out the best wood stains for refinishing furniture here.
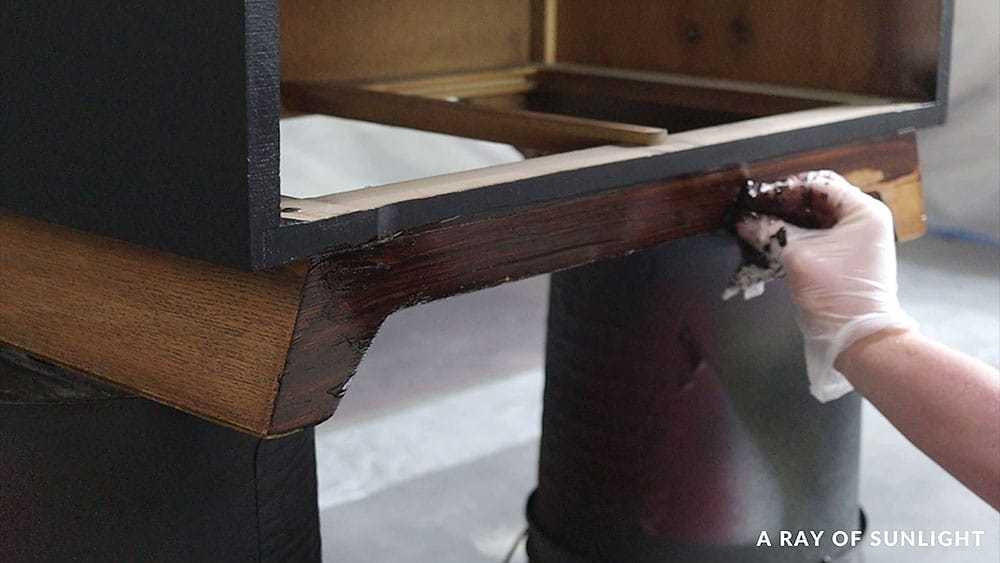
I let the gel stain sit for about 30 seconds and then wiped it back off with a clean lint free rag. Learn more about how to stain wood darker in this post.
Topcoat Stained Base
5 days later, after plenty of time for the stain to dry, I wiped on three coats of waterbased polyurethane, letting it dry between each coat. Check out more of the best topcoats for painting furniture here.
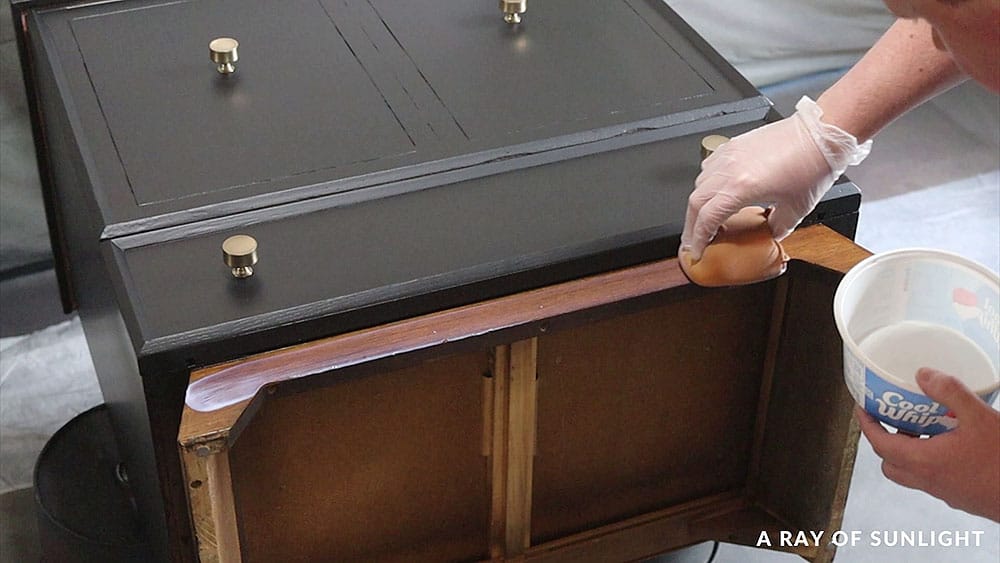
(If we didn’t let the stain dry for so long, we would have topcoated it with oil based poly instead. To use a waterbased poly topcoat over oil, you need to let it dry for at least 48 hours.)
Fix Painting Mistakes
And…In typical Taylor fashion, I found a way to create more work for myself on the very last coat of poly! I got some poly on the paint. So, there was a big smear of poly that was a different sheen than everything else.
You might want to check our post on the five biggest furniture painting mistakes and how to fix them.
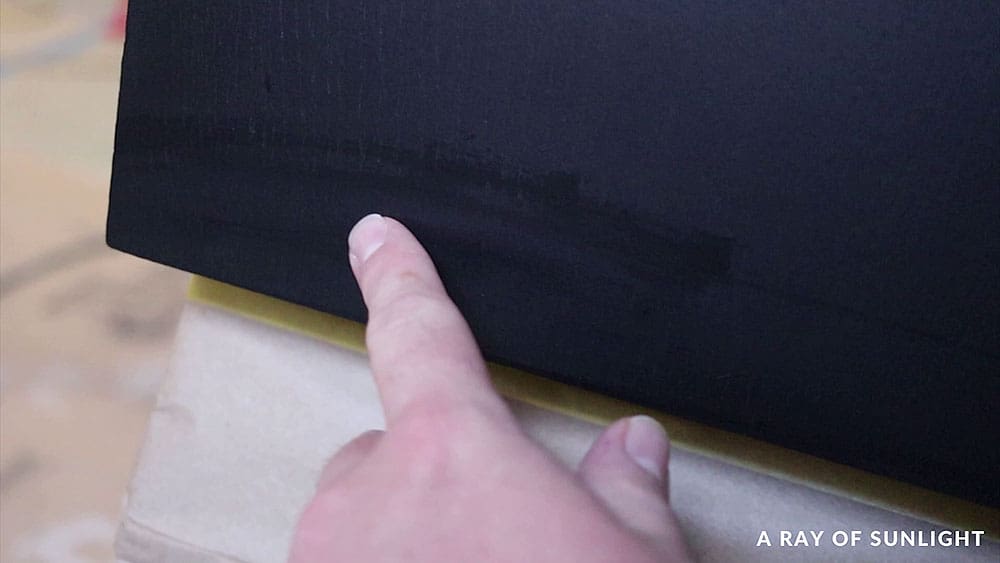
I was getting a little flustered at this point…but Natalie gave it to me straight and reminded me that I was just going to have to paint another coat, or else it would be easy to see the touch-up. So, we covered the base up and sprayed the sides… and the front to cover up where I scuffed it with the knob earlier.
Watch the full process of the makeover in our YouTube video below, or keep scrolling for the after photos to see what it looks like now!
More Before and After Makeovers
See All >
Click any of these “before” photos below to view the “after” of that makeover.


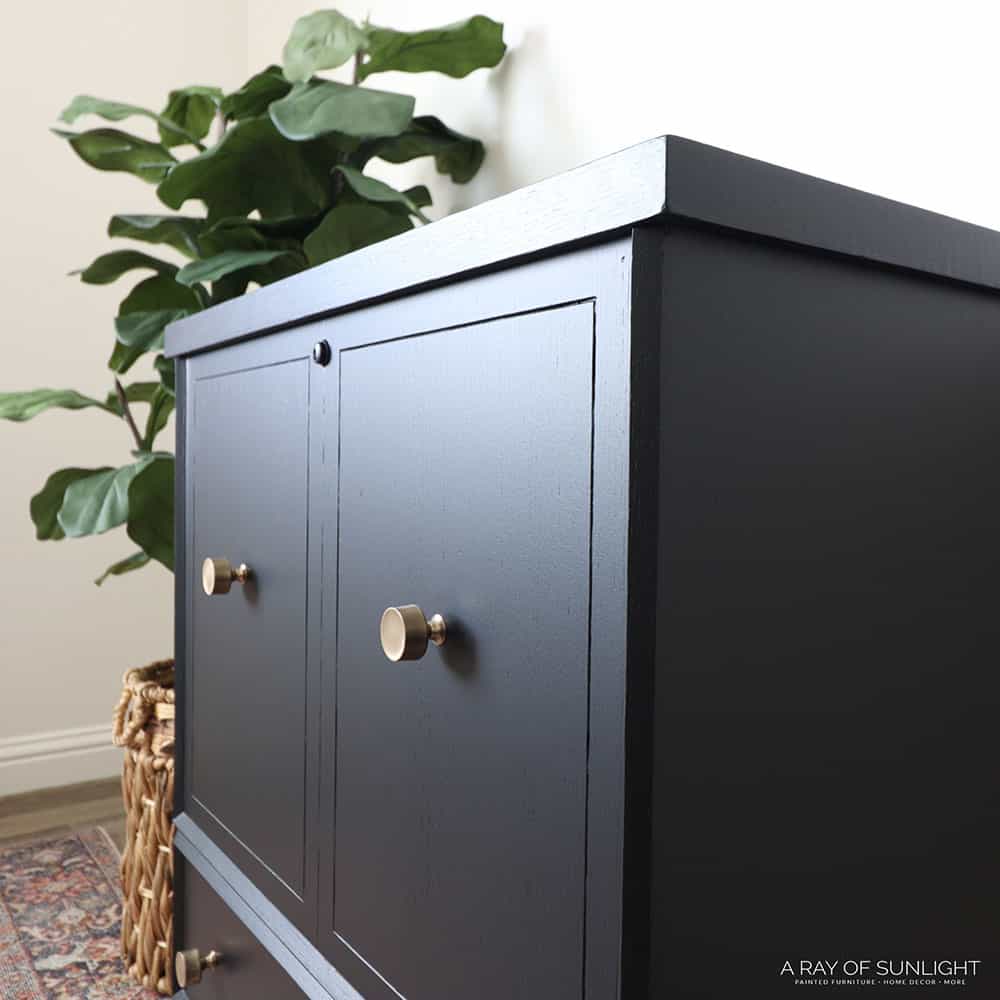
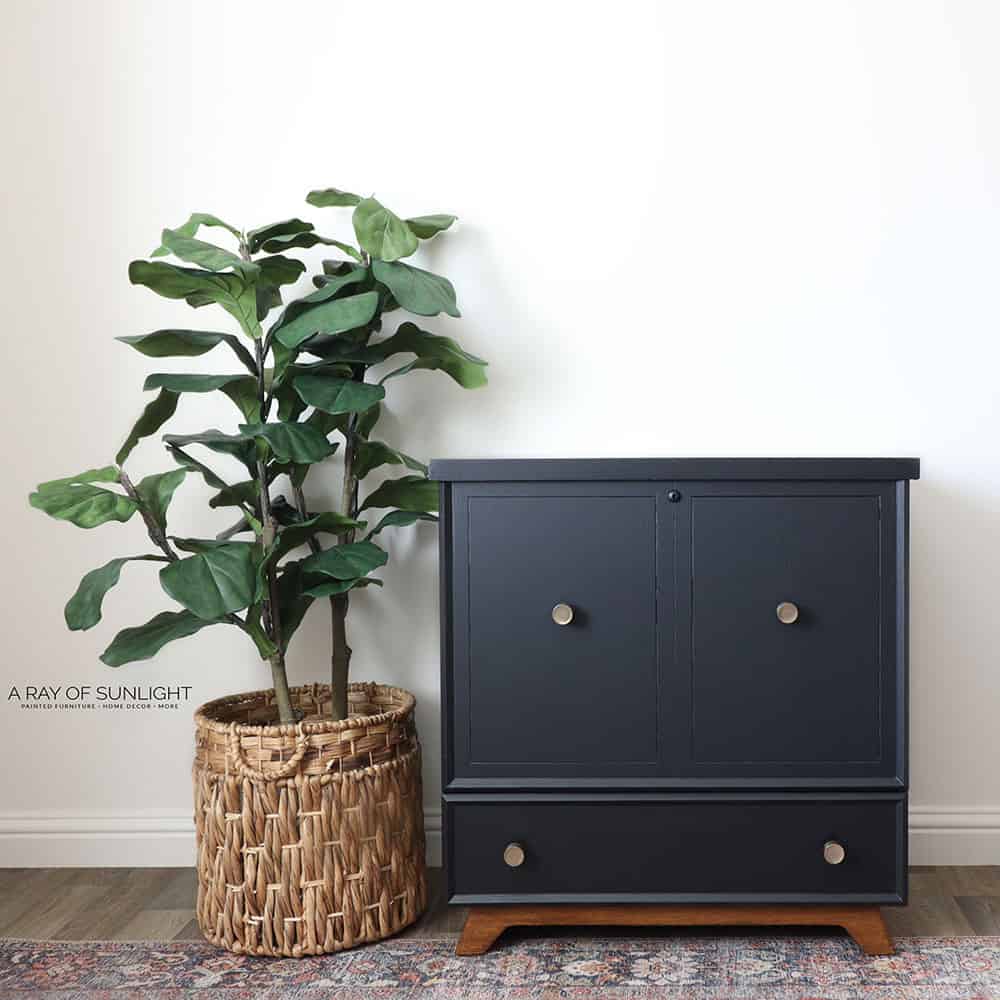
Even though I ended up creating more work for myself with some of the mistakes I made, I think it turned out great.
I personally love the stained wood base with the contrast of the dark color, but maybe that’s just me! Would you have made the base match the rest, or left it wood like me? I know which one Natalie would have picked!


Black Stain vs Black Paint
You can use either paint or stain to get a dark look on your piece, but there are some differences to consider between the two. If you’re considering these two options, here are some things to keep in mind.
First, the color and finish. While both will create a deep, dark hue, paint will have a more solid, opaque finish, while stain will allow the wood grain to show through. This means that the texture of wood may be more visible with the latter, adding an extra layer of character.
With application, paint is typically easier to work with due to its thicker consistency and ability to provide even coverage with less effort. Stain, on the other hand, takes a bit more care to apply evenly because it’s thinner and can drip or soak into the wood unevenly.
Both options are pretty similar when it comes to durability and maintenance, since you can seal them with a topcoat. Ultimately, the decision between these two will come down to personal preference and the style you’re going for.
I hope you enjoyed following along with painting furniture black and learned some tips and tricks for your own projects. Remember, even if you make mistakes along the way (like I did), it’s all part of the learning process.


Painting Furniture Black - No Topcoat!
We're painting furniture black with no topcoat needed and no sanding required with a thrifted cedar chest.
Materials
Instructions
- Prep your furniture for painting by removing old hardware and cleaning the furniture with some Krud Kutter to remove all the dirt, grease, and grime. Fill hardware holes and repair areas with KwikWood. Once the KwikWood dries, sand it down with 220 grit sandpaper.
- Filter your paint into the paint sprayer and mix in 20% water to thin the paint to create a less textured finish. Spray 2-3 coats of black paint onto your furniture.
- Attach old or new hardware to your furniture.
- Now, lightly scuff sand the base of the chest. Wipe some gel stain onto the wood base. Let the gel stain sit for about 30 seconds and then wipe it back off with a clean lint-free rag.
- Once the stained base is dry, wipe 3 coats of waterbased polyurethane to seal the stain, letting it dry between each coat.
Recommended Products
As an Amazon Associate and member of other affiliate programs, I earn from qualifying purchases.


More Black Painted Furniture Makeovers
- Repainting Furniture
- Painting a Desk Black
- Beyond Paint Review
- Painting a Dining Table Black
- How to Paint Cheap Furniture
Follow us on YouTube to get more tips for painting furniture. Or share your project with us on our Facebook Group and be part of our community. See you there!
So cute! Good job Taylor!
I love it and the stained base just raises the bar!
Definitely like it with the stained base!
The good news is that it is possible to get rid of the smell. Spray everything with clear shellac, at least a few coats. The smell should be gone after that and airing it out.
It’s beautiful! I love the black with the stained base. And super cute checked liner in the drawer. The knobs are the perfect accessories. Well done. So glad you didn’t throw up your hands and walk away but pushed on through the mistakes and got it finished.
Thank you so much for the love Joanne! I appreciate you!