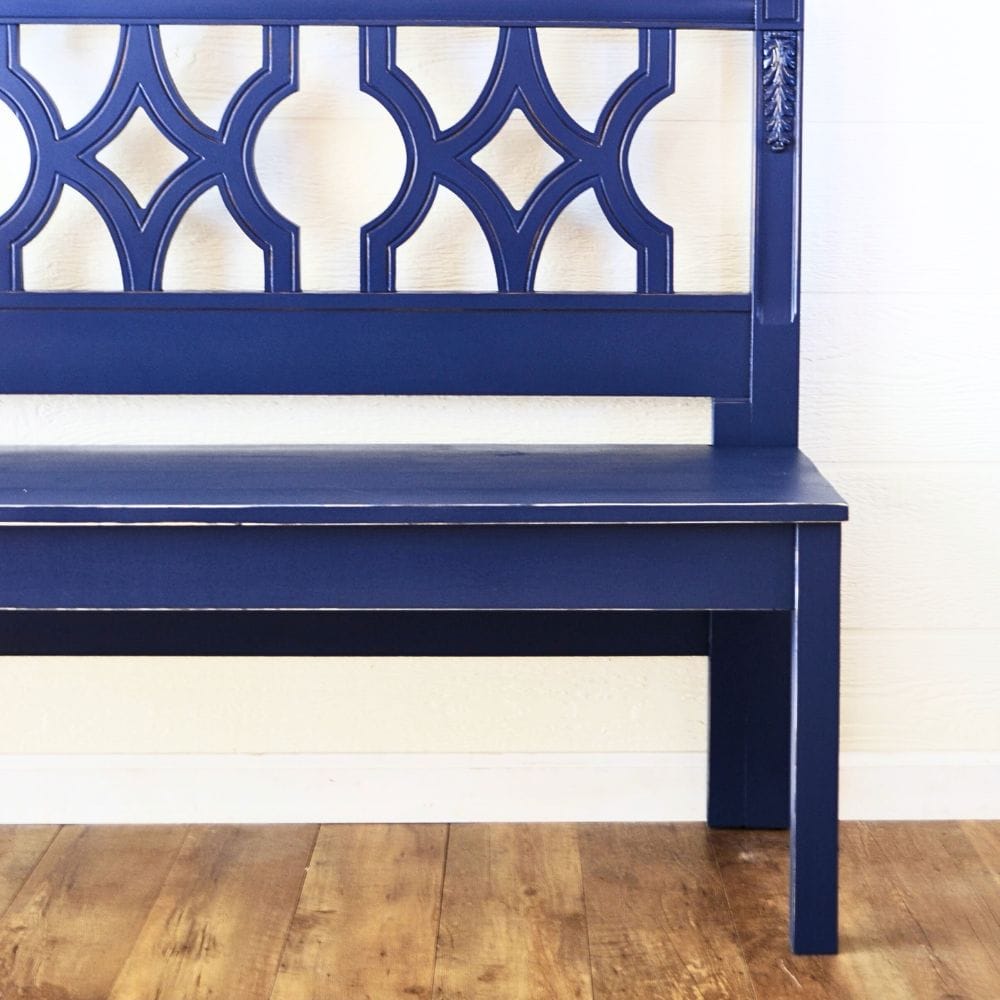
Turn a Headboard into a Bench
Are you looking for a creative way to repurpose an old headboard? Why not turn a headboard into a bench? It’s one of the easy and unique furniture makeover ideas that will add character and functionality to your home.
So how exactly do you turn a headboard into a bench? Don’t worry, it’s not as complicated as it sounds. You can totally do it! Let’s walk you through the steps in this simple tutorial.
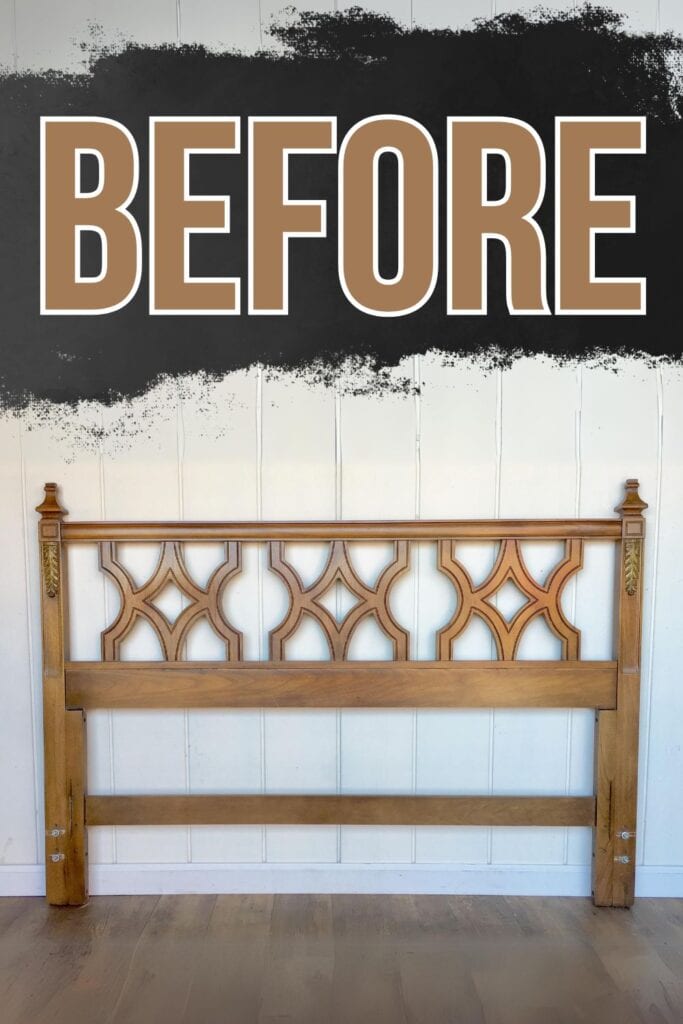
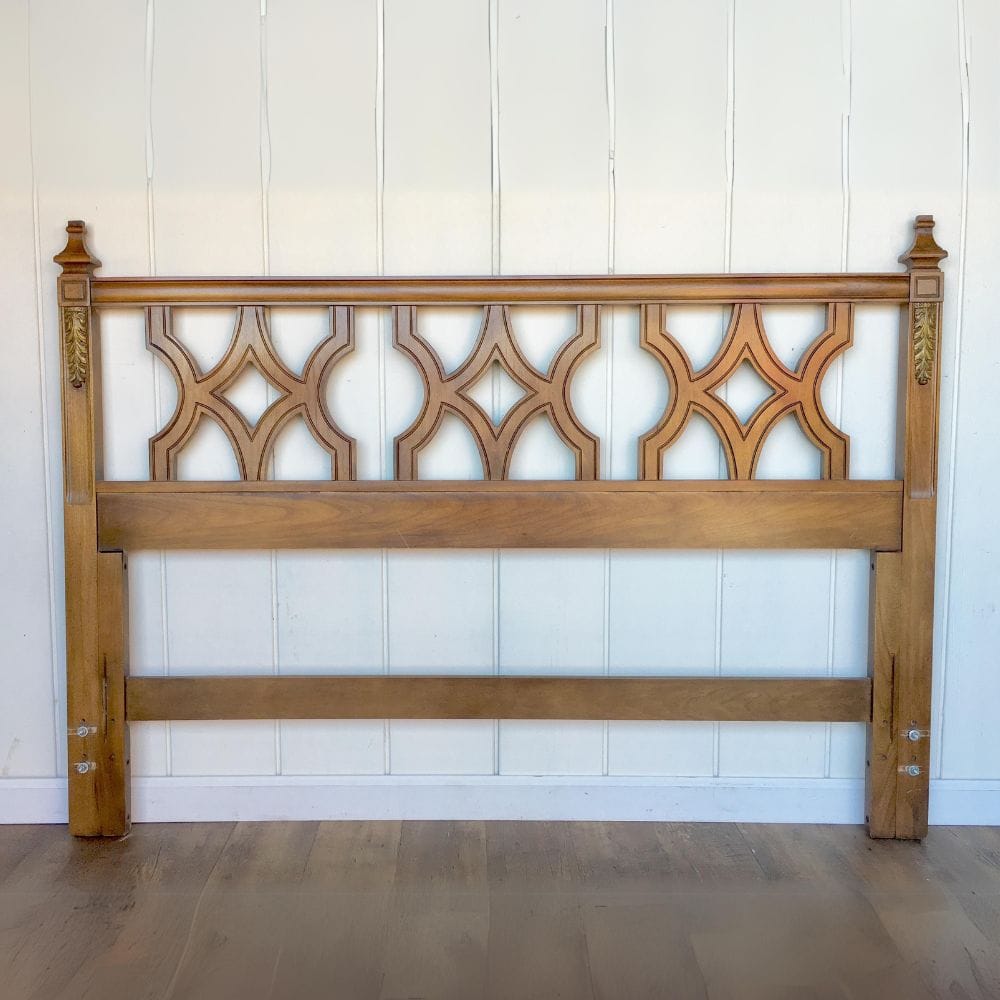
You may have an old headboard or bed frame lying around, taking up space and collecting dust. Instead of throwing it out, why not repurpose it into a stylish and useful bench? Not only will this save you money on buying new furniture, but it’s also an eco-friendly option.

Repurposing your old bed frame into a bench also allows you to customize the design according to your personal taste and style. You can choose the fabric, paint color, and other details to match your existing decor.
It’s also satisfying to see something you thought was useless transformed into something beautiful and functional. So let’s get started and make this one of a kind headboard bench!

Supplies Used for Turning a Headboard into a Bench
As an Amazon Associate, I earn from qualifying purchases. I also may earn from other qualifying purchases with other companies or get free product to review and use. All opinions are my own.
- Old Headboard or Bed Frame
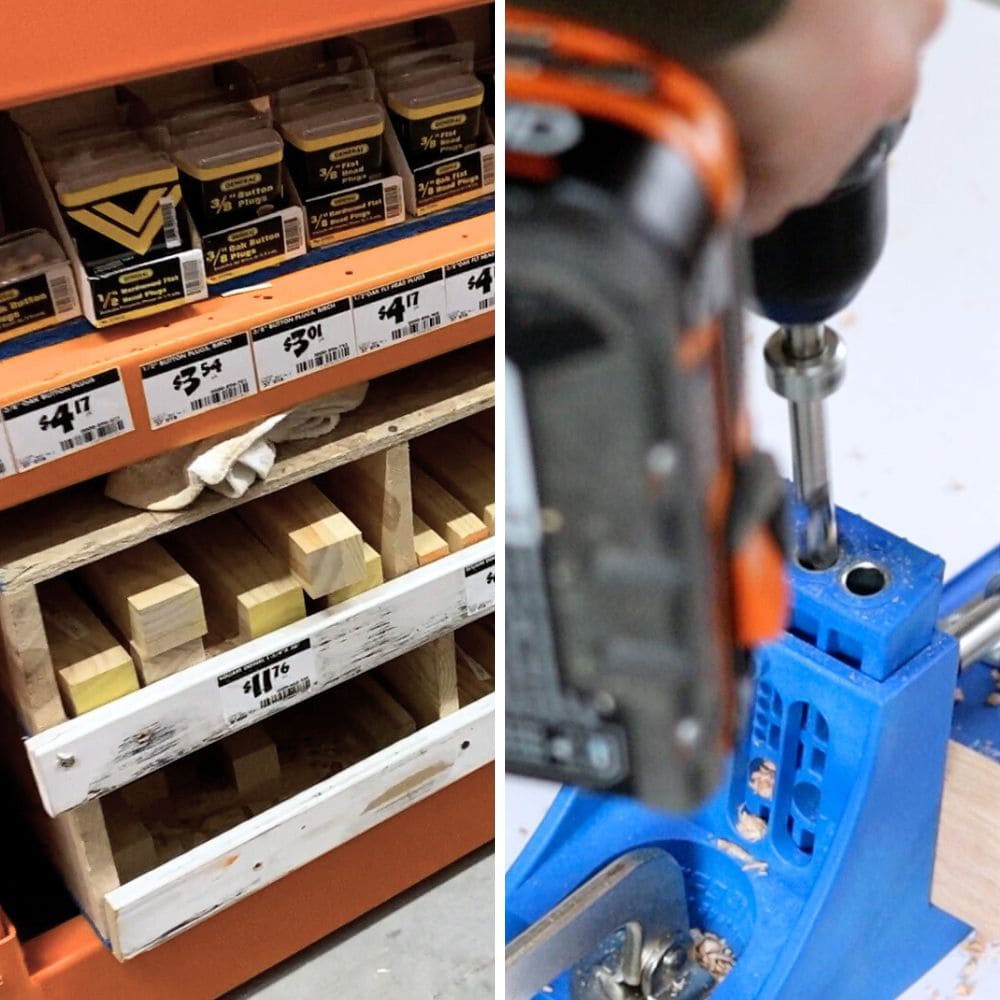
- 1″ x 4″ Common Wood Boards
- 2″x2″ Common Wood Boards
- 2″x2″ Wood Legs
- Kreg Jig Pocket Holes
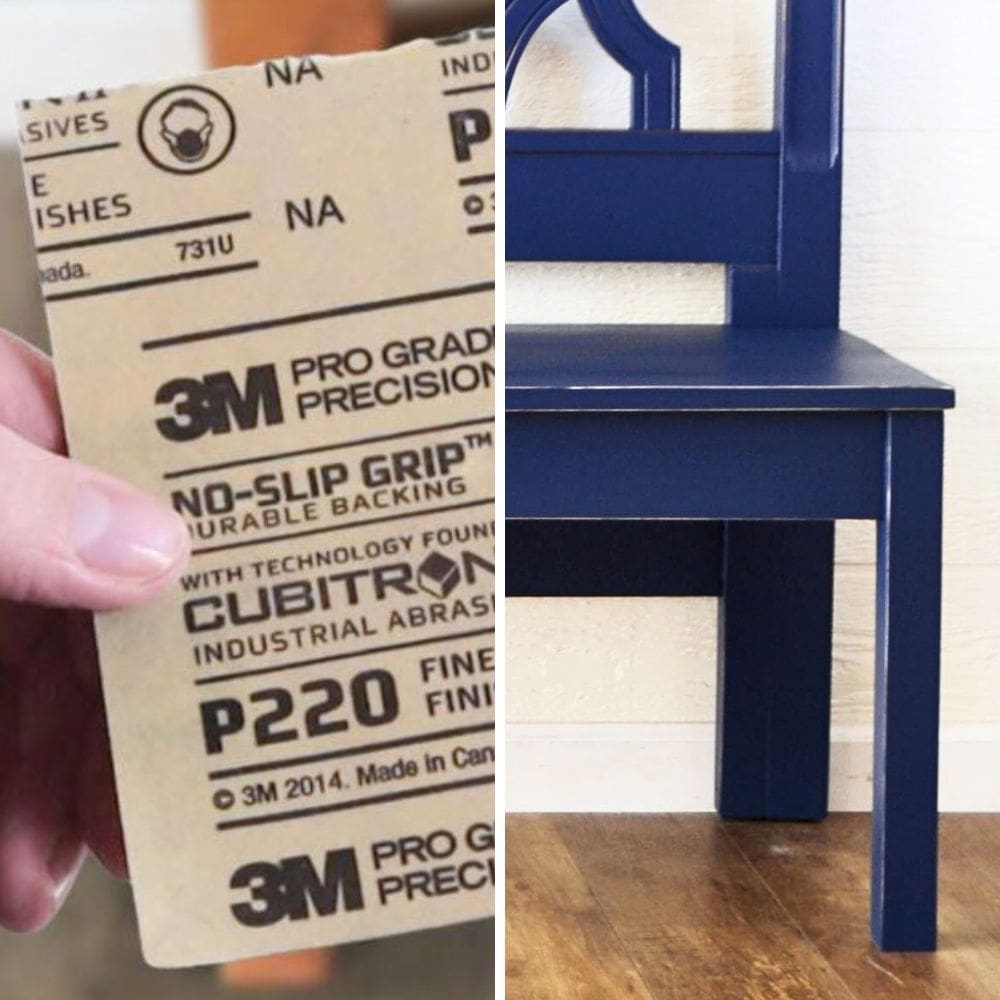
- 220 Grit Sandpaper
- SurfPrep Sander (Use code RAY10 to get 10% off your order)
- Shop Vac
- Tack Cloth
- Clear Shellac Spray
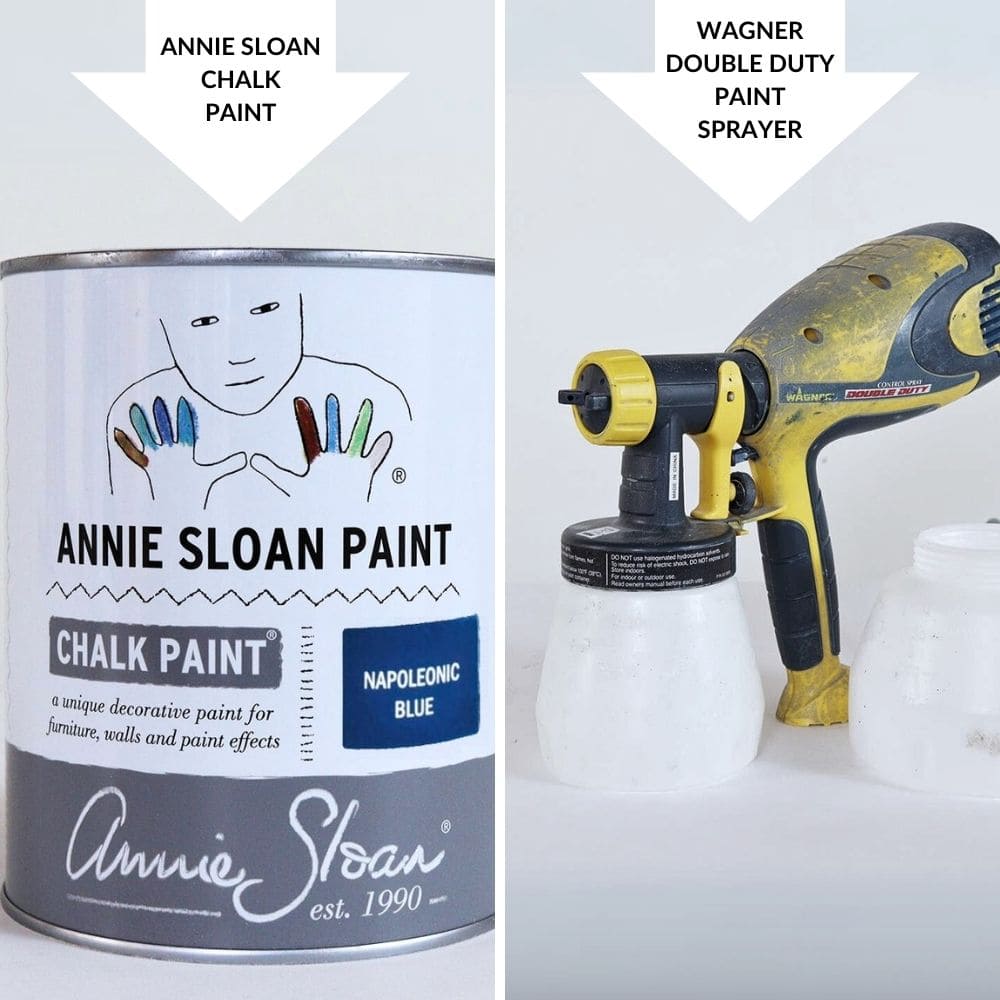
- Annie Sloan Chalk Paint in Napoleonic Blue
- Wagner Double Duty Paint Sprayer
- Waterbased Polyurethane
Creating A Bench from A Headboard
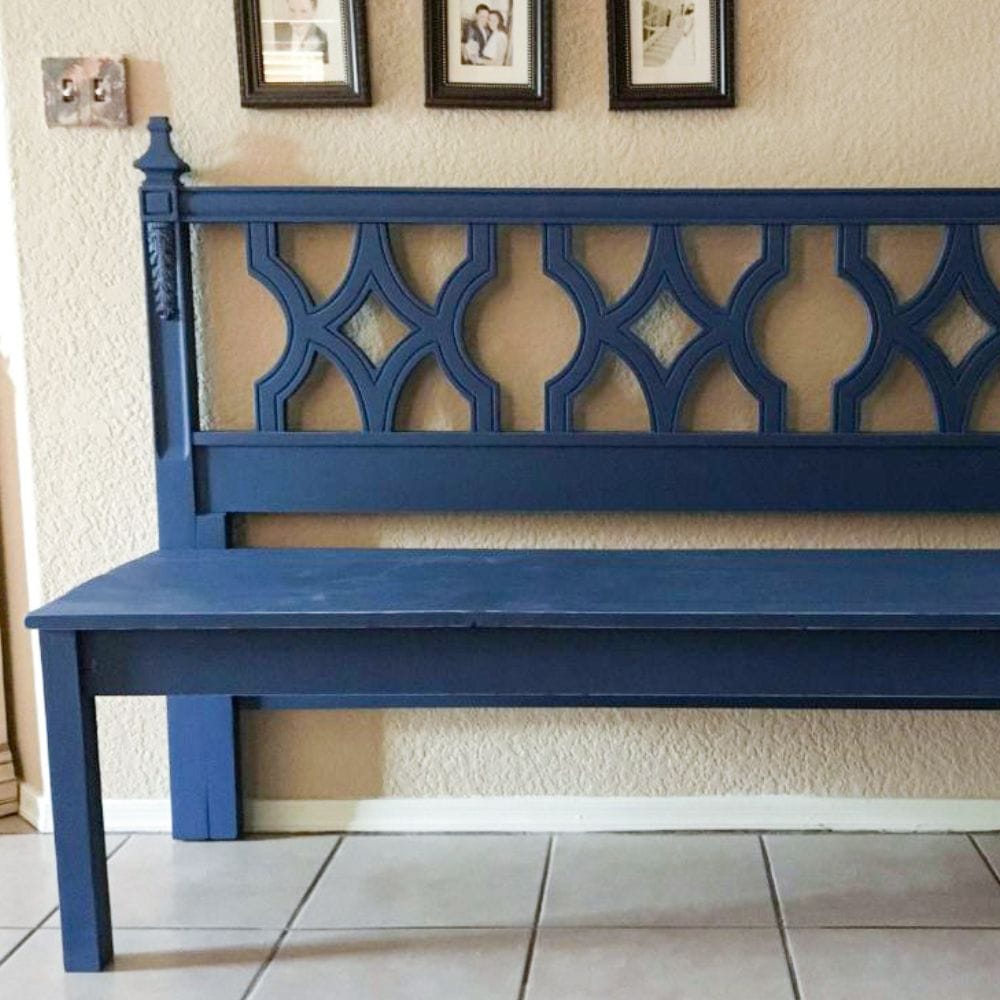
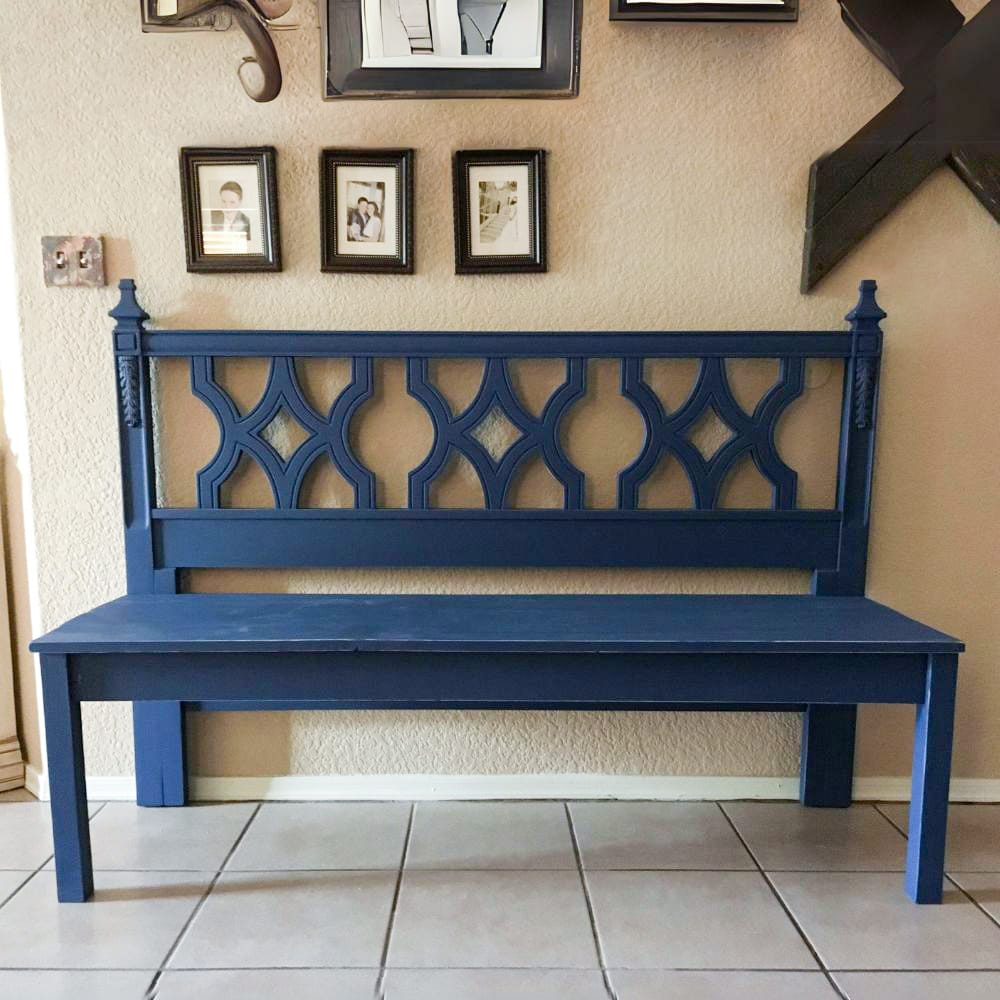
We already have our bed frame ready, so let’s dive into creating the bench from it! The first step was using 1″x4″ common board wood and 2″x2″ common wood boards to create the bench.
We attached these to the headboard using Kreg Jig Pocket holes, which made the process a lot easier. We did the same to the new 2″ x 2″ legs, making sure that they were sturdy and secure.
We made the seat depth to be 18″ deep. This was for a comfortable seating space for anyone using the bench. The build was simple and straightforward, with some support beams under the seat for added stability.
After all, we wanted the bench to be strong and able to support anyone who sits on it. We made sure to double-check all connections and make any necessary adjustments. We have a guide on how to make a bench from a headboard and footboard here for more details on this process.
Sanding Bench Before Painting
Before painting your repurposed headboard bench, it’s important to properly sand the surface. We used 220 grit sandpaper and my SurfPrep Sander for an efficient sanding process.
The goal of sanding before painting furniture is to smooth out any rough edges on the new wood pieces, as well as scuff up the finish on the headboard itself so that the paint will adhere better.
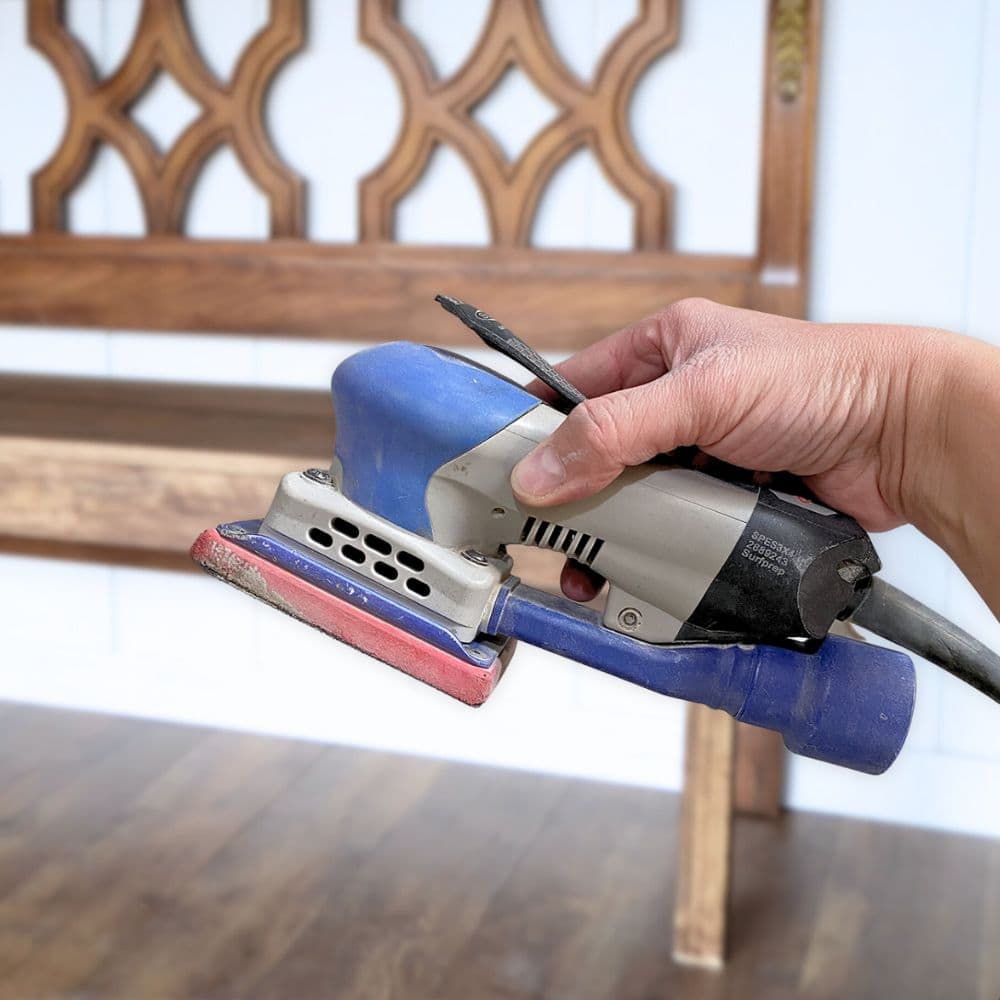
After sanding, be sure to clean off any dust and debris from the bench using a vacuum and tack cloth. Doing this helps us make sure the surface is completely clean and ready for painting. You wouldn’t want any dirt or particles messing up the paint job!
Priming Bench for Painting
And before we move on to painting, we need to make sure to prime the bench first. This helps create an even more smooth surface for the paint to stick to and it also blocks Wood Tannins Coming Through Paint. We used a clear shellac spray and applied 2 coats on all surfaces of the bench, including the new wood pieces that were attached.
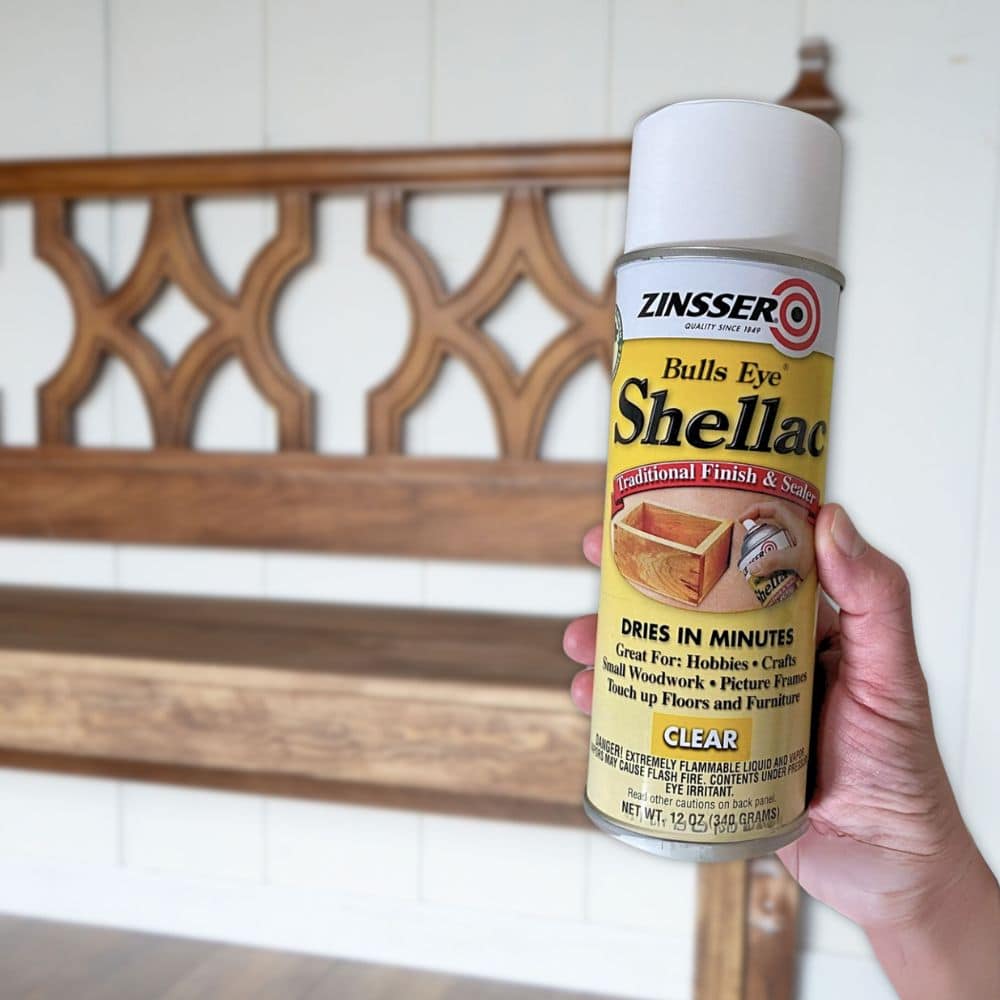
Once the primer is applied, it’s important to let it dry overnight. This gives enough time for it to fully dry and create a strong base for the paint. If you’re tempted to skip this step, don’t! Priming wood for painting really helps with the overall finish of the bench.
Painting Bench with Chalk Paint
We were so excited to finally start painting our headboard bench with chalk paint. We chose Napoleonic Blue from Annie Sloan Chalk Paint and used a Wagner Double Duty paint sprayer for an easy and even application. Here’s our list of the best blue paint for furniture for other blue paint brand options.
Would you like to save this?
The bed frame had some intricate details, and it helped that using this HVLP paint sprayer for furniture could easily reach all the nooks and crannies. Check out our honest Wagner Double Duty paint sprayer review for our experience and thoughts on it.
Paint the new bench with 2 coats of the Napoleonic Blue chalk paint, allowing each coat to dry completely before spraying the next. We wanted to make sure we got an even and solid coverage, so we made sure to apply a second coat.
Here’s our Annie Sloan Chalk Paint review if you’re curious about this paint and brand. You can also get inspired by these Annie Sloan chalk painted furniture projects.
Distressing Painted Bench
We wanted a distressed look for our bench, so we took some extra time to sand the edges and corners of the bench once it was dry.
We used 220 grit sandpaper to gently sand away some of the paint – this gave it a more rustic and aged appearance, just the way we wanted it. You can learn other distressing furniture techniques here for different effects.
Of course, cleaning off any dust must be done after sanding. We got our vacuum and tack cloth to thoroughly clean the bench and our workspace before moving on.
Spraying Poly on Painted Bench
Now it’s finally time for the finishing touches!
If this bench was going to be used outside, we would have used an oil-based polyurethane for extra protection against outdoor elements.
Instead, we sprayed 3 coats of waterbased polyurethane onto the painted bench. Waterbased poly is durable and dries quickly, making it great for indoor furniture.

If you’re going to use oil based polyurethane, make sure to let your painted furniture dry for at least 48 hours before applying it. Check out our post on topcoats for painting furniture for options and tips on how to choose the best one for your project.
Don’t skip on sealing painted furniture – it protects your hard work and makes sure that the paint will last for years to come. We still used our sprayer to easily apply the polyurethane, and here’s a tutorial on how to spray polyurethane if you’re new to it.
If you want to learn the right wood sealer for your project, check out our post on what to use to seal wood before painting!
With this makeover, you get your very own repurposed headboard bench that will be a unique piece in your home. It’s functional, stylish, and easy to make! We hope you have fun creating your own version of this project.
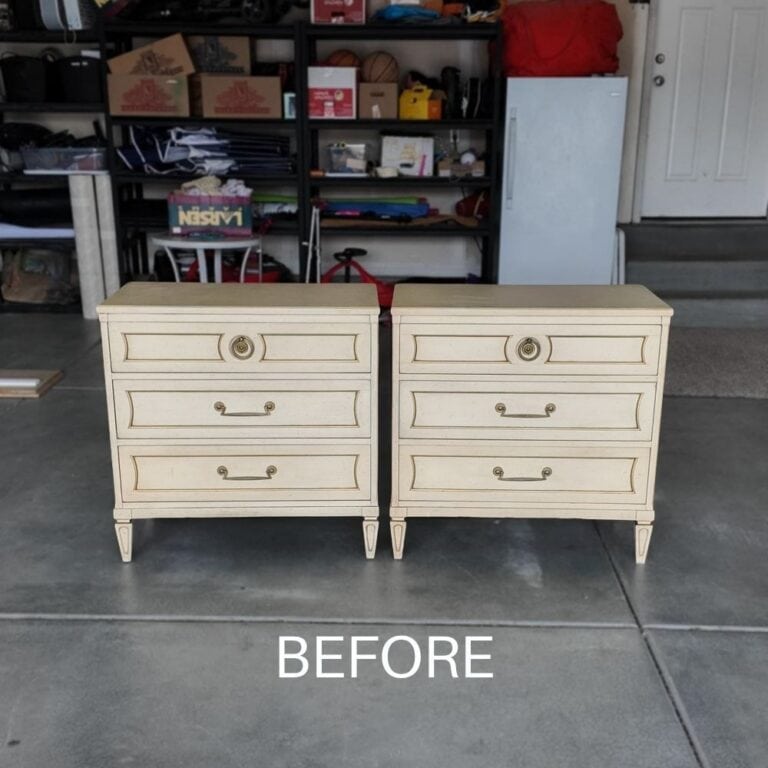
More Before and After Makeovers
See All >
Click any of these “before” photos below to view the “after” of that makeover.


Here are more painted benches ideas for inspiration! And get more ideas for your next DIY project with these chalk painted chair ideas.


Turn a Headboard into a Bench
Turn a headboard into a bench with this creative way to repurpose an old headboard and add character and functionality to your home.
Materials
- Old Headboard or Bed Frame
- 1" x 4" Common Wood Boards
- 2" x 2" Common Wood Boards
- 2" x 2" Wood Legs
- 220 Grit Sandpaper
- Tack Cloth
- Clear Shellac Spray
- Annie Sloan Chalk Paint in Napoleonic Blue
- Waterbased Polyurethane
Tools
Instructions
- The first step in transforming a headboard into a bench is to measure and cut the bed frame to fit the desired size of your bench. For reference, we used 1"x4" common board wood and 2" x2" common wood boards to create the bench, attached these to the headboard using Kreg Jig Pocket holes. We did the same to the new 2" x2" legs. We also made the seat depth to be 18" deep.
- To make sure your bench is strong and sturdy, add support beams underneath the seat. This will help distribute weight evenly and prevent any sagging or damage to the bench over time.
- Sand the new bench to remove any rough edges and create a smooth surface for painting. This also helps the paint adhere better to the wood.
- For a professional finish, prime all surfaces of the bench with a clear shellac spray. This will create a smooth surface for the paint to stick to and guarantee an even coverage.
- Use a high-quality chalk paint, such as Annie Sloan Chalk Paint, to add color and character to your bench. Apply 2 coats of paint using a paint sprayer, allowing each coat to dry completely before moving on.
- If desired, use sandpaper to gently distress the edges and corners of the painted bench for a more aged and rustic appearance. Remember to thoroughly clean off any dust before proceeding.
- To protect your hard work and for longevity, apply 3 coats of waterbased polyurethane using a sprayer. This will add durability and make sure the paint lasts for years to come.
- With these simple steps, you now have your very own repurposed headboard bench that is functional, stylish, and one of a kind.
Recommended Products
As an Amazon Associate and member of other affiliate programs, I earn from qualifying purchases.


More Blue Furniture Makeover Ideas
- Midnight Blue Dresser Makeover
- DIY Navy Blue Bedroom Dresser
- Bold Blue Chalk Painted Nightstand
- DIY Painted Hallway Cabinet
- DIY Light Blue Dining Room Buffet
Learn the Art of Updating Furniture!
If painting furniture feels overwhelming or your past attempts didn’t go as planned, this course will guide you step by step.

Follow us on YouTube to get more tips for painting furniture. Or share your project with us on our Facebook Group and be part of our community. See you there!
What an amazing idea! I love it. This upcycle turned out beautifully.
Thanks for your love on this headboard bench Michelle!