Paint Furniture Black – Everything You Need to Know
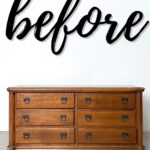
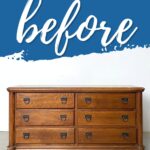

Today we’re going back to the basics on how to paint furniture black for beginners. No paint sprayer, this is all by hand. I’m including how to know if you can paint without sanding, and sharing some different options of paint and tools to make your project easier.
If you’re thinking to add a black painted furniture piece to your home, this is just the guide for you! So keep reading and keep this handy for later when you’re ready to get started on your project.
Black paint on furniture is a great way to add a bold, edgy look to your home decor. It’s also a classic color that always looks stylish and modern, and it actually works with any style, from modern to farmhouse as well.

Not to mention, black paint is a great option for furniture because it can easily hide any imperfections or scratches on the surface.
But working with such a dark and classic color may be intimidating for some. That’s why I’m here to guide you through all the steps and tips on how to successfully paint furniture black. Let’s get painting!

Supplies Used to Paint Furniture Black
As an Amazon Associate, I earn from qualifying purchases. I also may earn from other qualifying purchases with other companies or get free product to review and use. All opinions are my own.
- Krud Kutter
- 220 Grit Sandpaper
- Black Primer (more options below)
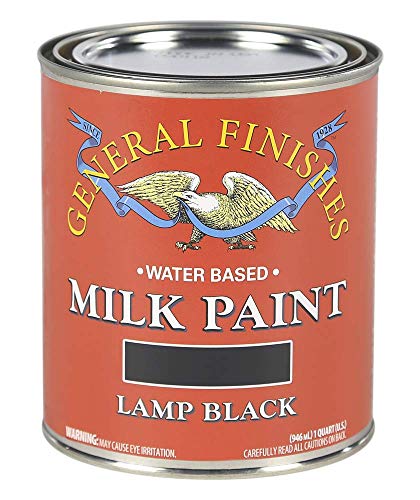
- General Finishes Milk Paint in Black (more options below)
- Zibra Round Paint Brush
- My Favorite Topcoat (more options below)
- Tile Grout Sponge
How to Paint Furniture Black
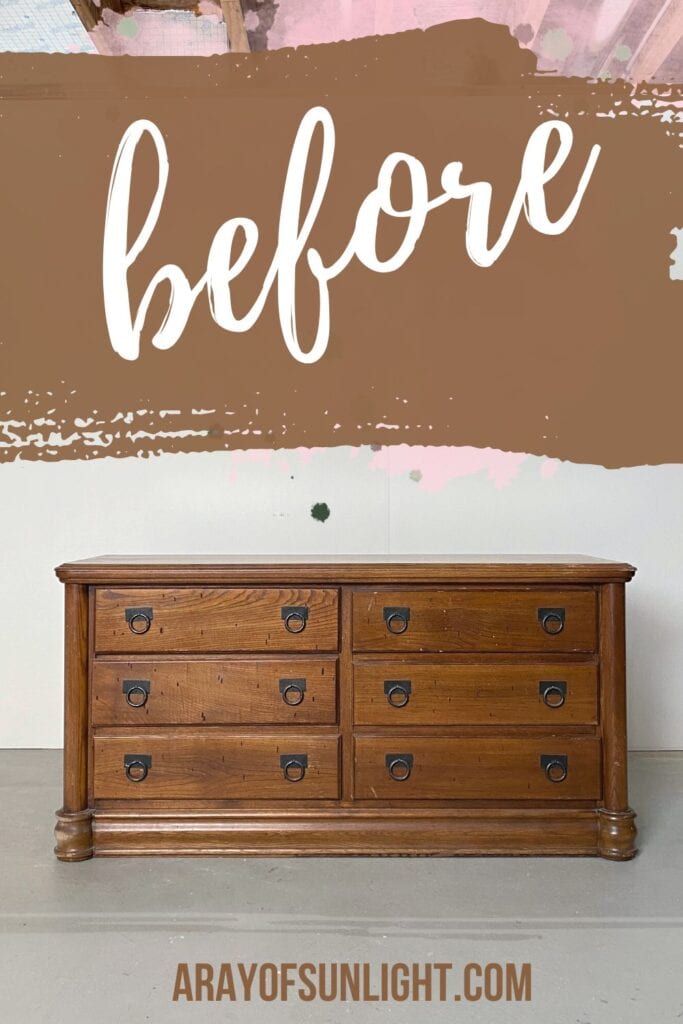
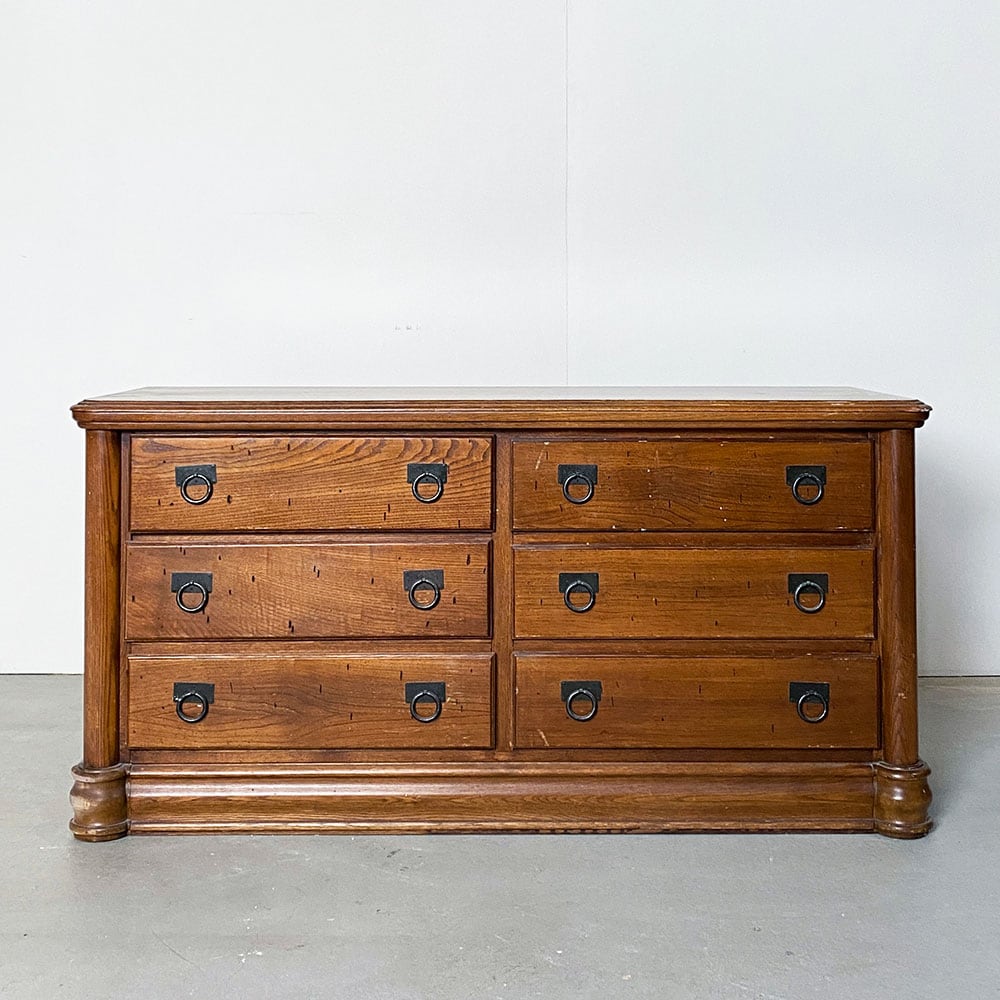
Here’s the step by step process we followed to paint this dresser black. You can use this same process to get a nice and durable black paint job on your next project too!
Remove Hardware and Clean Dresser
First, I remove the hardware. And then I clean the surface really well. No matter what your furniture is made of, it ALL needs to be cleaned really well with a degreasing cleaner.
We need to remove all of the oils, wax, grime, and dust from the surface, or else our paint won’t really stick to the furniture.
I like Krud Kutter, but you can use dish soap in warm soapy water, or TSP. Get more details on how to clean furniture before painting here!
Test the Paint
Knowing what kind of material you’re working with will help you determine the next steps in your project.
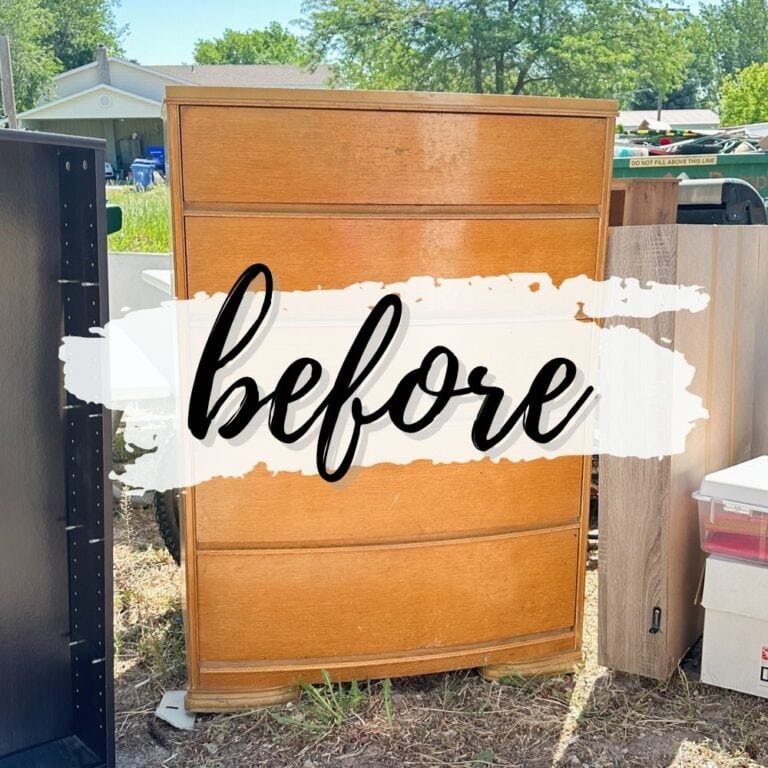
What is the Furniture Made of?
If you are painting laminate – the plastic, really slick stuff – then you will need to do some extra things before you paint, or else the paint will just scratch right off.
Learn all about the best paint for laminate furniture to make sure you get a durable finish on laminate!
When we look closely at the top of the dresser and feel it, it feels extra slick, and kind of like plastic. And instead of a natural wood grain… there is no texture to it. That’s laminate.
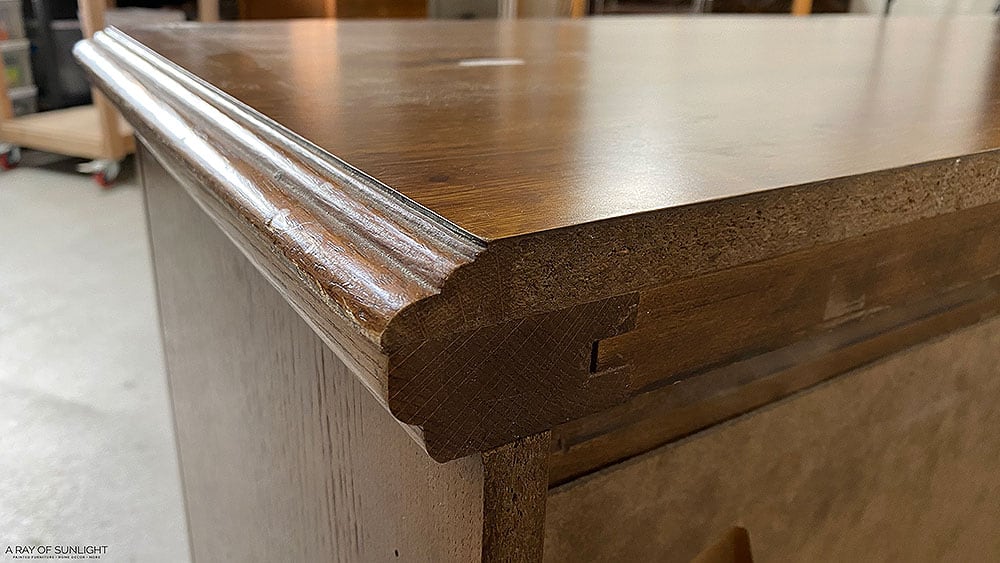
The rest of it seems to be wood. It has natural wood grain texture, it’s not slick and shiny, and it doesn’t feel like plastic.
Let me know in the comments if you want me to do a post on how to tell what your furniture is made of. If you can’t tell what your furniture is made of though, I have a couple of tricks that you can do to make sure your paint sticks!
Can you paint wood black without sanding?
Most likely you can. But you can do a little test to know for sure. Paint a sample of your paint onto a few different parts of your furniture. Then let it dry for 24 hours.
I actually did a sample WITHOUT scuff sanding beforehand, and a sample WITH scuff sanding before painting. Check out this post that is all about how to paint wood furniture without sanding or priming. And then I scratched at them after 2 hours, just for funsies.
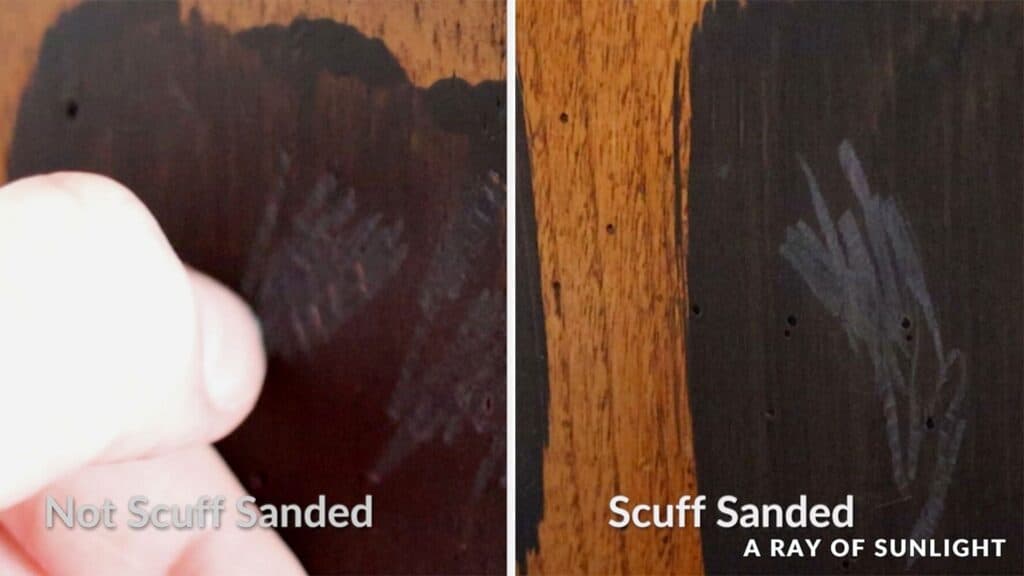
Both samples on the wood stuck really really good! The scuff-sanded one did better than the not scuff-sanded one, but for only drying for 2 hours each, they both did really well!
The samples on the laminate top though, both scratched SO easily. The scuff-sanded one scratched a little bit less easily than the not scuff-sanded sample.
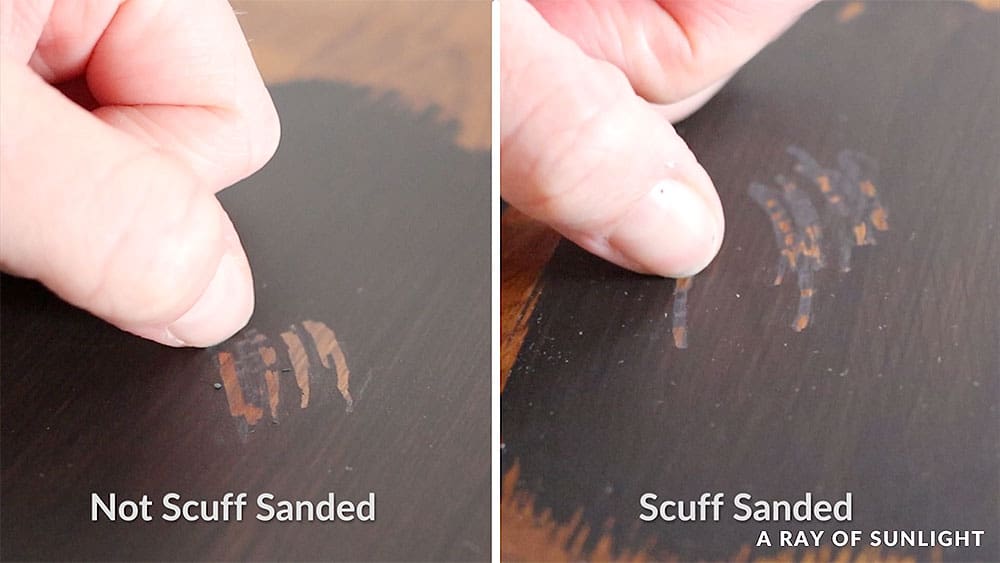
Paint Scratch Test
So I waited for the 24-hour mark. Both laminate samples still scratched, though not as easily as before… But the samples on the wood held on for dear life.
So, after this little test, I knew that I probably didn’t need to do anything else to the bottom of the dresser… but I knew that even scuff sanding the laminate top wouldn’t be enough to make the paint stick.
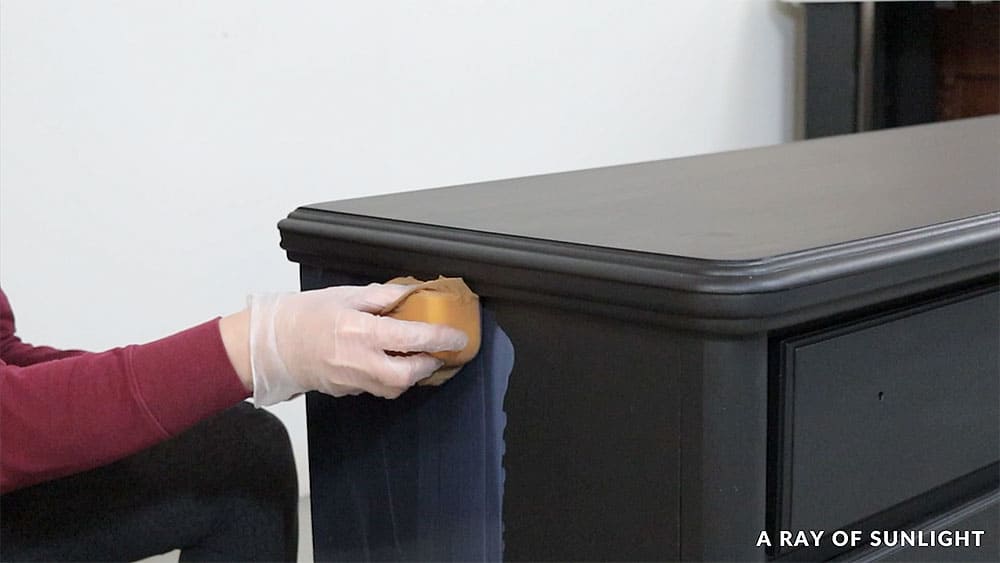
Scuff Sand Dresser (If Needed)
So I scuff-sanded the top of the dresser with 220-grit sandpaper. Learn more about sandpaper for furniture painting here.
And I did end up scuff sanding the bottom of the dresser too, just to show you what scuff sanding wood by hand can look like if your paint didn’t adhere well in the test.
How much do you need to sand wood before painting?
- We DON’T need to remove the old finish and get it down to raw wood.
- We just need to scuff it up a little bit.
- On grooves and details, I put the folded edge of the sandpaper into the groove and rub it back and forth.
- Be sure to remove the dust before you paint!
Think of how hard it is to hold onto something that’s really slick in your hands… like a brand-new phone without a case.
But if that phone has a case that isn’t as slick, and maybe has some texture on it… it’s so much easier to hang onto.
The same thing is true with paint and wood. Paint has a hard time holding onto a slick surface. But if we scuff it up, and remove the shine a little bit, then the paint has a much easier time of holding on. Learn more here about the importance of sanding before painting furniture.
Prime (If Needed)
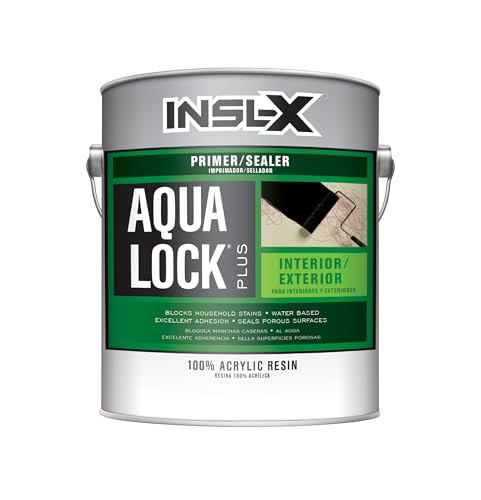
And then I primed the laminate. Here are the best bonding primers for laminate furniture. This time I tried out this Aqua Lock primer in black.
I’ve heard that it has great adhesion to even really slick surfaces, and that it self-levels really well…I love when paint self-levels! (In the end, I wasn’t super impressed with the self-leveling when I brushed the primer on though.)
I also love that this primer comes in black, so I don’t have to paint as many coats of black paint over it.
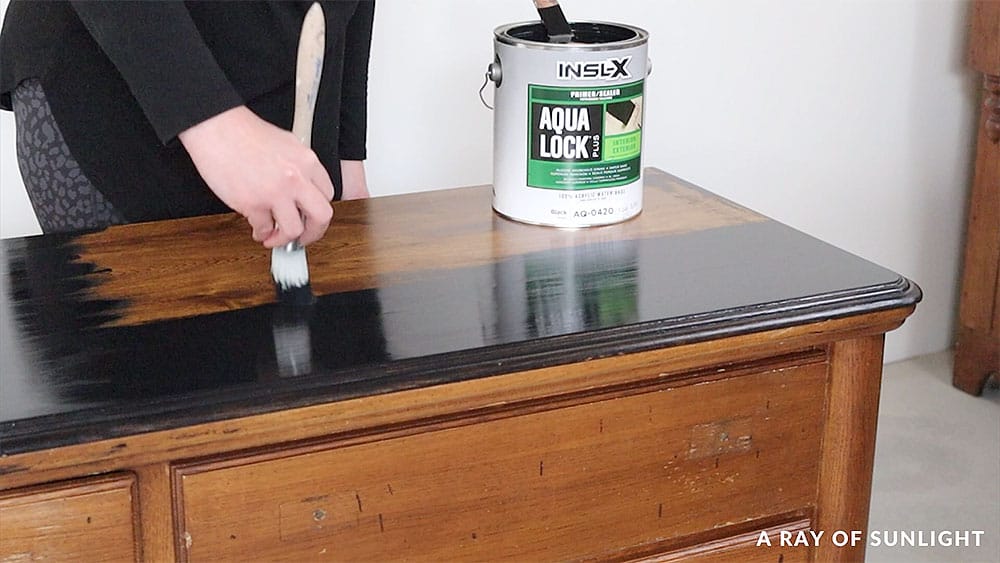
It was a little bit more expensive than some primers, and I had to get a gallon of it online. So if you’re only painting a single piece of furniture, I don’t know that this is the primer for you.
Other Primer Options
Instead, I would personally use plain ole clear shellac, especially with this milk paint, or chalk paint. Read more about the best primers for painting furniture (and how to choose the right one) here!
How can I paint my furniture black without sanding?
In this how to paint laminate furniture experiment last year I tested the clear shellac as a primer on laminate, compared to some other primers… and it made chalk paint stick to the laminate really well… even without any scuff sanding.
It comes in a spray can or a brushable version. Of course, there are other primers for laminate too.
White & Gray Tinted Primers
- Zinsser 123 Primer (Water Based) – available in White or Gray
- STIX (Water Based)
- Slick Stick Primer (Water Based)
- BIN Shellac Based Primer – can be tinted – use with any paint
- Cover Stain (Oil Based)
Clear Primers
- Clear Shellac
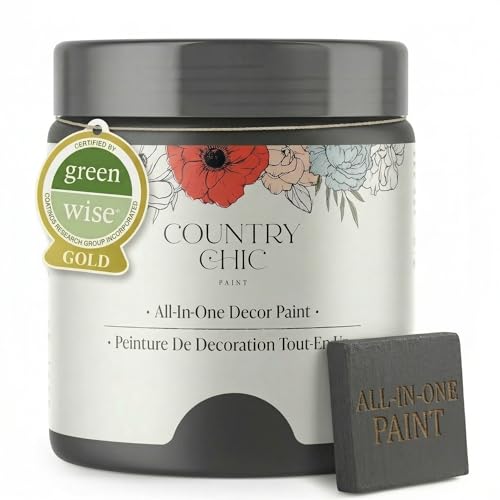
- Country Chic Paint Clear Primer (Water Based)
Primer Scratch Test
Since this primer is new to me, I did a scratch test on it, just to make sure that it was really sticking to the laminate before I wasted my time painting. It passed!

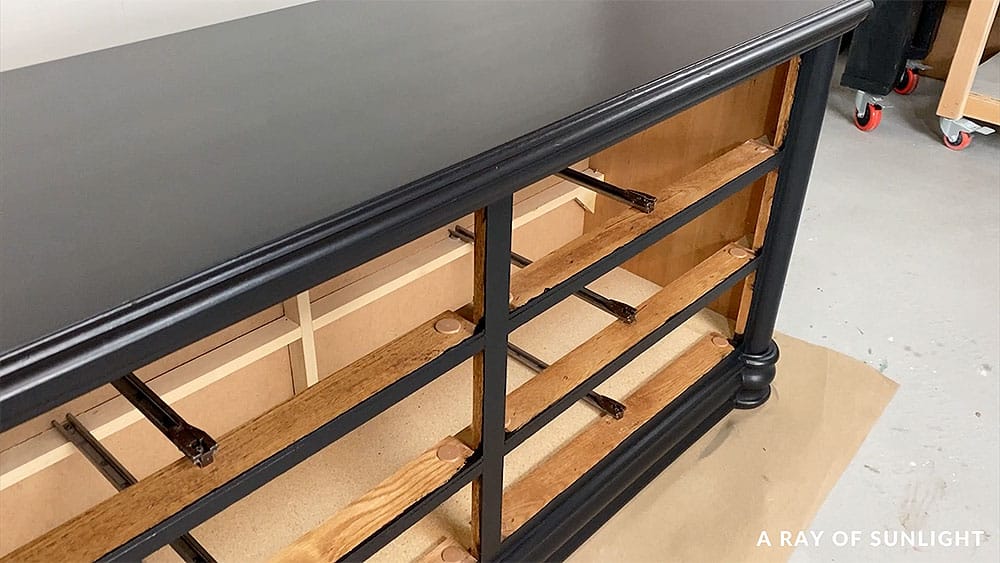
Painting A Dresser Black
Now that I know my paint will stick, it’s time to paint! I used my favorite brushable black paint, General Finishes Milk Paint in the color Lamp Black. Here’s a list of the best black paint for furniture that you can also use!
It’s water-based, so it doesn’t have harsh fumes, and clean-up is easy with soap and water. But it self-levels very very well. It’s one of the very best self-leveling paints out there in my opinion. Check out my comparison between chalk paint vs acrylic paint here.
I brushed it on with my round paintbrush from Zibra. The consistency of this paint is thinner than I’m used to with their paint. So the coverage wasn’t as good as normal. I’m not sure if they have a new formula or what. But I was a bit bummed with the coverage.

Painting with Paint Brush
You can use a cheaper paintbrush, but Zibra brushes are usually around $10 and are great quality. In general,
- The cheaper quality, the more brush marks you’ll get in your paint.
- The better quality, the less amount of brush marks you’ll get.
Cheaper brushes also tend to shed their bristles, while higher quality brushes don’t shed. Read through this post to learn more about the best paint brushes for painting furniture.
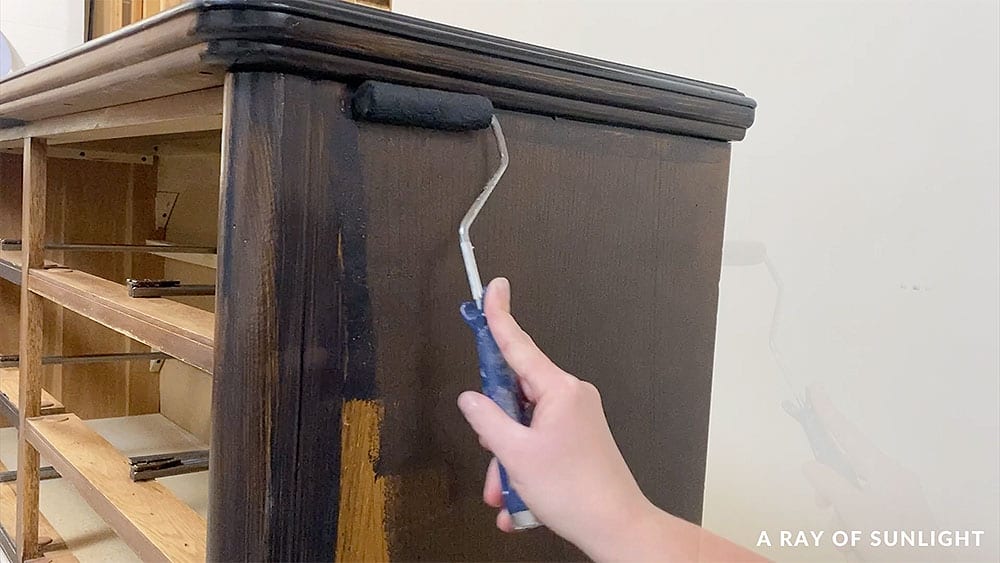
Painting with Roller
On one side and the top, I used a Sherwin Williams mohair roller so you can see what kind of texture was left behind if you roll it on. Check out the best rollers for painting furniture you can use here.
Would you like to save this?
(Since this paint is so good at leveling out, there was basically no texture left behind!)
I personally don’t care to roll paint on when I’m painting furniture. Especially if there are curves and grooves on it. Rollers just can’t get into those details as well as a paintbrush, so I end up using both a brush and a roller… And I feel like personally, I have more control over a brush than a roller.
What do you prefer?? A brush or a roller?? Or a sprayer? The good news is that you can paint however you want to! But if you want to tackle them quickly, learn the fastest way to paint grooves and details here.
Best Black Furniture Paint
This paint is definitely not the only black paint out there. Here are some more black paints that I recommend.
- Paint Couture Paint in Baltic Black – Transforming Kitchen Table – Self levels and very similar to General Finishes
- Country Chic Paint in Liquorice – Black Vintage Farmhouse Dresser – Chalk paint
- Homemade Chalk Paint with black Behr paint – Black Painted Antique Buffet – Chalk paint
- Melange ONE in Jett Black – Slatted Wood Dresser – All in one paint, satin sheen, no topcoat needed
- Fusion Mineral Paint in Coal Black – Repainting Furniture – All in one paint, matte sheen (so I like to topcoat)
- General Finishes Enduro Poly in Black – Painting a Desk Black – Must be sprayed, satin sheen, no topcoat needed. Get more tips on how to paint furniture black with Enduro Poly here.
- Shackteau Interiors Milk Paint in Black Beach – Black Milk Painted Dresser – Chippy, rustic look
You can also check out this list of the best black matte paint for furniture.
Paint 3 Coats
Here’s what the paint looked like after the first coat had dried for a couple of hours.
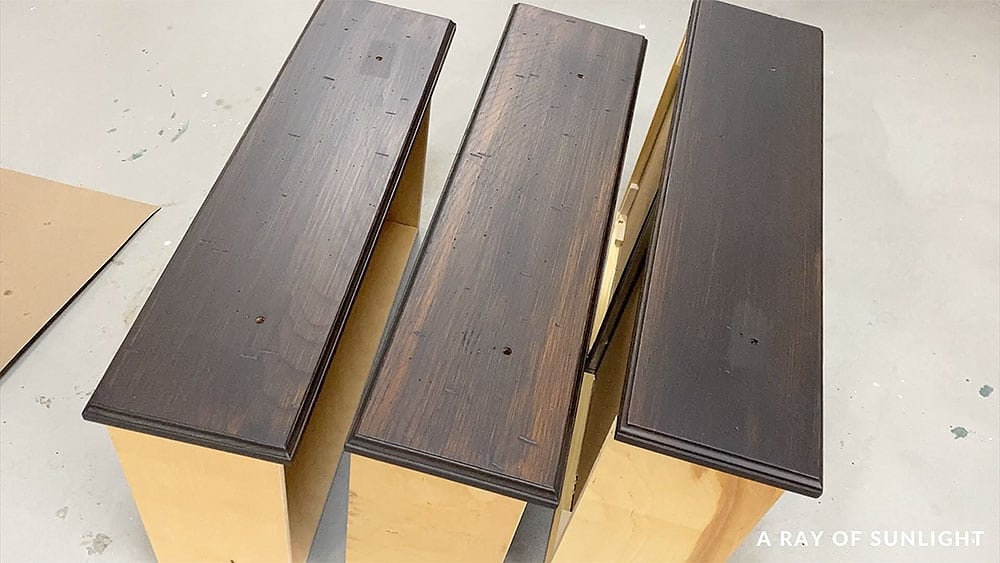
Overall, it definitely needed another coat of paint to achieve full coverage. I painted the second coat on the same as the first coat. But there were some areas that didn’t have full coverage. So I ended up painting a 3rd coat on.
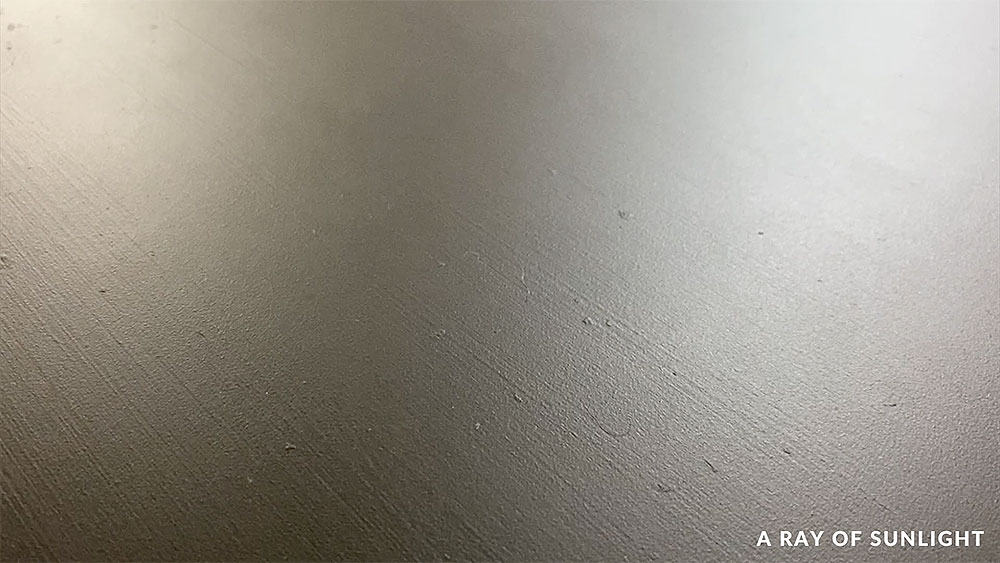
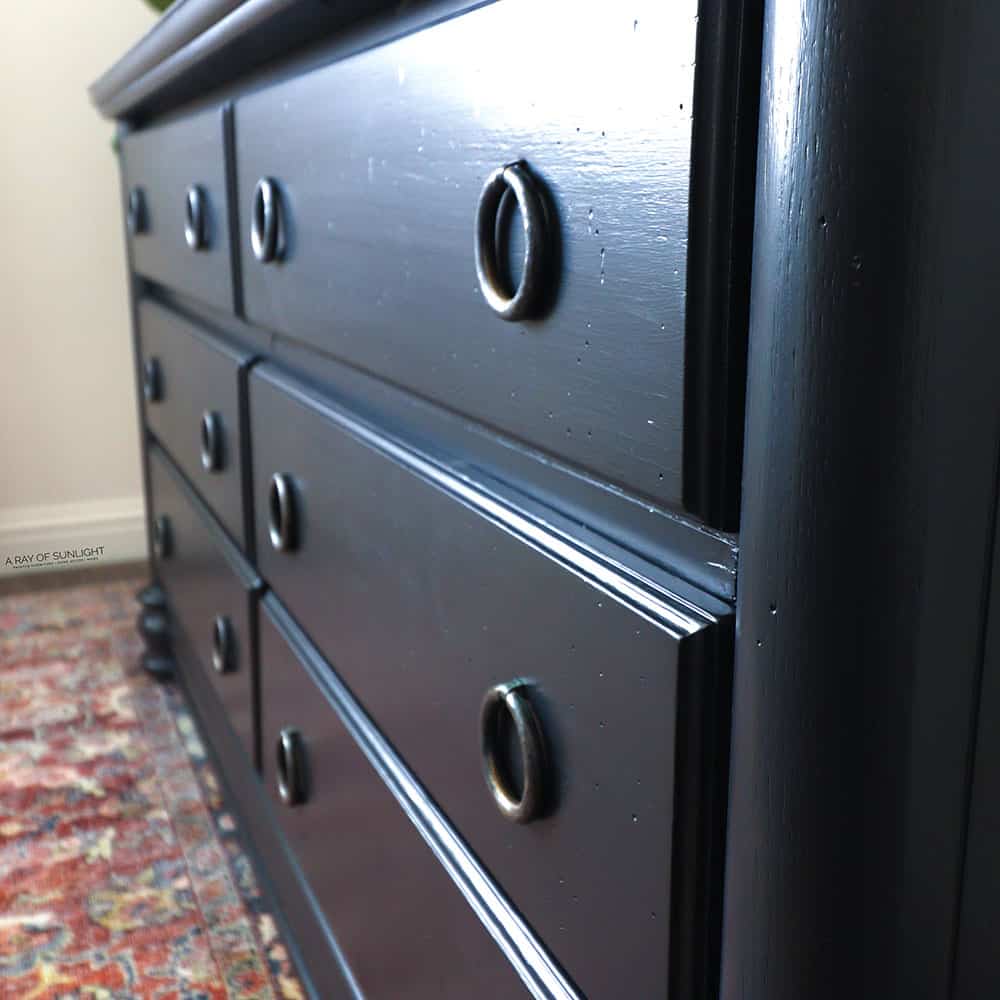
After that 3rd coat was dry, here is what it looked like. There are some brush marks, but for the most part, they leveled out and blended in with the wood grain.
On the top, where I had brushed the primer and rolled the paint, you could see brush marks from the primer, and only very very slight texture from the roller.
PS. If you really hate brush marks in your paint (like I do), check out this post on how to paint furniture without brush marks. If you’re tired of brush marks? This fix changes everything!
The biggest problem though, and this was just user error… but there were a lot of specks of dried paint on the top.
Sand and Paint Another Coat on Dresser Top
So between the thicker brush marks and the specks of paint, I decided to sand the top to get rid of those. Read this blog post to learn all about the best sanders for furniture!
Once the texture was all gone, I painted another coat on the top.
Topcoat Paint (If Needed)
Technically, with this paint, you could stop right there. They say that on low-traffic surfaces, you don’t need to topcoat this paint. The low luster finish of this paint is gorgeous!
But, I personally want my furniture to be durable enough to withstand kids, and normal wear and tear. So after the paint had dried for a couple of hours, I top coated it.
Other topcoat options
If you don’t want to topcoat by hand, you can get an absolutely amazing finish with
- oil based spray on polyurethane
- water based spray on polyurethane
- spraying waterbased polyurethane in a paint sprayer
You could also use an oil-based wipe on polyurethane too. Over black paint, oil-based poly looks absolutely amazing! Check out the best polyurethane for furniture options here.
But, for those who can’t spray, don’t want to spray, or want the topcoat to dry quickly, I went ahead and applied the topcoat by hand so you can see how to do it. Read this post to learn all about topcoats for painting furniture.
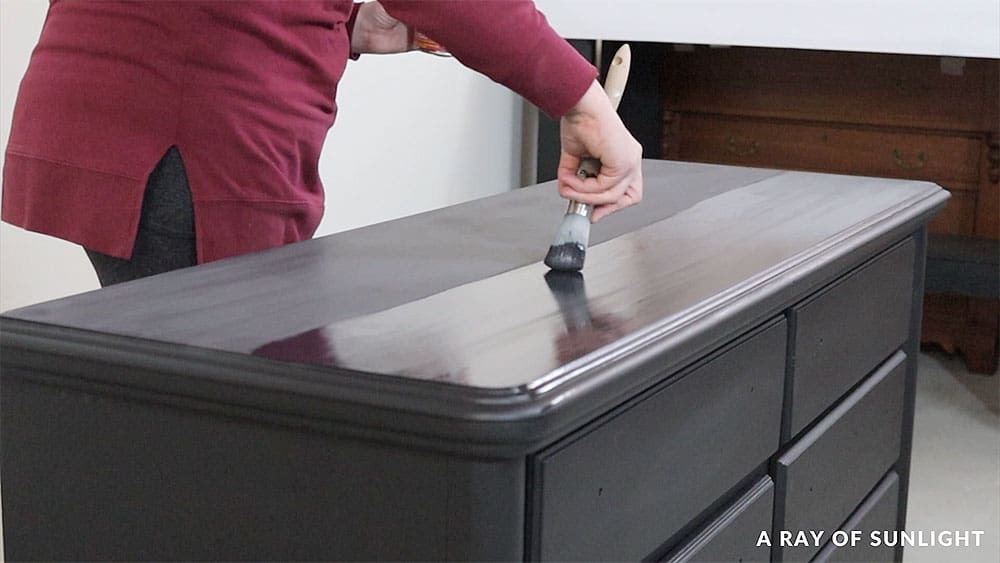
Mix Paint into the Polyurethane
One of the best tricks to top-coating dark paint with water-based polyurethane is to mix some of the paint into the polyurethane.
How to Wipe On Water-Based Poly
Then, I like to use a foam sponge to apply it. There are more expensive foam sponges from a bunch of different paint companies. But you can also use a cheap tile grout sponge.
Someone suggested putting a nylon stocking or pantyhose over the sponge…So, I’m trying it out today.
Spoiler alert… I think I’m going to keep doing it like this! I don’t know what changes, but the finish does look better.
Anyway, get a little bit of the tinted poly onto the sponge, but not too much! Then wipe it on. I try to wipe it on in the direction of the wood grain again.
And I try not to go back over it more than a time or two. I like to wipe it on the edges, then wipe down the middle, trying not to leave a bunch behind in the edges.
For the drawers, it works best when I wipe it on the edges first, with a sponge that doesn’t have much poly on it. I didn’t want too much poly in all of those grooves.
And then I put more poly on the sponge, and wiped it across the drawer, going off each side. For the top, I worked from side to side, in long strokes.
Then I let it all dry for a couple of hours. I wrapped my plastic glove around the foam to keep it from drying out while I waited for the first coat to dry. Here’s what the first coat looked like after it was dry.
Then I wiped on another coat of poly all over. Here’s more on how to apply polycrylic to painted furniture.
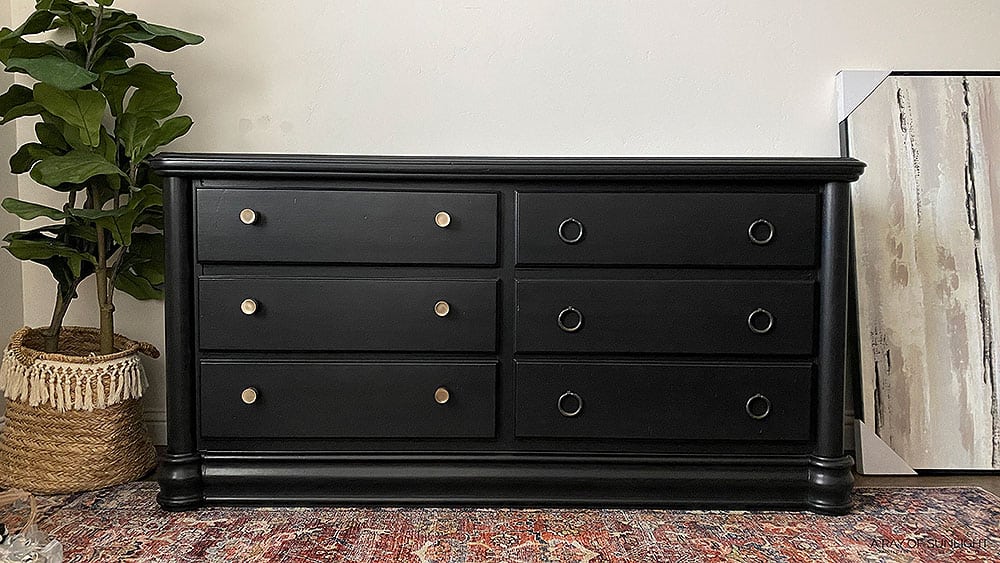
Attach Dresser Hardware
After that 2nd coat of poly was dry, I debated putting new gold knobs on, or putting the old hardware back on… Which one would you choose?
Let Painted Dresser Cure
Then, before you start using your furniture, give it about a month to fully cure. Or be extra gentle with it while you use it for the first month. After a month, the paint and topcoat will be as durable as it’s going to get, so it’s ready for you to use like you normally would.
How to know if black painted furniture is fully cured and ready for normal use
So you’ve waited a full month for your black painted furniture to cure and you’re ready to start using it. But how do you know if it’s really cured and durable enough for normal use? Here are a few simple signs to look out for:
- No more smell – When paint dries, it gives off a strong odor that can stick around for days or weeks. If the smell is totally gone, it means the paint has fully cured.
- No more tackiness – If you touch the surface of your painted furniture and it no longer feels sticky or tacky, that means the paint has dried and cured. This is important because if the paint is still tacky, it could get easily damaged in your daily routine.
Trust your instincts and give your furniture a gentle test run before fully committing. If it feels dry, smells fine, and shows no damage from light use, then your black painted furniture is good to go for regular use!
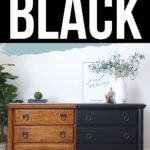
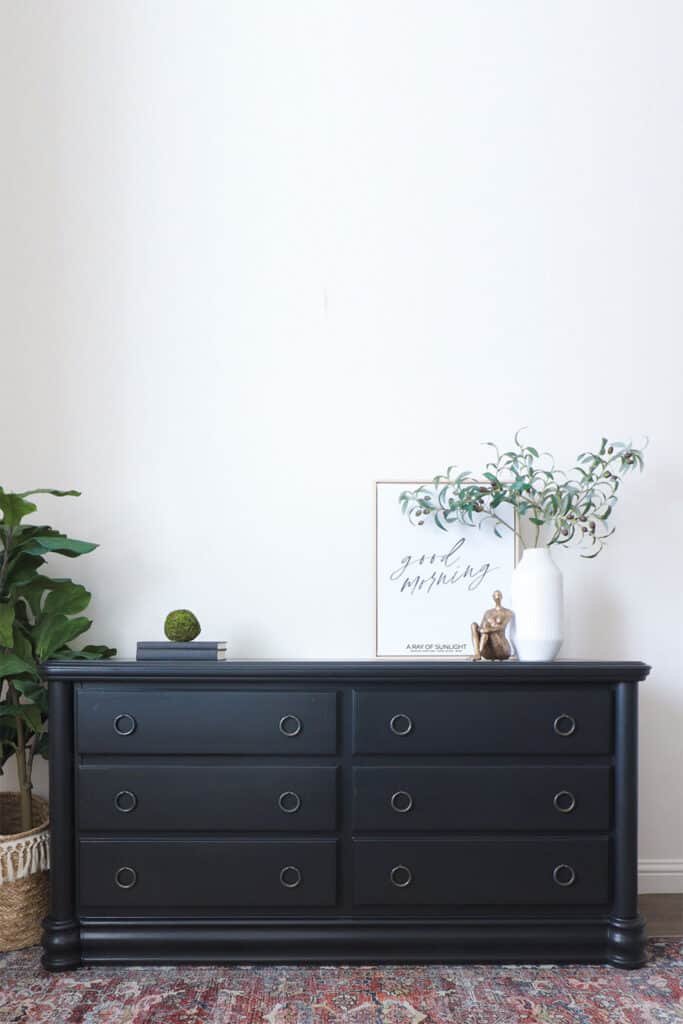
Here’s what it looks like now! And here are more black painted dresser ideas you can try!
More Before and After Makeovers
See All >
Click any of these “before” photos below to view the “after” of that makeover.


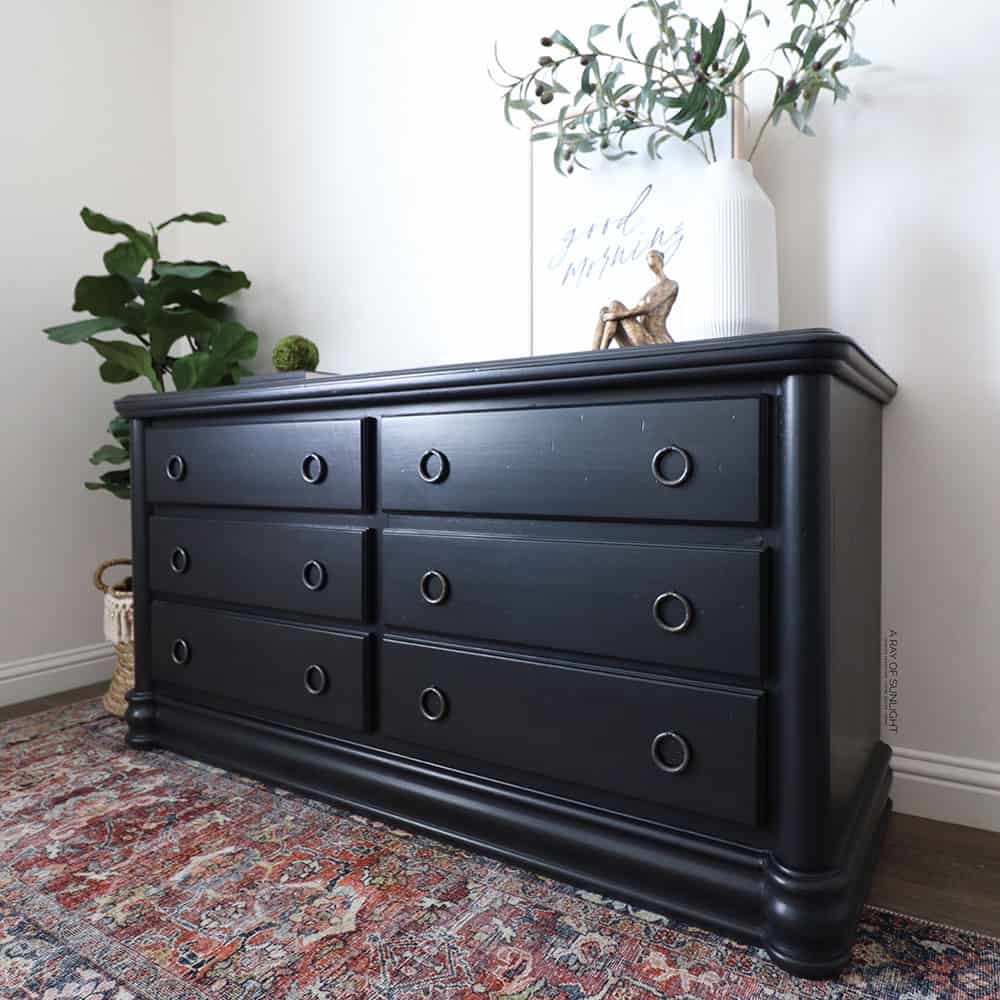
A freshly black painted dresser, with a durable paint job that’s going to last.
Is the finish perfect? No. There are still some streaks from the topcoat, and there are some brush marks… and minimal roller texture.
But for being hand painted, I’d say that it looks amazing. What do you think?

How do you make black painted furniture look distressed?
If you’re going for a rustic, vintage look, distressing furniture would be the way to go. And for your black painted piece, you can use sandpaper and rub it on the edges, corners, and other areas where wear and tear would naturally occur.
Remember to not overdo it though, unless you want a heavily distressed look. Start with a light hand and gradually increase pressure if necessary. You can always add more distressing, but it’s harder to take it away once done.
It also helps to use fine grit sandpaper like 400 grit for a subtler distressed look, or use coarse grit sandpaper like 80 or 100 grit for a more noticeable distressed effect.
If you’ve used powdered milk paint (not General Finishes Milk Paint) to paint your furniture black, this paint does have a chippy effect when it dries. You can still also sand it down to add some more wear and tear. Just make sure to seal your distressed piece with a topcoat afterwards to protect the surface.


Paint Furniture Black
Here's how to paint furniture black, all by hand, perfect for beginners.
Materials
Instructions
- Remove hardware and clean the furniture to prep for paint. This is to remove all of the oils, wax, grime, and dust from the surface, or else paint won’t really stick to the furniture.
- Test the paint by painting a sample of your paint onto a few different parts of your furniture. Then let it dry for 24 hours. Do a scratch test to determine if you need to sand.
- If needed, scuff sand furniture with 220 grit sandpaper. Clean up all the dust from sanding.
- Now, apply primer to furniture to help paint stick.
- Paint furniture with a few coats, sand to smooth out the paint, then apply a final coat.
- Topcoat painted furniture with 2 coats of waterbased polyurethane. To topcoat dark paint, mix some of the paint into the polyurethane then wipe the poly with a sponge. Try to wipe it on in the direction of the wood grain. Then let it all dry for a couple of hours.
- Attach dresser hardware. Let the paint cure for about a month and enjoy!
Recommended Products
As an Amazon Associate and member of other affiliate programs, I earn from qualifying purchases.


More Black Painted Furniture Makeovers
- Best Black Furniture Paint
- Black Coffee Table Makeover
- Beyond Paint Review
- Painting Oak Furniture Black
- Painting a Bed Frame Black
Follow us on YouTube to get more tips for painting furniture. Or share your project with us on our Facebook Group and be part of our community. See you there!
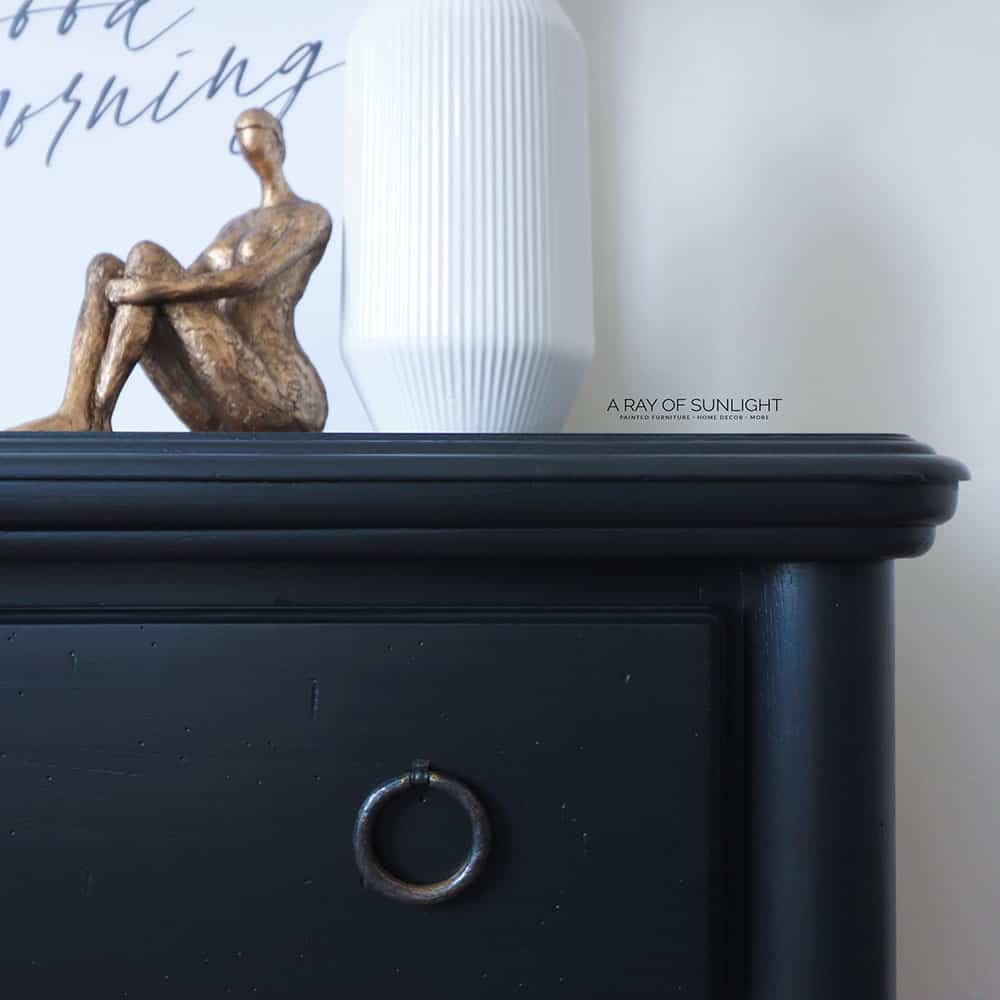
Beautiful! The finish is like glass and the small imperfections add character.
Absolutely love it