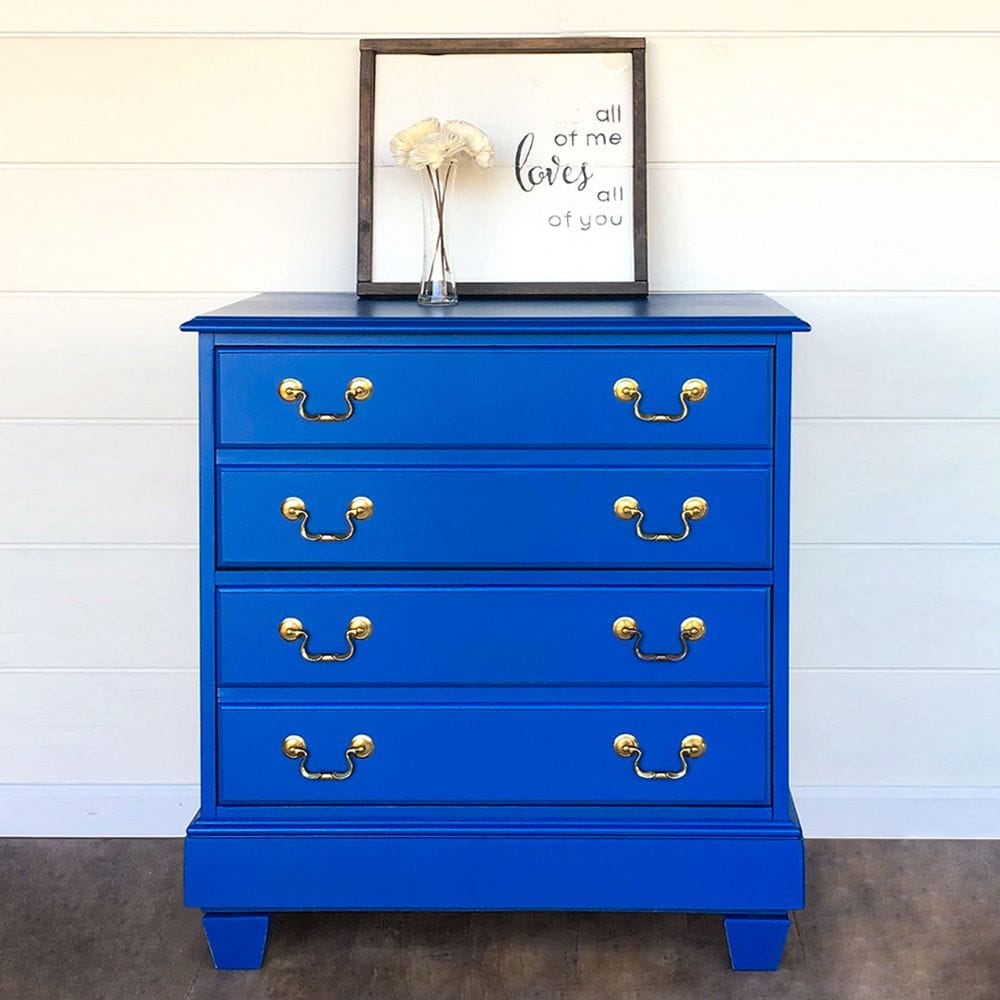
Blue Nursery Dresser Makeover
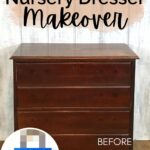
If you’re looking for a way to add some cheer and color to your little one’s room, then this blue nursery dresser makeover is perfect for you. We’ll be showing you how to transform an old, drab file cabinet into a stunning piece of blue painted furniture that will brighten up any nursery.
You don’t have to spend a fortune on new furniture – all you need is some paint, creativity, and love for DIY projects.
A nursery dresser not only serves as storage for all the adorable little outfits and tiny socks, but it also adds to the overall aesthetic of the room.
However, purchasing a brand-new dresser can be expensive and may not fit your budget. The good news is you can totally create a unique and personalized dresser for your baby’s nursery!

When it comes to decorating a nursery, there are countless options and styles to choose from. But one trend that never goes out of style is the use of blue for a boy or girl’s room.
This calming color has been associated with babies and nurseries for decades, and what better way to incorporate it than with a blue nursery dresser? Let’s create this beautiful piece of furniture!

Supplies Used for Blue Nursery Dresser Makeover
As an Amazon Associate, I earn from qualifying purchases. I also may earn from other qualifying purchases with other companies or get free product to review and use. All opinions are my own.
- Electric Screwdriver
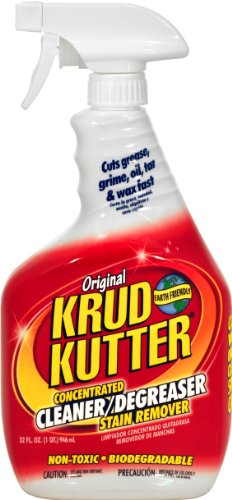
- Krud Kutter
- 220 Grit Sandpaper
- Cabinet Legs
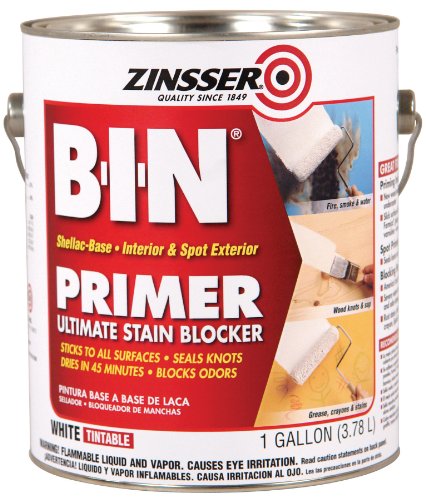
- Clear Shellac Spray
- Blue Paint
- Wagner Paint Sprayer
- Shop Vac
- Tack Cloth
- Water-based Polyurethane
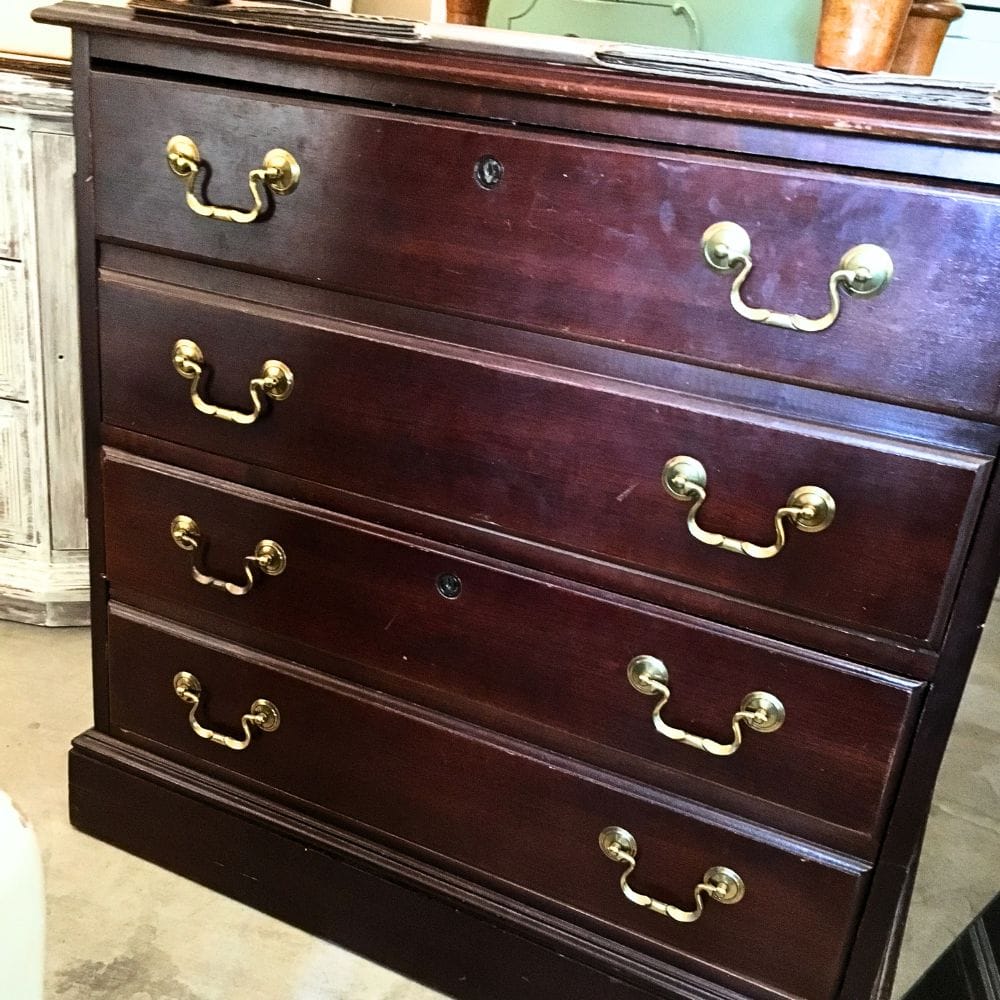
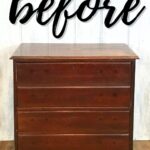
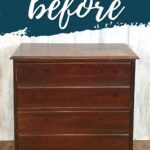
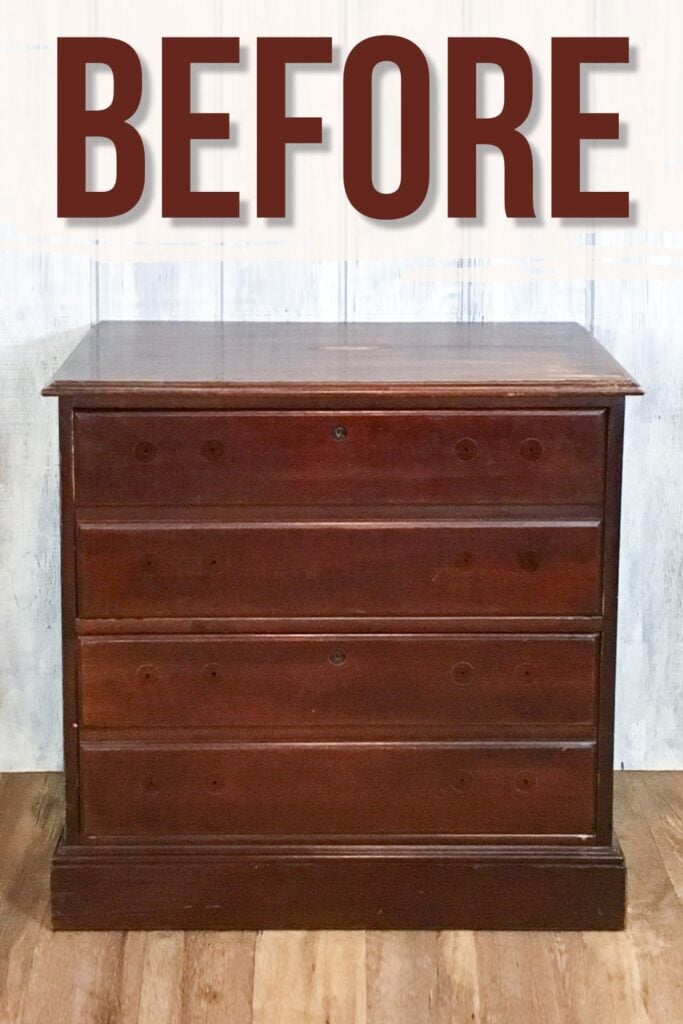
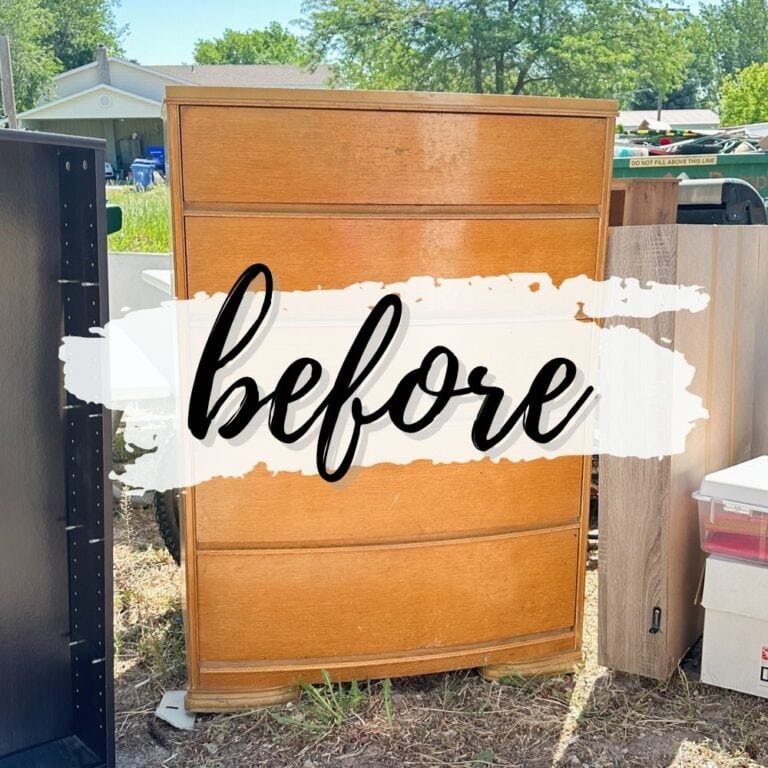
We started out with a simple wooden file cabinet that had 2 drawers, even though it may have appeared to have 4.
It’s the perfect size for a baby’s room and makes an ideal candidate for this dresser makeover.

Preparing Cabinet for Nursery Dresser Makeover
Before we can start painting, it’s important to properly prepare the cabinet.
Preparing furniture for painting starts with removing all hardware, including knobs and drawer pulls, using an electric screwdriver for efficiency.
This will guarantee that the paint is applied evenly and smoothly without any obstructions.
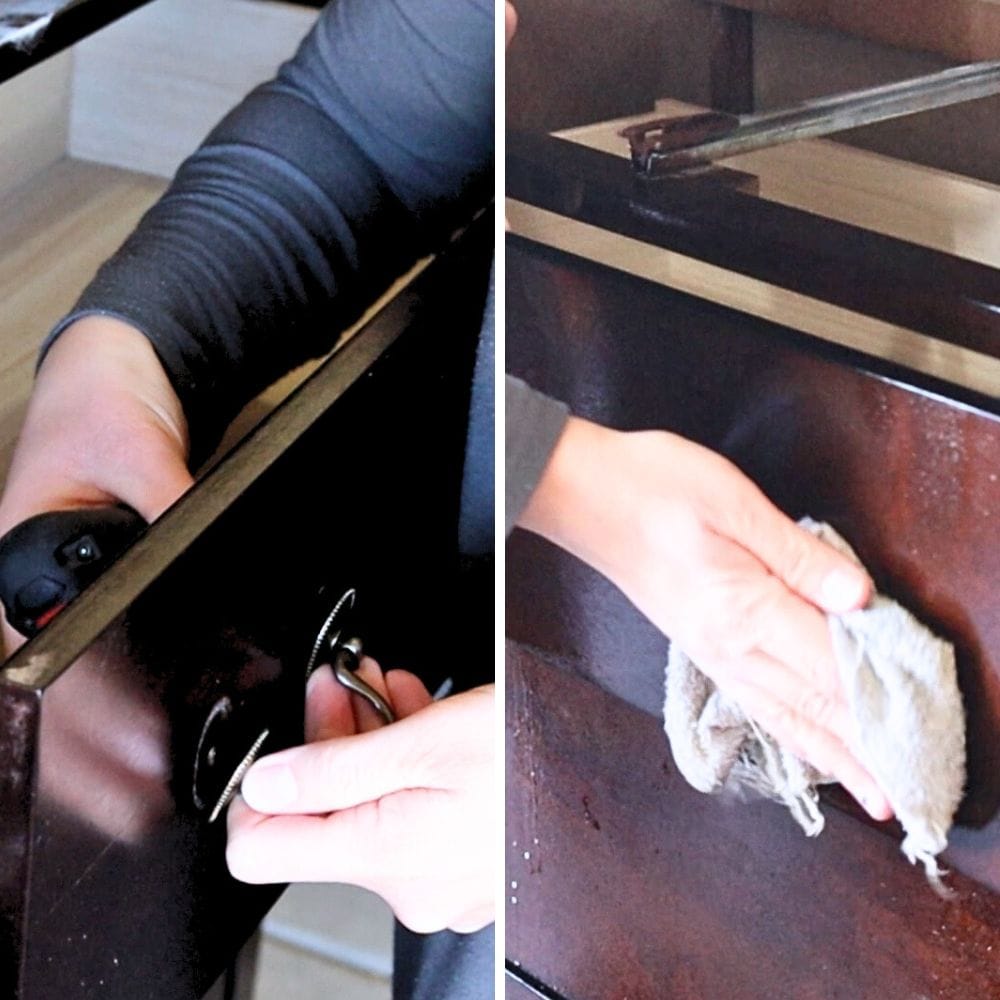
Next, we recommend giving the cabinet a good clean with Krud Kutter or any other degreaser to remove any dirt, grime, or oil build-up.
Simply spray the degreaser onto a damp rag and wipe down all surfaces of the cabinet. This is so the paint adheres properly and creates a clean base for your new blue color to shine.
Once you have cleaned the cabinet, make sure to let it dry completely before moving on to the next step.
Any moisture on the surface can affect the painting process and result in an uneven finish. Our post on how to clean furniture before painting will guide you through the process in detail.
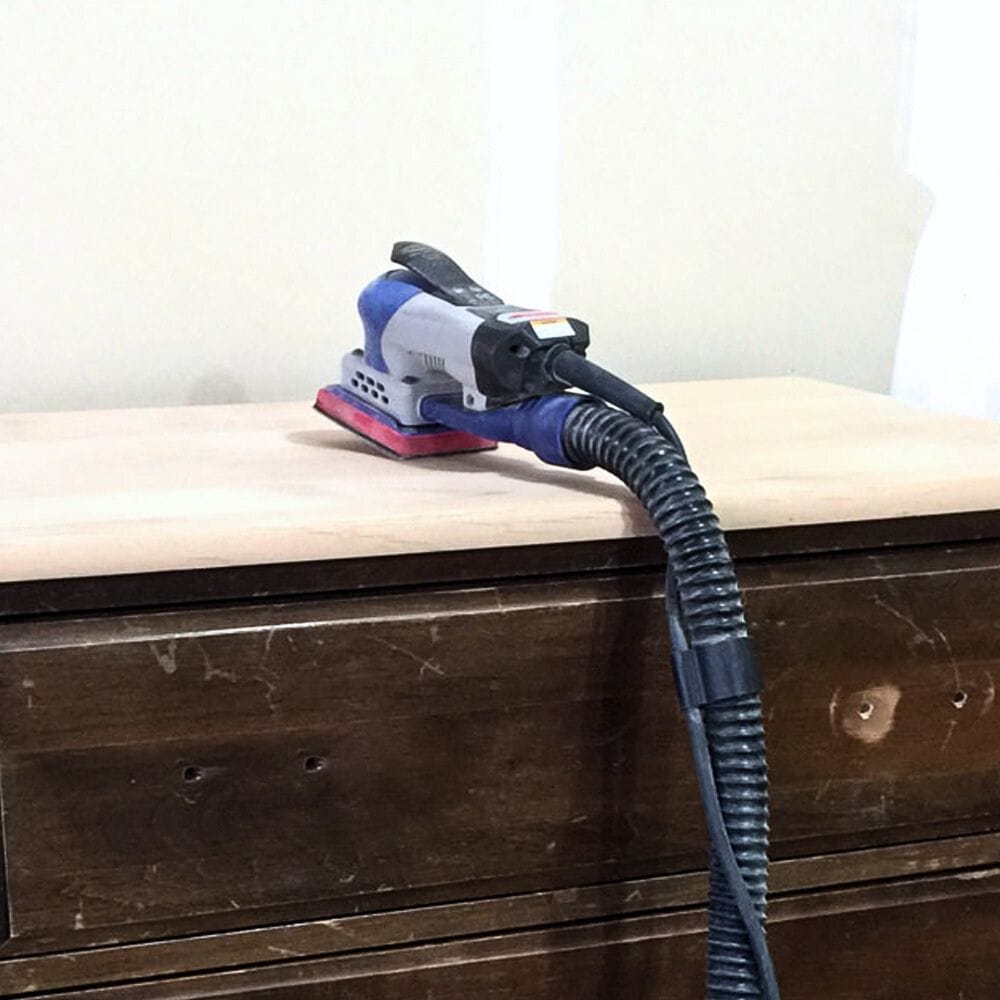
Sand the entire surface of the cabinet using a 220 grit sandpaper. This will help to smooth out any imperfections and create a rough surface for the paint to adhere to.
Make sure to wipe down any remaining dust with a tack cloth before moving on. You can’t skip sanding for paint prep if you want a long-lasting and professional-looking finish.
Adding Legs to Cabinet
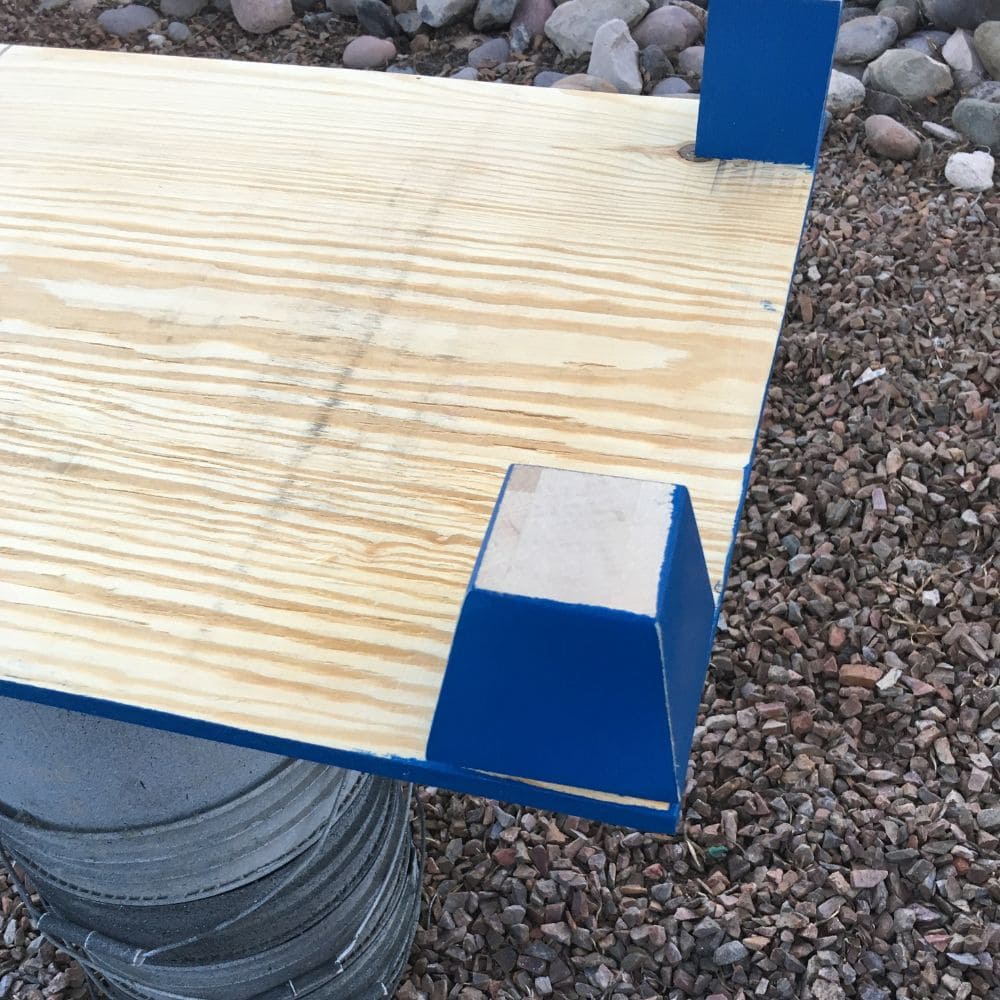
Adding legs to the cabinet not only adds some height and dimension, but it also elevates the overall look of the dresser.
We cut a piece of plywood to the exact size of the bottom of our cabinet to create a sturdy base for the legs.
Then we got wooden tapered legs for the front corners and simple straight wood blocks for the back ones.
Once you have all your leg pieces ready, drill and screw them into place. Make sure to evenly space them out and check for stability before moving on.
This step is important so the cabinet-turned-dresser stands securely and doesn’t wobble or tip over.
If you haven’t tried this, our guide on how to add legs to a cabinet will walk you through the process. We also have the best wood legs to add to furniture list that you can get for your project.
Priming Cabinet Before Painting Blue
Priming is a crucial step in any painting project, and this blue nursery dresser makeover is no exception.
By using a clear shellac spray as our primer, we were able to prevent any bleedthrough from the wood or previous finishes. Here’s more on using clear shellac to stop stains from coming through paint.
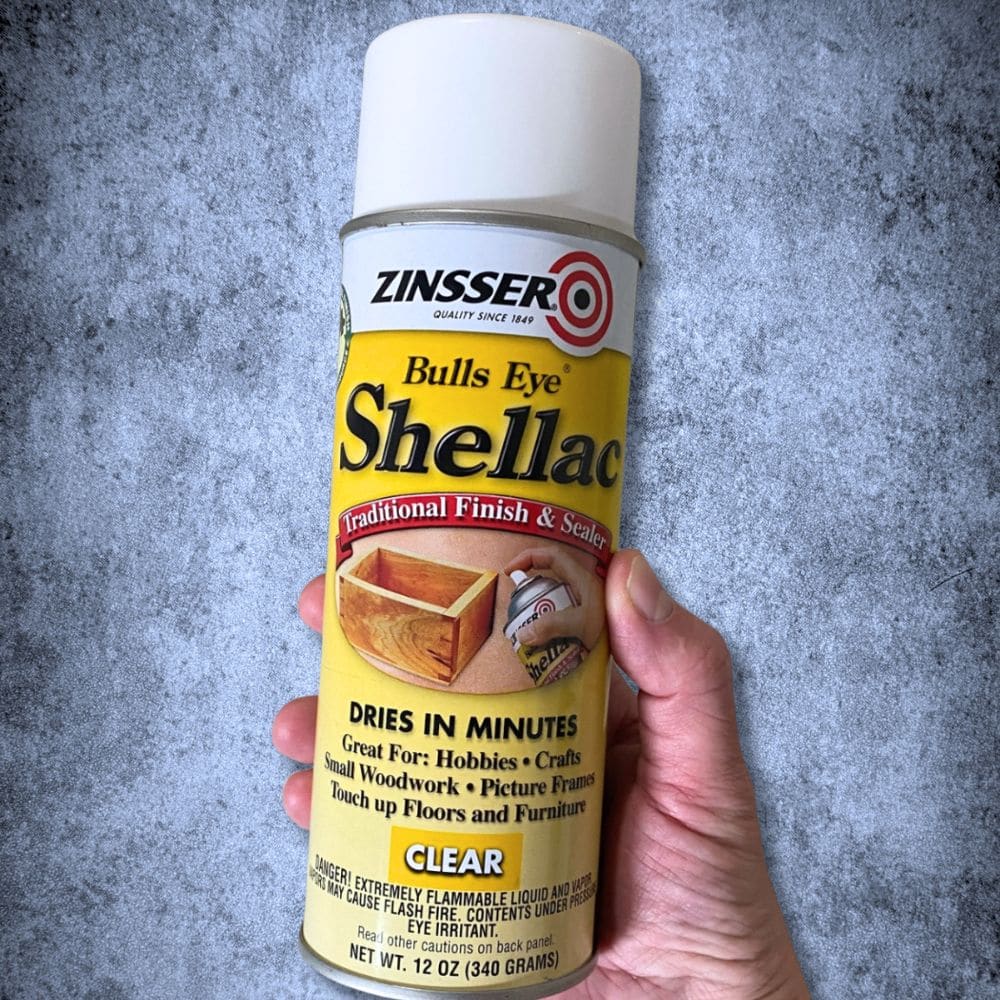
Not only does primer prevent bleedthrough, but it also helps the paint stick better and creates a smooth surface for painting.
This is especially important for a piece of furniture that will see frequent use and handling, like a nursery dresser.
Would you like to save this?
With proper priming, your paint job will last longer and look more professional.
Painting Cabinet for Blue Nursery Dresser
Painting the cabinet is where the real transformation happens, and it’s also the most fun part of this nursery dresser makeover project!
We color matched the blue paint at our local Home Depot – I can’t remember the exact match, but it was close to Annie Sloan’s Napoleonic Blue. But you can use any blue shade that speaks to you!
But if you want to see the result of Annie Sloan in Napoleonic Blue, you can check out this turn a headboard into a bench makeover.
For this project, we used a Wagner paint sprayer to apply the paint on both the cabinet and legs. Here are the best Wagner paint sprayers for furniture that we recommend!
Using a paint sprayer for furniture gets you an even and smooth coverage, and it’s also much faster than using a brush or roller.
If you’re undecided whether to use a sprayer or roller, check out our comparison between paint sprayer vs roller to make an informed decision based on your needs.
We sprayed two coats of blue paint to get the perfect shade and coverage. Make sure to let each coat dry completely before moving on to the next one.
If you’re looking for more tips, check out our guide on how to use a paint sprayer on furniture.
It’s important to remove the legs before painting them separately, then screw them back onto the base once they are dry.
This gives a more even and polished finish to the legs, rather than painting them while attached to the cabinet.
Distressing Blue Nursery Dresser
Distressing furniture is a great way to add character and charm to your piece, especially for a nursery dresser.
For this blue nursery dresser makeover, we used 220 grit sandpaper to lightly distress the edges. Don’t forget to clean up any dust after with a shop vac and tack cloth before moving on to the next step.
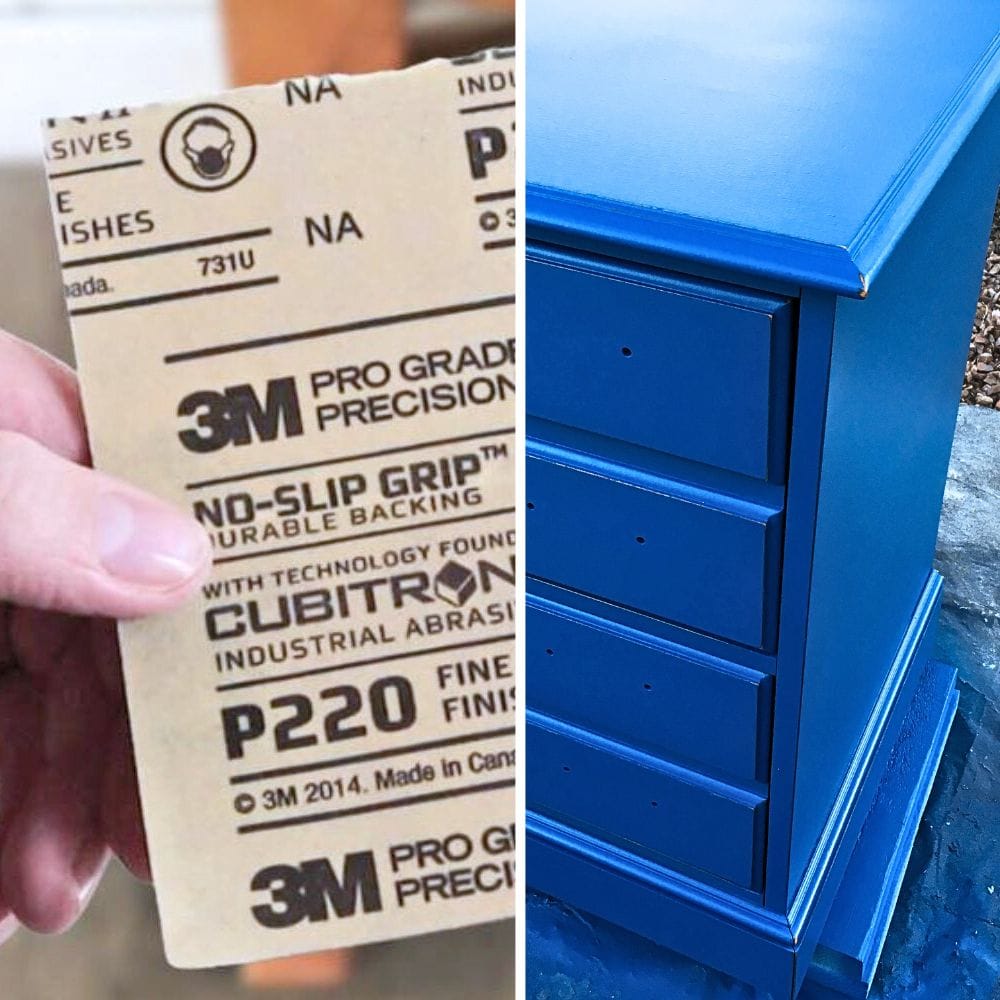
It’s important to only distress areas that would naturally see wear and tear, such as corners, edges, and handles. This adds a touch of authenticity to your distressed painted furniture.
If you’re unsure about how much distressing is enough, start slowly and build up gradually. You can learn the best distressing furniture techniques here!
Spraying Topcoat on Blue Nursery Dresser
Spraying a topcoat on your blue nursery dresser is the final step to guarantee a long-lasting and durable finish.
The topcoat creates a protective layer over the paint, guarding it against scratches, stains, and other wear and tear.
It also adds a smooth and glossy finish that enhances the overall look of your piece.
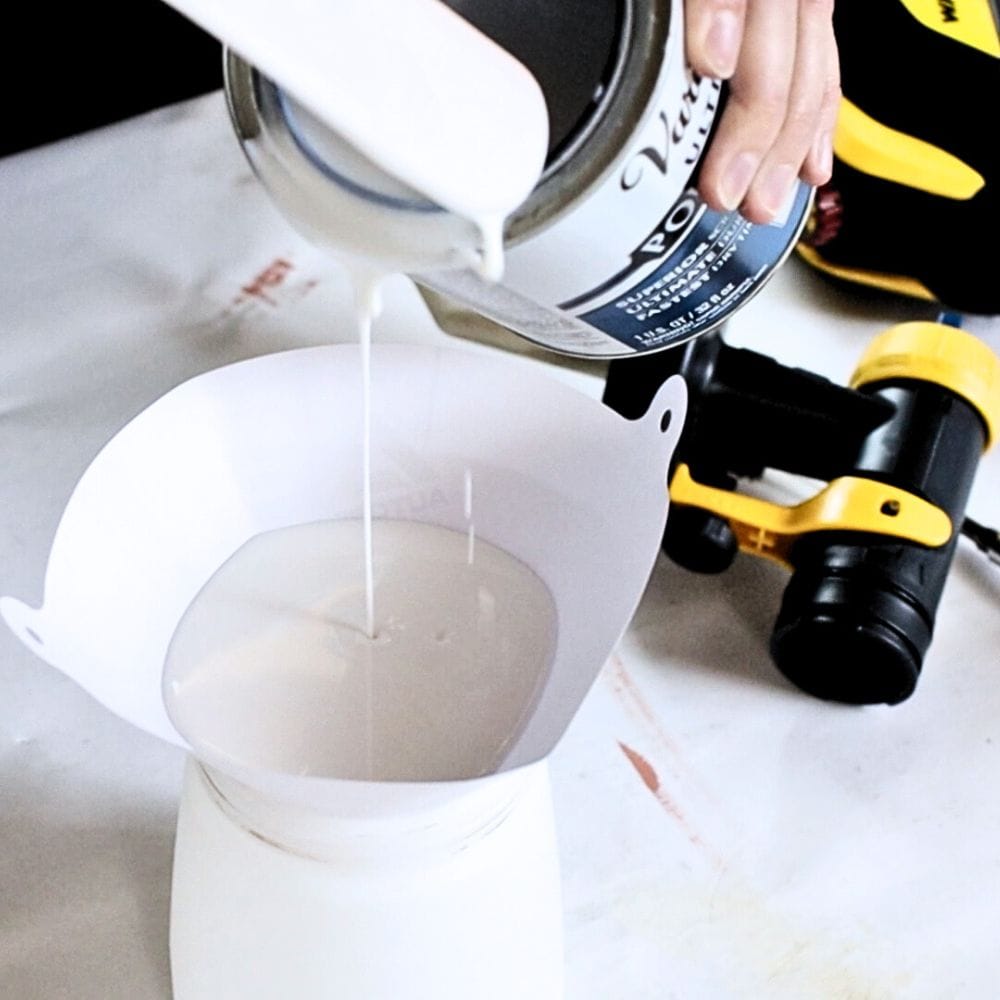
With the same Wagner paint sprayer we used for painting, we sprayed two coats of water-based polyurethane topcoat on our blue dresser.
This topcoat for painting furniture is easy to apply and dries quickly, making it the perfect choice for a busy nursery. Our tutorial on how to spray polyurethane will guide you through the process step by step.
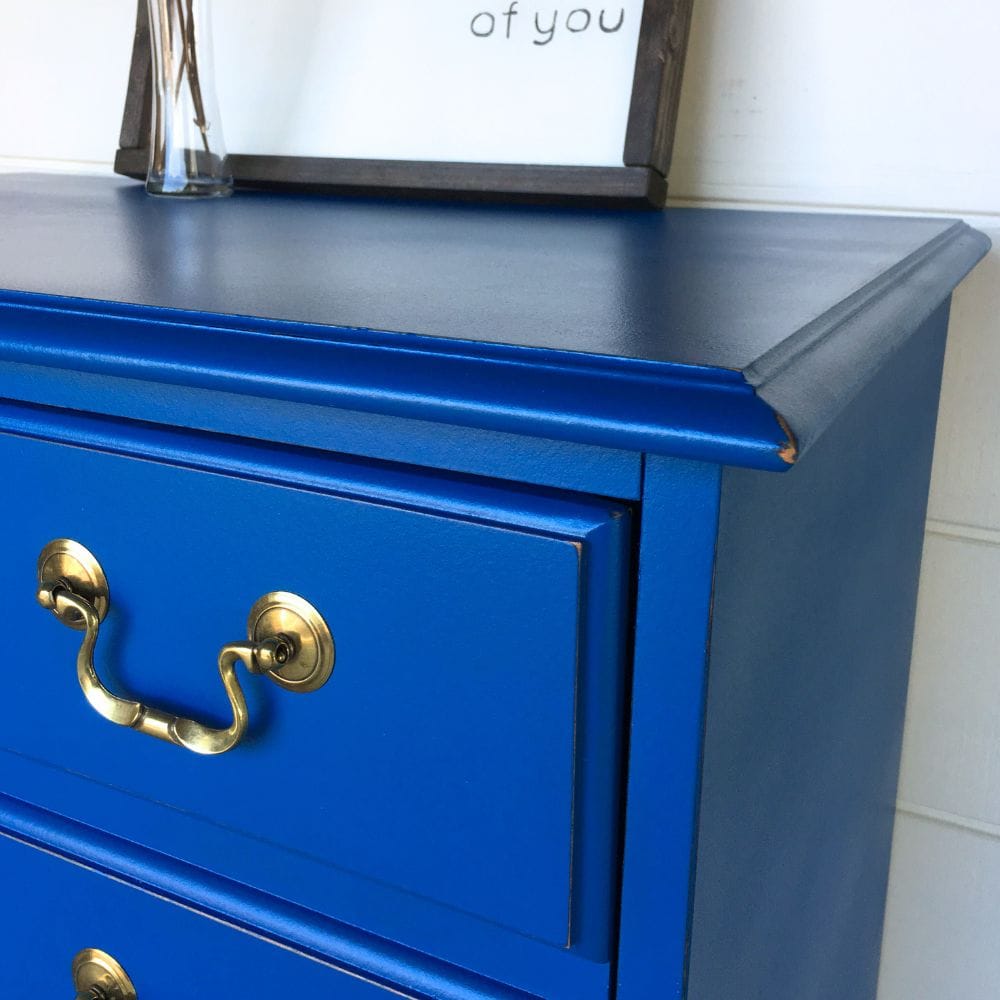
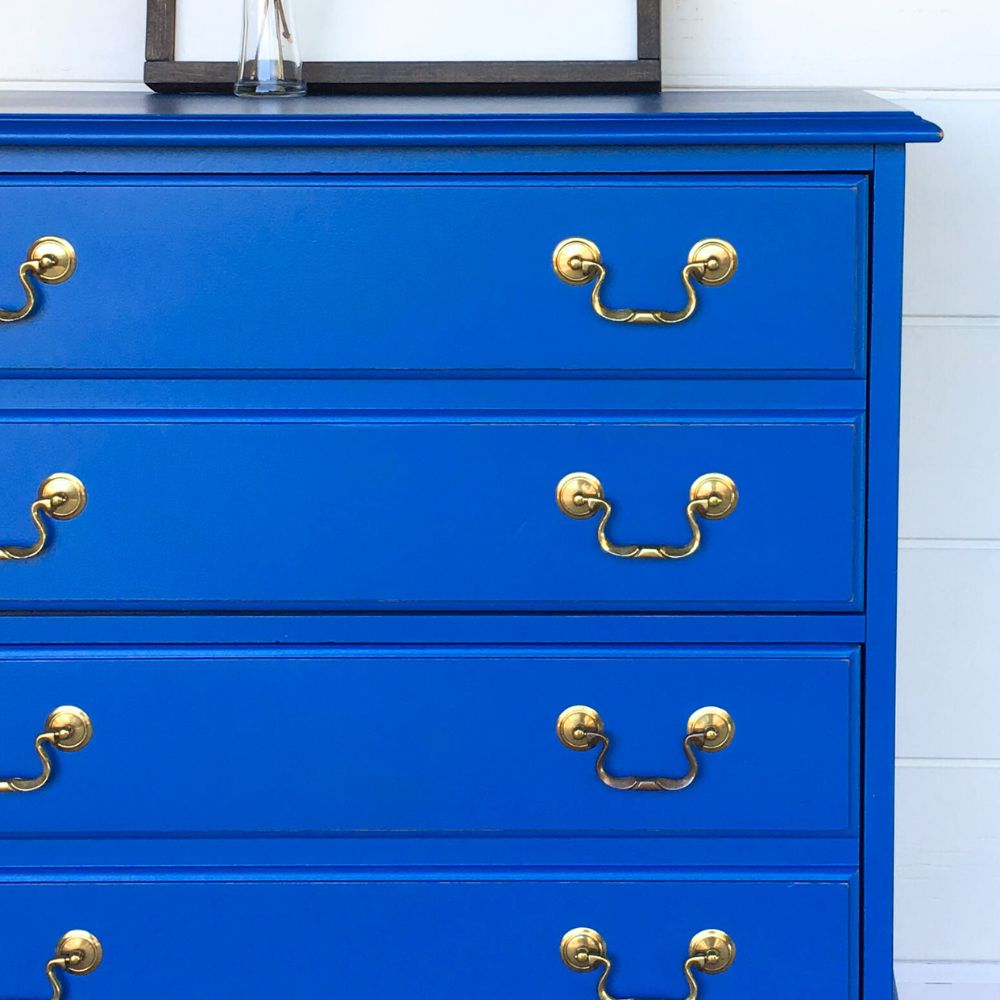
Once the topcoat is dry, it’s time to attach the original hardware back onto your newly painted blue nursery dresser. This step adds the finishing touch and completes the look of your piece. Make sure to align and secure each handle or knob properly for a polished and professional finish.
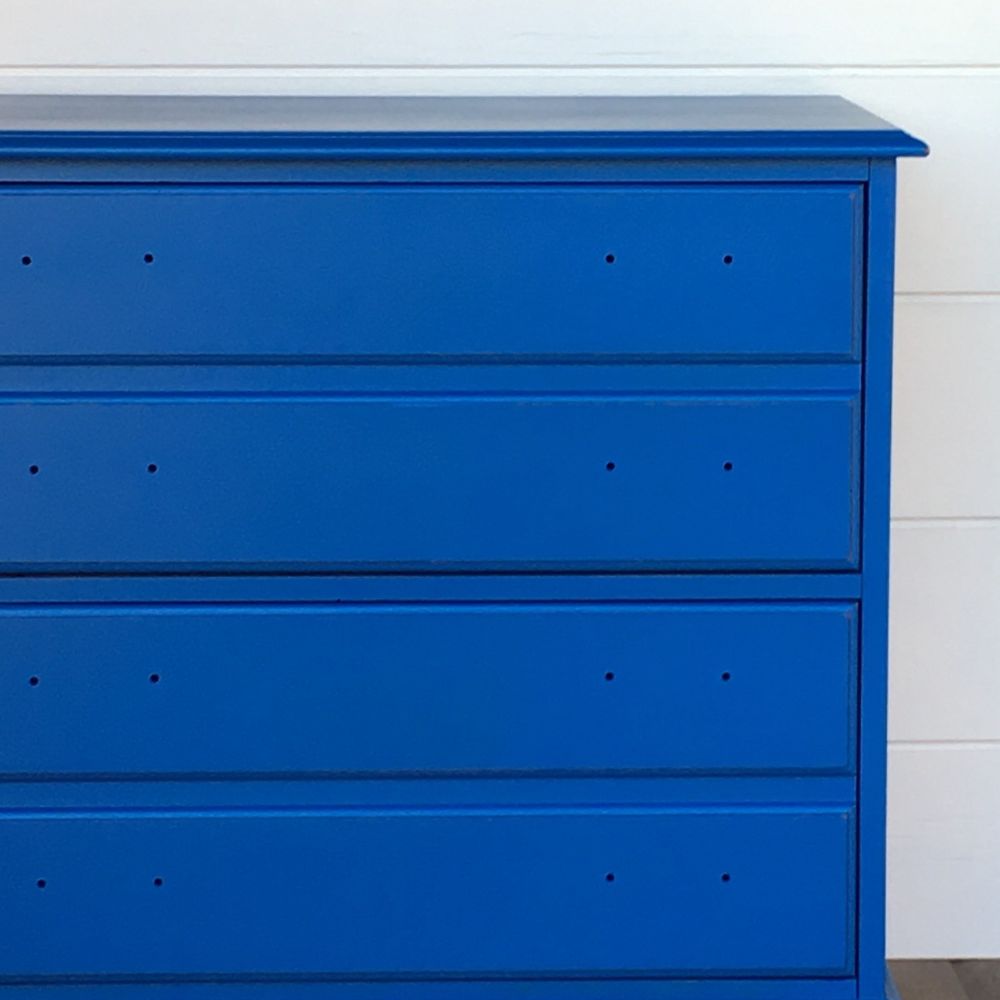
With the legs, the file cabinet now looks more like a dresser – coupled with the blue paint, it’s been transformed into a unique piece that adds a touch of style and whimsy to the nursery room.
And you can totally pull this off, too! Just follow our step-by-step guide and unleash your creativity to make your own version of a blue nursery dresser. For your nursery or kids room, here are boys dresser ideas. For small spaces, here’s our list of small bedroom dresser ideas!
More Before and After Makeovers
See All >
Click any of these “before” photos below to view the “after” of that makeover.


If you’d like to add a modern piece to the room, here are modern chalk painted furniture ideas! You can also check out these DIY dresser makeover ideas and painting old dresser ideas for other similar projects. And for color inspiration, here’s our list of colorful dresser ideas and ombre chalk painted furniture.


Blue Nursery Dresser Makeover
This blue nursery dresser makeover is perfect for you if you're looking for a way to add some cheer and color to your little one's room.
Materials
Instructions
- Prepare your cabinet by removing hardware. This allows for easier painting and a cleaner finish.
- Clean the surface of the cabinet using a degreaser like Krud Kutter. This removes any dirt, grime, or wax that may prevent the paint from sticking properly.
- Sand the cabinet using 220 grit sandpaper. This creates a rough surface for the primer to adhere to and helps remove any imperfections.
- Apply a clear shellac primer onto the cabinet. This will prevent any bleedthrough from the wood or previous finishes and create a smooth surface for painting.
- Use a paint sprayer to apply two coats of your chosen blue paint onto the cabinet and legs, making sure to let each coat dry completely in between. Remove the legs before painting them separately and screw them back onto the base once they are dry for a more polished finish.
- Distress the edges of your cabinet using 220 grit sandpaper, focusing on areas that would naturally see wear and tear for an authentic look. Clean up any dust with a shop vac and tack cloth before moving on to the next step.
- Spray two coats of water-based polyurethane topcoat onto your blue dresser to protect the paint and add a glossy finish. Let it dry completely before reattaching the hardware.
- Align and secure each handle or knob properly back on your painted blue dresser. This adds the finishing touch and completes the transformation of your piece.
Recommended Products
As an Amazon Associate and member of other affiliate programs, I earn from qualifying purchases.


More Dresser Makeover Ideas
- Painted Light Blue Dresser
- Blue Painted Dresser
- Dated Dresser Makeover
- DIY Navy Blue Bedroom Dresser
- Light Blue French Provincial Dresser Makeover
Follow us on YouTube to get more tips for painting furniture. Or share your project with us on our Facebook Group and be part of our community. See you there!