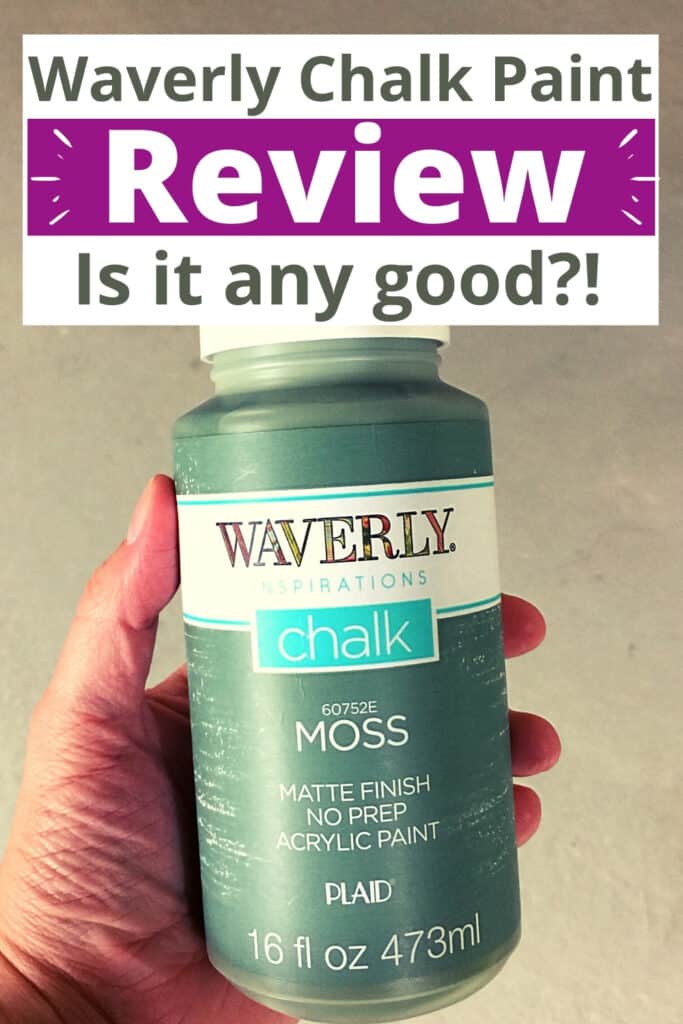
Waverly Chalk Paint Review


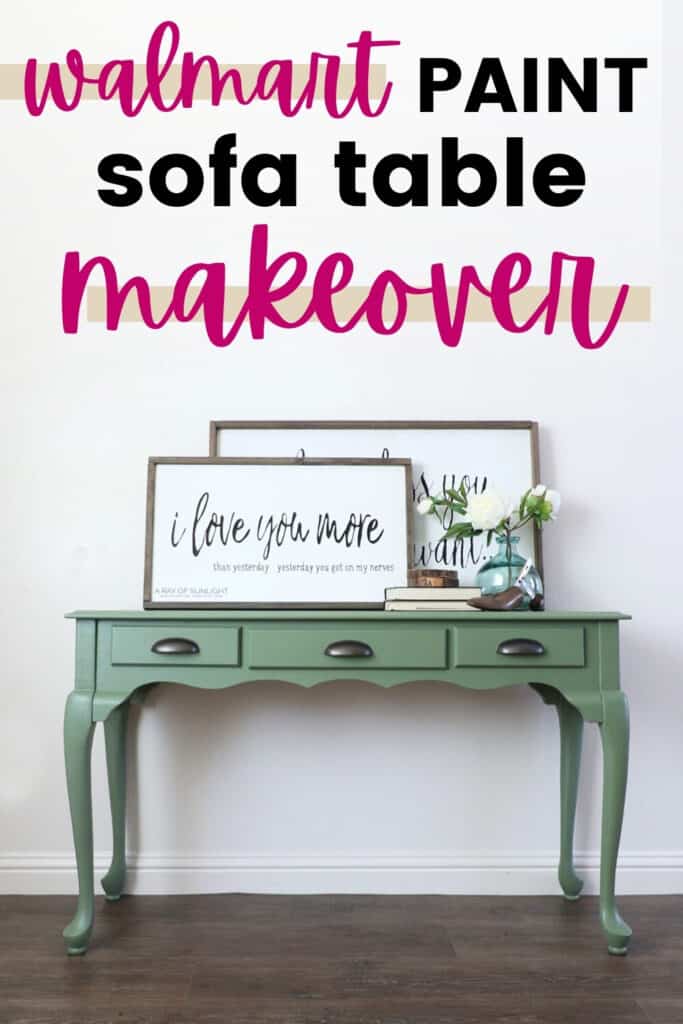
Is Waverly Chalk Paint good enough for painted furniture makeovers? We put the Walmart chalk paint to the test with this sofa table makeover in this Waverly chalk paint review. Known for its exceptional coverage and easy-to-use formula, it has made quite a splash in the DIY community because it’s one of the cheapest types of paint for furniture.
But how does it hold up in real-world applications? And how does it compare with other brands? Read on for our comprehensive review, tips on application, and comparisons with other big-name brands.
Using chalk paint has gained a lot of popularity in recent years as it gives furniture a beautiful, matte finish. Waverly Chalk Paint is a great choice due to its affordability and availability at Walmart stores. This makes it easily accessible for DIY-ers and beginners alike.
Let me say that applying Waverly Chalk Paint is as smooth as a summer breeze. This paint is known for its excellent coverage, and we found that to be absolutely true.

Even with a single coat, the coverage is remarkable! Plus, I can’t get over the very budget friendly price! And honestly, it holds its own when you compare it to its competition.
Pros and Cons of Waverly Chalk Paint
As an Amazon Associate, I earn from qualifying purchases. I also may earn from other qualifying purchases with other companies or get free product to review and use. All opinions are my own.
First, let’s dive into the pros and cons of Waverly Chalk Paint, and then we’ll dive into our first makeover with it and show you what you can expect with it.
Pros of Waverly Chalk Paint
Exceptional Coverage: Waverly Chalk Paint is known for providing outstanding coverage. Even with just a single coat, you’ll see a significant transformation. No more laborious layering and reapplying!
Easy to Use: The paint is incredibly user-friendly, perfect for both DIY-newbies and seasoned upcyclers. It glides on smoothly and dries without many brush marks at all, making your projects a breeze.
Budget-Friendly: Quality doesn’t always have to break the bank, and Waverly Chalk Paint is a testament to that. With a price tag that’s easy on the wallet, you’re getting excellent value.
Cons of Waverly Chalk Paint
Limited Color Range: While the colors available are gorgeous, the range could be wider. For those wanting a very specific shade, this could be a major drawback. Don’t forget though, you can mix colors together to create your own special color!
Availability: Depending on your location, Waverly Chalk Paint may not be readily available in your area. You may need to plan ahead and order online at Walmart.
Durability: While the paint offers great coverage, its durability is what you expect with other chalk paint brands… basically they need a topcoat to be durable enough for how much furniture gets used and abused!
Waverly Chalk Paint VS. Other Top Chalk Paint Brands
When it comes to chalk paint, Waverly certainly holds its own against other, more expensive brands. In fact, one might argue that it punches well above its weight.
While you might find that some premium brands offer a wider array of colors or a thicker consistency, the quality of the finish that Waverly provides, especially given its budget-friendly price, is truly remarkable.
Let me just say though, I prefer the slightly thinner consistency of Waverly compared to the super thick chalk paint from other brands. It’s easier to use right out of the container this way!
Through our hands-on testing, we’ve found that Waverly offers similar, if not better, results than some of the higher-priced brands.
Its high coverage and ease of use make it a great option for both beginners and seasoned DIY lovers.
So, if you’re contemplating a furniture makeover or a crafting project, don’t overlook Waverly Chalk Paint just because it’s more affordable.
It’s a perfect example of not having to sacrifice quality for cost. Check out my list of the top chalk paint brands for more information and comparisons!
Using Waverly Chalk Paint on Furniture
First, gather your supplies. For this specific project I used these supplies, all from Walmart.
- Dawn Dish Soap
- Waverly Chalk Paint 16oz (this table only used about a third of the container!)
- BEST 2” Paint Brush
- Gator 220 Grit and 320 Grit Sandpaper
- Clear Shellac
- Minwax Polycrylic Spray
I went to Walmart and picked up only 5 supplies to paint this sofa table. I wanted to see if I could paint a professional-looking, brush-free finish using ONLY products that you can get at Walmart.
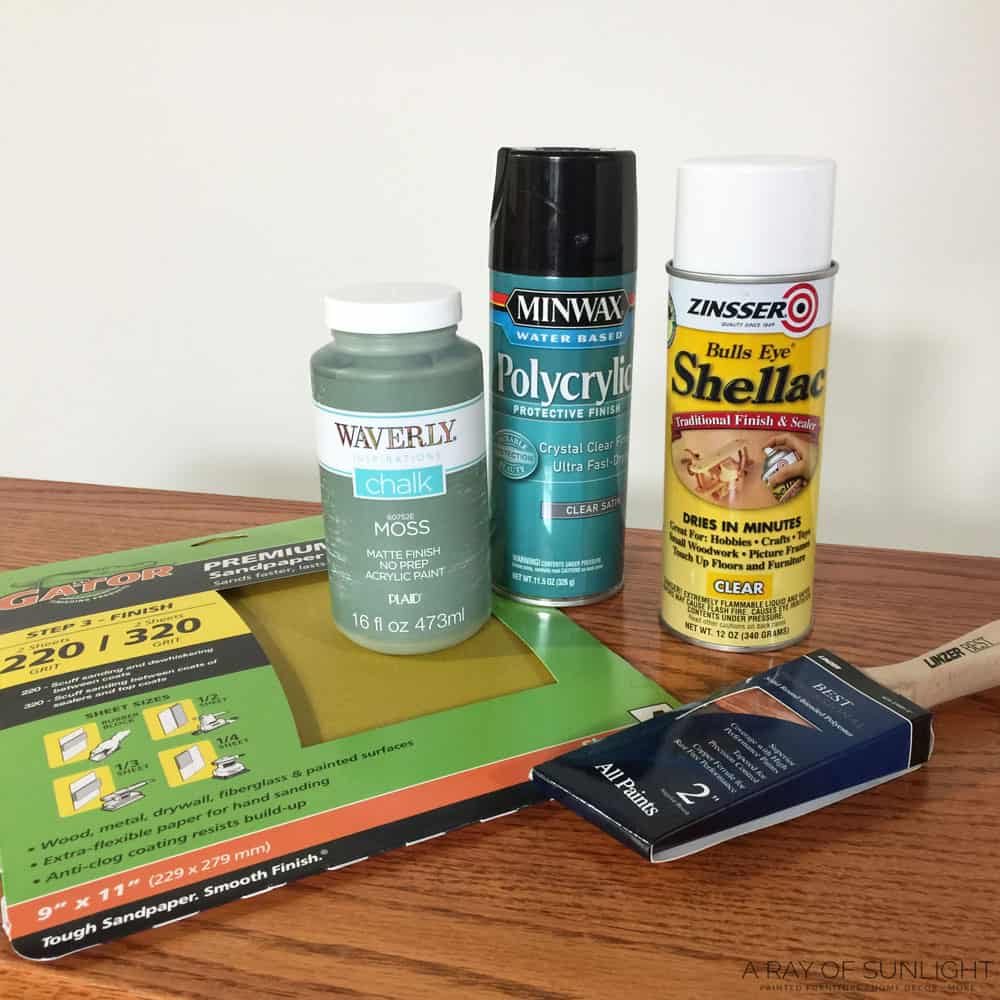
I also limited myself to only buying 5 basic products. Anything else that I needed for this makeover needed to be basic things that you should already have around your home – like a simple screwdriver, dish soap, and some rags.
My total at Walmart ended up being right around $40! So let’s dive into this makeover and see if it’s even possible to get a high-end painted finish with Waverly chalk paint!
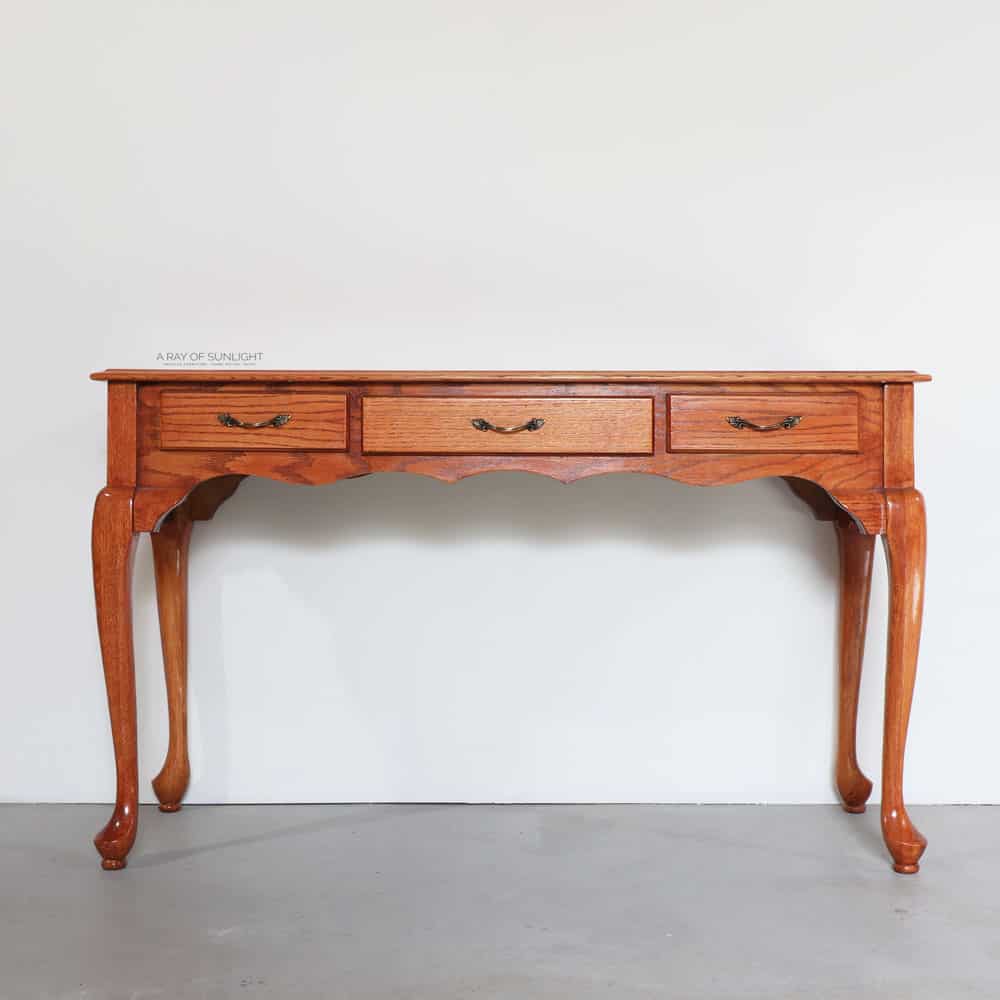
Here’s what the table looked like before.
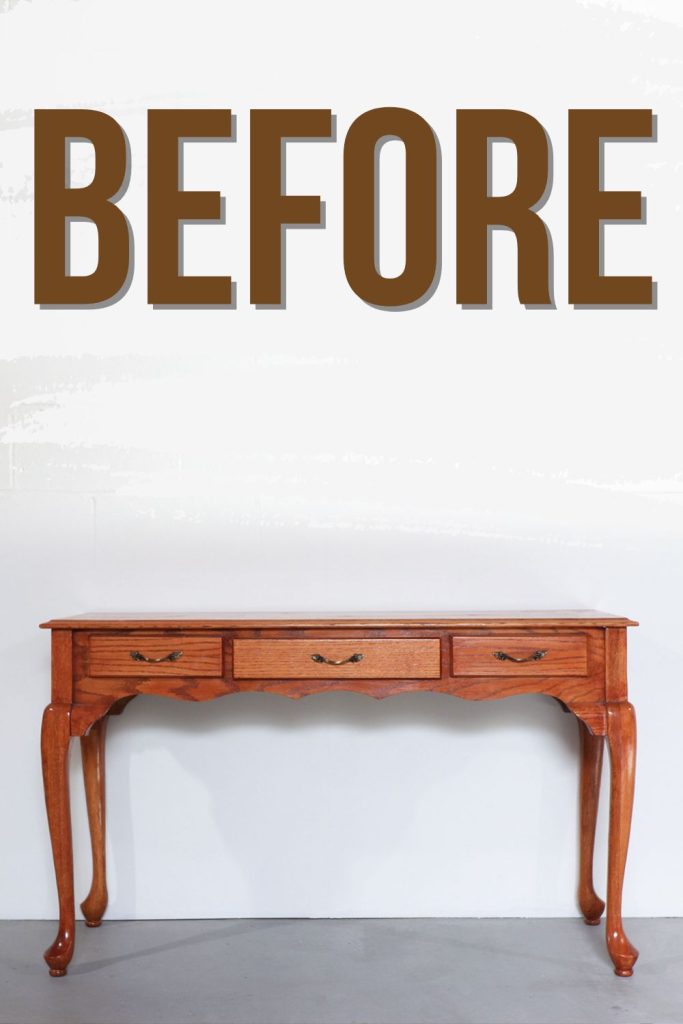
It’s an oak veneered sofa table that was made in China. Upon closer inspection, it looks like it was refinished fairly recently, so it was in pretty good condition.
But holy moly, that stain they used was definitely too orange for me!
Prepare Furniture for Paint
Check out this post on how to prepare furniture for paint for more details on the first things to do before painting furniture.
First I removed the hardware from the drawers. There is actually only one drawer on here, even though it looks like there are 3. So I had to flip over the table to get the hardware off the fake drawers.
Then, just like with every other time I paint furniture, I wiped it down really well to remove any gunk, dirt, or grease that could be on it.
But instead of using my typical Krud Kutter that I love, I opted to wipe it down with an old rag and some Dawn dish soap in a bucket of hot water. Learn more about how to clean furniture before painting here!
I’m telling you, this makeover is really taking everything back to the basics, the cheapest way to try to get a high-end-looking finish!
After I scrubbed the table with the hot soapy water, I wiped it down again, rinsing off any soapy residue that might have been left behind. Then I dried it all off before moving to the next step.
Do you Have to Prep Before Painting with Waverly Chalk Paint?
**Yes, Waverly Chalk Paint says it is a NO-PREP paint, but I don’t take chances when it comes to making sure the paint will stick, especially to a more shiny finish! If you truly want a professional finish that doesn’t easily scratch off, don’t skip scuff sanding!
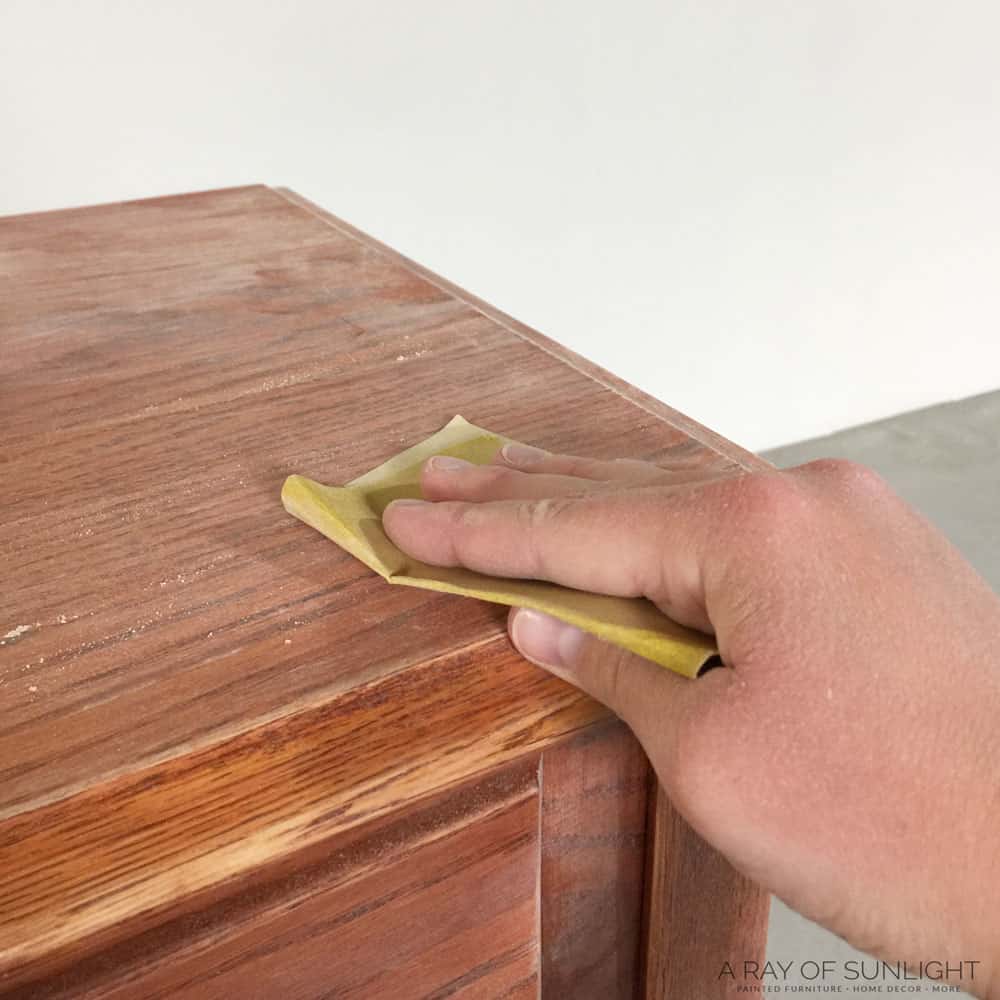
I tore up the 220 grit sandpaper into quarters, and then I lightly sanded the table all over. I didn’t want to sand through the old finish though!
I just sanded enough to dull the shiny finish and give the paint something to hold onto. Read more about the importance of sanding before painting furniture here.
So basically just a few passes back and forth over the whole thing. It took me about 20 minutes to scuff sand the whole thing.
Then I used my vacuum to suck up all of the dust, and I used a rag to wipe off what was left behind.
Prime Before Painting
Then we moved the table out to the garage to give it two coats of “primer”, letting it dry for at least an hour before I painted over it.
In this case, the primer is clear shellac. It’s actually what I use on probably 80% of my makeovers.
And it definitely serves a purpose or two, so even though it’s stinky, I don’t ever skip over some sort of primer anymore! Learn more about the best primers for painting furniture here.
I also use clear shellac to prevent bleed through. If you’ve never painted wood before, you probably have no idea what bleed-through is.
But let me tell you, it’s a big pain! Learn more about bleedthrough and how to stop stains from coming through paint in this post.
You can get shellac primer that is tinted white, but I love to use the clear shellac so I can distress the paint a little and see the wood underneath instead of white primer. Learn the 6 best distressing furniture techniques here!
I also like the spray can instead of brushing it on because it goes so much faster than brushing! I joke sometimes that the piece looks exactly the same as it used to at this point.

The shellac creates a bit of a shiny finish, but I promise, the shellac actually helps the paint stick better. Even though it looks shiny again.
After the last coat of shellac dried for an hour, we moved it back inside to paint.
Paint Furniture with Waverly Chalk Paint
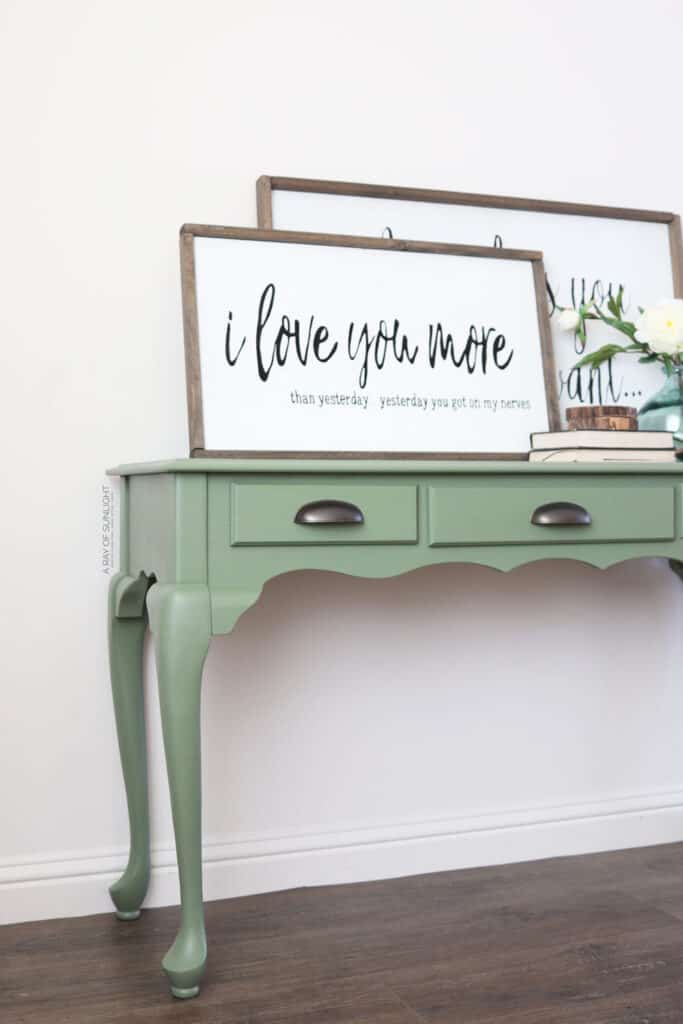
I chose this Waverly Chalky Paint in the color Moss. Check out my list of the best green chalk paint for furniture or our green chalk painted furniture ideas post for even more inspiration. Here’s a list of more best green painted furniture ideas if you like this color!
A professional paint finish to me is a finish that doesn’t have brush strokes in it. But, chalk paint is really thick usually, so it tends to leave a lot of brush strokes.
The biggest trick to avoid brush strokes with chalk paint is to thin out the paint a bit and use a nicer quality paint brush (not a dollar store paint brush or a chip brush!) Check out the best paint brushes for painting furniture here and learn how to paint furniture without brush marks here.
If you still have those pesky marks, here’s how to fix brush strokes in chalk paint! Or here’s how to spray paint a dresser with chalk paint, especially if you are painting a lot of pieces.
Since I really wanted to try to get a brush-free finish, while using a paintbrush, I added a little bit of water to the paint.
So I poured about 1/3 of the container of paint into a separate plastic bowl. Then I added some water to the paint and mixed it up.
The water thins the paint out a little and makes the paint dry slower, which gives it more time to flatten out, leaving fewer brush marks behind.
Would you like to save this?
**You want the paint to be thin enough to take longer to dry, but not so thin that you are basically painting on colored water!
How to Apply Waverly Chalk Paint
Then I brushed the paint onto the table with a BEST 2” brush from Walmart. I wanted to use a brush that was a little nicer to help minimize any brush marks.
When I brushed on the paint I tried to only brush the paint on with the direction of the wood grain, in long strokes.
I also didn’t load the paintbrush with very much paint to help avoid any drips that might happen because of too much paint in one area.
And then I was on the constant lookout for any drips that did happen, so I could catch them before the paint dried.
**Update: I wanted to see if I could spray Waverly chalk paint in a paint sprayer and it worked great! Check it out on this post on chalk painting furniture black to see how to spray Waverly Chalk paint instead!
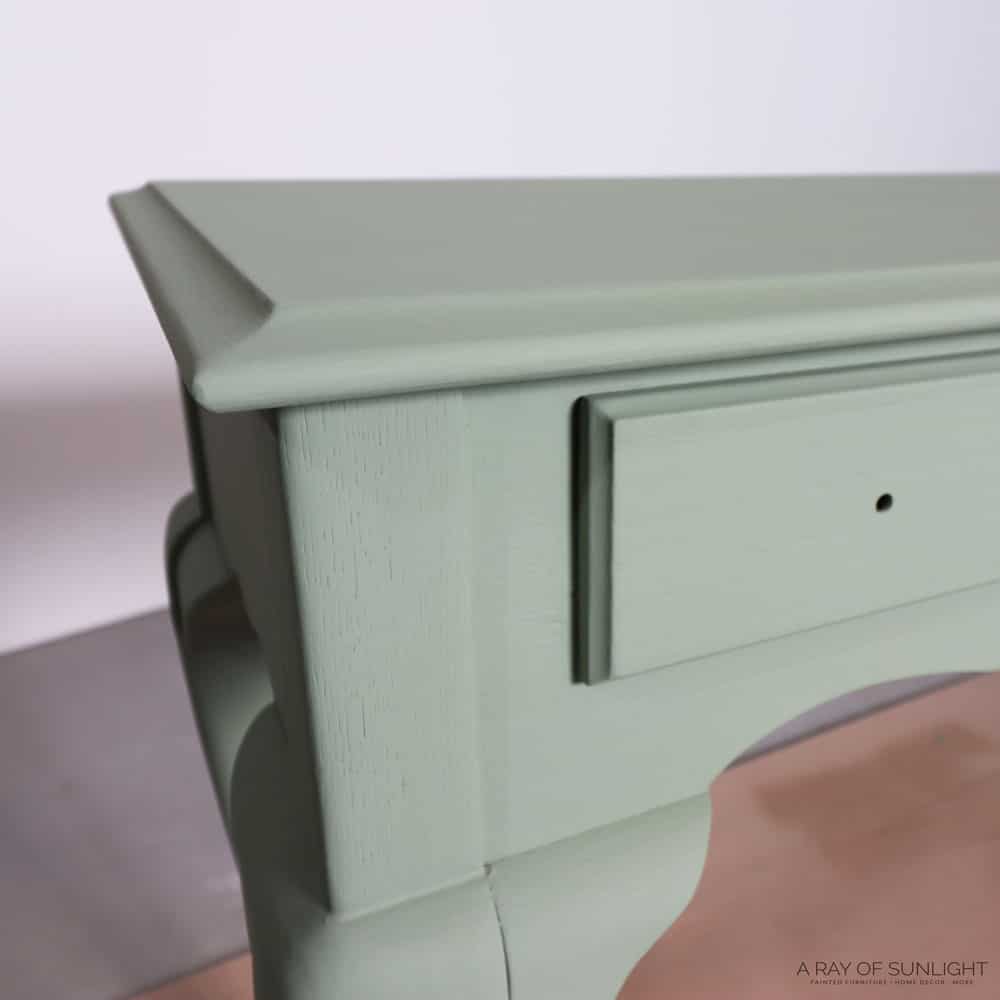
When I got to the drawer, I removed it and painted it on its own. Since I didn’t buy any tape for this project, I was really careful to only get paint on the drawer front and not on any other part of the drawer.
When I got to the legs, I went against the grain to apply the paint. I’ve found that it’s easiest to brush horizontally and kind of slap it on instead of going with the grain.
Be careful to not have much paint on your brush if you do this though, because paint can easily go flying once you start slapping! Haha
The crazy thing is that brush marks are pretty nonexistent even going against the grain here!
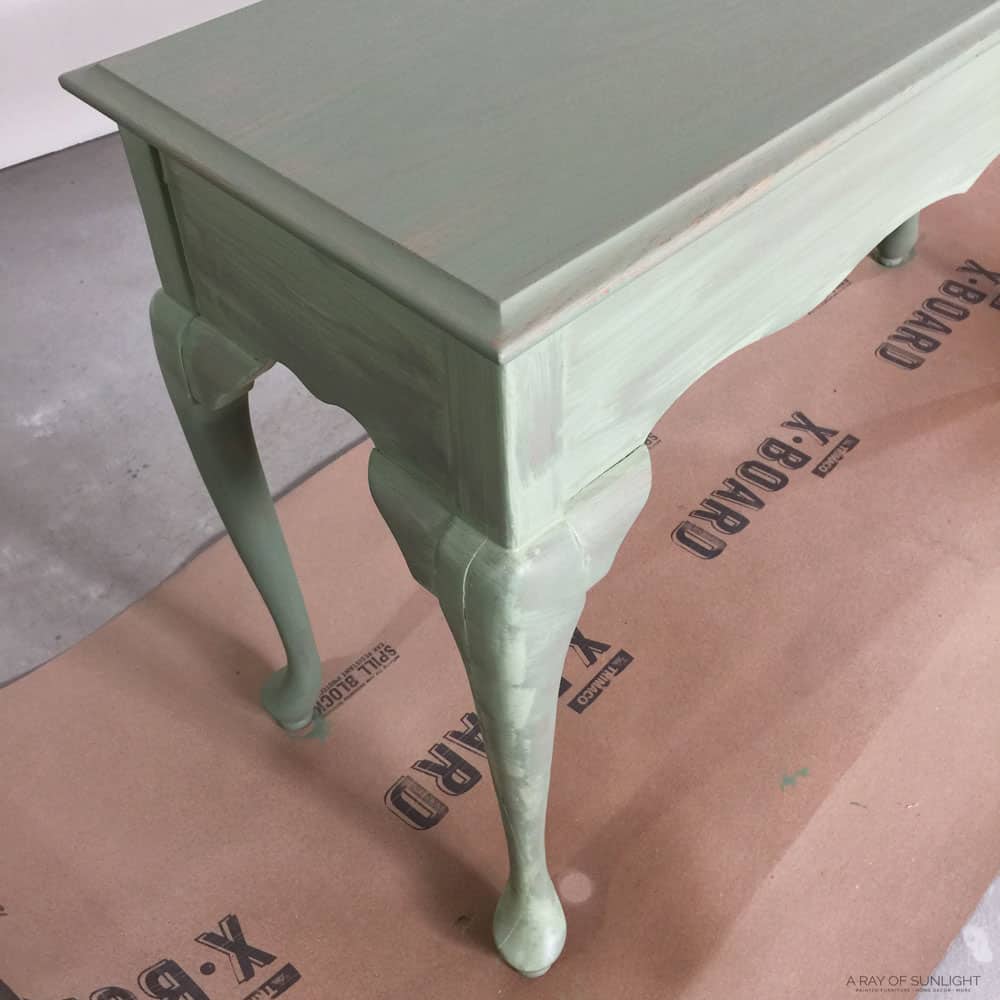
I slowly just made my way around the whole table until there was a coat of paint all over it.
While I waited for the paint to dry, I just wrapped the paintbrush in some plastic wrap to keep it moist until I could paint the second coat.

How Long Does Waverly Chalk Paint Take to Dry?
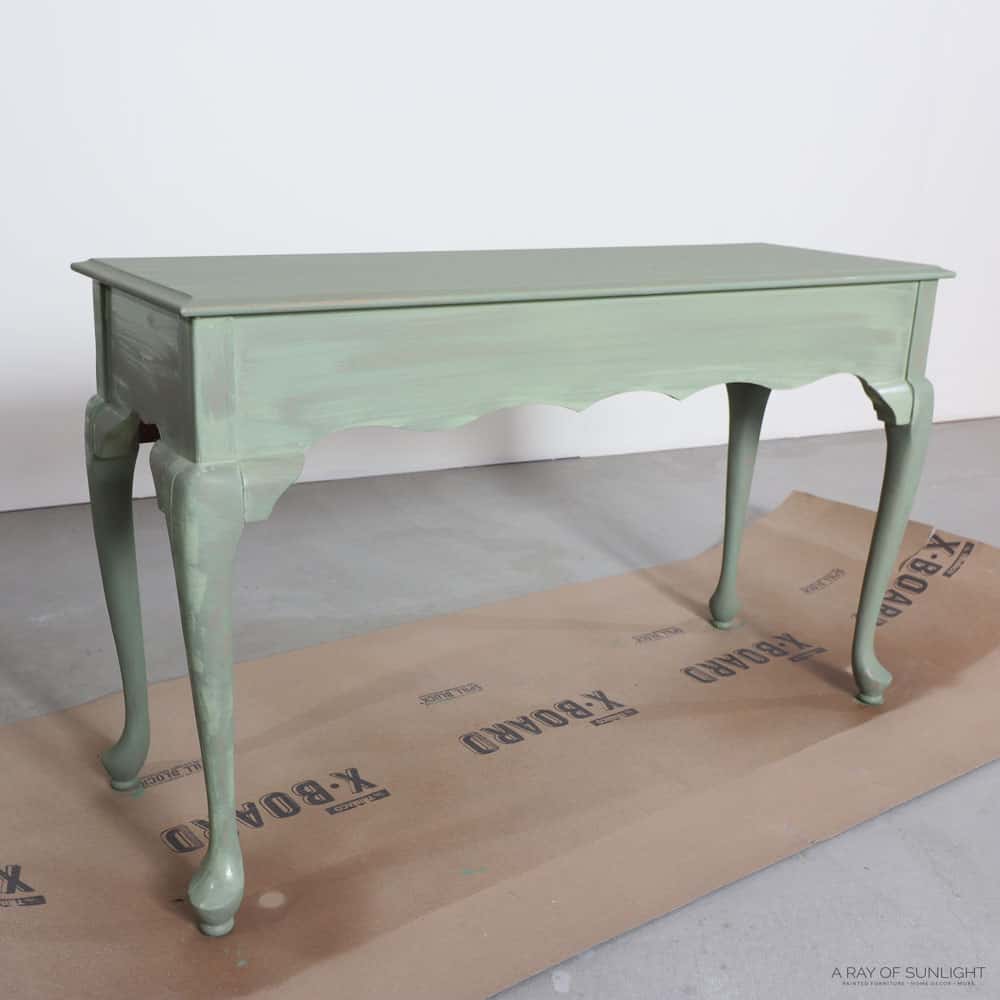
I came back about an hour later to put on a second coat of paint.
** The back of the container says to wait 2 hours in between coats of paint. I found that my paint was dry to the touch in about an hour. And then I just basically painted it just like I had painted the first coat. Each coat took about 20-25 minutes to paint.
I let the second coat of Waverly chalk paint dry completely before I moved on to sealing the paint.
How to Seal Waverly Chalk Paint
If you aren’t familiar with chalk-style paint, it’s super matte, so it has to be sealed with a clear topcoat. If you don’t seal it, it won’t be super durable, and you won’t be able to clean it very well.
You can seal Waverly chalk paint with water-based poly or wax! Check out this blog post about how to use Waverly Chalk paint and wax here.
For this project, I chose the easiest route and went with Minwax polycrylic to seal the chalk paint. Check out this post to learn all about the different topcoats for painting furniture.
I chose it because I wanted to be able to spray the poly on. I personally hate brushing on poly, and it’s so hard to get a really nice, streak-free finish when you brush it on.
Learn more about the features and pros and cons of Minwax polycrylic spray here.
I typically spray poly on with my paint sprayer, but since I couldn’t use it on this makeover, I opted for the spray can. Learn how to spray polyurethane with a paint sprayer here.
ANYWAY, I sprayed 3 coats of the polycrylic on this table, letting it dry for about 45 minutes between coats.
Between the 1st and 2nd coat, I lightly sanded it smooth with the 320 grit sandpaper to distress the paint a little bit, but mostly to make it feel really smooth.
I shook the can really well for 2 minutes, and then I kept the spray can about 12” away from the table. I kept the coats of poly really thin so there wouldn’t be drips.
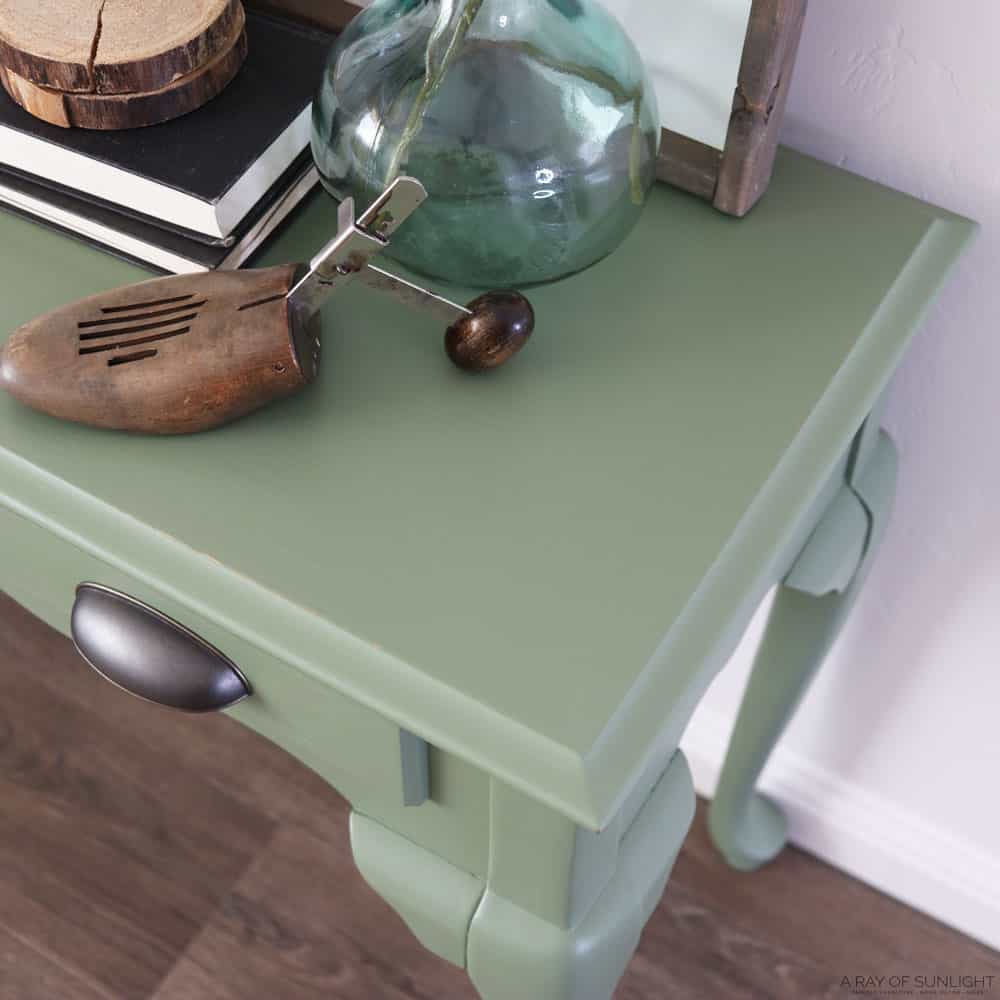
I ended up really liking how this Minwax polycrylic sprayed! It didn’t spit at all! And the satin sheen looks great!
If you want to use a brush when applying topcoat, check out the comparison of spray polyurethane vs brush on polyurethane here for more information on what to expect.
Waverly Chalk Paint Review
Honestly, I was pretty impressed with the coverage, especially for the price and the fact that I thinned it out a bit.
The combination of Waverly chalk paint and Minwax spray polycrylic is super durable too! (Including the cleaning, scuff sanding, and shellac primer to help it be durable!)
I’m not going to lie, I’m pretty impressed with how good of a finish these cheap products made! I honestly can’t see any brush marks with the “better” paint brush, putting some water in the paint and using long brush strokes.
Here’s everything you need to know about Waverly chalk paint.
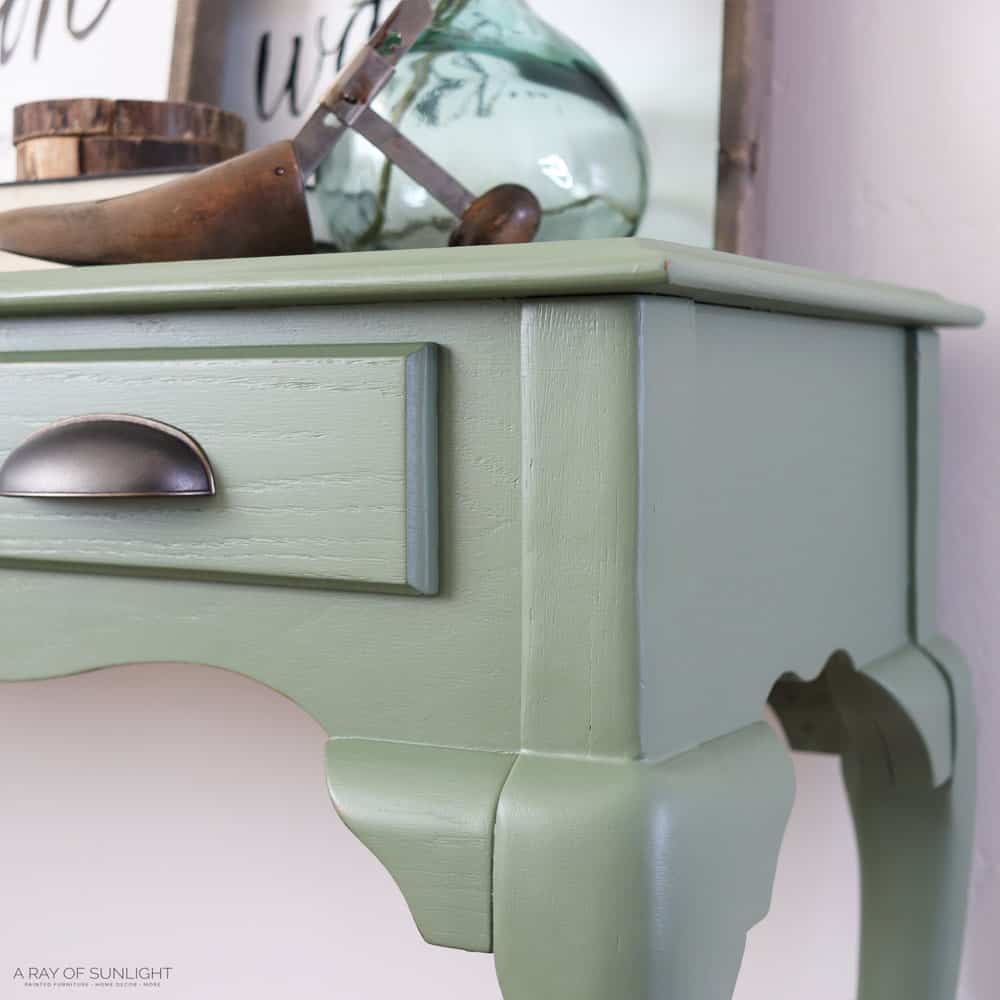
I ended up putting some cup pulls on the drawers instead of the old hardware. I think updating the hardware goes a really really long way in giving a piece of furniture a fresh new look. Learn how to change hardware on furniture in this post!
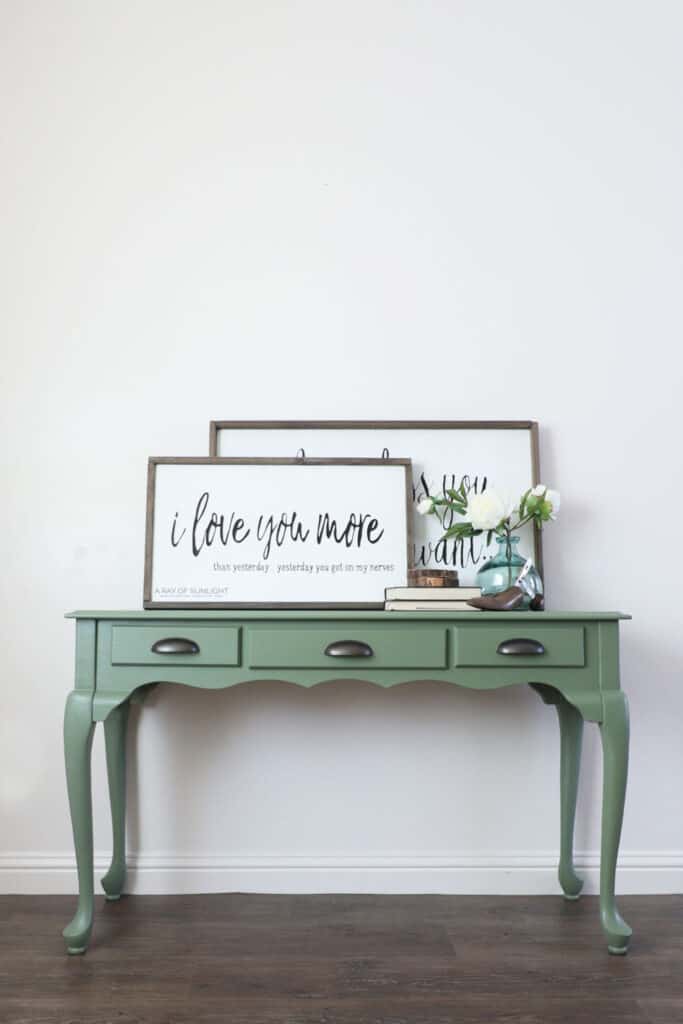
Here’s what the sofa table looks like now! For more similar makeovers, here’s our list of painted sofa table ideas and French painted furniture ideas.
Watch the whole process of the makeover in our YouTube video, or check out the after photos below!
More Before and After Makeovers
See All >
Click any of these “before” photos below to view the “after” of that makeover.


Get more ideas for your next DIY project with these painted benches ideas.
Can I mix Waverly chalk paint colors?
Mixing Waverly chalk paint colors is a great way to create custom shades and add more variety to your furniture makeovers. Plus, it’s a fun and creative way to personalize your projects.
One tip for mixing Waverly chalk paint colors is to start with the lightest shade and gradually add in darker colors until you reach your desired hue.
This will help prevent any mishaps and ensure that you have control over the color intensity.
You can also mix small amounts of paint at a time and test the color on a spare piece of wood or paper before applying it to your furniture.
Remember to take note of the ratio of colors used when mixing Waverly chalk paint to make sure you can replicate the color in the future if needed.
You don’t want to be doing trial and error every time you want to get a certain shade!

Should I brush or spray Waverly chalk paint?
When it comes to applying Waverly chalk paint, the method you choose ultimately depends on factors like your personal preference and the project at hand.
Brushing Waverly chalk paint can give you more control over the paint and allows for better precision. But brush strokes may be visible on your finished project.
On the other hand, spraying Waverly chalk paint can give you a smoother and more consistent finish.
It’s also great for larger projects as it can save you time and effort. However, it requires some skill and practice to get a flawless finish.
You should go for the method that you feel most comfortable and confident with!


Waverly Chalk Paint Review - Sofa Table Makeover
Can you get a brush-free, durable, and professional finish on furniture with Waverly chalk paint from Walmart?! Here is a Waverly chalk paint review with the steps for this sofa table makeover.
Materials
Tools
Instructions
- Prepare sofa table for paint by removing hardware. Then wipe it down really well to remove any gunk, dirt, or grease that could be on it with an old rag and some Dawn dish soap in a bucket of hot water. Then dry it all off.
- Lightly sand the table. Don’t skip this if you want a professional finish that doesn’t easily scratch off.
- Prime with 2 coats of clear shellac to prevent bleed through and help paint stick better. Let primer dry at least an hour before painting.
- Chalk paint is really thick usually and to avoid any brush marks, thin out the paint a bit. Thin paint by pouring about 1/3 of the container of paint into a separate plastic bowl. Then add some water to the paint and mix it up.
- Brush paint onto the table with the direction of the wood grain, in long strokes. For the table legs, you can go against the grain to apply the paint.
- While waiting for the first coat of paint to dry, just wrap the paintbrush in some plastic wrap to keep it moist until you paint the second coat. Let the second coat of paint dry completely before sealing the paint.
- Seal paint with 3 coats of polycrylic and let it dry for about 45 minutes between coats. Between the 1st and 2nd coat, lightly sand it smooth to distress the paint a little bit, but mostly to make it feel really smooth.
- Attach hardware to the table.
More Chalk Painted Furniture Makeovers
- Homemade Chalk Paint Dresser Makeover
- Behr Chalk Painted Dresser Makeover
- How to Paint Over Chalk Paint
- Chalk Painted Desk
- How to Chalk Paint Laminate Furniture

Follow us on YouTube to get more tips for painting furniture. Or share your project with us on our Facebook Group and be part of our community. See you there!
Thanks for this basic tutorial! I appreciate seeing professional results as a result. Gives me confidence in my own projects. I’ve had issues with GF milk paint scratching off shellac before. Are there differ types?
I’m loving what you did with the table !! I have a few pieces I want to do and we will see lol Thank you for all of the info 🙂
I grab those tables anytime I see one!!!! I love re doing them, and they sell super fast! I love the color of this one. I am a Heirloom Traditions All in One Paint fan, and this is so close to both envy and London!!! Love your videos and tutorials!