DIY Believe Sign from Dollar Tree
Are you looking for a simple and budget-friendly way to add some Christmas cheer to your home? This DIY Believe sign project is for you! With just a few materials from Dollar Tree, you can create a beautiful and customizable Christmas decor idea that will be perfect for any holiday display.
Whether you’re a seasoned crafter or just looking for a fun project to do with your family, this Christmas sign is sure to bring joy and festive spirit into your home.
This sign would make a great addition to any Christmas mantel, entryway table, or as part of a gallery wall. Not only is this project easy to make, but it also allows for creativity and personalization.

You can choose different paint colors, stains, and even add other elements like glitter or ribbon to make it your own.
And as mentioned, you won’t have to spend a fortune to create this sign. Most of the materials can be found at Dollar Tree, making it an affordable option for those on a budget.
So let’s get crafting!
Supplies Used for DIY Believe Christmas Sign
As an Amazon Associate, I earn from qualifying purchases. I also may earn from other qualifying purchases with other companies or get free product to review and use. All opinions are my own.
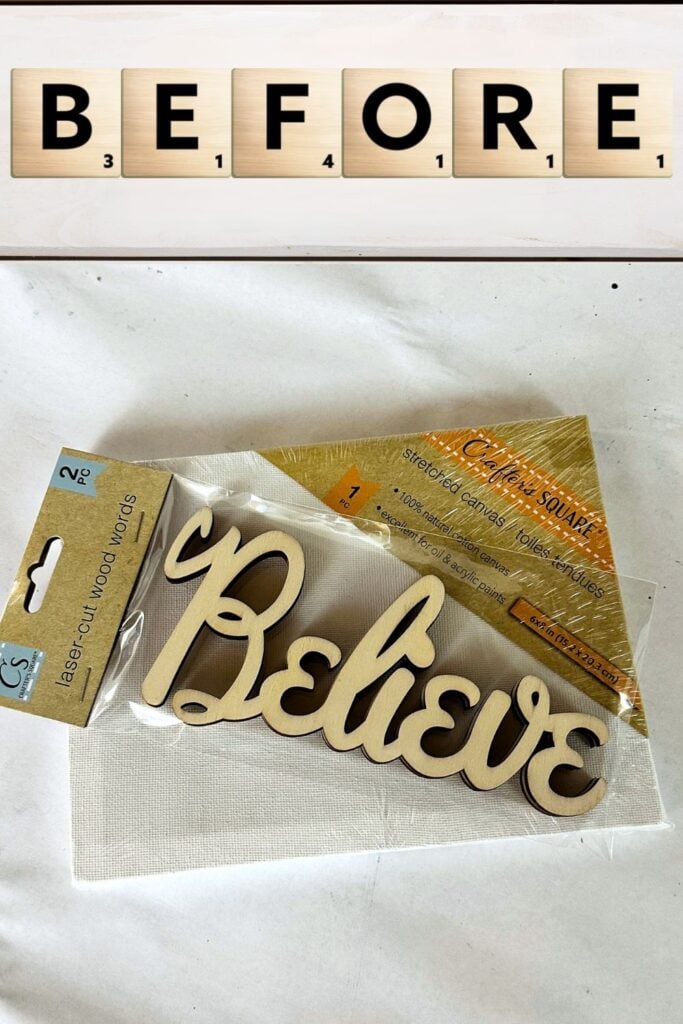
- 6″x8″ Stretched Canvas (from Dollar Tree)
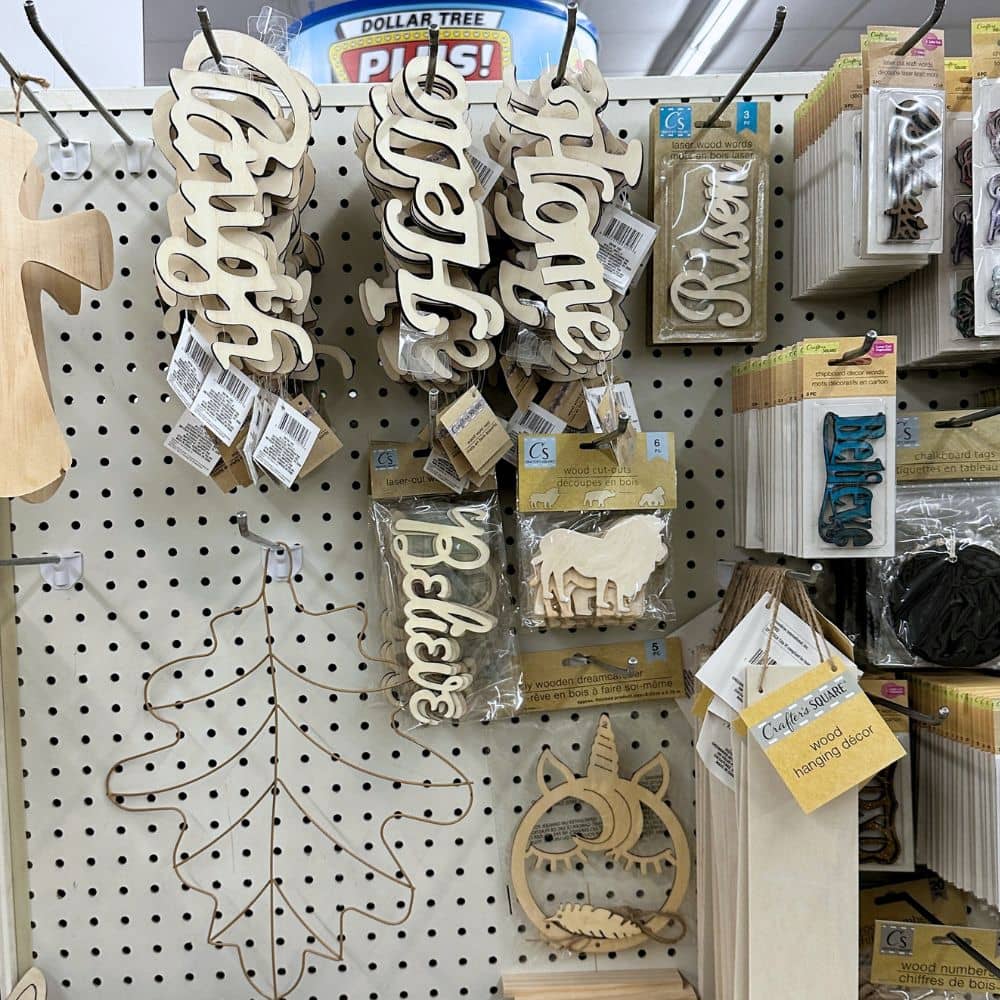
- Wooden Laser Cut “Believe” Word (from Dollar Tree)
- Furring Strips of Wood (from Dollar Tree)
- Black Paint
- Small Artist’s Paintbrush
- Miter Saw or Jigsaw
- 220 Grit Sandpaper
- Tack Cloth
- Stain
- Super Glue
Paint the Believe Wood Cut Out
We started by taking our wooden laser cut Believe word and painted it with black paint. We used Waverly chalk paint in the color Ink – this paint is budget-friendly and has great coverage, making it perfect for DIY projects like this.
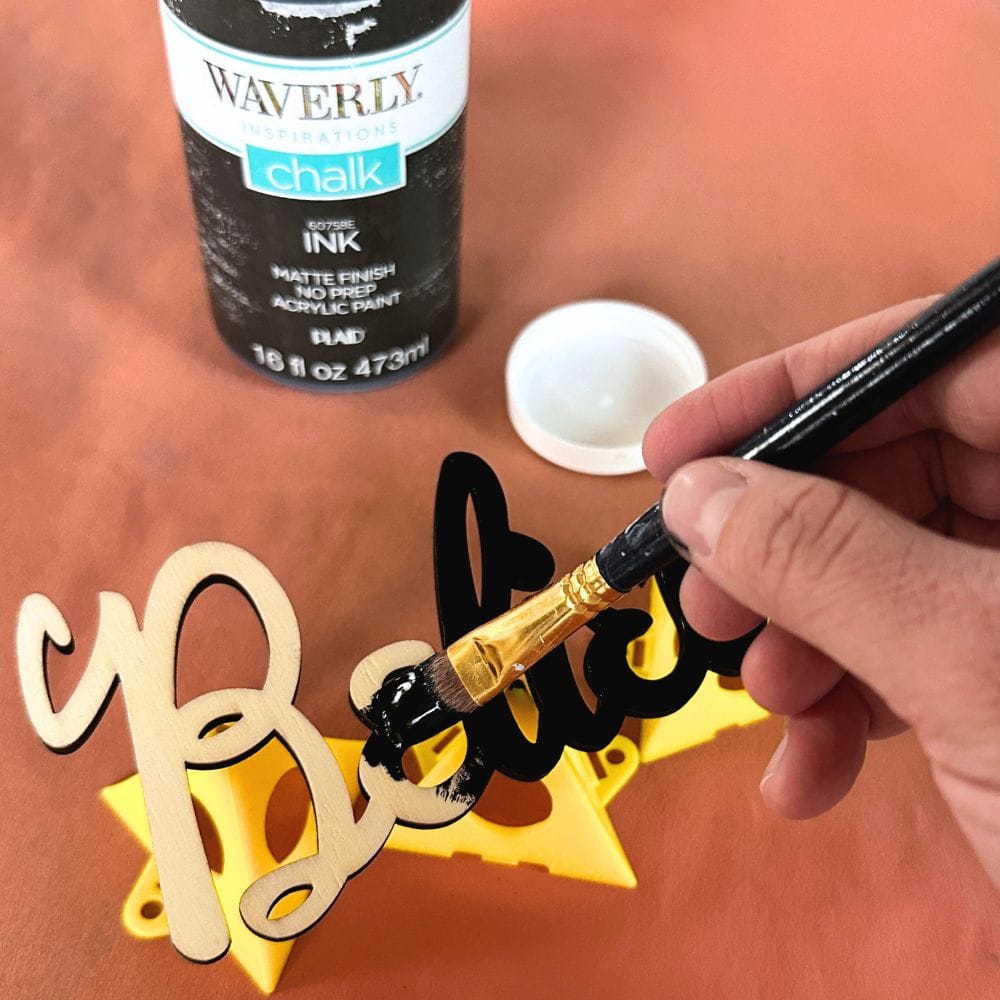
We used a small artist’s paint brush to apply the paint, and one coat of paint was all that was needed for full coverage on the front of the word. The paint completely dried within an hour so we were able to move on to the next step quickly.
And for a DIY sign like this, there was no need for a topcoat.
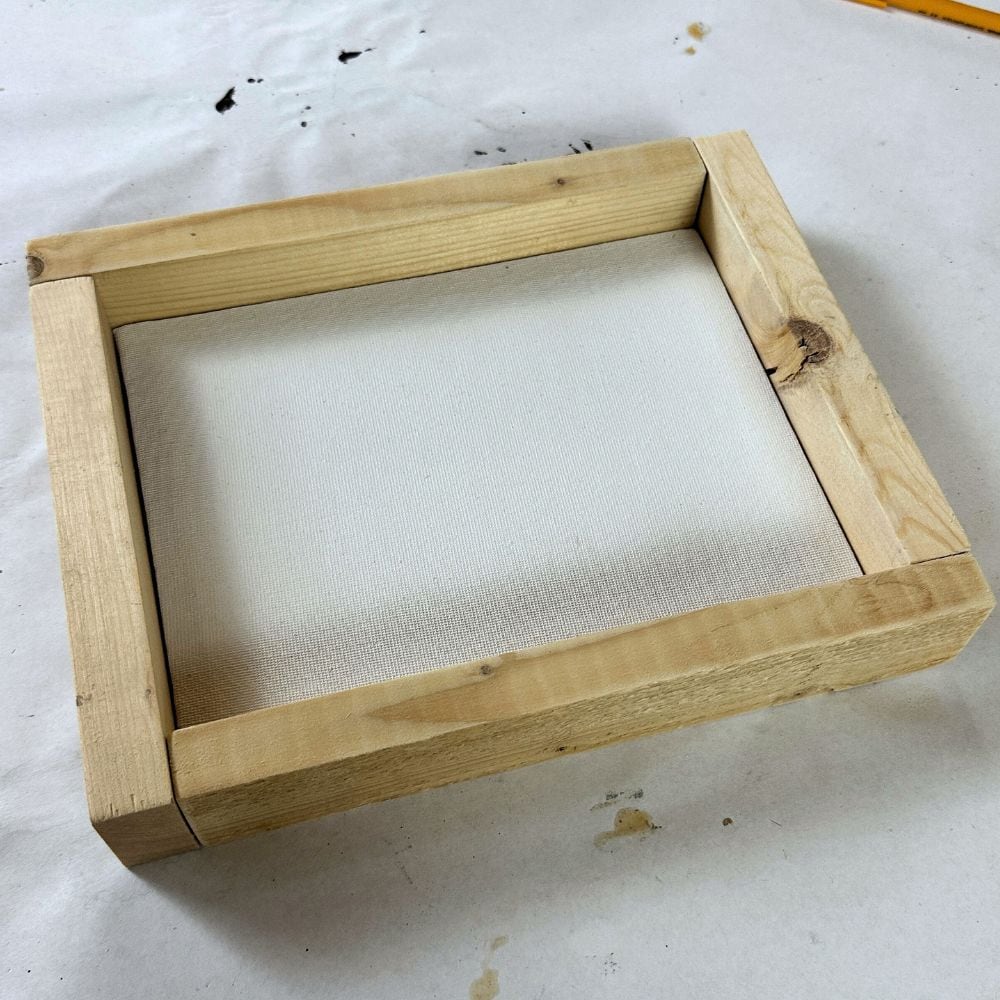
Cut and Sand the Wood Frame
Next, we moved on to cutting and sanding the wood frame for around the stretched canvas. We cut furring strips of wood into two pieces at 6.75″ long and two pieces at 8.75″ long using a miter saw. If you don’t have a miter saw, a cheap jigsaw can be used for this step as well.
Once the wood was cut, we sanded the edges with 220 grit sandpaper to create a smooth and polished finish. After removing any dust with a tack cloth, our wood frame was ready for staining.
Stain the Wood Frame
We moved on to staining the wood frame with Lilly Moon Gel Stain in Old Fashioned, but any stain color of your choice will work well for this project. This gel stain is a personal favorite as it dries quickly and has a low odor.
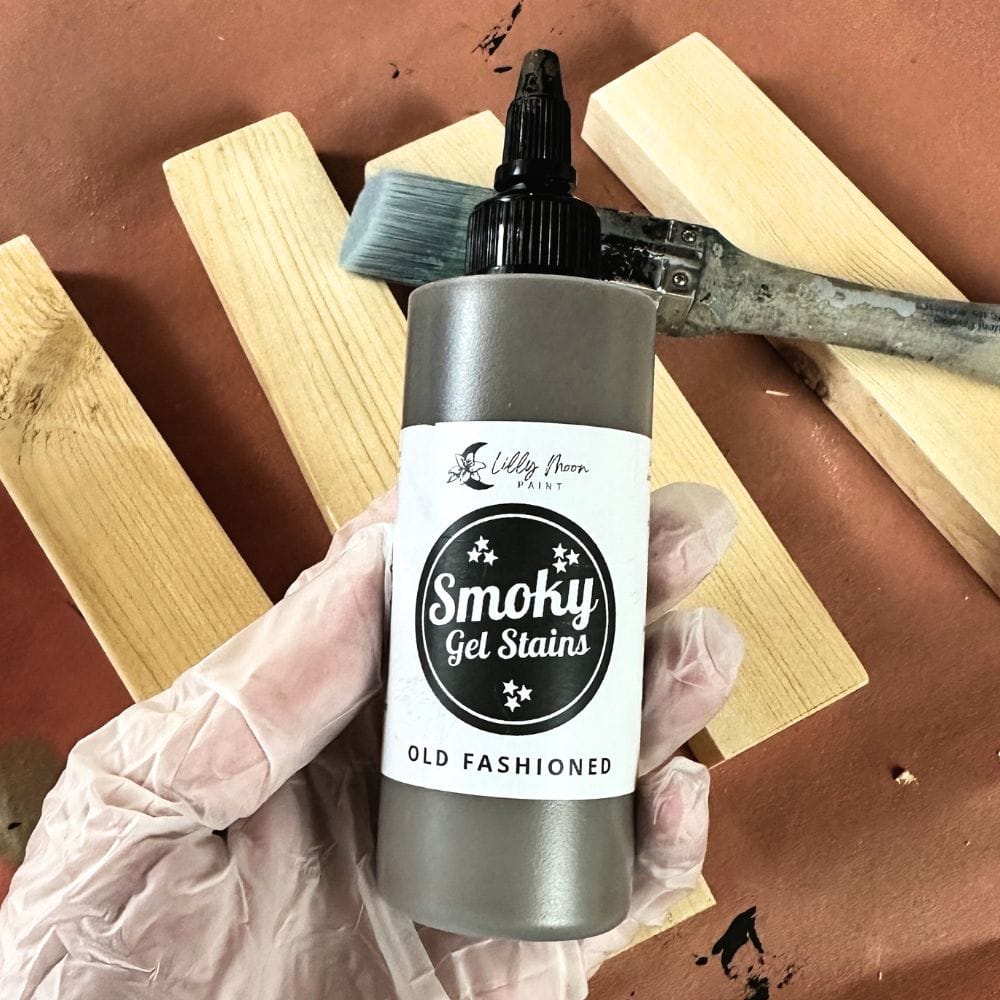
Check out our list of the best wood stains for furniture to learn more about what type of wood stain is best suited for different pieces of furniture.
To make sure the gel stain gets absorbed evenly into the raw wood, we gave it a light spray of water. This gave us extra time to work with the stain and made the stain go further.
Then we used a brush to carefully apply the gel stain to all sides of the wood, making sure we covered it evenly. Finally, we let the stained wood dry completely.
Glue the Believe Wood Cut Out to Canvas
While the stained frame dried, we glued the Believe wood cut out onto the stretched canvas with some instant super glue. You can also use hot glue for this step if you prefer.
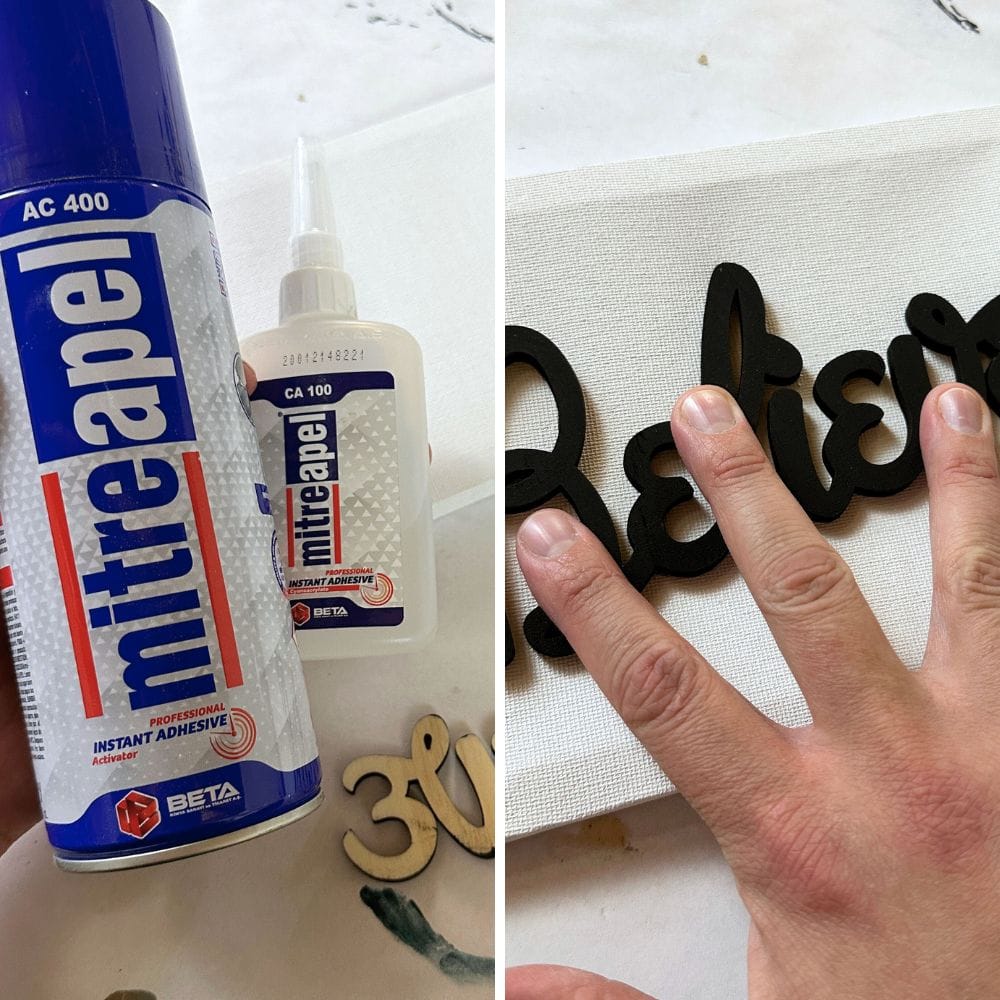
This instant super glue is seriously amazing and super fast! It dries instantly when you mix the spray and the glue. So we put the liquid glue on the back of the sign cut out, sprayed the canvas, and quickly placed the Believe word onto it.
Attach Wood Frame to Canvas
Our Believe sign was starting to come together! Finally, we glued the wood frame onto the canvas. If you have a nail gun available, that can also be used to attach the two pieces together. But for a simple and quick option, glue works just fine.
Would you like to save this?
Customize Your DIY Believe Christmas Sign
Now comes the fun part – customizing your sign! You can add extra details like glitter, ribbon, or even paint some festive designs on the canvas. Make it your own and create a unique piece of Christmas decor that you can proudly display in your home.
Check out these DIY Dollar Tree Christmas signs for inspiration.
Can I use a different word for the cut out?
Definitely! You can find a variety of laser cut wooden words at Dollar Tree or any craft store. Choose a word that speaks to you and fits your holiday decor theme. You can even spell out a different message by using individual letters.
Check out these Dollar Tree Christmas decoration ideas to spark your creativity. For other seasons, here are DIY Dollar Tree Spring decor and DIY Easter decorations from Dollar Tree!
What other words can I use for this Christmas project?
You can choose any word or phrase of your choice to create a personalized Christmas sign. Some popular options include “Joy,” “Peace,” “Merry Christmas,” and “Let it Snow.” There are many holiday themed words and phrases that can be used to create a special and unique sign.
Check out different modern, rustic, and even colorful Christmas signs in our blog post about the best Christmas signs of 2023.
Is this project kid-friendly?
This project can be fun for the whole family! However, just be sure to supervise the kids when using any tools or materials that could be potentially harmful, like the saws, or super glue.
Let your kids choose the color of paint or help with some simple decorating steps. It’s a great way to get them involved in the holiday decorating process.
If you’re looking for other fun projects with family, here’s a DIY Christmas village you can do using simple materials.
Can I make this sign for other seasons or occasions?
You sure can! This project can easily be adapted for other holidays or special occasions. For example, you could create a “thankful” sign for Thanksgiving, a “love” sign for Valentine’s Day, or even a personalized name sign for a birthday party.
Just switch out the word and customize it accordingly. The word “believe” doesn’t have to be for just Christmas either! It would be adorable all year round for a kid’s room, and kind of reminds me of a font that Disney might use.
We hope this DIY Believe Christmas sign from Dollar Tree materials has inspired you to get creative and add some handmade and homemade charm to your holiday decor. Remember, you can always customize and make it your own with different colors, stains, or decorations.


More Before and After Makeovers
See All >
Click any of these “before” photos below to view the “after” of that makeover.


DIY Believe Christmas Sign from Dollar Tree
Create a super simple and festive DIY Believe Christmas sign using affordable Dollar Tree materials.
Materials
- 6"x8" Stretched Canvas (from Dollar Tree)
- Wooden Laser Cut "Believe" Word (from Dollar Tree)
- Furring Strips of Wood (from Dollar Tree)
- Black Paint
- 220 Grit Sandpaper
- Tack Cloth
- Stain
- Super Glue
Instructions
- Paint the wooden Believe cut out with a small artist's brush. Let the paint dry.
- Next, create a simple frame around the stretched canvas by cutting the wood furring strips. For an offset frame, cut two pieces at 6.75" long and the other two pieces at 8.75" long using a miter saw or a jigsaw.
- Smooth the wood edges using 220 grit sandpaper and remove any dust with a tack cloth.
- Stain the wood frame with your preferred stain color. Spray the raw wood with water to aid the even absorption of the gel stain and prolong drying time. Brush the stain on all sides of the wood pieces evenly. Let the stained wood dry.
- As the frame stain dries, attach the Believe wood cutout onto the stretched canvas using instant super glue. Apply the liquid glue on the back of the sign, spray the canvas, and quickly place the believe word onto the canvas.
- Glue the wood frame to the canvas.
- Add extra decorations to make it your own!
Recommended Products
As an Amazon Associate and member of other affiliate programs, I earn from qualifying purchases.


More Christmas Decor Ideas
- Homemade Wooden Christmas Tree
- Build Your Own Christmas Village
- DIY Merry Christmas Wood Sign
- DIY Santa Painting with Decoupage Rice Paper
- DIY Simple Christmas Sign

Follow us on YouTube to get more tips for painting furniture. Or share your project with us on our Facebook Group and be part of our community. See you there!