DIY Christmas Village
The holidays are just around the corner, which means it’s time to think about Christmas decor ideas and start planning how to make your home feel cozy and festive. For this year, why not try making your own DIY Christmas village?
Gather your materials and get ready to create a charming little village that will bring the magic of Christmas into your home!
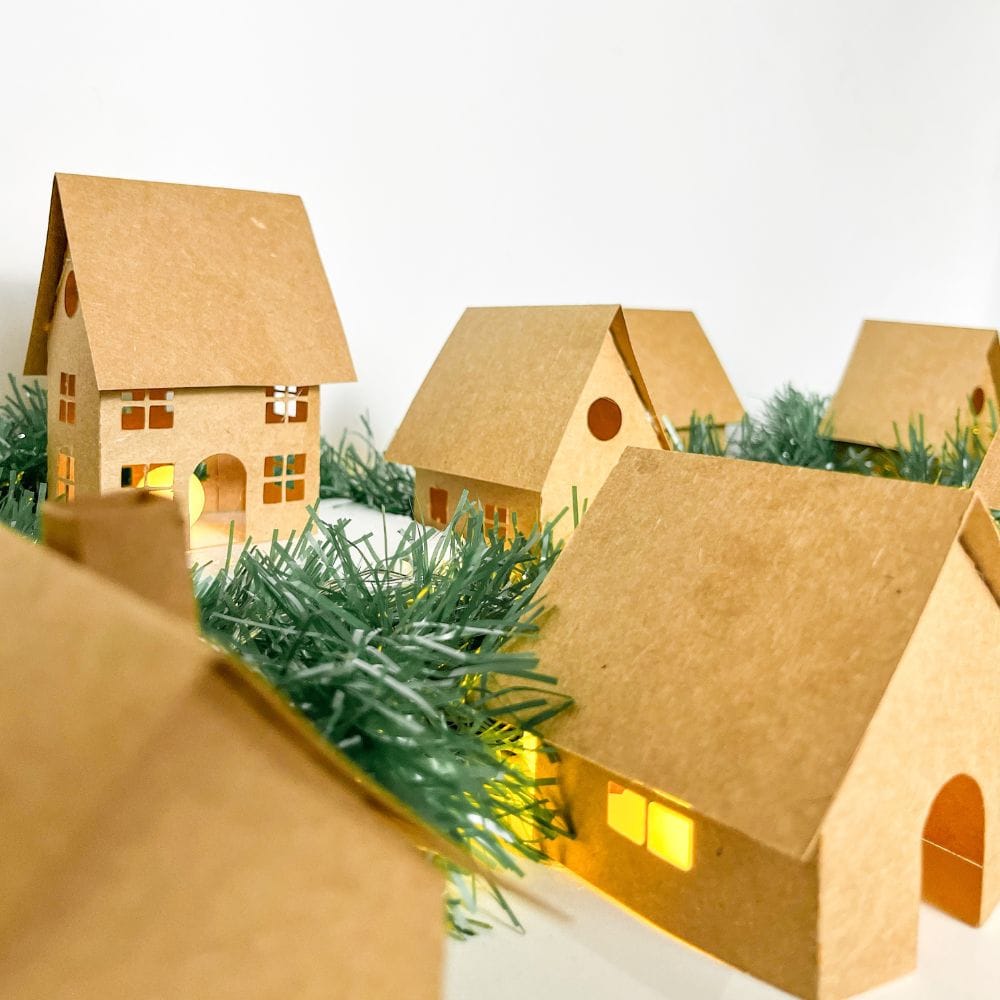
There’s something truly special about Christmas villages. They capture the essence of a winter wonderland, with their tiny houses, glittering lights, and cozy atmosphere.

Many people look forward to setting up their Christmas villages as part of their holiday decorations.
But instead of buying pre-made sets from the store, why not try your hand at making your own Christmas village?
DIY-ing your village lets you add your personal touches and get creative with the design. Plus, it’s a fun and rewarding project that the whole family can join in on.
Don’t worry if you’re new to crafting – making this Christmas village is super easy!
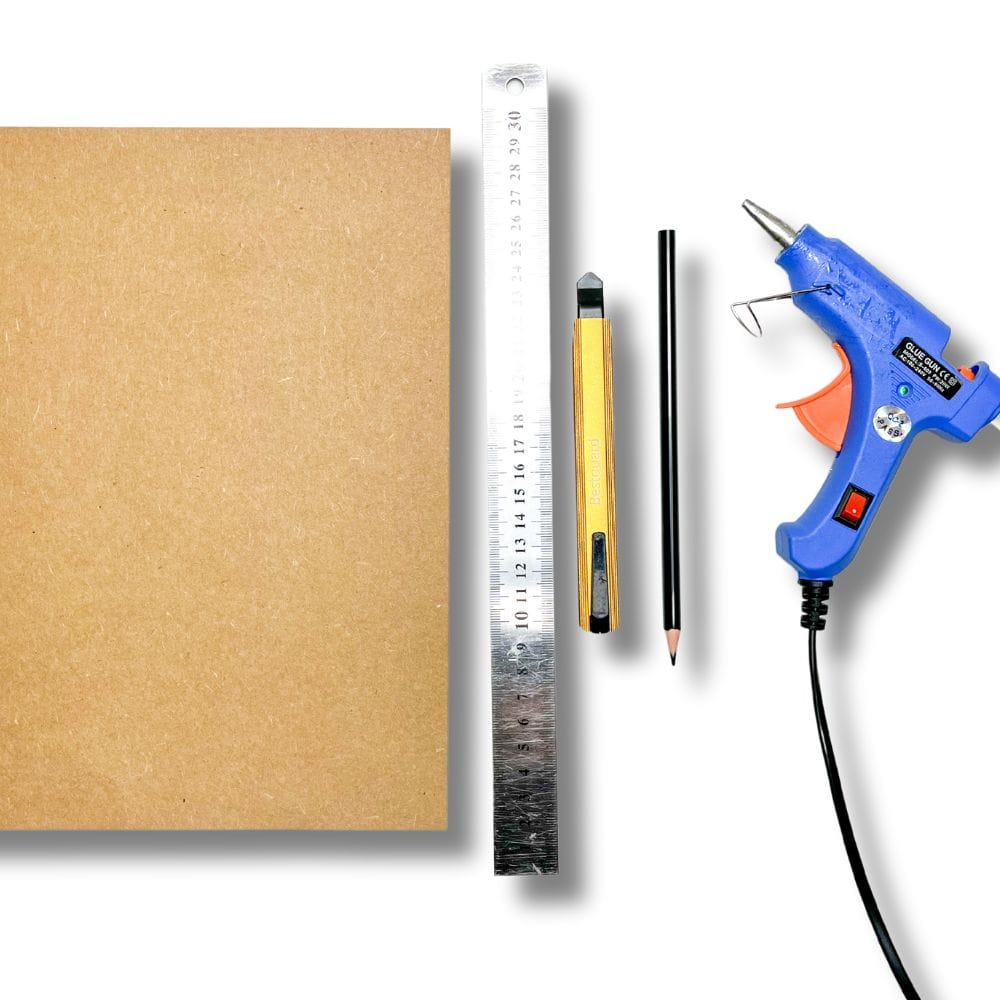
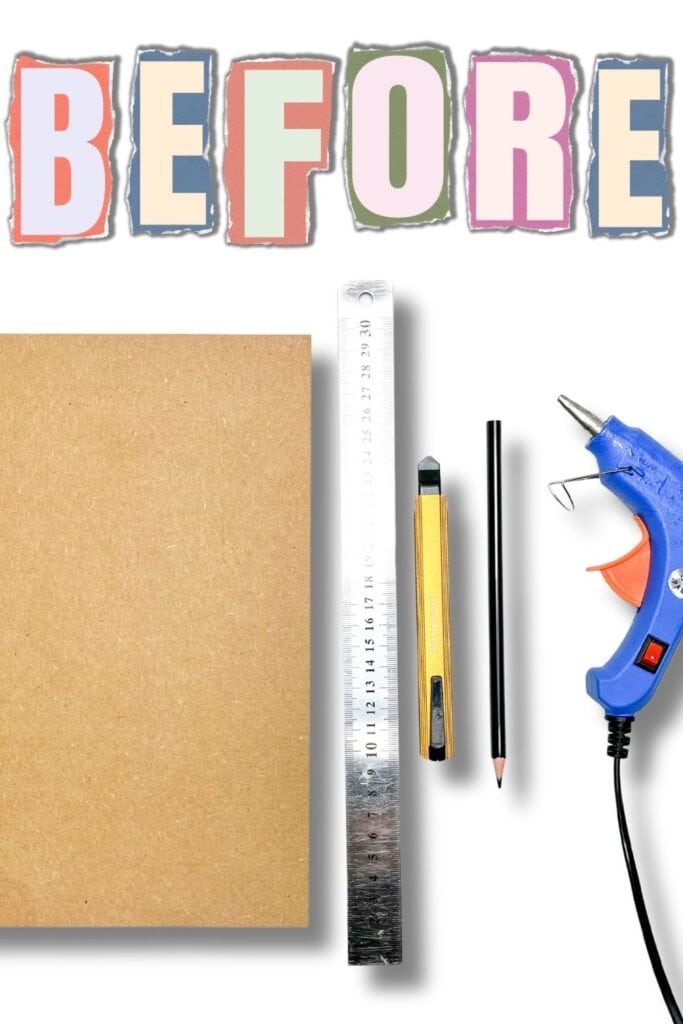
Supplies Used for DIY Christmas Village
As an Amazon Associate, I earn from qualifying purchases. I also may earn from other qualifying purchases with other companies or get free product to review and use. All opinions are my own.
- Card Stock
- Craft Cutter
- Metal Ruler
- Cutting Mat (Optional)
- Glue Gun
- Artificial Fir Garland
- Christmas Lights
Preparing House Templates
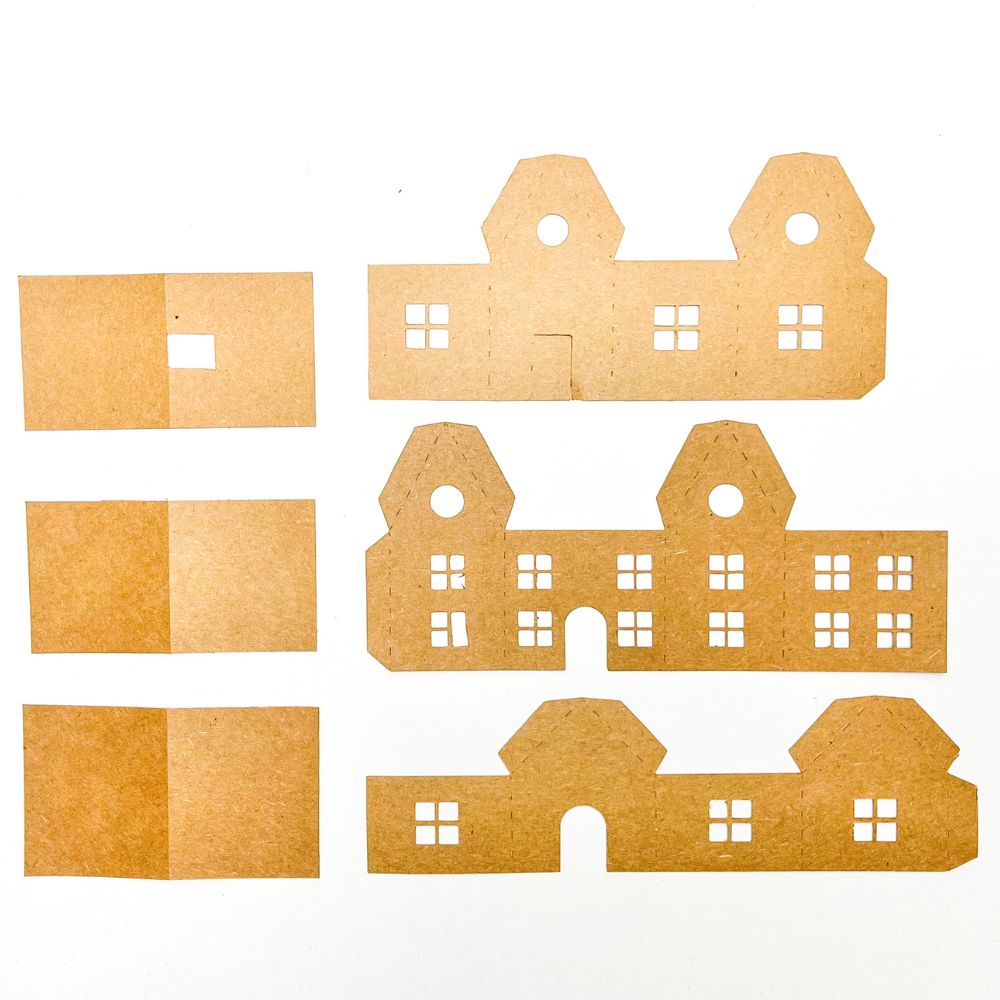
To start your Christmas village project, you will need to download and print the templates for the houses. These templates will serve as a guide for when you cut and assemble the houses.
Scroll to the bottom to download the Free Template!
They come in a variety of styles and sizes for a dynamic and interesting village.
Once you have the templates, simply print them on your desired craft paper. It’s best to use card stock to make sturdier houses.
If you want a larger village, you can resize the templates on a computer before printing.
Cutting and Scoring House Templates
After printing the house templates on card stock, it’s time to cut and score them. Using a metal ruler and craft cutter is the most precise way of cutting the templates.
Be sure to cut along the solid lines carefully for accurate house shapes.
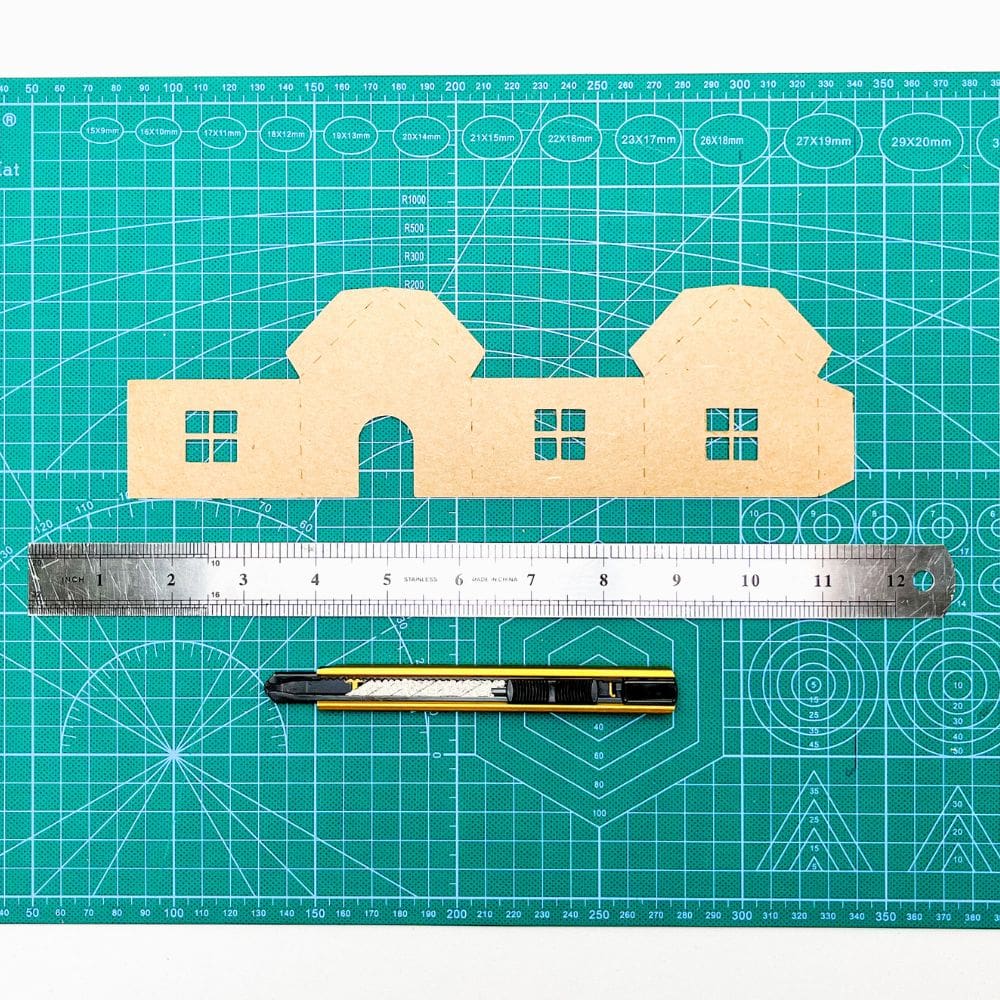
Then, use a scoring tool or even just the back of your craft cutter to lightly score along the broken lines. This step will make it easier to fold and assemble the houses later on.
If you have a scoring board, you can use that for a more uniform score line.
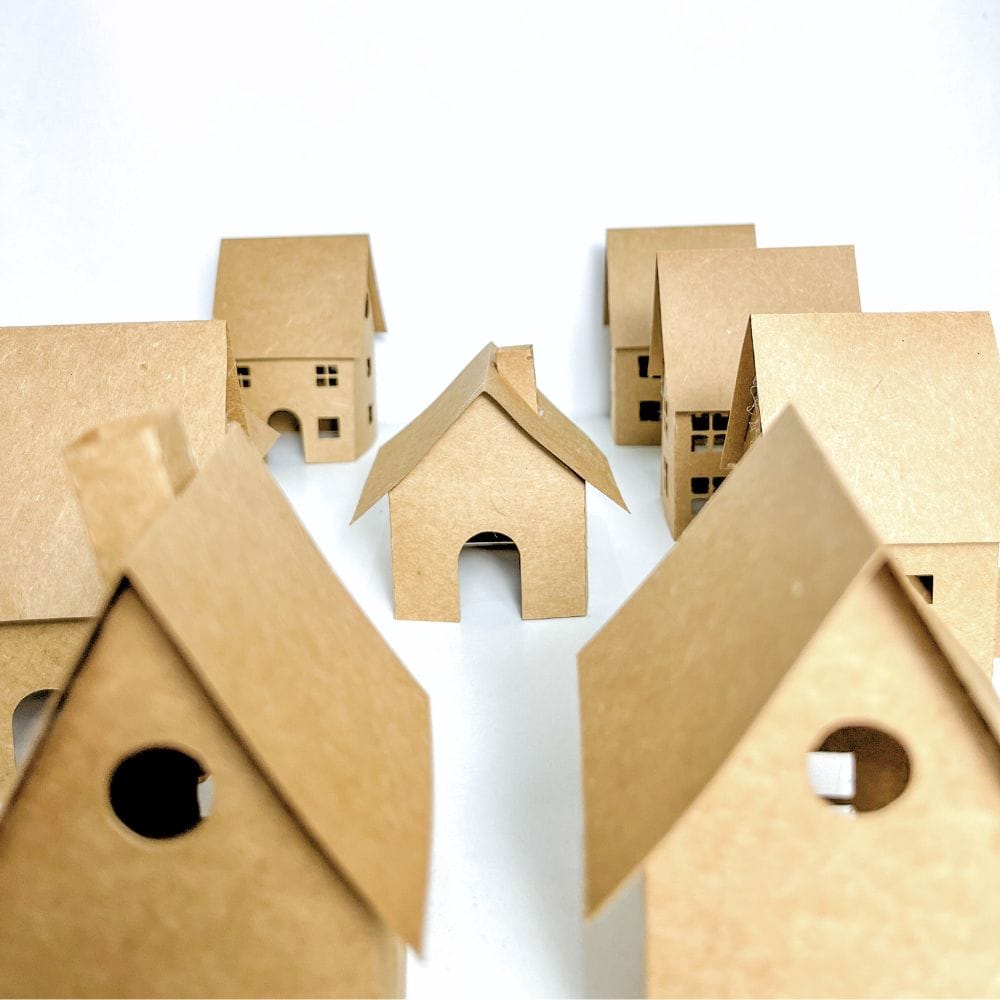
Assembling Christmas Village Houses
Now comes the fun part – putting together the houses! Using a glue gun, attach the tabs of the templates to each other, creating the walls and roofs of your houses.
Be sure to press them firmly together for a secure hold.

Repeat this process for each house and don’t forget to attach the roofs with chimneys.
You can customize your houses by adding different colored doors or windows, or even painting on designs like wreaths or snowflakes.
Setting Up and Decorating Christmas Village
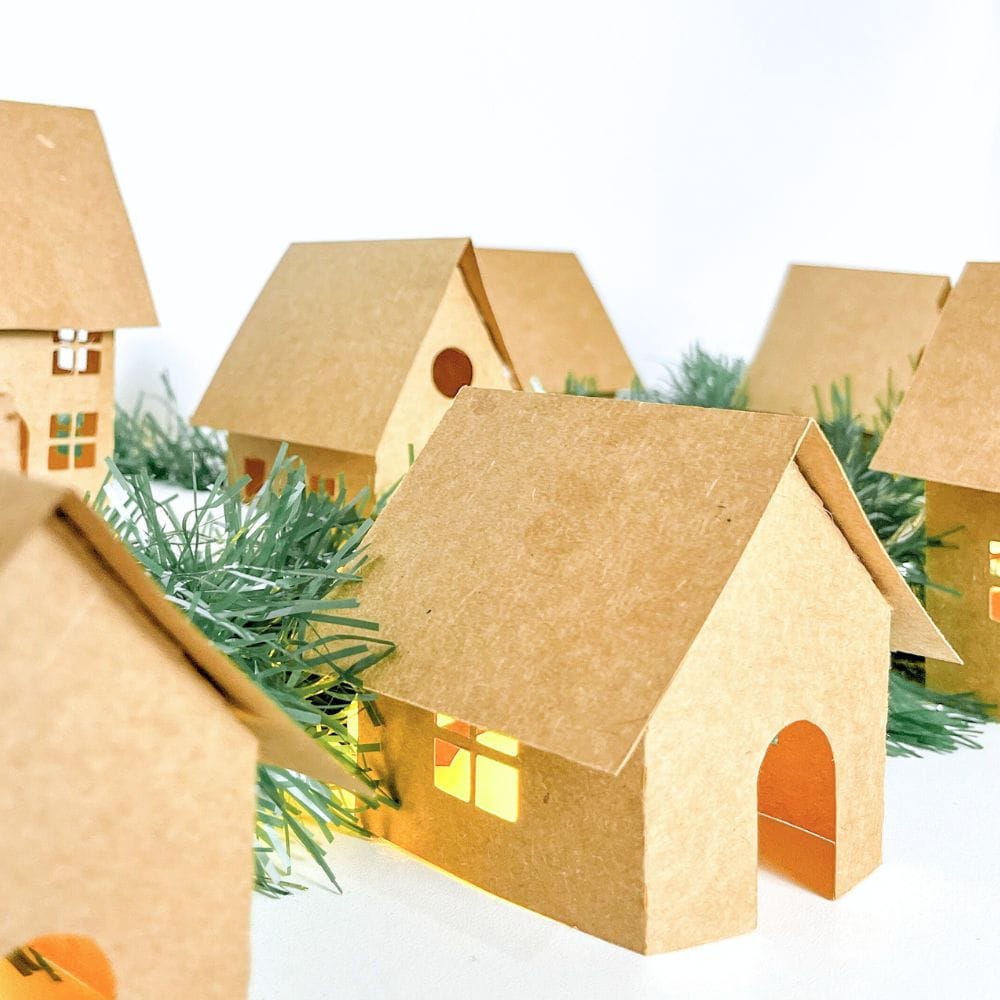
With the houses assembled, it’s time to set up your Christmas village! Find a flat surface in your home where you can arrange the houses.
You can use a table, shelf, or even create a base using foam board covered with white fabric or cotton for a snowy effect.
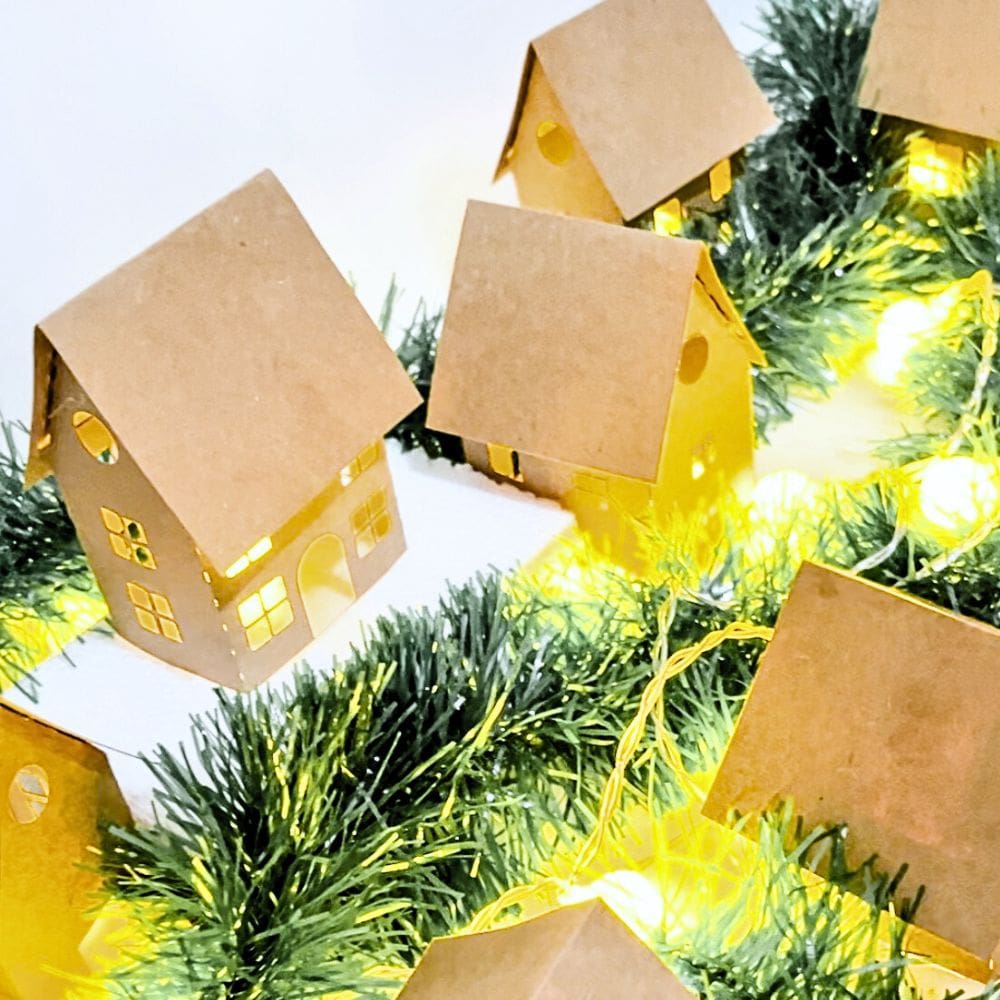
Once you have finalized the placement of your houses, you can now start decorating your village. Adding artificial fir branches around the houses creates a warm and cozy ambiance.
You can also use yellow Christmas lights to bring that magical glow to your village or go for colorful lights for that festive vibe. For a heartwarming element to your display, check out these Christmas believe signs.
Would you like to save this?
More Christmas Village Decor Ideas
If you’re keen on making your Christmas village more enchanting and special, there are countless ways to decorate it.
You don’t have to stick with just houses – you can add other buildings like a church, school, or even a train station. You can also include small figurines and props like snowmen, reindeer, and sleds to bring more life to your village.
You can sprinkle some fake snow on the rooftops and ground to create a snowy landscape. Or for more of a rustic Christmas decor, you can use natural elements like pinecones, twigs, or dried berries to adorn your village.
Check out these wooden Christmas village houses that give off such a warm and cozy vibe.
And don’t forget the iconic Christmas tree! You can incorporate a miniature version in your village, complete with tiny ornaments and lights.
We have this DIY foam Christmas trees tutorial for a tree that you can easily make at home. There’s this homemade wooden Christmas Tree sign you can easily recreate and display, too!
There are so many options and inspirations for your DIY Christmas village decorations that are festive but still affordable.
Can I use regular paper instead of card stock for the houses?
Yes, you can use regular paper instead of card stock for the houses. However, using card stock will make sturdier and more durable houses that will last longer.
If you do decide to use regular paper, be sure to reinforce the structure with some extra glue or tape to keep it from collapsing.
Another thing to consider when choosing between card stock and regular paper is the overall weight of your final product.
Card stock is thicker and heavier, which can make a difference in the stability and appearance of your Christmas village. Regular paper may not hold up as well with added decorations or lights.
Can I resize the templates to make larger or smaller houses?
Sure, you can totally resize the templates on your computer before printing to make bigger or smaller houses.
Just remember that resizing might mess with the proportions a bit, so it’s a good idea to print a test template first before committing to a larger size.
Are there any safety precautions I should take when setting up my Christmas village?
Be mindful of where you place your village to make sure it doesn’t create a tripping hazard or block any walkways.
And if there are small pieces like figurines or decors, be sure to keep them out of reach from children and pets.
Also, when using Christmas lights, be sure to follow proper electrical safety guidelines and keep them away from flammable materials.
Always turn off the lights when you are not home or going to bed, just to be safe.
Now you have your mini winter wonderland all set up and ready to spread holiday cheer!
Yes, you don’t have to be an expert crafter to make this DIY Christmas village. Take this opportunity to decorate your home as well as bond with your family this holiday season.


DIY Christmas Village
Why not try making your own DIY Christmas village that will bring the magic of Christmas into your home?
Materials
Instructions
- Choose the house templates that you want to use for your village. Print the templates on card stock for sturdier houses.
- Cut along the solid lines of the templates carefully using a metal ruler and craft cutter. Score along the broken lines using a scoring tool or the back of your craft cutter.
- Assemble the houses by attaching the tabs together with a glue gun. Don't forget to attach roofs and chimneys.
- Find a flat surface in your home to set up the village, such as a table or shelf. You can also create a base using foam board covered in white fabric for a snowy effect.
- Decorate your village with artificial fir branches, Christmas lights, and small figurines to bring it to life. For more enchanting decor, add other buildings like a church or school, and incorporate natural elements like pinecones and twigs.
Recommended Products
As an Amazon Associate and member of other affiliate programs, I earn from qualifying purchases.


More Christmas Decor Ideas
- Dollar Tree Christmas Signs
- DIY Believe Christmas Sign
- DIY Christmas Centerpiece
- Homemade DIY Christmas Village
- Christmas Village Houses to Paint

Follow us on YouTube to get more tips for painting furniture. Or share your project with us on our Facebook Group and be part of our community. See you there!