DIY Foam Christmas Trees
This step by step DIY foam Christmas trees tutorial is the easiest way to make Christmas trees for your farmhouse Christmas decor. You can easily switch up the color of the yarn or the embellishments to completely change the look of your trees.
This also makes for a fun and easy crafting project to do with friends and family during the holiday season. So let’s get started on one of these DIY farmhouse Christmas decor ideas and make adorable Christmas trees!

There are plenty of Christmas trees available in store, but why not add some homemade flair to your holiday decor this year? These DIY Christmas trees are easy on the budget and let you get creative, customizing them to match your style.
Another great thing about this DIY is that it’s perfect for all skill levels – you can get everyone involved, from the kids to the adults! So you can gather your friends and family for a fun holiday crafting day.
You can also get these rustic Christmas decor and farmhouse Christmas decor items to match these Christmas trees and create a cozy, cohesive look for your home. Now let’s dive into the process of making these cute and festive trees!
Supplies Used for DIY Foam Christmas Trees
As an Amazon Associate, I earn from qualifying purchases. I also may earn from other qualifying purchases with other companies or get free product to review and use. All opinions are my own.
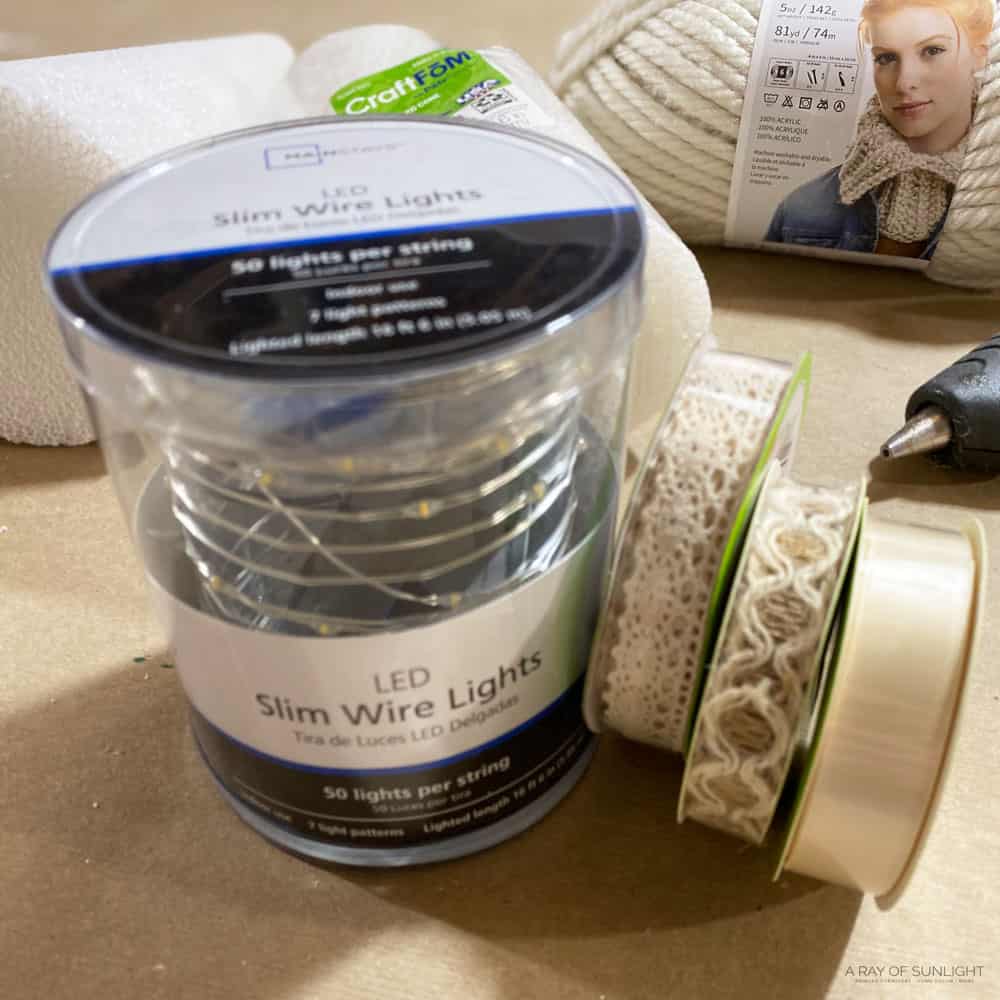
- Foam Cones – 12″, 9″ and 6″
- Yarn – I used 81 yards of yarn
- Hot Glue
- Embellishments – Fairy Lights, Ribbon, Etc.
How to Make Foam Cone Christmas Tree
To make these foam Christmas trees, you only need a few supplies that are easily available at any craft store. The star of this project is the foam cone, which serves as the base for your tree. You can choose different sizes to create a variety of trees or stick with one size for a more uniform look.
Wrap Foam Cone with Yarn
First, put a dab of hot glue in the middle of the cone and stick the end of the yarn onto it. (Be careful to not burn yourself!!) Then wrap the yarn around the cone a few times. Make your way to the top of the cone and put some hot glue on the top of the cone.
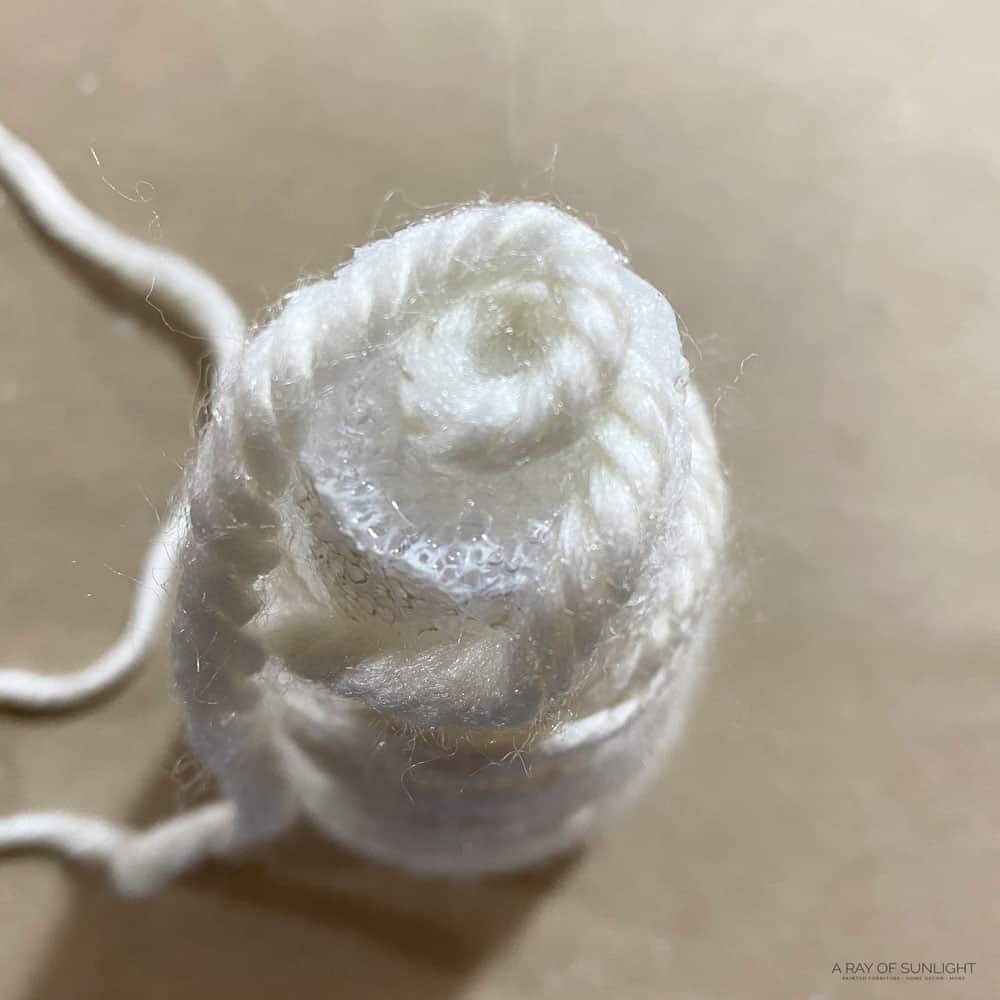
Making a loop, glue the yarn onto the top of the cone so all of the foam is covered. Be sure to press down the yarn as you go so that it is tightly wrapped around the cone.
Then make your way to the bottom of the cone while you continue to wrap the yarn round and around the cone. Put some glue along the edge of the bottom of the cone and put the yarn on top of the hot glue.
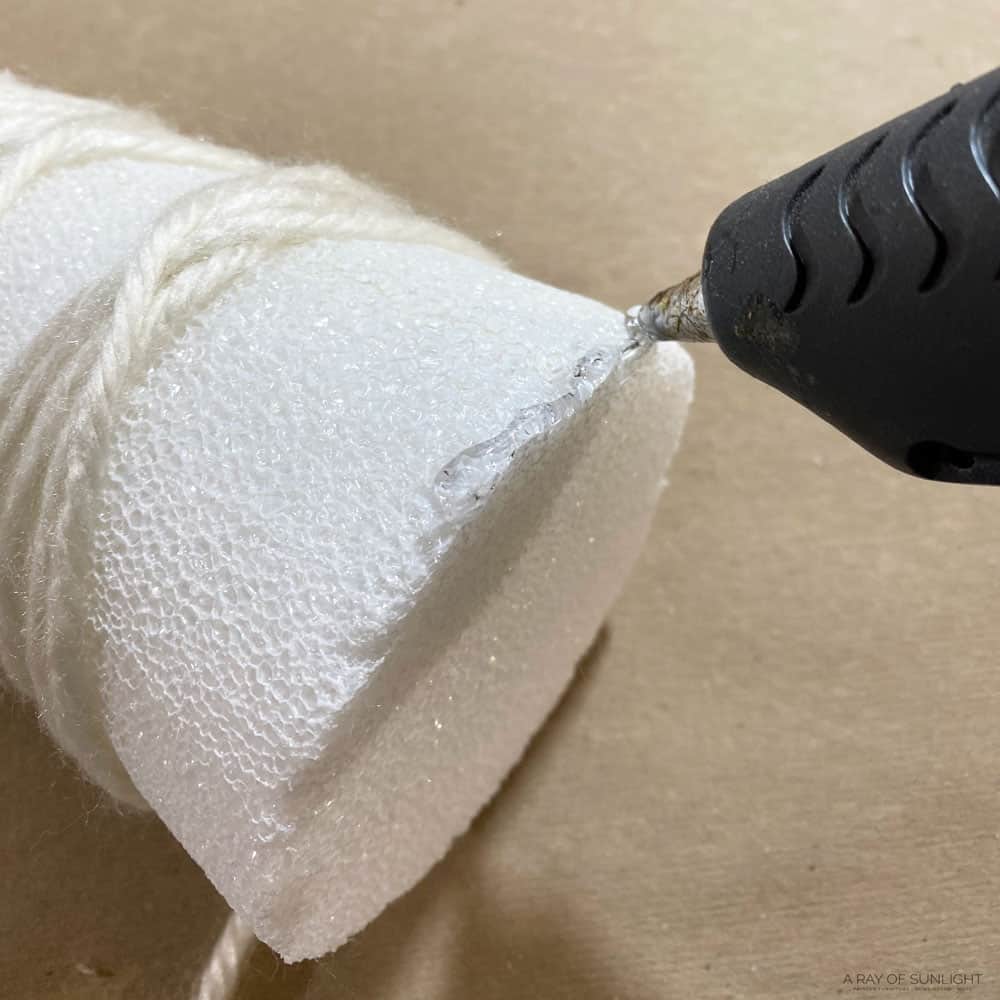
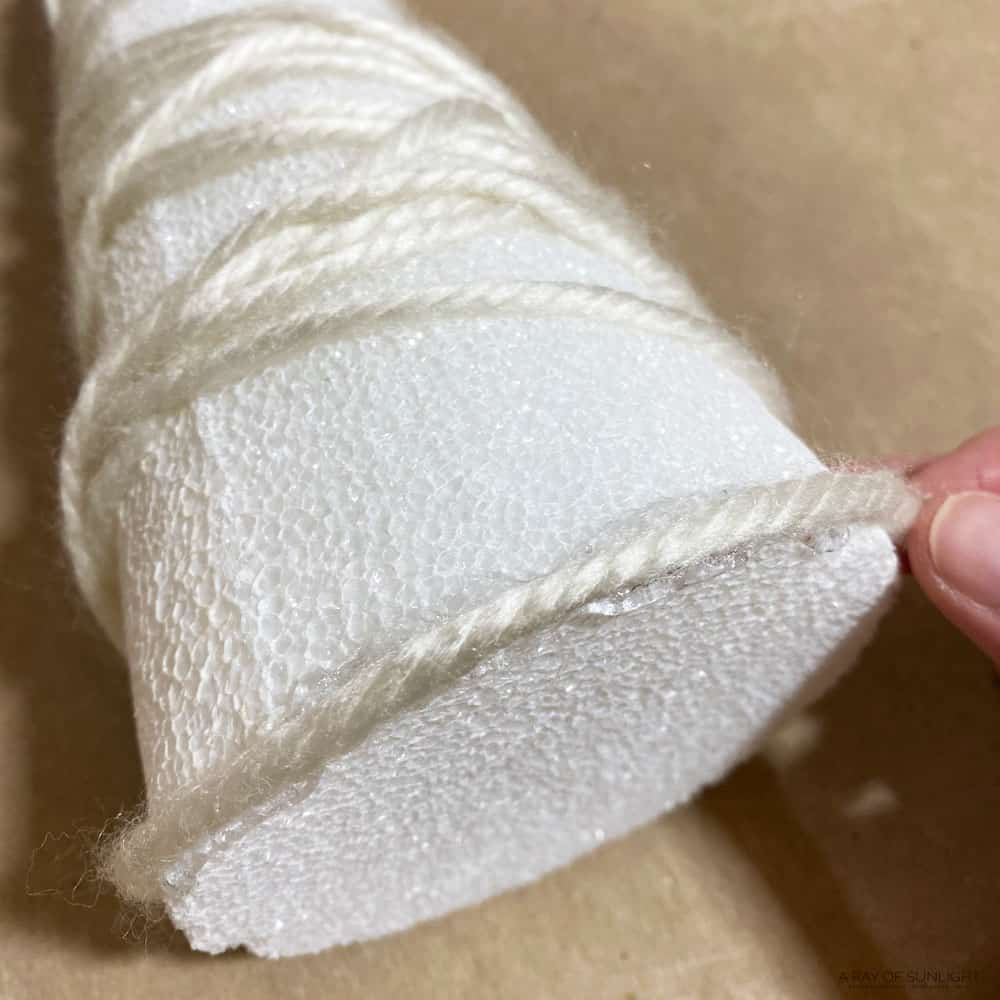
Work your way around the entire bottom of the cone a couple of times. Then wrap the rest of the cone in yarn, making sure to cover all of the foam with yarn. When the foam is completely covered, cut the yarn and glue it down in an inconspicuous place.

Decorating Foam Christmas Trees
You can either leave it plain, or you can add embellishments! This is where you can get creative and add your own personal touch. You can go colorful or keep it simple – just have fun with decorating your trees!
Would you like to save this?
Fairy lights are a favorite! My kids absolutely love the lights! Just wrap the lights around the cone, with the battery pack end of the strand at the bottom of the tree.
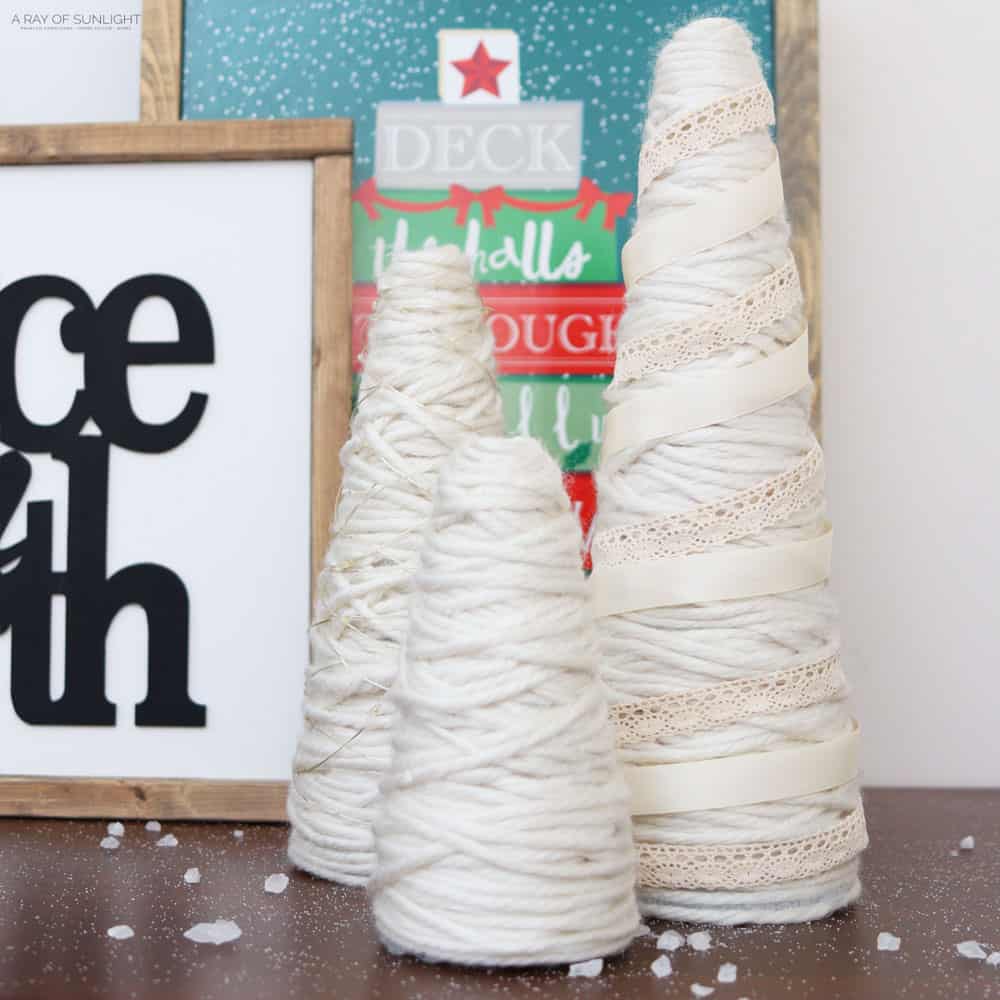
I also decorated one of the trees with some different types of ribbon. I just tucked it under the yarn and then wrapped it down and around the tree until I reached the bottom of the tree. Then I cut the ribbon and tucked the end under more yarn.
Display DIY Christmas Trees
Now you’re done! Easy peasy right?! I placed these DIY Christmas trees in front of some Christmas signs. I also sprinkled some salt and rock salt on the table to make it look like snow. We’ve used the same snow technique in our DIY painted Christmas village here.
If you’re still up for more DIY projects, why not try making wooden Christmas trees for a truly unique decor that adds a rustic touch to your home? You can also check out this wood Christmas tree DIY that’s easy to make and can be customized according to your theme.
Here are driftwood Christmas trees that come in different sizes if you’re looking for something eco friendly, stylish, and rustic. You can also get more inspiration for small wooden Christmas trees here. And if you have the traditional big tree and want ideas on how to make it more beautiful and festive, here are farmhouse Christmas tree decorations.
If you want to add elements of faith and meaningful decorations, here is our list of the best Christian Christmas signs. For an extra dose of holiday cheer, check out these reindeer Christmas signs and funny Christmas signs!
And to complete your magical winter wonderland, consider making these miniature Christmas village houses or these personalized DIY Christmas village decorations.
Foam Christmas Tree Ideas
There’s still so much you can do with your foam Christmas trees! For a more colorful and fun look, try using different colored yarns or mixing and matching patterns. You can also add a touch of sparkle with some glitter or metallic paint.
For a rustic and natural vibe, you can wrap your foam Christmas tree with twine or burlap. This will give your tree a cozy and warm feel. Then you can add colorful mini pompoms to act as ornaments and a star on top to complete the look.
Consider making your own mini decorations out of foam or felt. You can cut out shapes like snowflakes, stars, or even tiny presents and glue them onto your tree. You can also use small beads or buttons lying around in your craft supplies to add some texture and dimension.
Another creative idea is to use washi tape! You can find a variety of patterns and colors, making it easy to customize your foam tree. Simply wrap the tape around the tree from top to bottom, or cut small pieces and stick them on randomly for a more abstract vibe.
See there’s no limit when it comes to decorating your DIY foam trees! And the best part is, these trees are not just for Christmas – you can definitely use them as home decor all year round! Add these modern rustic Christmas decorations for a more stylish holiday look.

DIY Foam Christmas Trees
Learn how to make your own DIY foam Christmas trees, plus get inspired with some more foam Christmas tree ideas for your holiday decor!
Materials
Tools
Instructions
- First, wrap the foam cone with yarn by gluing one end of the yarn to the middle of the cone and then tightly wrapping it all the way to the top. Glue the end of the yarn onto the top of the cone.
- Make your way down to the bottom of the cone, continuing to wrap the yarn tightly and using hot glue to secure it in place. Cut the yarn and glue down the end in an inconspicuous spot.
- Get creative with decorating your tree by adding embellishments like fairy lights or ribbon. Attach them securely to the tree with glue or by tucking them under the yarn.
- Display your DIY foam Christmas trees on a table or shelf, and add some fake snow for a festive touch. You can use salt or rock salt to create the illusion of snow.
- If you're feeling extra crafty, try making other types of holiday decor like wooden trees, driftwood trees, or miniature Christmas village houses for a complete winter wonderland display.
Recommended Products
As an Amazon Associate and member of other affiliate programs, I earn from qualifying purchases.

More DIY Christmas Decorations
- Merry and Bright Wooden Sign – Dollar Tree
- DIY Wooden Christmas Village
- Christ the Savior is Born – DIY Wooden Christmas sign
- DIY Wood Christmas Trees
- Homemade Christmas Signs

Follow us on YouTube to get more tips for painting furniture. Or share your project with us on our Facebook Group and be part of our community. See you there!