Making Wooden Christmas Trees
Are you tired of the same old Christmas tree every year? Why not switch things up and try making wooden Christmas trees for your DIY farmhouse Christmas decor! It’s an easy and fun project that the whole family can participate in. Not only will it add a rustic touch, but it can also be a sentimental piece that you can reuse for holidays to come.
In this blog post, we’ll walk you through the steps of creating your own wooden Christmas tree using basic materials that you can find at any craft store or even in your own home.
Christmas trees are a symbol of the holiday season and decorating them is a beloved tradition for many families.

But instead of buying an artificial or real tree, why not try making your own wooden Christmas tree? Not only will it save you money, but it will also be a unique piece that you can use year after year.
Making a wooden Christmas tree is also a great way to get the whole family involved in holiday decorating.
Kids can help with adding layers and decorations, while adults can handle the more intricate steps. It’s a fun and creative activity that everyone can enjoy together.
You can customize it to match your existing decor or let your creativity run wild and make it truly unique.
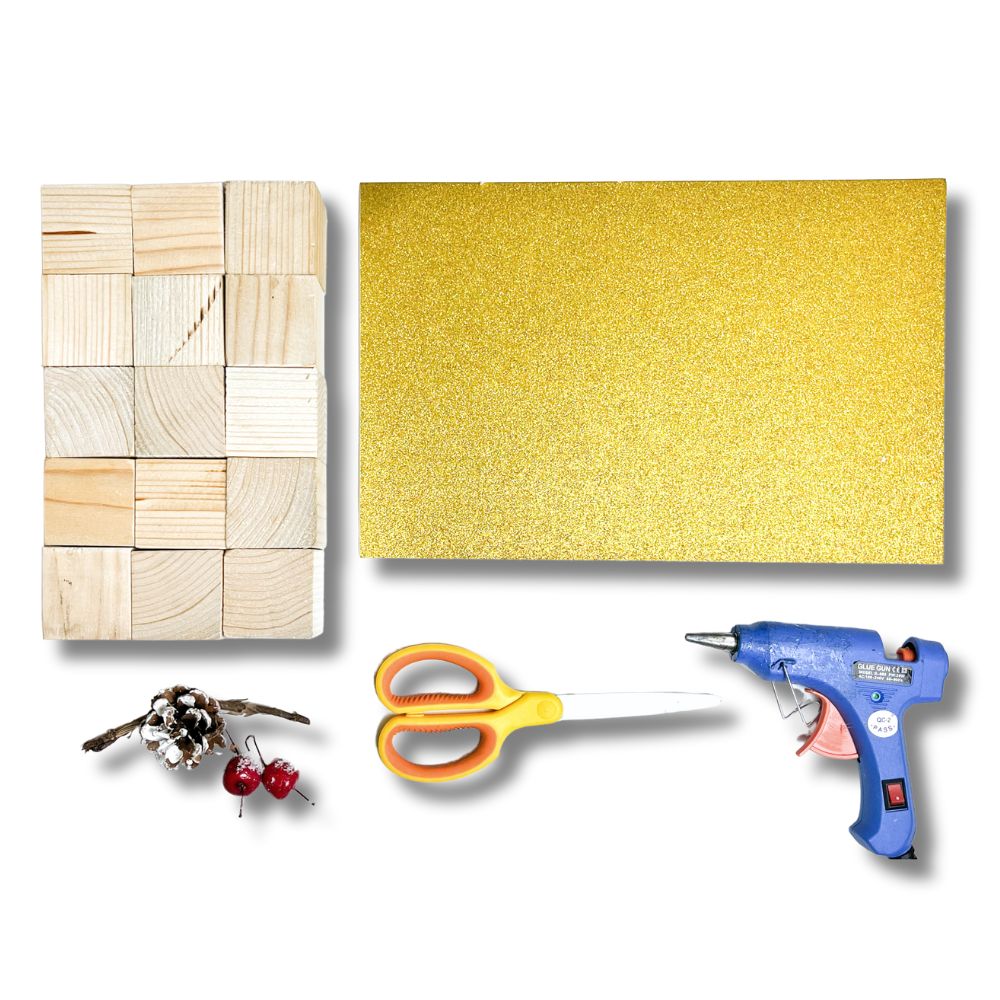
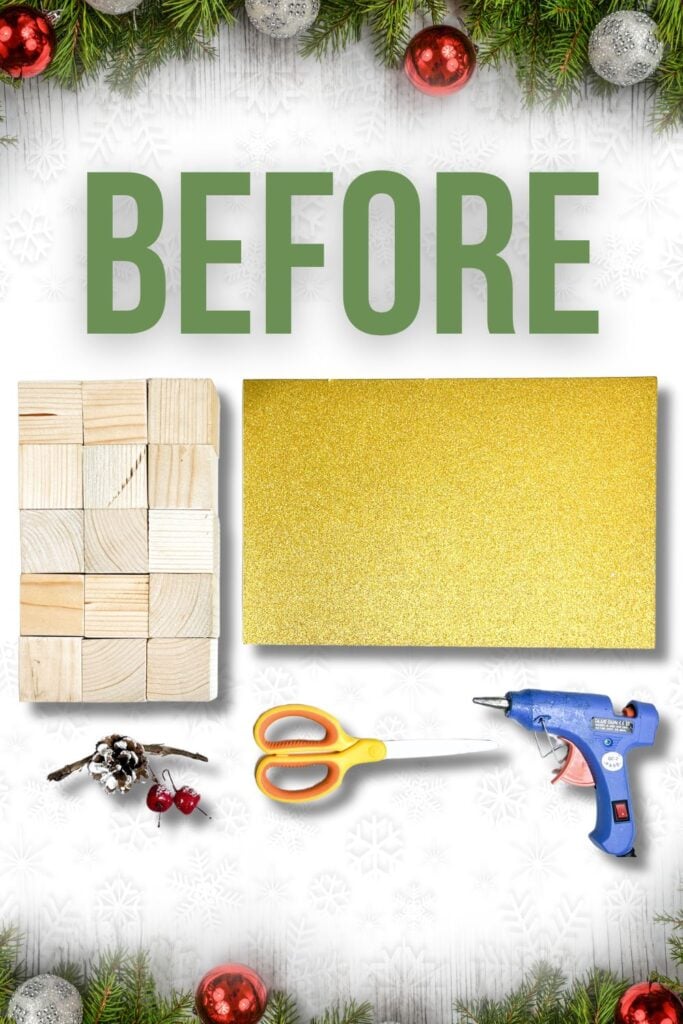
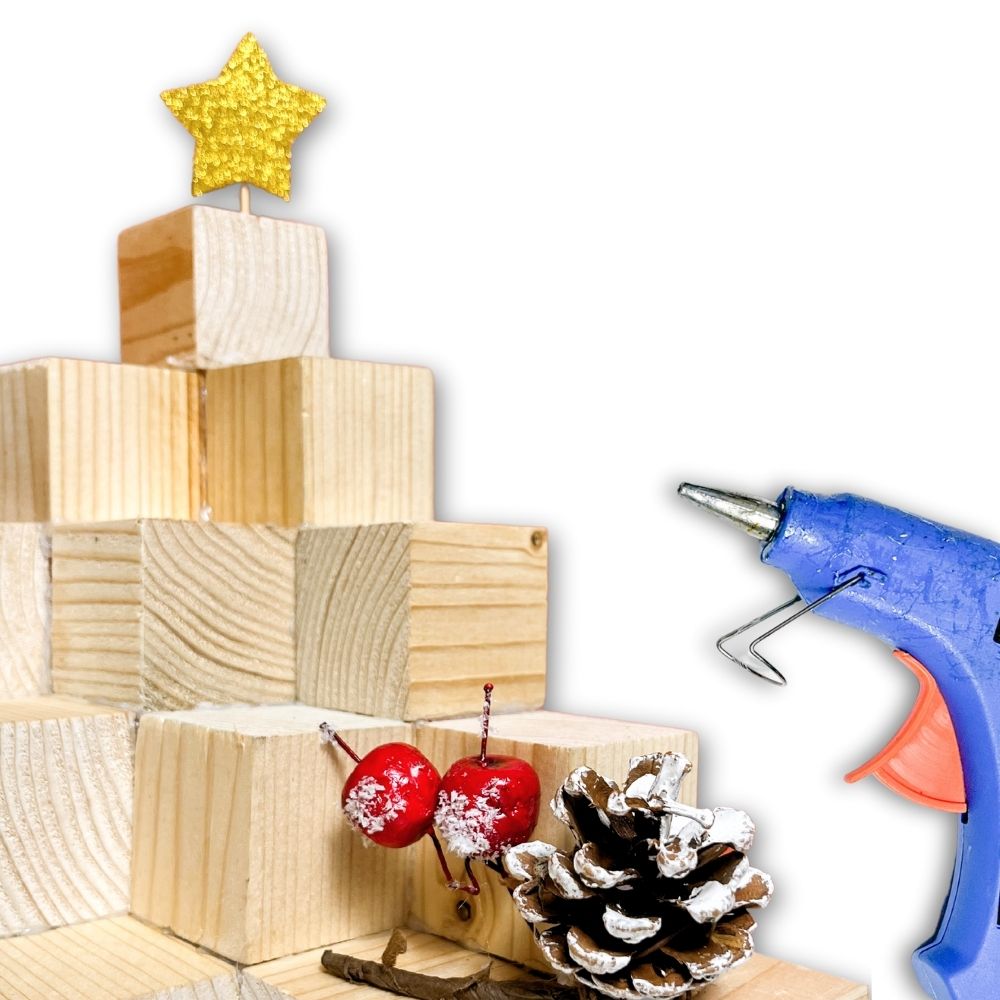
Supplies Used for Making Wooden Christmas Trees
As an Amazon Associate, I earn from qualifying purchases. I also may earn from other qualifying purchases with other companies or get free product to review and use. All opinions are my own.
- Wooden Cubes (2×2 inches)
- Glue Gun and Glue Sticks
- Scissors
- Glitter Card Stock for the star
- Any Star available to you for the top of the Christmas tree
- Christmas Decoration/Accessories
Assembling First Layer of Wooden Christmas Tree
Begin by placing the top cube at the center of your workspace. Apply a small amount of glue to one of its edges and attach it to the edge of another cube.
Make sure to hold the cubes together for a few seconds until the glue sets.
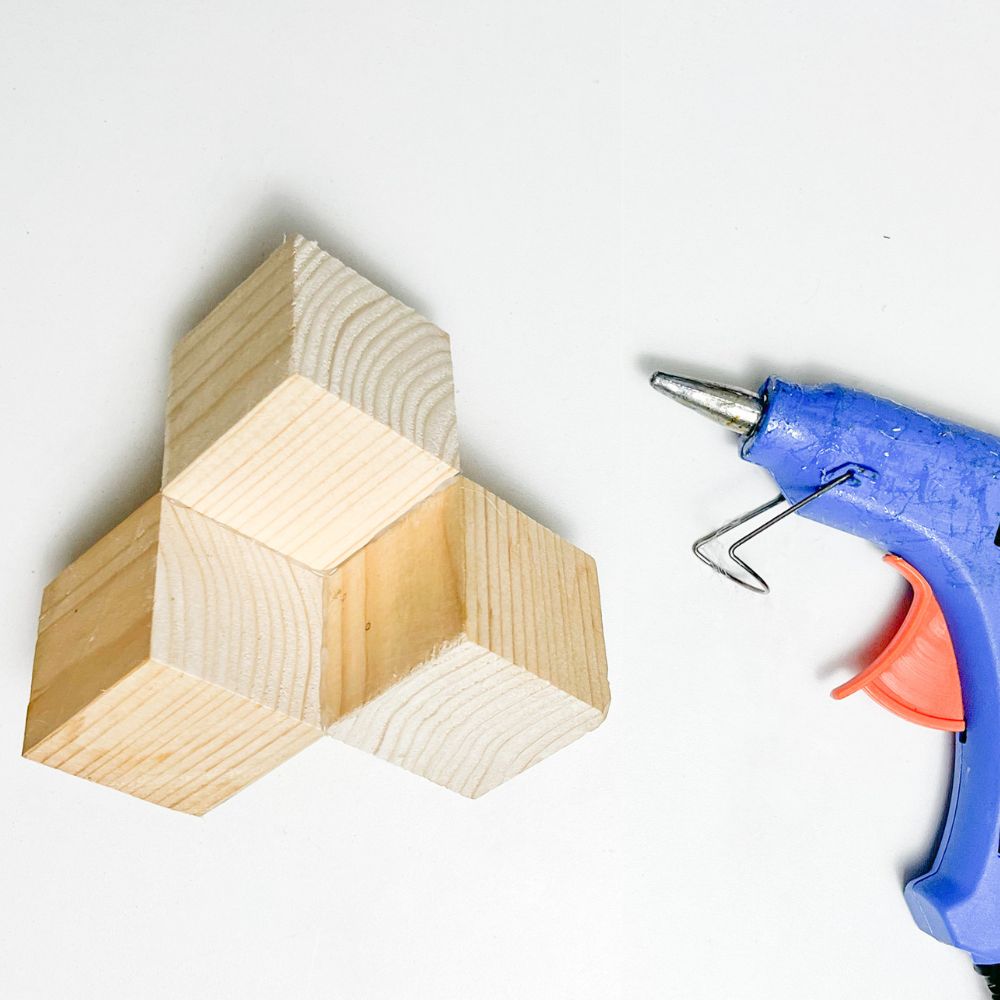
Repeat this step with another cube, attaching it to the other side of the top cube. This will create your first layer of the tree.
Keep in mind that the edges of the cubes should be touching each other and not stacked on top of one another.
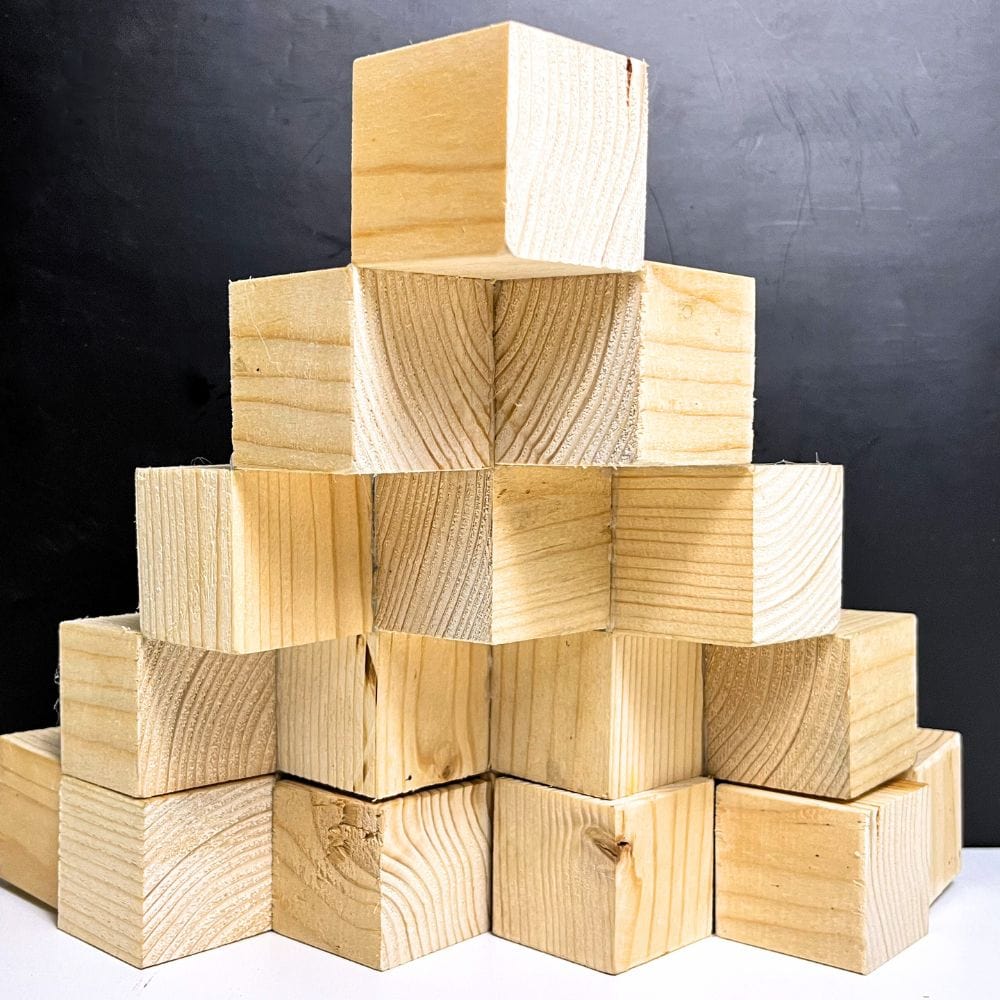
Adding Layers to Christmas Tree
Now that you have your base layer, it’s time to expand the tree shape and create more layers. Remember to apply glue to the edges of each cube before attaching it to another one.
Make sure to press each layer together firmly to prevent any gaps or spaces between the cubes. This will also give your tree a sturdy structure.
You’ll start to see your wooden Christmas tree take shape. Keep adding cubes until you have 5 layers in total.
Just keep in mind that the top layer should always be smaller than the bottom one for that classic Christmas tree shape.

As you add more layers, make sure to keep checking that the tree is balancing properly. If needed, adjust the placement of the cubes to make sure it stands straight and doesn’t topple over. Take your time with this step to guarantee a stable and sturdy tree.
You can also choose to make your tree as tall as you want by adding more layers or keeping it smaller with fewer layers – it’s completely up to you!
Check out this guide for creating your own homemade wooden Christmas tree that you can customize according to your holiday theme.
And here’s our DIY small wooden Christmas trees if you want to create your own small wooden Christmas trees.
Stabilizing Christmas Tree
The stability of your wooden Christmas tree is important so it stands upright and doesn’t tip over.
Adding extra cubes at the back of the lowest layer will help distribute the weight evenly and make your tree more secure.
It’s important to make sure that these added cubes are attached well with enough glue so they don’t come off easily.
Would you like to save this?
Take your time with this step and make sure to test the stability of your tree by gently pushing it from different angles.
If you notice any wobbling, add more cubes until it feels solid and balanced. This step may require some trial and error, but if you want a sturdy tree, it’s worth the extra effort.
Once you’re happy with the stability of your tree, let the glue dry completely before moving on to the next step.
This will prevent any shifting or movement while decorating your tree so that your hard work doesn’t go to waste.
Decorating and Finishing Touches for Wooden Christmas Tree
Decorating your wooden Christmas tree is the fun part! Get some glitter card stock and cut out a star shape to glue onto the top of your tree for that classic star-topped look.
You can also use any other small decorations or ornaments you have on hand to add some festive flair.
To add a touch of whimsy to your wooden Christmas tree, you can also wrap string lights around it. As the lights twinkle through the gaps between the cubes, it will create a warm and cozy ambiance in any room.
Plus, it’s a great way to save on electricity costs compared to having a traditional light-up tree.
You can customize the tree to match your existing decor or let your creativity run wild and make it unique.
You can also use homemade ornaments or attach sentimental items like family photos onto the tree for a more personal touch.
There are so many ways to make your wooden Christmas tree special and one-of-a-kind!
If you’re running out of ideas for your Christmas tree, here are farmhouse Christmas tree decorations. And if you want to add elements of faith and meaningful decorations, here is our list of the best Christian Christmas signs.
Check out this driftwood Christmas tree for an eco-friendly option yet perfect for a rustic and farmhouse feel.
Storing and Reusing Wooden Christmas Trees
Once the holiday season is over, you can pack away your wooden Christmas tree and reuse it for years to come.
Unlike traditional trees that may need to be disposed of after a few weeks, your handmade wooden tree will remain in good condition as long as you store it properly.
To store your wooden Christmas tree, carefully wrap it in bubble wrap or tissue paper and place it in a box. Store the box in a dry and cool place, away from direct sunlight or extreme temperatures.
When you’re ready to use your tree again, simply unwrap it and add some fresh decorations for a new look.
Making a handmade wooden Christmas tree is not only a fun and creative activity, but it’s also an eco-friendly and cost-effective alternative to buying a traditional tree.
If you’re looking for more unconventional ways to complete your holiday decor, check out this budget-friendly DIY dowel Christmas tree.
And you’ll have a unique and special decoration that will be cherished for years to come!


Making Wooden Christmas Trees
Try making wooden Christmas trees with the family and create a sentimental piece that you can reuse for holidays to come.
Materials
- Wooden Cubes (2x2 inches)
- Glitter Card Stock for the star
- Any star available to you for the top of the Christmas tree
- Christmas Decoration/Accessories
Tools
Instructions
- Assemble the first layer of the tree by attaching three wooden cubes together with glue to create a triangle shape. Hold the cubes together firmly until the glue dries completely.
- Continue adding layers by attaching more cubes to the previous layer, making sure to apply glue and press each cube firmly for stability. Go for 5 layers in total, with each layer forming the classic Christmas tree shape.
- Stabilize the tree by adding extra cubes at the back of the bottom layer to distribute weight evenly and prevent wobbling. Test the stability by gently pushing the tree from different angles and adjust as needed.
- Get creative with decorating your wooden Christmas tree using glitter card stock, string lights, and other ornaments. Personalize it with homemade decorations or sentimental items for a unique touch.
- When the holiday season is over, carefully store your wooden Christmas tree in a dry and cool place to be reused next year. Unwrap it and add fresh decorations for a new look each time.
Recommended Products
As an Amazon Associate and member of other affiliate programs, I earn from qualifying purchases.


More Christmas Decor Ideas
- DIY Foam Christmas Trees
- Homemade Wooden Christmas Decorations
- DIY Wall-Mounted Christmas Tree
- Family Christmas Signs
- Rustic Christmas Coffee Table Decor

Follow us on YouTube to get more tips for painting furniture. Or share your project with us on our Facebook Group and be part of our community. See you there!