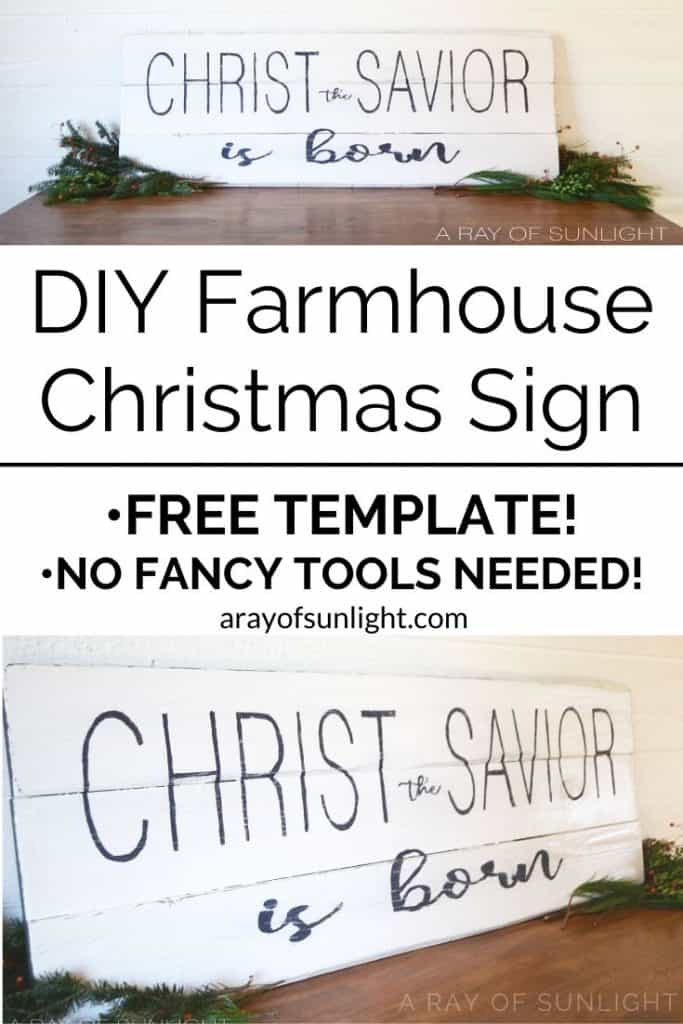
Christ the Savior is Born – DIY Wooden Christmas Sign
Are you looking for a unique and meaningful addition to your Christmas decor this year? We’ve got the perfect project for you – this Christ the Savior is Born – DIY wooden Christmas sign! With our easy to follow tutorial and free printable template, you don’t need any fancy tools or skills to create this beauty!
If you’re like us, then you probably love getting crafty during the holidays and creating your own DIY farmhouse Christmas decor. So let’s get started with this beautiful handmade sign for a special touch to your home this holiday season.
Can you believe it’s Christmas time again? Where does time go? This year I wanted to make a large farmhouse Christmas sign to place over our stockings and I think this is such a good one!

I love that through the insanely long shopping list and hustle and bustle of getting ready for Christmas I can easily be reminded of the real meaning of Christmas whenever I pass by this sign. It’s so easy to forget when Christmas has become so commercialized.
These 3 wood boards hung around our garage for almost a year, but they were perfect to make a DIY wooden Christmas sign! And it didn’t take very long to make.
Supplies Used for Christ the Savior is Born DIY Wooden Christmas Sign
As an Amazon Associate, I earn from qualifying purchases. I also may earn from other qualifying purchases with other companies or get free product to review and use. All opinions are my own.
- Wood – I used (3) 6″ pine boards measuring 46″ long (Home Depot can cut them down for you!)
- Scrap Wood Braces – I used (3) scrap 4″ fencing, each measured about 14″ long
- Screws – 1″ – 1.25″ screws to attach the wood braces to each of the boards
- 220 Grit Sandpaper
- Black Paint
- White Paint
- Large Paint Brush to paint the sign
- Small Artist Paint Brushes to paint the design (or a Sharpie Paint Pen if you aren’t comfortable with a brush!)
- Graphite Paper
- Scotch Tape
- Scissors
- Pencil
- Printable Template
Now you’re probably thinking, “How did you go about painting all of the words? There is no way I have the materials or time to do that!” Well, guess what! I bet you do, and I’m going to show you how! If you can color within the lines of a children’s coloring book, you can make a DIY Christmas sign!
A while back, I wanted to make DIY farmhouse signs as gifts. I searched for days for a decent tutorial on how to paint a farmhouse sign.
There were plastic stencils or Silhouette machines to buy or papers to print out and a crazy time consuming way to transfer a quote onto wood. Since I was on a budget I chose the cheapest route.
Man, one sign took me almost a full day between creating the saying, transferring the image and painting it on. I was worn out and so not ready to make the second sign. There had to be an easier way without spending very much money.
I knew about graphite paper, but I was apparently too lazy to go to the store and get some. For some reason laziness always makes more work. 😉
The next time I had a sign idea in my mind I was ready to make the trip to the store to buy graphite paper (wow, my true home body spirit is showing now). I’m so glad I did! Making these adorable wood signs are such a breeze!
Here is how to easily make your own DIY wooden Christmas sign (mine is 46″ long x 16.5″ tall) — I did the hard work for you! Use this FREE template to make your own farmhouse Christmas wood sign! (This template is for personal use only. Thanks!)
How to Build Wood Christmas Sign
Cut the fencing boards down to 46″ long, then cut 3 wood braces out of the leftover wood. They don’t have to be perfect, but long enough to brace together the 3 boards. You can also have them cut at Home Depot especially if you don’t have the tools.
Next, lay the fencing boards face down on a smooth and flat surface to create the shape of the sign. Spread the braces out on the back of the sign (one brace in the center, one on the left, and one on the right.) Make sure they are going perpendicular to the fencing boards and that they are touching all 3 boards.
Screw the braces into the sign to hold the sign together. We used 6 screws for each brace. This guide on how to build a pallet board to paint is a similar method! And once the sign was built, we gave it a light sanding with 220 grit sandpaper to smooth out the rough edges, and then wiped the dust away.
How to Paint DIY Wooden Christmas Signs
After assembling the wood sign, it’s time to paint! First, start by painting the entire sign with black paint. Don’t worry about getting a perfect coat, as this will add to the rustic look of the sign. Let the paint dry completely.
Then apply 2-3 coats of white paint over the black layer, allowing each white coat to dry before adding another one. For a rustic distressed look, lightly sand the painted sign so some of the black paint is showing. (If you don’t want a distressed farmhouse sign, skip the black paint and the sanding.)
Print DIY Christmas Signs Template

Would you like to save this?
While the paint dried, I printed off the template and taped it together. The best way to do this is to cut off the small 1/4″ border on the right of all of the pages and bottom sides of the 1st four pages. Then line up the overlapping text and tape it together, piece by piece. I did the top four pages and the bottom four pages and then attached both rows together.


Place the template where you want it and tape it into place at the top. Then place the graphite paper (darkest side down) under the template. Use a pencil or pen to trace around the outline of the text. Since the graphite paper is much smaller than the template, I did one section and then moved it to the next until it was all transferred onto the boards. Once the outline is traced onto the wood, remove the template.
With a small paintbrush and the black paint, paint the words onto the sign. I used the outline as a guide but didn’t always stay in the lines. After one coat was dry I quickly touched up any places that needed another coat.
**If you feel more comfortable with a pen than a paintbrush, you can use a Sharpie paint pen instead! Here’s a great tutorial on how to paint farmhouse signs, including using graphite paper and a paint pen.
After the black paint dried completely I lightly sanded everything once again. This time I looked for any mistakes I made that could be “erased” by the sandpaper. That’s the great thing about distressing afterward. When mistakes are made painting on the letters, it can easily be fixed and it only adds to the rustic farmhouse character of the sign.
You can also adjust the size of the template in your print settings if you are wanting a smaller sign. Also, I originally wanted a line underneath “Christ the Savior”, but since I used 3 boards instead of one solid piece of wood, I left the line out. Here is the template for that.
I absolutely love my new sign and know that you will enjoy yours too!


Here’s a list of our favorite Christmas sayings for signs that you can choose from that captures the true meaning of Christmas. You can also paint your own Merry Christmas standing sign that you can easily move around your home.
If you don’t want to do your own sign, we’ve curated this list of beautiful DIY wooden Christmas signs and cheerful reindeer Christmas signs. You should also check out these Jesus Christmas signs and Christian Christmas signs to serve as a reminder of what Christmas is all about.
Yes, we all need a little reminder of what Christmas is all about and a good DIY Christian Christmas sign can do just that. Please share this tutorial with family and friends who would love to make a Christmas sign as well!

Christ the Savior is Born - DIY Wooden Christmas Sign
Create DIY wooden Christmas signs like this beautiful "Christ the Savior is Born" sign with our easy tutorial and free printable template.
Materials
- Wood – (3) 6″ pine boards measuring 46″ long
- Scrap Wood Braces – (3) scrap 4″ fencing, each measured about 14″ long
- Screws – 1″ – 1.25″ screws
- 220 Grit Sandpaper
- Black Paint
- White Paint
- Sharpie Paint Pen
- Graphite Paper
- Scotch Tape
- Pencil
- Printable Template
Instructions
- Cut the fencing boards down to 46" long, then cut 3 wood braces out of the leftover wood. They don't have to be perfect, but long enough to brace together the 3 boards.
- Next, lay the fencing boards face down on a smooth and flat surface to create the shape of the sign. Spread the braces out on the back of the sign (one brace in the center, one on the left, and one on the right.)
- Make sure they are going perpendicular to the fencing boards and that they are touching all 3 boards. Screw the braces into the sign to hold the sign together. Once the sign is built, give it a light sanding with 220 grit sandpaper to smooth out the rough edges then wipe away any dust.
- After assembling the wood sign, paint the entire sign with black paint. Let it dry completely then paint over it with 2-3 coats of white paint. Let each coat dry before adding another one.
- For a rustic distressed look, lightly sand the painted sign so some of the black paint shows through the white layers. If you prefer a clean and polished look, skip the black paint and sanding.
- Print off the template and tape it together by cutting off the small border on each page and lining up the overlapping text. Tape it to the top of the sign, then place a sheet of graphite paper (darkest side down) under the template and trace around the letters with a pencil or pen.
- Remove the template once all letters are transferred onto the wood, then use a small paintbrush and black paint to fill in the letters following your traced outline. You can also use a Sharpie paint pen for this
- After the first coat of black paint is dry, touch up any areas that need another coat. Once completely dry, lightly sand the sign again to distress and fix any mistakes made while painting.
- Enjoy your new DIY wooden Christ the Savior is Born Christmas sign with a meaningful message that captures the true spirit of the holiday.
Recommended Products
As an Amazon Associate and member of other affiliate programs, I earn from qualifying purchases.


More DIY Home Decor Ideas
- Painted Fall Pumpkins
- DIY Faux Olive Tree Plant – How to
- DIY So I Can Kiss You Anytime I Want Sign
- DIY Wooden Christmas Village
- DIY Galvanized Bucket Decorating Idea for Spring

Follow us on YouTube to get more tips for painting furniture. Or share your project with us on our Facebook Group and be part of our community. See you there!