DIY Wooden Christmas Village
If love getting creative during the holiday season, then check out this super easy DIY wooden Christmas village! It makes a stunning table centerpiece for your Christmas decor, plus they double as candlestick holders!
With just a few simple supplies, you can add this charming piece to your DIY farmhouse Christmas decor and have a beautiful holiday display in no time! This project is perfect for all skill levels, so even if you’re new to crafting, you can still make this adorable wooden village.

I love how easy these were to make. You can easily make a couple of houses, or you can make a ton of houses for your village! It’s up to you! Plus they double as candle stick holders, but they look great without candles too!

I first got this idea from AngelaRoseHome on Instagram, who had seen this idea on The Navage Patch. I loved them so much, I had to make my own set! And you can too – just follow this simple guide and get crafting!
So gather some friends or family for a fun crafting day to make these beautiful wooden houses and create a cozy and festive Christmas village. Not only is it a great way to spend time together, but you’ll also have unique and personalized decorations to display in your home!
Supplies Used for DIY Wooden Christmas Village
As an Amazon Associate, I earn from qualifying purchases. I also may earn from other qualifying purchases with other companies or get free product to review and use. All opinions are my own.
- 4″ x 4″ x 8′ Lumber
- 1″ Drill Bit and Power Drill
- Miter Saw
- Sandpaper / Power Sander
- Paint / Stain (see below)
- Copper Couplers
How to Make a DIY Wooden Christmas Village
Our Christmas village is mainly made up of wooden houses, so we’ll start by making those. The process is quite straightforward. First cut the 4×4 piece of lumber in half so you’re only working with 4′ long pieces.
Drill Chimney Holes for Wooden Christmas Houses
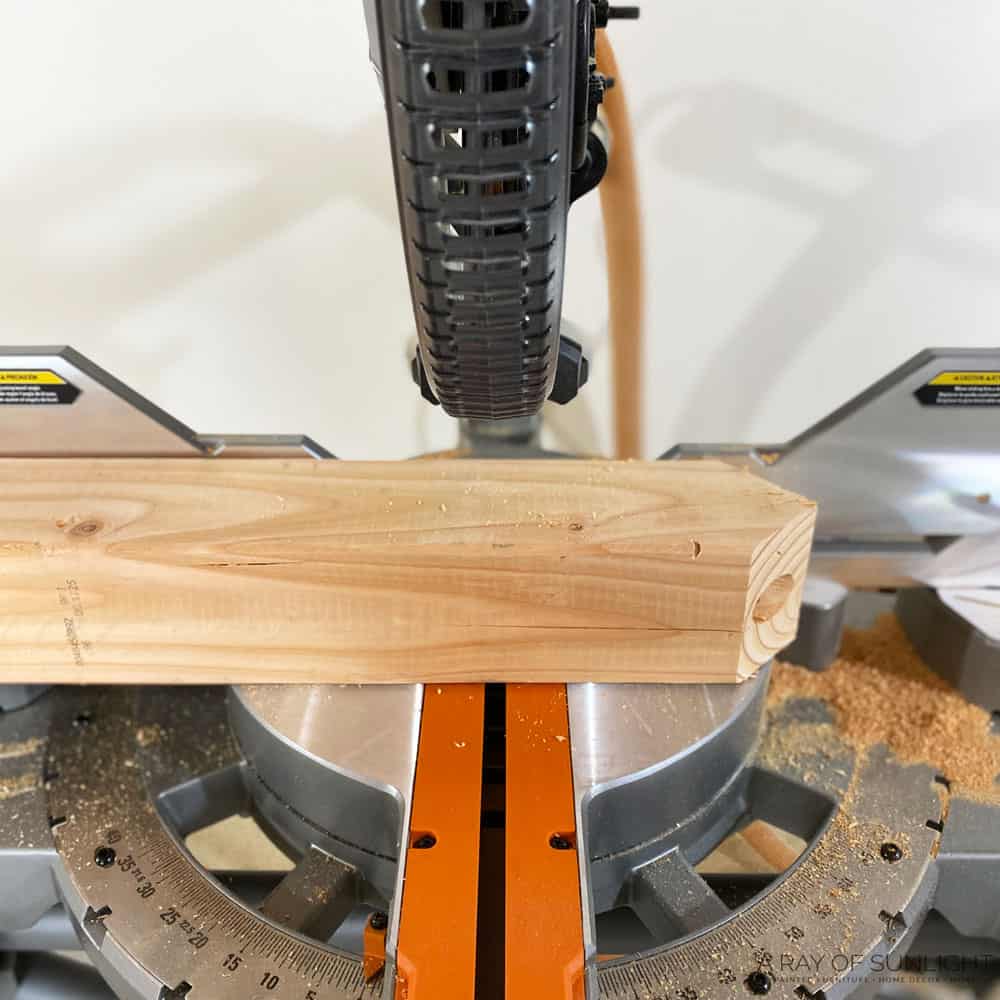
Then, using a 1″ drill bit, drill a hole on the top edge of the 4×4.
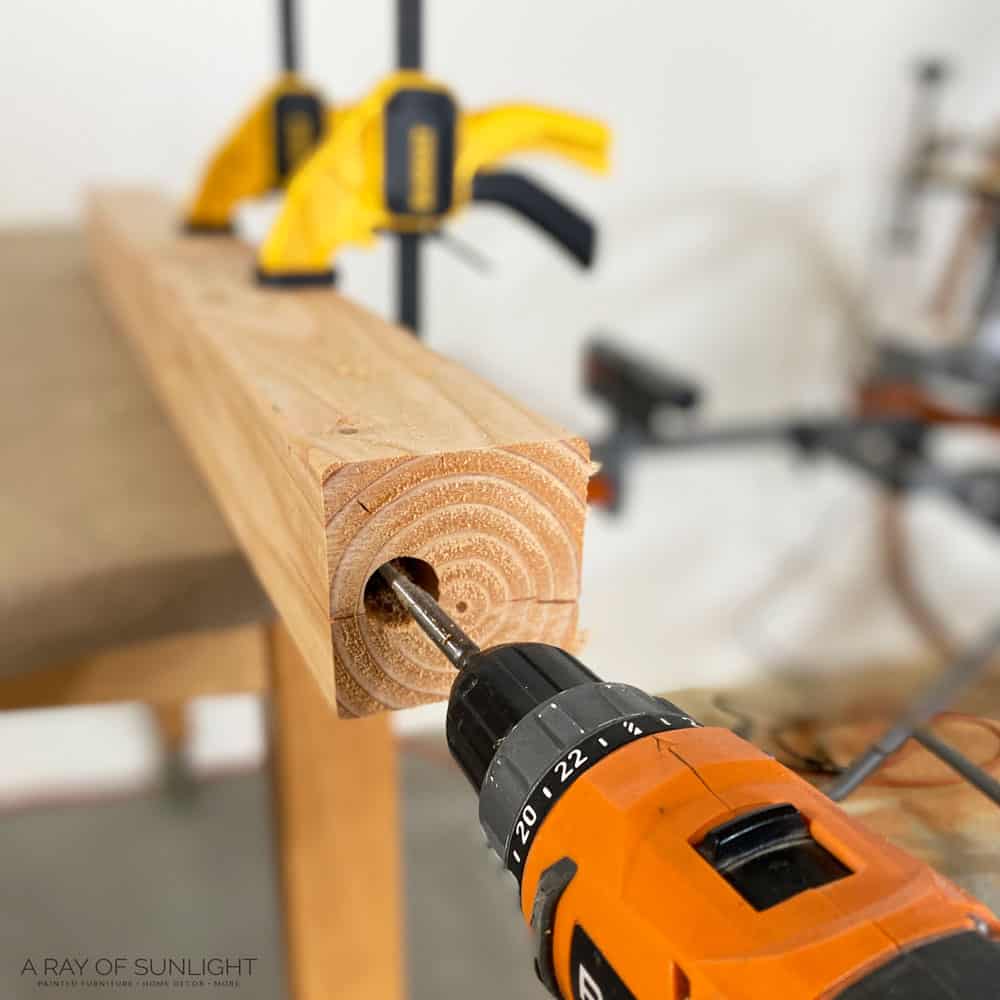
I clamped my 4×4 onto my table with a couple of clamps first. And then I drilled my hole a little off the center, so the chimney would sit on one side of the roof. I drilled probably 1.5″ to 2″ deep.
It’s easiest to drill the hole for the chimney when the surface is flat, so that’s why we drill before we cut the roof lines. Once you cut the roof lines, it’s slanted and doesn’t sit flat for drilling. So be sure to drill the hole first.
NOTE: Some of the houses didn’t get a hole for a chimney. I just left their roofs plain.
Cut Wooden Christmas Houses
Then mark the middle point of your 4×4 (at around 1.75″) so you know where to line up the miter saw. Then put your miter saw at a 45 degree angle and cut your roof line.
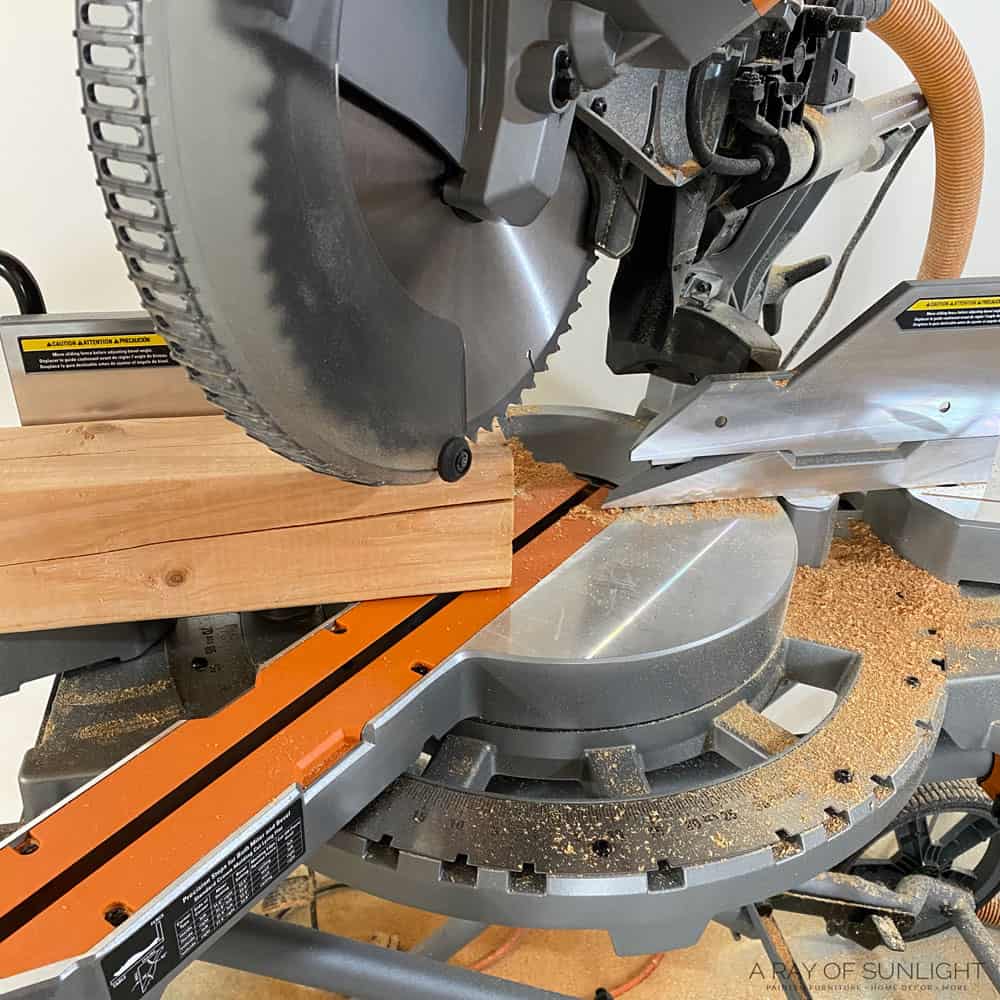
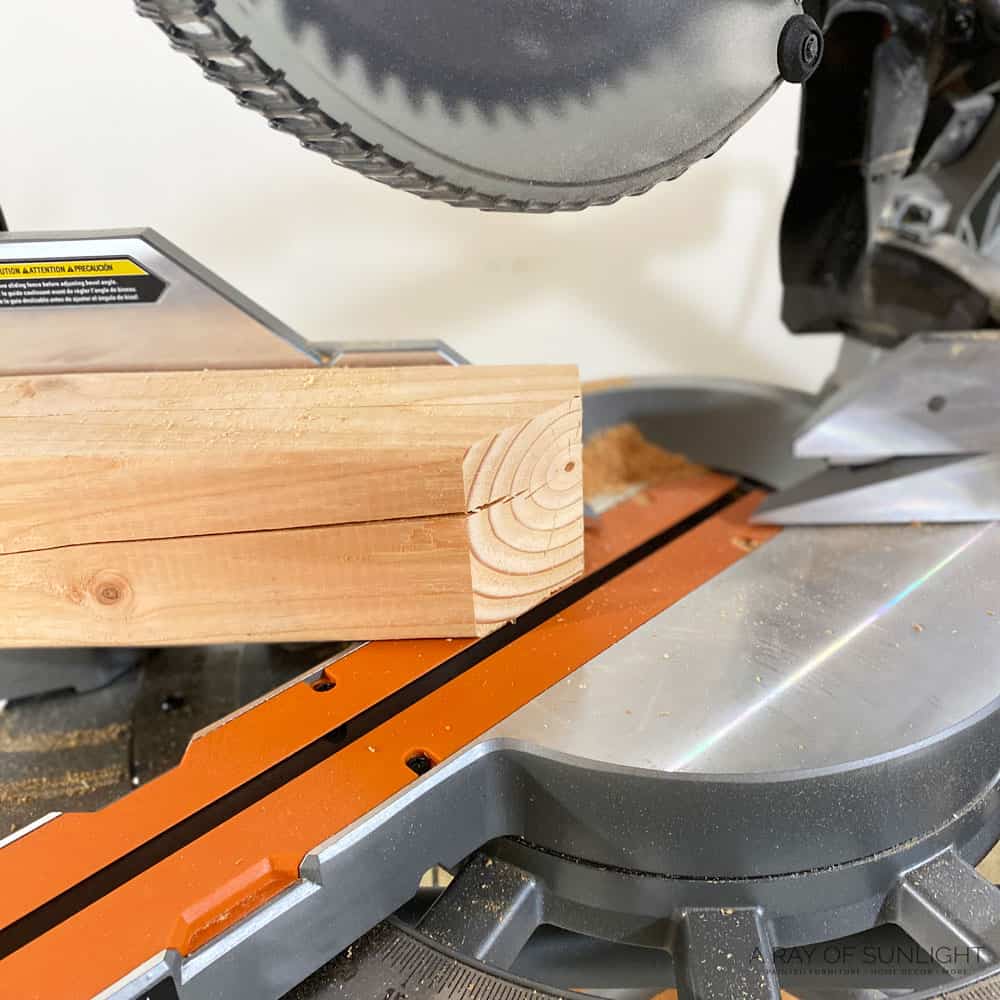
Line the miter saw up to cut from the middle of your block to the edge. Then flip over the block and cut the other side of the roof. Then cut the 4×4 at a regular 90 degree angle to make your house. Repeat this process for as many houses as you want to make.
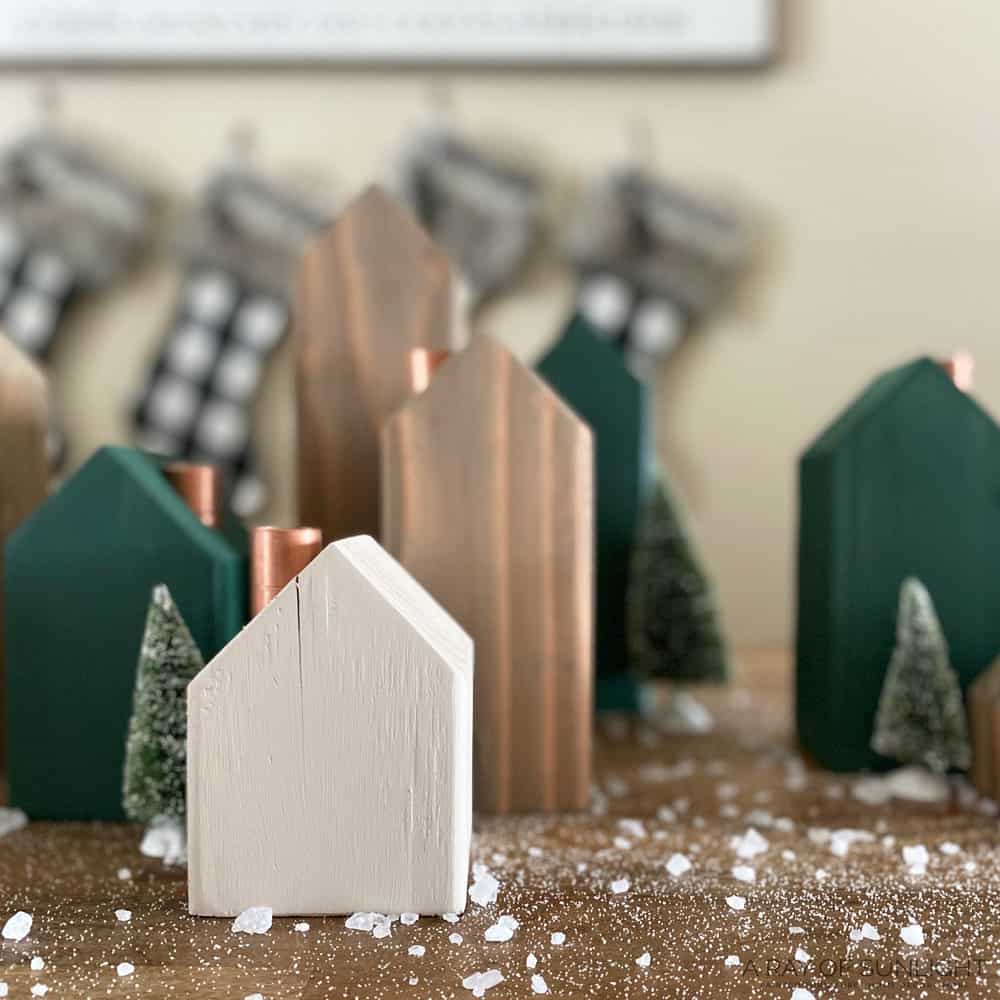
I cut some longer than others, and some pretty short. I wanted a variety of house sizes for my village. You can choose to cut your houses all the same size or mix it up like I did.
Sand Wood Christmas Village Houses
After all of your houses are cut out, sand your house down with some 220 grit sandpaper or your power sander. Sand them enough to remove any splinters so you have a smooth surface as well as not hurt yourself while working on the wooden houses.
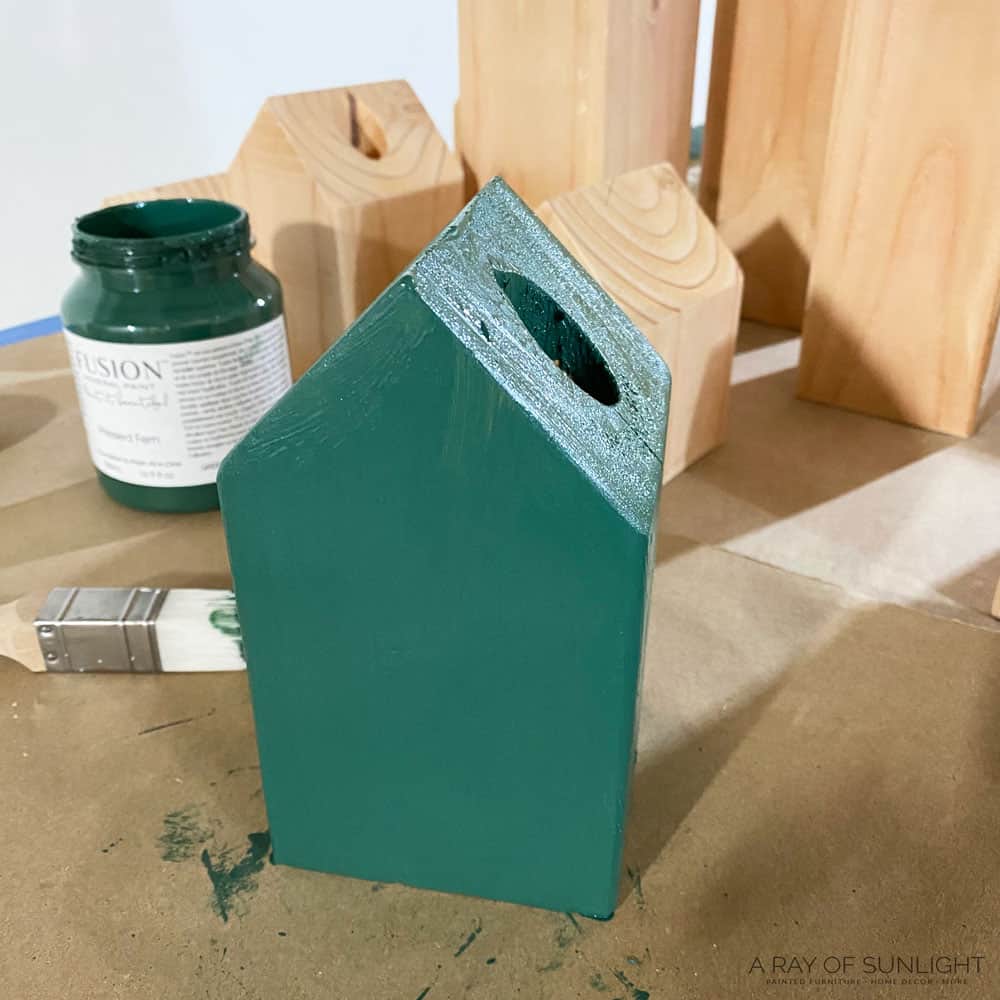
Paint or Stain DIY Christmas Village
Then paint or stain them as you wish! You can go with traditional Christmas colors like red and green, or go for a more neutral and rustic look with browns and whites. You can also follow your own color scheme and even get creative with patterns or designs.
Would you like to save this?
For my village, I used:
- Fusion Mineral Paint’s Pressed Fern
- Fusion Mineral Paint’s Cathedral Taupe
- Homemade Stain (see below)
Homemade Wood Stain Recipe
For the stain, I used a homemade stain made from watered down Valspar Antiquing Glaze. Literally, I mixed a small amount of the glaze with a bunch of water until it was a really really thin consistency. Then I tested it to make sure I liked the shade of stain.
I love using a homemade waterbased stain so I don’t have to worry about fumes. But it also dries super fast. You can use regular wood stain though! Check out the best wood stain options here if you want to go the traditional route.
Either way, let the stain/paint dry completely before moving onto the next step. You don’t want any smudging or smearing when you start adding the finishing details!
Put Coupling into DIY Christmas Village Chimneys
Place your copper coupling into the hole you made for the chimney. You can use some hot glue to secure the coupling a little better if you need to. Or you can also leave it unglued so you can remove the chimney later if you want.
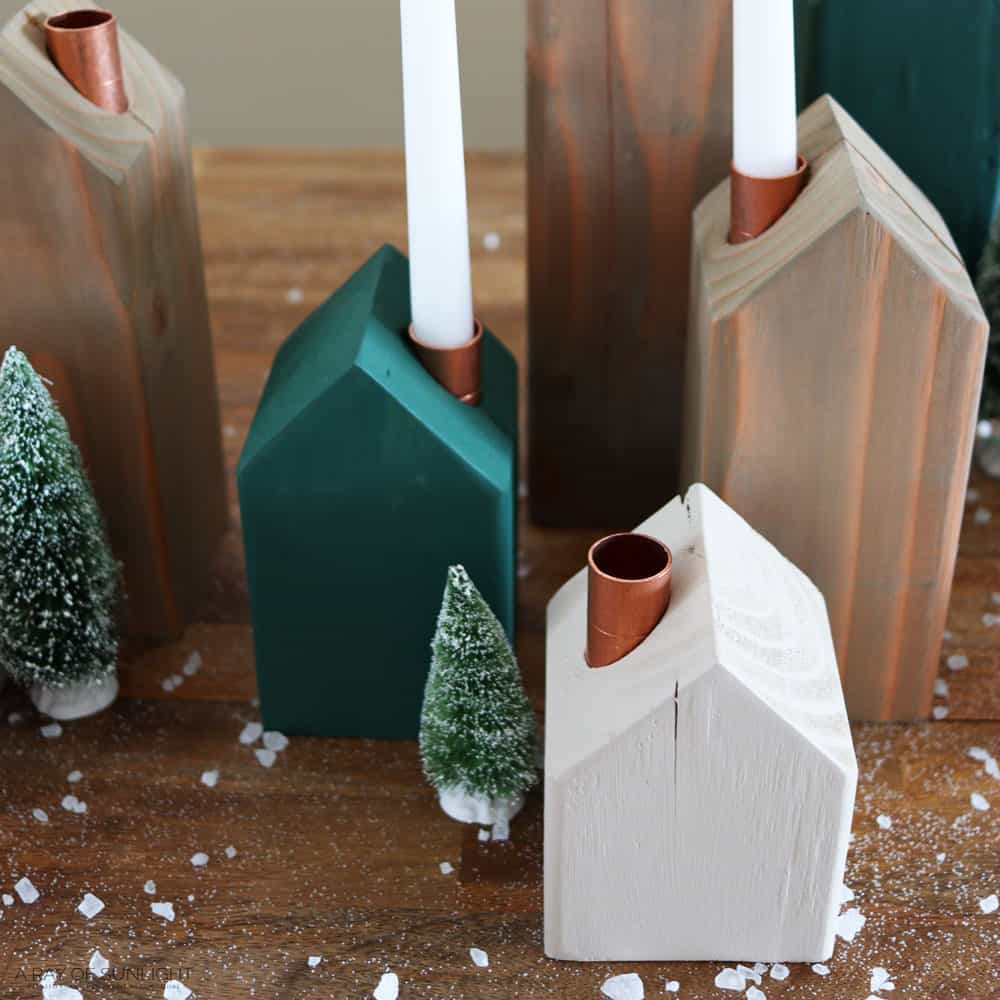
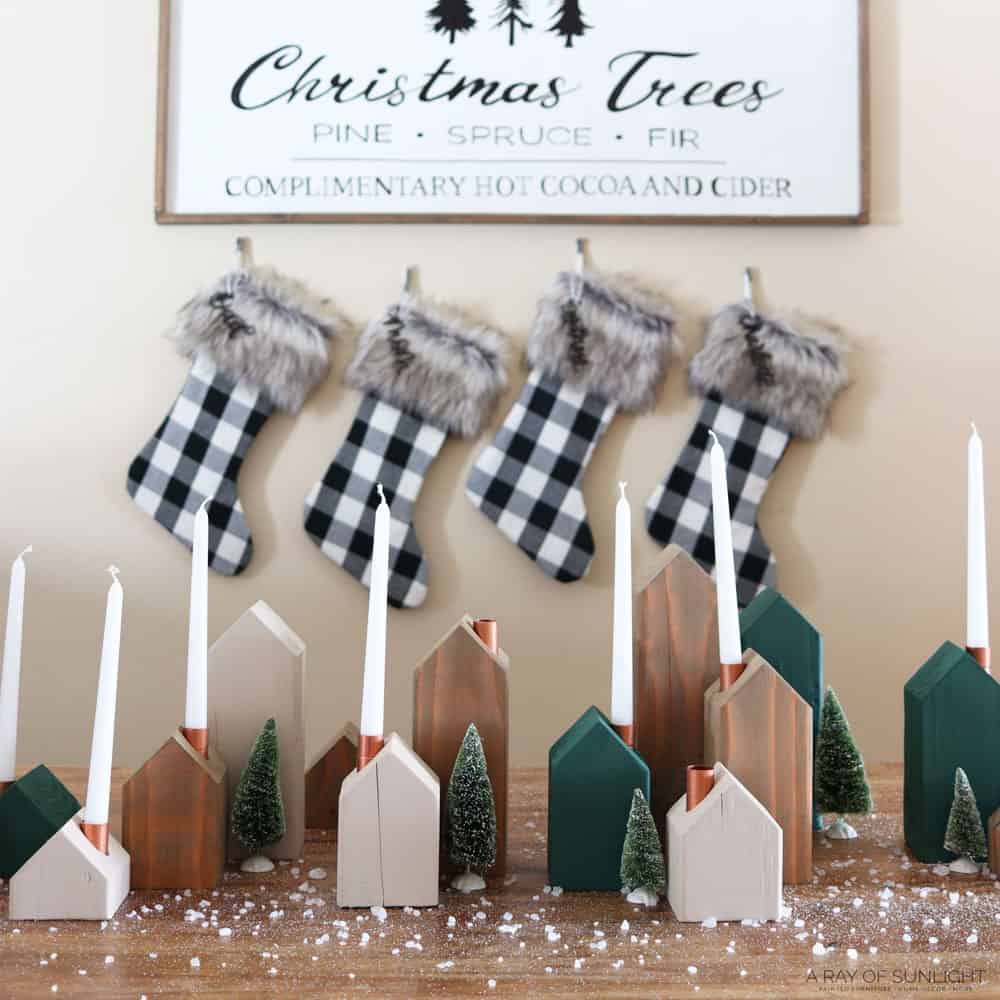
Mine fit well without any glue. Then you can put candles in some of the chimneys! Don’t they make the cutest and coziest candle holders? You can even put in candles in different colors or scents to add even more life and charm to your village.
Display DIY Wood Christmas Village
You’re all done!! Some ideas for where to put your DIY Christmas village:
- On your dining table as a centerpiece
- On an entryway table or sofa table
I decorated around my village with some bottle brush trees. And I sprinkled some regular table salt and rock salt on the table as fake snow. This village would look perfect paired up with small wooden Christmas trees and DIY wood Christmas trees to complete your unique winter wonderland.
There are so many options and inspirations for your DIY Christmas village decorations that are festive but still affordable. You can also add some more rustic Christmas decor for the perfect cozy and warm ambiance. Add a heartwarming element to your wooden Christmas village with these Christmas believe signs that ties your holiday setup together beautifully.
If you want more, here you can build your own Christmas village with your family using simple materials! You can use card stock to make your DIY Christmas village and decorate however you want! Consider these Christmas village houses to paint for a fun activity and unleash your creativity.
If you want ready made decor, heck out our charming selection of Christmas village houses, each one a delightful addition to your seasonal decor, inviting joy and wonder. Here are wooden Christmas village houses in all sorts of styles and sizes, so you can mix and match to create a collection that’s your vibe.

DIY Wooden Christmas Village
This DIY Wooden Christmas Village guide will help you make charming wood Christmas village houses that also work as candle holders.
Materials
- 4″ x 4″ x 8′ Lumber
- Sandpaper
- Paint / Stain
- Copper Coupling
Instructions
- Cut the 4x4 lumber in half to create two 4' long pieces. You can easily make multiple houses with one 4x4 piece!
- Clamp the wood onto a table or surface to secure it, then use a 1" drill bit and power drill to create a hole on the top edge of the 4x4. This will be where the chimney sits.
- Mark the middle point on your wood (around 1.75"), set your miter saw to a 45 degree angle, and cut along that line to create the roof of the village houses. Flip over the block and cut the other side of the roof, then finish up by cutting at a 90 degree angle to make the house shape. Repeat this step for as many houses as you'd like to make.
- Smooth out the surface of each wooden house with sandpaper or a power sander to remove any splinters and create a smooth surface. This will also make it safer to handle while working on the houses.
- Paint or stain your houses using whichever color scheme or design you prefer. Get creative and have fun with it!
- Insert copper couplings into the drilled holes for each chimney, and use hot glue if desired to secure them in place. This will serve as a cute and functional holder for candles.
- Display your finished DIY wooden Christmas village in any area of your home for a festive and charming touch. Consider adding some fake snow, bottle brush trees, or other decorations to complete the look.
More DIY Christmas Decorations
- Farm Fresh Christmas Tree Sign
- Merry and Bright Wooden Sign – Dollar Tree Decor
- Christ the Savior is Born Sign
- Homemade DIY Christmas Village
- DIY Merry Christmas Wood Sign
Follow us on YouTube to get more tips for painting furniture. Or share your project with us on our Facebook Group and be part of our community. See you there!