DIY Believe in the Magic of Christmas Sign
Make your own DIY Believe in the Magic of Christmas sign using a couple of supplies you might already have around your home! Yes, you can do this without a Cricut, Silhouette cutting machine or a stencil! Plus, we have a free template for you to make the process even easier.
This DIY farmhouse Christmas decor is a simple and cost effective way to add a touch of rustic charm for the holidays, perfect for those who love to create and decorate on a budget. So let’s start crafting!

The holiday season is the perfect time to get creative and make your own decorations for a cozy and festive home. “Believe in the Magic of Christmas” – this phrase really captures the holiday spirit so how about making a sign with this inspiring message?

I love these small wood signs for any holiday! They are really easy to make, and are the perfect size to add to any existing decor. They also make amazing neighbor gifts for Christmas, or a mother’s day or birthday gift as well!
Plus, I’m including the exact template that I used to paint on this wood sign, so you can make your very own DIY Believe Christmas sign. Again, it’s easier than you think, so don’t worry and just have fun while doing it yourself or with friends and family!
Supplies Used for DIY Believe in the Magic of Christmas Sign
As an Amazon Associate, I earn from qualifying purchases. I also may earn from other qualifying purchases with other companies or get free product to review and use. All opinions are my own.
- 1″ x 2″ x 8′ Furring Strip (you don’t need the whole 8′)
- 1″ x 6″ Common Board
- Primer
- Believe in the Magic of Christmas FREE Template
- Paint and Stain (see below)
- Graphite Transfer Paper
- Sharpie Paint Pen
- Brad Nailer and 1 1/4″ Nails (Or a hammer and some nails)
How to Make DIY Believe Christmas Sign
For these DIY Christmas wood signs, we’re going to start from scratch and create the frame first. Have this 1″ x 2″ x 8′ furring strip ready – again, you won’t need the whole 8′ strip. We’ll cut the strip into 4 pieces to make the frame.
Measure and Cut Wood for Sign
First, measure and cut the wood for your sign. I cut the furring strips into:
- (2) 5 1/2″ pieces
- (2) 7″ pieces
And I cut the 1″ x 6″ common board at 5 1/2″ long so it made a square. (Remember common boards aren’t cut at exactly 6″ or whatever it says. My common board was cut at 5 1/2″ wide when I bought it.) Then I sanded the edges of all of the pieces to get rid of the splinters on the ends.
Paint and Stain Wood Sign
Next, I painted the 1″ x 6″ square with primer and white chalk paint. I used BIN shellac based primer to prevent the knots from bleeding and turning yellow. And I love to use chalk paint on my signs because it makes it easier to paint the letters onto!
To stain the frame, I used a homemade stain made from watered down Valspar Antiquing Glaze. Literally, I mixed a small amount of the glaze with a bunch of water until it was a really really thin consistency. Then I tested it to make sure I liked the shade of stain.
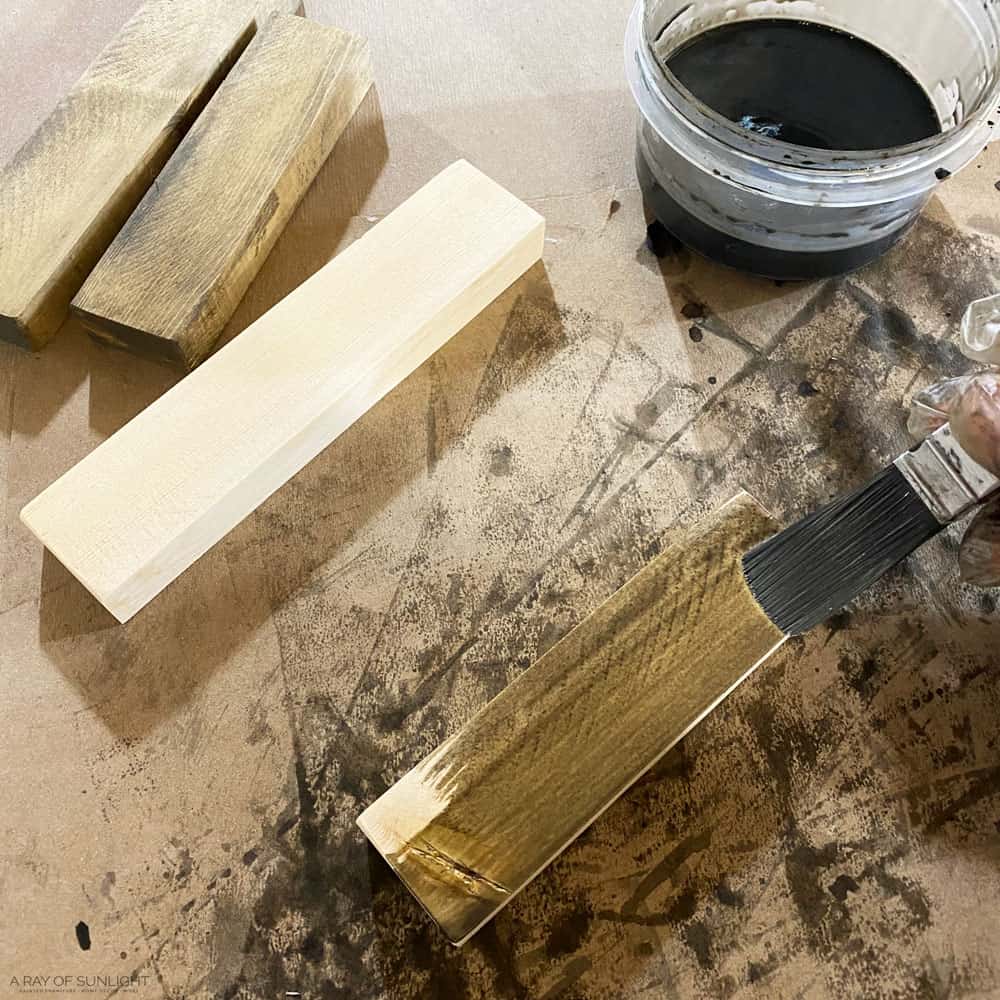
I love using a homemade waterbased stain so I don’t have to worry about fumes. But it also dries super fast. You can use regular wood stain though! Either way, let the stain dry completely before moving onto the next step.
Print Believe in the Magic of Christmas Template
While the paint and stain are drying, print out the FREE “Believe in the Magic of Christmas” template. Then cut it out on the lines so it fits the 5 1/2″ x 5 1/2″ wood square you’ve painted white.
How to Paint Christmas Believe Sign Template
On your dry square piece of wood, lay the transfer paper with the dark side down. Then line up the template so the words are where you want it to be on the sign. Tape the template to the sign so it doesn’t move.
Then use a pen or pencil to trace the outline of the letters onto the wood. When you lift up the template, you’ll see an outline of the letters! Now grab your Sharpie paint pen (and a regular sharpie for the smaller letters) and paint the letters in!
For a guide on painting letters on wood signs, here’s how to paint farmhouse signs. Or you can also get wood cut outs from Dollar Tree like what we did in this DIY Believe sign. If you’re comfortable with freehand lettering, check out this Merry Christmas standing sign for inspiration.

Would you like to save this?
Assemble Believe Wood Sign and Frame
Once the letters are all painted on, let the paint dry completely. Then nail the frame to the sign! Attach your two short sides of the frame to the 1″ x 6″ wood sign. Then attach the longer sides to the wood sign and the other sides of the frame.
Get more details on how to make a wood sign here! You can also check out these fun wooden Christmas signs that are readily available. We’ve also listed our top picks of Christian Christmas signs to bring the Christmas spirit while incorporating elements of faith.
You’re all done!! Enjoy your new sign!!


More Before and After Makeovers
See All >
Click any of these “before” photos below to view the “after” of that makeover.


Check out other Christmas sayings for signs here that you can use. Here are wooden Christmas door signs that you can hang outside to welcome your guests this Christmas season. And put up some reindeer Christmas signs to add a festive and cheerful feel!
Pair it up with rustic Christmas decor and farmhouse Christmas decor to create a welcoming and nostalgic atmosphere for your home. Then complete your magical winter wonderland with these Christmas village houses!

DIY Believe in the Magic of Christmas Sign
Materials
Instructions
- Start by cutting your furring strip into 4 pieces, 2 measuring at 5 1/2" and 2 at 7". These will make up the frame for your sign.
- Take your common board and cut it at 5 1/2" to create a square. Sand the edges to get rid of any splinters.
- Apply a primer on your square board. Then paint the board with white chalk paint for a clean base for the letters of the Believe in the Magic of Christmas sign.
- Stain the wood frames - you can use homemade water based stain or regular wood stain. Let the paint and stain dry completely before moving on.
- Print out the FREE "Believe in the Magic of Christmas" template and cut it out on the lines. Make sure it fits the wood square you've painted white.
- Lay the transfer paper with the dark side down on your painted square board. Line up the template and tape it down to prevent it from moving.
- Trace the outline of the letters onto the wood using a pen or pencil. When you remove the template, you'll see an outline of the letters on your board.
- Fill in the traced letters from the "Believe in the Magic of Christmas" template using a Sharpie paint pen. Use a regular sharpie for smaller letters if needed.
- Attach the frames to the square sign by nailing the short sides to the 1" x 6" board, and then attaching the longer sides to both the board and frame. Your Believe in the Magic of Christmas sign is now complete!
Recommended Products
As an Amazon Associate and member of other affiliate programs, I earn from qualifying purchases.


More Wood Sign Ideas
- Farm Fresh Christmas Tree Sign
- DIY Simple Christmas Sign
- Christ the Savior is Born – DIY Wooden Christmas sign
- Funny Christmas Signs
- DIY Merry Christmas Wood Sign

Follow us on YouTube to get more tips for painting furniture. Or share your project with us on our Facebook Group and be part of our community. See you there!