Painted Sewing Table With Silk All-in-One Mineral Paint
Today, we’re excited to talk about a fun and easy project that is perfect for those who love painted furniture. We’ll show you how to transform an ordinary sewing table into a beautiful piece of decor. This painted sewing table with silk all-in-one mineral paint is a makeover that anyone can do, regardless of painting experience.
Plus, using all in one paint makes this project a breeze, and the end result is truly impressive! If you haven’t tried it already, it’s one of the best types of paint for furniture for quick and easy results!
I’ve teamed up with some of my furniture painting friends to share Dixie Belle Paint’s new Silk Mineral Paint colors, test their new Bonding Boss primer, and have fun with a giveaway! Scroll down to the bottom of this blog post to enter, and to see everyone else’s brand new makeovers with Dixie Belle’s new paint colors! (Hint, they are good!!)

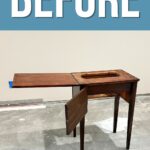
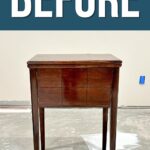
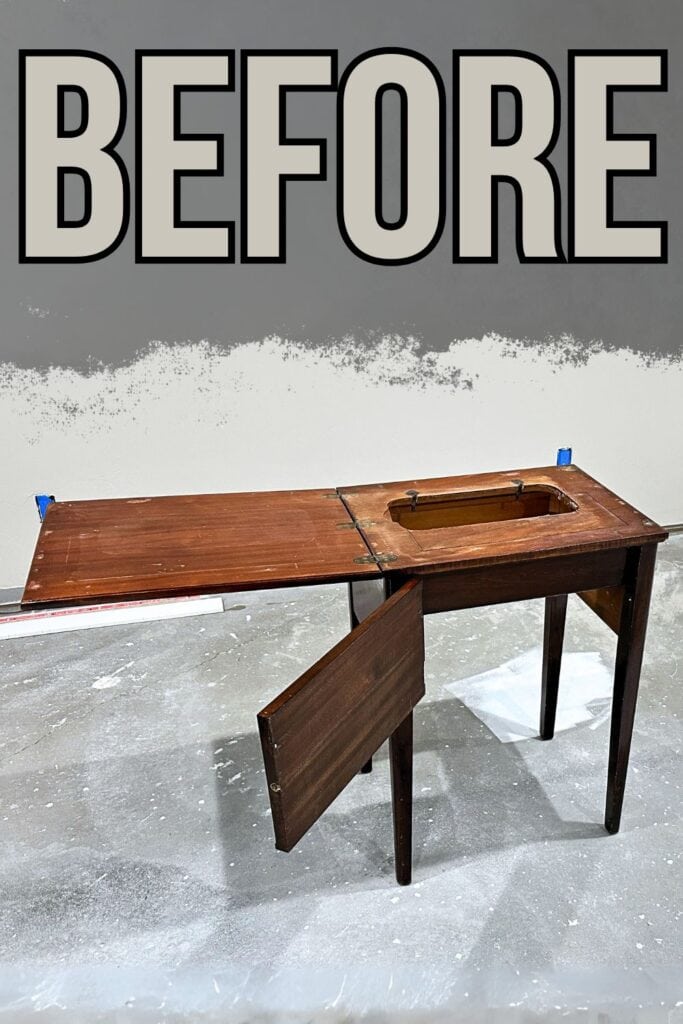
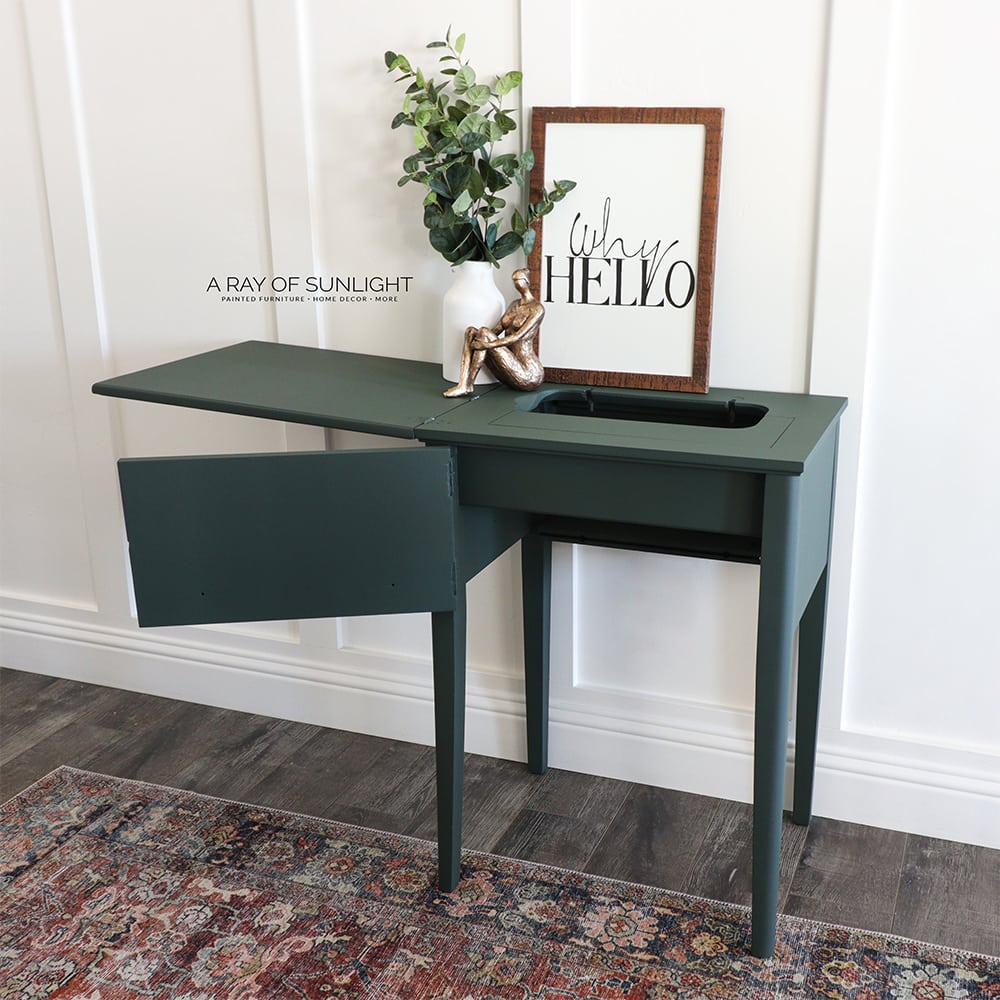
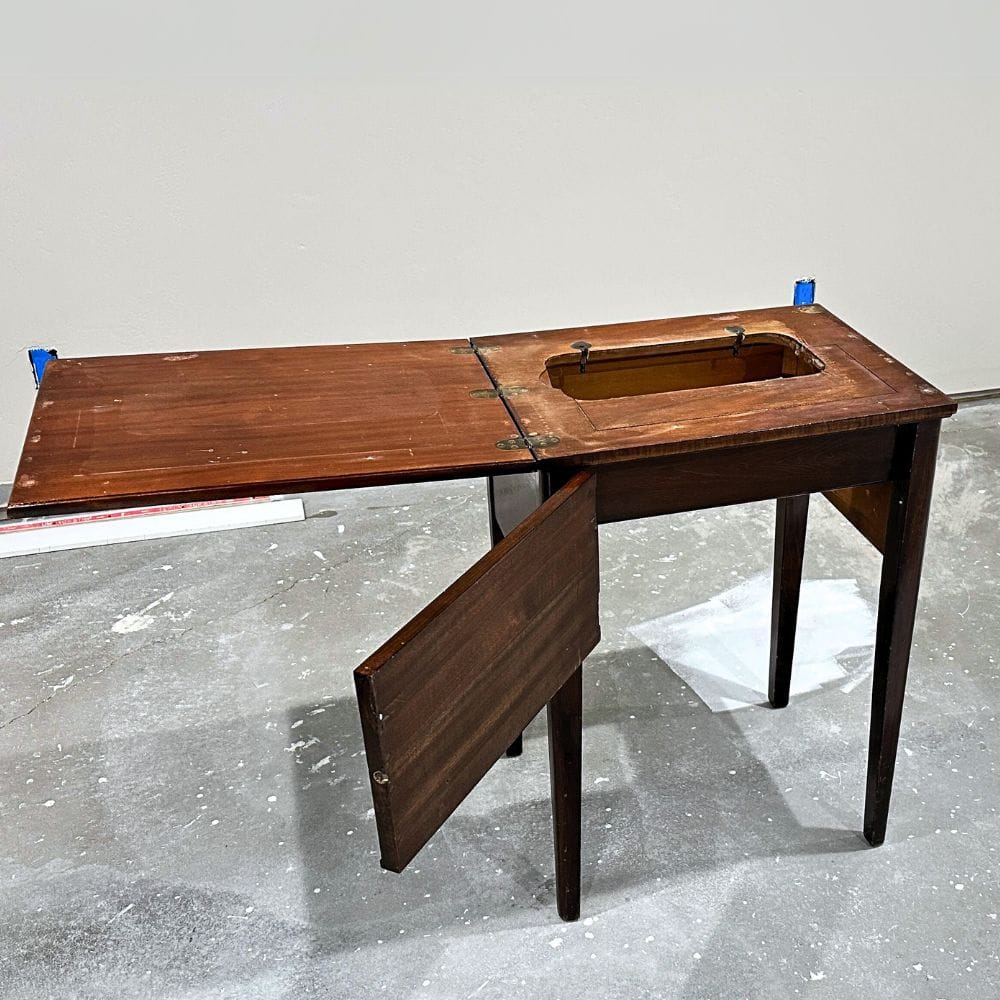
I bought this old sewing table at a thrift store for $10. No sewing machine in here, and new sewing machines won’t fit, so I’m gonna turn it into an accent table or end table for someone.
Oh, and a little shoutout, thank you Dixie Belle Paint for sponsoring this post and giveaway!
Scroll Down to Enter the $200 Dixie Belle Giveaway!

Supplies Used for Painted Sewing Table
As an Amazon Associate, I earn from qualifying purchases. I also may earn from other qualifying purchases with other companies or get free product to review and use. All opinions are my own.
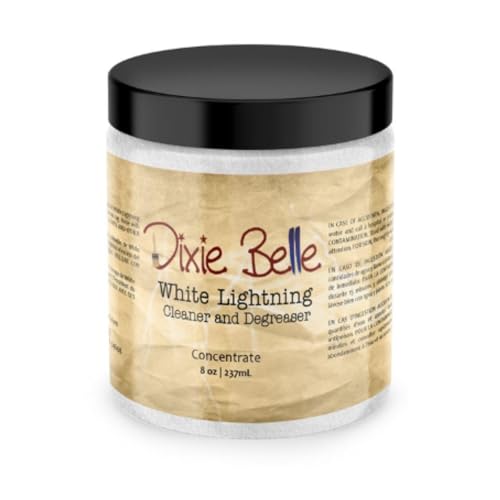
- White Lightning Dixie Belle Cleaner
- 220 Grit Sanding Screens (Use code RAY10 to get 10% off your order)
- SurfPrep Sander (3×4) (Use code RAY10 to get 10% off your order)
- Dixie Belle Bonding Boss Primer
- Mohair Roller
- Round Brush
- Dixie Belle Silk Paint in Acadia
- Paint Sprayer
- Paper Towels
Preparing Sewing Table Before Paint
First I cleaned it with white lightning Dixie Belle cleaner. Just mix the powder with hot water, and then wipe it on with an old rag to remove grime and prep the furniture for paint.

Unfortunately, this piece was refinished at some point, and the varnish had puddled in some areas. The finish was also very bumpy and damaged in some areas, so I sanded these areas all smooth with 220 grit sanding screens and my 3×4 SurfPrep sander.
Unfortunately, sanding through the finish usually means that we will have bleed through stains from the sanded areas, so I had to seal those areas very well to prevent stains from coming through the paint.
Priming Sewing Table with Dixie Belle Bonding Boss Primer
Dixie Belle Paint came out with a new primer called Bonding Boss that is a stain blocker and a bonding primer in one. It’s waterbased though so I have my doubts on how well it will work when pieces have very bad stains from the wood tannins. But I want to test it and see if it’s good or not.
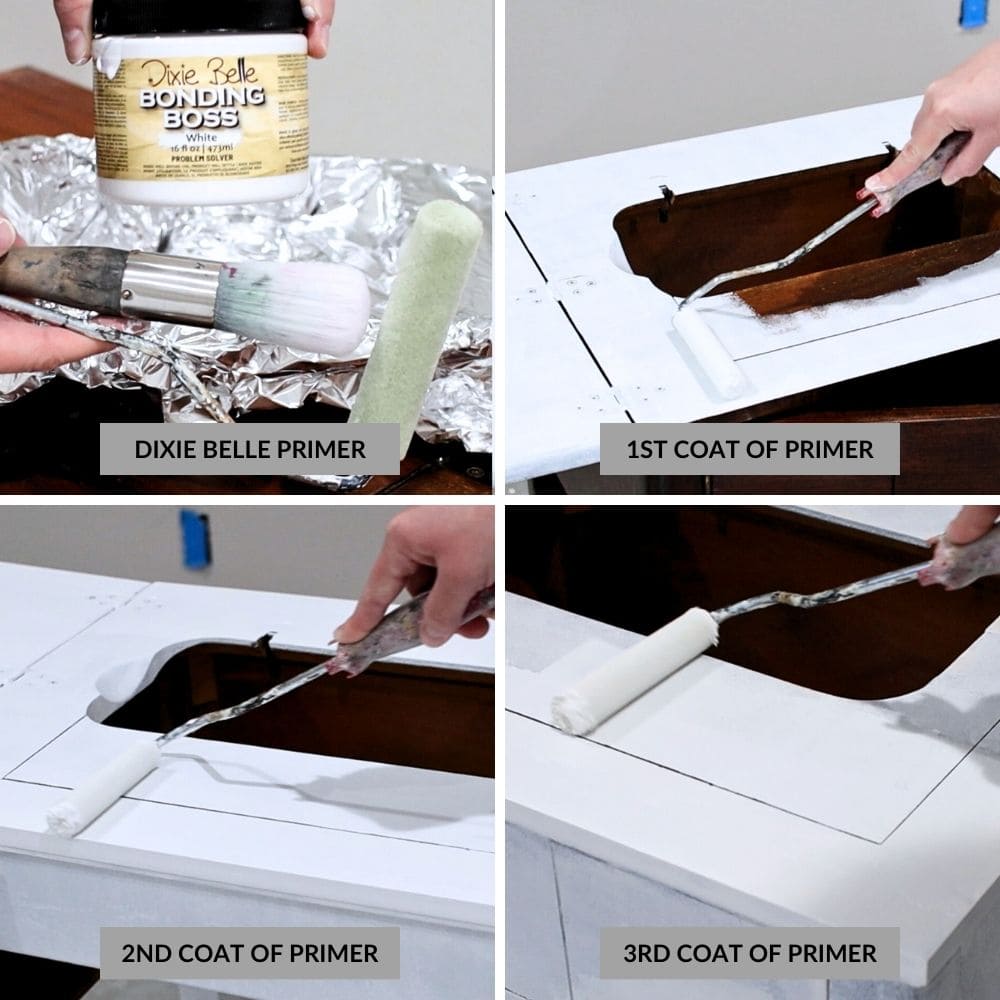
I primed the table with 3 coats of primer, using a mohair roller and round brush. I let the primer dry around 20 hours between each coat, which is longer than the recommended time, but I know waterbased primers that have any chance at blocking stains need a longer dry time between coats.
Here’s a list of the best paint brushes for painting furniture. A paint brush can make or break the look of your finished project, so don’t skimp here!
After the first coat, I could easily see a lot of bleedthrough stains all over. By the last coat, I could see faint stain lines, but it wasn’t pronounced. So, I can say it can block stains, but it takes a long time to do so.

And yes, I left the hinges on. Hinges honestly are a pain to put back on and have the doors work properly, so I have gotten in the habit of leaving them on. The proper thing though would be to remove them or tape them off so they don’t get painted.

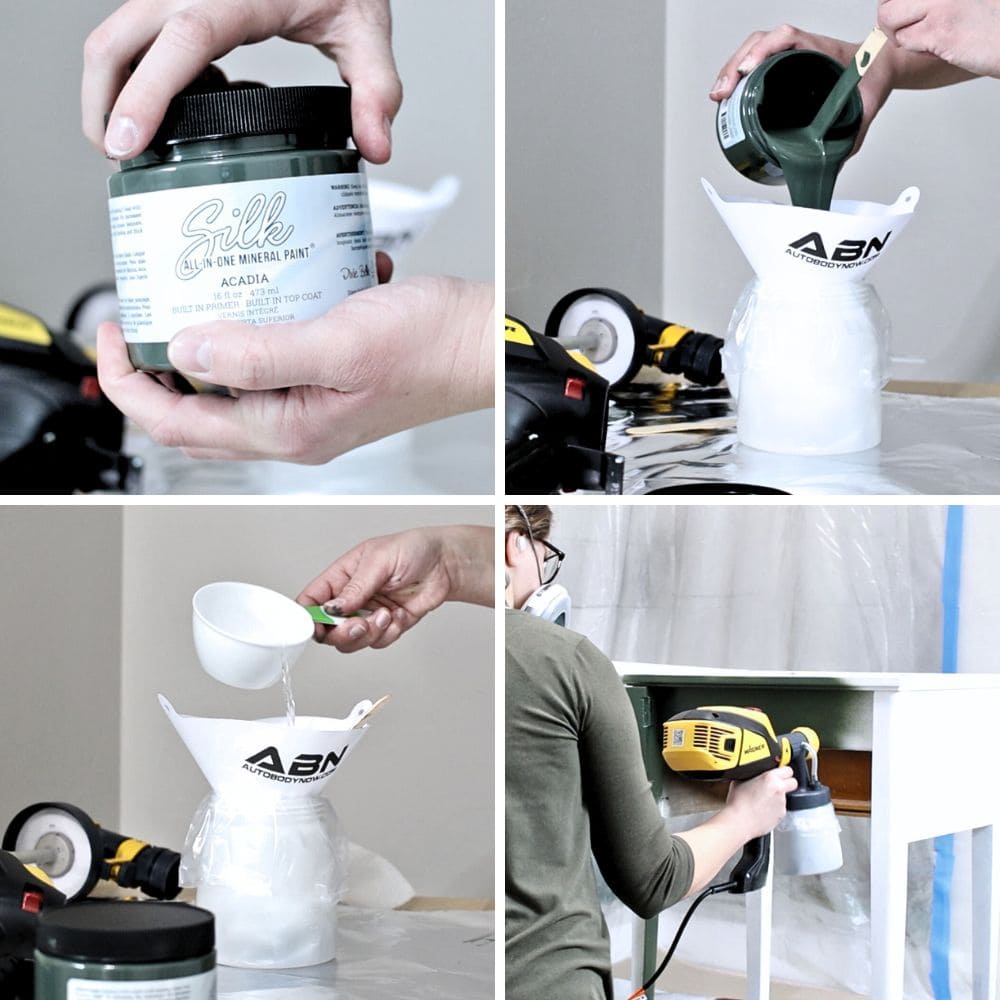
Painting Sewing Table with Dixie Belle All-in-One Mineral Paint
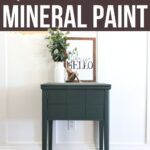
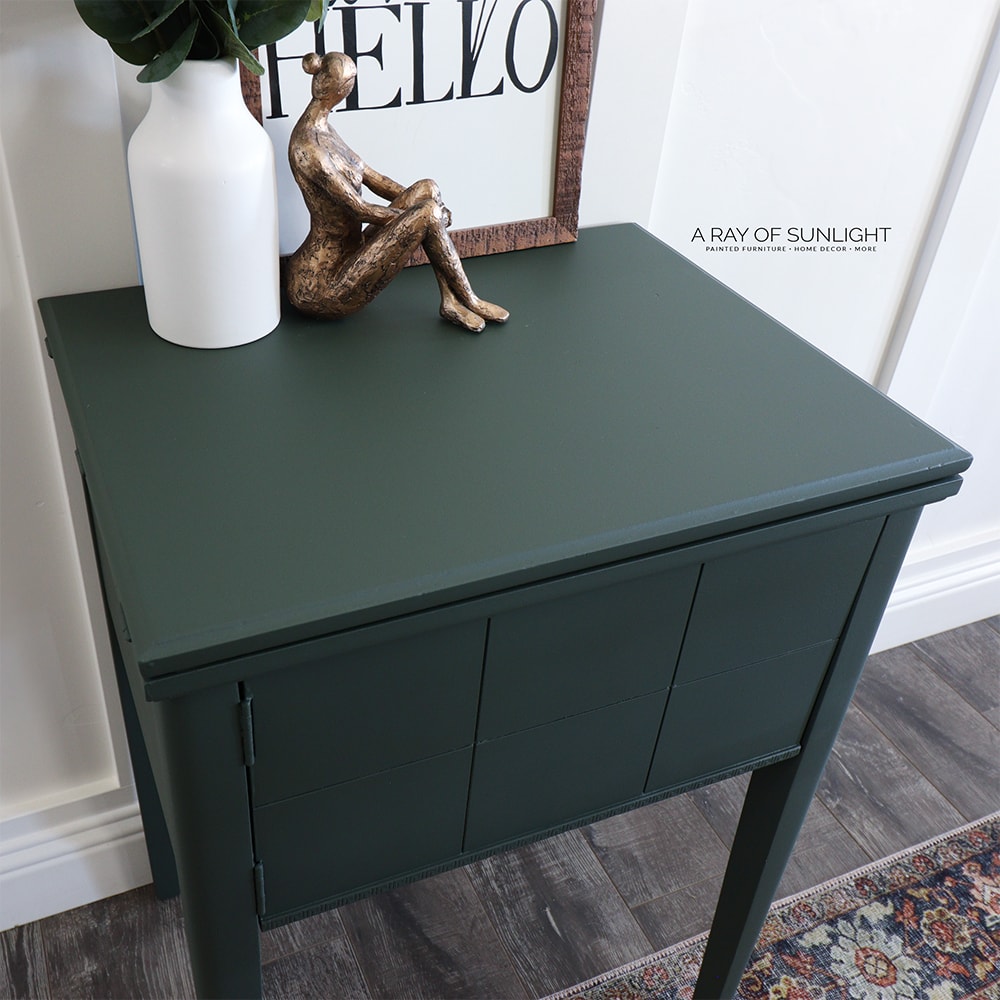
A day after the last coat of primer, I set up a makeshift paint booth and sprayed the beautiful new color of silk paint, called Acadia, onto the table.
I thinned the paint out by about 15% I think, but it still was thicker than I like to spray. I didn’t thin it more though because I didn’t want to mess with the integrity of this paint. Here is more information on how to thin paint for the Wagner FLEXiO paint sprayer.
It also has a stain blocking primer built in, and even though this is a darker color, I want it to keep blocking those stains that are coming though.
Would you like to save this?
I also sprayed the inside of the table in case anyone opens it up, I wanted it to look nice inside.
I let the paint dry for a couple of hours between coats, with everything open. Then I laid some paper towels on the top before I closed the top so the freshly painted surface wouldn’t stick together or get ruined, even though it was dry to the touch.
Once closed, I sprayed the areas that I couldn’t get, letting it dry for a couple of hours between coats.
This paint doesn’t require a topcoat, and honestly, I just wanted a quick and easy makeover here, so I opted to not topcoat this one…. I’ll probably regret that, or I would if I was keeping it. If I topcoated it, I would have sprayed it on. Here is how to spray polyurethane if you want to topcoat a project and make it more durable.
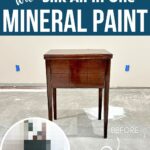
Here’s what it looked like before… and here’s what it looks like now!
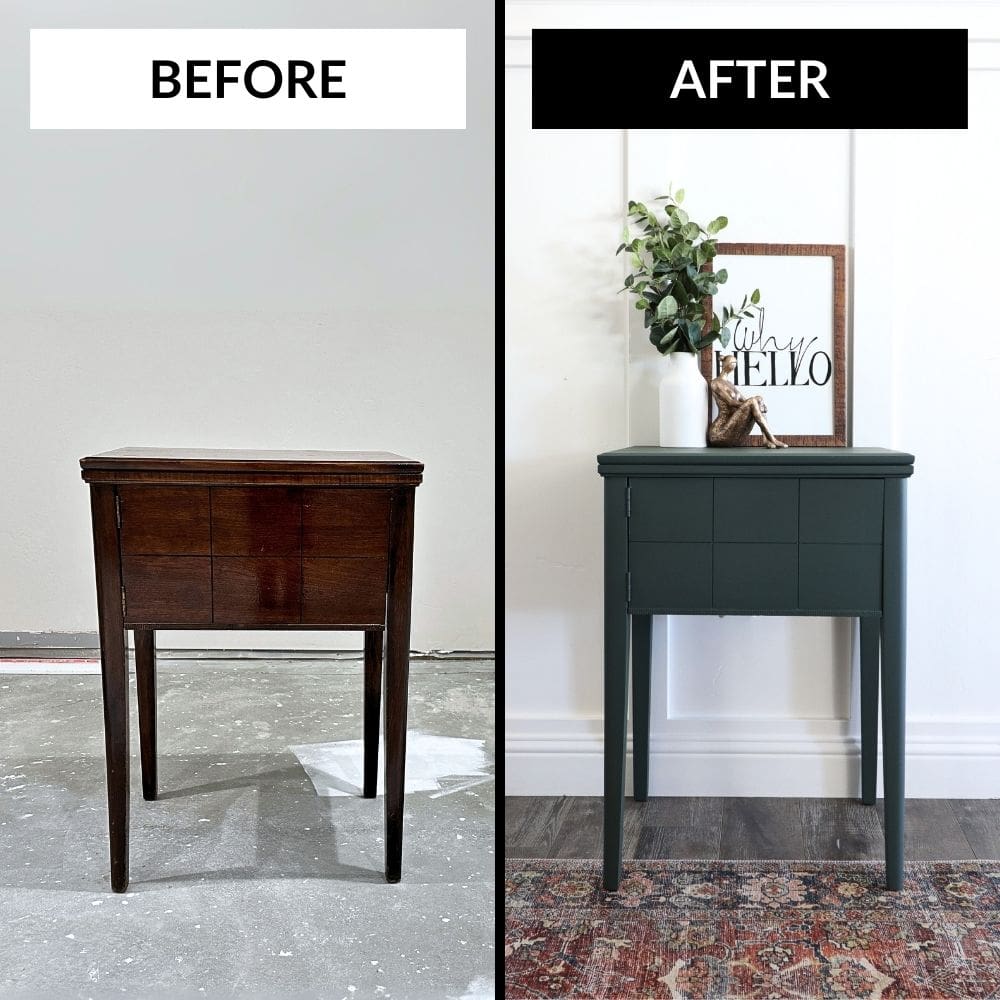
Isn’t it cute?? Painting furniture doesn’t have to be a long drawn out process for fun little projects like this!
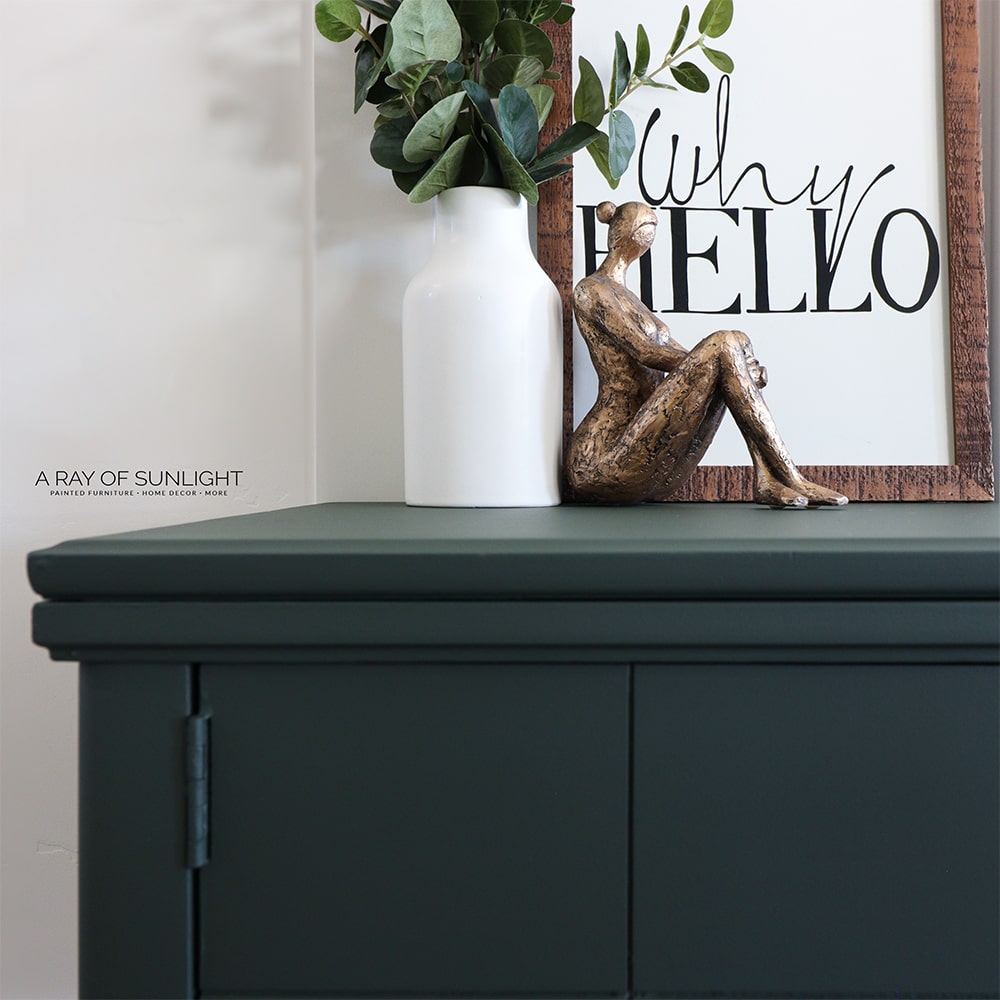
Dixie Belle Paint just came out with new colors, and this paint color is one of them. They knocked it out of the park on this. It’s such a good color! You can check out my Dixie Belle Silk Paint review for more of my thoughts on this paint.


Here’s our list of the best mineral paint for furniture, including Dixie Belle, for more details about each paint and which is the right one for your next project.
Also, in the end, the Bonding Boss primer and the dark silk paint didn’t let any stains from the wood come through. I’m not sure if it would still work if I topcoated this paint, because usually that’s when problems arise. Thankfully, it worked out, though!
Watch the full video of this makeover here, or keep scrolling to see the after photos of this project!
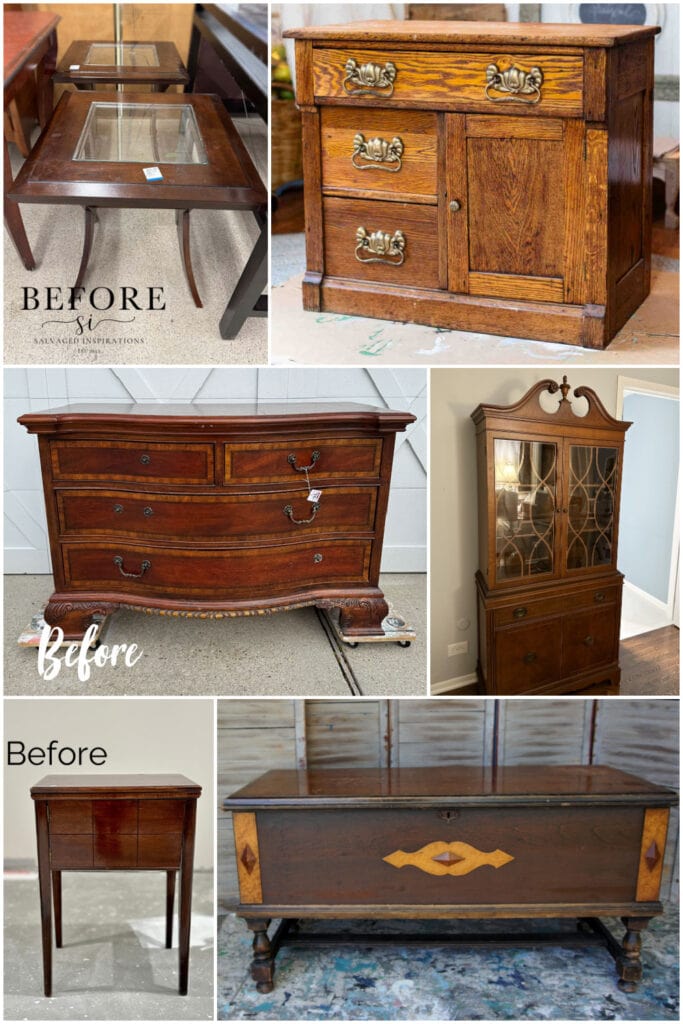
More Before and After Makeovers
See All >
Click any of these “before” photos below to view the “after” of that makeover.


For similar projects, here’s our list of old sewing machine table ideas. And now, without further ado, it’s time for some fun!
Enter the $200 Dixie Belle Giveaway here!

Visit these other furniture makeovers for 4 more chances to win the $200 Dixie Belle Giveaway!
- Painted Side Tables from Salvaged Inspirations
- Cabinet Makeover from Reinvented Delaware
- Painted Dresser from Confessions of a Serial DIYer
- China Cabinet Makeover from Living Large in a Small House
- Two Tone Cedar Chest from Petticoat Junktion
The winner will be randomly picked and announced on Tuesday, March 26th here on the blog. The winner has 48 hours to claim their Dixie Belle Giveaway before another winner is selected so be sure to check back! 🙂


Painted Sewing Table With Silk All-in-One Mineral Paint
This painted sewing table with silk all-in-one mineral paint makeover gets you a cute accent piece using Dixie Belle Paint's new color.
Materials
Instructions
- Start by cleaning the sewing table with Dixie Belle's White Lightning cleaner. Just mix it with hot water and wipe away any grime with an old rag to prepare for painting.
- If there are any rough or damaged areas, sand them smooth with 220 grit sanding screens and a sander before moving on to priming. This is for a smooth finish without any imperfections.
- To prevent bleed through stains, use Dixie Belle's Bonding Boss primer and apply 3 coats with a mohair roller and round brush. Make sure to let each coat dry for at least 20 hours before applying the next one.
- Use Dixie Belle's All-in-One Mineral Paint in the beautiful color of Acadia. Thin it out by about 15% and spray onto the table for a flawless finish. Don't forget to paint the inside for a complete look.
- Let the paint dry for a couple of hours between coats.
- This paint does not require a topcoat, so it's perfect for a quick and easy makeover. However, if you plan on using it a lot, a topcoat will help it last longer. Enjoy your beautifully transformed sewing table!
Recommended Products
As an Amazon Associate and member of other affiliate programs, I earn from qualifying purchases.


More Painting Furniture Tips
- Best All-in-One Paints for Furniture
- All in One Paint for Furniture
- Dixie Belle Paint Review
- Mineral Paint Vs Chalk Paint
- How to Use All in One Paint

Follow us on YouTube to get more tips for painting furniture. Or share your project with us on our Facebook Group and be part of our community. See you there!
I have been subscribed to your blog for quite awhile now and love seeing all the transformations! Your posts are always full of useful information as well!
Love these new Dixie Bell colors!
This sewing table is beautiful.
I love the Glacier
I don’t have a specific color to paint furniture. I would have to just paint according to what works for each area I am using it in. Every room in my home is a different color – so would use accordingly. Yes, every room has a color. No white walls here.
I love the color of the green table!
I am a huge Ray of Sunlight fan.
Pretty new color 🙂
Good work, Natalie! I enjoy your blog!
I enjoy painting and fixing up wood items!
I love the acadia color. Turned out beautiful. I also want for try the bonding boss!
I like the Sequoia and the Glacier. Thank you for going through the steps and showing us your beautiful work.
Lovely!
This Acadia green looks amazing on this sewing table. I love spraying with Silk paint as well. Beautiful Natalie! XOXO Pinned
That color is such a rich shade of green and it really brought out the details on the front of the sewing cabinet! Gorgeous makeover Natalie! Pinned 😊
Love the color 😊
I love how you can see the grid on the front that was nearly invisible before! The green makes it sleek and updated! Bonding BOSS is fantastic. You don’t have to get complete coverage of stains before painting. It will still block beautifully as long as you give it that needed drying time. I haven’t used stinky shellacs in years! XOXO
I love the color! I’m so impressed with how much paint can change the look of furniture.