How to Take Orange out of a Wood Dining Table


Looking at your orangey piece and thinking how to take orange out of a wood dining table? Don’t worry, you’re not stuck with that look forever, and you definitely don’t need to be a pro to tackle it!
With these refinishing furniture techniques, I’ll walk you through the exact steps I used to get rid of those orange tones and give your piece a new finish that fits your home decor and style better. Keep reading to learn more!
Welcome to Furniture Fixer Upper day, where we join 4 of our talented furniture friends and bring you brand new makeovers! I’ll link to my friend’s makeovers after our after photos at the bottom of this post! Don’t forget to check out their masterpieces!! Okay, back to our makeover!
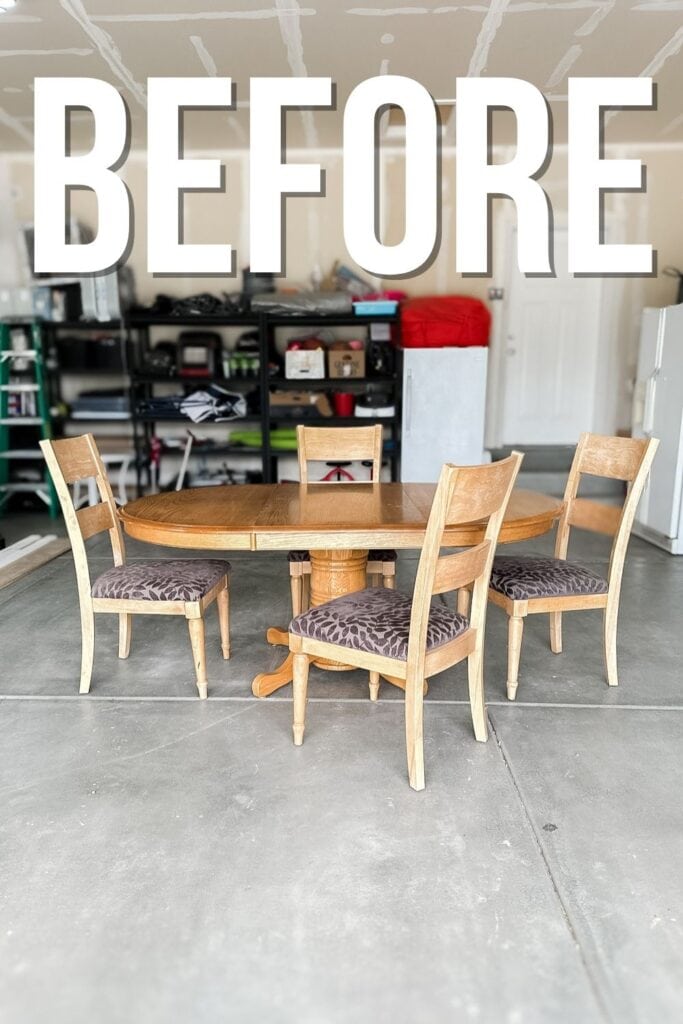
We started with this oak dining table in pretty good shape, but the finish on it was very orange. This table is made of solid wood. I couldn’t find any indication that it’s made of veneer. Maybe the apron part has some plywood.

For the chairs, I didn’t like the fabric, and it obviously doesn’t go together super well. It definitely doesn’t go with the look of my house, which has a lot of grey undertones and deep wood tones.
So, we gave this dining set a makeover! Let’s see how we did it, and learn how you can do it for your own table and chairs, too. Get ready for all the tips and tricks along the way!

Supplies Used to Take Orange out of Wood Dining Table
As an Amazon Associate, I earn from qualifying purchases. I also may earn from other qualifying purchases with other companies or get free product to review and use. All opinions are my own.
- Klean Strip
- Cheap Chip Brush
- Carbide Scraper
- Steel Bristle Brush
- 0000 Steel Wool
- Mineral Spirits
- Coarse Foam Pad (Use code RAY10 to get 10% off your order)
- SurfPrep Sander (Use code RAY10 to get 10% off your order)
- Shop Vacuum
- Tack Cloth
- Minwax Ebony Stain
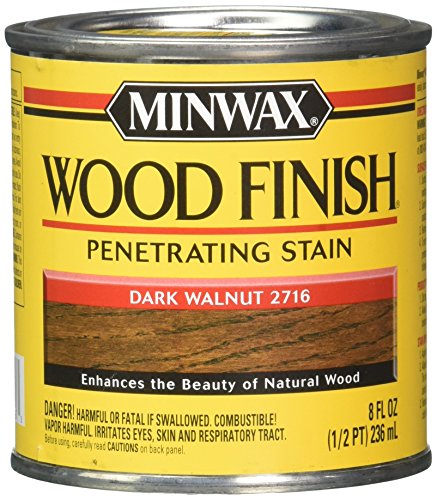
- Minwax Dark Walnut Stain
- Green Minwax Waterbased Stain
- Semi Gloss and Satin Waterbased Polyurethane
- Vonforn Paint Sprayer
- Foam Sponge
- Pantyhose
- Krud Kutter
- DeWalt Orbital Sander (Best Sander for Beginners!)
- Foam Pad for DeWalt Sander (Sand Curves with a Power Sander!)
- Clear Shellac
- Black AquaLock Primer
- Sherwin Williams Emerald Urethane Paint in Caviar
- Faux Leather for Chair Seats
Removing Old Finish
What we did first was remove the old finish. This one was a little bit thicker, so it wasn’t coming off as easily as most furniture does. Sometimes, finishes are thicker on certain furniture and harder to remove.
So, I used this Klean premium stripper. It’s cheap and works very well. The problem with this stripper is that it has more fumes. It’s more toxic than many other strippers that I like to use, like this QCS Stripwell, which is very clean and almost 100% non toxic.
But I wanted to try out a different stripper and see what it was like. Actually, I tested the QCS out on a little bit, but I don’t have any footage of it. It performed basically as well as the Klean Strip did. Learn about this product in our Stripwell QCS review here!
Anyways, I brushed Klean Strip on with just a cheap chip brush. I let it sit for about 30 minutes. When I came back, the finish still wasn’t really coming off. I let it sit for another 15 minutes. It still didn’t seem to be working very well.
It wasn’t bubbling up or anything that was showing me that it was really working. So I got out this carbide scraper that can eat through and slice through layers of paint and stain. The combination of the stripper and scraper worked like magic.
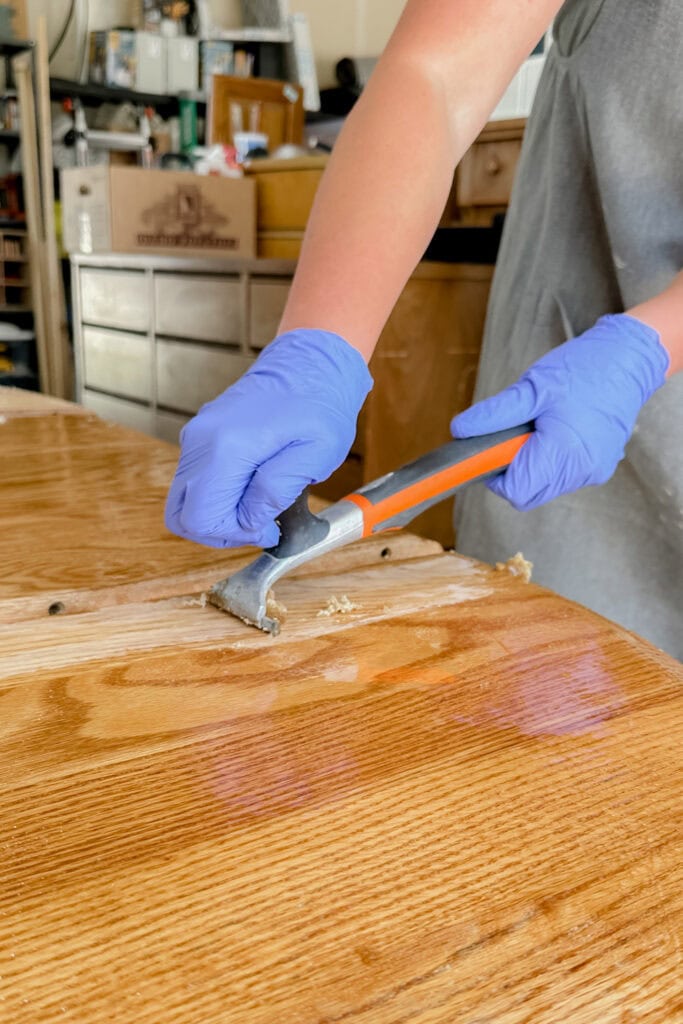
Usually, you have to put more muscle into it when using the carbide scraper on its own, but with this method, it was very, very quick and easy. I got it down to raw wood in almost every spot that I could use this scraper.
For the other spots, I had to use a steel bristle brush and some steel wool to get into the curves and details. I do always try to go with the wood grain.
There were some spots that I had to apply two coats of the chemical stripper. Then, I went back over everything with mineral spirits and 0000 steel wool to remove the remaining residue. Then, we let it dry. This stuff dried very quickly.
You can check out our blog post on how to remove stain from wood without sanding for more tips!
Smoothing Out Surface
There were some spots with some of the old finish left. So, we used our SurfPrep Sander and a coarse foam pad to sand the curves.
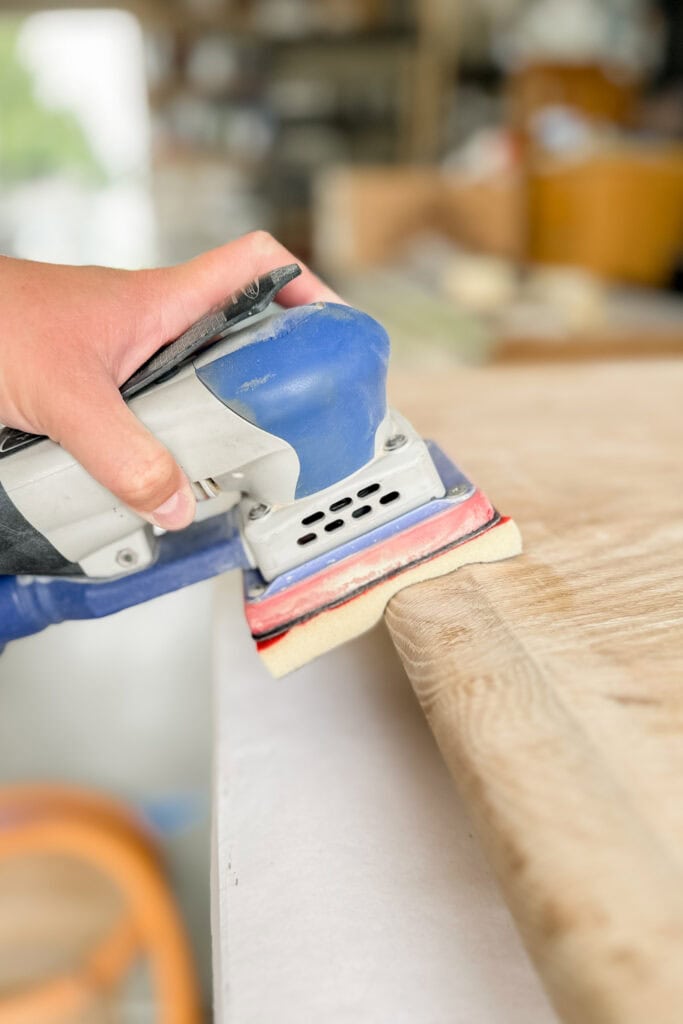
If you have the DeWalt orbital sander, you can use this foam pad that attaches to it. Then, you can use your sanding discs and attach them to the foam pad. That will help you sand the curves without any issue. It makes the process so much faster than hand sanding, and it does a very good job.
So, I did that with 100 grit sandpaper. Then, we went back and did everything with 150 to smooth it out a little bit. We still removed the finish, but really, at that point, we were just looking to smooth it out.
Then, we went and sanded, especially the top. We sanded by hand in the direction of the wood grain with 150 grit sandpaper. This was to make sure that we didn’t leave any sanding swirls in the wood.
Orbital sanders can sometimes leave little swirl marks behind. And you don’t really see these dark little circles super well until you stain. So, we sanded really well by hand afterward just to make sure we got rid of any swirls.
Then, we cleaned up the dust with our shop vacuum and tack cloth. Get more tips on how to clean wood after sanding here.


Staining Wood Dining Table
Then, this was the part that I was very, very nervous about for this entire makeover. It took me months to gather the nerve to actually do this, after I found the dining table.
How was I going to prevent this oak table from staining orange or having very warm undertones? How can I get it to stain to match my house, which has a lot of gray undertones? I did not want a warm wood look.
I have that with my old kitchen table, which I’ve had forever, and it doesn’t look good in this space. It needed to be more on the green side, with gray undertones.
A few months ago, my mom came up with a concoction. If you don’t know color theory, green reduces red and orange. If you mix some green into your stain, it will help combat the orange undertones that come with this oak wood.

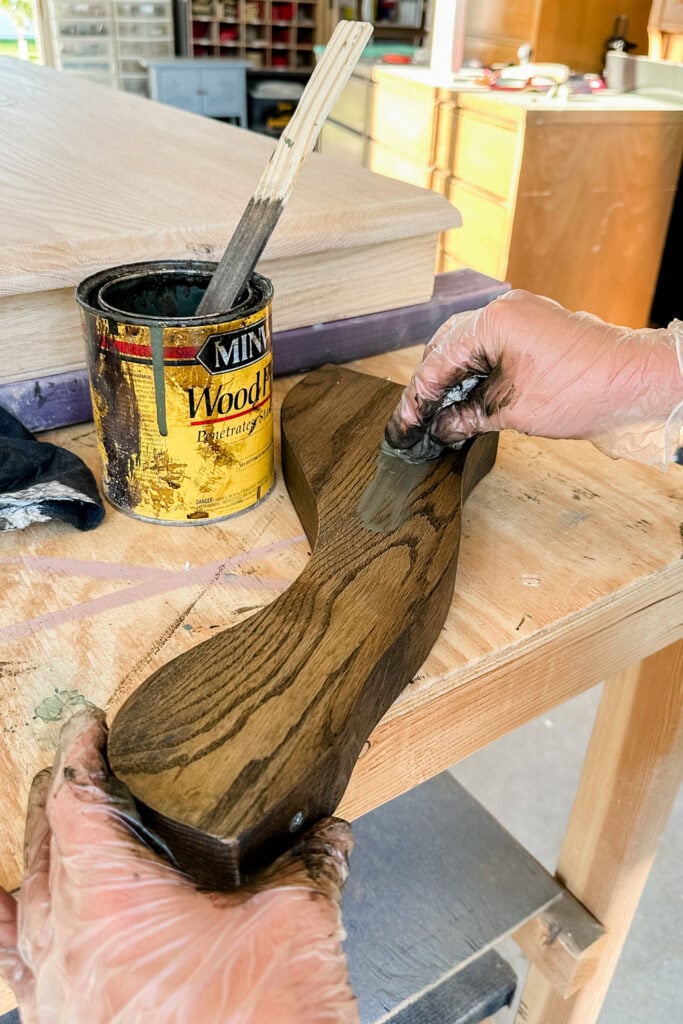
First, I tested this out on the underside of the leaf to make sure that the wood would stain the correct color. It did, so then I moved forward. I stained it with just straight Ebony, which is a black stain.
The Secret to Taking Orange Out of Wood
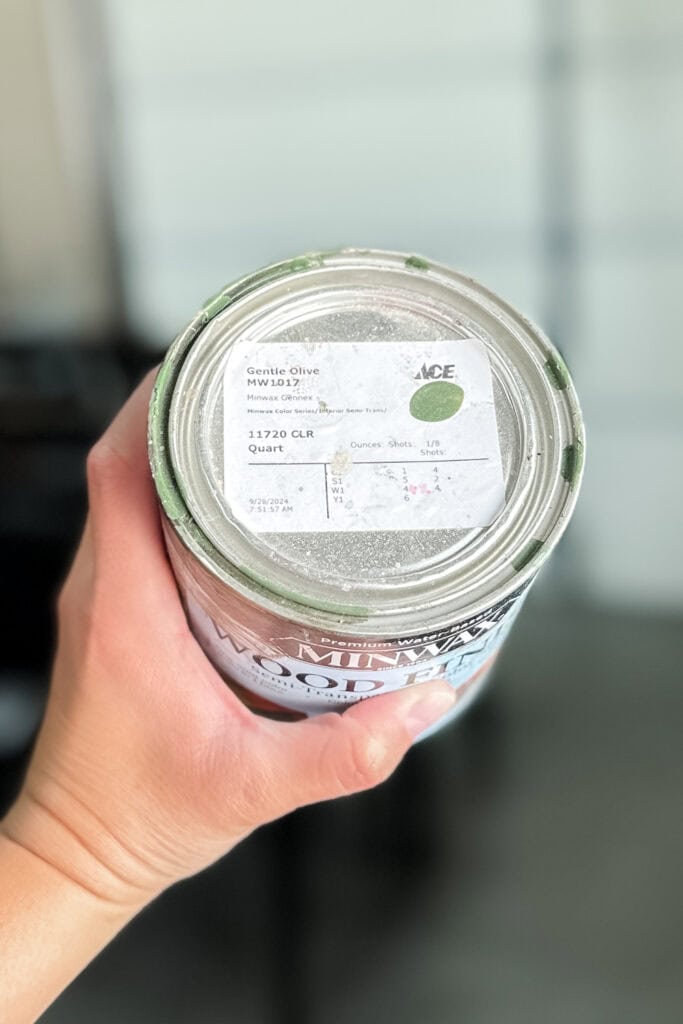
Before letting that dry, wiping it off or anything, I applied Dark Walnut MIXED with a green waterbased Minwax stain. I know you’re not supposed to mix oil based and waterbased stains. But we did, and it has worked out like magic.
Here is the tint code for the green waterbased stain. You can take it to Ace Hardware and have them mix it up for you! I don’t know what the ratio of the green stain to dark walnut stain, but I know there has to be quite a bit of the green stain mixed in.
Would you like to save this?
I worked in sections, and then I wiped off the excess so that when I was done, everything was even. I let it dry for a couple of days. If you’ve never done this before, check out our how to stain furniture for beginners here.
But the leaf wasn’t the same color. It was more of a milk chocolate color, and the rest had more black in it. So I did have to go back over some places with just the Ebony a couple of days later to try to even out the stain. Then I let it dry for 72 hours before topcoating.
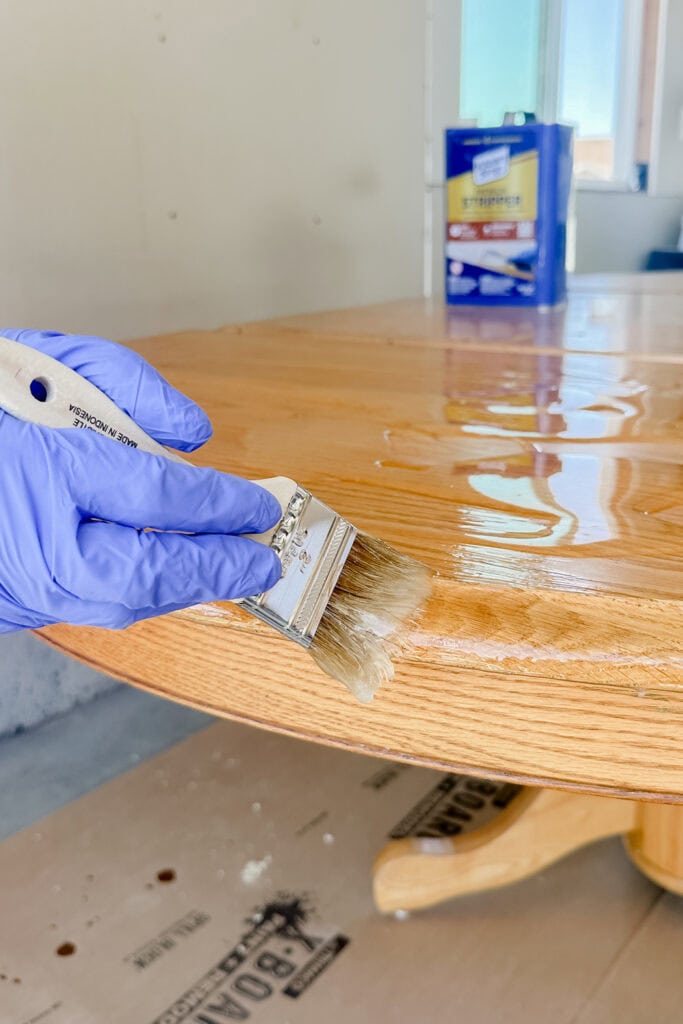
Topcoating Wood Stain
Once again, you don’t really want to mix oil and waterbased products, and we want to give the topcoat every fighting chance to be able to hold on. So we let the table dry all the stain dry for at least 72 hours, and then I top coated with waterbased polyurethane in Semi Gloss.
I used my cheap beginner paint sprayer, the Vonforn sprayer, to apply it. I applied 4 coats, and then we let them dry overnight. Here’s more on how to spray polyurethane. Then we lightly sanded with the fine grit foam pad just to smooth everything out.
When we first applied the top coat, it was pretty hot outside, so it dried fast, making it feel rough. I lightly sanded it to make it smooth with a fine grit foam pad.
Then when it was cooler outside, around 60 to 70 degrees, I topcoated by hand with Satin for the last coat. When you wipe it on, it goes on with more glossy than when you spray it on. In the end I did five coats for maximum durability. I want this thing to be durable and look good as long as possible. And I topcoated the last coat by hand, and in cooler weather so it would dry smoother.
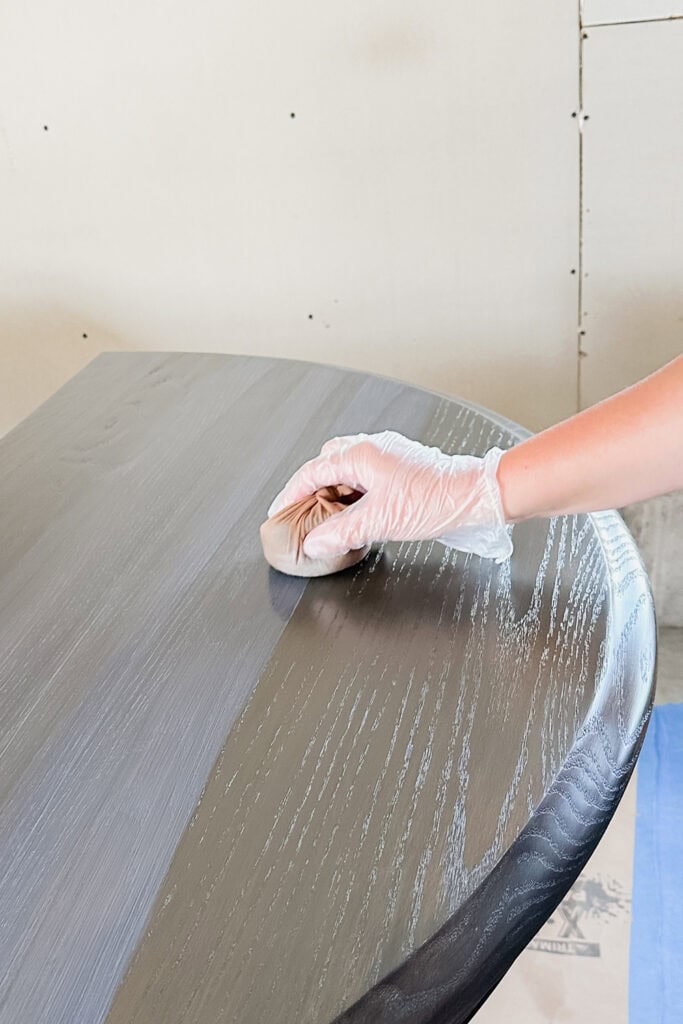
I used a foam sponge and then wrapped it in some pantyhose. I don’t understand why, but somehow, this combination is the very best for no streaks and a really smooth finish. It just looks really nice in the end, so I wiped the poly on quickly this way, making sure that there were no drips, runs, or puddles on the furniture. Learn more about this technique in our guide on how to apply polycrylic to painted furniture here.
I did five coats for maximum durability. I want this thing to be durable and look good as long as possible.
We let this table dry for about a week or maybe more, before we brought it in, because we want that topcoat to really start curing and become hard and durable before our kids have access to use it. You know how kids can be rough with things. Full cure is about 30 days, so we have to be careful with it for the next few weeks as well.
Painting Wood Chairs
Then we moved on to painting the chairs. We removed the seats, which were screwed on from underneath, and then we tore off the fabric from them. Then we prepped them for paint.
We cleaned them with Krud Kutter to remove all the grime, food, and gunk that had built up on these chairs. Then Taylor sanded them lightly with the DeWalt orbital sander and a foam pad, getting into all the details. We just wanted to scuff up and remove a little bit of the shiny finish to help the paint stick. We don’t want the paint to scratch off anytime soon.
The foam pad makes it easier to sand the curves. Then he removed the dust with a vacuum and a tack cloth.
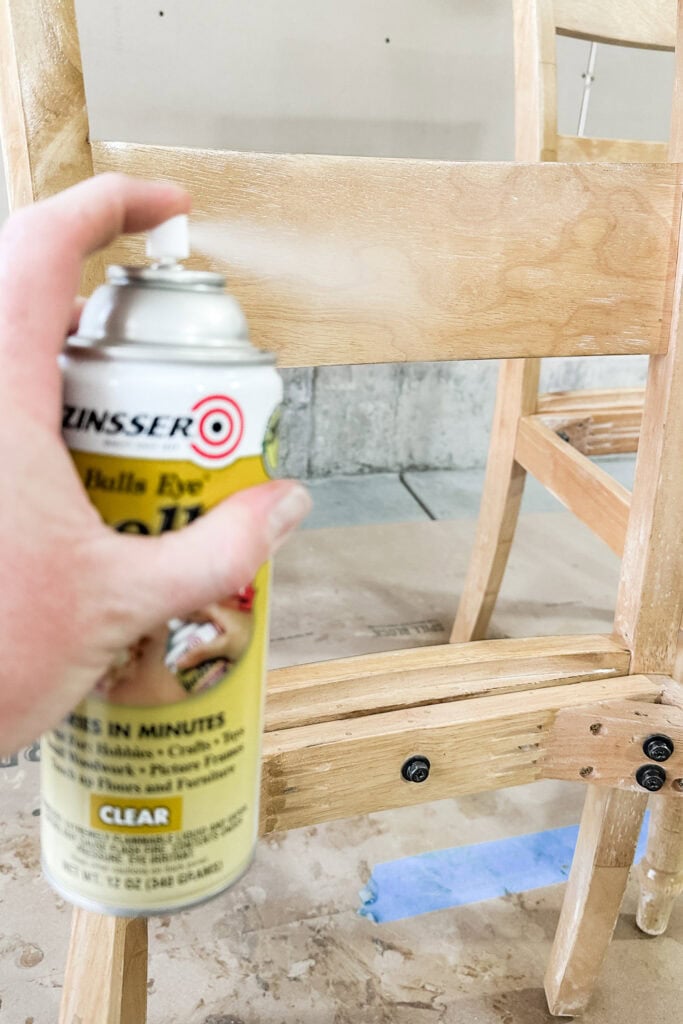
Next, we primed all of these chairs with clear shellac and let them dry overnight. The clear shellac helps the paint to stick, but also prevents any stains from coming through and ruining the paint. Learn more about priming wood for painting in this post.
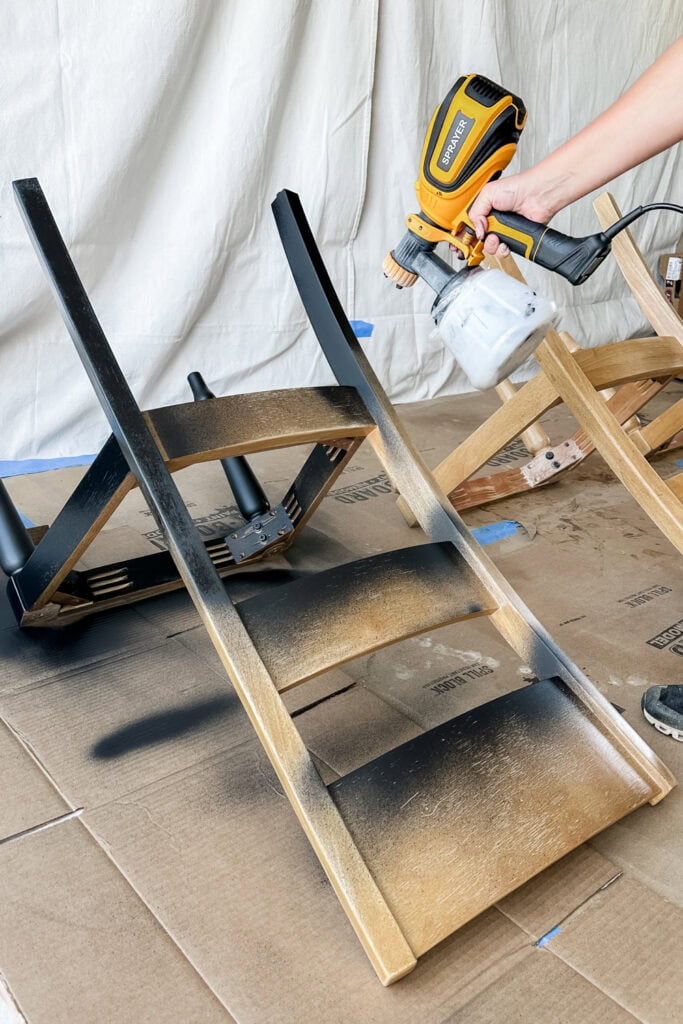
The next day, we sprayed black AquaLock primer with our Vonforn sprayer. I did not thin it, and it went on really well. It helps the paint have even coverage, is very, very durable, and sticks very well, too.
I messed up about ten years ago when I painted my old dining chairs. They have looked terrible for so long that the paint chips and scratches off so easily. I want to make sure that that does not happen with these chairs.
I want them to look nice for years to come and so I am doing all the prep that I can to make sure that they look nice for a long time. We did lightly sand the primer with some more fine grit foam pad to smooth it out. I cannot stand rough feeling paint at all!
Then we sprayed the chairs with Sherwin Williams Emerald Urethane in the color Caviar. I thinned it out with 15% water. Here’s our more detailed guide on how to thin paint for a sprayer.
We also sprayed first thing in the morning when the temperatures were about 60 to 70 degrees outside. This way, the paint would not dry very fast and would feel smoother. We painted two coats.
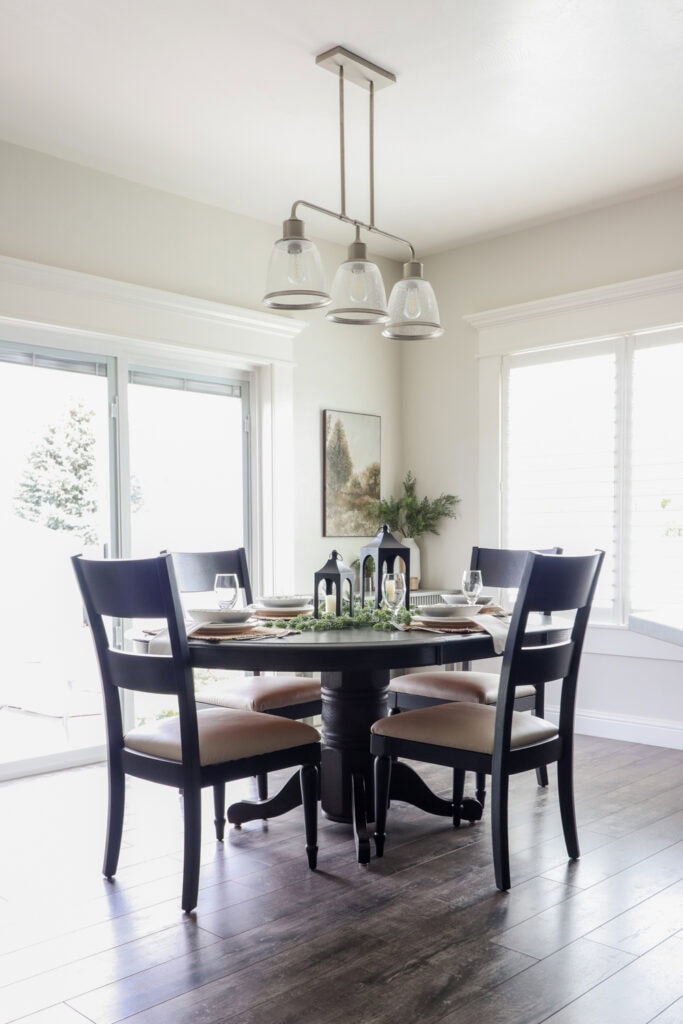
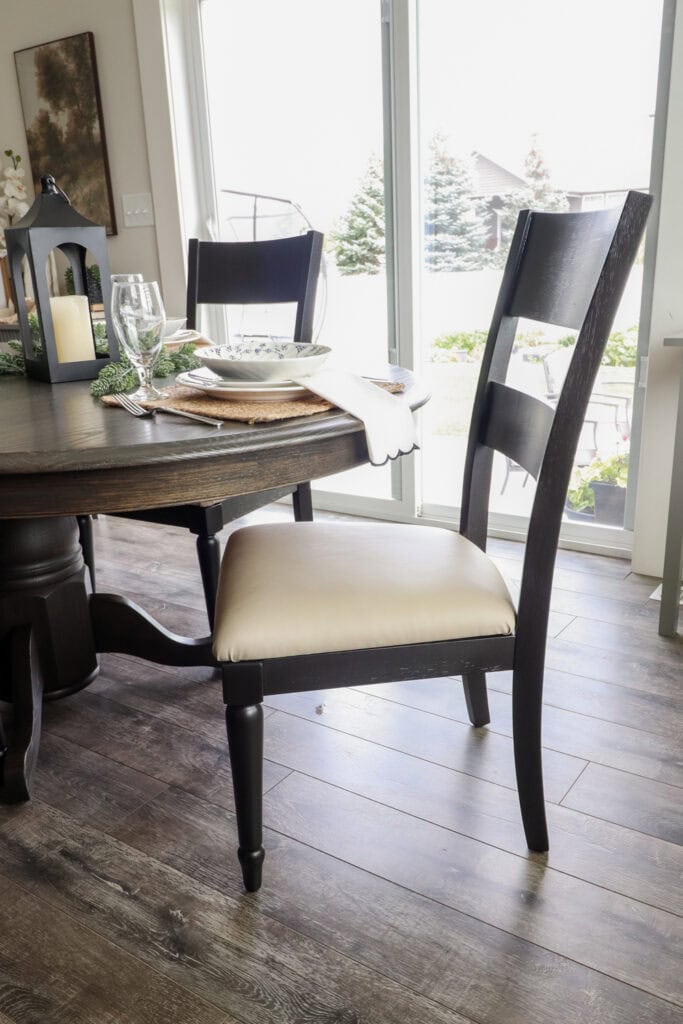
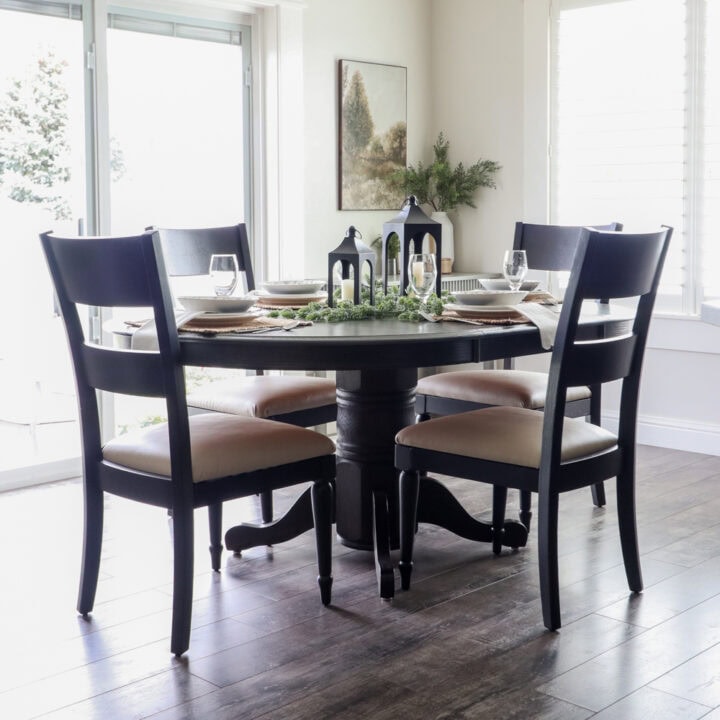
Then, we covered the chairs again with some new faux leather that matches the beige tones in our home. And here’s what our dining set looks like now!
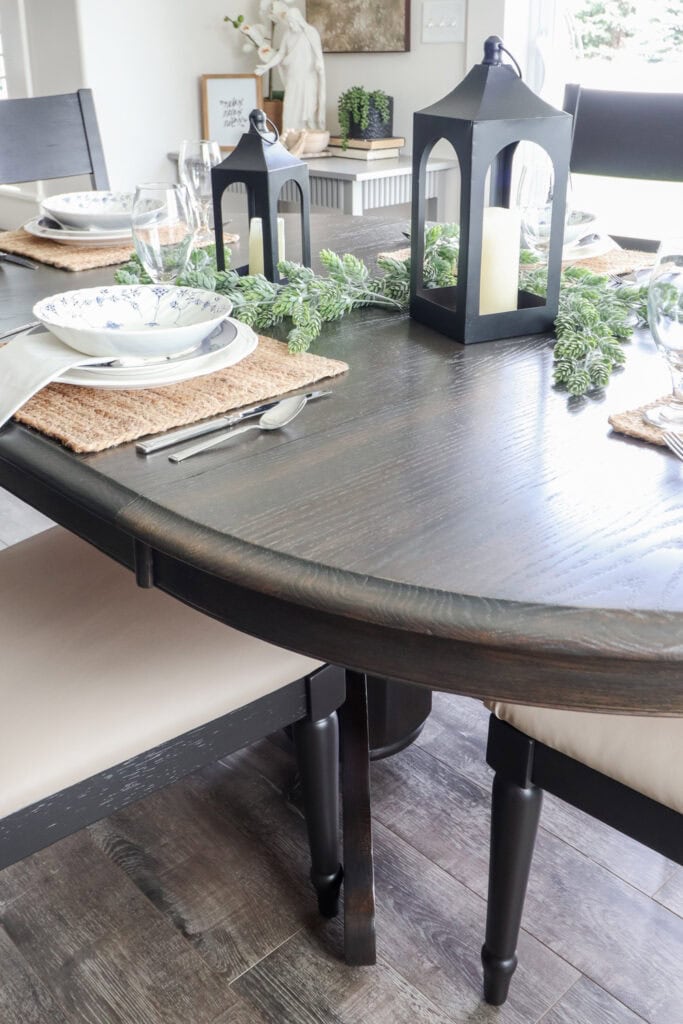
It looks so good with the rest of our house. We’re so excited for this new dining table! Check out more dining table makeover ideas here.
Don’t forget to check out these other awesome before and after furniture makeovers from my Furniture friends!! (Click the links below the photos!)
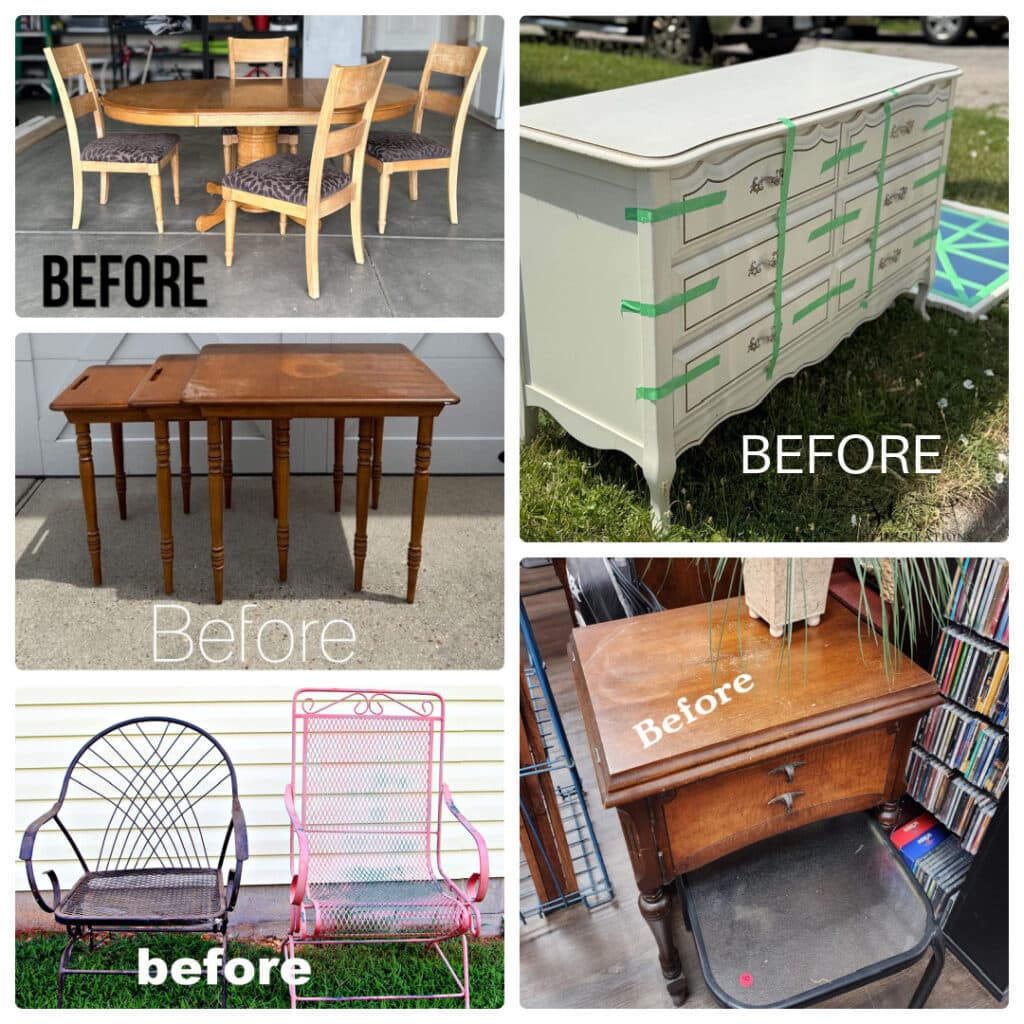
- Refresh Wrought Iron Chairs with Spray Paint from Petticoat Junktion
- DIY Kitchen Island from Sewing Cabinet from My Repurposed Life
- Furniture Makeover for Beginners from Salvaged Inspirations
- Painted and Stained Nesting Tables from Confessions of a Serial DIYer
More Before and After Makeovers
See All >
Click any of these “before” photos below to view the “after” of that makeover.


How to Take Orange out of Wood Dining Table
Learn how to take orange out of wood dining table in this guide and give your piece a new finish that fits your home decor and style better.
Materials
- Klean Strip
- 0000 Steel Wool
- Mineral Spirits
- Coarse Foam Pad (Use code RAY10 to get 10% off your order)
- Tack Cloth
- Minwax Ebony Stain
- Minwax Dark Walnut Stain
- Green Minwax Waterbased Stain
- Semi Gloss Waterbased Polyurethane
- Satin Waterbased Polyurethane
- Foam Sponge
- Pantyhose
- Krud Kutter
- Foam Pad for DeWalt Sander
- Clear Shellac
- Black AquaLock Primer
- Sherwin Williams Emerald Urethane Paint in Caviar
- Faux Leather for Chair Seats
Tools
Instructions
- Remove the old finish by applying the stripper on your wood table with a cheap chip brush and let it sit for about 30 minutes (or longer if that finish is extra stubborn). Then grab a carbide scraper and get that orange finish right off.
- For tricky spots and curves, reach for a steel bristle brush and a bit of steel wool to dig into all those details. Just work with the wood grain.
- Smooth it all out and remove any remaining finish with a coarse foam pad, starting with 100 grit, and following up with 150 grit. Clean up the dust with your shop vacuum and tack cloth.
- Mix up a custom stain, such as Dark Walnut and Green. Work in sections, then wipe off the excess, making sure everything is even.
- After everything dries for a good 72 hours, apply three to five coats of waterbased polyurethane. Spray the first few coats, then wipe on the last one with a foam sponge wrapped in pantyhose for that smooth, pro finish.
- For the chairs, give everything a scrub with Krud Kutter, scuff with a sander and foam pad, then clean up from sanding.
- Prime them with clear shellac and let them dry overnight. This helps the paint to stick and prevents any stains from coming through and ruining the paint.
- The next day, spray black AquaLock primer to help the paint have even coverage and make it very durable.
- Thin the paint with 15% water, and spray two coats onto the chairs.
- Cover the chairs again with some new faux leather that matches the rest of your home. And that completes the makeover!
Recommended Products
As an Amazon Associate and member of other affiliate programs, I earn from qualifying purchases.

More Refinishing Furniture Tips
- How To Stain Furniture Without Sanding
- How to Lighten Cane Furniture
- How To Restain Furniture For Beginners
- Orange To Walnut Stain In One Easy Step
Follow us on YouTube to get more tips for painting furniture. Or share your project with us on our Facebook Group and be part of our community. See you there!
This table makeover is STUNNING, Natalie! I know from experience how much work these sets can be (especially the chairs!) and you knocked it out of the ballpark – LOVE IT! Pinned XOXO
Thank you SO much for the kind words Denise! I’m so glad you like it!
Natalie,
The new look is amazing! Orange furniture is soooo out! 🙂
As always, great tips. ie green stain, and foam pad for sanding curves.
pinned!
gail
Appreciate it so much Gail!
It went from dated to gorgeous!
Aww thank you SO much!
Absolutely fantastic makeover!! It looks SO freakin good now, and I love the stain you ended up with after adding the green..what a great tip! XOXO
Ahh thanks so much Christy!
A lovely dining set. Worth the effort!
Thanks so much Karen!