How To Restain Furniture For Beginners


If you have a finished piece you want to update but don’t know where to start, this guide on how to restain furniture for beginners will walk you through everything you need to know. Restaining can seem intimidating at first, but it’s a simple way to refresh old furniture and highlight its natural beauty.
With a few helpful tips and these refinishing furniture techniques, you will feel ready to begin your next project. So keep reading to find out how easy it can be!

Maybe you have a piece of furniture that does not look the way it used to. The stain might be dull, or just not your style anymore. You want to restain it, but you aren’t sure how to start or what to expect.

Restaining furniture can feel intimidating, but if you break it down step by step, it is totally doable, and can even be budget friendly. If you have been putting it off, this guide is here to make it easier!
I’ll go over how to restain furniture and give you the simplest ways to approach this project. Let’s dive in!
Check The Type of Furniture
Now, first of all, you need to start with the right piece of furniture. You need to make sure that your furniture is wood. If it is made with wood veneer, that is just fine, but the outside, everywhere that you’re going to stain, needs to be wood because stain cannot soak into plastic or particle board or laminate like it does the wood.
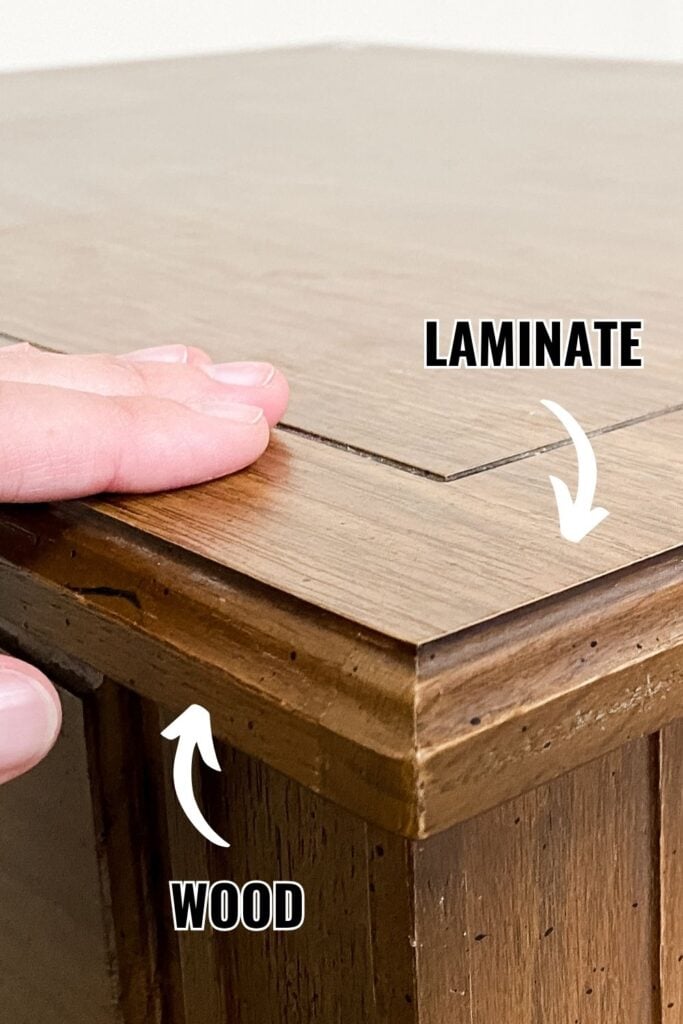
So you need to check all of the surfaces. Can you feel a natural wood grain? Does it feel like plastic? If it feels like plastic or super slick, it probably is laminate. Sometimes, laminate can be really tricky and looks and even kind of feels like wood. Check out my guide on how to stain laminate furniture here.
Make sure it has wood grain and that it’s not just printed on the surface. So you need to start with solid wood.
As an Amazon Associate, I earn from qualifying purchases. I also may earn from other qualifying purchases with other companies or get free product to review and use. All opinions are my own.
Using a Gel Stain
Now, you have a couple of options. If your furniture is in very good condition, it’s a little bit lighter in color, and you want it with a darker stain, you have the option to restain without removing the old finish.
Basically, you use a gel stain. You do have to do a little bit of prep to make sure that it sticks to the surface. The gel stain will kind of soak in if it is able to, but it can also just stay on the top of the surface. And then you still need to topcoat it. It won’t get rid of the scratches, but It can help kind of cover them in.
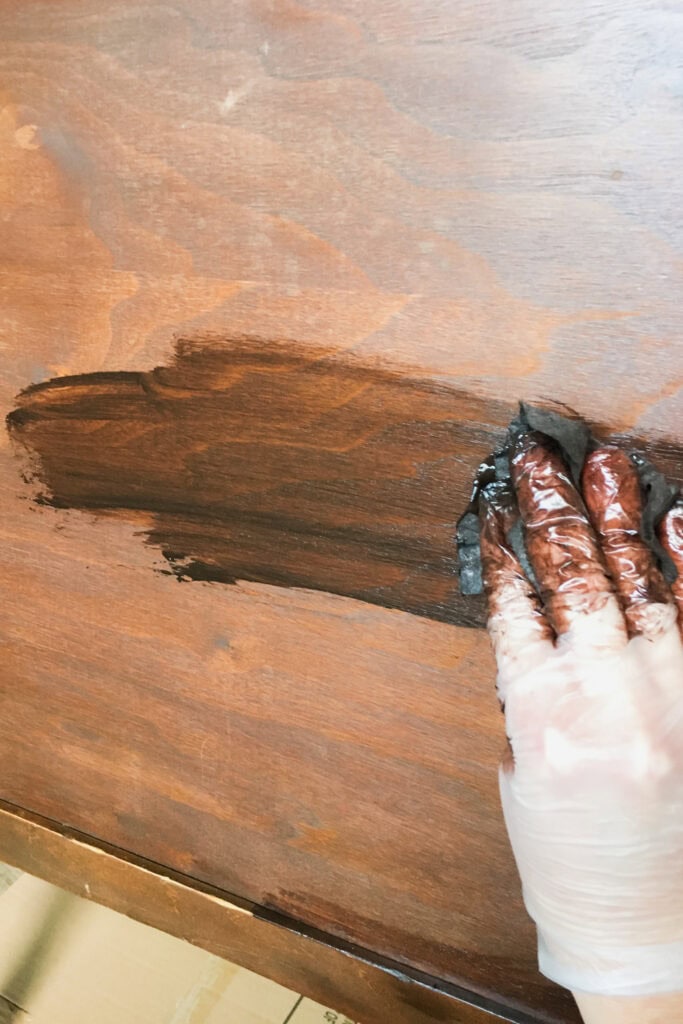
That’s why I say if your furniture is already in very good condition without scratches and dings all over, you can use gel stain. And it is kind of a shortcut. It’s less work time, but there’s more dry time needed for that. For more on this, here’s my more detailed guide on how to stain furniture without sanding.
Remove the Old Finish
The typical way of restaining furniture is to remove the old finish first. You can sand it down or use a chemical stripper. We really like Citristrip and Klean Strip. There’s also Stripwell QCS, a non toxic stain remover (Use code SUNLIGHT10 to get 10% off your order!). Check out my Stripwell QCS review here.
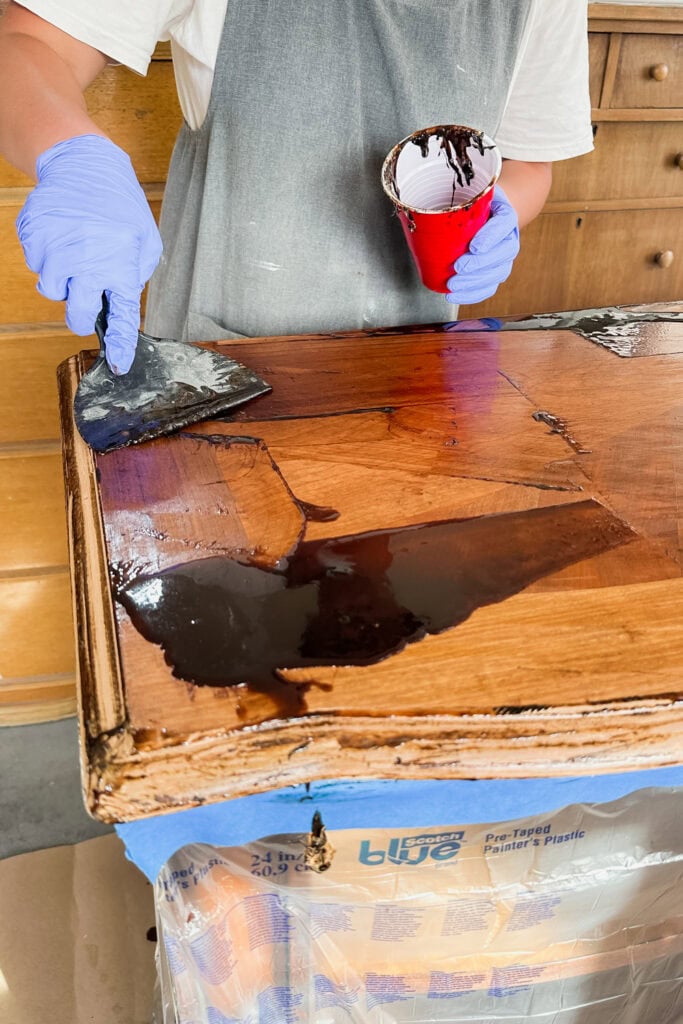
Just remember, the strippers make a lot of mess. There’s a lot of gunk, but if you sand instead, and the furniture is made of veneer, which is just a very thin piece of wood, and you sand through it, it basically makes it impossible to stain the piece and make it look very good.
You will always be able to see that spot where you sanded through the wood veneer. Here’s a makeover where I sanded through veneer to particle board.
Would you like to save this?
Learn more about the best wood stain removers in this post. See how I used these strippers in my guides on how to remove wood stain and how to remove stain from wood without sanding. If you don’t like to use any of these, check out how to restain a dresser without stripping here.
Sanding the Surface
After you get it back down to raw wood, you will need to sand everything lightly with 220 grit sandpaper to remove any residue and gunk from the chemical stripper and to make sure that you have a good, smooth surface.
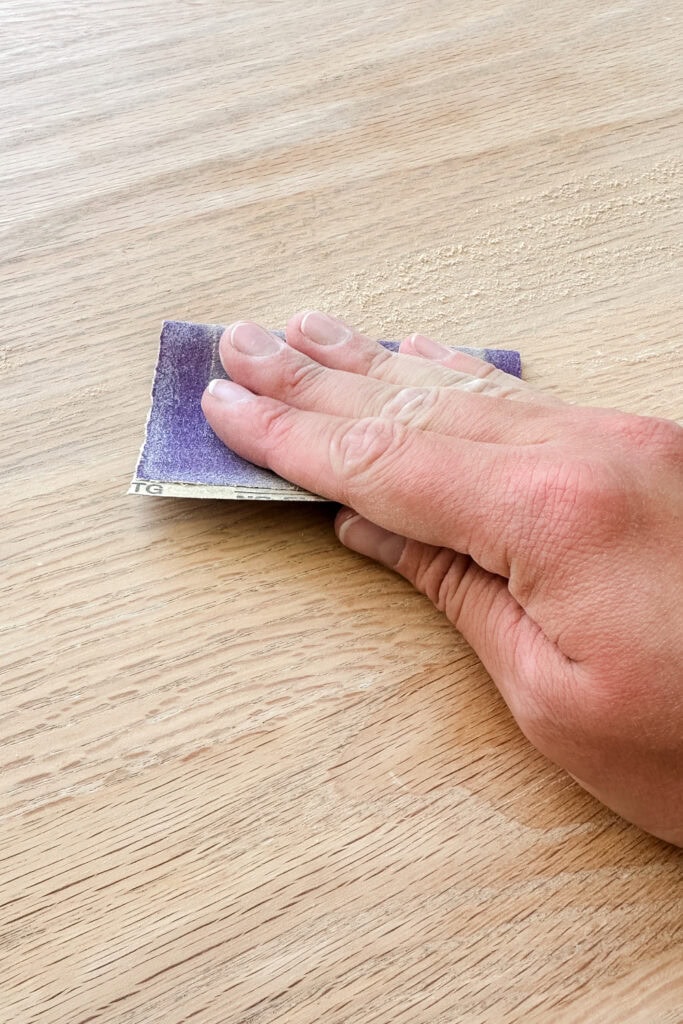
And then remove all the dust using a shop vacuum or a vacuum with a hose and a brush attachment. And then I like to use a tack cloth to get rid of all the dust. I have more tips on how to clean wood after sanding here.


How to Restain Wood
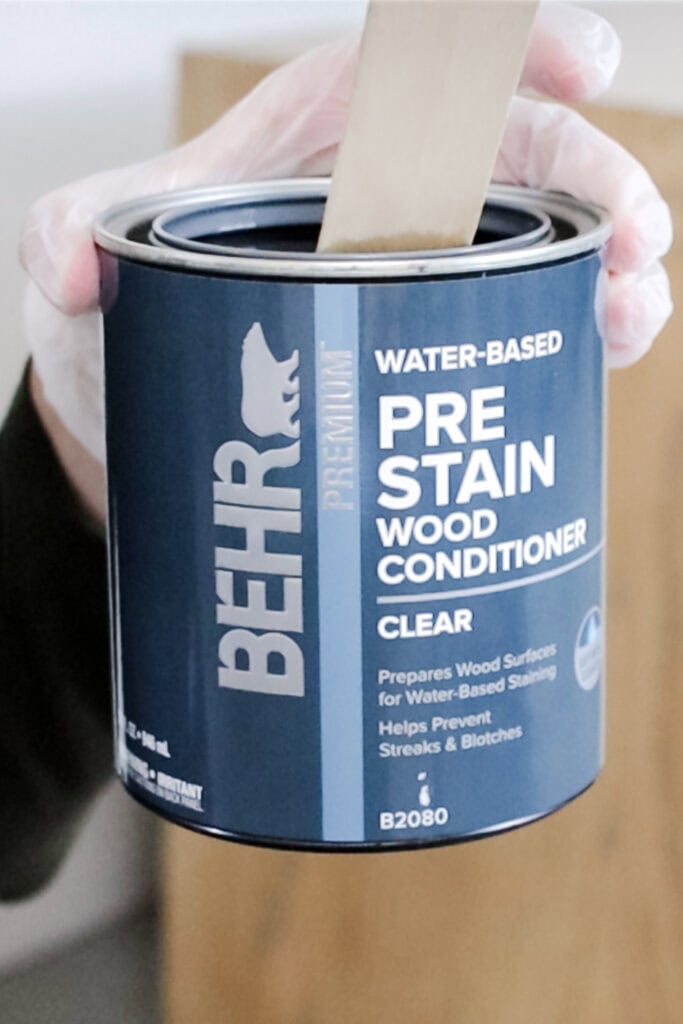
So now on to the stain. A lot of people use a pre stained wood conditioner before they stain to help the stain not be so blotchy. If you do use one, your stain will probably not soak in as dark. Just be aware of that.
On the exact piece of furniture you’re working on, always, always, always test the stain on a spot where you can’t see it to check how the wood would take the stain. If you’re happy with the stain color, then you can start applying it to the entire piece.
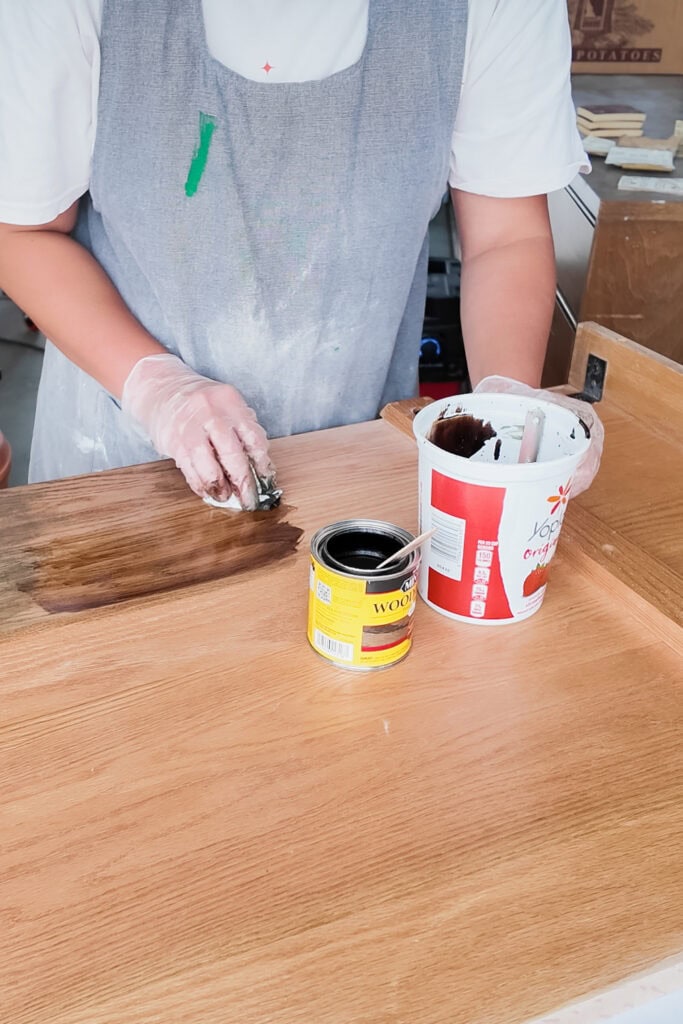
You need to stir the can with a stir stick. Make sure all of the stuff from the bottom gets mixed into the stain. Check out your options for the best wood stains for refinishing furniture in this post.
You can brush or wipe it on with a lint free rag. I have a list of the best brushes for staining wood here. And then you wipe off the excess after it has sat for a couple of minutes. The longer it sits, the more it can soak into the wood, and the darker the color will be.
It’s very important to wipe off the excess stain so that it doesn’t puddle and get sticky. Get more tips on how to stain wood with a rag here.
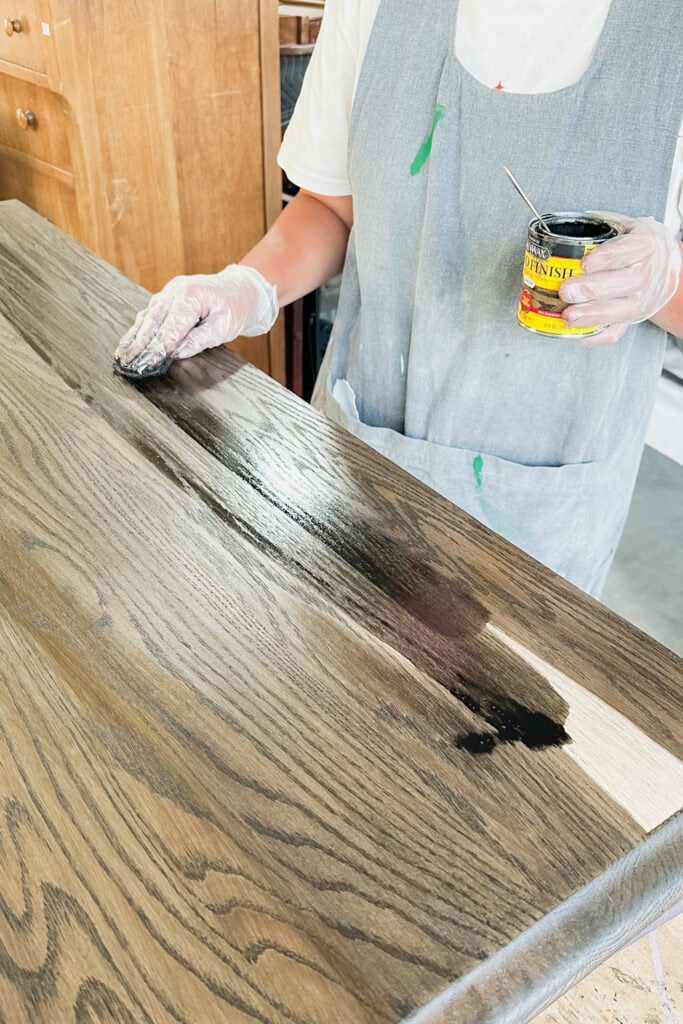
Also, here’s some very, very important safety info. Any of the tools and cloths you used that got stain on them, lay them outside to dry. Do not crumple them up and throw them in your garbage container. They can catch fire. Leave them outside lying flat to dry to avoid any fire.
Let the stain dry for 48 hours, then you can come back and topcoat the stain. This will make it durable, easy to clean, and wipeable. It’ll make it smooth and protect the stain.
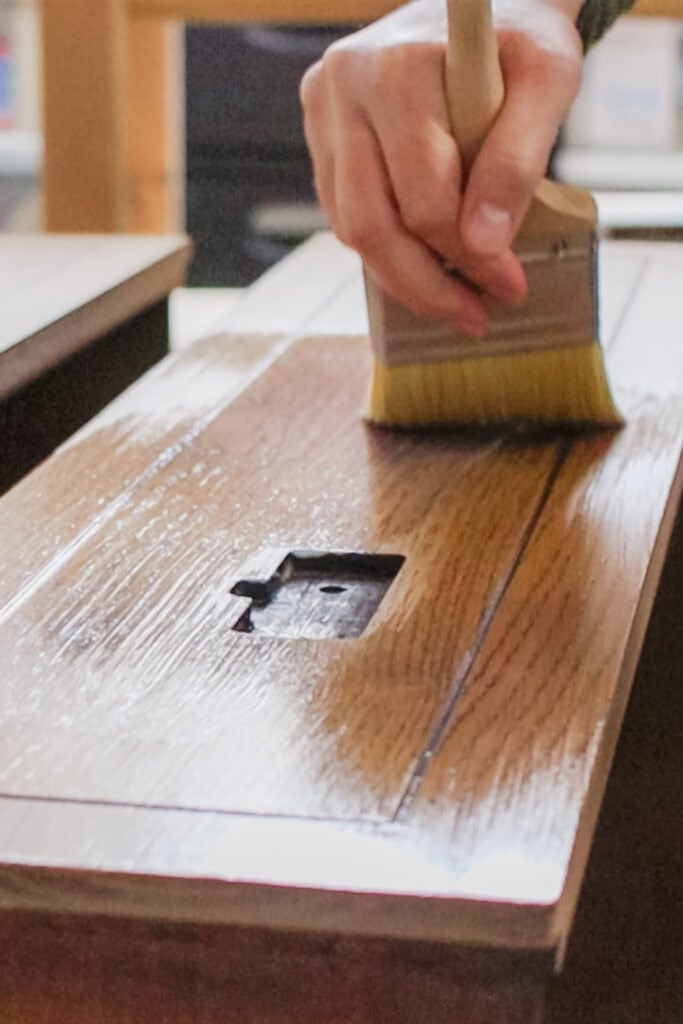
An oil based topcoat is more durable, but it does have a warm amber tone to it. A waterbased topcoat is clear, dries fast, and is easy to clean up. Check out my polycrylic vs polyurethane comparison here to learn about these two options. You can learn how to apply polycrylic to painted furniture in this post.
With the right products and techniques, you can bring out the natural beauty of wood again. Hopefully, this guide helped you understand the process and what to expect when restaining your furniture.
More Refinishing Furniture Ideas
- How to Remove Old Stain from Detailed Wood
- Can you Stain Over Paint
- Orange To Walnut Stain In One Easy Step
Follow us on YouTube to get more tips for painting furniture. Or share your project with us on our Facebook Group and be part of our community. See you there!