How to Stain Laminate Furniture


Learning how to stain laminate furniture properly is important because laminate is a different material from wood and needs a different approach. Knowing what to expect ahead of time makes the process easier and helps you get better results.
These refinishing furniture techniques show how various furniture surfaces are handled from start to finish. For now, I will tackle the process of refinishing laminate in detail. Let’s dive in!
Most people think that you cannot stain laminate because it’s a plastic type surface with basically a printed design that makes it look like wood. Laminate can also be white or other colors, but what we are talking about here is how to stain laminate with a wood look finish.

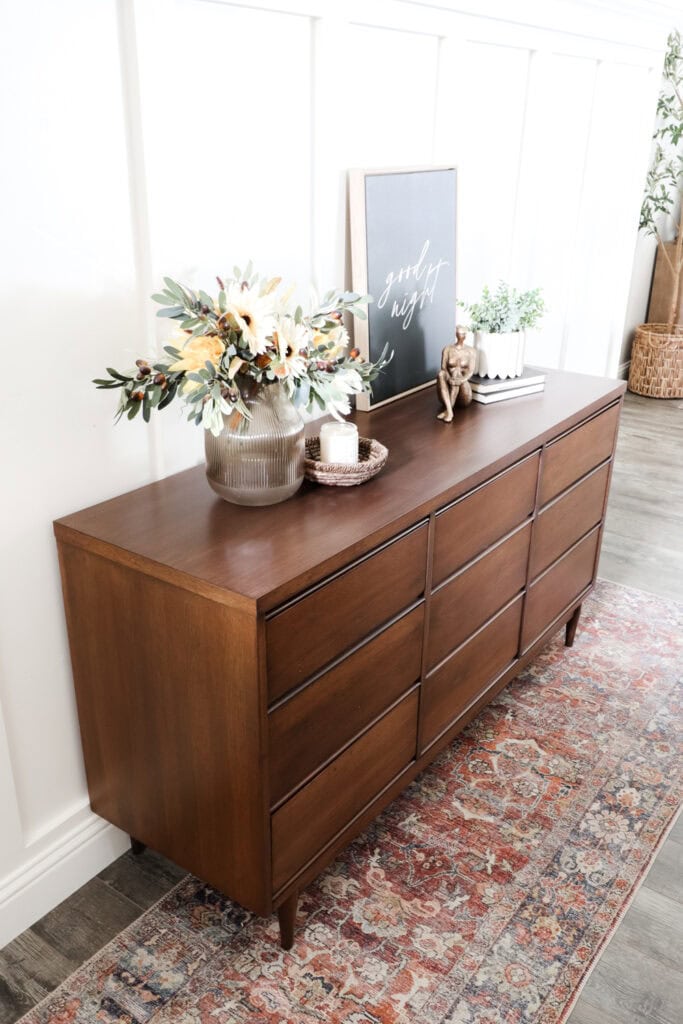
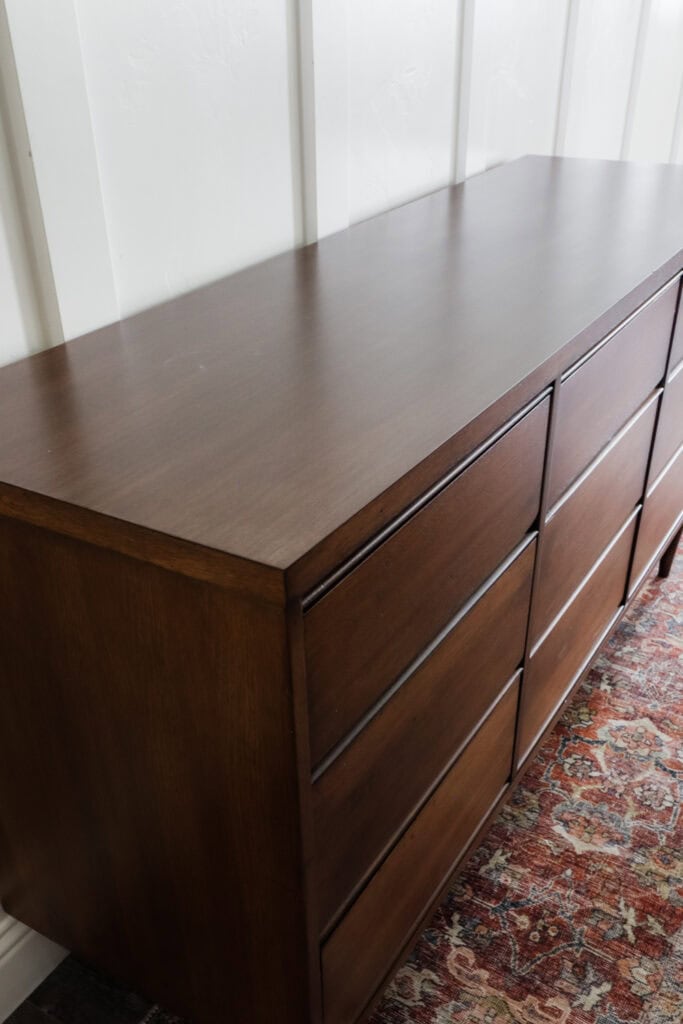
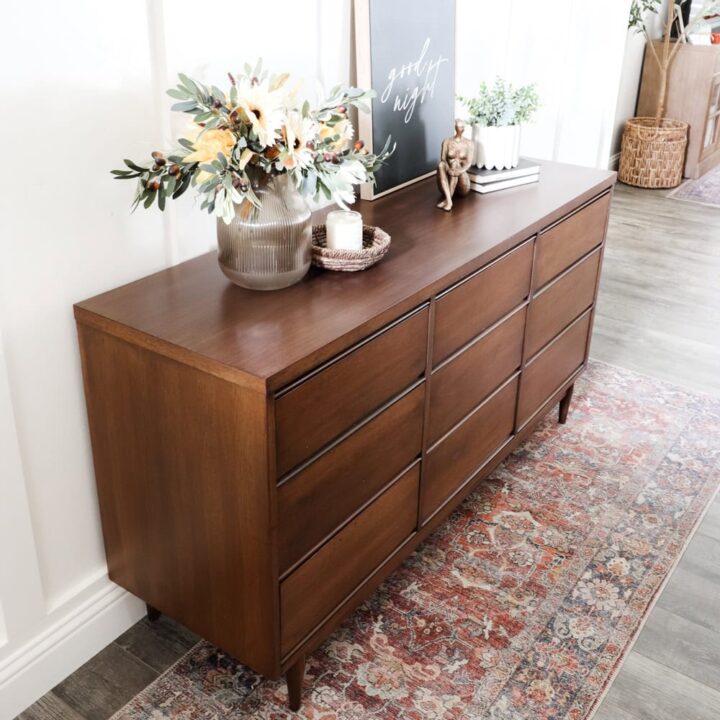
This works fantastic on a dresser like this, where the top is laminate, and the rest is wood. You can refinish both surfaces using the same technique, and when done properly, the stain holds up without scratching off.
This is not for making laminate look like a light or raw wood finish. It works best when you want to deepen its color and add richness instead. If you’re ready, let’s get started!
Supplies Used to Stain Laminate Furniture
As an Amazon Associate, I earn from qualifying purchases. I also may earn from other qualifying purchases with other companies or get free product to review and use. All opinions are my own.
- Krud Kutter
- Damp Rag
- 220 Grit Sandpaper
- Shop Vac
- Tack Cloth
- Clear Shellac Spray
- Gel Stain
- Chip Brush
- Lint Free Rag
- Topcoat
Preparing Laminate Furniture
We’ve got to clean it up, get rid of the gunk, grime, dirt, grease, and all that stuff that just builds up over the years of use, especially with this old piece.
To cut through grease and grime, I like to spray Krud Kutter onto my furniture and wipe it off with a damp rag. This cleans so much better than just using a wet rag. Let it dry, which is basically almost instantly.
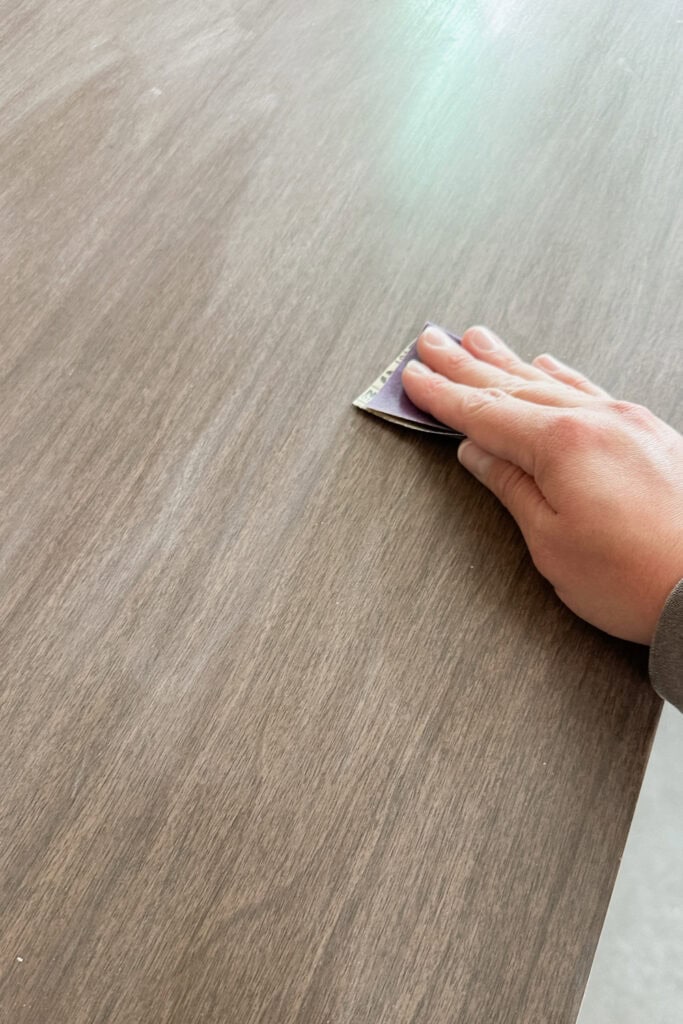
And then you will need to very lightly sand the laminate with 220 grit sandpaper. Do not go any more coarse than that, so don’t use any number that is lower than 220. You don’t want to scratch and damage the laminate. You can learn more about what grit to use in my guide on the best sandpaper for refinishing furniture.
Basically, the goal is to make it dull and not shiny anymore. You can use an electric sander if you want to, but you really don’t need to do anything more than just what you can do by hand with some 220 grit sandpaper.
Don’t go crazy here. I cannot stress this enough. Do not go crazy and try to sand off the color or anything. You just want to very, very lightly scuff up the top bit of the surface.
Then, remove the dust. I use a shop vac with a hose and a brush attachment to suck the dust residue off, then a tack cloth to remove any remaining dust. Here are more tips on how to clean wood after sanding.
Priming Before Staining Laminate
We’re going to do everything in our power to keep the new stain from scratching off the slick surface. This is key, so do not skip it: priming. This helps the stain stick to the really thin and slick laminate layer.
Clear shellac is technically used as a topcoat, but I like to use it as a primer. Check out more options for the best bonding primer for laminate furniture here.
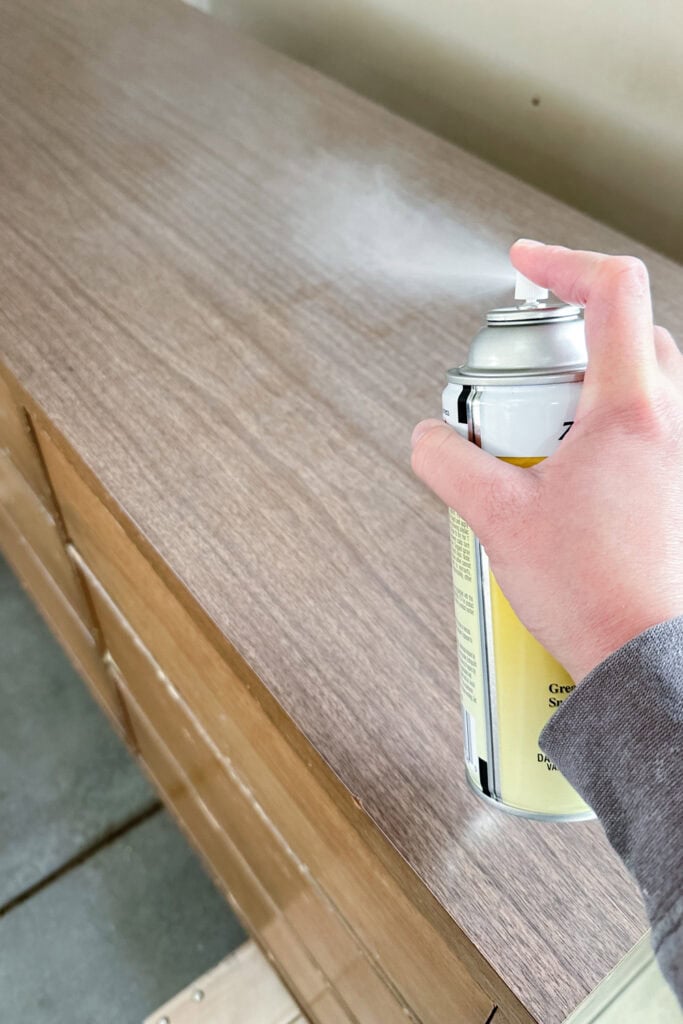
I use the spray on version, so it’s just really quick. It dries really quickly, and when it does, it doesn’t leave a rough surface. It’s very smooth and the perfect little sandwich to make two things stick together. Spray your laminate piece with a coat, and let it dry for an hour.


Staining with Gel Stain
Now, a typical wood stain is really thin and will soak into the wood. The longer you let it sit, the longer it will penetrate. You remove the excess, and voila, you’ve stained your wood. But it doesn’t work for surfaces where you can’t let it soak in, right?
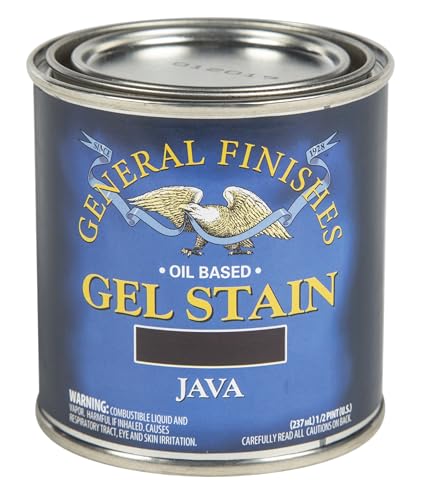
With laminate, you can’t really let the stain soak in. So instead of using regular wood stain, you need to use this gel stain. A few different brands make it, but I really like the General Finishes Java Gel Stain. It sticks very well and covers scratches and dings. It does kind of soak in, but it sits on the surface. It’s one of the best gel stains I’ve tried. See how I also used it in this farmhouse cabinet makeover.
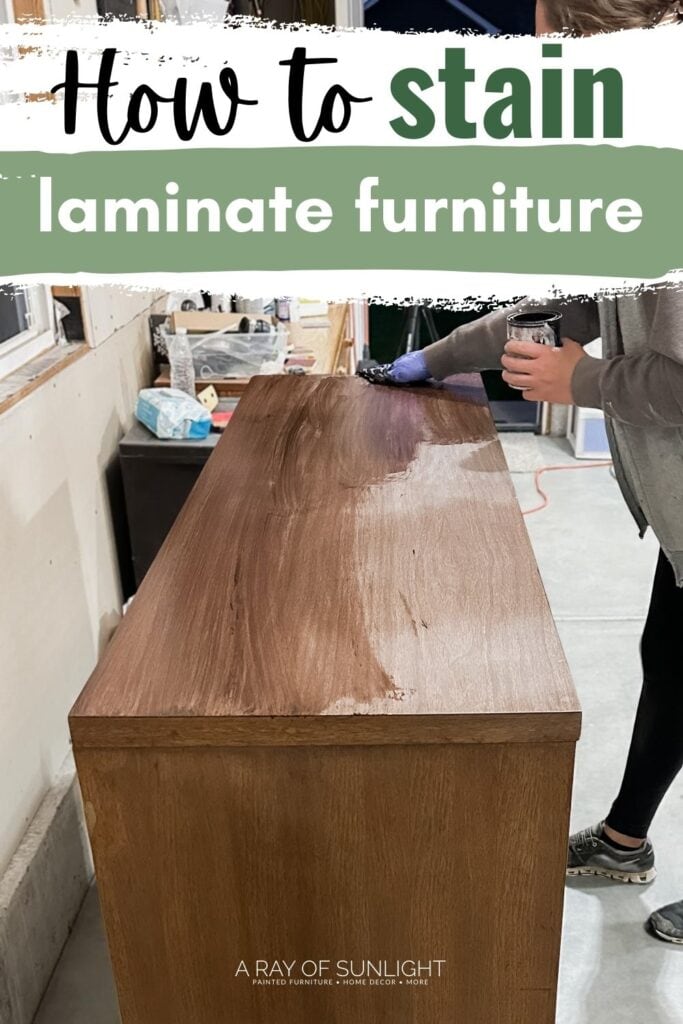
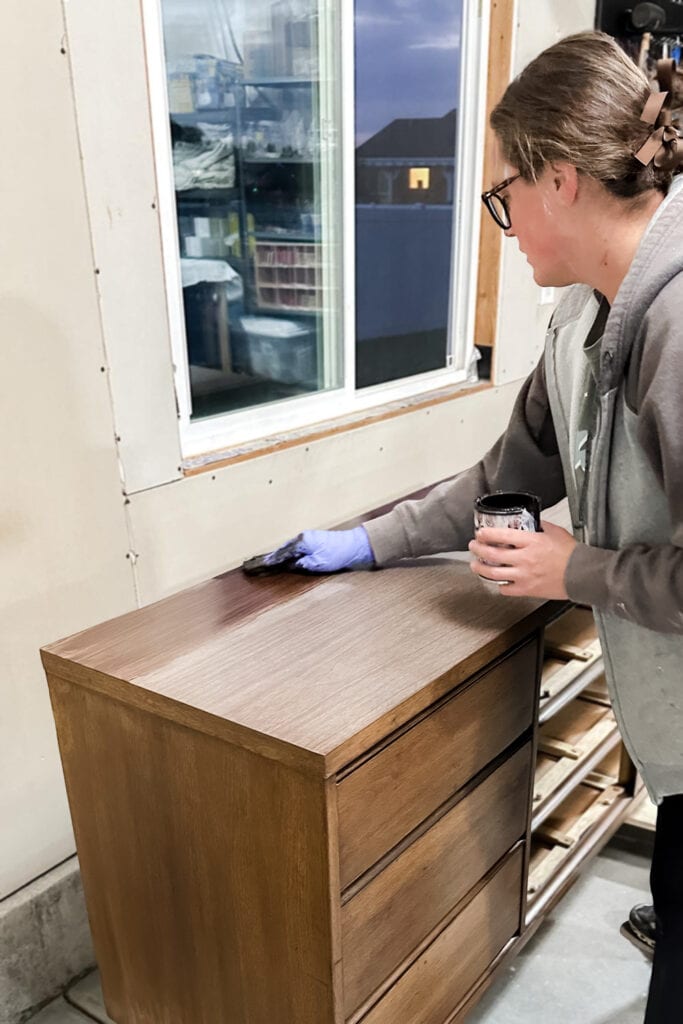
So you’re going to use a chip brush, or I like to just dip a lint free rag into the stain, and then I can throw the rag away later. Wipe the stain on, and let it sit for no longer than about a minute. Always go with the direction of the wood grain.
Would you like to save this?
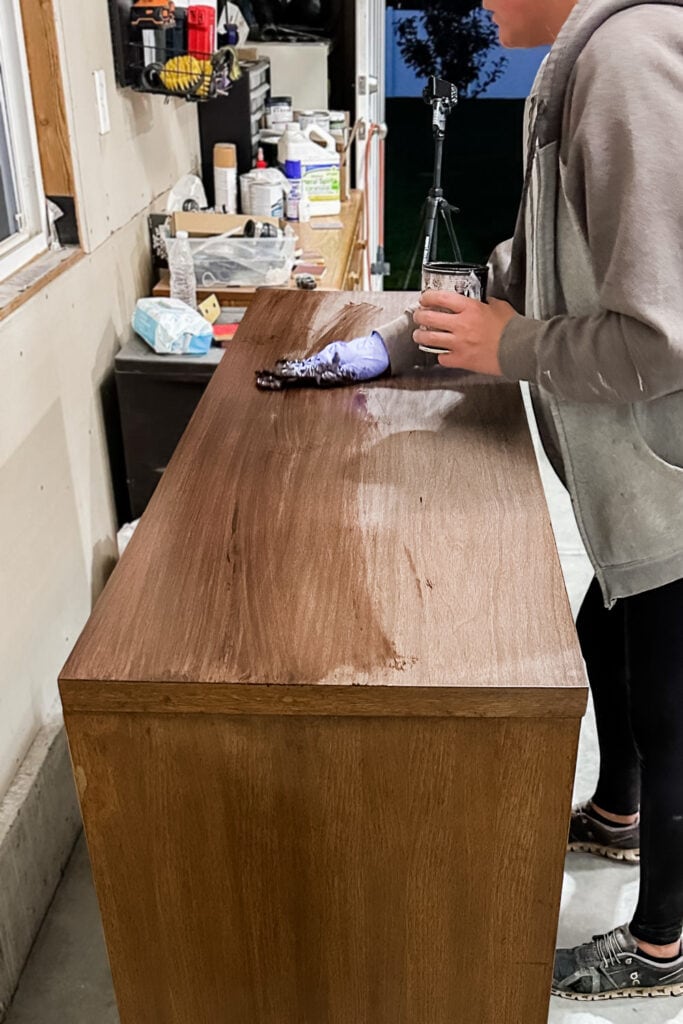
It starts to dry and get tacky, so I work as fast as I possibly can to wipe it on and right back off with a clean lint free rag. I basically try to remove almost all of it, but in that time, it will darken the laminate. Check out my guide on how to stain wood with a rag here.
And then this is very, very important. Always lay your rags out flat outside to dry. Don’t just throw your wet, stained rags into the trash can all bunched up. This can cause a fire, so always remember to let them completely dry before you toss them in the garbage.
Topcoating Gel Stain
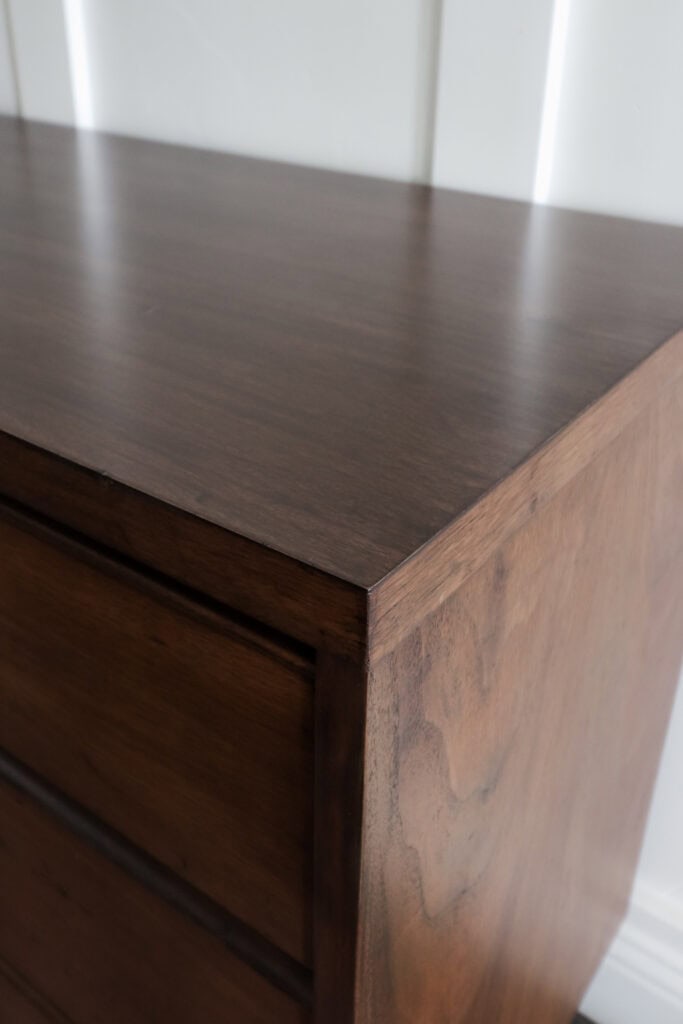
Then you let your refinished piece dry for 24 hours. If you want to darken it, you can apply another coat. If you’re already happy with how it looks, the last step is to add a topcoat. Do not skip this step. Your gel stain can and will scratch if you do.
You can use an oil based or waterbased topcoat. In this case, I used Minwax Polycrylic in a spray can, and it worked fantastic. It was quick, easy, and gave me no problems. Learn all about the Minwax Polycrylic Spray in this post.
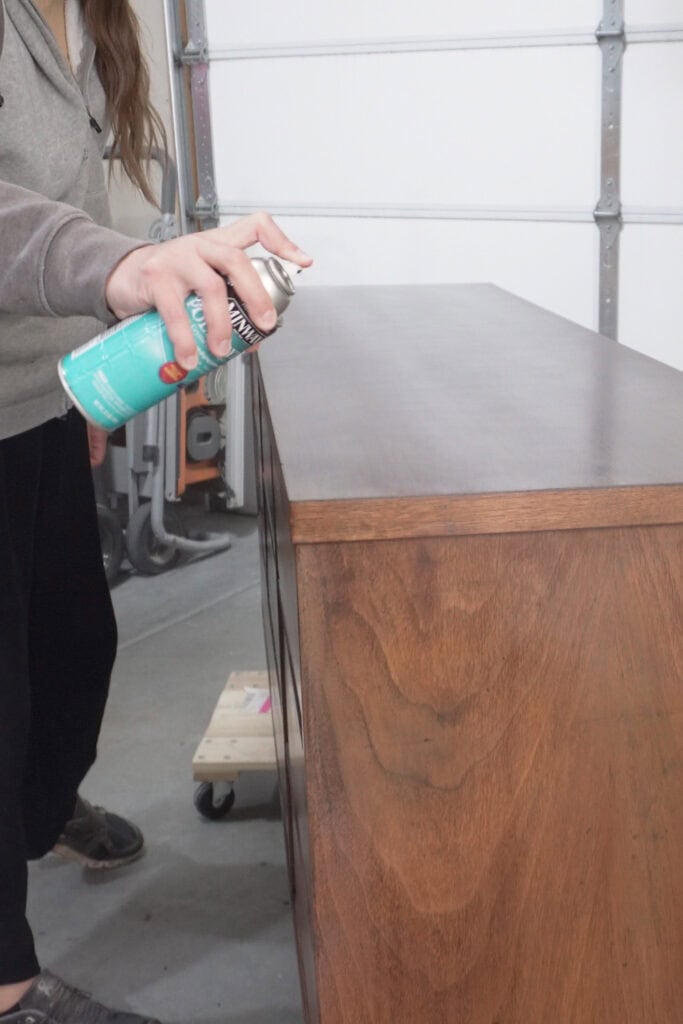
You’re not supposed to topcoat oil based products before they’re completely dry, so make sure that you wait at least 24 hours after you’ve done the gel stain. If you’re concerned, let it dry for 48 hours just to be extra sure.
I apply three coats following the instructions, and then I let it dry for another 24 hours before I lightly use my piece. And that is the quick and easy way to update your laminate furniture!
How to Stain Laminate Furniture
Learn how to stain laminate furniture properly with simple steps to help you get better, longer lasting results with this kind of surface.
Materials
Tools
Instructions
- Clean the laminate furniture to remove gunk, grime, dirt, and grease that built up over years of use. Spray Krud Kutter onto the surface and wipe it off with a damp rag, then let it dry.
- Very lightly sand the laminate using 220 grit sandpaper. The goal is to make the surface dull instead of shiny, not to scratch or remove the pattern.
- Remove all sanding dust from the surface. Use a shop vac with a hose and brush attachment, then follow up with a tack cloth.
- Prime the laminate using clear shellac to help the stain stick to the slick surface. Spray on one coat and let it dry for about an hour.
- Use gel stain instead of regular wood stain since laminate cannot absorb stain the same way wood does. General Finishes Java Gel Stain works well because it sticks to the surface and covers scratches and dings.
- Apply the gel stain with a chip brush or a lint free rag, always going in the direction of the wood grain. Let it sit for no longer than about a minute before wiping it back off with a clean lint free rag.
- Let the gel stain dry for 24 hours before deciding if another coat is needed. Apply a second coat only if you want to darken the color.
- Add a topcoat to protect the gel stain. Apply three coats of your choice of oil based or waterbased topcoat. Let it dry for at least 24 hours before lightly using your piece.
Recommended Products
As an Amazon Associate and member of other affiliate programs, I earn from qualifying purchases.


More Refinishing Furniture Tips
- Can You Refinish Particle Board Furniture
- How to Refinish Veneer
- Whitewashing Stained Wood
- This Is What a Damaged Dresser Can Turn Into (Beginner Makeover)
Follow us on YouTube to get more tips for painting furniture. Or share your project with us on our Facebook Group and be part of our community. See you there!