Quick Painted and Stained Dresser Makeover


If you have a thrift store find or just want to update a piece you already own, a little paint and stain can work wonders. This quick painted and stained dresser makeover is a fantastic weekend project you can do.
Keep reading to see how it’s done! And if you’re feeling more inspired to tackle your own project, we have plenty more DIY dresser makeover ideas to get your creativity flowing here.

Welcome to Furniture Fixer Upper day, where we join 4 of our talented furniture friends and bring you brand new makeovers! I’ll link to my friend’s makeovers after our after photos at the bottom of this post! Don’t forget to check out their masterpieces!! Okay, back to our makeover!
Okay, we bought this dresser for about a hundred bucks. It’s not solid wood, even though it looks like it is. It’s more of a modern piece, probably built in the last ten years. So it’s not super high quality, but I love the style of this piece.

There is a viral trend that will be perfect for this makeover. I want to do it, but I also want to make it a very quick makeover, which seems crazy for this big of a piece, but I want it to be a project that I could do in a day, maybe two.
And so I set out to use the products that will give me a smooth finish very quickly, and not make me prime and sand and do all of the prep work to make the paint stick. So that is the goal here today, and let’s make it happen!

Supplies Used for Quick Painted and Stained Dresser Makeover
As an Amazon Associate, I earn from qualifying purchases. I also may earn from other qualifying purchases with other companies or get free product to review and use. All opinions are my own.
- Krud Kutter
- Damp Rag
- Electric Screwdriver
- Klean Strip Premium Stripper
- Pretaped Plastic
- Cheap Chip Brush
- Plastic Putty Knife
- Mineral Spirits
- 0000 Fine Steel Wool
- Wood Glue
- Clamp
- Kwikwood
- 220 Grit Sandpaper
- Dewalt Orbital Sander
- Foam Pad for Dewalt Orbital Sander
- SurfPrep Sander (Use code RAY10 to get 10% off your order)
- Shop Vac
- Tack Cloth
- Behr Special Walnut Waterbased Stain
- Fusion Mineral Paint in Bayberry
- Lint Free Rag
- Delicate FrogTape
- Beyond Paint In Licorice
- Vonforn Paint Sprayer
- Paint Filters
- Respirator
- Waterbased Topcoat In Satin
Prep Before Dresser Makeover
This piece did have a few issues I had to address first. We had to do some things to make it look high end professional, so I can sell this for top dollar, or so I can be proud of it in my own home. If it had been in great condition beforehand, I would have been able to do this project in a day, basically.
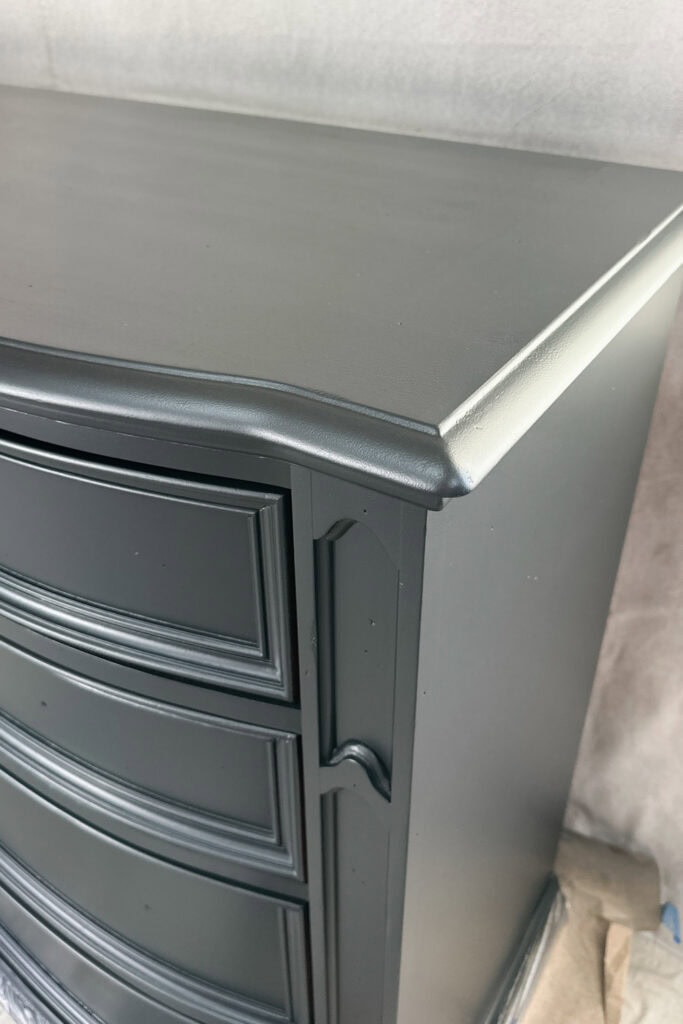
The first thing is the top of this dresser. It looked like somebody might have had candles on it, and the candles got really hot and melted the finish down to the raw wood, and so we can feel the circle on the top of this.
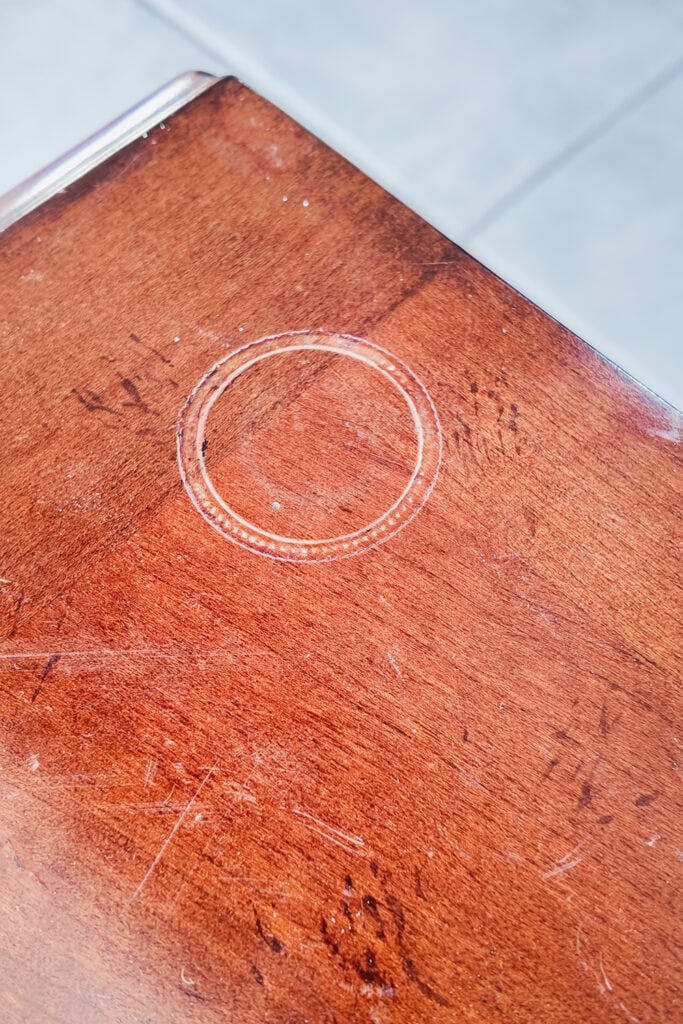
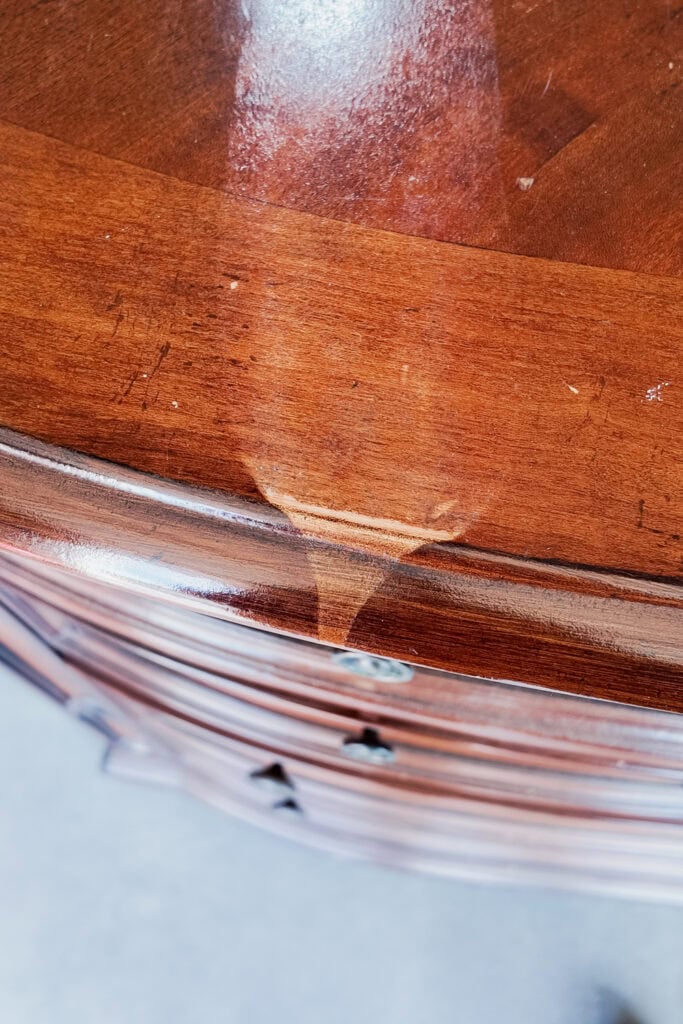
It also seemed like a candle was tipped over, possibly because the finish was ruined, as if something had spilled right here, and I suspect it’s hot wax. So we need to address those. Otherwise, we would still be able to see these marks through the paint.
If this were wax and we didn’t get rid of any remaining residue, then the paint would not stick. So we had to strip this top down. I didn’t want to, and I would rather not, but we had to.
Clean Old Dresser
But before that, the one prep step before painting that I never skip is cleaning. You don’t know what gunk and grime were on this old, used furniture, and we’ve got to get that stuff off, plus any dirt or dust, so then the paint will stick.
I cleaned everything with Krud Kutter and a damp rag, and I really focused on cleaning anything below the drip, just in case there was wax buildup anywhere. We cleaned, took out the drawers, and cleaned the inside as well. I have more tips on how to clean furniture before painting here.
Fix Loose Drawer
But when we did that, I found there was a loose drawer that was wiggling around. So I opened and inspected it, and the drawer track on the bottom was loose.
So before anything else, I grabbed my electric screwdriver. This one rotates the head so you can screw in at more of an angle for tight spaces, which is perfect for inside drawers or inside dressers.
I used it to tighten the screws in the front and the back, and voila! The drawer track just needed tightening up! The drawer’s now solid and secure, and would not wobble anymore. This was something that took literally two minutes to fix. Here’s how to fix broken dresser drawer tracks if yours need repair.
Also, as I was cleaning, I found that there were two drawers that needed some attention as well, but we came back to those things after I got the top stripped off down to raw wood.
Strip Dresser Top
I could have sanded the top down, but it would have taken a really long time to do so. I did try my carbide scraper, but with the slick finish, it wasn’t gripping anything, and it wasn’t coming off as easily as I would like.
So I grabbed this Klean Strip premium stripper that I used on the last project. So I grabbed it and decided this was going to be the fastest method to get the paint off without me just standing and sanding for probably a couple of hours. Here’s more on how to remove paint from wood without sanding.
Before applying the stripper, I knew it could drip down the sides, and I didn’t want it to ruin the rest of the dresser, so I taped everything, including the sides and the front, with pretaped plastic.
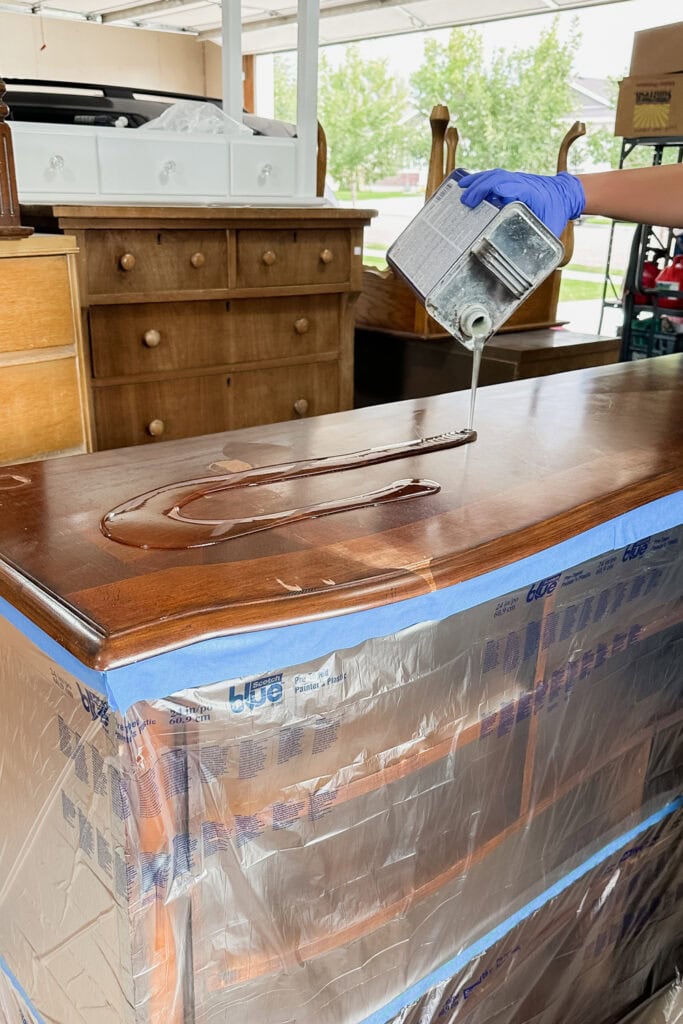

Then I applied the Klean Strip. I just poured it onto the top and then moved it around with a cheap chip brush, and wow! That finish came off so easily. Just as I was brushing the stripper around, it was starting to move and loosen up.
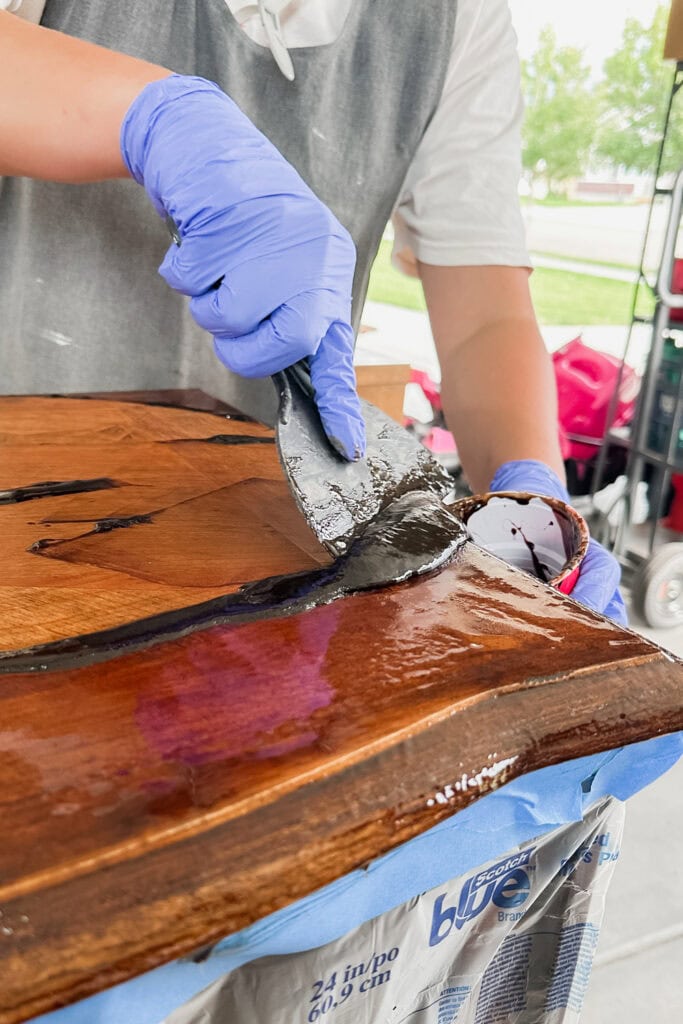
After applying it, I waited for about a minute and then used a plastic putty knife to scrape off the stain, and it just came right off. There were a couple of spots where it stayed on, though, so I just applied more stripper, let it sit for another couple of minutes, and it came right off.
I did notice the curved edge felt different. It didn’t feel like solid wood. It felt like there was a wood filler or something on this.
I wiped off the remaining residue of stripper with a paper towel and then cleaned up the residue with mineral spirits and 0000 fine steel wool. Then we let it dry.
Strip Dresser Base
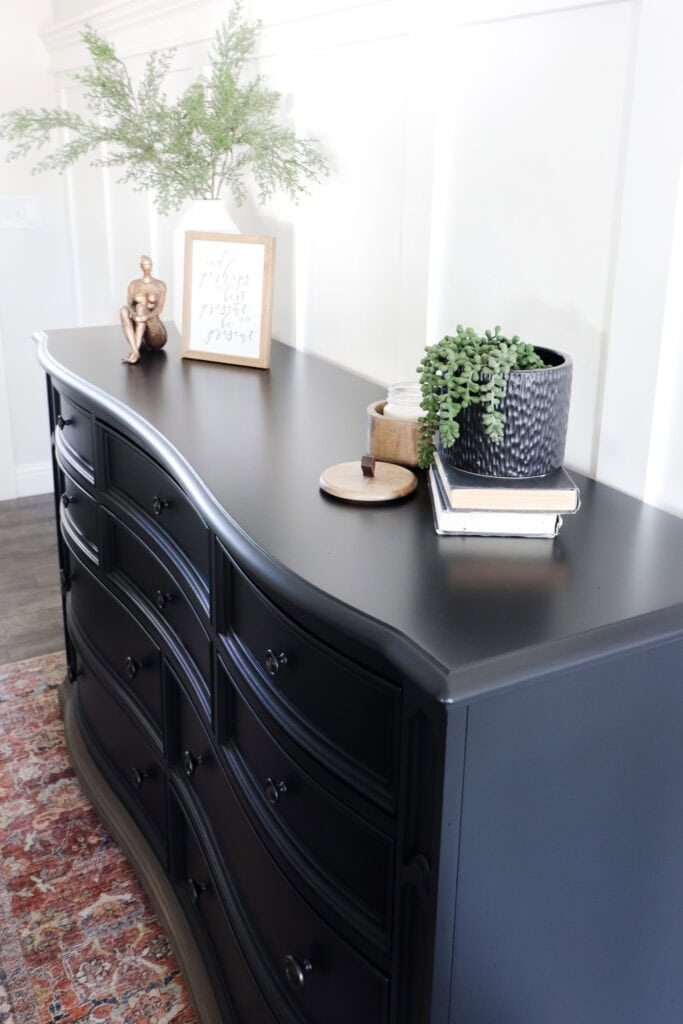
Part of the viral trend that I saw from Shabby Chic Flips by Angelina is that she paints the dresser, but then stains the bottom, and I love this look, especially on this style of furniture.
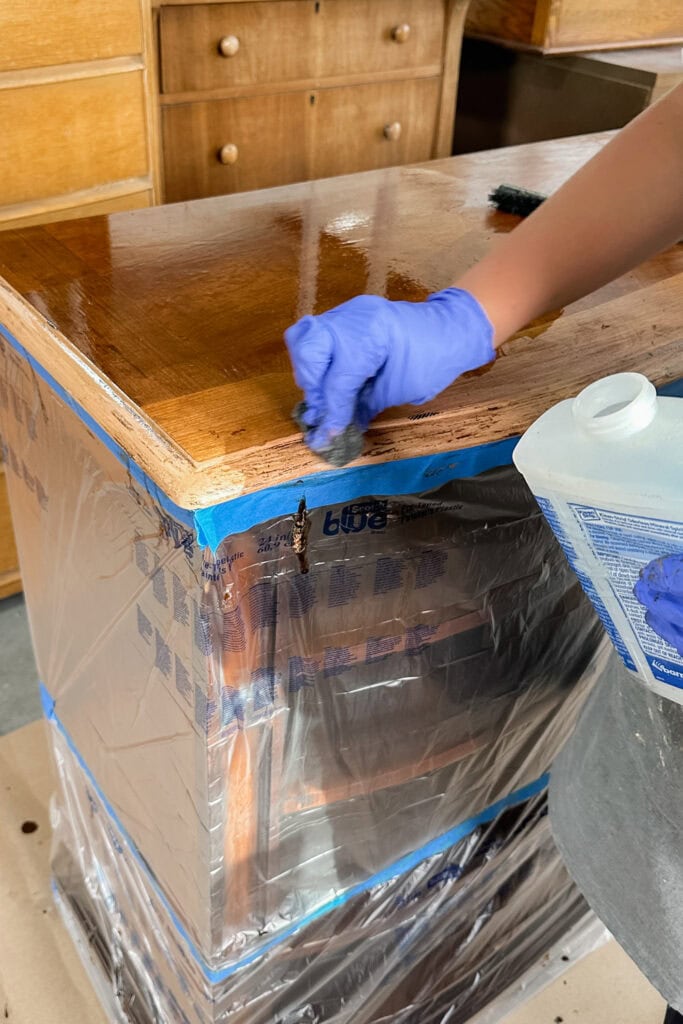
To be able to create that look, I also had to strip off the stain from the base. I don’t want this warm cherry wood stain. I want a neutral stain instead. So I did the same process: applied the Klean Strip with a chip brush.
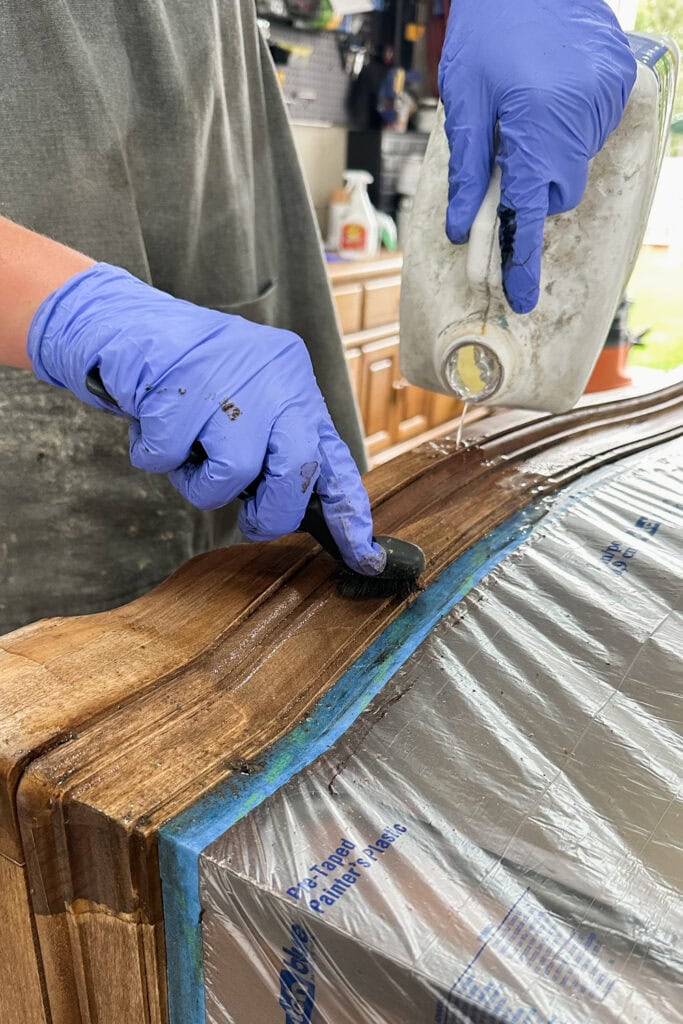
It easily came off when I used the putty knife, some steel wool, and a wire brush, just a few minutes after applying the stripper. Then I wiped it down with a paper towel to remove some of the leftover residue, and then cleaned it up with mineral spirits and steel wool.
Then I wiped it down with a paper towel to just help it dry faster, and then let it dry. Each part of this dresser took about 10 minutes to strip, and I’m not kidding, it was such a fast process. The finish wasn’t that strong, so the stripper just ate away at it and loosened it up so fast.
Fix Veneer Drawers
Before I moved on to anything else, I needed to address the situation with the drawers. So on one drawer, the veneer on the bottom was loose and lifting up. Thankfully, it wasn’t chipped, so I just put some wood glue underneath it with a toothpick. And then I clamped it down and let the glue dry overnight. Learn more about how to fix veneer that is lifting here.
On another drawer, the wood veneer had chipped, and if you look closely, you can see that underneath this is not wood, it’s not MDF, and it’s not particle board. It’s actually plastic. The base of these drawers was made out of plastic and then covered with wood veneer.
The wood veneer had chipped in just a couple of spots, so I quickly mixed up a little batch of Kwikwood, which was so easy because you just cut off the amount that you need and then knead it together in your hands.
You push it into place, leaving some extra, so you can sand it down smooth. and just let it dry. Since I was letting everything else dry overnight, I let this dry overnight as well. Here’s my guide on how to use KwikWood.
The next day, I sanded that Kwikwood down smooth with some 220 grit sandpaper on my orbital sander. It’s perfect for beginners. It’s cheap, and you can connect it to your shop vac with this little adapter. Learn how to attach shop vac to sander in this guide.
I unclamped the clamp from the drawer that was glued, and then turned my attention to the two places where I had stripped off the finish.
Sand Remaining Residue
Now, when you strip off a finish, you do need to lightly sand it to remove any remaining residue, but that was super easy. I just grabbed my sander with the foam pad to not sand too much, and went with 220 grit sandpaper on it.
I just did some light sanding. I just wanted to remove the rough texture left by the stripper residue. It was like a five minute quick sanding job to just sand everything smooth. The foam pad helps me sand these curves on both the top and base.
Would you like to save this?
But I found out that the structure of the top is made out of MDF. They had filled in the curves on it with some type of filler, paint, or something that could be stained to make it look like wood. Once again, this dresser is not high quality. It’s built well, but it is not solid wood.
Something I do want to point out is that if you are just getting started and on a budget, this Dewalt orbital sander is what I started with. It’s very aggressive, so it can sand off and remove finishes very quickly. You can sand the curves with this foam pad, and you can sand flat surfaces as well. It does a fantastic job.
My preference, though, as I’ve been in this for so long, is my little SurfPrep sander. It’s rectangle, so I can get into corners better. It’s not as aggressive, and so it doesn’t jump around as much.

It’s easier to control and sand these curves. It’s also smaller and lighter. But it does come at a pretty big investment. It’s like $600 compared to $80, so it’s not something I would advise getting if you’re just starting out. Check out my honest SurfPrep Sander review here!
But if you’re doing makeovers and a lot of projects all the time, this is such a good investment. While I do prefer my professional grade sander, again, for beginners, the Dewalt sander is perfect to start out and will do what you need it to do. Here’s my list of the best sander for beginners for more options.
Then I vacuumed up all of the dust with my shop vac and used a tack cloth to wipe everything off and remove any remaining dust.

Apply Waterbased Stain
You could do this either way. You could either do the paint and then do the stain, or you can do the stain and then do the paint. It doesn’t really matter. You might have to touch up things either way.
I decided to do the stain first. Since I wanted this to be a super quick makeover, I used waterbased stains instead of oil. Waterbased stains are a little bit harder to work with because they dry so fast, but this also means it makes the project super fast.
And there are no toxic fumes, so you can use this indoors. I mixed up Behr Special Walnut and a little bit of the color Bayberry from Fusion Mineral Paint. I basically just used some green paint that I had. I mixed those together. It was maybe a 50/50 mix. I honestly can’t remember.
The green helps cancel out any orange in the wood, so then I’m not left with a warm wood stain. There’s a lot of grays and green undertones in my house, so I just wanted something that wasn’t warm.
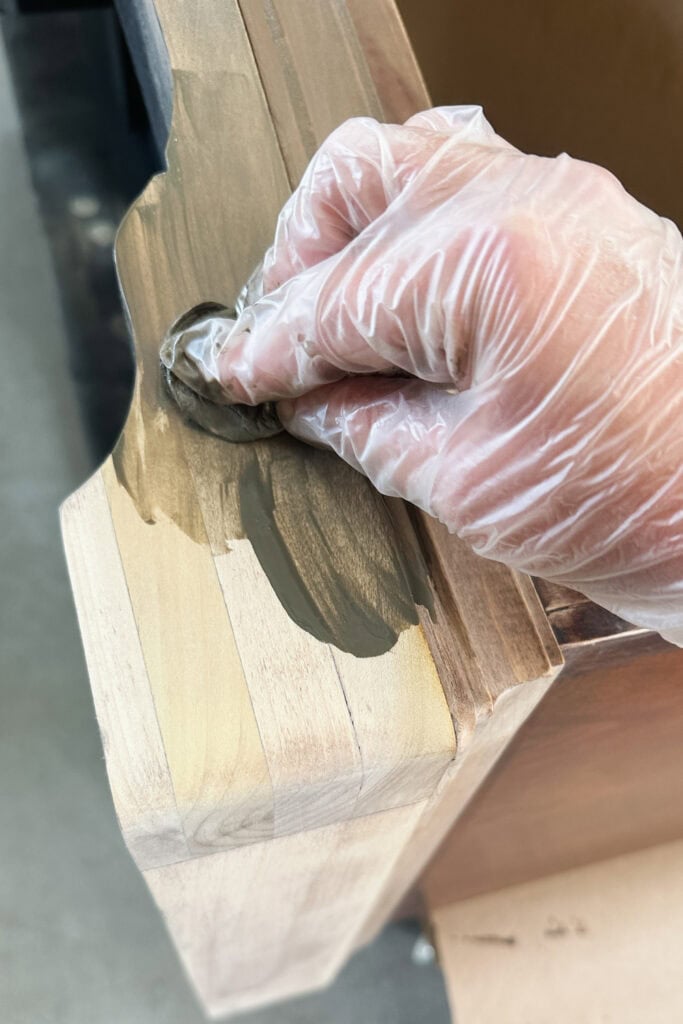
I mixed those together, and then I just applied the stain with a lint free rag, working in very small sections as I went. And like I said, this stuff dries very quickly. I know it looks weird having the warm cherry wood stain next to this stain that almost looks gray, but it will get better once I put the paint on.
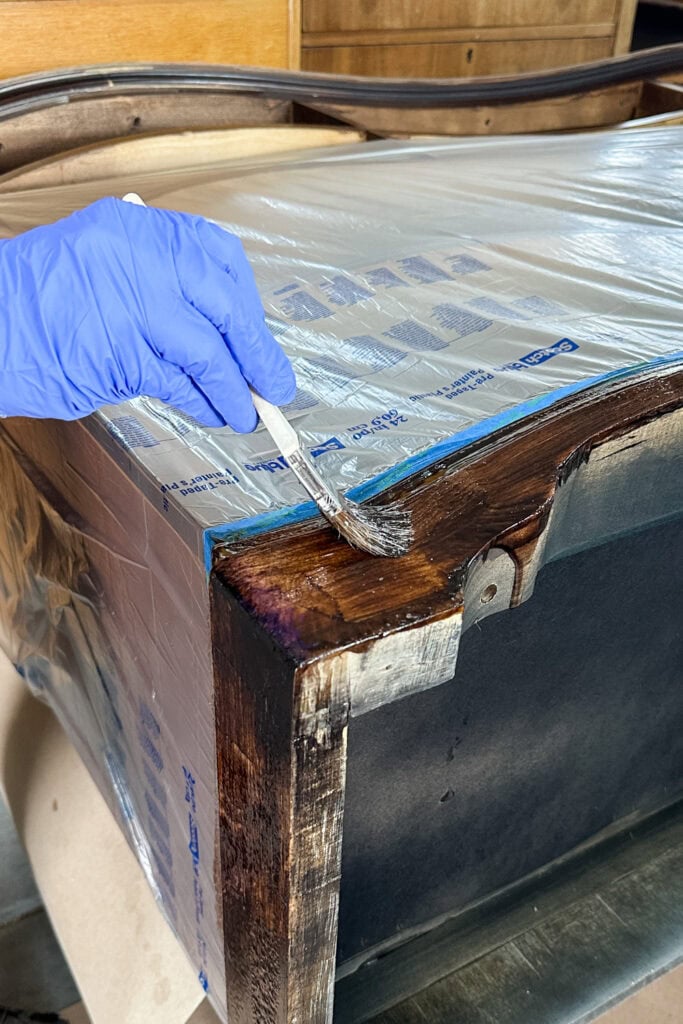
The stain dried for around an hour. And then I taped it off, and this is very important, using delicate FrogTape. It sticks really well, but it doesn’t stick so well that it will ruin the freshly painted or stained finish.

If you were to just use regular tape, it could peel off or ruin the stain. I taped off the new stain, so I wouldn’t get paint onto it. And then I finished taping with pretaped plastic to cover the rest of the base.
We also hung up some drop cloths on the walls and on the floor. If you don’t have a dedicated spray area, you could get a spray tent or spray outside. I did also tape off the insides of the drawers. Get more tips on how to paint furniture indoors without making a mess here.
You can learn about this on my blog post about how to prevent overspray when painting furniture. And I have a video about how I tape off drawers in my Spray Like a Pro course.
Spraying Doesn’t Have to Be Scary!
If sprayers have ever intimidated you, this class changes everything. Learn how to spray furniture confidently and save hours compared to brushing, without streaks, drips, or stress.

Spray Paint Dresser
To make this project as quick as possible, I used a paint that does not need any sanding or priming beforehand. I didn’t want to go through more prep, primer, and everything. I did test this out on a sample one time, painting over an oak cabinet door, and it worked beautifully.
I didn’t thin out the paint. I just sprayed it right on, and it amazed me. This sprayer sprayed this very, very thick paint, and it just dried gorgeous. When I tested the durability of the paint on that door, when I scratched really, really, really hard, I was able to get a little bit of it off.
But when I topcoated it, I could not, for the life of me, get that paint to scratch off with my fingernail. I used Beyond Paint in the color Licorice, and filtered it into my paint sprayer so it won’t get clogged.
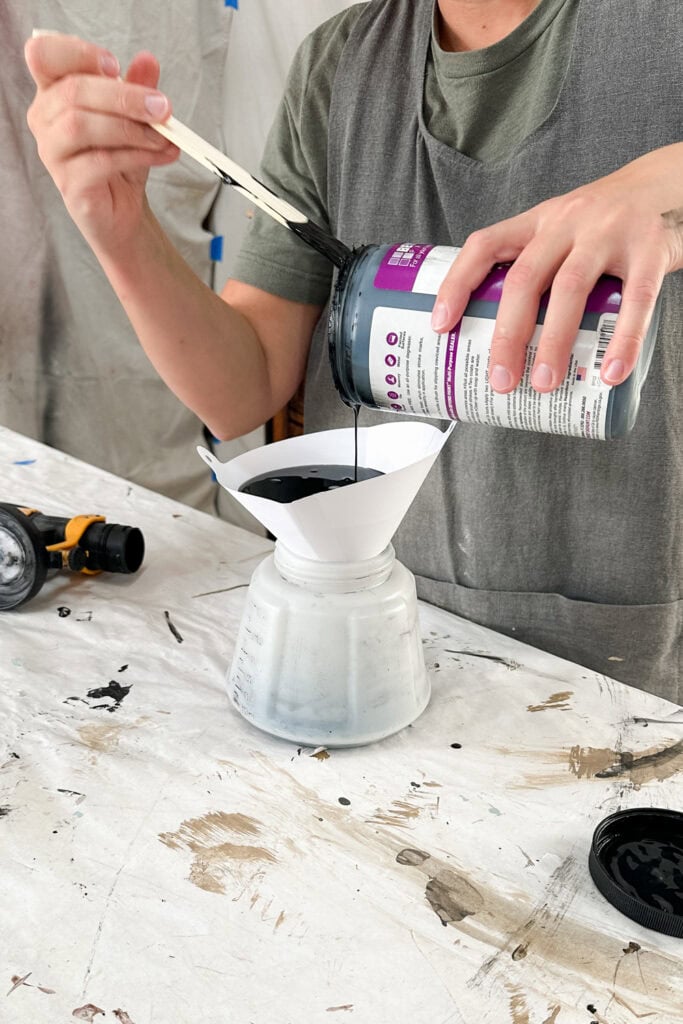
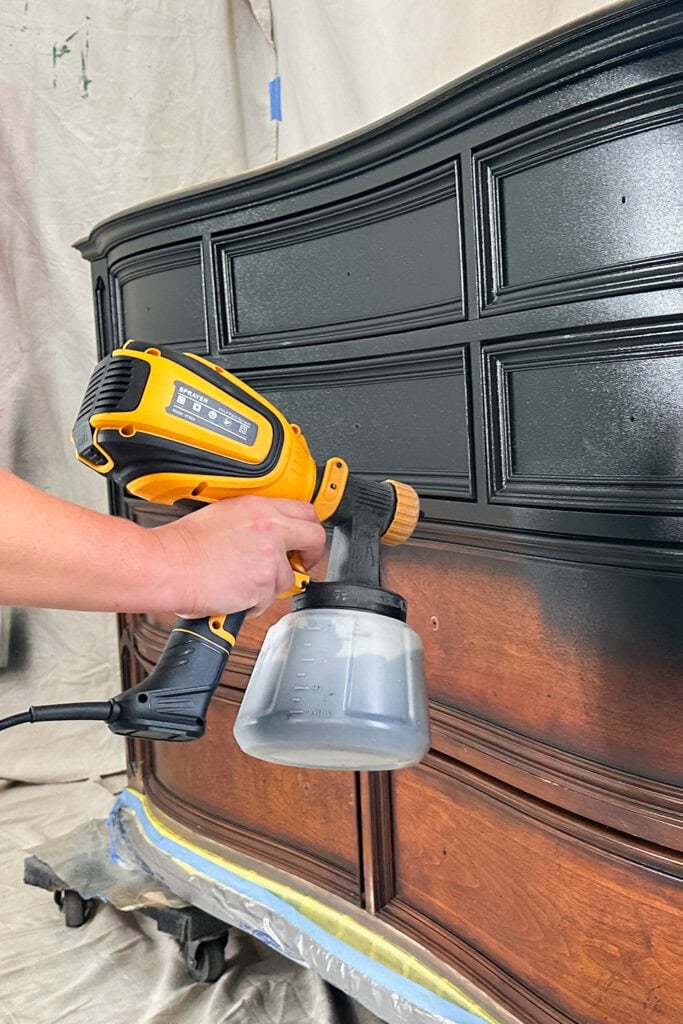
The Vonforn sprayer is a cheap, beginner level sprayer that does as good a job as my $1,300 sprayer. I tested it, like I always do, making sure that my settings were right, and then I sprayed the dresser.
I was able to spray a coat in less than five minutes. The problem is, when I stepped back and looked at it, there was so much texture, and I was so worried. This didn’t happen on the sample, and so I’m sitting here thinking, did I ruin this project? Would I have to go and sand all of this down?

For about 5 to 10 minutes, I was really worried until the paint started to dry in certain areas, and it was smooth in those areas.
Spraying this paint on is like magic. You don’t have to prep and thin the paint. It has amazing coverage, and you end up with a smooth finish. I ended up doing 2 coats, just to make sure I had coverage everywhere.
I have tested rolling and brushing it on, and it leaves quite a bit of texture. You can check it out in my black sewing desk makeover in this Beyond Paint review.
And I did obviously open up the drawers and spray inside them, on the edges, and stuff. And I let it dry for a couple of hours between coats. Instead of brushing and rolling the paint onto this huge dresser for a couple of hours, I sprayed it on in 5 minutes.
After that, I had a couple of hours to do other things while the paint dried. So spraying this saved me probably 2 and a half hours, which is incredible. Once the second coat was slightly dry, I peeled off the tape to see how everything looked. And the stain with the black looked so good!
Topcoat Painted and Stained Dresser
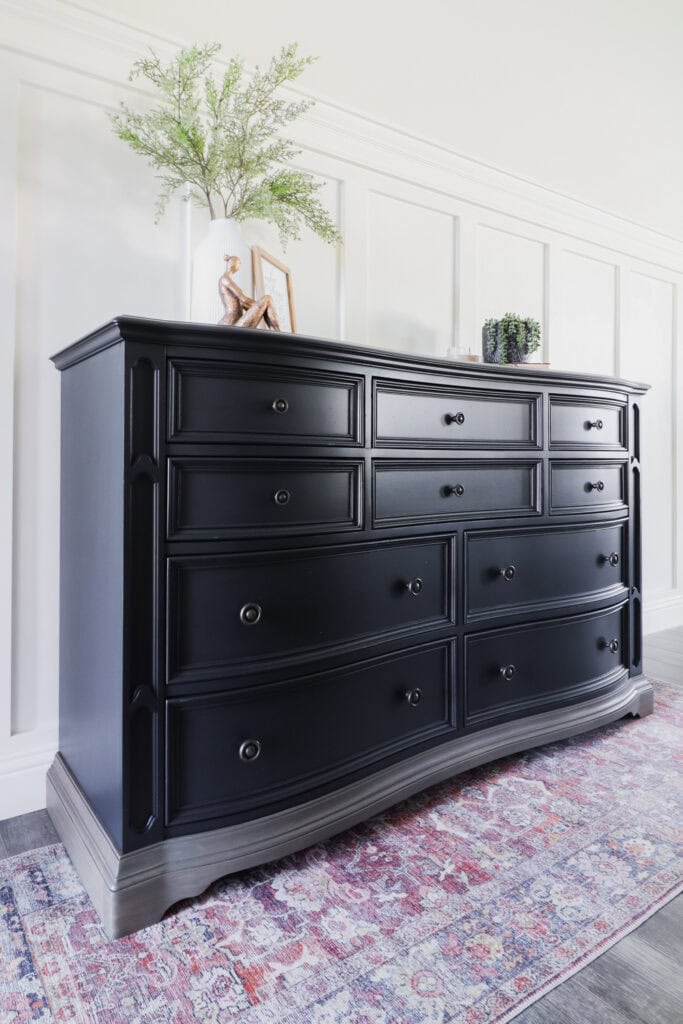
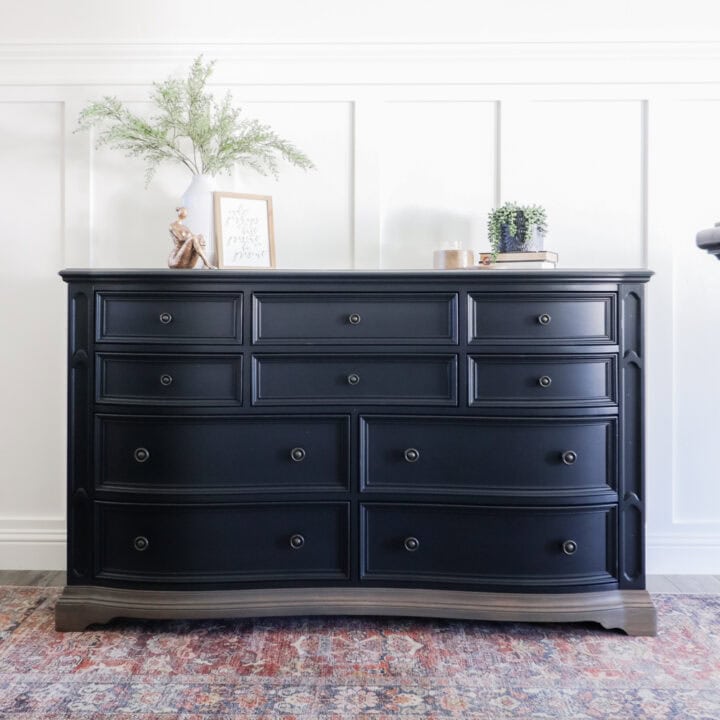
Then I cleaned out my sprayer and put in a waterbased topcoat in the satin finish. And I sprayed on 2 coats. This is just me being extra, to make sure that the dresser is very durable. Oh, and then I put on the old hardware. And here’s what it looks like now!
Watch the full makeover on our YouTube video below, or scroll down to see the after photos!

It’s a beautiful modern look without the cherry wood finish. I love it so much, and now it’s a statement piece instead of a boring, regular cherry wood dresser that you see in any home. Here’s the easiest way to paint furniture for another quick makeover that only took one day!

Don’t forget to check out these other awesome before and after furniture makeovers from my Furniture friends!! (Click the links below the photos!)
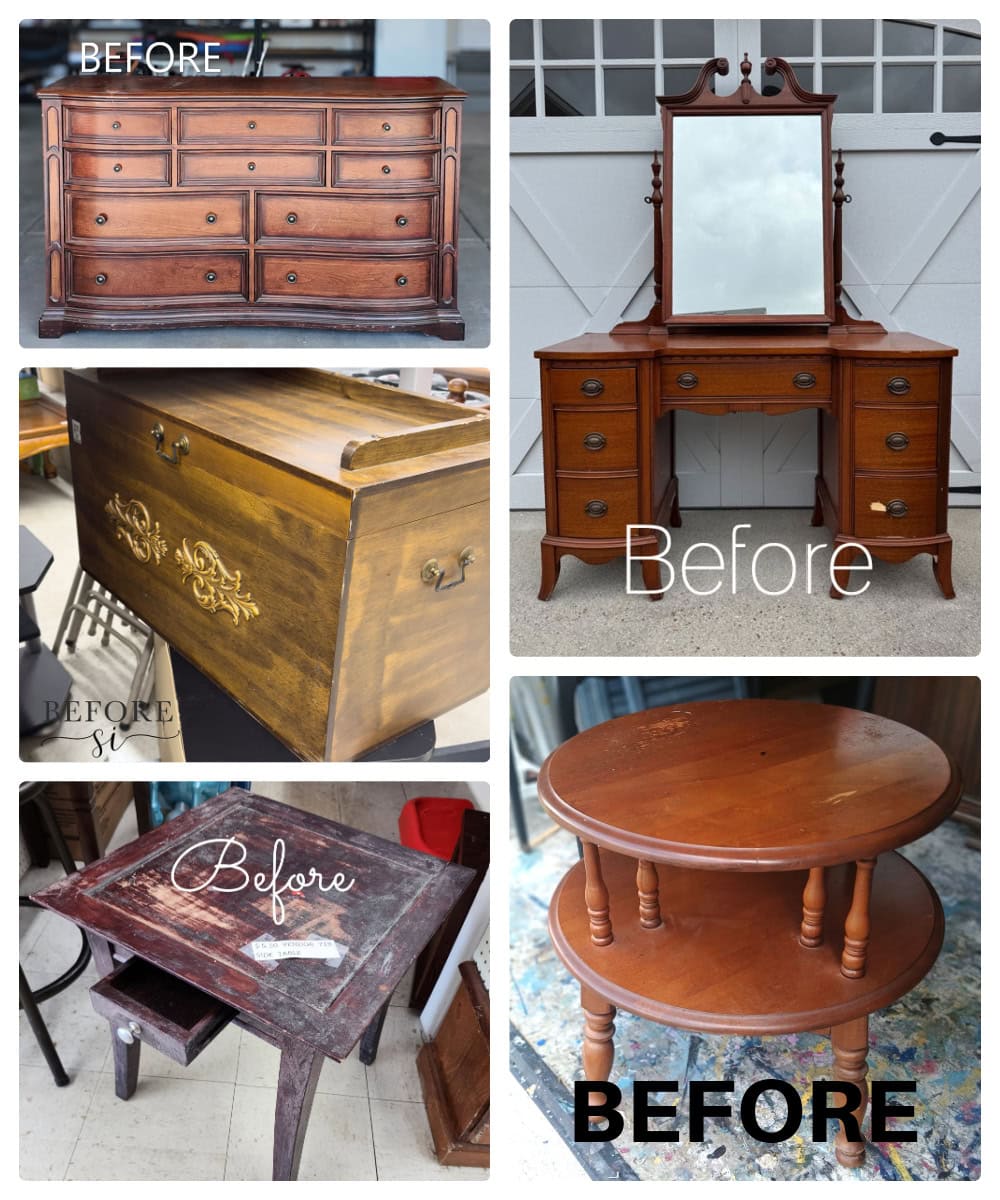
- Paint Inherited Furniture to Fit Your Decor from Petticoat Junktion
- Floral Decoupaged Side Table Makeover from My Repurposed Life
- Thrifted Chantilly Blanket Box from Salvaged Inspirations
- Black Painted Dressing Table from Confessions of a Serial DIYer
More Before and After Makeovers
See All >
Click any of these “before” photos below to view the “after” of that makeover.
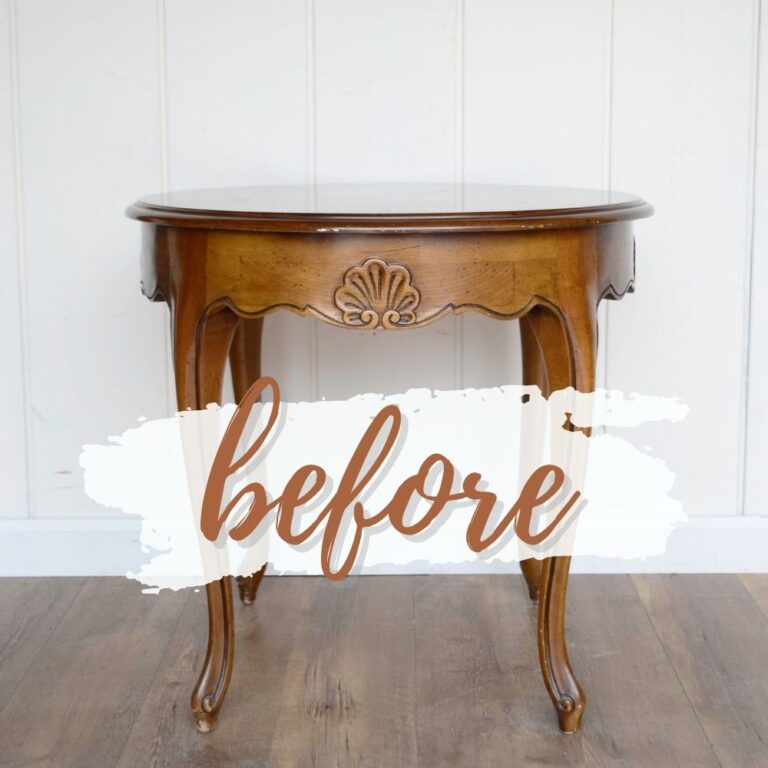


Quick Painted and Stained Dresser Makeover
This quick painted and stained dresser makeover is a fantastic weekend project you can do with a thrift store find or a piece you already own!
Materials
- Krud Kutter
- Damp Rag
- Klean Strip Premium Stripper
- Pretaped Plastic
- Cheap Chip Brush
- Mineral Spirits
- 0000 Fine Steel Wool
- Wood Glue
- Kwikwood
- 220 Grit Sandpaper
- Foam Pad for Dewalt Orbital Sander
- Tack Cloth
- Behr Special Walnut Waterbased Stain
- Fusion Mineral Paint in Bayberry
- Lint Free Rag
- Delicate FrogTape
- Beyond Paint In Licorice
- Paint Filters
- Waterbased Topcoat In Satin
Tools
Instructions
- Start by cleaning the entire dresser with Krud Kutter and a damp rag to get rid of any dust and grime.
- Then, you'll want to take out the drawers and fix any loose tracks or damage.
- Strip the top and base of the dresser using Klean Strip Premium Stripper and a chip brush. After you apply it, use a plastic putty knife to scrape everything off.
- Wipe off any leftover stripper gunk with mineral spirits and 0000 steel wool for a clean surface. Let everything dry completely before you move on to the next step.
- If you have any loose veneer or chips, use wood glue and a clamp to fix them. Fill in smaller spots with Kwikwood and let it dry overnight before sanding it smooth with 220 grit sandpaper.
- Apply your waterbased stain to the top and base with a lint free rag. Once it's totally dry, tape off the stained area with delicate Frog Tape and pretaped plastic.
- Spray the dresser with Beyond Paint in Licorice using a sprayer for the best finish. Give it two good coats, and let it dry.
- Finish with two coats of a waterbased topcoat in satin for extra durability.
Recommended Products
As an Amazon Associate and member of other affiliate programs, I earn from qualifying purchases.


More Dresser Makeover Ideas
Follow us on YouTube to get more tips for painting furniture. Or share your project with us on our Facebook Group and be part of our community. See you there!
oooolalaaaa, this is WOW gorgeous Natalie! I’ve never tried Beyond paint but it looks/sounds awesome! Pinned XOXO
Aww thank you SO much Denise!!
We were totally on the same page today! It’s gorgeous!! XOXO
Great minds think alike 😍 Thanks so much Christy!!
Natalie,
I love the new look of your painted and stained dresser. You can’t beat an easy paint sprayer finish!
I hate stripping furniture, but you make it look so easy. 🙂
Pinned!
gail
Aww thanks so much!