How to Turn a Dresser Into a TV Stand


If you’re tired of your old dresser taking up space and collecting dust, why not give it a new purpose? In this post, we’ll show you how to turn a dresser into a TV stand! It’s one of our favorite furniture makeover ideas to repurpose old pieces and add some extra style to your living room.
You don’t have to spend a fortune on a new TV stand when you can easily transform an existing piece. So, if you’re ready to DIY, keep reading, and we’ll walk you through the process step by step!

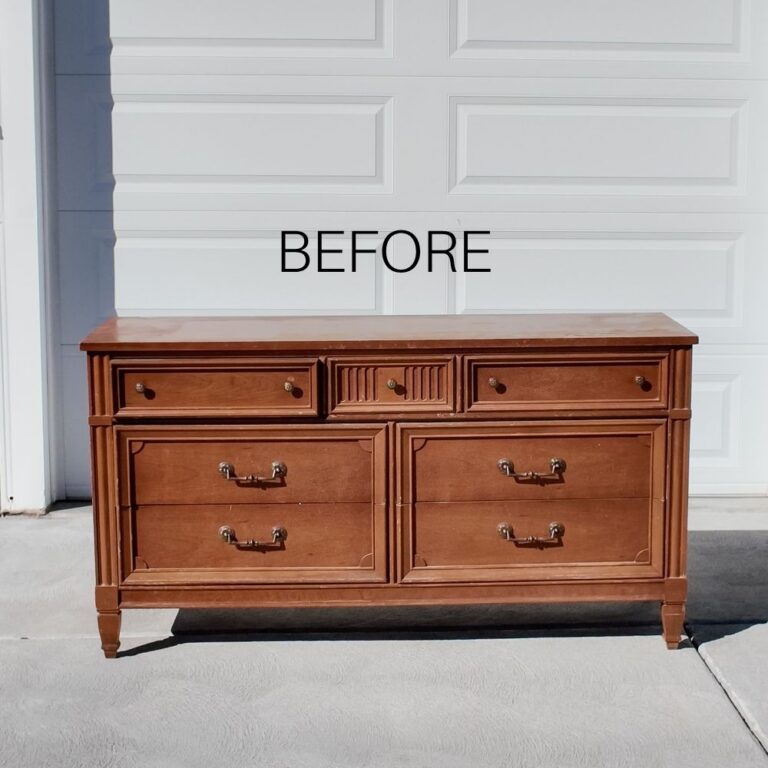
Our neighbor had this cheaply made dresser, and we ended up getting it for free! You can check out the best places to get good furniture for cheap here if you’re on a budget. We saw potential in turning this piece into a TV stand for our small home.

It was missing some drawers – the before photo above doesn’t show all of the drawers that we had. But this actually worked in our favor for this project! You’ll see how the transformation turned out in the end.
Repurposing old furniture not only saves you money from buying a new piece, but you also get the freedom to customize it and make it uniquely yours. So, let’s dive into this guide on how to turn a dresser into a TV stand!

Supplies Used to Turn a Dresser Into a TV Stand
As an Amazon Associate, I earn from qualifying purchases. I also may earn from other qualifying purchases with other companies or get free product to review and use. All opinions are my own.
- JigSaw
- Cedar Fencing Wood Planks
- Nail Gun
- Mini Kreg Pocket Hole Jig
- Trim
- Bondo
- Drill
- Miter Saw
- Dark Walnut Stain and Grey Stain
- 220 Grit Sandpaper
- Krud Kutter
- Clear Shellac Spray
- Behr Latex Paint in Heavy Cream
- Calcium Carbonate Powder
- Paint Sprayer
- Varathane Waterbased Polyurethane in Satin
- New Hardware
How to Turn a Dresser Into a TV Stand
First, we used a Jigsaw to cut the supports for the top two rows of drawers. This left us with a big hole in the top section and nothing covering the top of the bottom rows of drawers.
We had to put a piece of wood on the back, in line with the front support, so we could attach cedar fencing planks to cover the big hole. We secured the wood inside the back using our nail gun.
We also added a piece of wood at the front, just under the top, to prevent it from bowing under the weight it will need to support. Then, we attached it to the top of the dresser using our mini Kreg Pocket hole jig.
We wanted the drawers to look fancier than they were, so we nailed some simple skinny trim. At this point, we also filled in the old hardware holes with Bondo, let the filler dry, and sanded it smooth for the new hardware later on. Then, we drilled a large hole in the back for cords to go through.
Add New Wood Shelf and Top
We cut small planks of cedar fencing boards for the shelf and the top of the TV stand. Since we didn’t have a table saw, we had to mix and match different widths to make the shelf fit snugly. We just used the Jigsaw and an old Miter saw to make all these cuts.
We did the same for the top but used boards that were 2 inches longer than the dresser’s width, so the wood stretched all the way across with a slight overhang on each end. So we ended up with four wooden planks spanning the depth of the piece and completely covering the top (but we stained them first before we attached them).


Sand and Stain Wood Boards
We sanded the wood boards with 220 grit sandpaper to smooth them out and then cleaned off the dust before staining them with a mix of dark walnut and grey stains. You can learn how to stain wood furniture in this post. We let them dry for 48 hours before topcoating.

Would you like to save this?
Paint Dresser Turned TV Stand
While the wood for the new shelf and top dried, we started with the prep work on the soon to be TV stand: cleaning it with Krud Kutter, scuff sanding the surface to smooth out imperfections and help with adhesion, and spraying two coats of clear shellac over the whole thing to prevent any bleedthrough issues. You can learn all about how to prepare furniture for painting in this post.

To make our own chalk paint, we mixed Behr latex paint in Heavy Cream, calcium carbonate powder, and water. Check out more of the best chalk paint recipes you can easily follow here. Using our paint sprayer, we applied five coats onto the piece, letting each coat dry before spraying the next coat. Since the light color was going over dark wood, it needed more layers than usual.

Once the finish dried, we used 220 grit sandpaper to heavily distress the edges to create that worn, charming look. If you want something more subtle, you can start light and build up as you go – it’s way easier to add more distressing than to fix overdoing it. You can try out these other best distressing furniture techniques, too!
We cleaned up the dust from sanding and then, using our nail gun, attached the finished wood planks to the shelf and to the top to the dresser.

Topcoat Painted TV Stand
As a final step in how to turn a dresser into a TV stand, we topcoated the entire piece. We used Varathane Waterbased Polyurethane in Satin, adding three coats to protect the piece and make the paint and stain last. You can learn more about sealing painted furniture here, which also includes a guide on how to apply waterbased poly.

Then, we added new hardware to the drawers, giving them a fresh, updated look. This small detail can make a big impact on the overall look of your new TV stand. Here’s a more detailed guide on how to change hardware on a dresser!
If you want to add some height to your piece, learn how to add legs to a dresser here.

And there you have it – a beautiful, unique TV stand made from an old dresser. With a little creativity and some DIY skills, you can turn almost anything into something fresh and stylish! It’s a great way to repurpose what you already have and create something one of a kind without breaking the bank.


More Before and After Makeovers
See All >
Click any of these “before” photos below to view the “after” of that makeover.


How to Turn a Dresser Into a TV Stand
Materials
Instructions
- Start by cutting the supports for the top two rows of drawers using a Jigsaw. This will create a hole in the top section, but don't worry, we'll cover it up later.
- Attach cedar fencing wood planks to cover the hole using a pneumatic nail gun. Make sure to secure them inside the back of the dresser for stability.
- To prevent the top section from bowing, add a piece of wood at the front just under the top and attach it using a mini Kreg Pocket hole jig.
- You can nail some simple trim onto the drawers. This will add a touch of fancy to the finished piece.
- Fill in any old hardware holes with Bondo, let it dry, and sand it smooth for new hardware later on. Drill a large hole in the back for cords to go through.
- Cut small planks of cedar fencing boards to create a new shelf and top for the TV stand. Use a Jigsaw and Miter saw for precise cuts.
- Sand the wood boards with 220 grit sandpaper to smooth them out before staining them with your desired color. Let the stain dry for 48 hours before topcoating.
- Prepare the dresser for painting by cleaning it with Krud Kutter, scuff sanding the surface, and spraying two coats of clear shellac to prevent any bleedthrough.
- Mix together your own chalk paint using latex paint, calcium carbonate powder, and water. Apply up to five coats onto the dresser using a paint sprayer for a smooth finish.
- Distress the edges of the piece using 220 grit sandpaper to create a worn, charming look. You can start light and add more distressing as desired. Clean up any dust from sanding.
- Attach the finished wood plank shelf and top to the dresser using a pneumatic nail gun for a sturdy finish.
- Topcoat the entire piece with waterbased polyurethane to protect the paint and stain. Apply three coats for maximum durability.
- Replace old hardware with new ones for a fresh, updated look.
- And that's how to turn a dresser into a TV stand!
Recommended Products
As an Amazon Associate and member of other affiliate programs, I earn from qualifying purchases.


More painted furniture makeovers
- Chalk Painting A Dresser
- Painting Furniture With Chalk Paint
- White And Modern Wood Dresser Makeover
- White Wash Furniture With Chalk Paint
- Two Toned Painted and Stained Furniture
Follow us on YouTube to get more tips for painting furniture. Or share your project with us on our Facebook Group and be part of our community. See you there!