Chalk Painting A Dresser


If you’re looking for a quick, easy, and affordable way to transform your old dresser into a stylish piece of furniture, then chalk painting a dresser is the perfect solution. Not only does it give your dresser a fresh new look, but it also adds that rustic and vintage charm that is popular in home decor.
And with so many of these chalk paint furniture ideas available, you can get creative and make your own unique statement. Let’s get started with updating a dresser with chalk paint!

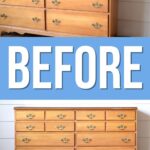
You may have an old dresser lying around that has seen better days. It may be scratched, dinged, or just plain outdated. But don’t toss it out just yet! You can easily update it with a fresh coat of paint and some creativity.

Chalk painting allows you to give your old dresser a new look without having to replace it. It’s also a budget friendly option – chalk paint is affordable and easily available at most home improvement stores, and you can even make your own!
Chalk paint can work with any style not just shabby chic or farmhouse but also modern and eclectic. You can use it to give your dresser a distressed look or go for a smooth finish – it’s a versatile paint that allows you to add your own personal touch.

Supplies Used for Chalk Painting Dresser
As an Amazon Associate, I earn from qualifying purchases. I also may earn from other qualifying purchases with other companies or get free product to review and use. All opinions are my own.
- Electric Screwdriver
- Drill
- Bondo
- Krud Kutter
- 220 Grit Sandpaper
- SurfPrep Sander (Use code RAY10 to get 10% off your order)
- 220 Grit Sanding Screens (Use code RAY10 to get 10% off your order)
- Vacuum
- Tack Cloth
- Painter’s Tape
- Clear Shellac Primer
- Behr Paint in Pure White
- Calcium Carbonate Powder
- Paint Filter
- Paint Sprayer
- Old Wood Slats or Planks
- Nail Gun
- Wood Glue
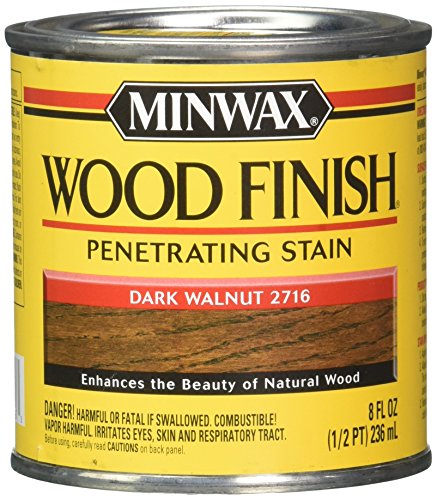
- Minwax Dark Walnut Wood Stain
- Varathane Polyurethane
- New Hardware
Remove Hardware from Dresser
First, we took all the hardware off the dresser using this super handy electric screwdriver. It’s important to get all the hardware off before painting, so you don’t end up with paint on it or have trouble reaching certain spots.
Next, we filled any holes in the dresser with Bondo. This made sure the surface was smooth and ready for painting. We just mixed it up, spread it over the holes, and overfilled them a bit so they could be sanded down smooth later after it dried. Here’s our Bondo Wood Filler review for a more detailed guide on using Bondo as well as our honest thoughts on it.

Clean and Sand Dresser
Once we had all the hardware removed and filled any holes, it was time to give the dresser a good clean. We used Krud Kutter, like we usually do, to wipe down the entire surface and remove any built up grime or dirt.
Then we scuff sanded the entire dresser using a SurfPrep Sander and 220 grit sanding screens. Cleaning and sanding helps the paint to adhere better and gives it a smoother finish, so take the time to do it properly for the best results. Here’s how to clean furniture before painting and sanding before painting furniture to learn more about these steps.

We vacuumed off all the dust and wiped the dresser with a tack cloth for any remaining dust or debris. Then we taped off the drawers using painter’s tape – we didn’t want any paint getting on the inside of the drawers while we painted the outside.
Prime Dresser for Chalk Paint
Before moving on to painting, we primed the dresser with clear shellac. This helps to seal the wood and prevent any stains or tannins from bleeding through the paint. It also helps with adhesion, making sure the chalk paint sticks well to the surface.

Clear shellac is one of the best primers for chalk paint – it comes in a spray can, which makes it quick and easy to apply. Shake the can well and spray an even coat onto the dresser, making sure to cover all areas. We did 2 coats on our dresser and let each coat dry for about an hour or so before applying the next one.
Chalk Paint Dresser White
As we mentioned above, you can make your own chalk paint, and we did just that for this dresser project. Following our homemade chalk paint recipe, we mixed Behr Pure White paint, calcium carbonate powder, and water. Here are some other best chalk paint recipes you can try as well.

Once the paint was ready, we filtered it into our sprayer so there wouldn’t be any chunks or clumps. This would help with getting a smooth finish on the dresser. If you ever get lumps on your finish, here’s our guide on how to fix lumpy chalk paint.
We used the Vonforn paint sprayer, which is affordable and one of the best paint sprayers for chalk paint. We sprayed 2 coats of chalk paint, letting the first one dry before applying the second. Do light and even strokes with the sprayer to avoid drips or uneven patches of paint. Here’s how to fix spray paint drips if you run into this issue!
If you’re still wondering, “can you use chalk paint in a sprayer?” – read this post to get answers! Here are common chalk painting mistakes to avoid, and if you are working inside your home, check out this guide on how to use a paint sprayer indoors.


Distressing Chalk Paint
Since we wanted that rustic farmhouse look, we went back over some of the edges and detail with 220 grit sandpaper. We focused on areas that would naturally be worn out over time and gave them a light sanding to reveal some of the wood underneath. This gave the dresser a light distressed look.
Would you like to save this?
This is optional and depends on the look you want to create. You can check out other distressing furniture techniques here if you want the same look as we did in this project. Then we wiped the sanding dust up with a tack cloth.
Update and Stain Dresser Top
For the top, we recycled some old wood slats off some pallets we had laying around to get a natural wood top. We cut them to the size we needed and then attached the planks to the top with our trusty nail gun and some glue.
We stained the wood plank top with Minwax Dark Walnut Wood Stain to give it a rich, deep color. This added a nice contrast against the white chalk paint and gave the dresser an even more rustic feel. We have a guide on how to stain wood furniture here if you’re new to staining.

Topcoating Chalk Paint and Stain
After the paint and stain have dried, it’s important to topcoat your project. We gave the whole dresser, including the top, 3 coats of Varathane Waterbased Polyurethane. For this step, we still used our Vonforn Paint Sprayer to make the finish even and smooth.
If you wondered, can you use a paint sprayer for polyurethane? Yes, you can, and you can check out this post for more tips!

We added the new hardware after – changing out the hardware on a piece of furniture can give it a completely new look! You can find unique and stylish hardware at your local home improvement store or online. We have more tips on how to change hardware on a dresser here.
So you can see how chalk paint can transform an old, outdated dresser into a beautiful, rustic piece of furniture. This white dresser with a stained top is the perfect addition to any farmhouse or shabby chic style home! You can also pair it with a matching frame to create a cohesive look – get inspired by these painted bed frame ideas!


More Before and After Makeovers
See All >
Click any of these “before” photos below to view the “after” of that makeover.


For more makeovers using classic colors, check out these black and white dresser ideas. Pink would be a fun color to try, too – here are pink chalk painted furniture ideas you can easily recreate!


Chalk Painting A Dresser
Here's our guide on chalk painting a dresser if you want to transform an old piece of furniture, adding a fresh look and vintage charm that suits any style, from rustic to modern.
Materials
- Bondo
- Krud Kutter
- 220 Grit Sandpaper
- 220 Grit Sanding Screens (Use code RAY10 to get 10% off your order)
- Tack Cloth
- Painter's Tape
- Clear Shellac Primer
- Behr Paint in Pure White
- Calcium Carbonate Powder
- Paint Filter
- Old Wood Slats or Planks
- Wood Glue
- Minwax Dark Walnut Wood Stain
- Varathane Polyurethane
- New Hardware
Tools
Instructions
- Start by removing all hardware and filling in any holes or scratches with Bondo Wood Filler. This will give you a smooth surface to work with and make painting easier without obstructions.
- Clean the dresser with Krud Kutter and sand it down with a Surfprep Sander and 220 grit sanding screens. This helps the paint adhere better for a smoother finish.
- Prime the dresser with clear shellac to seal the wood and prevent any stains from bleeding through. Spray 2 coats and let dry for an hour between coats.
- Mix your own chalk paint using Behr Pure White paint, calcium carbonate powder, and water. Filter it into a paint sprayer for a smooth finish.
- Spray 2 coats of chalk paint on the dresser, letting each coat dry before applying the next. Use even strokes to avoid drips or uneven patches.
- For a distressed look, lightly sand the edges and details with 220 grit sandpaper. Wipe off dust with a tack cloth.
- Add a natural wood top by cutting old wood slats from pallets. Attach them to the top of the dresser with a nail gun and glue.
- Stain the wood top with Minwax Dark Walnut Wood Stain for a rich, rustic look that contrasts nicely with the white paint.
- Topcoat the entire dresser, including the stained top, with 3 coats of Varathane Waterbased Polyurethane for protection and durability.
- Finally, add new hardware to complete your transformed dresser! This simple change can make a big impact on the overall look of the piece.
Recommended Products
As an Amazon Associate and member of other affiliate programs, I earn from qualifying purchases.


More painted Furniture makeovers
- Painting a Wood Dresser Red
- Painting a Dresser Gray
- Dated Dresser Makeover
- Painting Wood Furniture White
Follow us on YouTube to get more tips for painting furniture. Or share your project with us on our Facebook Group and be part of our community. See you there!

Such a beautiful transformation.
Thank you so much Joanne!