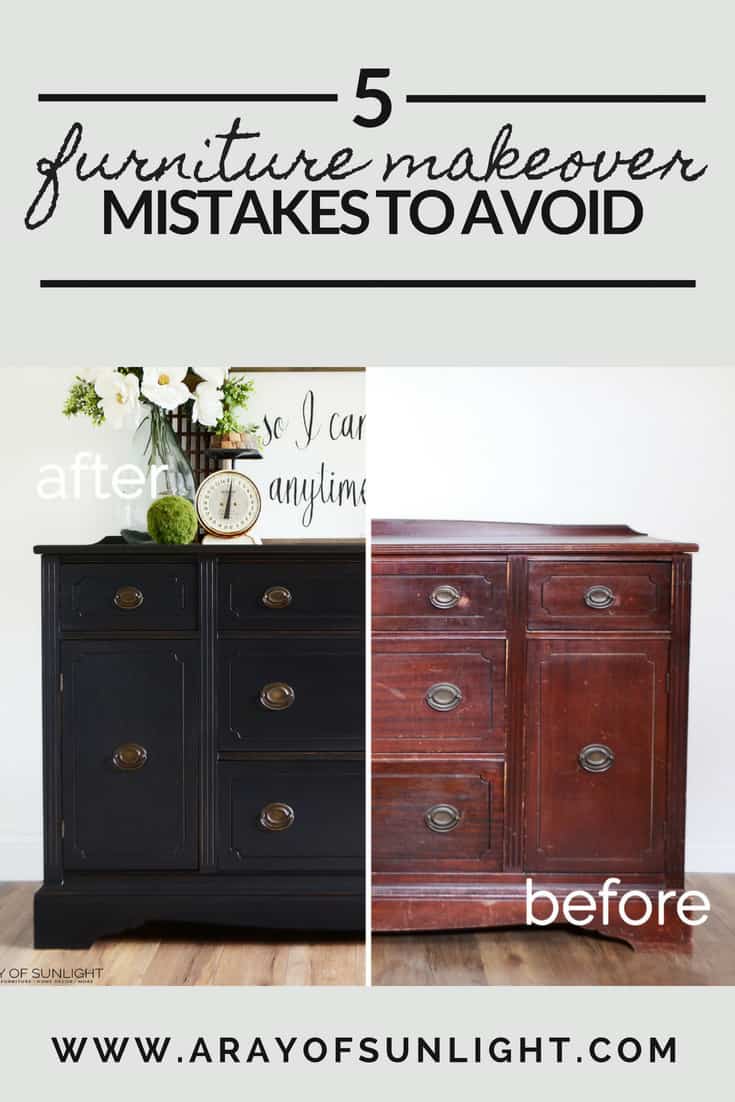
Five Furniture Makeover Mistakes to Avoid


Sometimes painting furniture projects don’t go as planned or mistakes are made. This weathered black painted buffet was one of those times. Luckily there are a few ways to keep these projects from completely failing. Here are five furniture makeover mistakes to avoid.
I know that your project can still turn out awesome, even if you feel like calling it quits!
I think I need to preface this though. I’m in no way complaining or looking for sympathy.

This is the story of the adventure I went on while refinishing this vintage buffet. And even though it was a long process, I’m so glad I had this adventure!
Now, I’m in the business of flipping furniture. But every once in a while, I come across a piece that really takes me for a ride. When nothing that I had planned seems to work.
Like this buffet for instance. Some would say that I spent too much time on it, and I should have just slapped some chalk paint on it in the first place, instead of going through so much work.
But here’s the deal. If I’m selling my furniture to good paying customers, why would I ever want to take a shortcut? I know it’s sooo tempting sometimes, but it really just isn’t worth it.
And even if I wasn’t selling it, I would want the paint finish to last as long as possible without getting easily getting scratched and ruined.
So let’s start at the beginning, and I think it will start to make sense.
As an Amazon Associate, I earn from qualifying purchases. I also may earn from other qualifying purchases with other companies or get free product to review and use. All opinions are my own.
Inspect furniture before purchasing
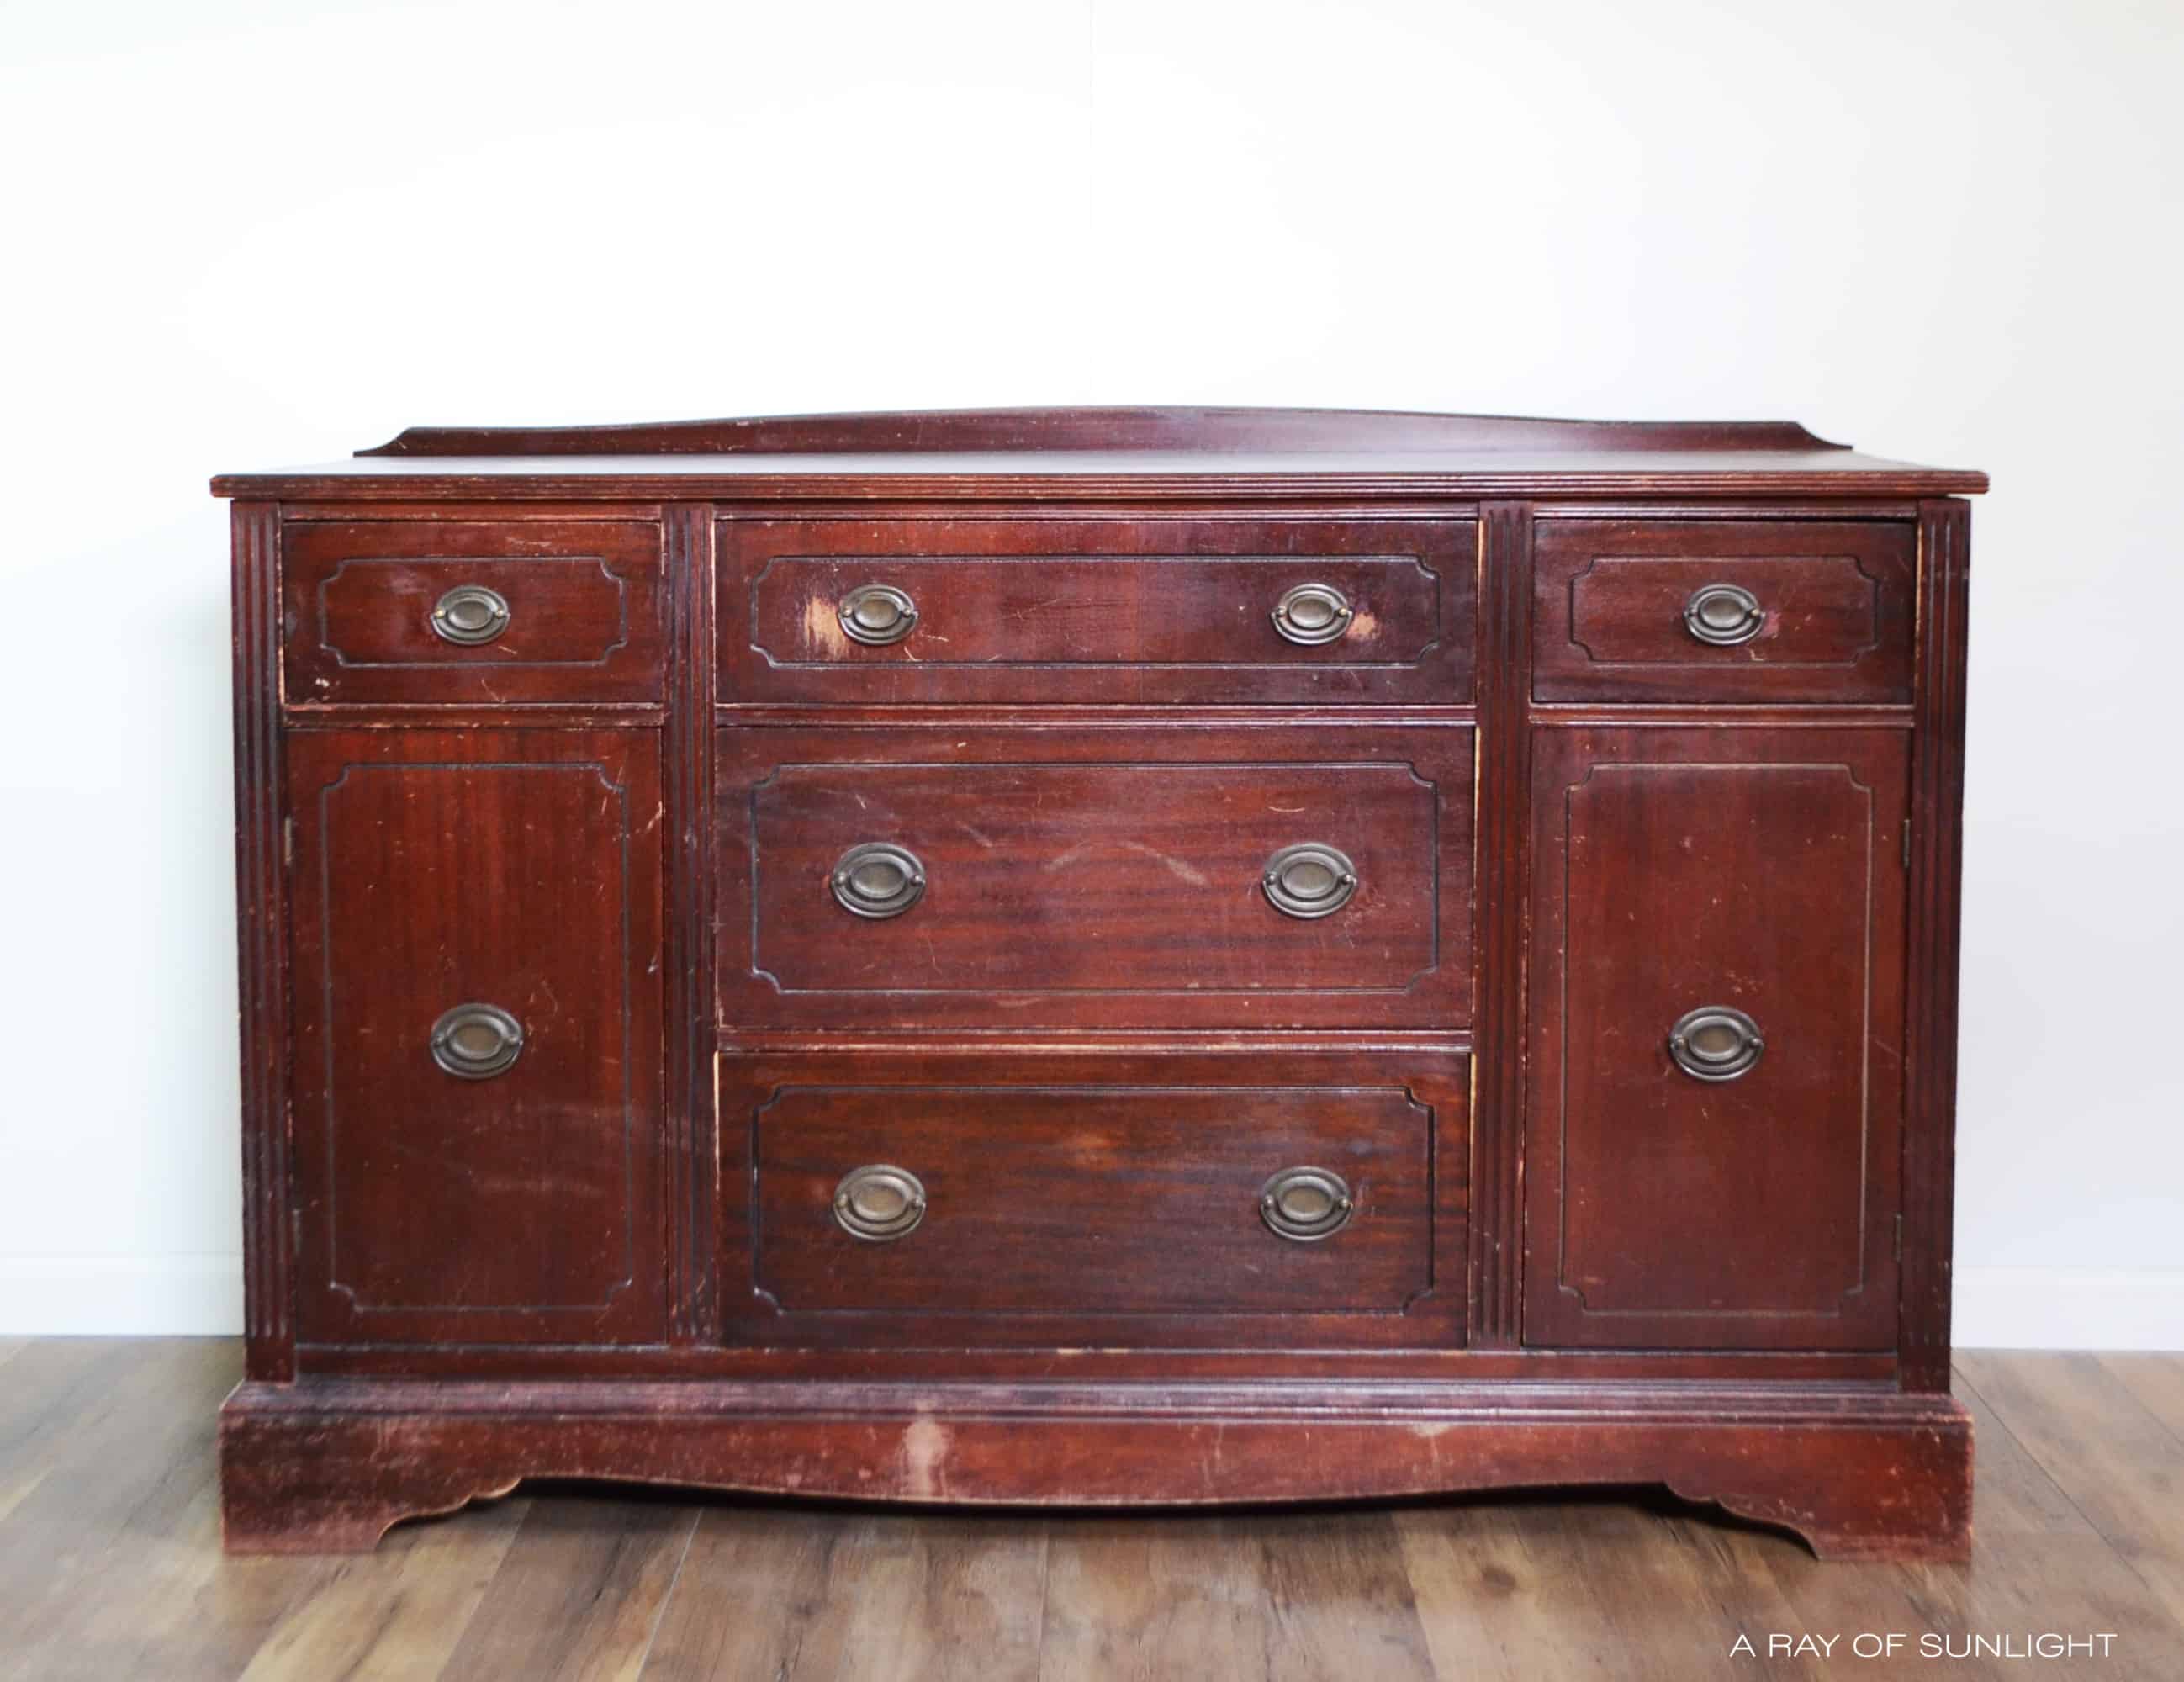
Avoid buying a piece of furniture just because you love the style. In the beginning, I thought I was avoiding this mistake. A few months back my husband and I picked this really cool buffet up.
I looked it over, triple checked that the structure was sound, that the drawers worked, and that any repairs needed, were something that I could handle.
We purchased it, brought it home, and added it to our stash of furniture.
As I had a few minutes here and there, I repaired the few things that needed repair. Those repairs took extra time. They also took extra skill.
Make sure you have the time and skill for repairing furniture before you buy old furniture! Learn about repairing old furniture here!
Don’t compromise quality for a quick remedy!
A few weeks ago, I was ready to start actually working on it. So, I started my usual prep process; cleaning it with Krud Kutter, and then wiping it down with a damp rag.
The Krud Kutter basically cleans up any wax, oil, and dirty grime that is built up on the surface. It works soo good!
But this time it apparently worked too good! Learn more about how to clean furniture before painting here.
(That’s how I didn’t completely avoid “Furniture Makeover Mistake” number 1! But there was no way of really knowing about the bad finish until I purchased this one.)
As I wiped the Krud Kutter off with a damp rag, I noticed that the original finish was gumming up. It was becoming super hazy, like a heat stain, but it was also super sticky.
So I rubbed a little bit harder, and found out that the finish was starting to rub off in those places.
My original plan was to paint it with chalk paint and glaze.
But once I noticed how much the original finish was gumming up after what should have been a normal cleaning, I wasn’t about to paint over a finish that I couldn’t trust.
So this brings me to a comment and question I’ve been asked a lot through this whole buffet makeover.
“Chalk paint sticks to anything, why didn’t you just paint over it? You don’t need to strip the original finish to use chalk paint!”
Well yeah, chalk paint sticks to a lot of things. But remember, I’m selling this buffet.
And I’m not just painting it to make a quick dollar. My goal is to create beautiful furniture out of old and worn-out quality made furniture.
Check out this makeover on how to chalk paint furniture to see what happens when you don’t use chalk paint correctly.
I’m sure you have seen those cheap pieces of painted furniture that were painted super quickly, with the goal to make a quick buck.
Second Chance Studios bought a really pretty french provincial buffet, only to find out when it was delivered to her, that the right paint wasn’t used.
The paint started peeling off in sheets because there was no adhesion.
I’m not about to try to sell anything like that. I want to provide my customer with a long-lasting durable finish, on a piece that will live through another 2 or 3 generations.
So no, there is no way I am about to slap some paint over a finish that I’m not 100% sure of. No matter what product you put on top of a failing finish, it will always fail.
Your paint needs something to hold onto, and if there is nothing there, it will scratch, peel or come right off with the original failing finish.
It also just wouldn’t have looked right. I would have needed to sand the original finish down smooth with the areas with no finish anymore.
But with the finish already gumming up, trying to sand would have been a nightmare in itself.
And you know, maybe it would have worked out alright if I would have let it sit for a few days and dry completely.
Maybe I was just overthinking it, but if that isn’t the case, I’m glad I overthought it, because I would have hated to provide a customer with a piece that I wasn’t sure about lasting.
How to Remove Old Finish from Furniture
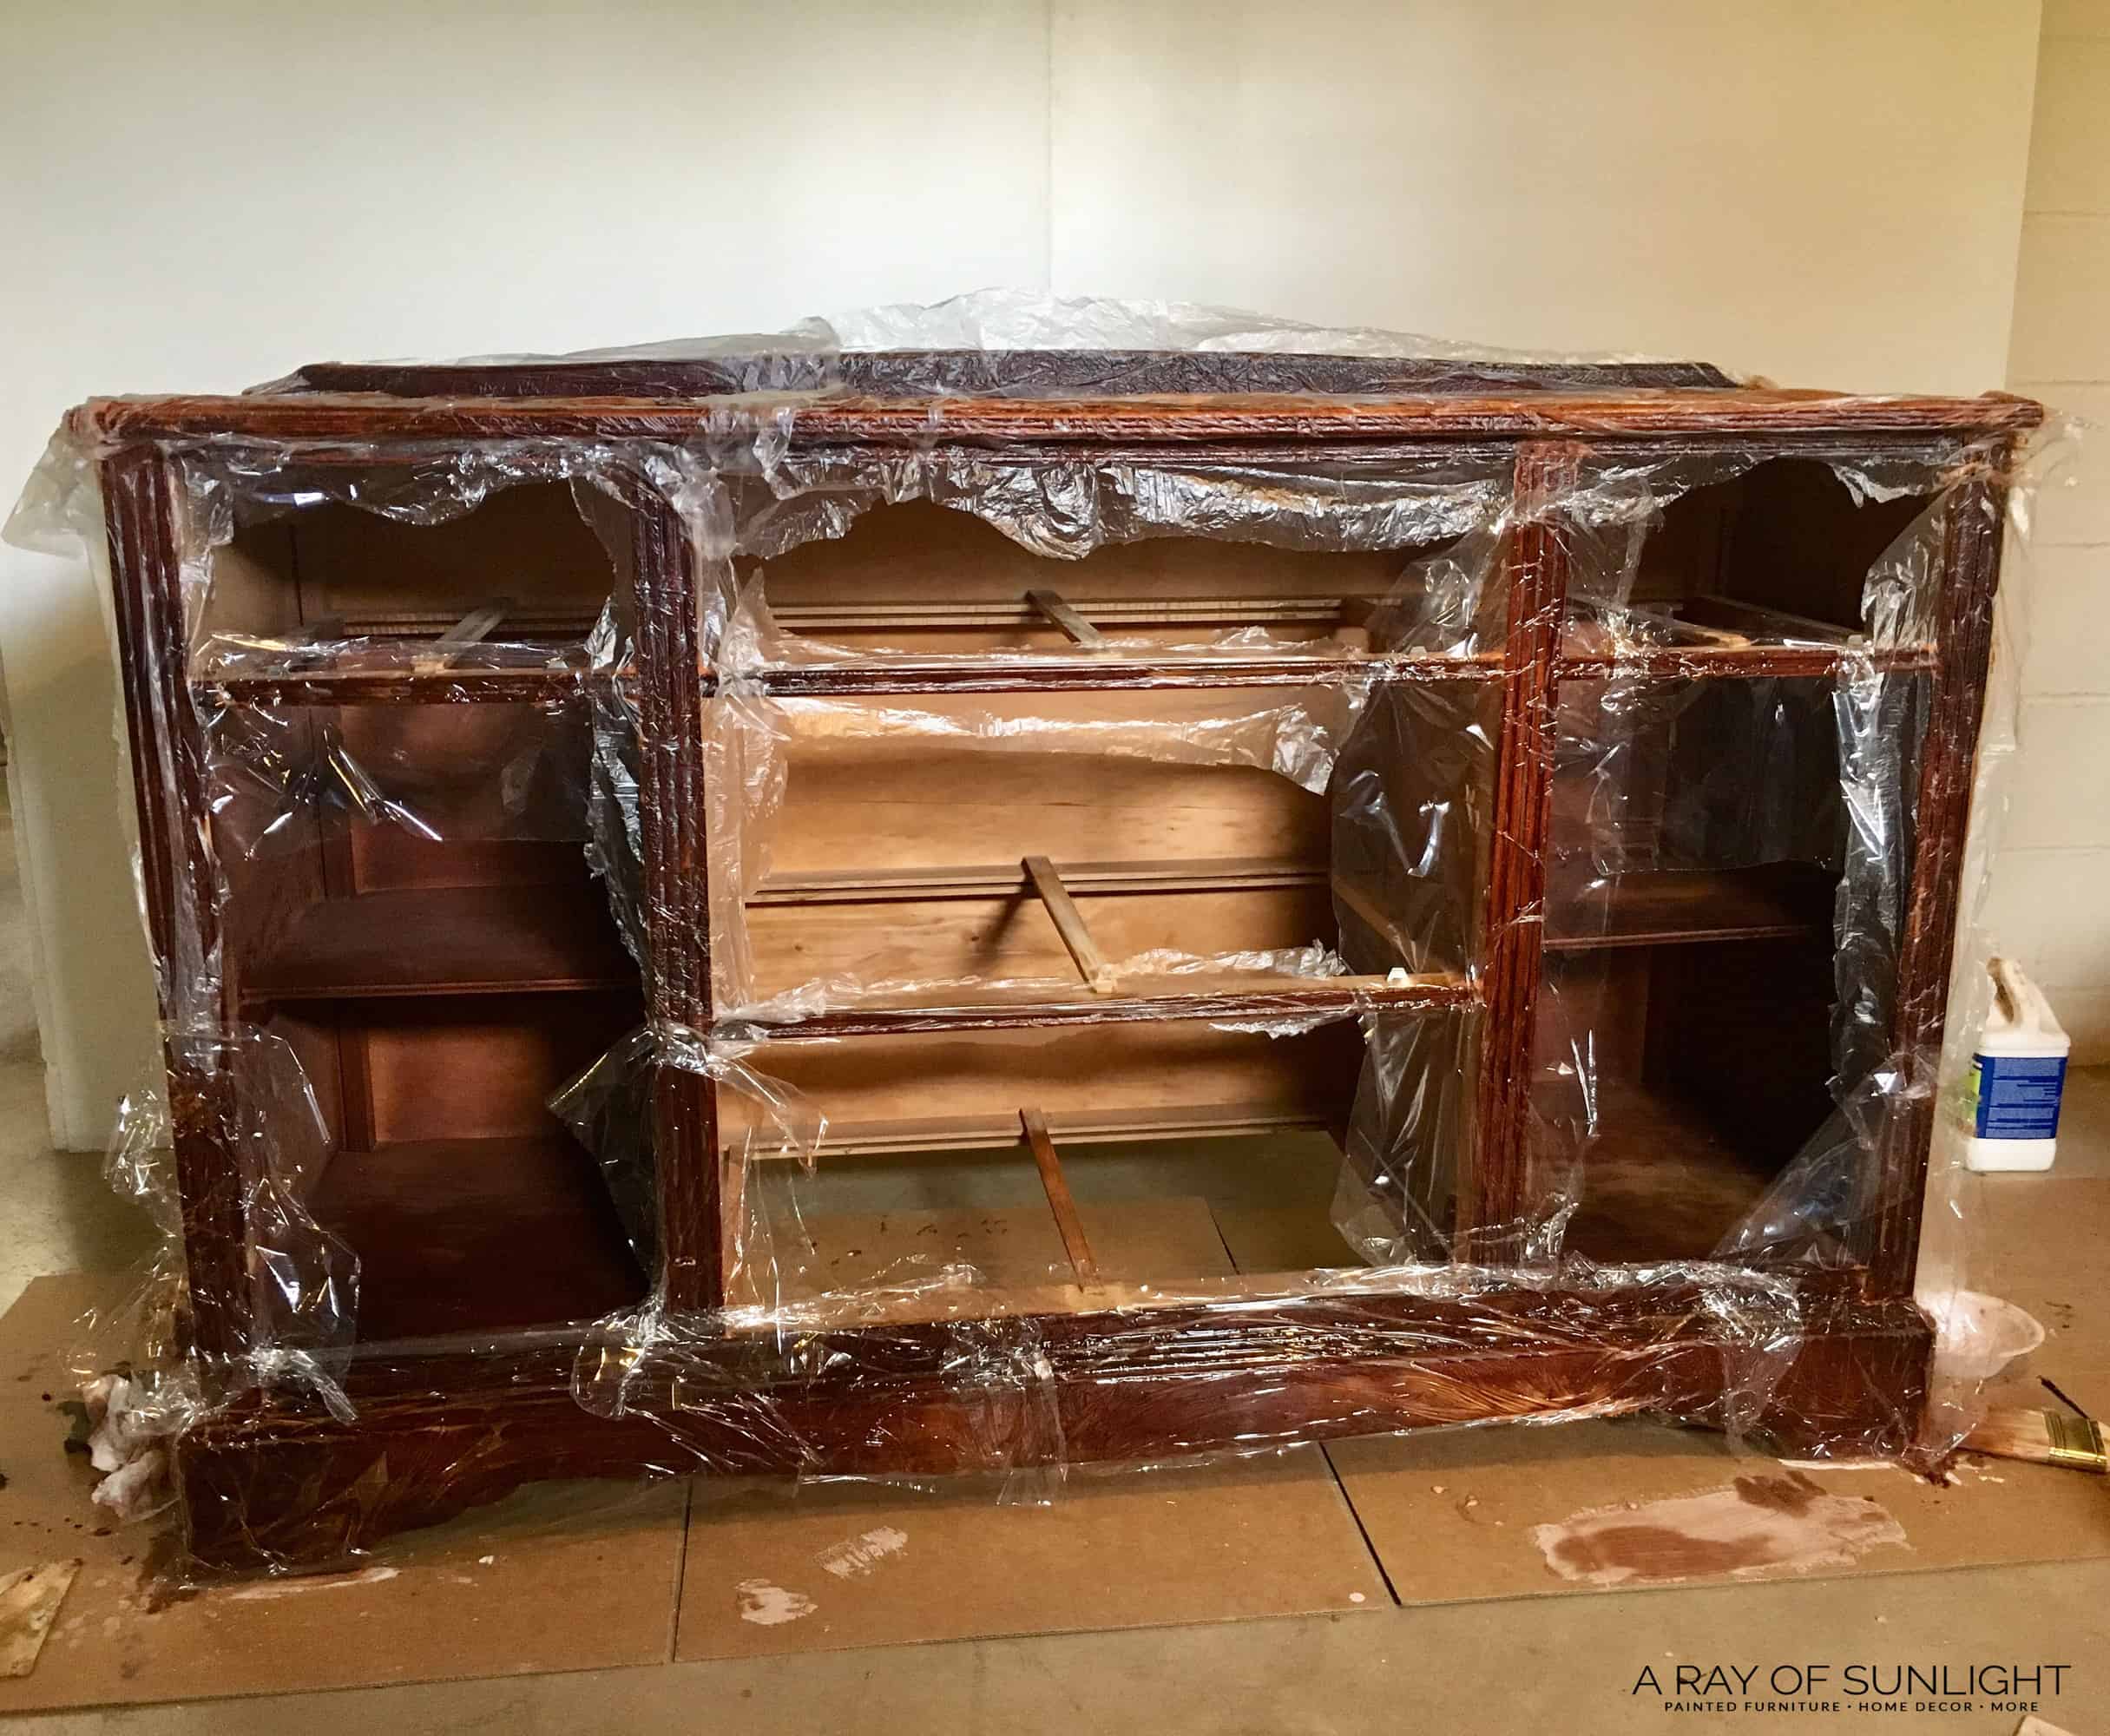
I didn’t want to chance it, so I busted out the stripper. My very favorite furniture stripper is Citristrip. It’s not super harsh like most strippers, it’s low VOC, and it does a great job!
Check out this YouTube video I made on how to remove stain from detailed wood.
If you want to read more about the process, check out this post on how to remove stain from wood. I wrote it when I refinished another buffet, and wanted the detailed legs to be bare wood.
This time though, I laid plastic wrap and cut up clear garbage bags directly on the citristrip to help the stripper work longer without drying out.
Once the old finish was stripped and cleaned, (I think this process took about 3-4 hours) I let the wood dry over the weekend.
We live in a decently humid area (Northern MN), and so it takes everything longer to dry than normal. I wanted to make sure it was completely dry before moving on.
P.S. I didnt strip inside of the cabinets because the finish was just fine. I also ended up repairing some missing veneer with my favorite method. Check out this post on how to repair damaged furniture.
Don’t give up when your plan keeps failing!
I really put this furniture makeover mistake to the test!
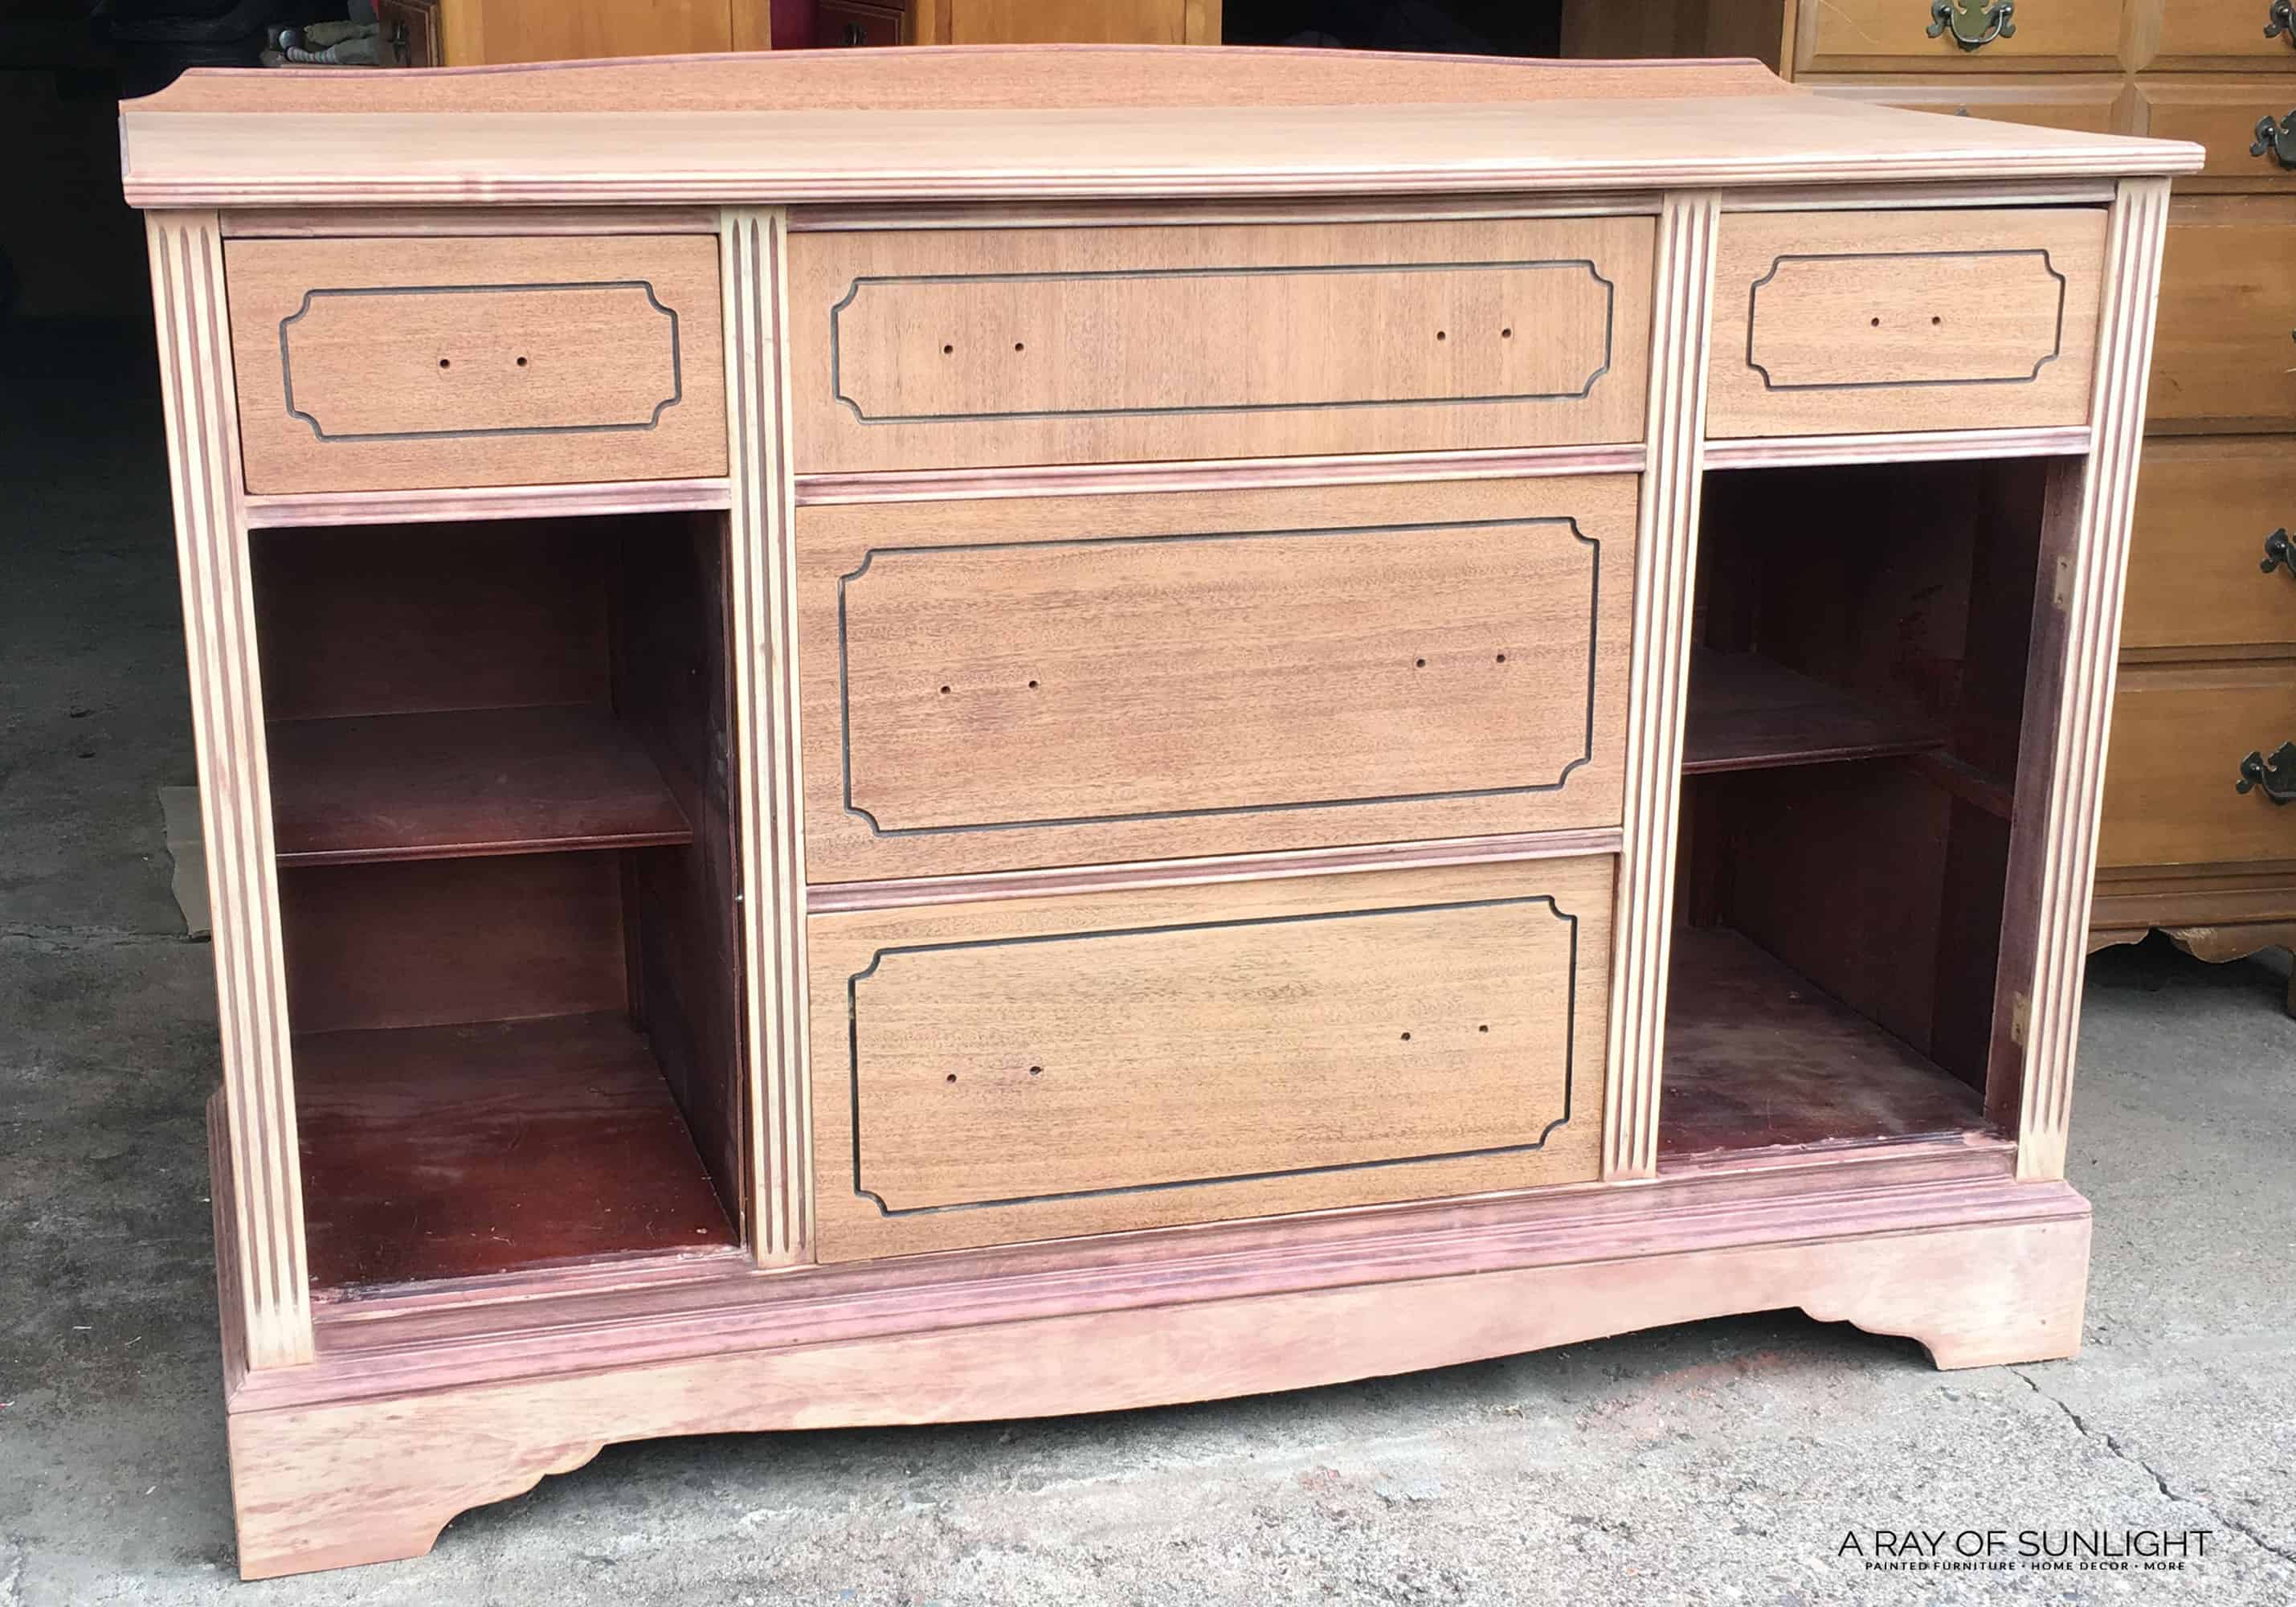
Since I went through the whole process to strip the whole buffet down, I thought it would be fun to try out the raw wood look! Spoiler alert. That didn’t work out so well. ha!

Once the buffet was dry, I could see a lot of mismatched coloring, but hoped that it would go away after some sanding.
So I brought out the orbital sander for all of the flat surfaces. (Man I wish that I had my SurfPrep sander for this.)
Learn about the best sanders for furniture here and sandpaper for furniture painting here.
Since the orbital sander is round, I hand sanded inside the corners. I also hand sanded the trim. But as I sanded more and more, I could tell that the woods still weren’t going to match up very well.
The base was super red, and the top and drawer fronts were perfectly light. The rest of the body was yet another type of wood too!
On to plan C!
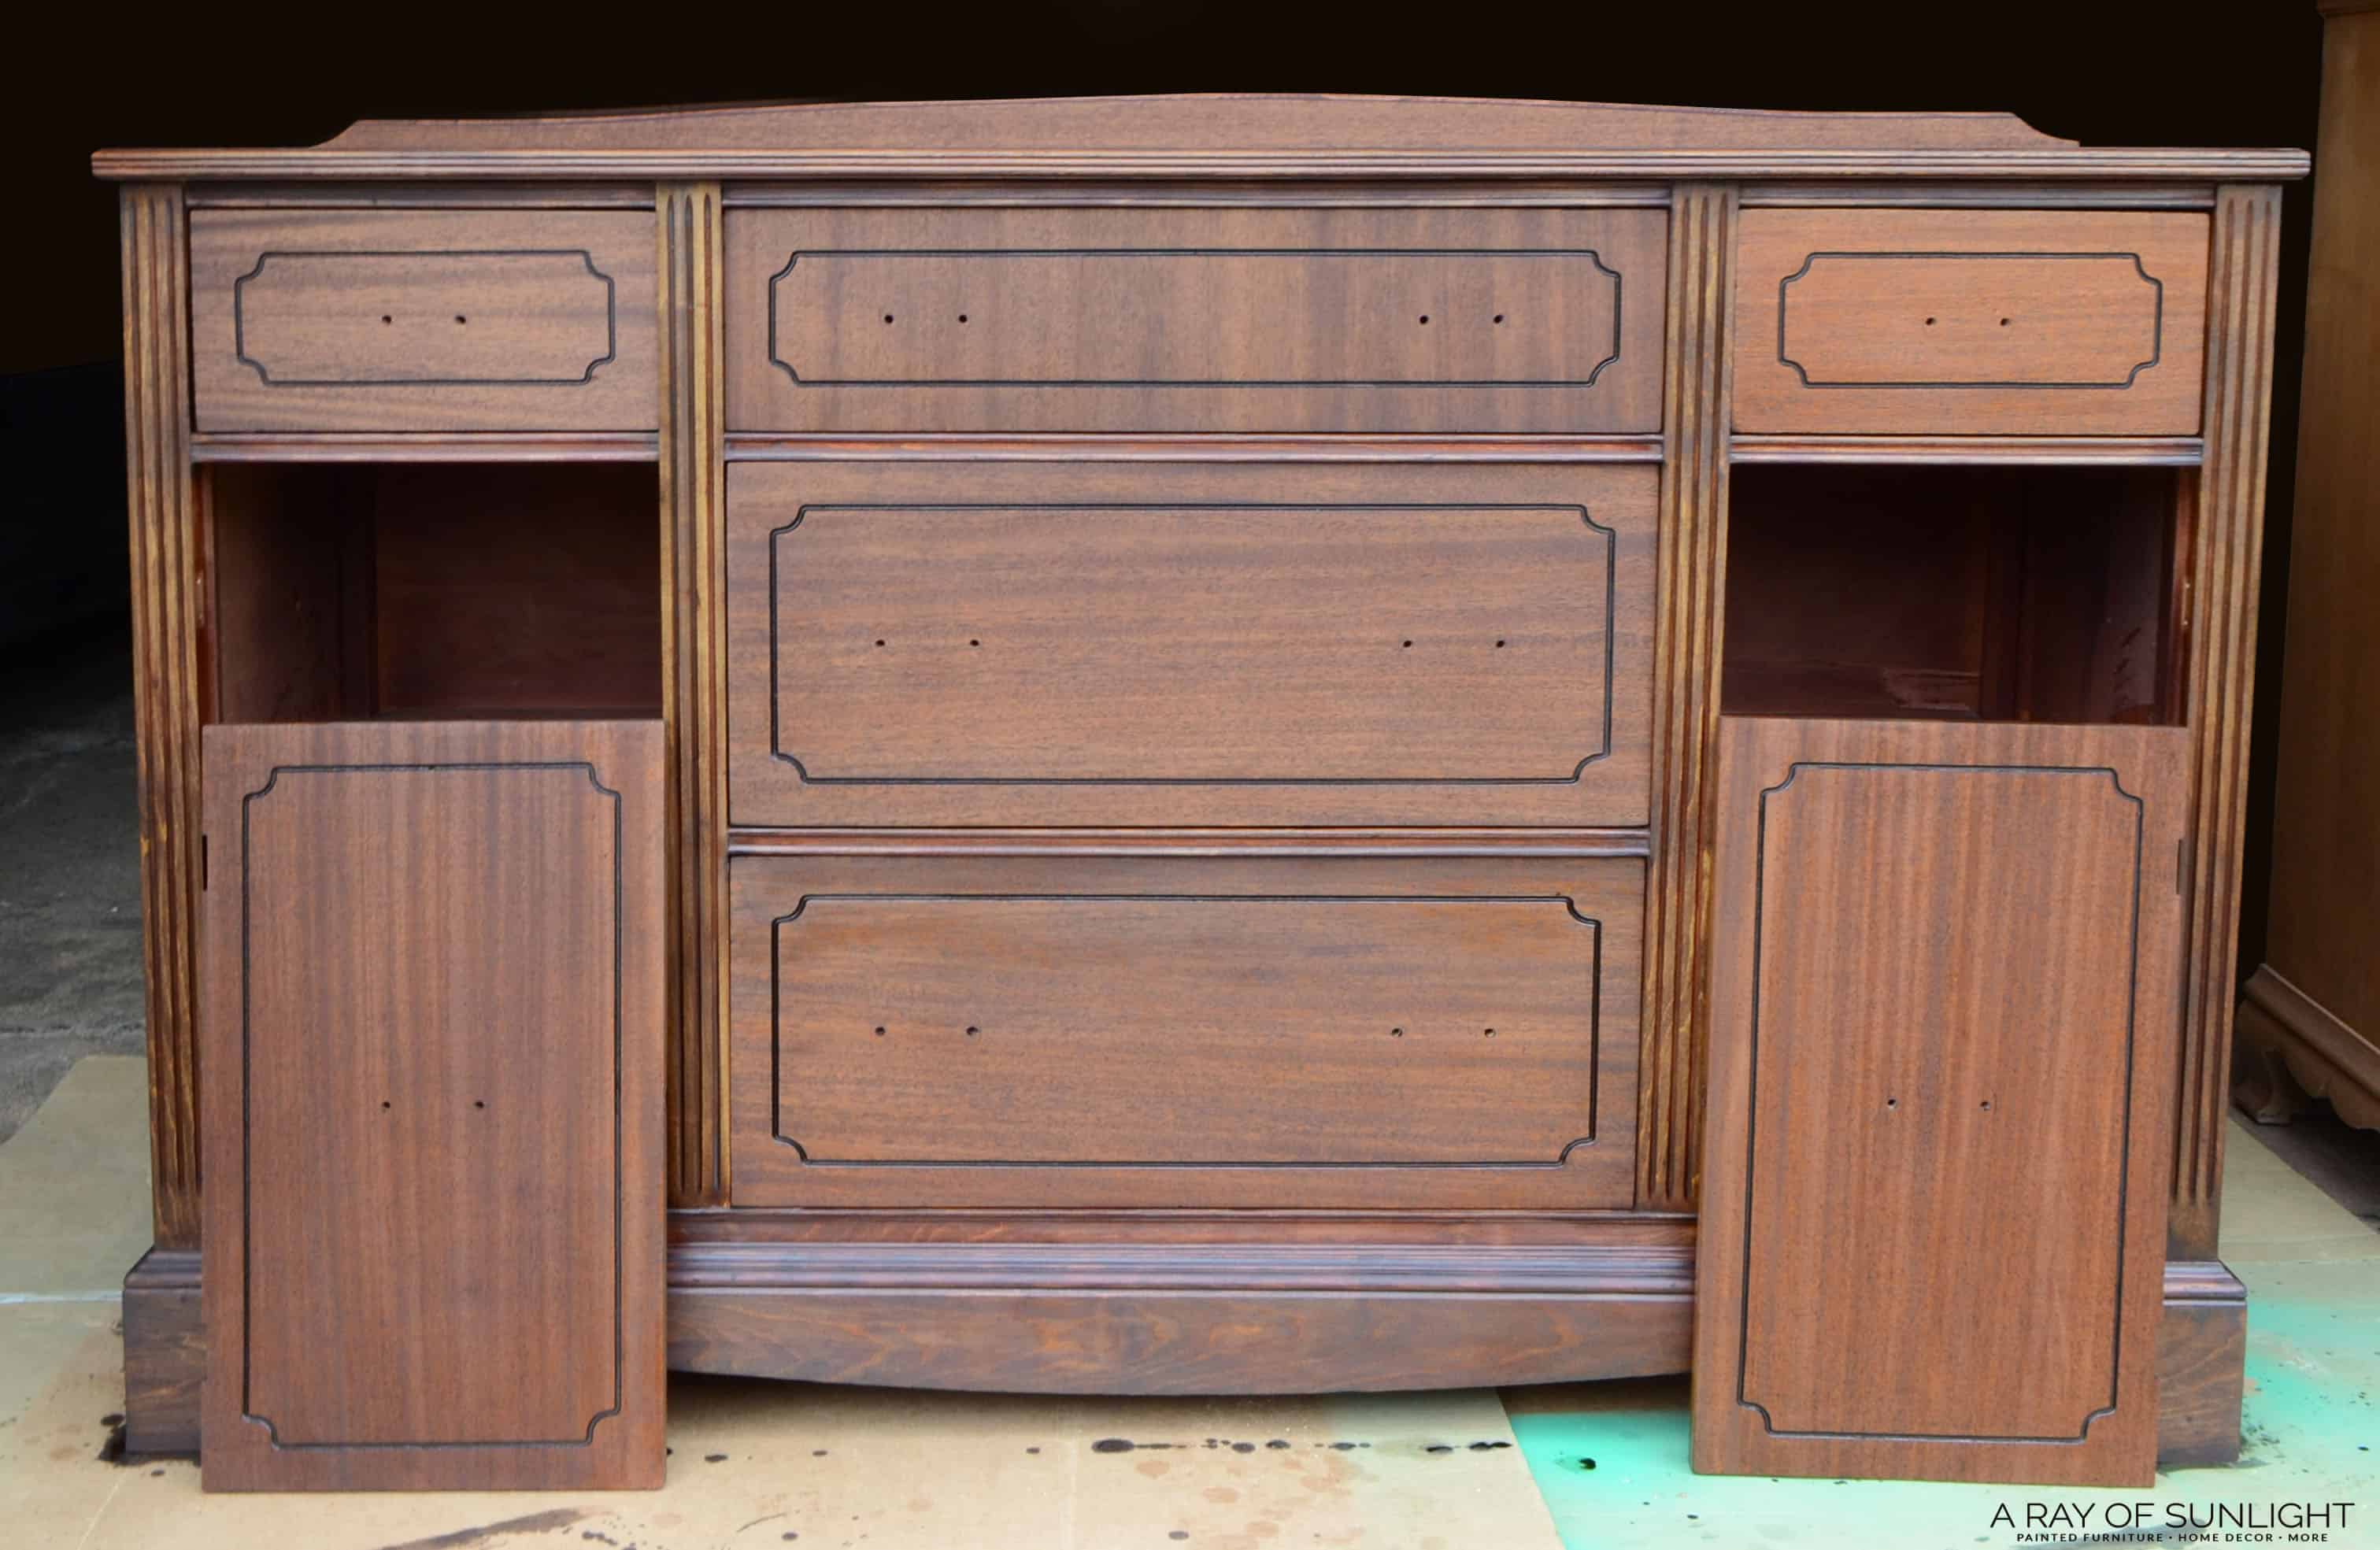
So I decided to try staining the buffet instead! I chose a dark walnut stain, hoping that would hide any wood inconsistencies.
Well, it stained alright. But the different woods were definitely noticeable. And not in a good way!
I shared a little sneak peek on my Facebook page, and I was blown away by the response to paint it!
I feel like every time I ask Facebook what color I should paint something, I have multiple people who suggest to leave it as is, or to keep it wood.
To be honest, I’m really not sure why they are following me. Except maybe to try to save the “antique” furniture from being ruined by painters like me. I don’t know!
But this time I didn’t get one suggestion to leave the wood! Whoa!
You know the drill, on to plan D! I decided that since I had done all of that work to uncover the wood, that I wanted to be able to show the wood off as much as possible.

Would you like to save this?
How to Color Wash Wood (Like whitewash, but with a different color!)
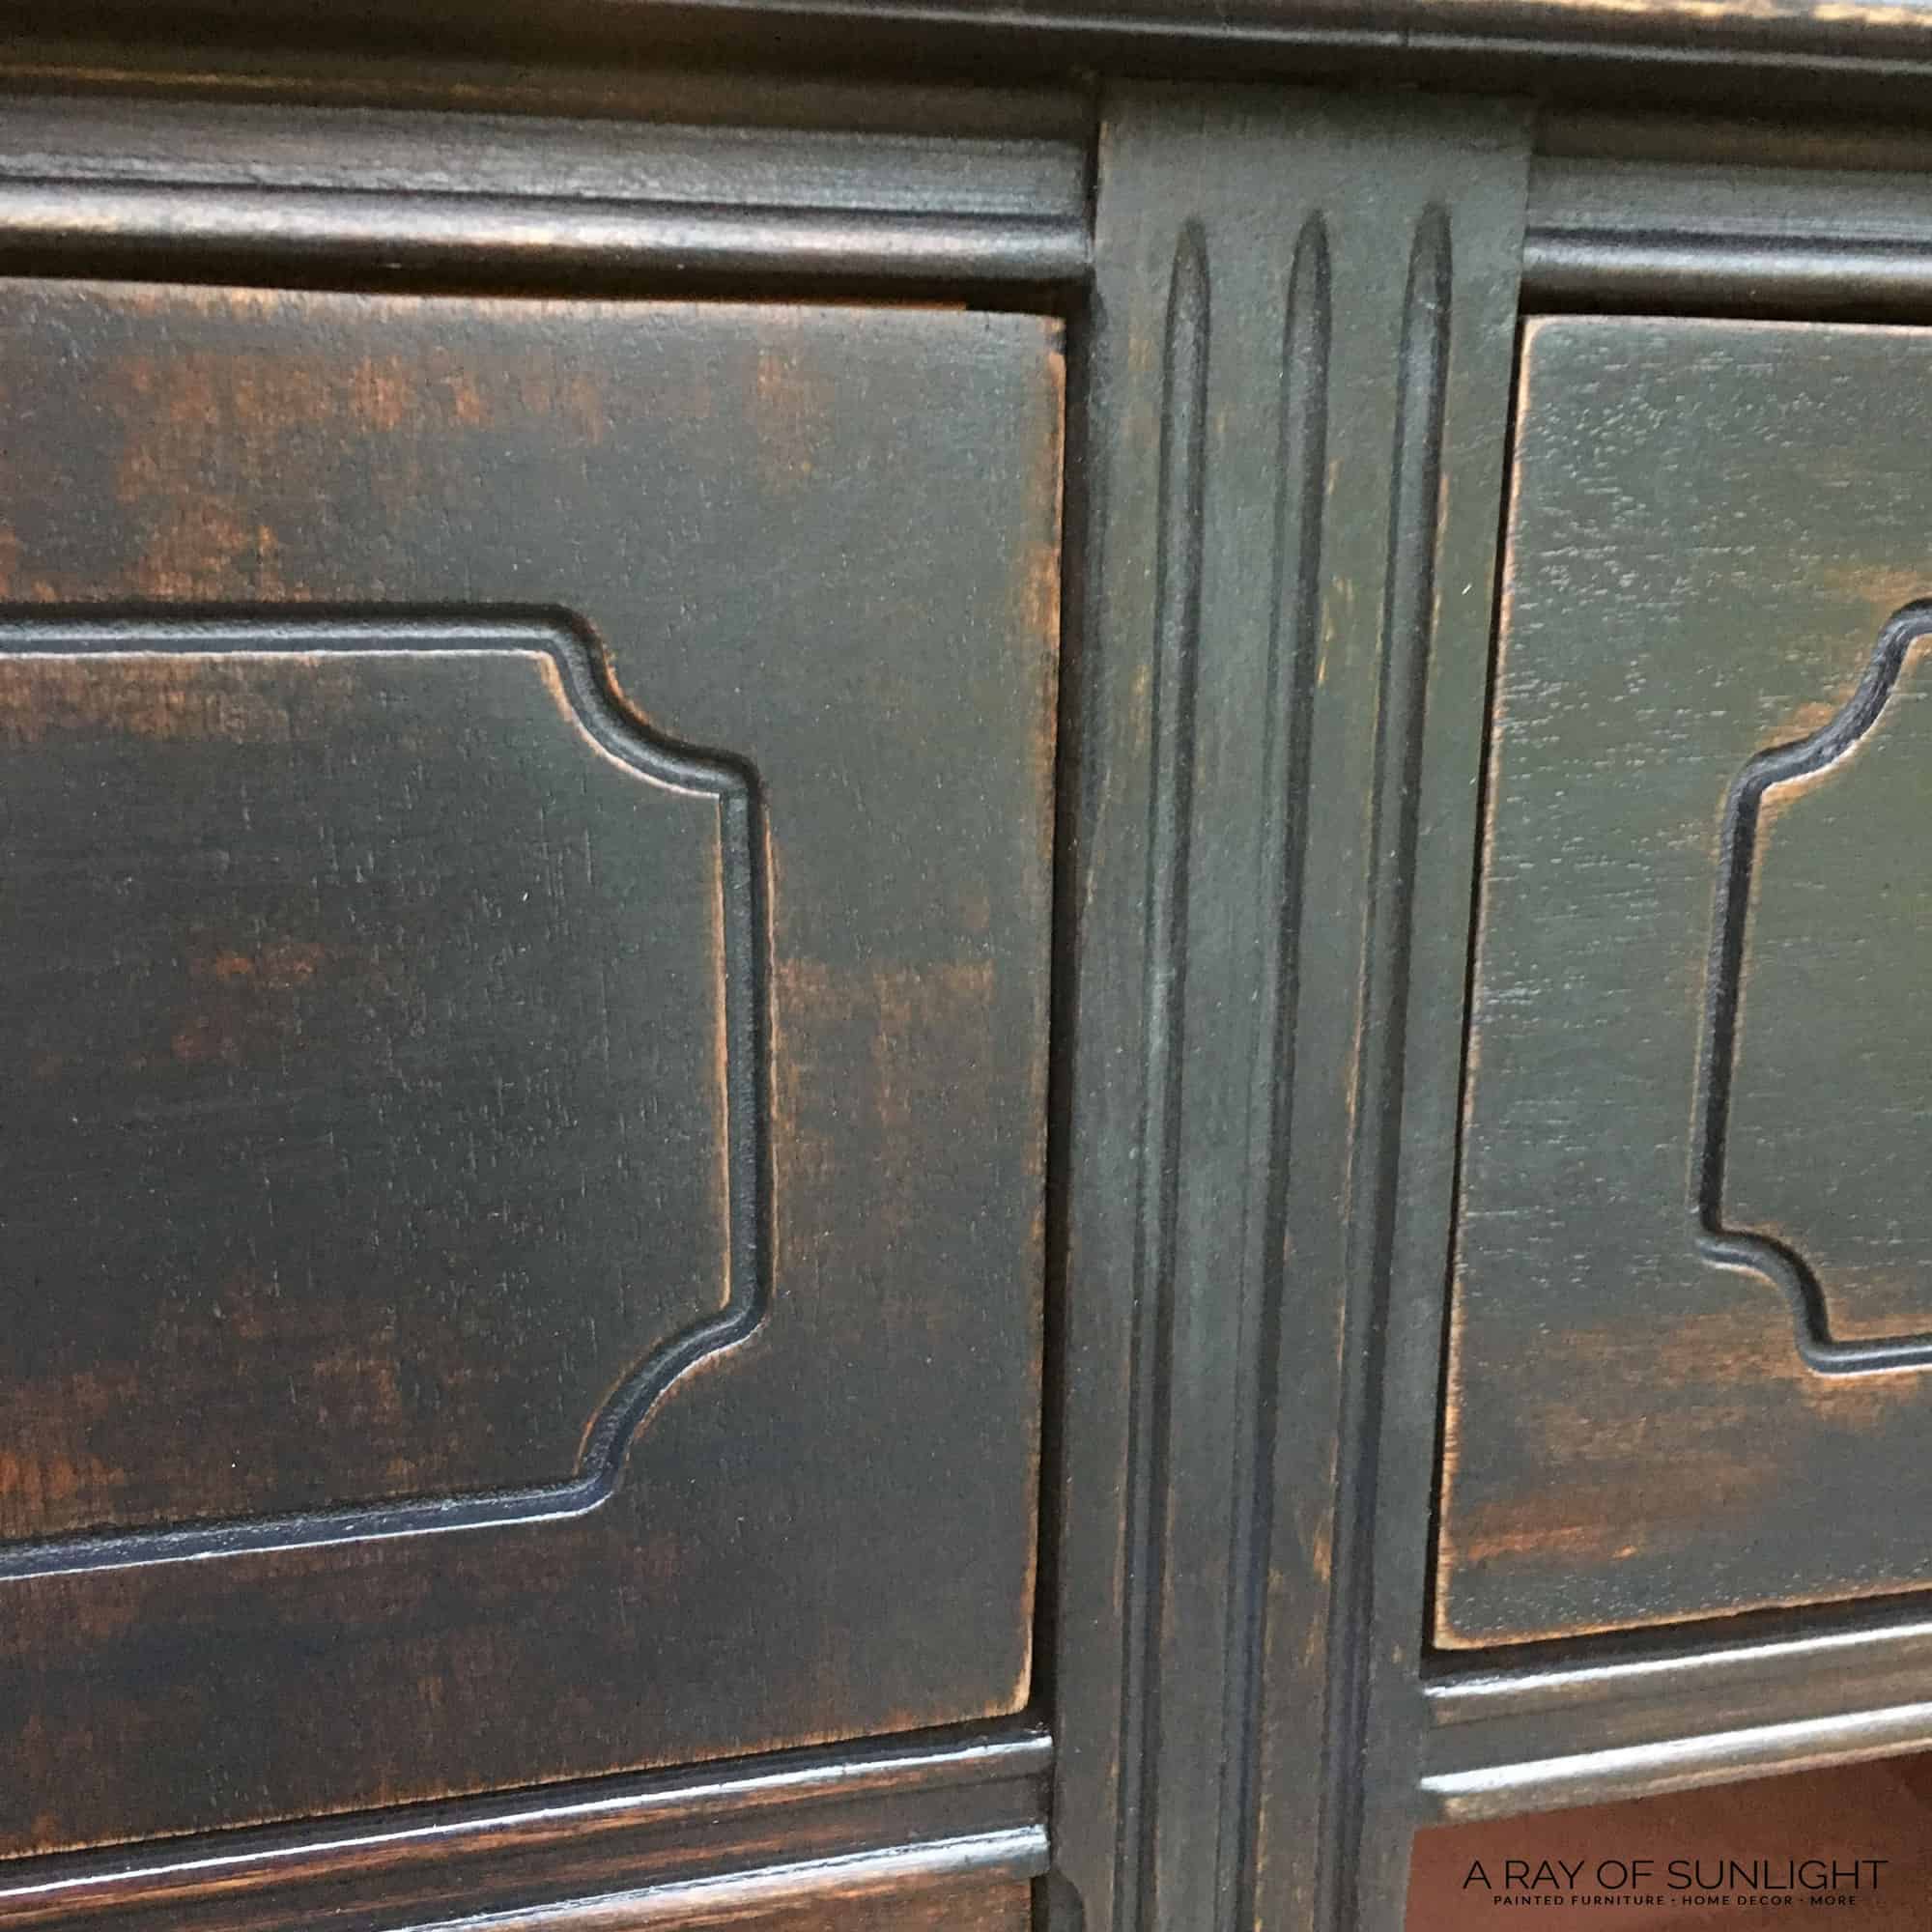
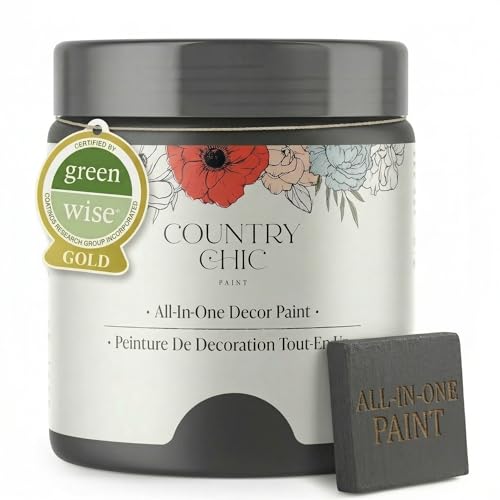
To create a color-washed effect, I used an inexpensive chip brush to apply the paint. I used Country Chic Paint’s Liquorice, and watered it down to about a 1:1 ratio of water to paint.
The thinned paint created a really thin coat of paint, and made it possible to achieve the color wash effect where you can still see the wood underneath, but the paint masks the different woods at the same time.
Check out this post on refinishing an old dresser to learn more about color washing!
I created even more of a weathered finish by hand sanding (400 grit sandpaper wrapped around a used sanding block) the places that I wanted wood to peek through.
It was a pretty easy task since we didn’t paint full coverage in the first place.
Once the color wash finish was perfect, I sprayed on one coat of my favorite polyurethane. Learn how to spray polyurethane the right way here.
I’m really not sure what happened at this point (now I do! read below), but once again I had a problem. I’ve never had that happen before, and I use this poly all the time!
Extra Tip: Read and follow the instructions on the back of the can!
**Now I know that I probably didn’t mix the polyurethane enough before I sprayed it. So the flattening agent wasn’t completely mixed through the rest of the poly. Creating some areas with a hazy (more matte) finish, and others with a crystal clear satin (less matte) finish. SO BE SURE TO ALWAYS STIR POLY REALLY WELL!
So I decided to let everything dry for a few days, and let’s be honest, I needed to take a bit of a break from it. Especially when I thought I was going to be done. Yikes!
After a few days, I returned to the buffet and started over. No, not all the way over! Thank goodness!
But I prepped the finish by lightly sanding everything down with 220 grit sandpaper (this exact sandpaper is my favorite!!), wiped it all down, and then gave everything another 2 coats of thinned out Liquorice.
I wanted to cover up the foggy finish so I could have that perfect even finish I was after.
This time, I was out of patience, so I lightly sanded the edges and just a few spots, but left everything else alone.
I ended up losing that beautiful color washed effect because of the extra coats of paint, but man I was just done with working on it.
And then I sprayed on my favorite poly again. And what would you guess, it got foggy in those same places again! (Come on Natalie, learn to stir your poly already!)
Learn what’s the best polyurethane for furniture here.

Don’t be afraid to try new techniques!
(But maybe try a new technique on a sample board instead of a large piece;))
The fogginess reminded me of a matte finish, so I thought I would try my hand at a waxed finish. Oh boy, here’s another can of worms! *facepalm*
A little back story for “Furniture Makeover Mistakes” number four… I had used wax basically one time before this. And I hated it.
I used the Minwax paste wax and definitely was not happy with the finished product. And then I was told that I should have used Annie Sloan wax instead. Because the paste wax is a pain.
Using Annie Sloan Wax and Country Chic Paint Wax
But at the beginning of this project, while I was waiting for the stripper to do its thing, I stopped by a local store and grabbed some Annie Sloan clear wax.
I thought I might use it on this buffet, but wasn’t really sure about it. Now was the perfect time to bust out the wax that I’ve heard so much about, and give it a try!
At first I tried straight Annie Sloan clear wax. But I wasn’t super impressed, so I grabbed my Country Chic Paint black wax and mixed the two together.
I didn’t want to go too heavy with the black wax and cover even more wood up, so I opted to mix the two. I waxed the whole thing. And I learned a lot.
First, that I much rather spraying on poly with my paint sprayer. It goes on so much faster and sooo much easier!
Grab yourself one of these best HVLP paint sprayers for furniture to make your life easier too!
Second, that wax is super finicky. Especially over black paint. Well, I wasn’t in love with it. There was even more unevenness in the finish than before.
I applied the wax, buffed it out and let it sit overnight. The next morning I buffed it more, but I really hated how many finger prints were being left, and still the uneven finish.
I can’t say the uneven finish was completely the wax, but it wasn’t helping too much.
Ask others for advice or ideas!
So I turned to my friends on my Instagram and asked for advice. Soo much advice came in!
Some saying to use a different rag, some advising to use a different wax, and a lot of furniture artists saying that they hate wax. One piece of advice came in though that spiked my interest.
Laura told me to rub a little bit of baby oil over the fogginess to help it disappear. Interesting! I’m familiar with hemp oil, and decided that I might as well give this baby oil a try.
Right off the bat, I was impressed with the finish it started to create. It completely helped the uneven wax issue, and created a really pretty sheen.
I wiped on the baby oil, let it sit for probably about 15 minutes, and then wiped off any extra oil with a clean rag. After a few hours the oil was completely dry!
I did go back once or twice and wipe off the extra oil that still remained.
Don’t worry when your vision doesn’t end up on your furniture
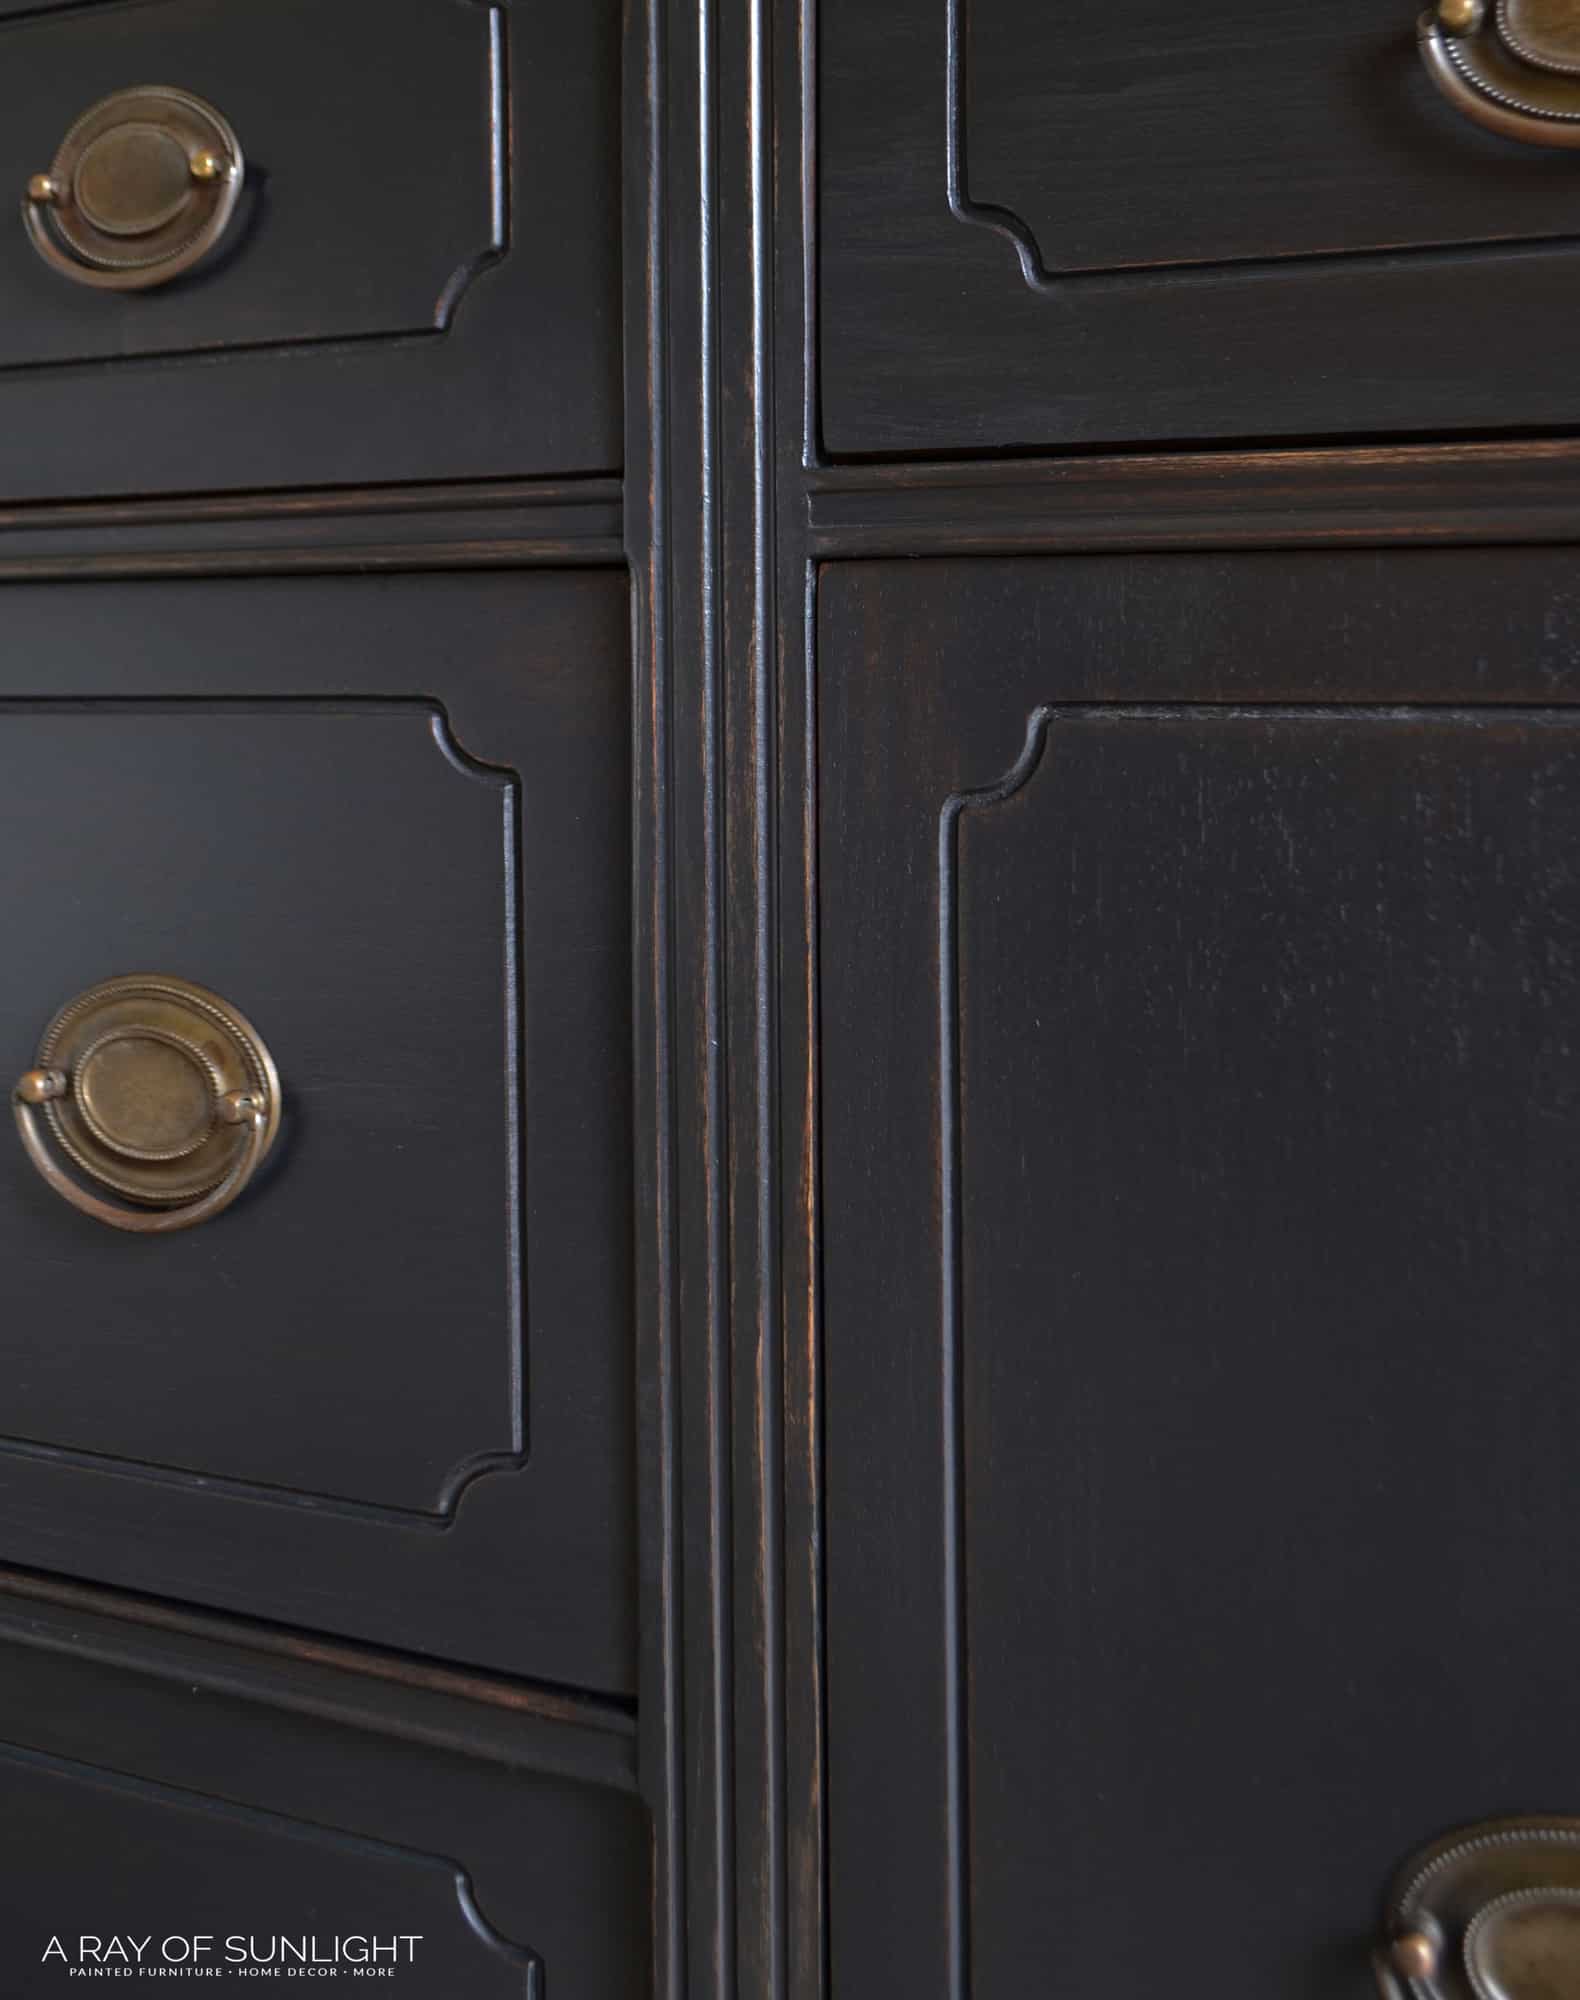
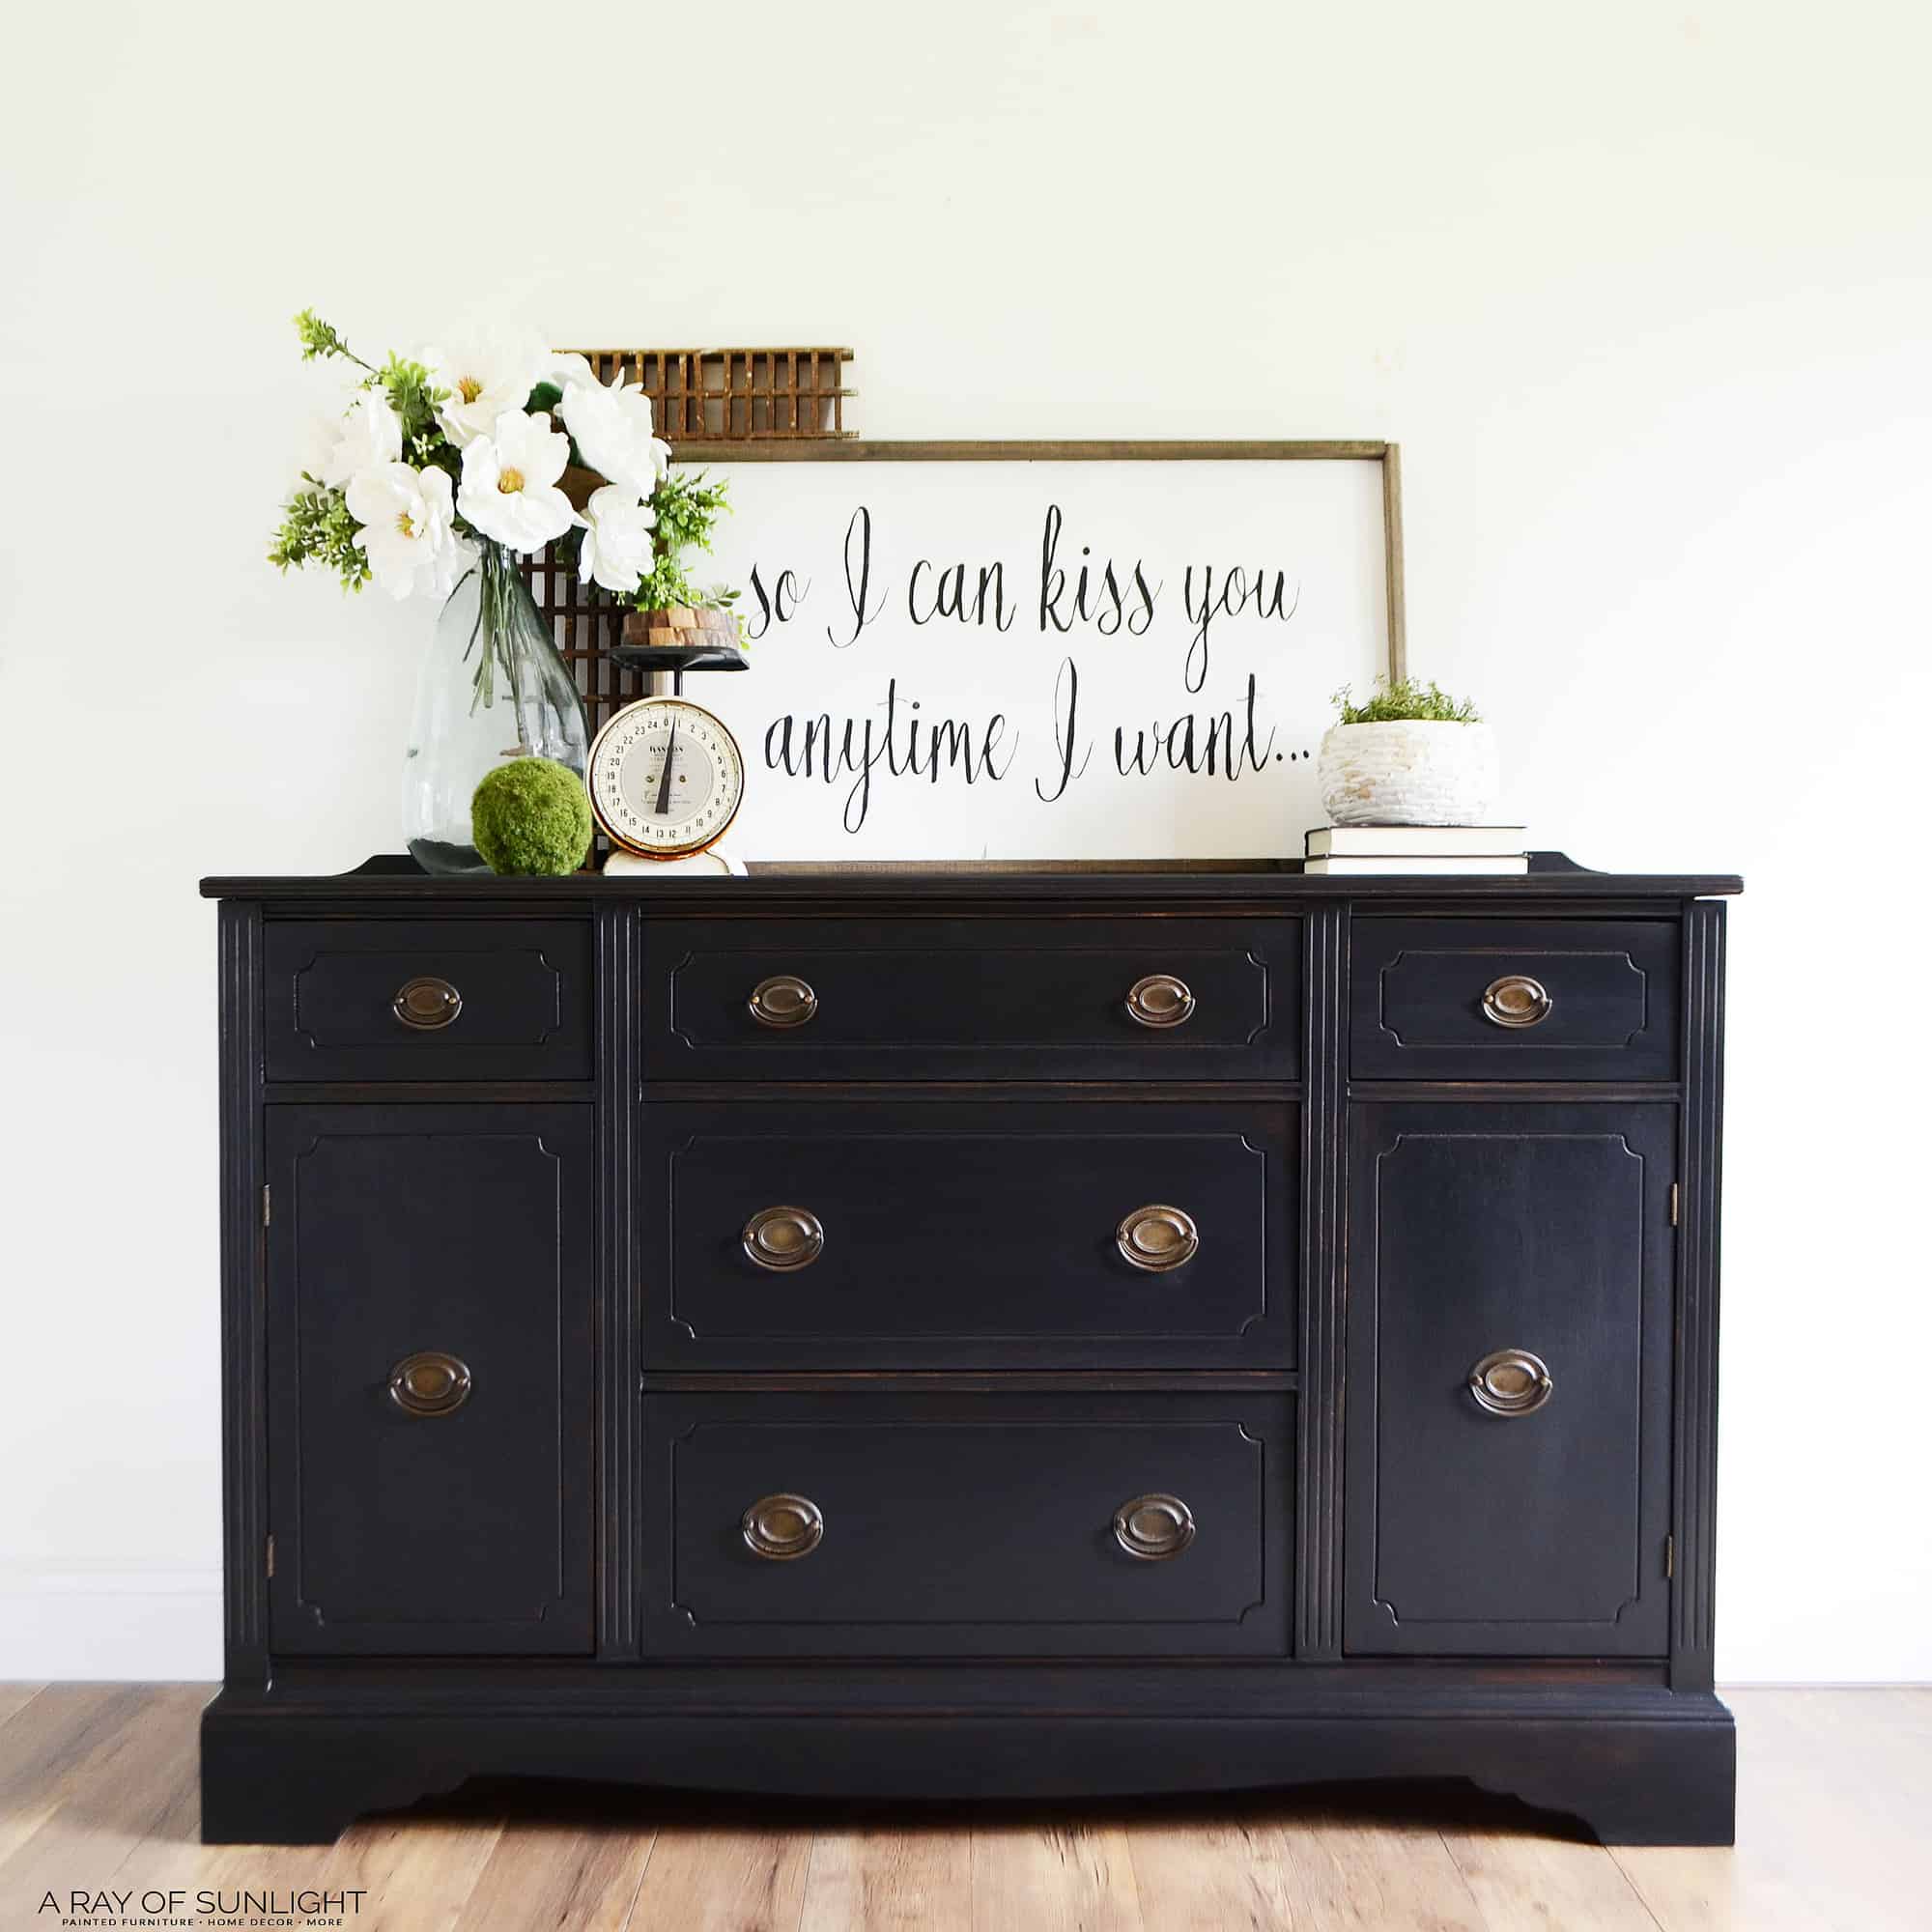
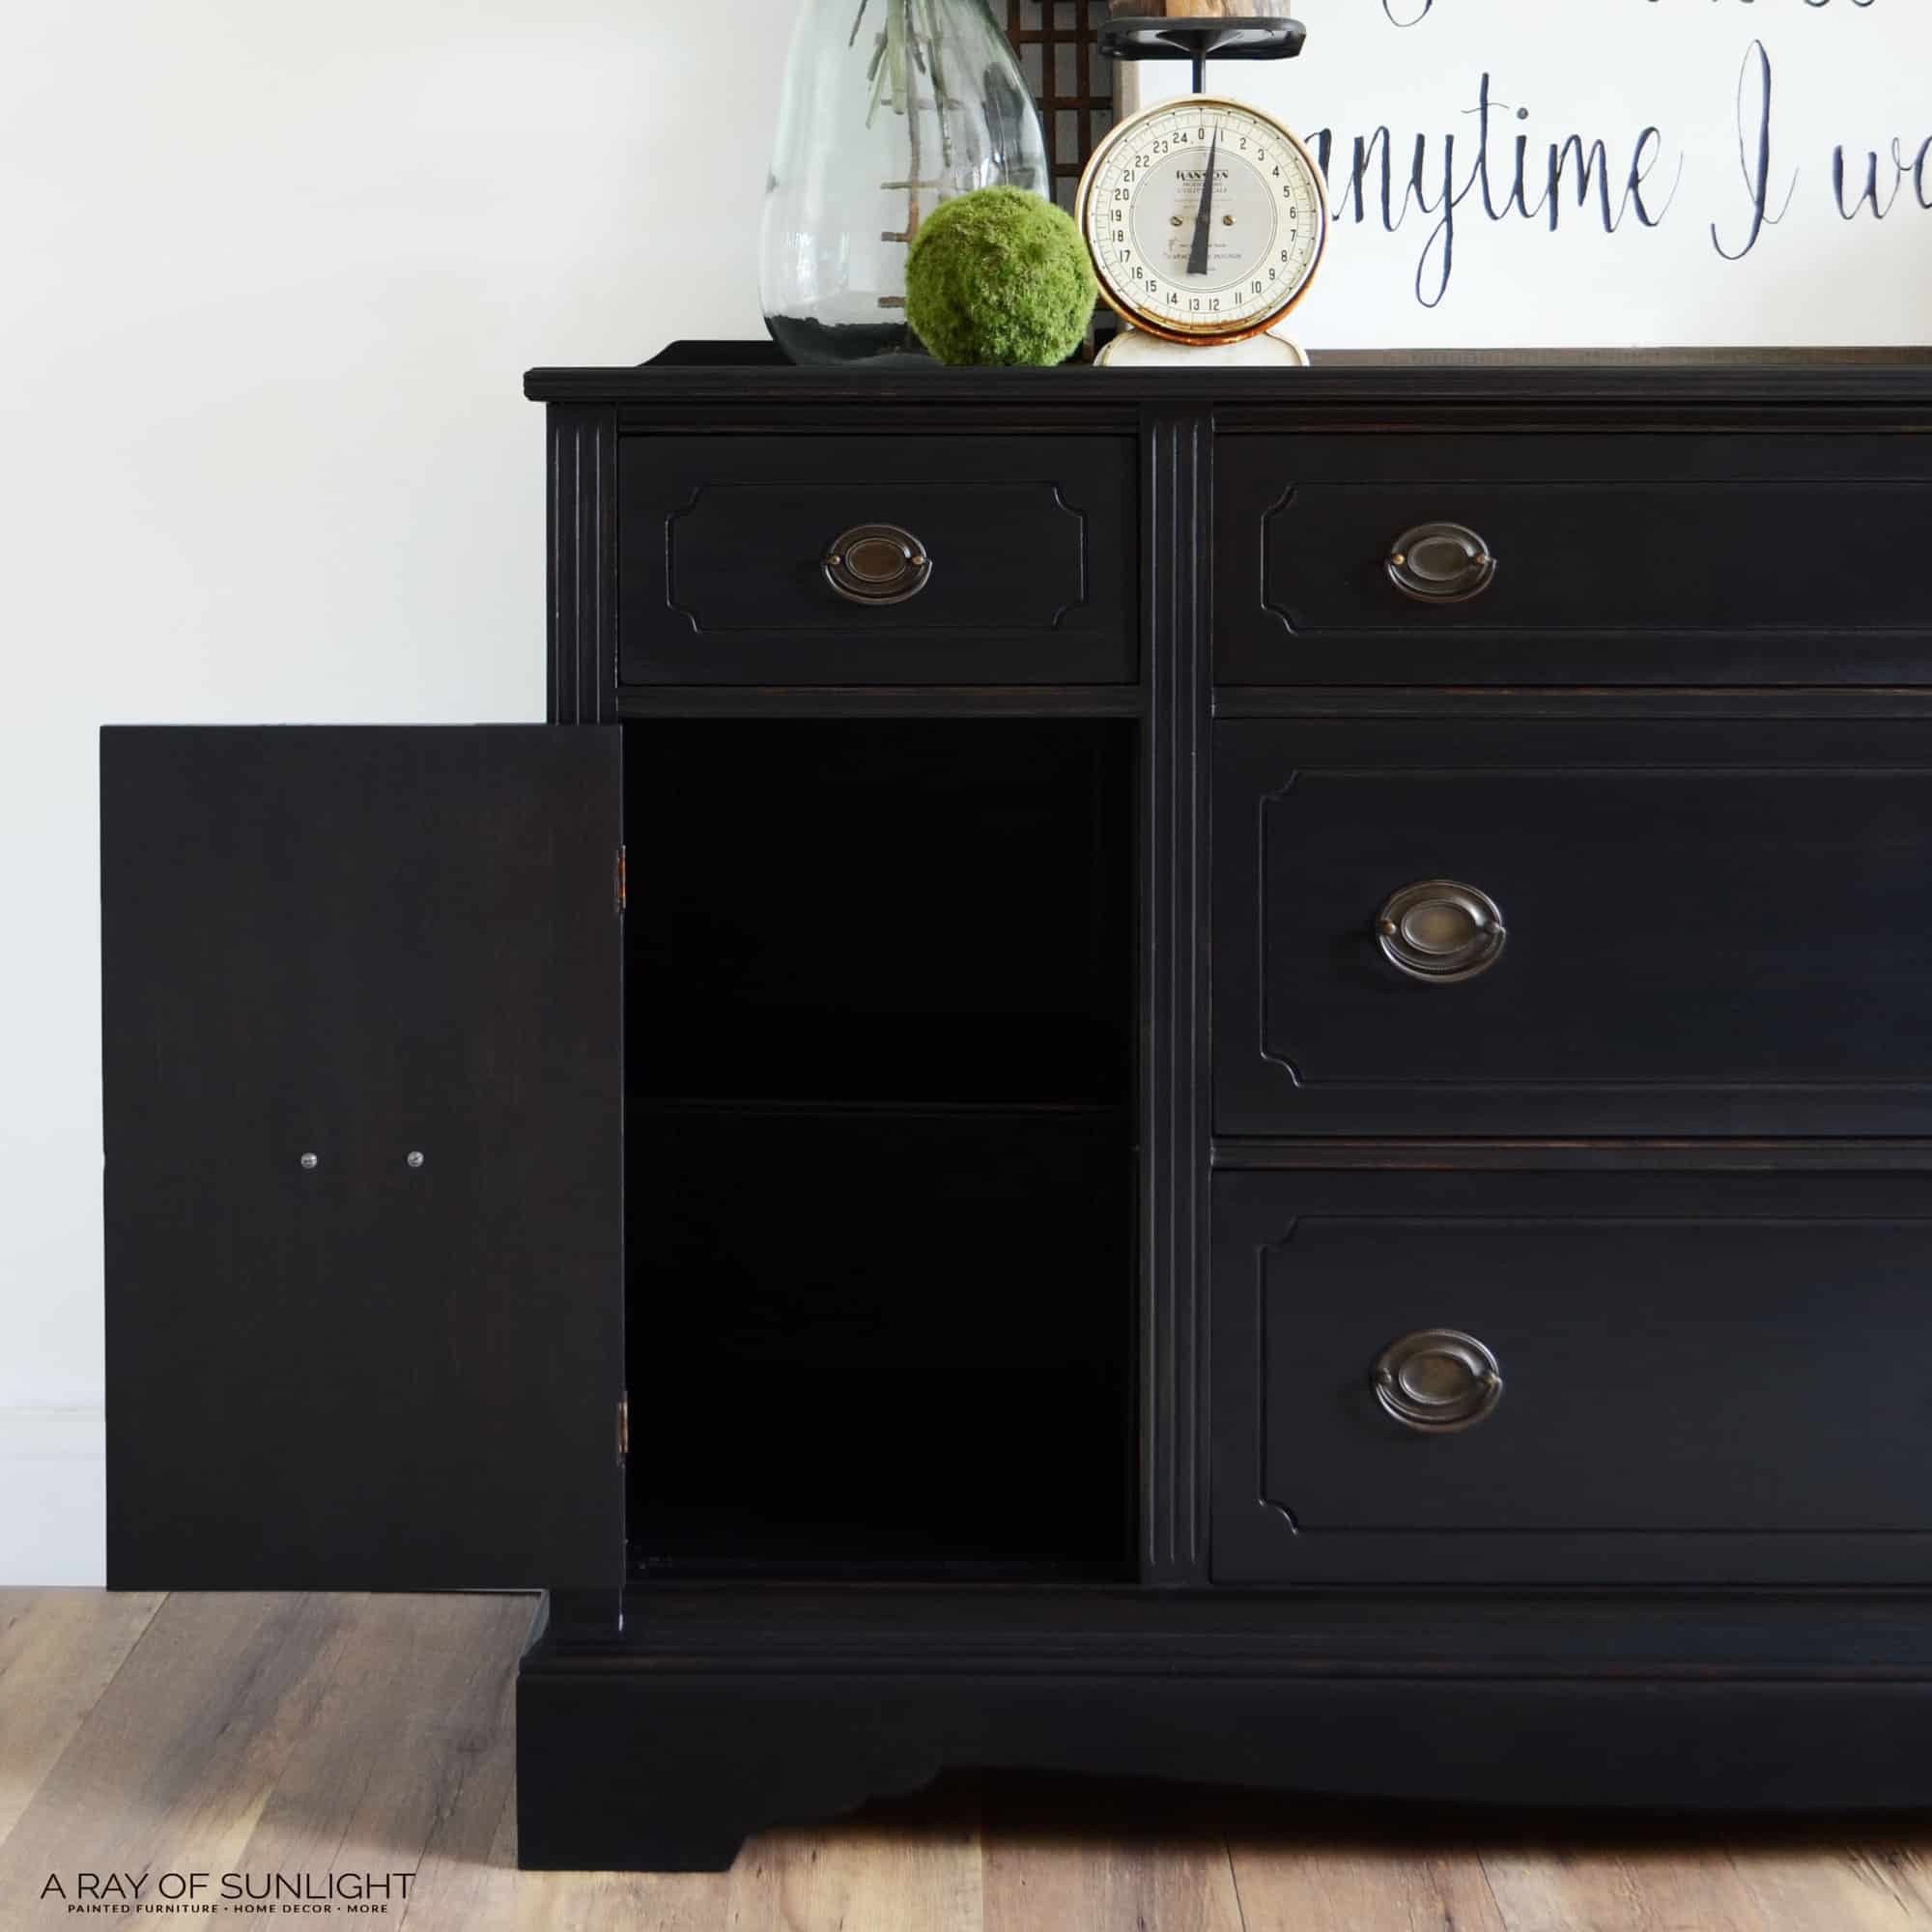
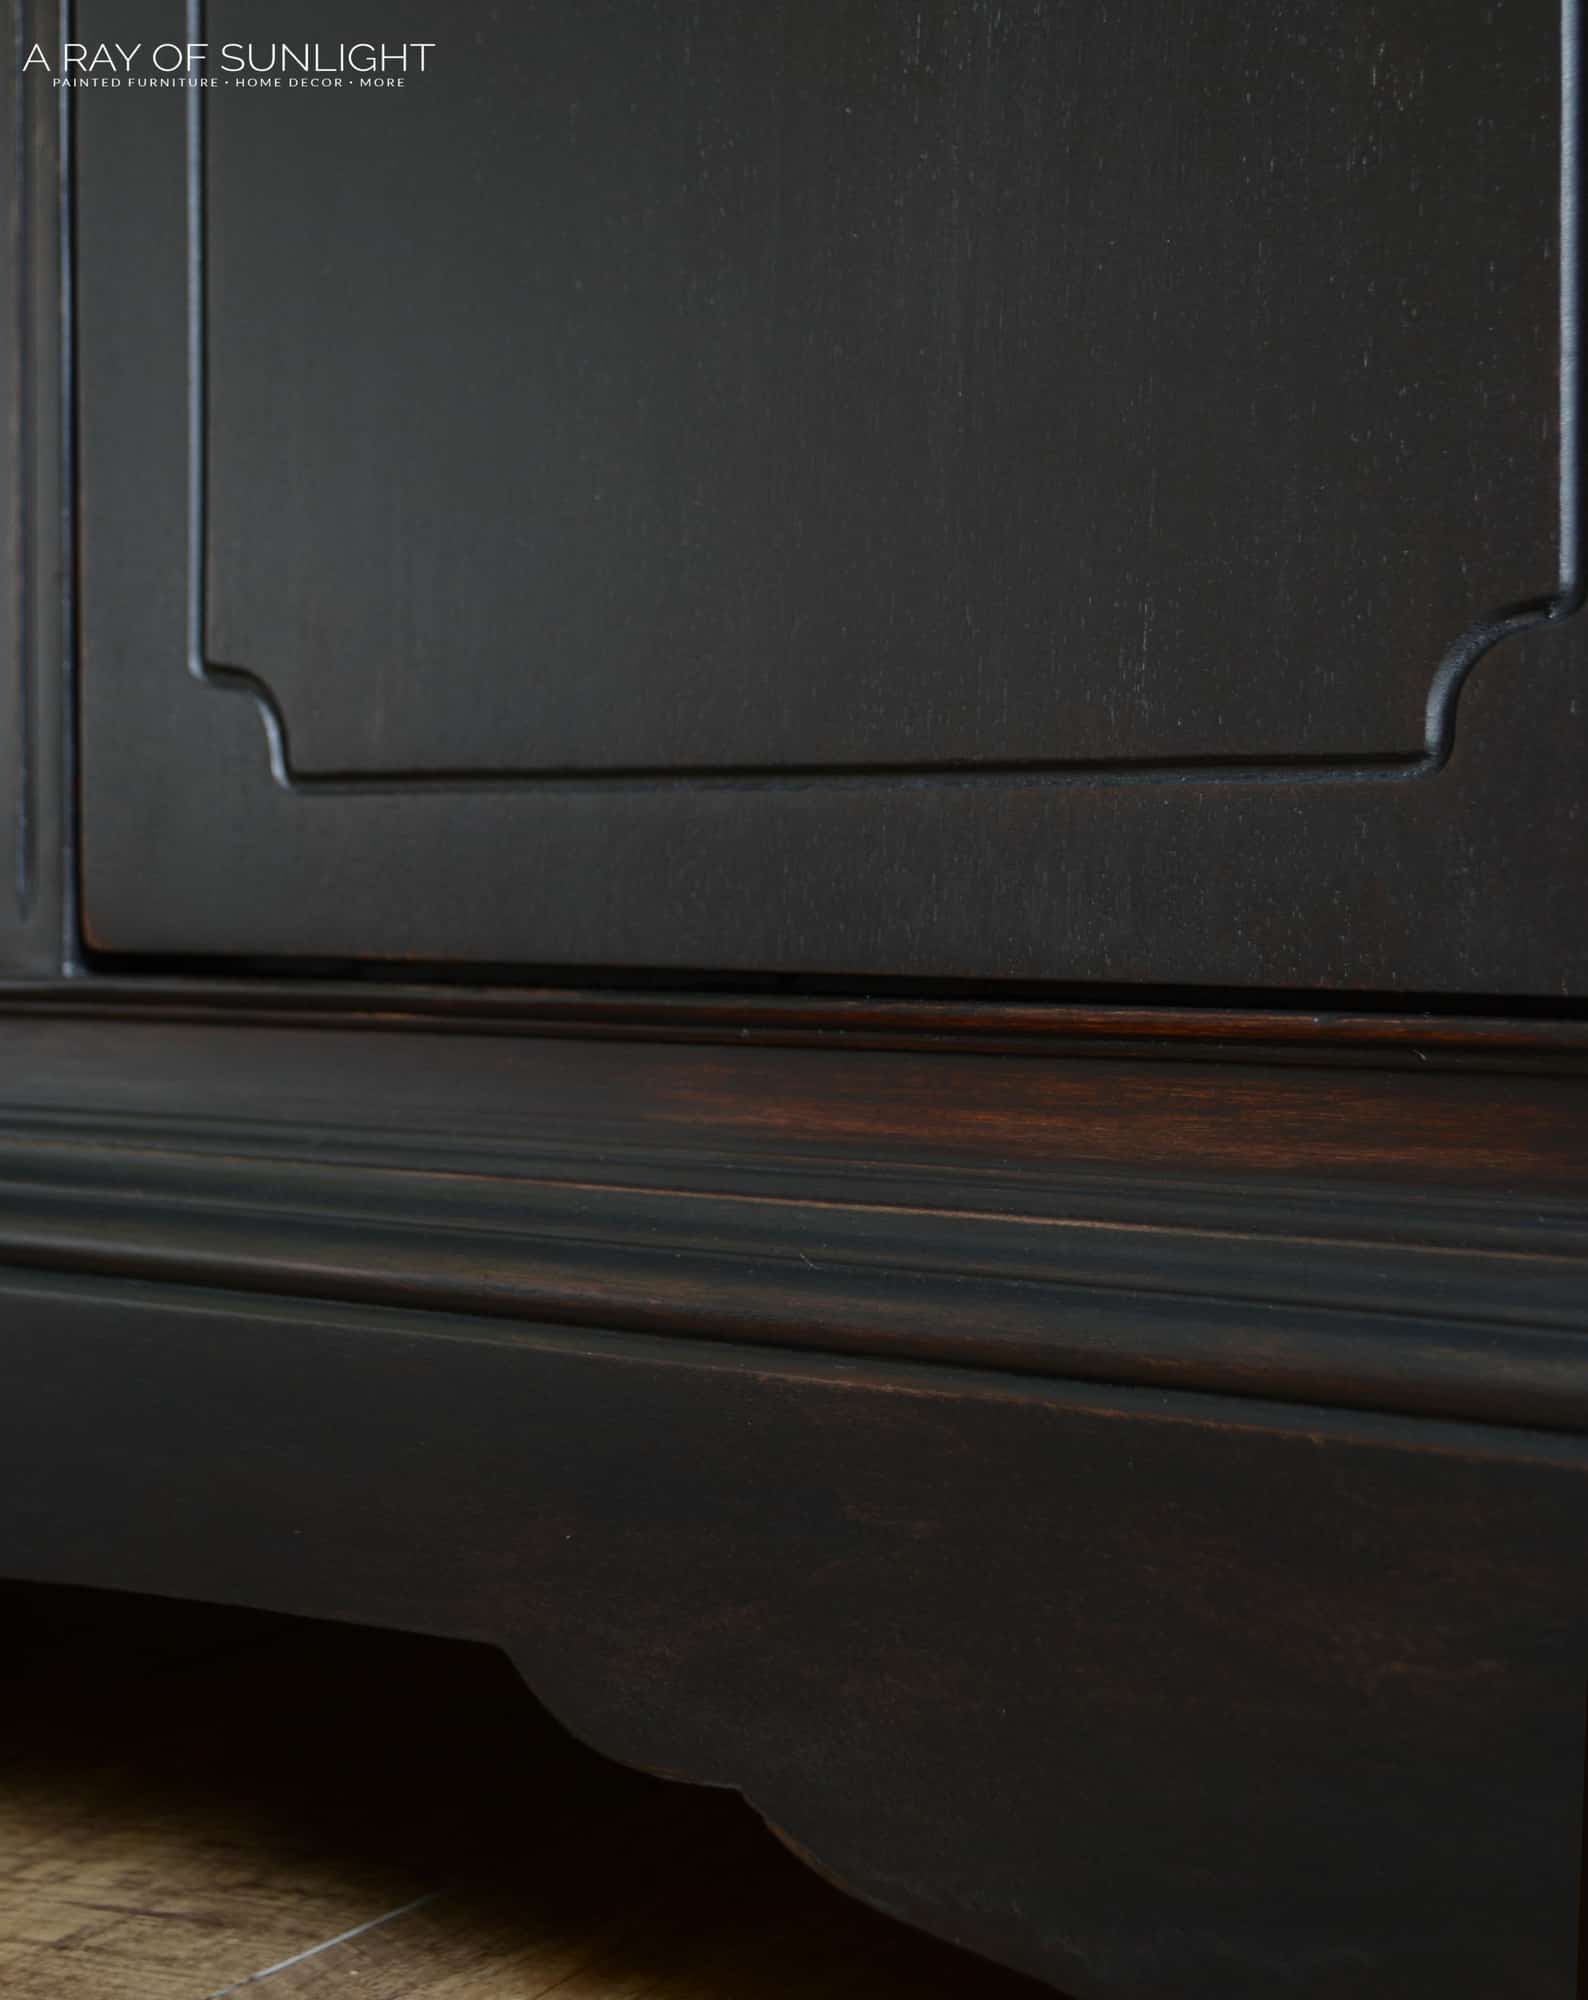
And this is what we were left with. A beautiful weathered black finish. I’ll admit, it’s more weathered and imperfect than I usually go for, but as days go on, I am falling more and more in love with it!
It was hard to just let this buffet do its thing and not be in control of what happened, but in the end, it all worked out.
So this is probably one of the hardest furniture makeover mistakes for me to avoid! I just like things to turn out how I envisioned, but sometimes that’s not going to be the case.
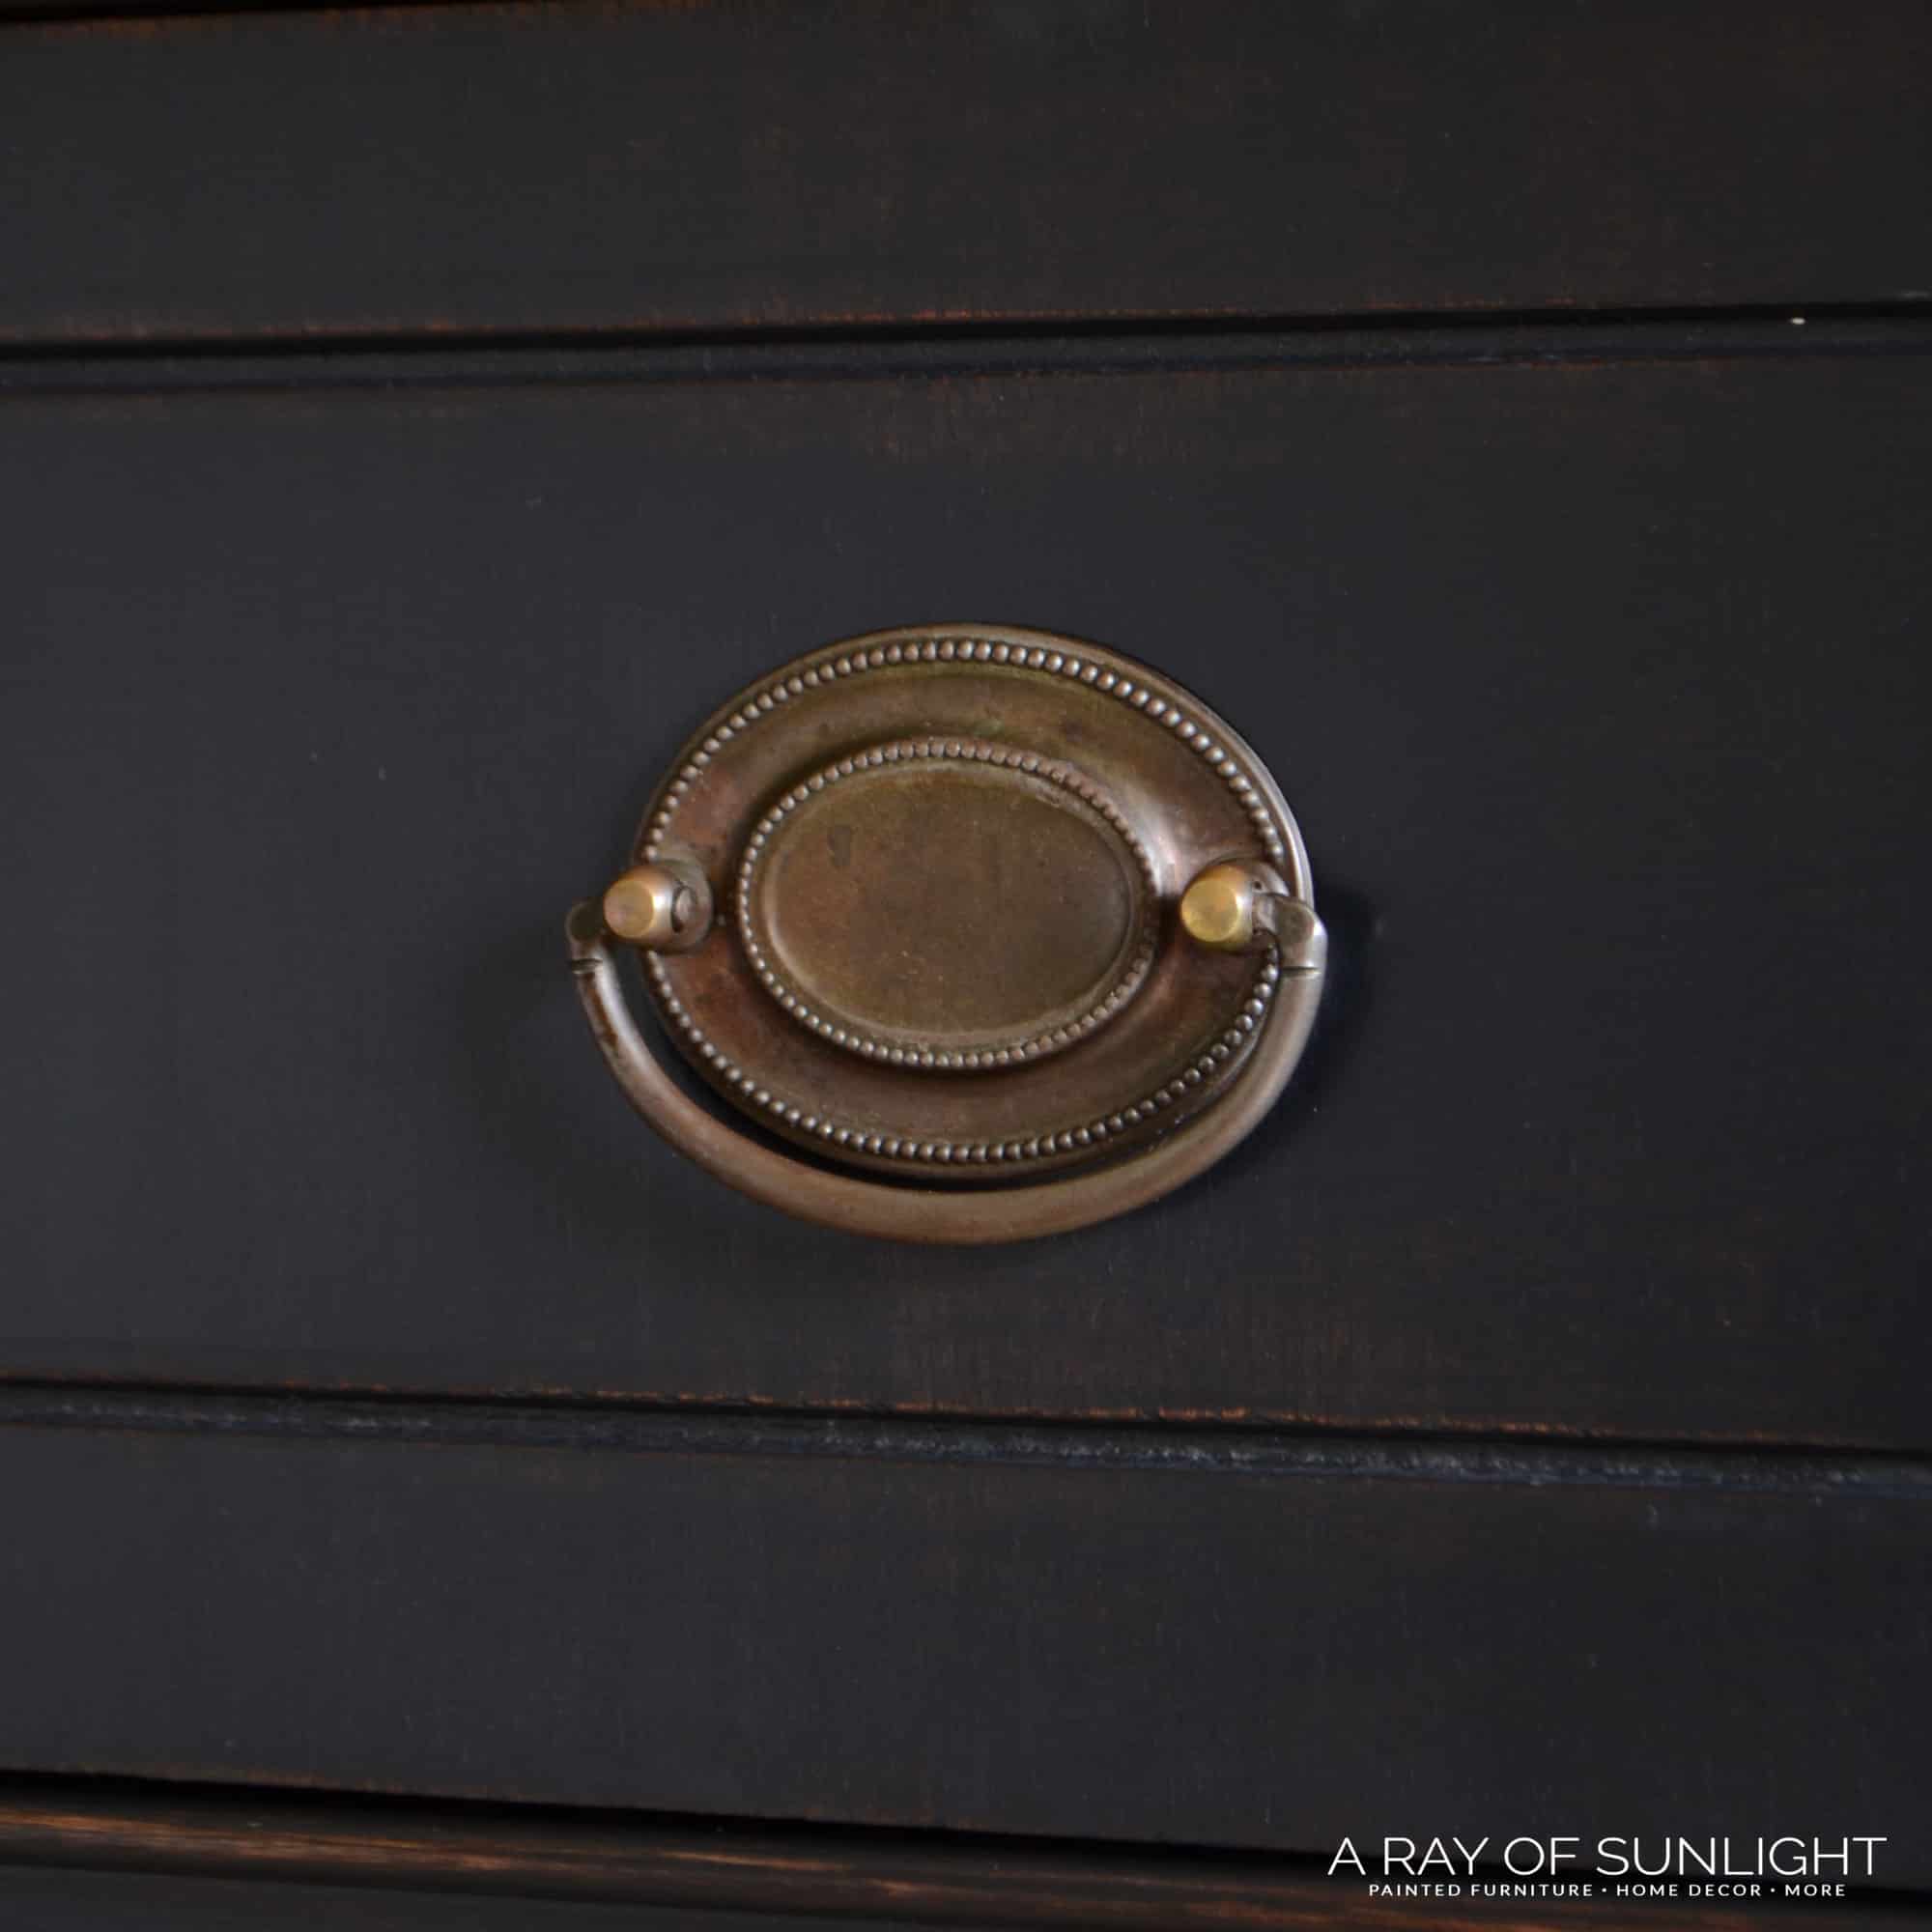
I finished up the piece by cleaning the original hardware with some light cleaner and then put everything back together. Learn how to clean old furniture hardware here.
Moral of the story?
Don’t take shortcuts when it comes to prepping a piece. If the finish is failing, make it right and get rid of it.
Don’t be afraid to try new things. Even if it might not work the way you planned, or may not even work at all.
I love the quote, “Very few things on this side of heaven are permanent.” And paint is not one of them.
When nothing seems to be going your way, just go with the flow. I sure wasn’t looking for a weathered imperfect finish, but that’s what I got. And I actually really love it.
This piece has a lot of character to begin with, so it really fits the piece.
Learn from mistakes and problems. I could have stepped away from this piece in the very beginning. I knew it had the potential to be a thorn in my side.
But I’m so glad that I didn’t walk away. I learned so much from the whole entire process, and I even had fun for most of it.
And once you’re done with the piece, celebrate! I know I’m going to pick an easier piece for my next project. ha!
Supplies Used for Black Painted Buffet Makeover
Do you want to achieve this finish without all of the hassle?? I know you can! Just start out with a piece of furniture that has a nice even finish, with little to no blemishes.
- Liquorice by Country Chic Paint (I thinned out the paint to create a wash by using about a 1:1 ratio of paint to water. Then I used a cheap chip brush to apply the paint in long straight brushstrokes)
- 400 Grit Sandpaper (to distress the paint)
- My Favorite Polyurethane (if you stir your poly really well before application, you won’t have to use wax afterward to cover up a hazy finish!)
- Annie Sloan Clear Wax and Country Chic Paint Black Wax (I mixed these waxes at a 1:1 ratio. Then I used a cheap chip brush to apply the wax, and an old cut up t-shirt rag to buff the wax)
- Baby Oil (Optional! But if you want to try it, I wiped it on with an old cut up t-shirt, let it sit and soak in for at least 15 minutes, and then wiped all of the excess oil off with a clean rag.)
Don’t forget to follow Country Chic Paint on Facebook or Instagram! Check out more black chalk painted furniture ideas here.


I’d love to hear about your furniture makeover mistakes, whether you’re selling, or creating pieces for your own home! It’s so nice to hear that we aren’t alone when things aren’t going as planned!
If you want to know how to make money painting furniture, check out this post to learn more.
More Furniture Makeovers
- How to Easily Paint Black Furniture (if you’re looking for a solid black finish, this paint makes it SO easy!!)
- Black Vintage Farmhouse Dresser
- Black Milk Painted Dresser
- Painted Buffet Ideas
- Painting Oak Furniture Black
Follow us on YouTube to get more tips for painting furniture. Or share your project with us on our Facebook Group and be part of our community. See you there!
Hi! Try Maison Blanche wax if you need to wax a piece. Every color works effortlessly. It’s dries quickly and buffs to a nice sheen. I use it weekly. And the look as hard to beat!! I’ve used it for 5 years along with other brands of waxes and will say there is a learning curve to some of them. I don’t use Annie Sloan it gets streaky and has uneven sheen. Country chics wax stays tacky and doesn’t buff easily. Best wishes!
Oh that’s good to know! Thank you for the info!
Hi Natalie,
I loved reading this! I just went through a very similar experience but with white paint! Oh my, I went on a crazy roller coaster ride, but am thankful for everything I’ve learned! Thanks for sharing because I can totally relate!:)
Oh no! I’m sorry to hear that! But glad we can learn from our experiences!! Happy Painting!
Hi, what did you use to clean the hardware?
Hey Traci! I love to use Bar Keepers Friend
HI Natalie – I don’t know when this article first appeared however it came to me at a time when I needed it. I am not a professional, I call myself a chalk paint hobbyist. I am retired and upcycling furniture is now my hobby and my love. I do this on a budget (I am on a pension) which means I am unable to purchase the premium chalk paint and I am at the mercy of American prices coverted to Australian dollars plus huge freight costs which is really difficult. You (as in American painters of beautiful old pieces) are fortunate to have a range of products at reasonable prices. I have had a piece I have nicknamed “The never ending story.” Reading your article has helped me realise that others have issues with their pieces. I am now re inspired and while reading your article have come up with some new ideas. Thank you from Down Under, Brisbane Australia. Pauline
Hey Pauline!
I’m so so glad to hear that it helped you a bit. I’m so sorry about your piece that is giving you fits though. If you keep working at it I’m sure it’s going to turn out beautiful!
What kind of paint do you use Down Under? I can’t even imagine the prices to ship to Australia!
My goodness! I feel like whatever could go wrong, did go wrong. Selfishly, I am thankful that you went on this journey and lived to share your story. I am bookmarking this so that I know what to do if (when) this happens to me. I can’t thank you enough for the detail you’ve put into this post. I am so thankful to have it!
Oh dang I’m sorry!
Yeah you can put it on a while after. You can also try fusion mineral’s beeswax. I’ve heard great things about it fixing the fogginess and streaks.
If the veneer is in good condition, there is no need to remove it.
I am relatively new to the furniture refinishing scene (I have done pieces for myself but not to actually sell to someone else). Revently, I found an antique oak wash stand at a yard sale for $35 and brought it home. It was partially painted black and the rest had an old, old finish. I used stripper for the painted part and sanded the rest, finding vaneer damage. I decided to simply use a wood filler because most all of the damage was on the inside of the two small doors and I decided to use a light paint to cover the inside of the doors and add some hydrangea transfers. I was going to whitewash the rest. Well, I have never whitewashed before and, unfortunately, I didn’t use enough water to thin the paint and the end result was not ideal. Thankfully, I had not done the body of the wash stand…only the doors and the mirror holder thingy (whatever it’s called). I am currently in the process of sanding the pieces back down to re-whitewash them. I watch your videos all the time and I am confident I can, hopefully, live up to your standards!
Hey Deborah! We’re so glad that you’re here and learning together with us. We totally get where you’re coming from as all of these mistakes that you’re making, we’ve also made them too. But we can always learn from our mistakes and that’s what we do here, learning from our mistakes and then sharing them with you so we can all learn together. Keep up the good work! You’ve got this. We’re confident you’ll get your project to look exactly as how you want it. Best of luck!
I LOVE this entire story as well as the links that you leave. Thank you for the honesty and humbleness that makes me feel “normal” and inspire to be better! I especially love the part about your integrity and making the furniture “right” instead of taking shortcuts to make it look good but knowing it’s not perfect so you do what it takes to make it right for yourself as well as the customer no matter how frustrating. You are inspirational in character and in your beautiful work. Thank you for sharing your processes and work.