This Is What a Damaged Dresser Can Turn Into (Beginner Makeover)

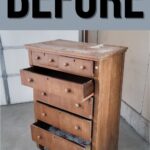
If you’ve ever looked at a worn out piece and wondered if it’s worth saving, this before and after dresser makeover will show you what’s possible. This is what a damaged dresser can turn into with a little patience and these refinishing furniture techniques.
In this post, I’ll walk you through how to refinish a dresser for beginners, including repairs, prep, and updating the finish, so you can get beautiful, lasting results at home and even start flipping furniture for profit.
Welcome to Furniture Fixer Upper day, where we join 4 of our talented furniture friends and bring you brand new makeovers! I’ll link to my friend’s makeovers after our after photos at the bottom of this post! Don’t forget to check out their masterpieces!! Okay, back to our makeover!
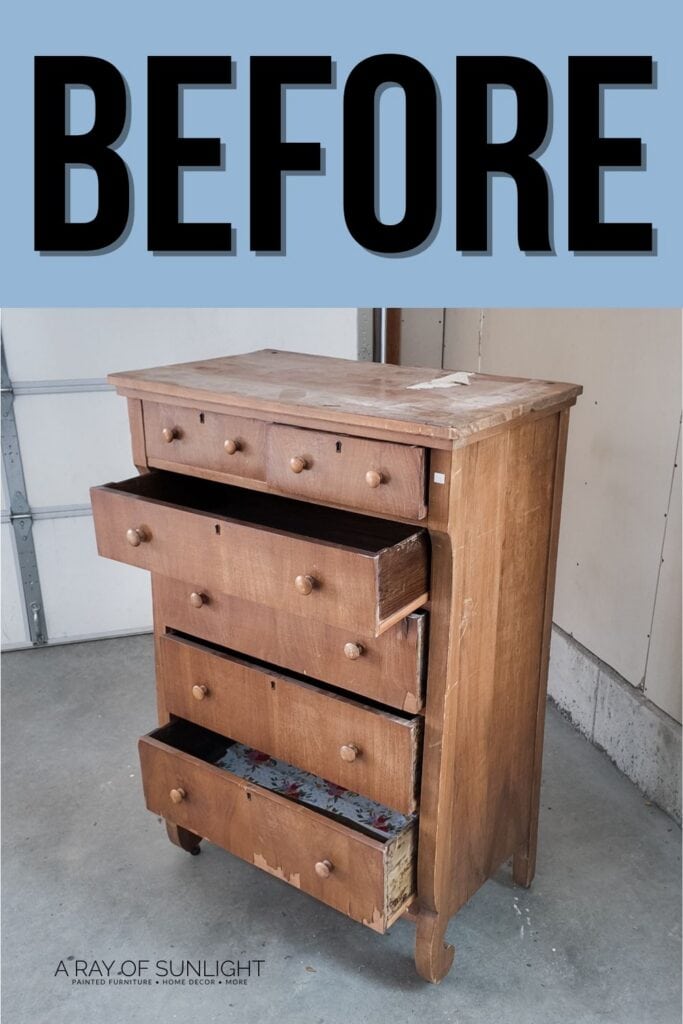
This $60 antique empire high boy dresser was trashed when we got it, but I just couldn’t resist this pretty empire style, especially since it’s an antique we don’t usually get in our area.

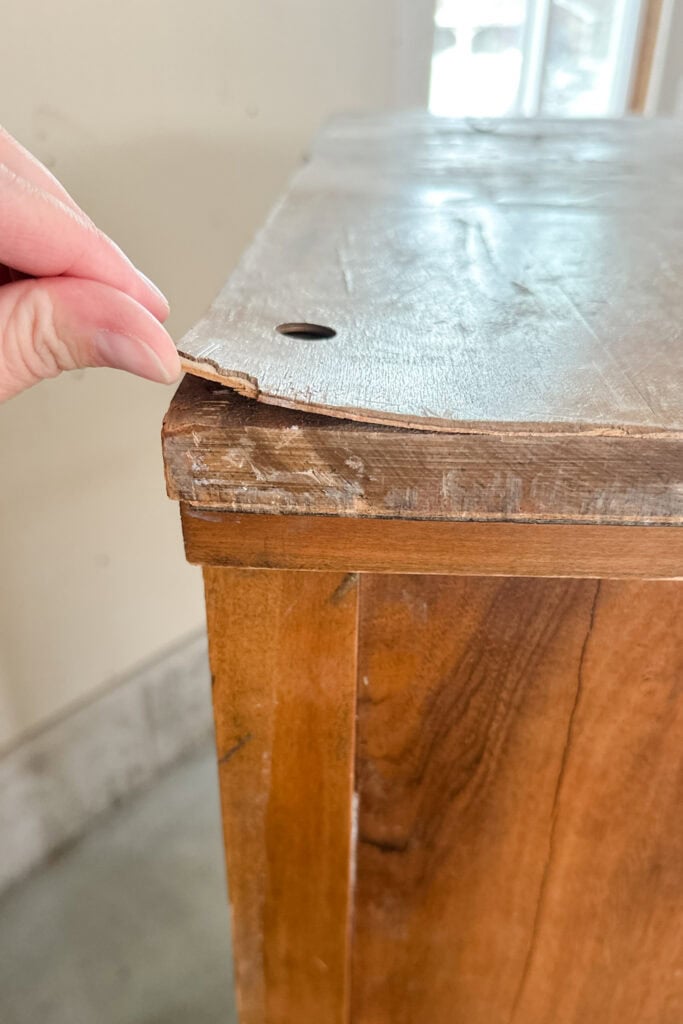
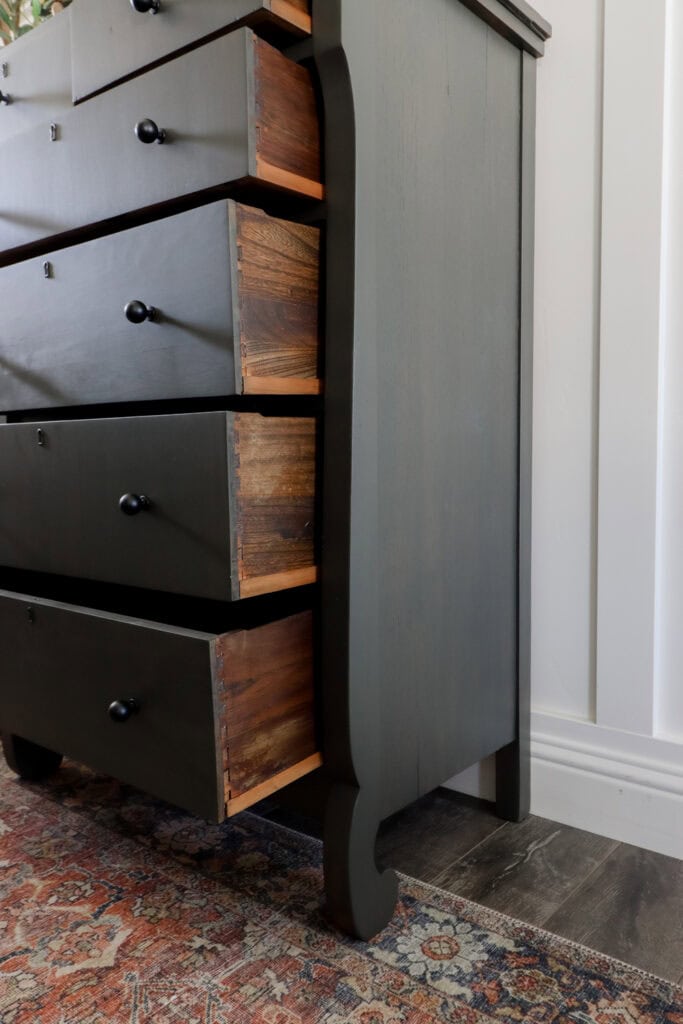
But it needed a lot of work. The veneer on two of the drawers and the top was coming off. In a case like this, where it’s really loose and damaged in so many places, it isn’t worth it to me to fix all that.
The back of this dresser was also coming apart. This was a mess, and I really probably shouldn’t have purchased it because there was so much work to do. This was a full on fix.

Supplies Used for Antique Dresser Makeover
As an Amazon Associate, I earn from qualifying purchases. I also may earn from other qualifying purchases with other companies or get free product to review and use. All opinions are my own.
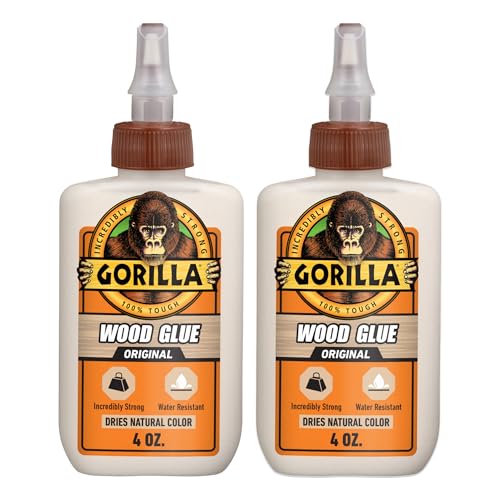
- Wood Glue
- Clamps
- Bondo Wood Filler
- Dewalt Orbital Sander
- Festool Rotex Sander
- Festool RTS Sander
- SurfPrep Foam Pad (Use code RAY10 to get 10% off your order)
- Melange Paint (Maduro Brown, Basilisk Black, Jacob’s Well)
- Zibra Chiseled Wedge Paintbrush
- Zibra Small Artist Paintbrush
- Lint Free Cloth
- Topcoat
- Paint Sprayer
- Paint Sprayer Filter
- Respirator
- Black Knobs and Gold Knobs
- Wise Owl Furniture Salve
How to Fix Damaged Furniture
But again, I just couldn’t pass up this antique, which means I spent a lot more time, money, and effort on it than on a regular dresser that’s in pretty good condition to begin with.
Even though it was $60, it wasn’t that great a deal because I had to spend so much time repairing things. So when you’re flipping furniture, it’s not always great to just get a free find or something on the side of the road that needs a lot of work.
I had to glue, clamp, and nail the back together because of how this dresser was built. And then the drawers weren’t going in and out properly, so I had to sand their edges and make sure all the drawer tracks were in the right positions to work properly.
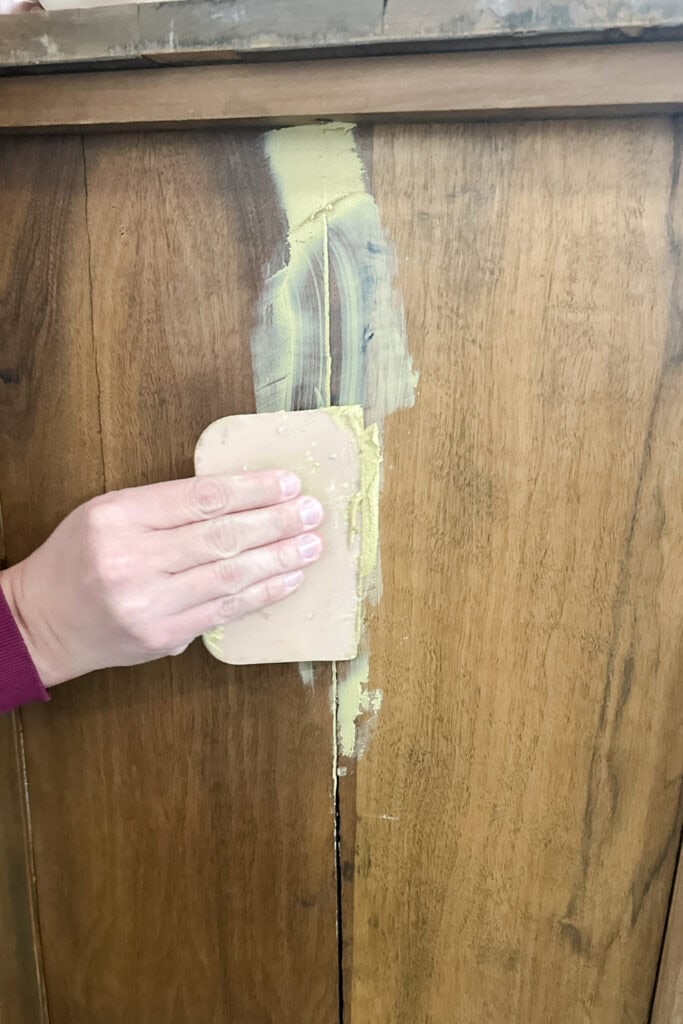
There were also small chips in the wood veneer that needed to be fixed, and a large crack all the way down the side of the dresser that needed to be filled in. I have more tips on how to fix cracks in wood before painting here.
These took me a few days to get the piece to a point where I could think about actually refinishing it.
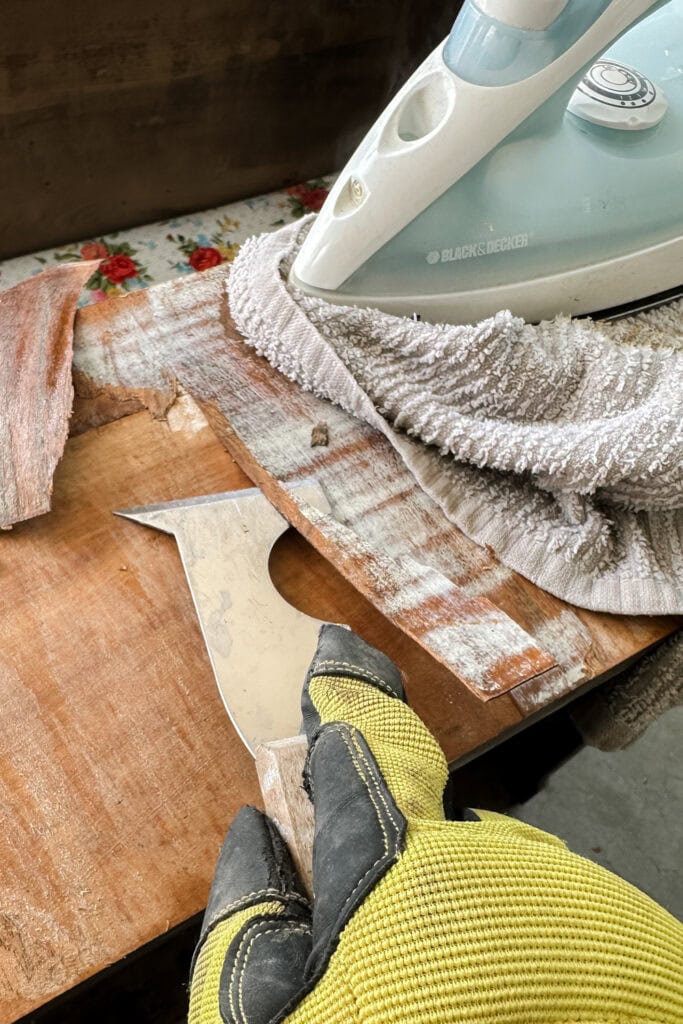
Removing Veneer from Furniture
On an antique like this, I knew it was going to be wood underneath the veneer, so I wasn’t worried about removing the veneer. I have a post on the insanely easy way to remove veneer, and that’s what I did.
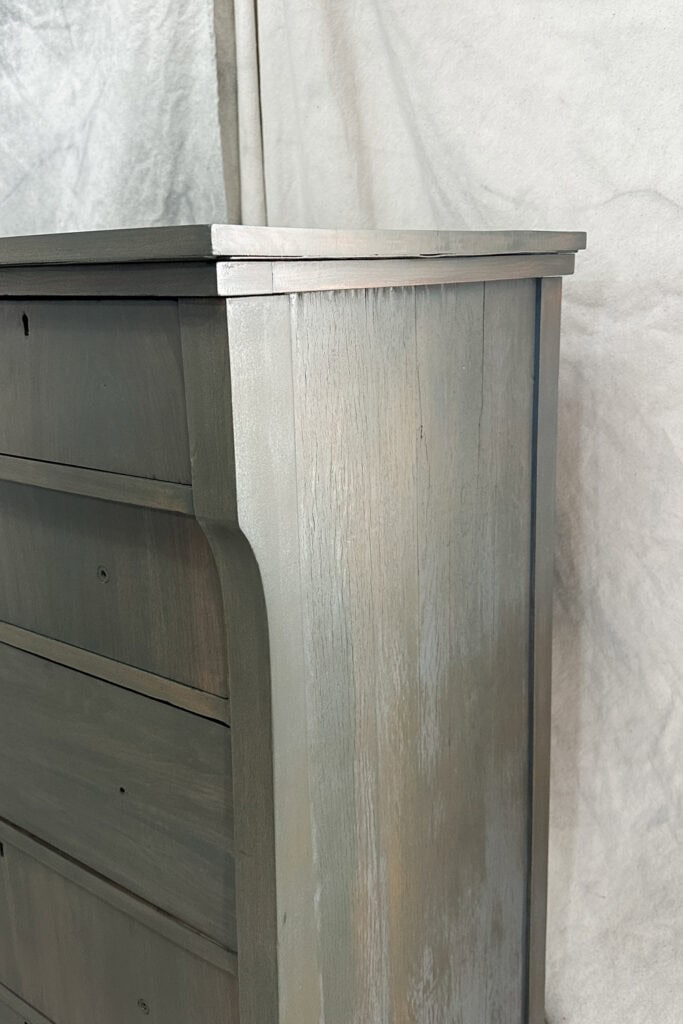
But the wood underneath was of lesser quality. It was still good wood, but not the pretty veneer the rest of it was. It had some gouges and cracks that I filled with Bondo, then I sanded them all down to be flush with the surrounding wood with my orbital sander.
I spent multiple days getting this piece of furniture ready to update the finish, which again, I do not recommend going in and doing this much work if you can avoid it. If it’s an heirloom or something very special to you, or you have the time and the resources to work on it, then go for it.
But this wasn’t a quick flip, and I spent more time on it than what I will get out of it.
How to Refinish A Dresser
Originally, I planned to paint this a dark navy or black paint color to hide ghost lines or any remaining damage. But as time went on, I really wanted more and more wood, not just paint. And not orange or red in most wood finishes, but I really love a deep, rich, and neutral wood stain, like the kitchen cabinets that we have.
But I’m also not a fan of painting a piece of furniture brown. If it’s gonna be brown, I want it to have the wood grain peeking through. So I knew I wanted a dark, natural wood stain color.
How to Stain Furniture Without It Looking Orange
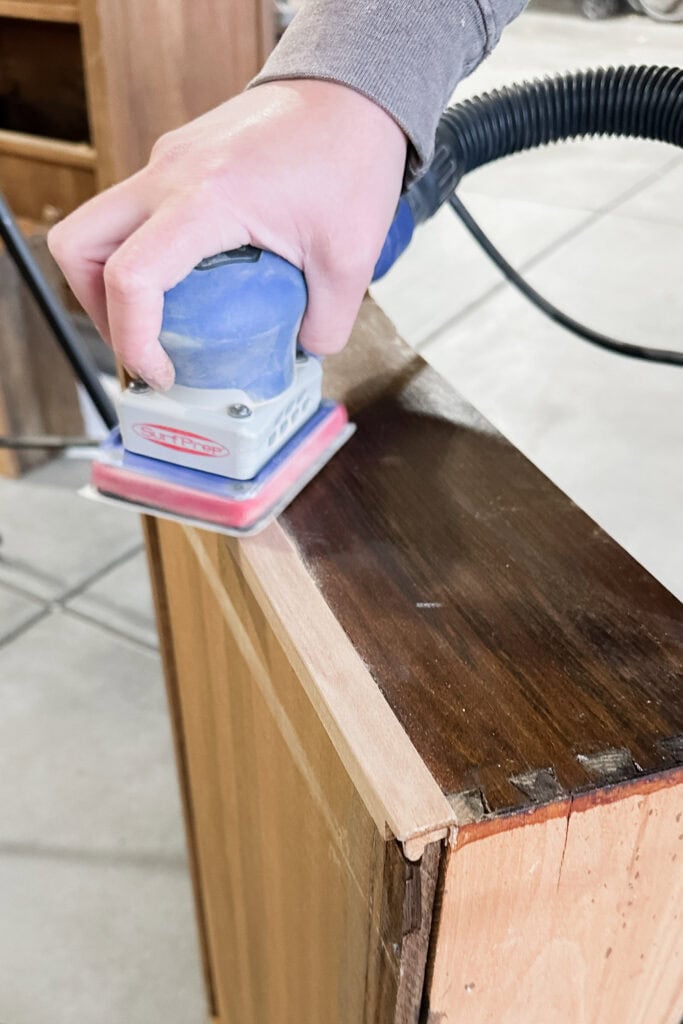
After fixing the damage, I moved on to removing the finish. We started with our beginner orbital sander, but quickly changed to the more aggressive Festool Rotex sander to very quickly sand down the Bondo and the finish. Then I moved to the Festool RTS with a SurfPrep foam pad for the curves and corners.
I didn’t do a super detailed and thorough job, but I sanded most everything down to raw wood. Then I went and dug through my paint stash.
I found a brown, which was too light, and I knew I needed it darker, so I added some black. I also needed a green to counteract the dresser’s red and orange undertones.
I mixed those together a few different ways and came up with a winner. I ended up using around 40% Maduro Brown, 40% Basilisk Black, and 10% Jacob’s Well from the Melange Paint line. These were just extra paints that I had sitting around. Had I not had these paints, I would’ve just gone for Sherwin Williams in the color Clove.


Paint Wash Furniture Technique
So I mixed those up, and then I added some water to turn it into a paint wash. And this part was very, very scary to me, because you just never know how the stain’s actually going to soak into the wood.
Would you like to save this?
I was using paint, and it soaks in and dries very, very fast. So you don’t have as much time to work with it, but it also sits on top of the surface just as much as it soaks in, and so I feel like I have more control over the final color than an oil based stain that just penetrates into the wood.
Plus, I really wanted to test this out to see if it was a viable water based stain alternative, so I can do it indoors without all of the strong smell of oil based stain.
I brushed the wash very lightly and very quickly, section by section. I also watered it down by maybe 50%. The more water you add to it, the thinner it’s gonna be, the more time that you have to work on it, and the more forgiving it will be. The less water, the thicker the coverage.
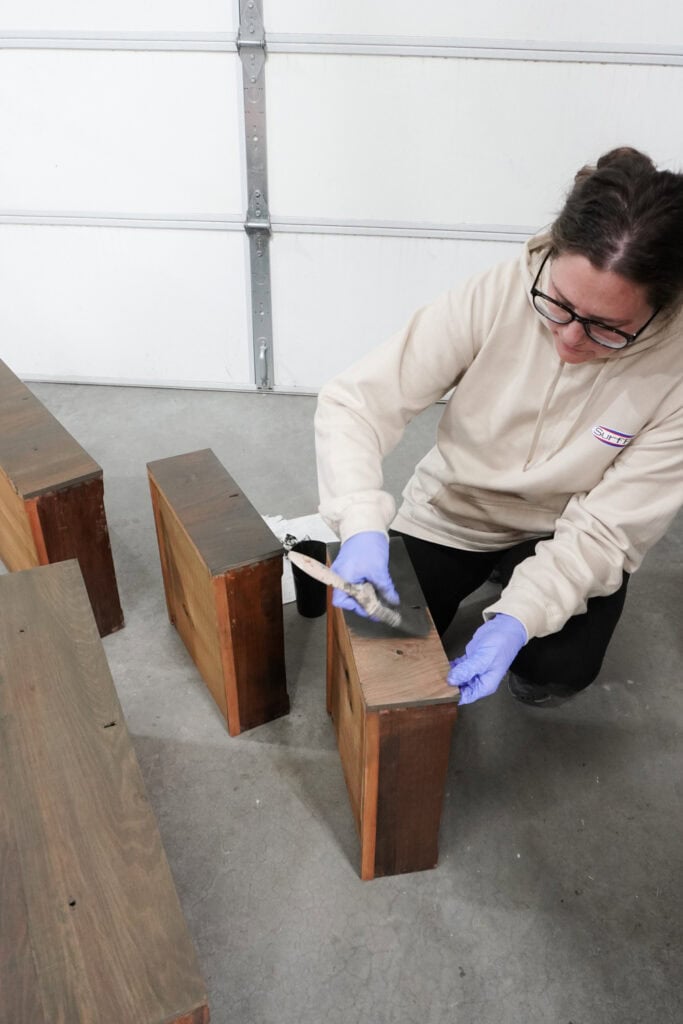
Then I wiped away the excess with a lint free cloth after it had started to soak in. I did this on the entire piece, but for some reason, I brushed on three coats on the drawers. By the time I got to the last side of the dresser, I was really rushing because I was trying to finish up so we could go spend time as a family.
Because of that, I wasn’t being as careful. I should’ve thinned the paint a little more because it was getting thicker. When I came back, the drawers had almost full coverage… you couldn’t see any wood grain.
The rest of the dresser was how I wanted it to be, but on one side, you could see the brush marks because it wasn’t really a wash but more of a slightly thinned out paint at that point. And it didn’t look good.
So the next day, I sanded all the drawers back down to raw wood, and sanded everything else with a fine grit SurfPrep foam pad to even out any brush marks and just try to even things out because there were multiple spots that I wasn’t super happy with.
How to Blend Wood Filler With Stain
And then I did something this time that I should have done the first time. I took a tiny paintbrush, dipped it into the brown paint I had mixed, and went very lightly over all the wood filler to hide it.
The wood filler just doesn’t soak up stain like wood does. Even when you use paint wash over it, you can still see where the wood filler is. But I’ve learned that if you make it look darker, then it just looks more like wood grain and more natural.
So I just used some of the dark paint over the wood filler. I wasn’t exactly precise, but I tried to be as close as possible to cover only the wood filler. Learn more about staining wood filler here.
Then I did another light coat of a more thinned out paint wash all over. I also did two more coats on the drawers. And in the end, it looked so much better. The dresser and the drawers matched almost perfectly.
Topcoating Refinished Dresser
Technically, I used an all in one paint, but I can’t treat it as one because it has a matte finish that I know won’t hold up like I need it to.
So I got some satin polyurethane, put it into my paint sprayer, and mixed in a little paint wash to tint it dark brown. This way, it will help the overall color look similar. I sprayed on three coats.
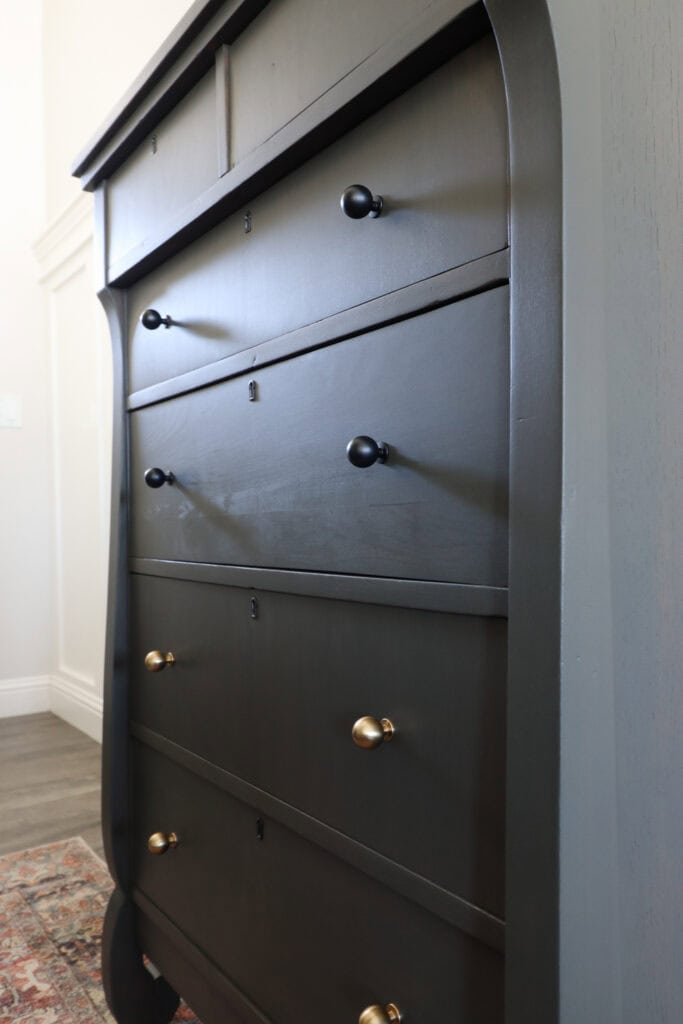
I tested a few different knobs and had the hardest time choosing between these black and gold ones. Unfortunately, I didn’t have enough gold knobs on hand and had a hard deadline for this, so I couldn’t wait until the next day for shipping. So I went with the black knobs. Which knobs would you have picked?
I also rubbed Wise Owl Furniture Salve inside the drawers to make them fresh and new.
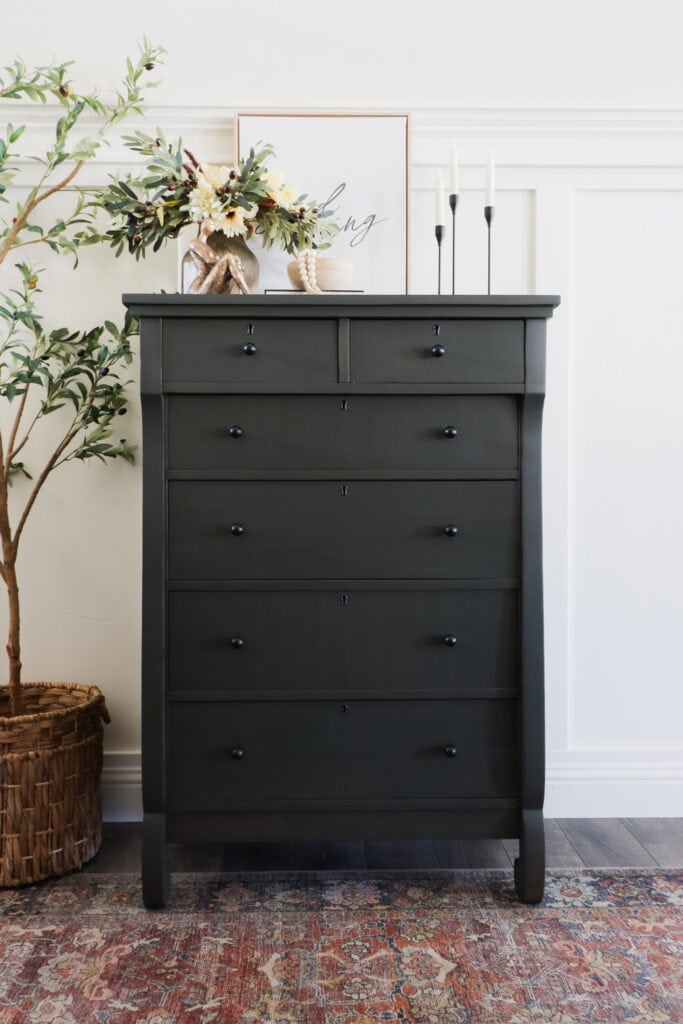
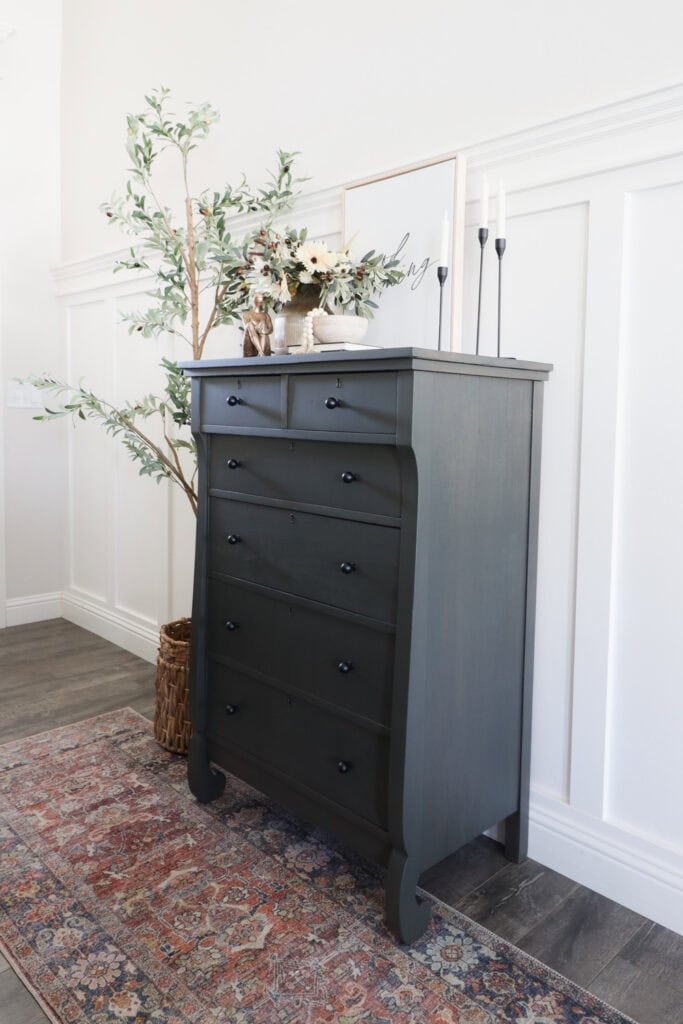
This poor little antique dresser was tossed aside, but thankfully, they donated it, and I was able to give it a brand new life. Here’s what it looks like now!
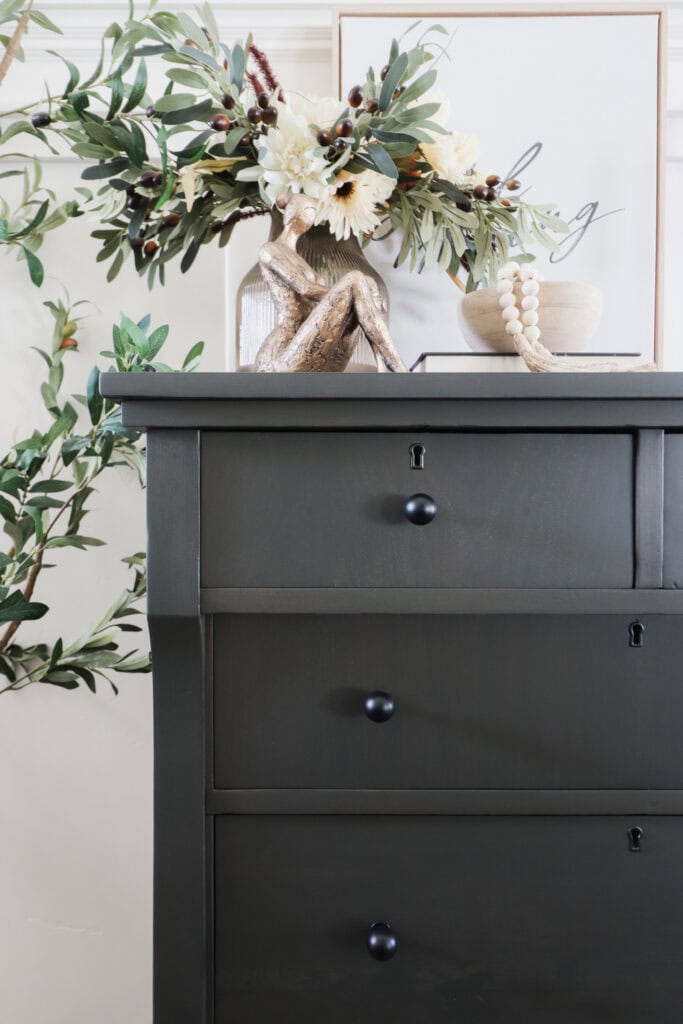
It turned out so good with a neutral stain that’ll work in any home, and I’m so happy that I was able to preserve an antique. Now I can list this thing, and I’m gonna list it for $800. I put a lot of time and money into it. And I fully believe that an antique like this is worth that price or more.
I learned so much from this makeover. It just goes to show that it’s okay to make mistakes. Remember how I made a mistake of putting too many coats of paint on the drawers, and then I had to sand them back down.
This furniture makeover took a lot longer because of that, but it was fixable. There’s always a way to fix things and keep moving past the problems that you can run into in a project.
Don’t forget to check out these other awesome before and after furniture makeovers from my Furniture friends!! (Click the links below the photos!)

- Major Lane Cedar Chest Update from Petticoat Junktion
- French Provincial Coffee Table Makeover from My Repurposed Life
- This Is What a Damaged Dresser Can Turn Into (you are here)
- Vintage Rose Tall Dresser Makeover from Salvaged Inspirations
- Stunning Pine Armoire Makeover from Confessions of a Serial DIYer
More Before and After Makeovers
See All >
Click any of these “before” photos below to view the “after” of that makeover.


This Is What a Damaged Dresser Can Turn Into (Beginner Makeover)
In this beginner makeover with repair, prep, and refinishing, this is what a damaged dresser can turn into.
Materials
- Wood Glue
- Bondo Wood Filler
- SurfPrep Foam Pad (Use code RAY10 to get 10% off your order)
- Melange Paint in Maduro Brown
- Melange Paint in Basilisk Black
- Melange Paint in Jacob’s Well
- Lint Free Cloth
- Topcoat
- Paint Sprayer Filter
- Black Knobs
- Gold Knobs
- Wise Owl Furniture Salve
Tools
Instructions
- Check your furniture for damage and decide what needs to be fixed first. Look for peeling veneer, loose parts, and drawers that don't work properly.
- Remove veneer from where it is too loose or damaged to save. Glue, clamp, and secure any loose areas. Make sure the structure is solid so everything holds together.
- Adjust anything needed so the drawers slide in and out smoothly. Check the drawer track and sand the drawer edges.
- Fill chips, cracks, and gouges with wood filler. Let it dry completely, then sand it down flush with the surrounding surface.
- Sand the entire dresser to remove the old finish and prep it for the new one.
- Mix the colors and add water to create a paint wash to use as stain.
- Brush the paint wash on lightly and quickly, working one section at a time. Wipe away the excess with a lint free cloth after it starts to soak in.
- Lightly sand out any brush marks or uneven spots. Use a fine grit pad to smooth the surface without removing everything.
- Paint over any wood filler areas with a small brush. This helps blend and make them more natural.
- Apply another coat of two of paint wash over the entire dresser to match everything, including the drawers.
- Seal the dresser with a topcoat to protect the finish. Spray 3 coats for maximum durability.
- Add finishing touches like new hardware and refresh the inside of the drawers with furniture salve.
Recommended Products
As an Amazon Associate and member of other affiliate programs, I earn from qualifying purchases.


More Refinishing Furniture Ideas
- How to Take Orange out of a Wood Dining Table
- What Does Old English Do To Wood
- How to Stain Furniture White
Follow us on YouTube to get more tips for painting furniture. Or share your project with us on our Facebook Group and be part of our community. See you there!
You did such an amazing job bringing this piece back to life! Rescuing these forgotten pieces is my favorite because you really can’t go wrong. Love it! XOXO
Thanks so much Christy!
Wow, that is quite a difference. Great job!
Ahh thank you!!
A lot of work but you brought this beauty back to life my friend, GORGEOUS! I’m sure it will sell quickly. Pinned XOXO
Thanks so much Denise! I appreciate it!
Oh, Natalie! So.Much.Work. But oh so worth it! Wow, the finished piece is gorgeous! It’s unrecognizable!
Super job!
Pinned
gail
Thank you Gail! That makes me SO happy to hear! It was definitely worth it.
I’m glad you saved it. You did a great job. I love the black.
Aww thank you SO much!
I actually was surprised at the original condition and am so happy you rescued it. It looks pretty darn good. Hope someone sees the effort you put in and the charm of the piece to reward you with your price.
Aww I appreciate it. Thanks so much!
This was definitely well worth the effort you put into refurbishing this piece of furniture. Love it 🥰
Aww thank you so much!