How to Sand Down Wood
If you’ve ever wondered how to sand down wood to prepare for refinishing furniture, you’re in the right place! This blog post is designed to take you step by step through the process of sanding down to raw wood, and this technique works with veneer or solid wood.
From understanding the type of wood you’re working with, to the correct sandpaper to use, and even these sanding furniture tips – we’ve got it all covered.

Sanding wood can seem like a daunting task, especially if you’re new to it. But don’t worry! If you’re sprucing up a beloved piece of furniture or working on a DIY project, this guide is here to help you.

It’s important to do this step properly, or else it can ruin the wood. You don’t want to end up with a lumpy or uneven surface, as well as a finished piece that looks rough and unprofessional. And even if it’s your first time, you can definitely get great results!
Packed with handy tips and proven techniques, this post will show you how to sand wood like a pro. So let’s dive in, dust off those old pieces, and give them a fresh new life! You can also start with this sanding furniture for beginners guide for all the basics.
supplies Used for sanding down wood
As an Amazon Associate, I earn from qualifying purchases. I also may earn from other qualifying purchases with other companies or get free product to review and use. All opinions are my own.
Is Your Wood Veneer or Solid Wood
First, make sure you know if you are working with veneer or solid wood.
Some look like it’s a solid piece of wood, but really, it is just a thin piece put over particle board or real wood. Veneer is just a very thin piece of wood, and it is easy to sand through it and down to the next layer.
It’s important to figure out if your surface is either of these two before you start, so you know how aggressively you can sand.
How to Identify Veneer Wood
How can you tell if it’s veneer? Well, on the edges of your furniture or piece of wood, usually you can see a very thin, dark line where the veneer is on top.
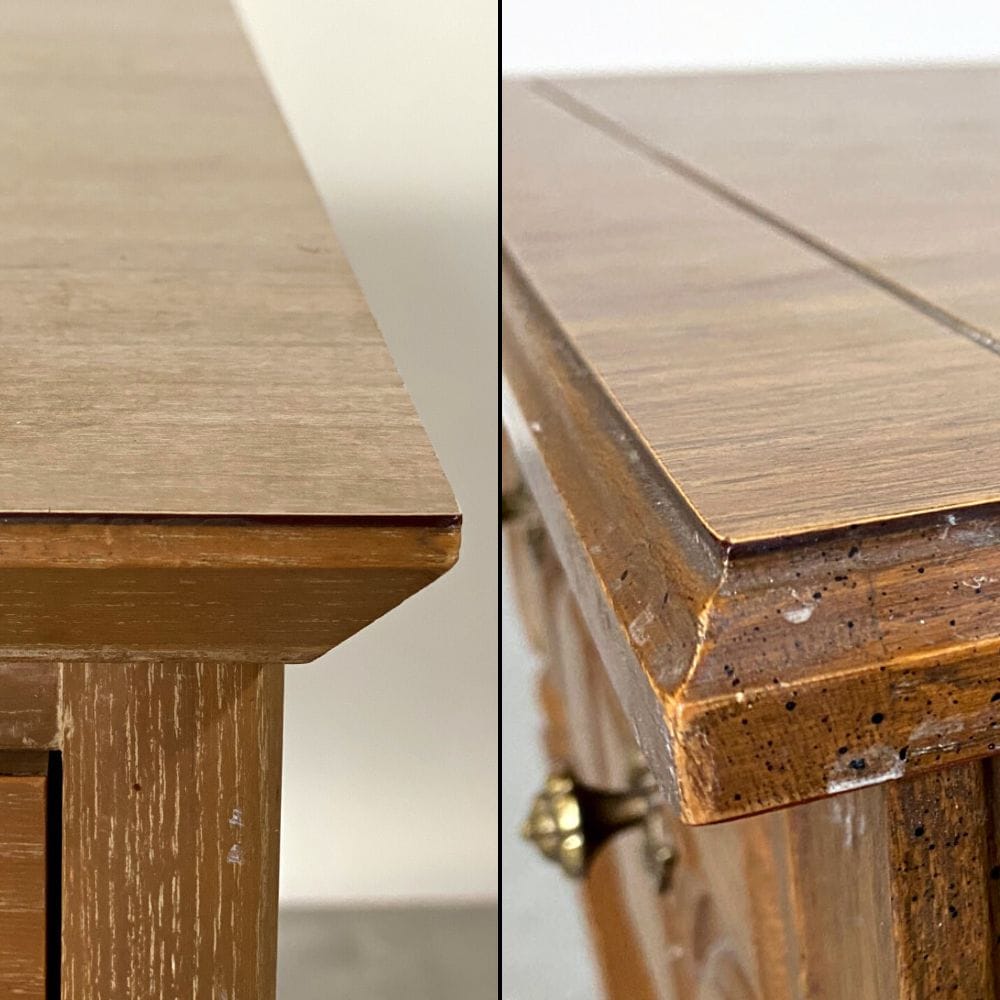
In the photo above, it’s a laminate veneer instead of wood, but from the side, it looks the same!
It usually is like a sixteenth of an inch thick and it just looks different than the rest of the wood on the sides. If you can’t see this on your furniture, usually you can see this on the back, but sometimes they put veneers on the edges as well.
And so sometimes it’s nearly impossible to tell if it is a piece of veneer. Just remember, even if it might kind of look like it’s not, it very well could still be veneer. So be careful and don’t sand too aggressively because you might go through it, and if you do, then it will be almost impossible to stain it and make it look good.
If you’re wondering: can veneer be sanded? The answer is yes, but you have to be cautious – check out the post to learn more. Here’s sanded through veneer to particle board if it happens to you!
Prep Before Sanding Down Wood
First, make sure that your surface is clean. If it is a finished surface with a stain on it and it has been used, make sure that there’s no grease or grime, or wax that can get smushed into the wood grain when you are sanding.
Use a degreasing cleaner like Krud Kutter and a damp rag for this, then let the wood dry completely. Here’s our step by step guide on how to clean furniture before painting.
Once you know if you’re working with veneer or a true piece of solid wood, then you can decide what your plan of attack is.
If you’re working with a piece of veneer and you want to get the old finish off of it, my recommendation is to first use a chemical stripper to remove most of the old finish and then proceed to sanding.
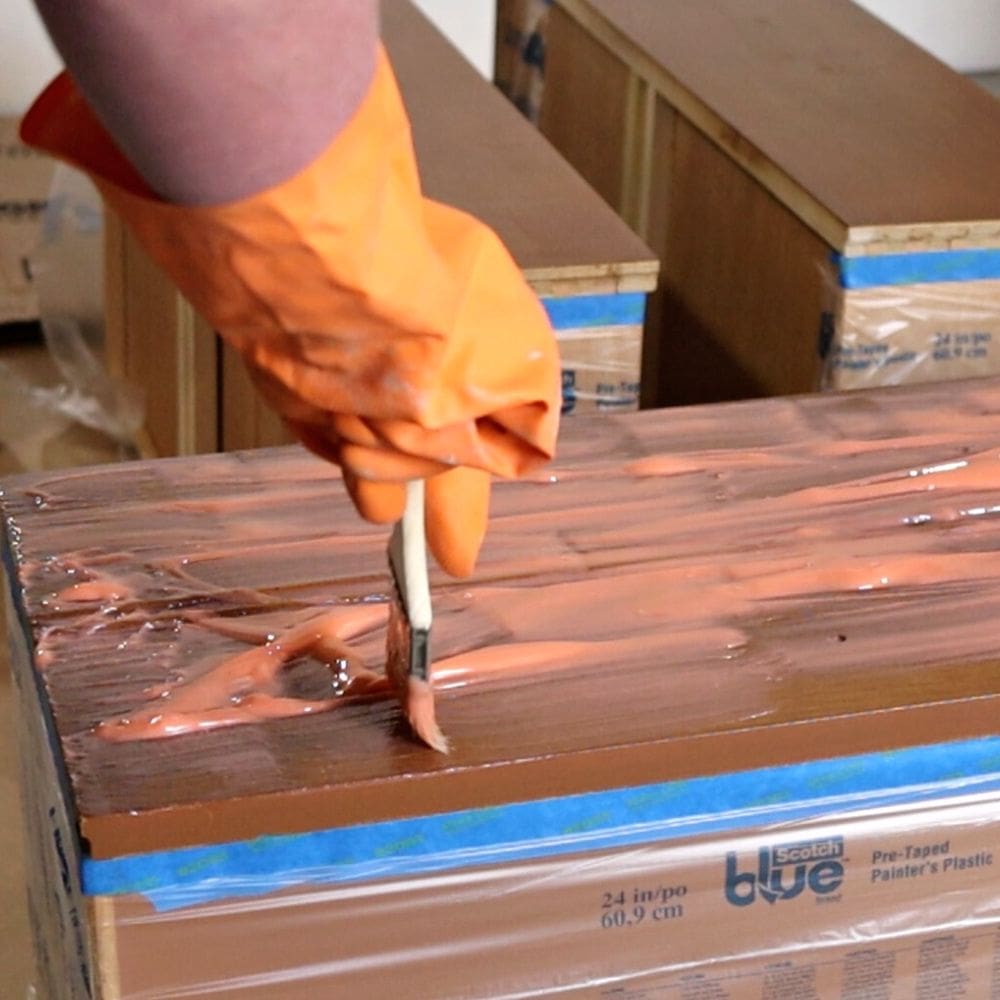
Learn how to use a chemical stripper in our posts on how to remove wood stain and how to remove paint from wood furniture.
Chemical strippers will just remove the stain and the finish from your wood, and they will not ruin it or go through the veneer.
And when it’s time to sand, all you will have to do is do it lightly, and you won’t have to worry about sanding through thin veneer. Here are the best wood stain removers you can use to remove the old finish.
If your wood is solid with no veneer on it, you can sand to your heart’s content because usually it’s pretty thick, and you don’t have to worry about going through much on that.
How to Sand Wood
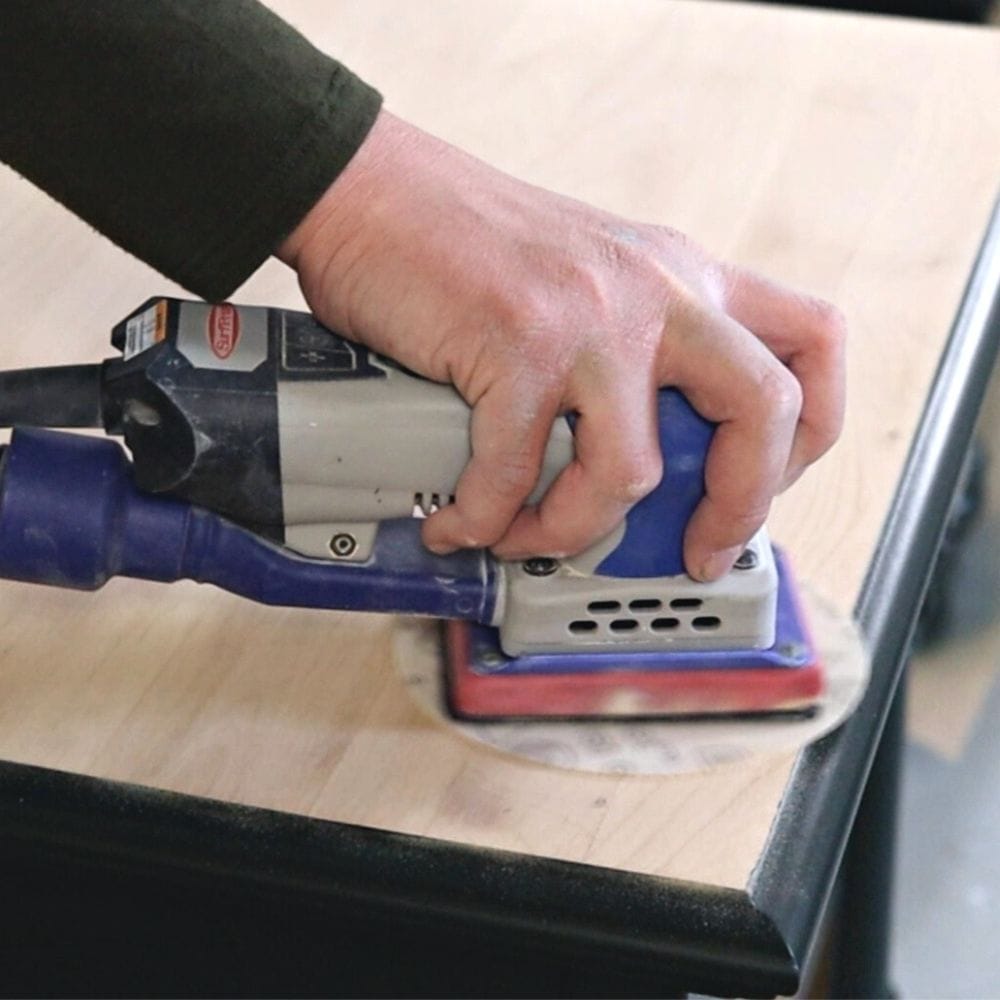
When you are sanding down to bare wood, start with coarse grit sandpaper. Something like 80 or 100 grit sandpaper will work really well and fast at removing the stain or the paint.
Would you like to save this?
It will also do a very good job of sanding the wood down to remove scratches and nicks and get most of it off.
If you don’t have a power sander, do yourself a favor and invest in one! Your project will go by much faster if you even have a budget friendly one in your toolbox! Here are the types of sanders for furniture if you aren’t sure what to get.
The Importance of Sanding with the Grain
Remember to sand with the direction of the wood grain, which are those lines that are in the wood. For best results, follow those lines so that you don’t get a bunch of swirl marks left in the surface that show up after you stain.
What Grit Sandpaper for Wood Furniture
After using 100 or 80 grit, remove the dust and then move to either 120 or 150 grit sandpaper. Then sand everything down with 120 or 150 grit. The point of this is now to smooth out the surfce and remove those sanding swirl marks left behind by the very coarse paper.
If you use 80 and then you go up to 220 grit, you will probably have a lot of swirls in your wood. So, to avoid these, you need to move through each number of grit, starting at the lower numbers and working your way up to the higher numbers.
You can skip one number of grit at a time, so for example, you can go from 100 to 150, but you should not go from 100 to 220. After you use 120 or 150, remove the dust again to help the sandpaper work faster and more efficiently. Then go over everything with 220 grit to prepare the surface for paint or stain.
The Best Sandpaper for Wood Furniture
The best sandpaper for sheet sanders or sanding by hand is 3M Pro Grade Sandpaper. It holds up longer, and the abrasive lasts longer than other options.

If you’re using an orbital round five inch sander, use Diablo sanding discs or sand net discs. The sand net is awesome, and they are really good quality as well because they don’t clog up easily, so it makes the job go faster.
If you are sanding edges or details, SurfPrep makes these awesome foam sanding pads (Use code RAY10 to get 10% off your order) that will tackle them. And they make these foam sanding pads for electric sanders of all different sizes and shapes.
Any sander that accepts a Velcro or a hook and loop type piece of sandpaper, SurfPrep has a foam pad that will make it a lot easier with curved surfaces, as well as details and grooves. Learn more about how to sand curved surfaces in this post.


For more information on the best sandpaper for furniture painting to use, check out our blog post for all the details you need to know before you choose. We’ve also listed the different types of SurfPrep sandpaper here, which are compatible with most sanders.
And for a dust free piece and workspace, here’s how to clean wood after sanding! You can also learn how to attach shop vac to sander here for faster dust collection.
And there you have it! Sanding might seem like a daunting task, but with the right tools, a good understanding of the material you’re working with, and a dash of patience, you’ll have your piece looking as good as new.
Either way, if it’s veneer or solid wood, remember to approach with care, follow the grain, and work your way up the sandpaper grits.

How to Sand Down Wood
Discover the step by step process of how to sand down wood from raw wood, veneer, or solid wood.
Materials
Instructions
- Use Krud Kutter and a damp rag to remove oils, grease, and grime from the wood, then let it dry completely.
- Start with coarse grit sandpaper, like 80 or 100 grit. After sanding with 100 or 80 grit sandpaper, remove dust, then switch to 120 or 150 grit sandpaper.
- After sanding with 120 or 150 grit sandpaper, remove the dust again, then sand with 220 grit to prepare the surface for paint or stain.
Recommended Products
As an Amazon Associate and member of other affiliate programs, I earn from qualifying purchases.


more sanding furniture tips
- Sanding Before Painting Furniture
- How to Sand Wood By Hand
- Festool Rotex 125 Review
- Best Detail Sander
- Best Hand Sander for Furniture
Follow us on YouTube to get more tips for painting furniture. Or share your project with us on our Facebook Group and be part of our community. See you there!