I Used the Wrong Paint on This End Table, Here Is What Worked Instead
Sometimes DIY projects don’t go as planned, and that’s exactly what happened when I used the wrong paint on this end table. Here is what worked instead with the right paint and a few adjustments!
This reminds me why I love sharing these painting furniture ideas that actually work for real life. You can totally fix any mistakes and still end up with a piece you love. Keep reading to see how this quick painted end table makeover went!
Welcome to Furniture Fixer Upper day, where we join 4 of our talented furniture friends and bring you brand new makeovers! I’ll link to my friend’s makeovers after our after photos at the bottom of this post! Don’t forget to check out their masterpieces!! Okay, back to our makeover!

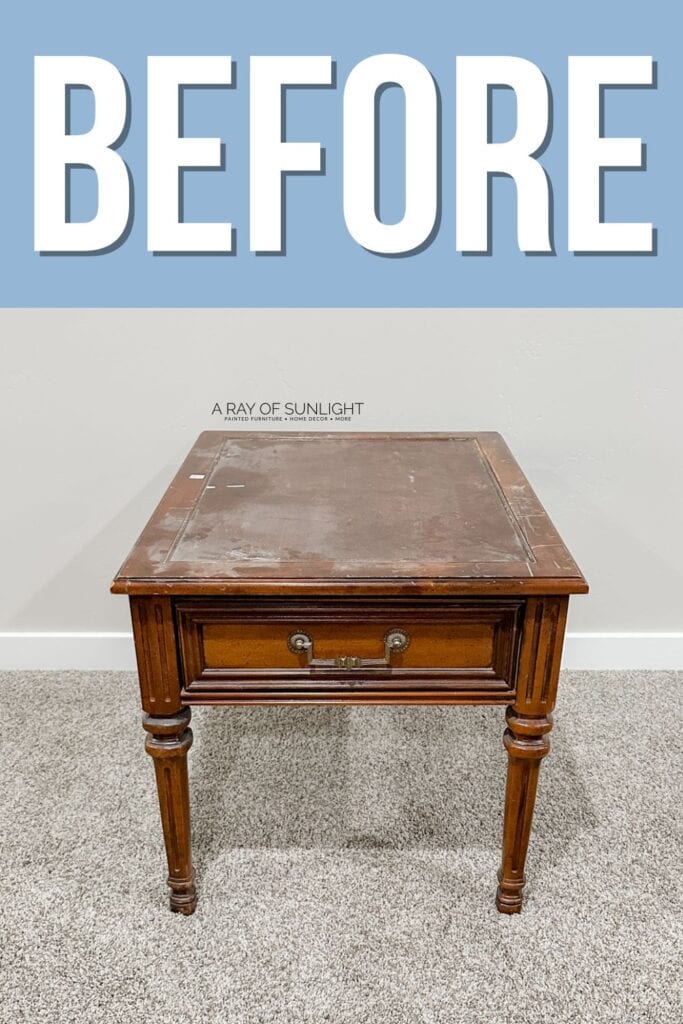
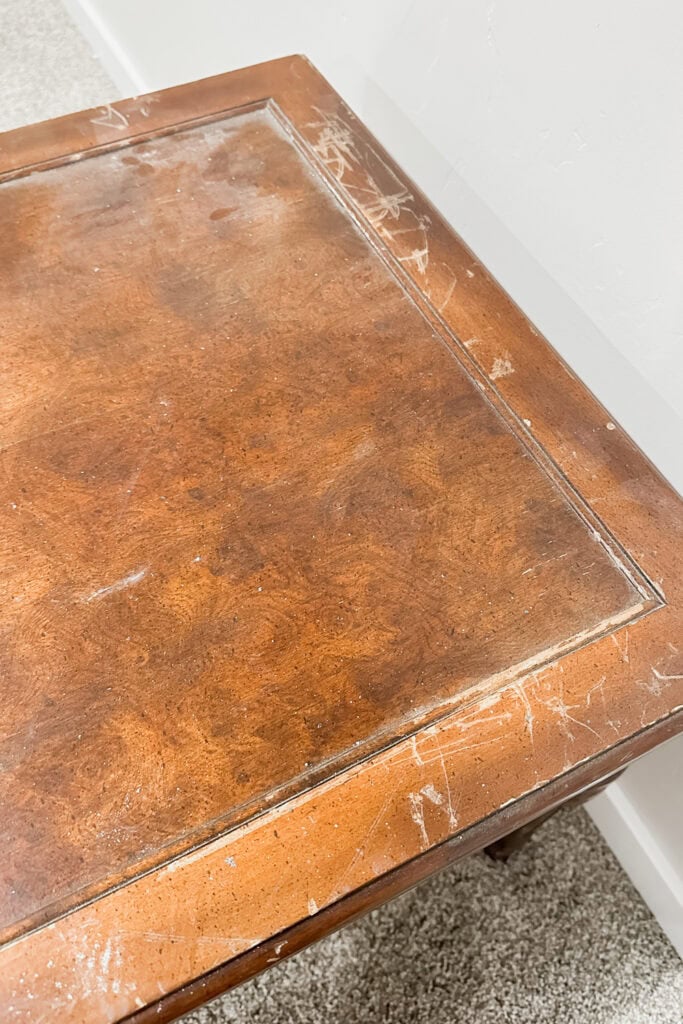
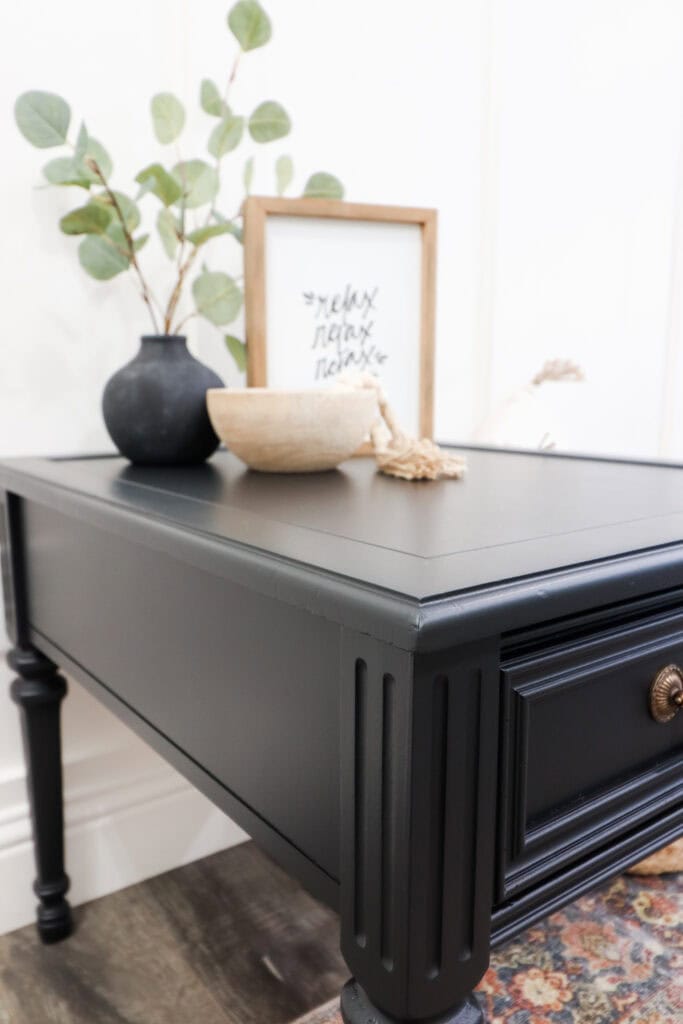
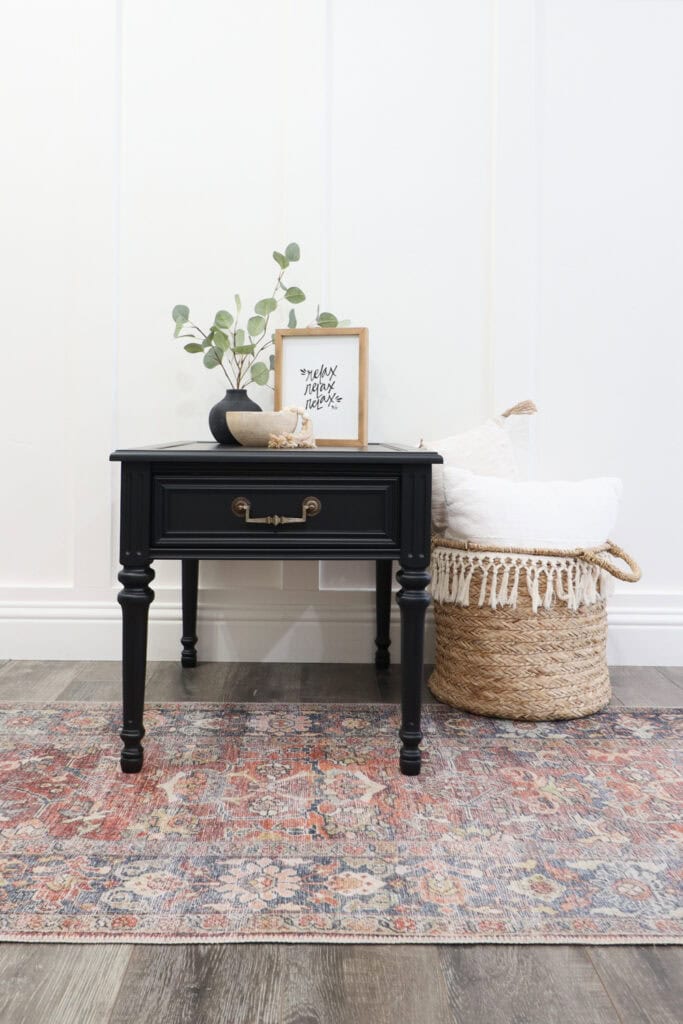
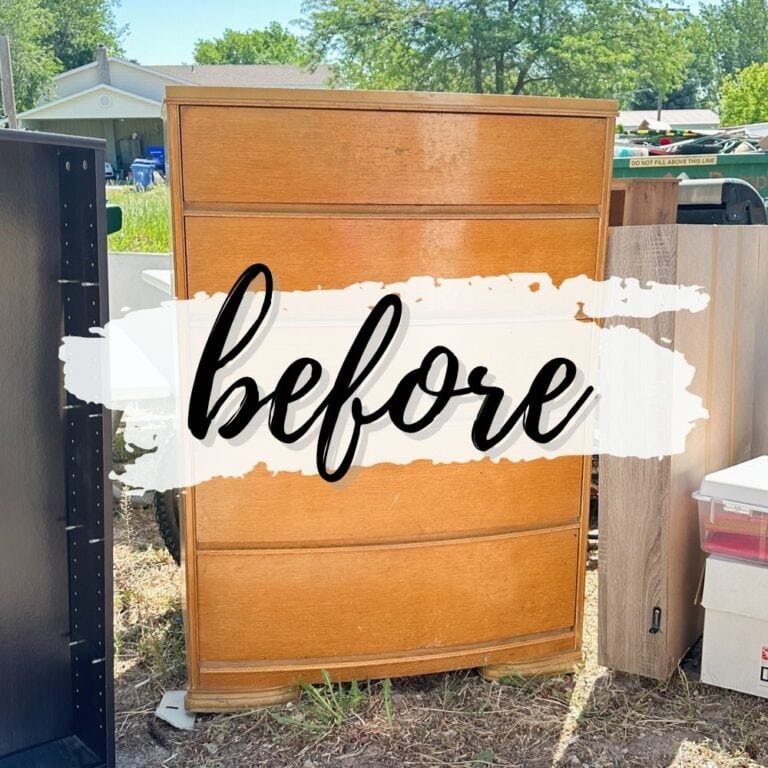
We started with a simple end table that we bought from the thrift store for $15. The top was very scratched up, but other than that, I love the style. I like the curves on the legs, not exactly vintage, French provincial looking, and it’s just a cute little table I can quickly update.
Even with the scratches and worn finish, this was still a great piece that I found for very cheap and could update in a single day with not very many supplies. So instead of having a worn out end table in my home, it now has a nice, even finish and fits my decor so much better.
We painted the table first with Beyond Paint, but it didn’t give us the results we wanted. So let’s dive into this project, and I’ll walk you through exactly what went wrong and what worked in the end!

Supplies Used for Painted End Table Makeover
As an Amazon Associate, I earn from qualifying purchases. I also may earn from other qualifying purchases with other companies or get free product to review and use. All opinions are my own.
- Electric Screwdriver
- Krud Kutter
- DeWalt Orbital Sander
- Foam Pad
- Shop Vac
- Dust Free Sanding Adapter
- Tack Cloth
- Beyond Paint in Licorice
- Dewalt Battery Operated Paint Sprayer
- Wagner Spray Shelter
- Sprayer Liners
- Paint Filters
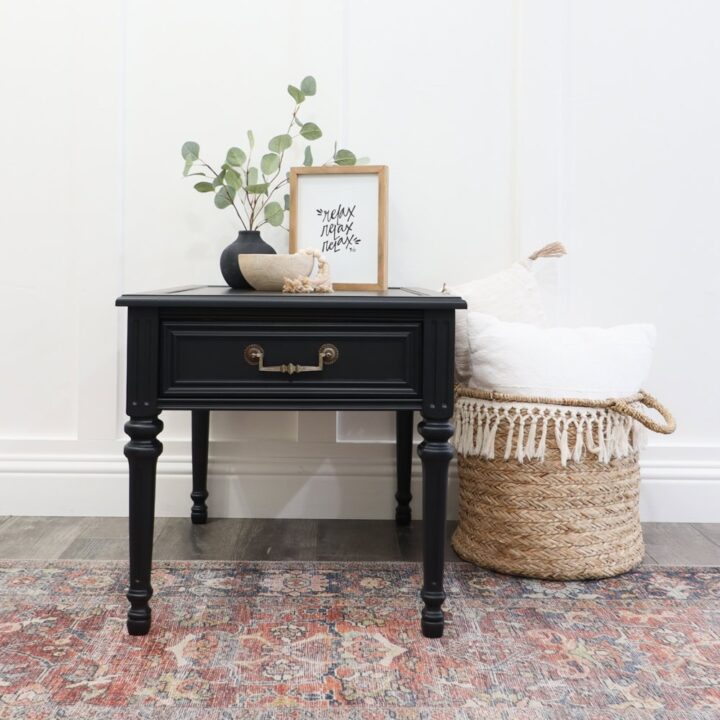
- Heirloom Traditions Paint in Iron Gate
- Paintbrush
Prepping Furniture For Painting
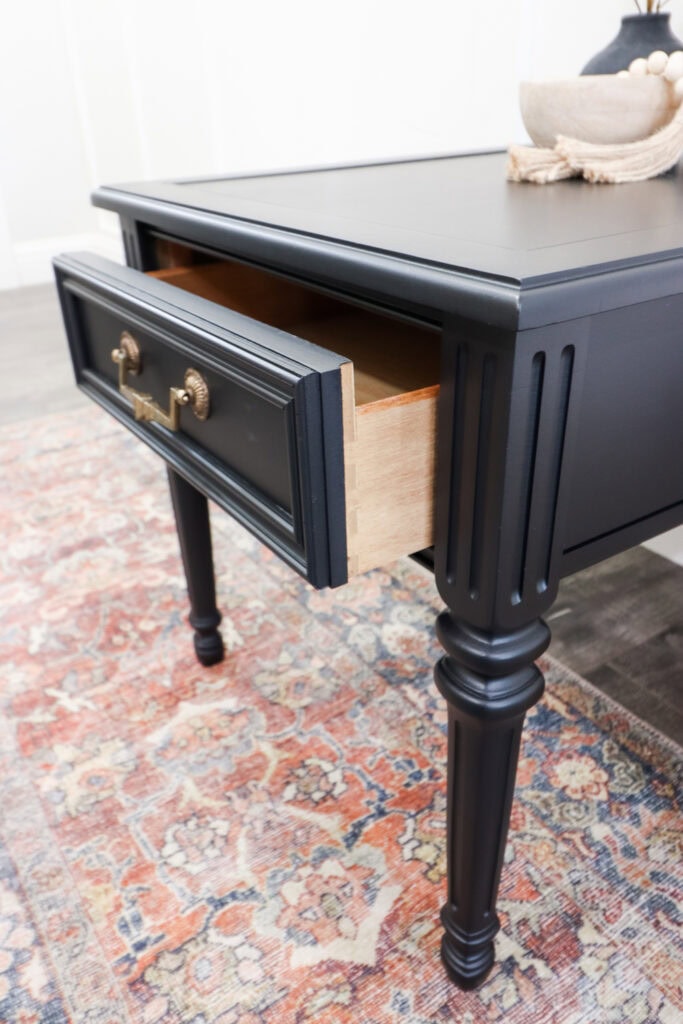
Number one is to remove the hardware. Always remove any of it. It’s super simple to just open up the drawer and unscrew. I like to use my electric screwdriver because it just goes a lot faster, but you can use a simple screwdriver.
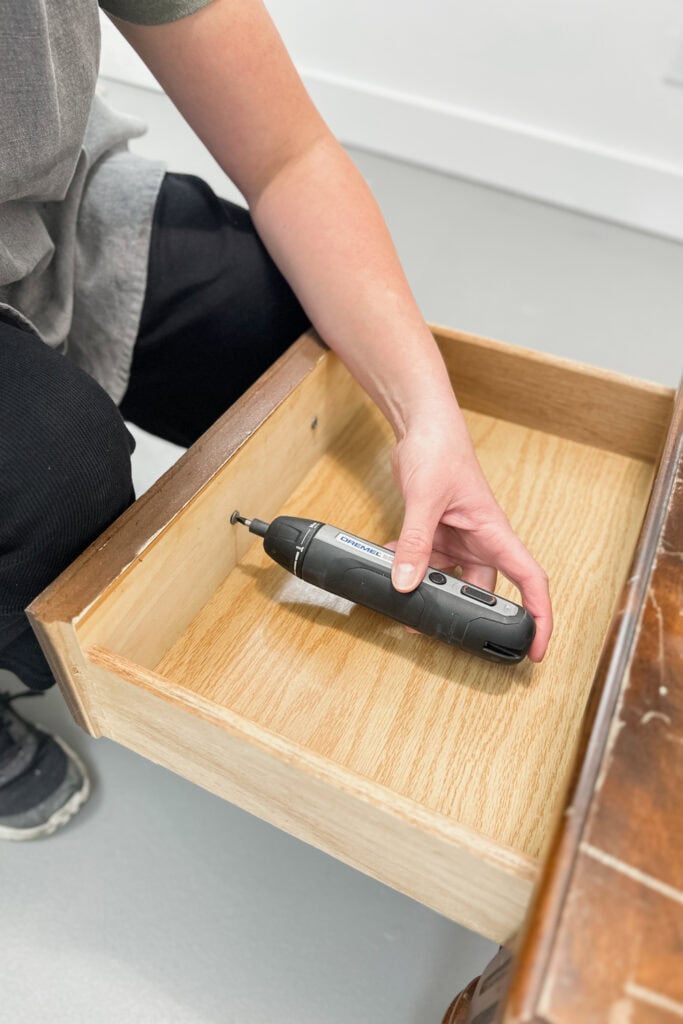
Keep track of the hardware and the screws that come with it. I like this hardware, so I’m just gonna put it back on. If it were something ugly, then I would have filled in the holes and put a knob on the drawer instead. Learn the different ways of filling holes when replacing cabinet or furniture hardware here.
Next, I like to clean all the grease, grime, and dirt from all the years that it has been used. I sprayed on Krud Kutter, let it sit for just a few seconds, and then wiped it back off. Make sure to remove stickers or anything like that, too. This cleaner helps remove them much faster than just water or Dawn dish soap.
And since the top was so scratched up, I had to remove those scratches first. If I had just painted over them, those imperfections would still show through the finish. I did not want this to look like a DIY job, so taking the time to fix the surface beforehand was important.
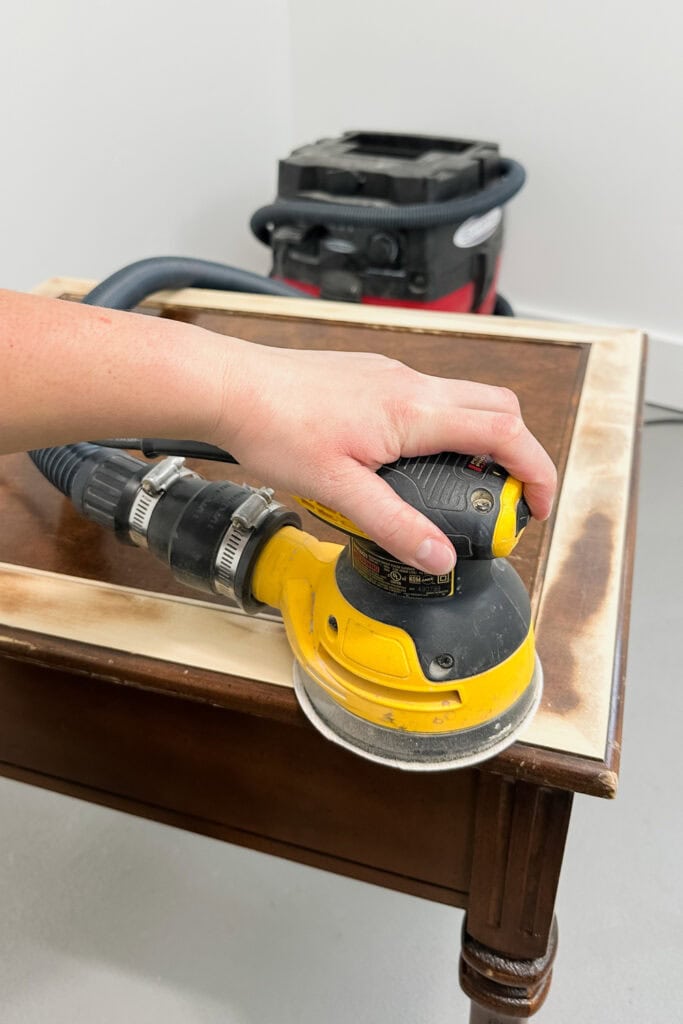
I sanded just on that edge where all the scratches were. I used my DeWalt orbital sander, which is budget friendly, quick, and efficient, perfect for beginners. I have it listed as one of the best sander for beginners here. I also like to add this foam pad to it to help sand any curves.
I also attached my shop vacuum to the sander with this cool little adapter, so my workspace stays dust free. Check out my guide on how to attach shop vac to sander here. The vacuum sucked up most of the dust as I sanded, then I used the brush attachment on my shop vac hose, followed by a tack cloth, to clean up any dust left on the surface.


How to Paint an End Table
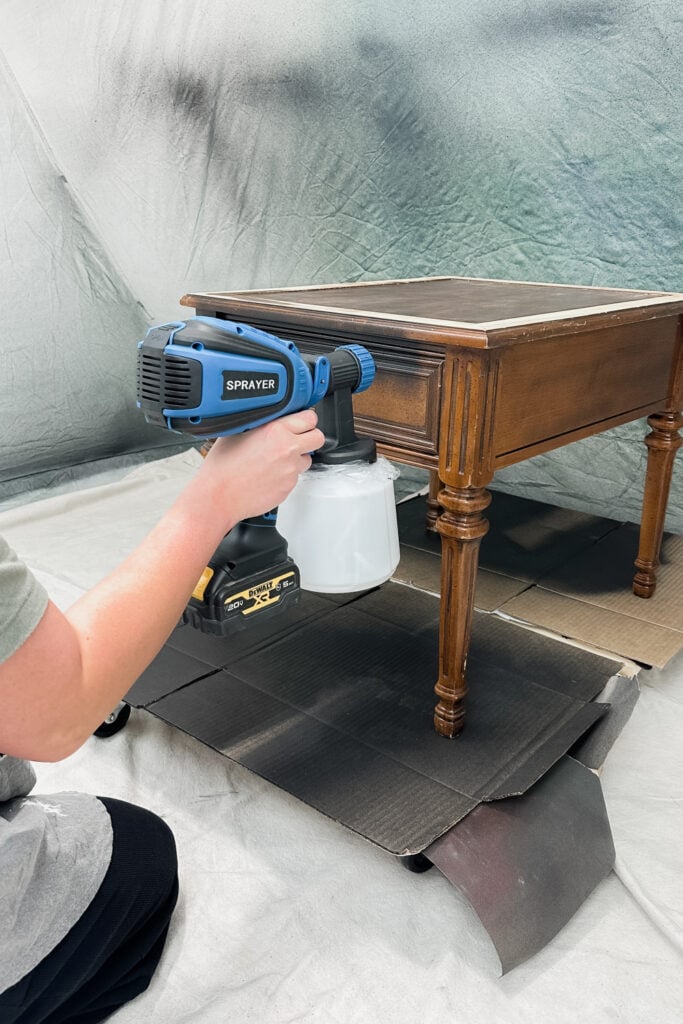
With the clean slate, I wanted a factory smooth finish with no texture or brush marks, so I sprayed instead of brushing or rolling. I used this battery operated sprayer that was new to me, instead of my usual plug in one, to see how it handled thick paint like Beyond Paint.
We also used this Wagner spray shelter in our small basement workroom to prevent overspray from reaching the walls and floor. It’s easy to set up in 5 minutes, and easy to take down and put back in the bag it comes in. I do like to lay down a dropcloth or cardboard to make the tent floor last longer.
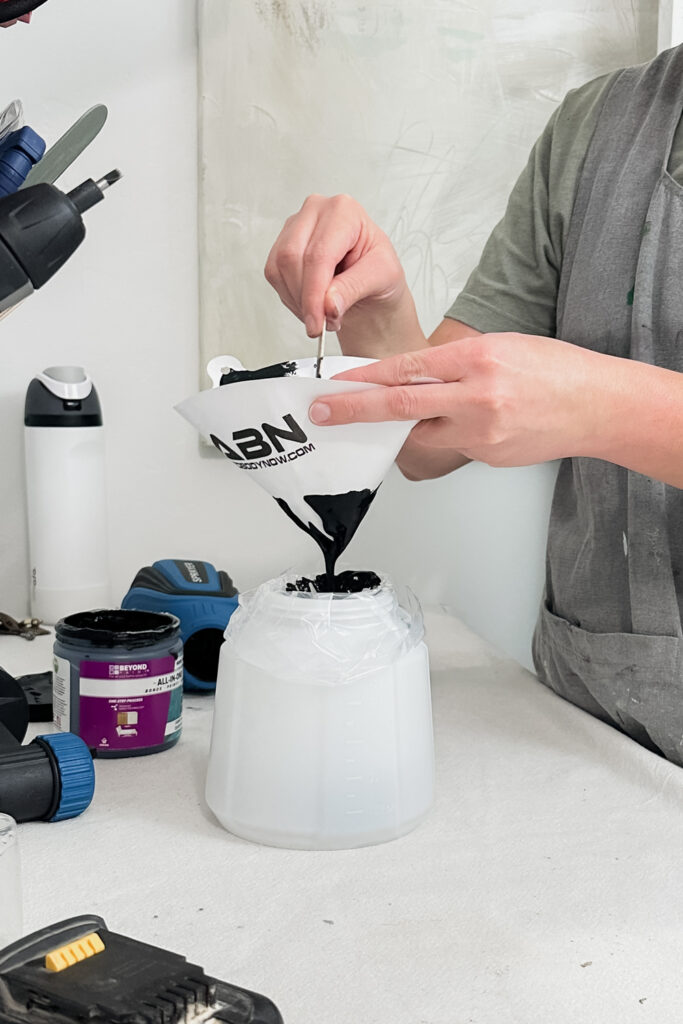
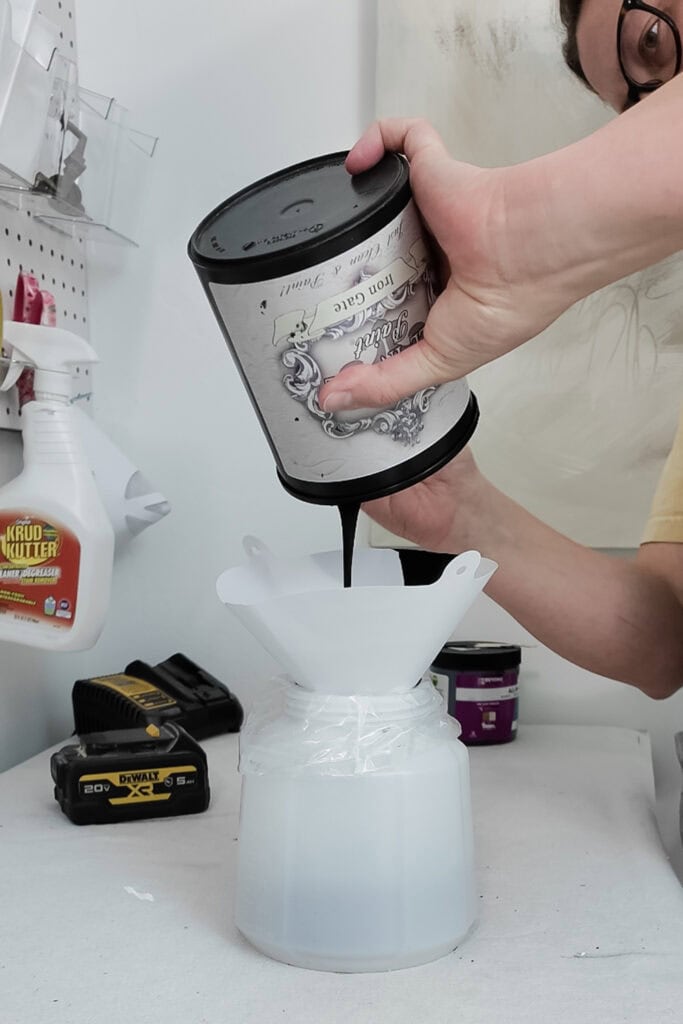
I poured the paint into the sprayer through these liners, so I did not have to clean the container or waste paint. I also filtered it to prevent clogging, which is something I never skip after learning the hard way.
Would you like to save this?
Beyond Paint is very thick, and while the sprayer could technically spray it without thinning, it came out painfully slow even with the settings all the way up. So I added a little water to bring it closer to a regular paint consistency, and it sprayed much better.
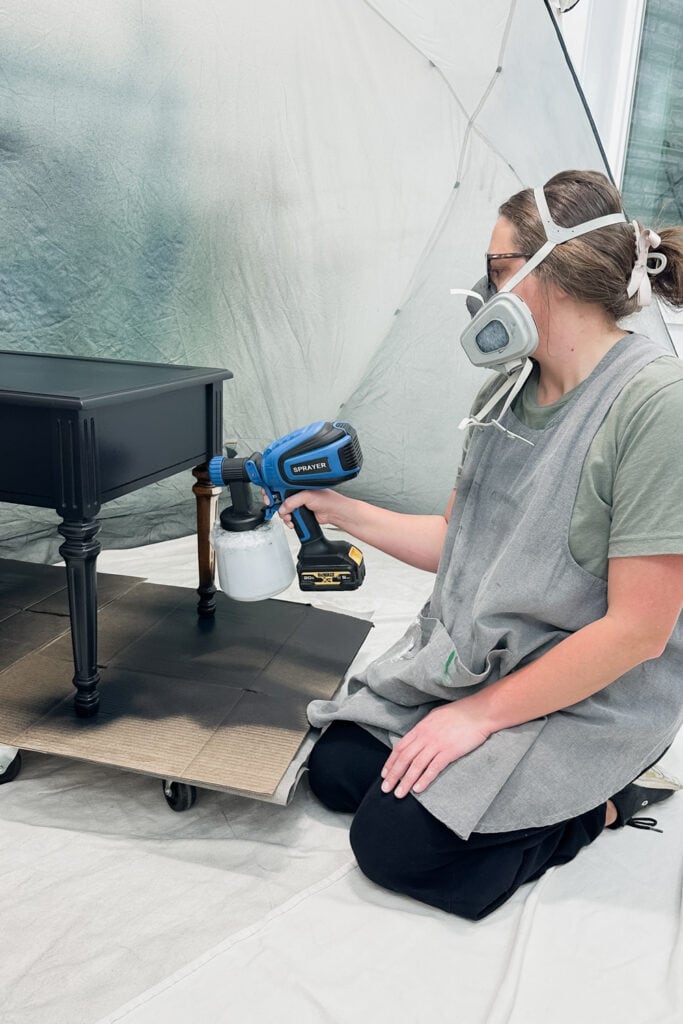
Spraying this piece took about 10 minutes, about twice as long as it takes with my usual sprayer. This battery operated sprayer was much quieter, had less overspray, and made it easy to move around without being plugged in. While I did not like how slow it was, it could still be worth using for quick projects or working outside without dealing with a long cord.
I sprayed everything with a medium thick coat, and once it dried, I could see where I had not sanded down to raw wood in some spots. That’s not unusual for the first coat, but after painting furniture for over 10 years, I knew this meant I needed a primer.
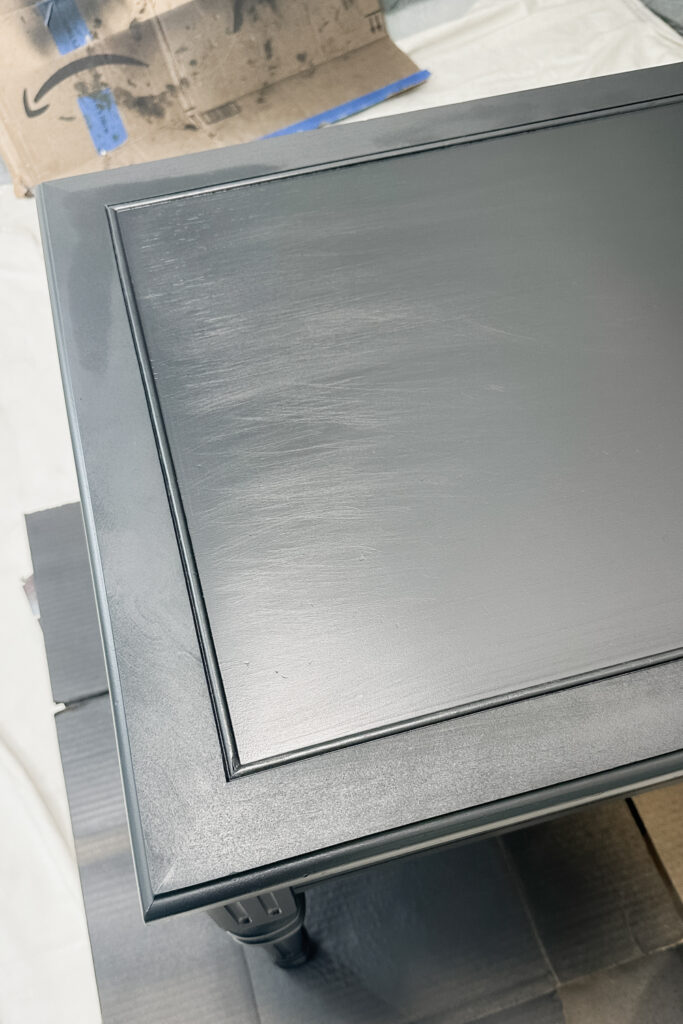
But first, I decided to try another coat of Beyond Paint. Spoiler alert: it didn’t take care of the problem. Thinking about my options, I could use black AquaLock primer since this is a dark paint color, or I could use Heirloom Traditions Paint.
Beyond Paint vs Heirloom Traditions
On my last project, I worked with Heirloom Traditions, and the piece had some spots sanded down to bare wood. After spraying it on, I did not see any difference in sheen at all with the areas that still have a finish on them. So that made me wonder if it’s much better at this type of thing than Beyond Paint. I compare Beyond Paint vs Heirloom Traditions Paint in detail in this post.
I grabbed a little paintbrush and applied Heirloom Traditions to one section, where half still had a finish on the wood and half was raw wood under the Beyond Paint. I brushed on 2 coats, and I could not see where the line of the sheen difference was.
So I would much rather go forward with this than prime it with the black AquaLock primer and then do another coat of Beyond Paint. It dries to a more matte finish, and I prefer a bit of sheen, so the piece doesn’t get really dirty easily. I also would have had to add a topcoat, which felt like too much work for what was supposed to be a quick project.
So I sprayed on 2 coats of Heirloom Traditions onto the end table. I sanded between coats with these fine grit SurfPrep foam pads (Use code RAY10 to get 10% off your order) to smooth the top because they do the smoothing without sanding through the wood or finish. You can learn more about foam sanding pads for electric sanders here.
Then I let the piece dry for 24 hours, so I wouldn’t accidentally scuff it while putting the hardware back on, then reattached the hardware since I liked it as is. And that is the quick makeover!
If I were to do this exact project over again, I would’ve used my favorite, the Vonforn sprayer. It already comes with everything that you need to get started on your first projects. Check out my Vonforn paint sprayer review here. And again, I would’ve used Heirloom Traditions instead of Beyond Paint.
Don’t forget to check out these other awesome before and after furniture makeovers from my Furniture friends!! (Click the links below the photos!)
- How to Restore Old Wood Furniture Without Sanding and Stripping from Petticoat Junktion
- Black and Hickory Side Table Makeover from My Repurposed Life
- End Table Makeover (you are here!)
- Walnut Bronze Table Makeover from Salvaged Inspirations
- Crabby Dresser Makeover from Confessions of a Serial DIYer
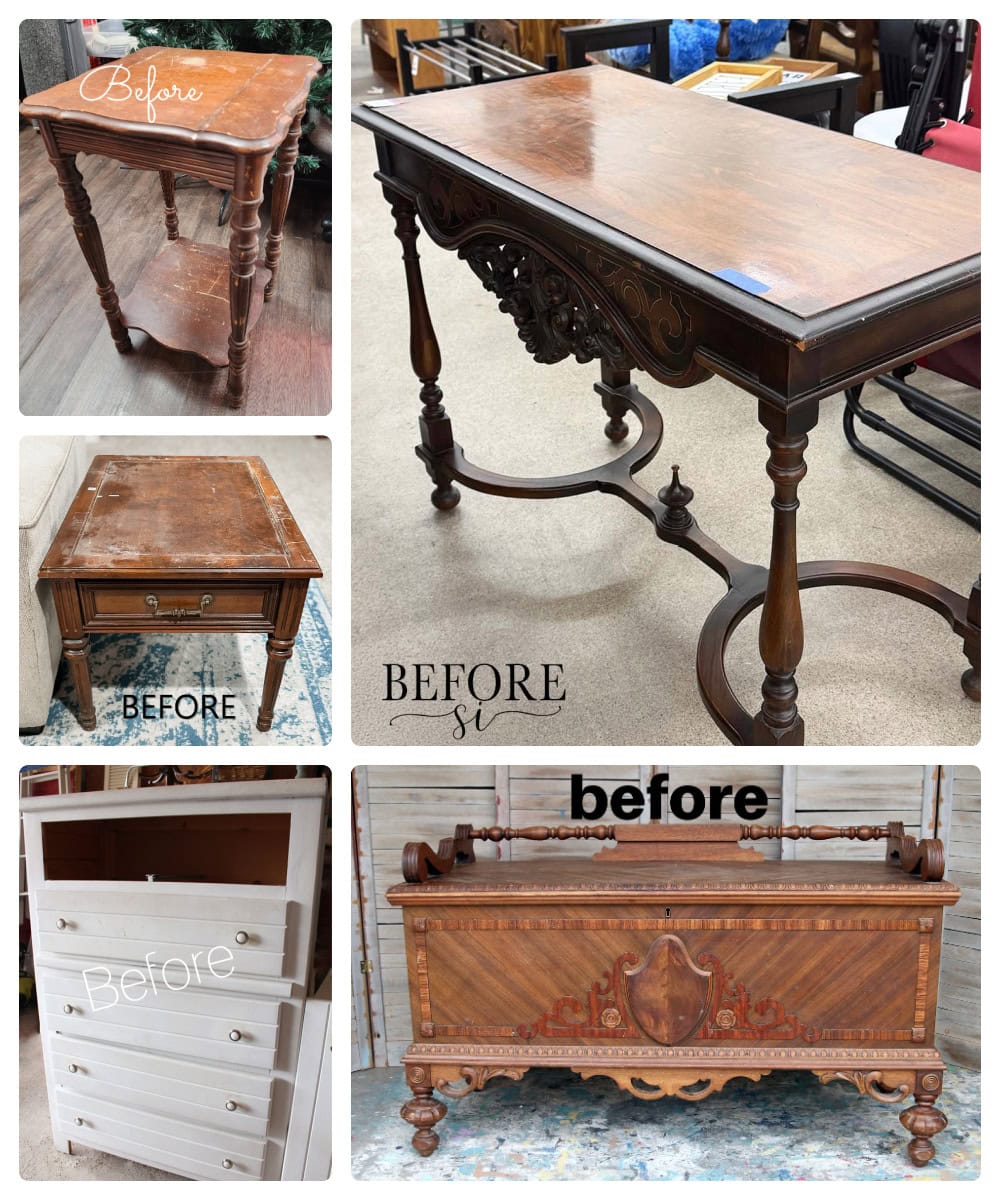
More Before and After Makeovers
See All >
Click any of these “before” photos below to view the “after” of that makeover.


Painted End Table Makeover
In this painted end table makeover, I used the wrong paint at first. Here is what worked instead with the right paint and a few adjustments!
Materials
Tools
Instructions
- Remove the hardware from the drawer. Set the hardware and screws aside so they can be reused later.
- Clean off all the grease, grime, and dirt using Krud Kutter. Spray it on, let it sit for a few seconds, then wipe it off, making sure to remove any stickers or residue.
- Sand any scratched areas using a DeWalt orbital sander with 220 grit sandpaper so they don't show through the paint. Use a shop vac then a tack cloth to clean up the dust after sanding.
- Set up a Wagner spray shelter to protect the walls and floor from overspray.
- Pour the paint into the sprayer using liners, filter it to prevent clogging, then spray 2 coats of Heirloom Traditions Paint on the entire piece.
- Let the paint dry for 24 hours before reattaching the hardware to complete the makeover.
Recommended Products
As an Amazon Associate and member of other affiliate programs, I earn from qualifying purchases.


More Furniture Makeover Ideas
Follow us on YouTube to get more tips for painting furniture. Or share your project with us on our Facebook Group and be part of our community. See you there!
SO much better! It always amazes me at how black paint can take something to the next level! XOXO
Right?? I’m always amazed at what black paint can do too 😊
Lovely! Thanks for sharing.
Ahh you’re welcome! Glad you like it!
I love this post because so true, sometimes you have to pivot, right?! 😀 This table looks awesome in its new sleek black! Pinned XOXO
Yes, exactly! 😄 Thank you so much Denise and I appreciate the pin!
Beautiful. I love the color and finish.
Aww thank you so much!!
Your “new” table is gorgeous. You can’t go wrong with HTP all-in-one Iron Gate! The company is local to me, and I love browsing their new store.
Pinned!
gail
Thank you so much Gail! 😊 So true!! That’s awesome that the company is local to you.
Beautiful makeover Natalie. I need to try Heirloom Traditions Paint! Kathy (pinned)
Aww thanks so much Kathy! I’d love to hear your thoughts on Heirloom Traditions Paint once you try it out!
VERY nice makeover. I love the rich black finish on this piece.
Thanks for all your tips. It looks beautiful. 🙂
Aww thank you so much! I’m so glad you like it. And you’re welcome! Hope all the tips were helpful for you.