How To Distress Furniture With Sandpaper


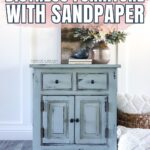

Distressing furniture brings out a nice, farmhouse rustic look on your pieces. It’s one of the painting techniques for furniture that can instantly add character and charm, and today, we’re showing you how to distress furniture with sandpaper!
There are many ways to create this effect on your pieces, but we’ll be focusing on sanding, which is the most common and easiest method you can do, including tips on using the right type of sandpaper and paint to get the look you want. Let’s get started!

If you want the rustic style on your furniture, distressing is the way to go. This way, the piece appears as if it has been well loved and passed down through generations, even if you just updated it last week!

Also, I mean, if you’re going to have nice furniture and you have kids too, your kids are going to distress your furniture. So, you might as well get it started yourself! I love distressing. It creates a nice, warm, worn feel to your furniture, and it’s really fun to do.
So, here is your guide on how to distress furniture with sandpaper. It’s super easy to do, and we’ll walk you through a few simple steps so you can try it out on your own piece. Keep reading to see how it’s done!
Supplies Used to Distress Furniture
As an Amazon Associate, I earn from qualifying purchases. I also may earn from other qualifying purchases with other companies or get free product to review and use. All opinions are my own.
Use a Clear Primer
So, number one, before you even get started painting, you need to consider the primer you’ll be using. Beware that if you use one that is tinted white or black (or any other color), and your paint color is different from it, you will see the color of the primer when you go to sand the paint.

And so, I like to use clear shellac as my primer because it’s clear. That means I don’t have to look at a white primer underneath my blue paint. We also feature clear shellac in our list of the best spray paint primer for wood here, making it an overall good choice for your DIY projects.
What Paint to Use
The next thing to talk about is what type of paint to use. Chalk paint and mineral paint are the best types to use if you want to distress your furniture. Here are the top chalk paint brands and the best mineral paint for furniture.
If you want a really chippy distressed look, milk paint is a fantastic option, since the paint chips a lot (on the right type of furniture). Learn more about Best Milk Paint for Furniture before choosing this option, as it can be a particular type of paint to use.

All of these paints already need a topcoat, so you’re not adding an extra step by distressing them.
These paints also don’t clog up or ball up when you sand them. It just sands into a nice fine powder. If you use latex paint that you use on your walls and start sanding it, it balls up, and it’s just not as easy to distress.
What Sandpaper to Use
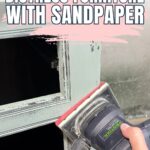
Now, after using these paints, make sure that your furniture is all the way dry before you start distressing it with sandpaper. Then, when it’s ready, I like to use 220 grit sandpaper or 400 grit sandpaper.

400 grit won’t distress and remove the paint as much. 220 grit will definitely – it’s a fantastic sandpaper to use for this aged look. Anything lower than 220 is going to leave a lot of scratches, and it will take off a lot of the finish really fast.
Check out our best sandpaper for furniture painting for more on grits and the top brands you can use for your projects.
Would you like to save this?
How to Distress Furniture with Sandpaper
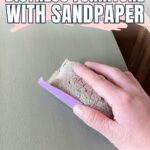
So, again, I either use 400 grit or 220 grit. When I am distressing, I follow the corners and edges of the piece. Those are where it would be a more natural distress as you’re using your furniture.
I also like to rub the sandpaper over any details, like if there’s a little flower emblem. I like to rub it just on the edges of that flower detail, just to kind of highlight the edges.

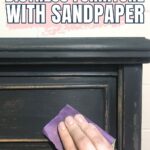
If it’s a dresser that has a bunch of drawers, I think you’ll be grabbing the drawer to open it every single day for years and years, so where would that paint eventually get rubbed off? It’s usually right below or right above the knob.
So, you gotta think: if you were to use this piece of furniture forever, where would that be? At what point would it start to show signs of wear and tear? I like to distress these places: edges, corners, and surfaces that get touched a lot.


Now, you can just rub the sandpaper very, very lightly to get a very lightly distressed look, or you can sand a lot harder to rub off more of the paint and have a heavy, distressed look. Start with a very light touch and see how you like it, and then you can always sand a little bit more if you want more of the effect.

Don’t rub too hard at first – it’s best to gradually build up the distressing. You can always add more distressing, but it can be tricky to take it away if you go too far. But if it happens, for some reason, you can always come back with some more paint and go over where you distressed.
Clean Up After Distressing
After you’re done and you like the look of it, remove all of the dust. I like to use a vacuum with a hose and a brush attachment to just suck up all of the dust, and then a tack cloth to wipe the remaining dust off. We have more tips on how to clean wood after sanding here.

Add a Topcoat
You will need to topcoat the piece at this point. Even if you’re not using chalk or mineral type paints, you need to add a topcoat because you have broken that barrier of paint, and so where it is distressed is more susceptible to getting scratched off and worn off faster.

I like to use waterbased polyurethane in the satin finish. We have a more detailed guide on how to apply polycrylic to painted furniture in this post. Can you use a paint sprayer for polyurethane? – you can check out the post to find out!
Distressing furniture with sandpaper is a simple and fun way to create that cozy, rustic charm for your pieces. Using the right primer, paint, and sandpaper makes it easy to create this look. Now it’s your turn to try this technique!

How To Distress Furniture With Sandpaper
We're showing you how to distress furniture with sandpaper to bring out a nice, farmhouse rustic look on your pieces.
Materials
Tools
Instructions
- Before you start painting, think about the primer you will be using. Using a clear primer means you will not see unwanted colors showing through when sanding.
- Pick the right type of paint for distressing your furniture. Chalk paint or mineral paint works best because they create a smooth finish and are easier to sand.
- Make sure the paint is fully dry before starting the sanding process. Use 220 grit sandpaper for heavier distressing or 400 grit for lighter effects.
- Focus on edges, corners, and areas that would naturally show wear over time. Sand raised or detailed sections to highlight their look.
- Start with gentle sanding to see how the distressing looks. And then you can always sand a little bit more if you want more of the effect.
- When you are happy with the look, clean off all the sanding dust. A vacuum and tack cloth work well to get a smooth surface.
- Finish by adding a protective topcoat to complete your piece. This helps keep the distressed areas from wearing down too fast and makes the finish last longer.
Recommended Products
As an Amazon Associate and member of other affiliate programs, I earn from qualifying purchases.


More Painting Furniture Tips
- Painting Stained Furniture Without Sanding
- Stenciling Furniture
- Updating Oak Furniture: How to Get a High End Look (Without Replacing It!)
- Easy Paint Blending Techniques For Furniture
- How to Paint Furniture Indoors Without Making a Mess
Learn the Art of Updating Furniture!
If painting furniture feels overwhelming or your past attempts didn’t go as planned, this course will guide you step by step.

Follow us on YouTube to get more tips for painting furniture. Or share your project with us on our Facebook Group and be part of our community. See you there!