How To Turn a Dresser Into Shelves
Learning how to turn a dresser into shelves is a great way to reuse older furniture and make it more functional for your home. This simple project can give you extra storage and a unique piece that fits your space better.
If you need a little inspiration before diving in, check out these DIY dresser makeover ideas. There are plenty of easy projects that show what you can do with older furniture. Now, keep reading for this makeover that gives a tired dresser a brand new purpose.
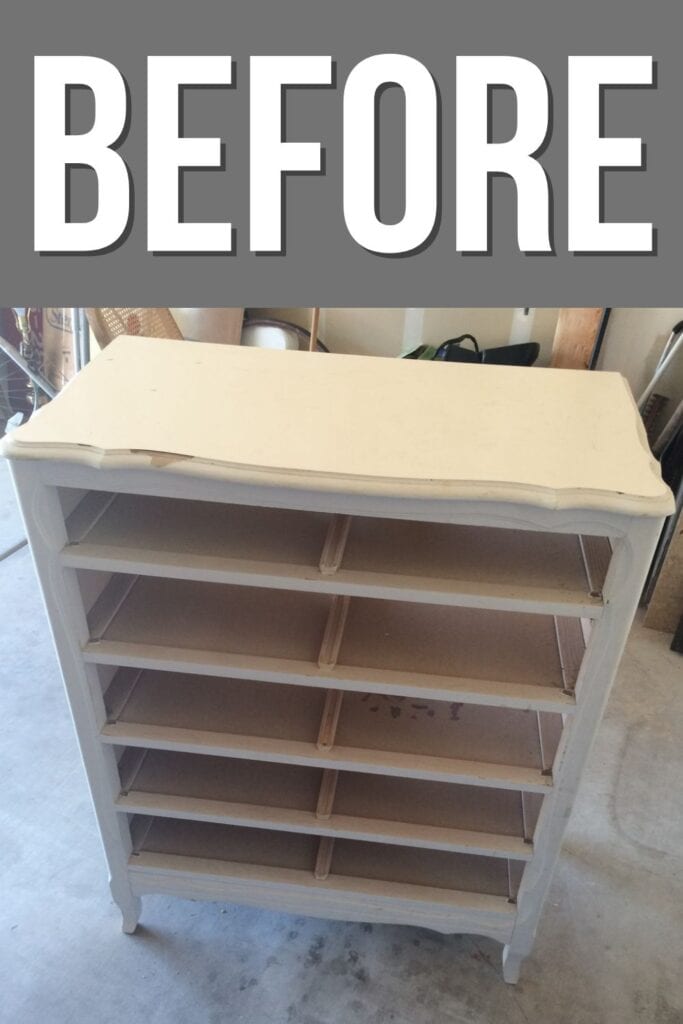
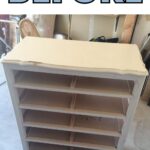
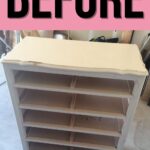
Natalie at My Vintage Porch was purging her garage a few months ago, and I was lucky enough to snag this little dresser. It had no drawers, and its once curvy top and the bottom of its legs had been trimmed off as if someone had put it into a tight space that it was a bit too wide for.

It was dirty, chipping, and had no back. Let’s just say that most people would throw her away because she is just too damaged. But I saw past that. I saw its curvy details and what its future could look like.
You can turn something worn or incomplete into a piece that works better for your home. With a little creativity, it’s easy to give old furniture a completely new purpose. Let’s get started with turning this dresser into shelves!

Supplies Used to Turn a Dresser Into Shelves
As an Amazon Associate, I earn from qualifying purchases. I also may earn from other qualifying purchases with other companies or get free product to review and use. All opinions are my own.
- Screwdriver
- Beadboard
- Thin Plywood
- Cedar Fencing
- Orbital Sander
- Nail Gun
- Finishing Nails
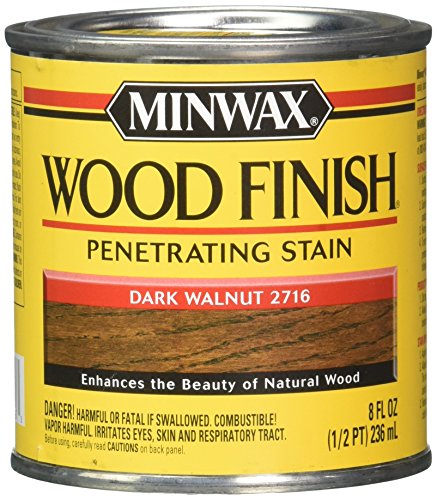
- Dark Walnut Stain
- Plywood
- Trim
- Screws
- Wood Filler
- Oops Paint
- Calcium Carbonate Powder
- Waterbased Polyurethane
Disassembling Dresser Parts
I started by taking off the top. Lucky for me, it was as easy as unscrewing a few screws. Then I went to work taking apart the first drawer support. I thought this was going to be easy, as it had been in the past. Well, I thought wrong. Everything was glued and did not want to come apart. But I had started, so I couldn’t go back.
Cutting Wood for Shelves and Top
I finally finished taking out the drawer support and eagerly moved on to the next step. It was time to cut some wood. I needed to make the insides look a bit more polished, so I cut some leftover beadboard to fit on the top inside sides and then cut some thin plywood to fit into the rest of the inside sides.
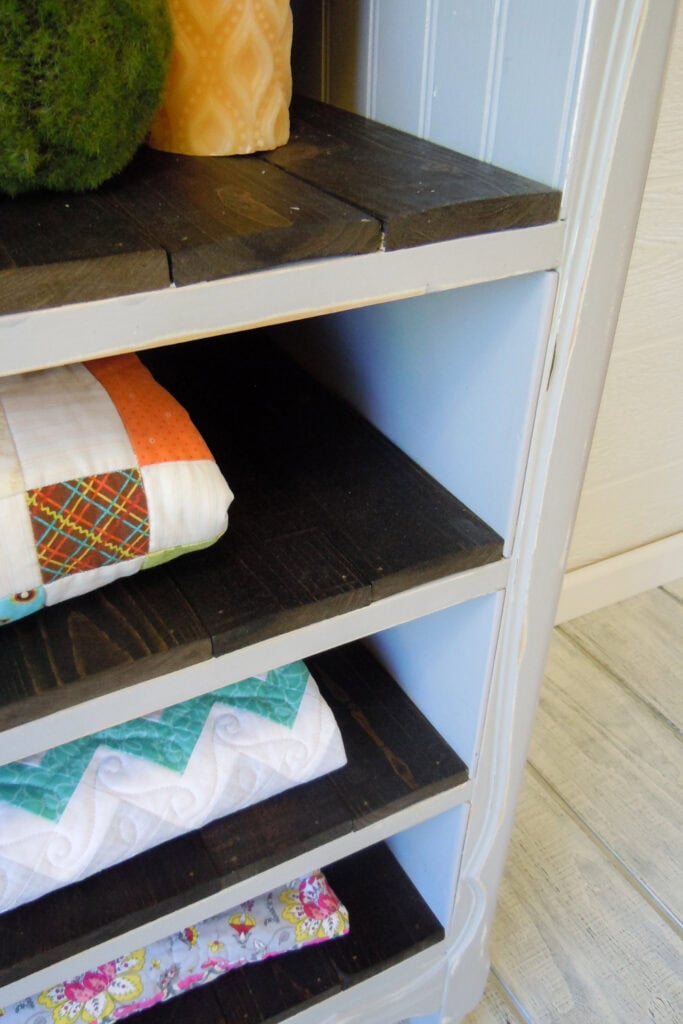
Then I got to work cutting my trusty cedar fencing to fit as my new shelves. I love how they look like pallet wood, without having to take apart old pallets. Once all the wood was cut, I sanded everything down lightly with my trusty orbital sander. Check out the best orbital sanders here.
Then I attached the sides with my nail gun and finishing nails so it could be painted with the dresser. I laid the cedar out on flattened out boxes and stained the tops and sides in Dark Walnut and let them dry.
As for the top, when I went to Home Depot to get my plywood, I made sure to ask a kind worker to cut the large piece down to size for me. I also did this for the back piece of beadboard. I love doing this because it’s free, and I don’t have to do anything when I get home. Whenever I remember to get it cut there, I am always very happy when I get home, and I don’t have to cut any big pieces of wood.
I brought my wood home, and then cut my piece of trim to fit around the edges of the plywood to cover the not so pretty edges. I attached the trim with my nail gun and finishing nails, then I grabbed the screws and attached the new top to the dresser.


Painting the Dresser
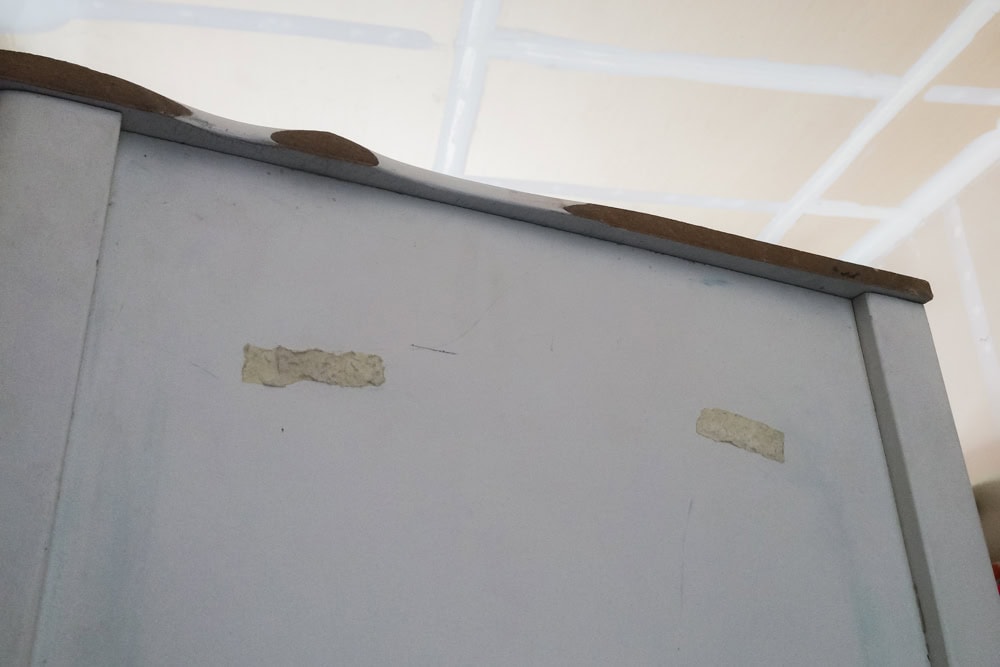
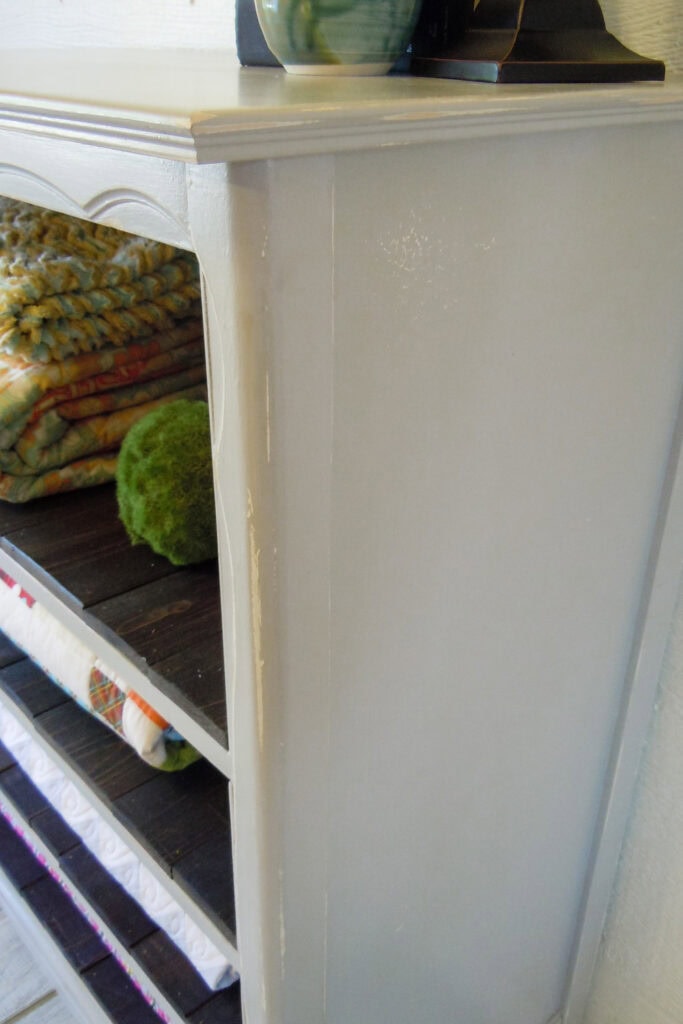
Then, I got out the wood filler and filled in anything that needed to disappear. I let it all dry, and then I grabbed the orbital sander and sanded it all down good. I had to get rid of the sticky stuff that was on the sides and smooth out the outside of its legs, where they had been trimmed off by a previous owner. Every part of the dresser was sanded down until smooth.
Would you like to save this?
I wiped her down and got out the white and pretty grey Oops paint I had found at Lowes. I mixed it with calcium carbonate powder and water to make chalk paint. Here’s my easy to follow homemade chalk paint recipe.
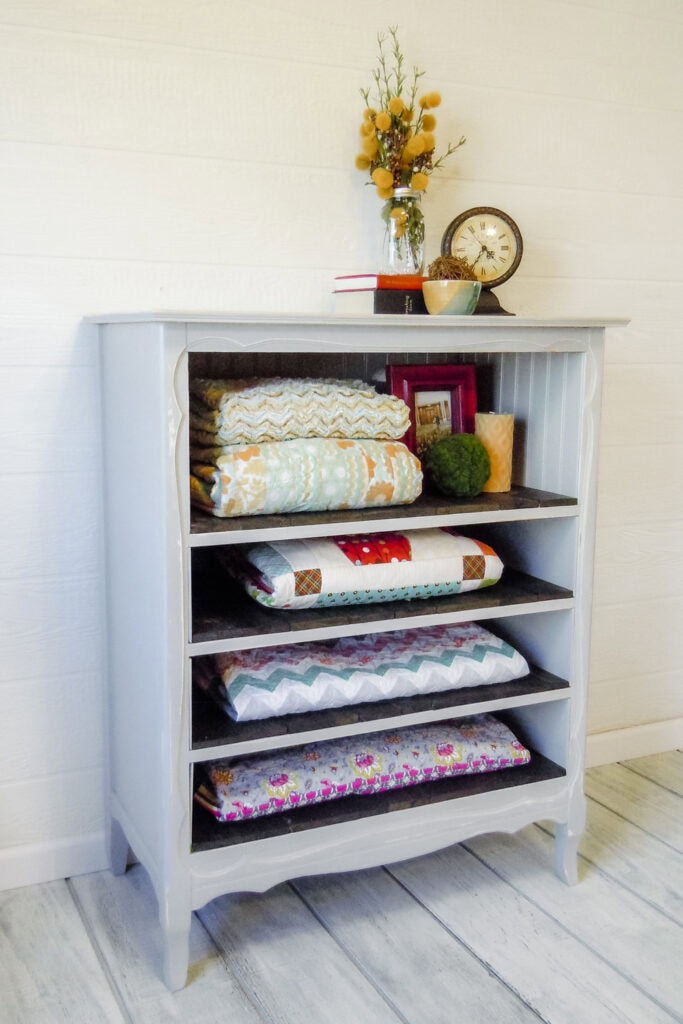
I started painting, and this piece took 1 coat of white and then 2 coats of grey paint. I waited for it to completely dry, then I grabbed my sander and lightly started to distress the dresser. I usually don’t distress with my orbital sander, but I was sick and tired of sanding by hand.
I’m so glad I did, though. It needed that extra distressing that the sander provided. You can see these distressed dresser ideas here for more inspiration on this look.
Attaching Wood Shelves
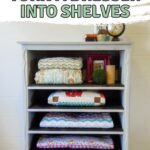
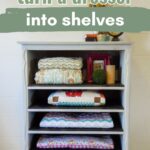
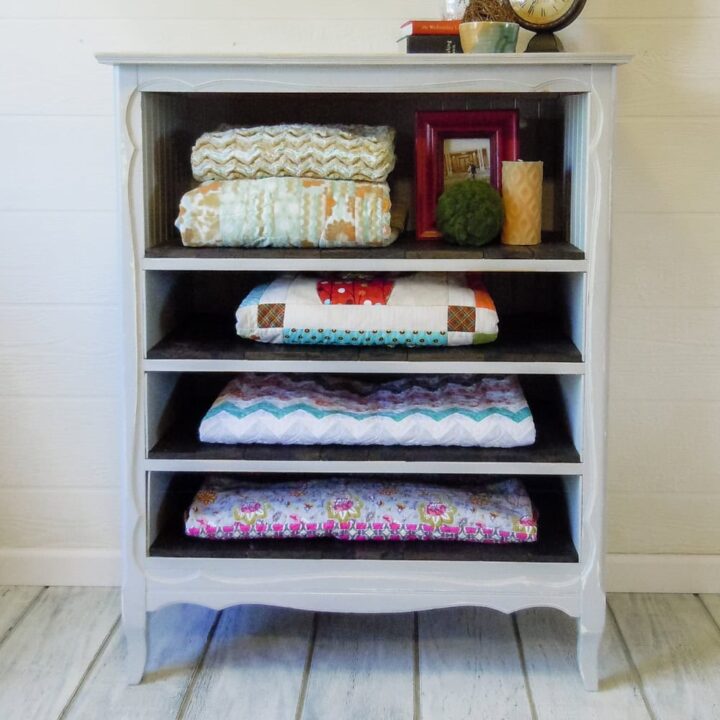
I wiped the dresser down and attached all of the stained cedar wood and the new beadboard backing. Finally, I gave it a good coat of waterbased polyurethane and let it dry for the last time.
This is one of those pieces that even my husband says we should keep. He loves it almost as much as I do. I love how different it is, yet how functional it still is. You can add cute baskets to hide your possessions, or show them off on your pretty little shelves.
Next time, I hope you can see potential in an old dresser, and even if you don’t want to do the work, maybe pass it on to someone else who can. These pieces have the best stories!

More Before and After Makeovers
See All >
Click any of these “before” photos below to view the “after” of that makeover.


How To Turn a Dresser Into Shelves
Learn how to turn a dresser into shelves to reuse your older furniture and make it more functional for your home.
Materials
- Beadboard
- Thin Plywood
- Cedar Fencing
- Finishing Nails
- Dark Walnut Stain
- Plywood
- Trim
- Screws
- Wood Filler
- Oops Paint
- Calcium Carbonate Powder
- Waterbased Polyurethane
Instructions
- Start by removing the top of the dresser and taking off any drawer supports. Some pieces come apart easily with screws, while others are glued and take more effort to separate.
- Cut new wood pieces to create clean inside surfaces by using beadboard for the upper sides and thin plywood for the lower sides. Then cut cedar fencing to size for the new shelves.
- Lightly sand all of the cut wood with an orbital sander. This smooths everything out and prepares it for stain or paint.
- Attach the beadboard and plywood inside the dresser using a nail gun and finishing nails. Stain the cedar shelves in dark walnut and let them dry.
- Cut plywood and trim for the top, then attach them to the dresser.
- Fill any imperfections with wood filler and let it dry completely. Sand every part of the dresser until smooth.
- Mix white and grey Oops paint with calcium carbonate powder and water to create homemade chalk paint. Apply one coat of white and follow with two coats of grey.
- Once dry, lightly distress the piece with a sander. This creates a worn, farmhouse look without needing to sand by hand.
- Attach the stained cedar shelves and the new beadboard backing. Finish the entire piece with a coat of waterbased polyurethane and let it dry.
Recommended Products
As an Amazon Associate and member of other affiliate programs, I earn from qualifying purchases.


More Furniture Makeover Ideas
- How To Paint Over Chalk Paint That Has Been Waxed
- Painting a Wood Dresser Red
- Navy Sideboard Furniture Makeover
- How to Paint Wood Nightstands
- This Is What a Damaged Dresser Can Turn Into (Beginner Makeover)
Follow us on YouTube to get more tips for painting furniture. Or share your project with us on our Facebook Group and be part of our community. See you there!