Small Merry Christmas Sign
There are so many easy-to-make DIY farmhouse Christmas decor ideas out there, but we’ve got a special one for you today – this small merry Christmas sign! This project is perfect for adding a festive touch to your home, and it’s also a great way to get creative and have some holiday fun.
We’ll walk you through the steps of making this adorable sign, so let’s get the crafting fun started!
Making small signs is a popular trend in home decorating, and it’s no surprise why. These signs are versatile, budget-friendly, and easy to make.

And what better time to make a small sign than during the festive holiday season?
If you’re looking for a quick and fun Christmas craft project, this merry Christmas sign is just what you need. It’s simple enough for beginners but still allows room for creativity and personalization.
Whether you want to display it on your mantel, hang it on a door, or give it as a gift, this sign is sure to spread holiday cheer.
Here’s some little DIY action for the most wonderful time of the year!
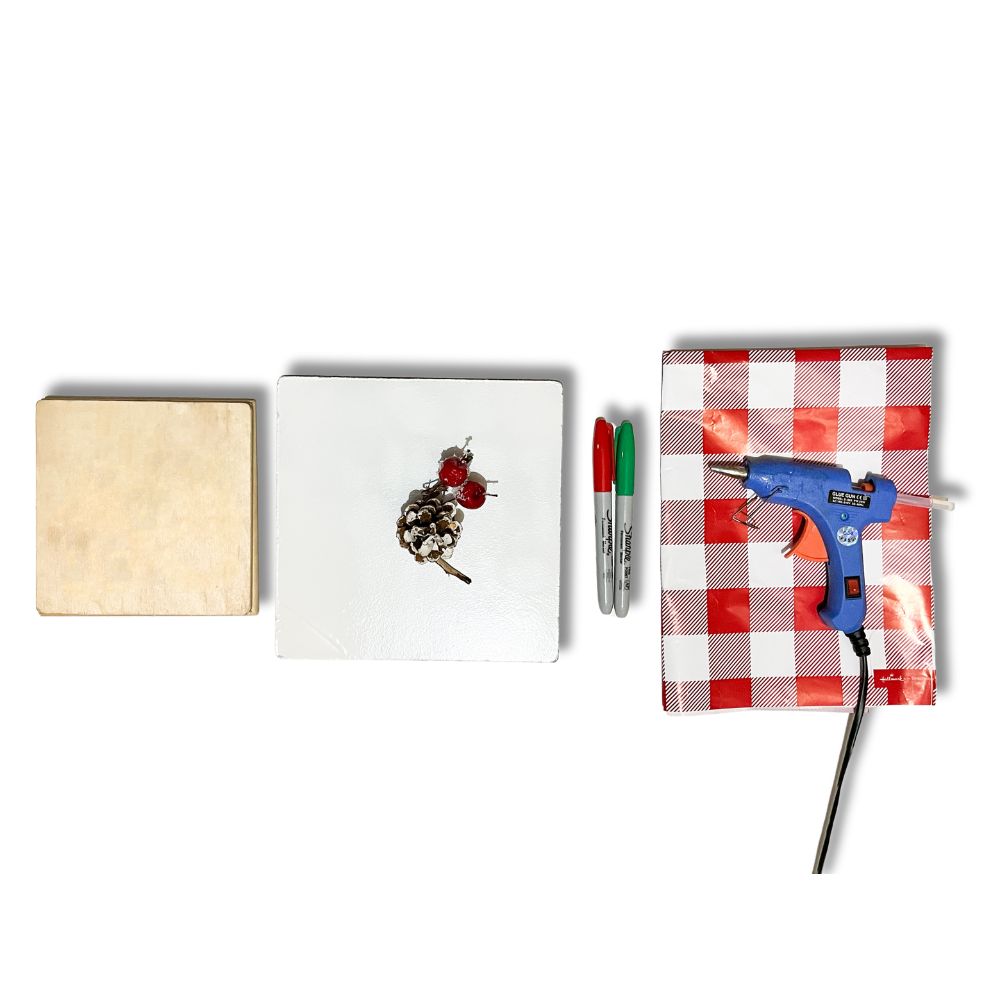
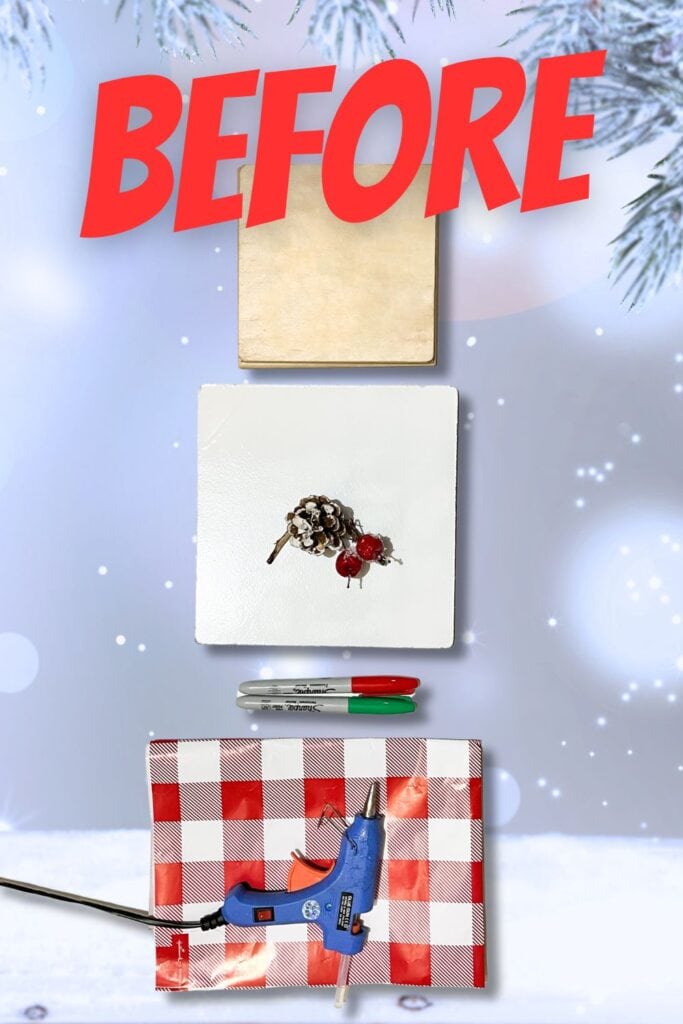
Supplies Used for the Small Merry Christmas Sign
As an Amazon Associate, I earn from qualifying purchases. I also may earn from other qualifying purchases with other companies or get free product to review and use. All opinions are my own.
- Wooden Dowel
- Glue Gun
- Old Wooden Square (one bigger and one smaller)
- Checkered Wrapping Paper
- Small Christmas ornament
- Pencil to sketch
- Green Permanent Sharpie
- Red Permanent Sharpie
Cutting and Gluing Wooden Dowels For Frames
Cutting wooden dowels may sound intimidating, but trust us, it’s a lot easier than you think.
First, gather your dowels and make sure your glue gun is ready to go. Next, measure and cut the dowels according to the size of your square bases and in 45 degree angles.
Once you have all your dowels cut, it’s time to assemble the frames. Glue the angled ends together to form a square shape, and hold them in place until the glue dries.
Repeat this process for both the bigger and smaller square bases.

Then, make sure to let the frames dry completely before moving on to the next step. This will guarantee that they are securely put together and won’t fall apart when you attach them to the bases.
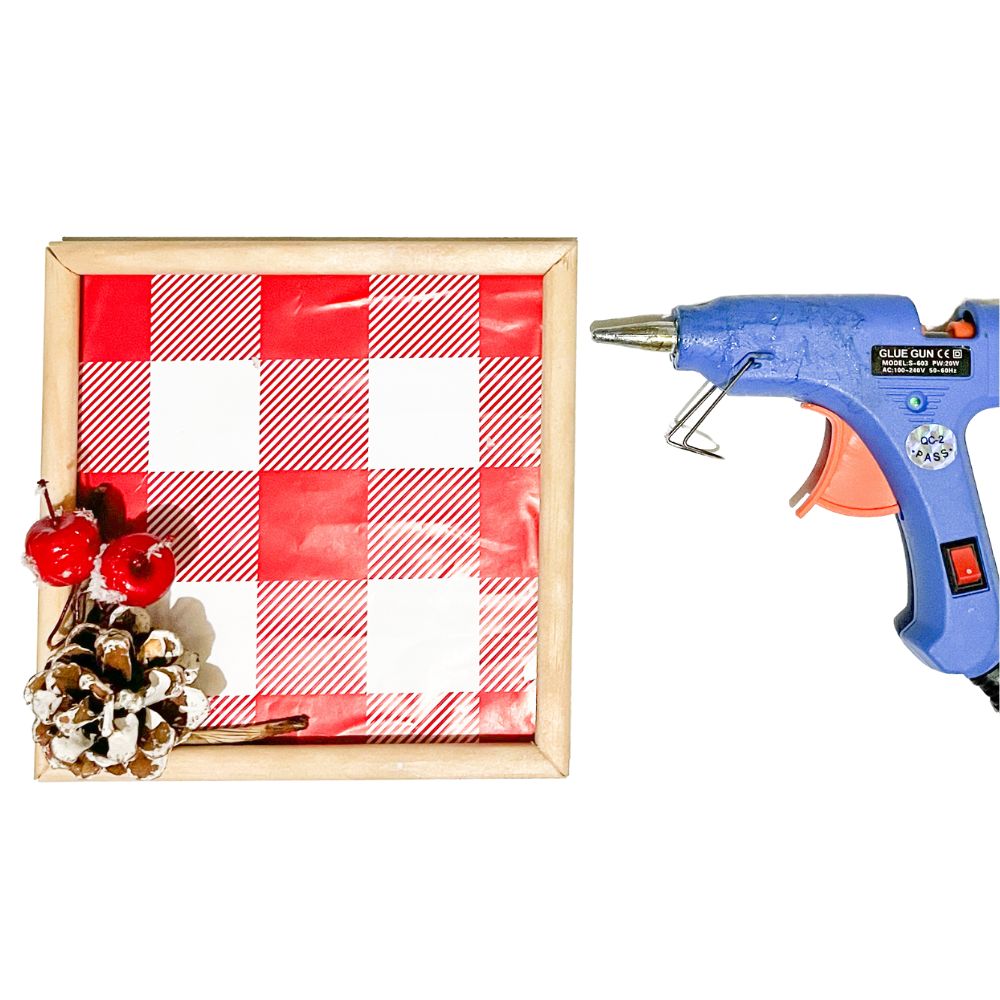
Covering Smaller Wooden Square with Wrapping Paper
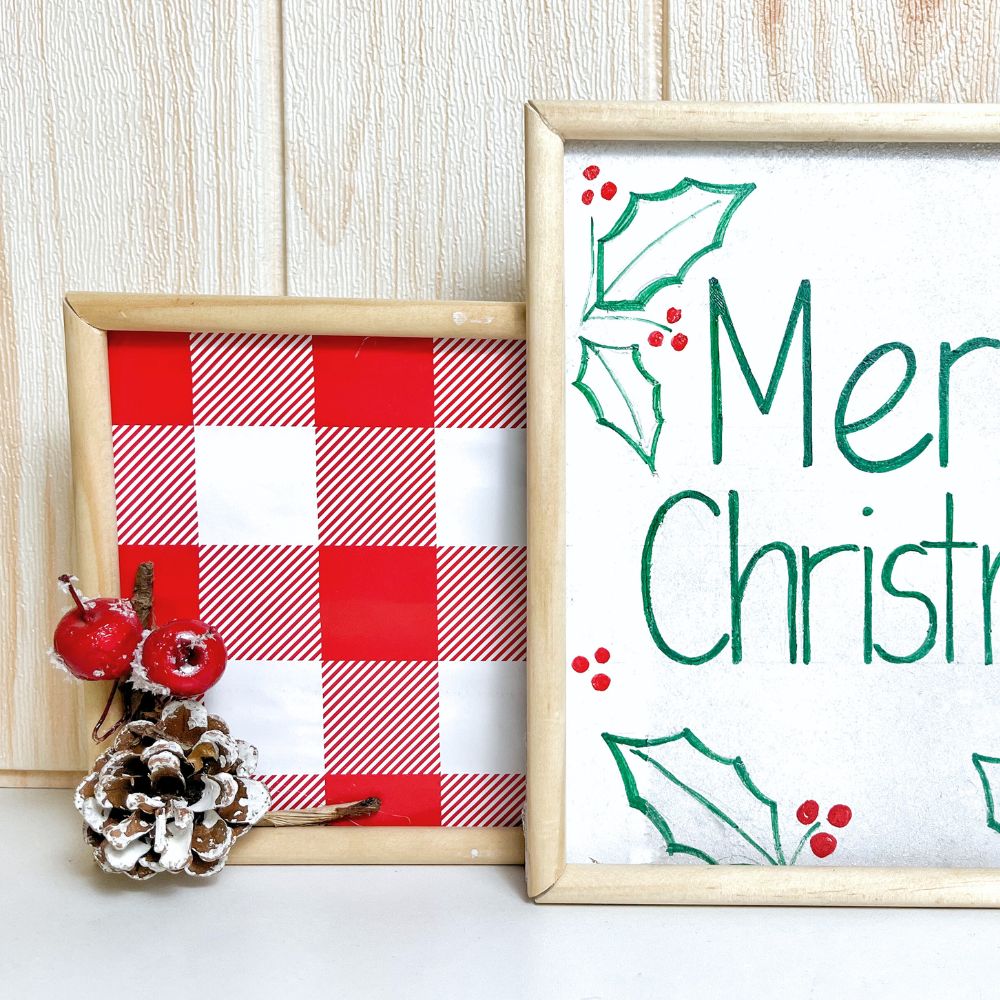
The checkered wrapping paper adds a touch of farmhouse charm to the smaller wooden square. Attach the paper to the wooden square using your glue gun, smoothing out any creases or bubbles as you go.
This step might seem small, but it makes a huge impact on the overall look of the sign.
Don’t have checkered wrapping paper on hand? Not a problem! You can easily substitute with other wrapping paper or even fabric. Just make sure to measure and cut the material to fit the size of your wooden base before gluing it on.
To add a special touch, we glued a small pine ornament onto the bottom corner of our square. This adds an extra dimension to the design and ties in with the festive theme.
You can use any small Christmas ornament you have on hand, or even make your own by attaching a small pinecone or bell to the corner. You can also add other elements like ribbon, twine, or faux greenery for some added flair.
Here’s our list of Dollar Tree Christmas decoration ideas if you don’t want to make your own holiday decor and be creative without breaking the bank.
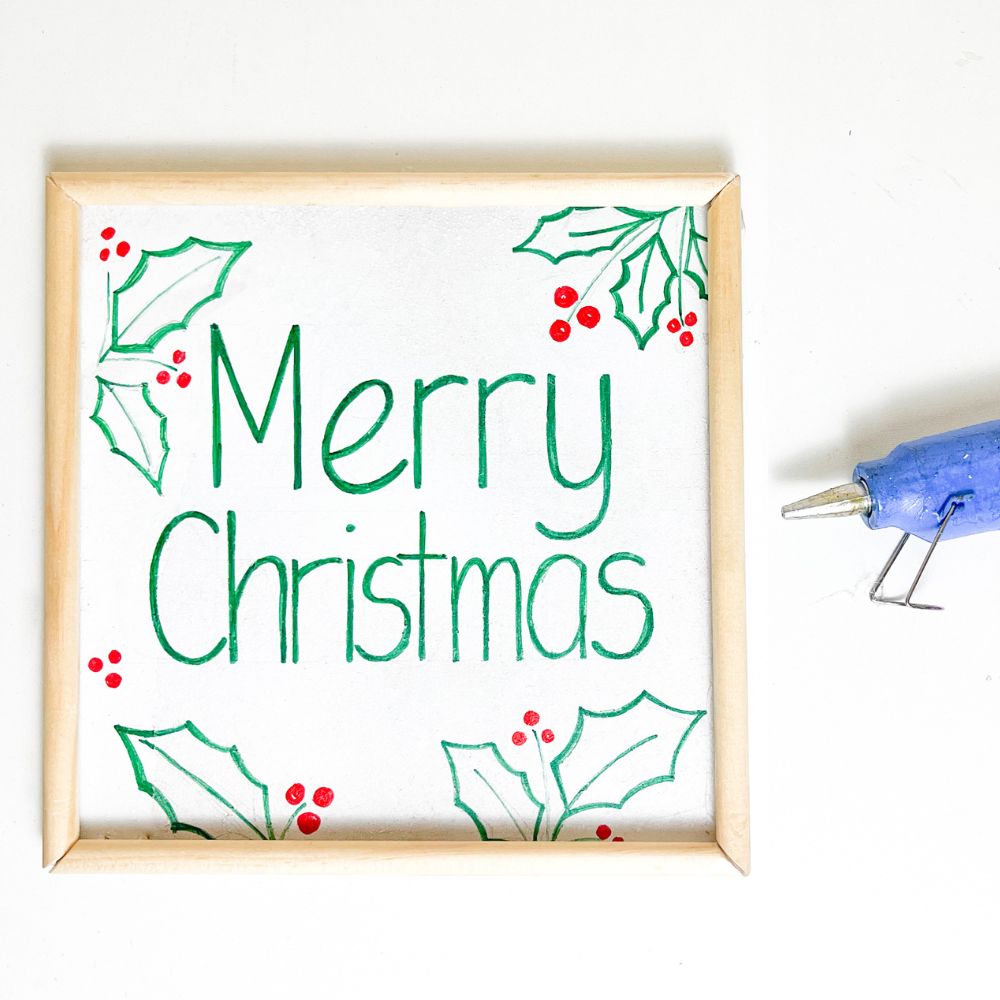
Designing and Decorating Bigger Wooden Square
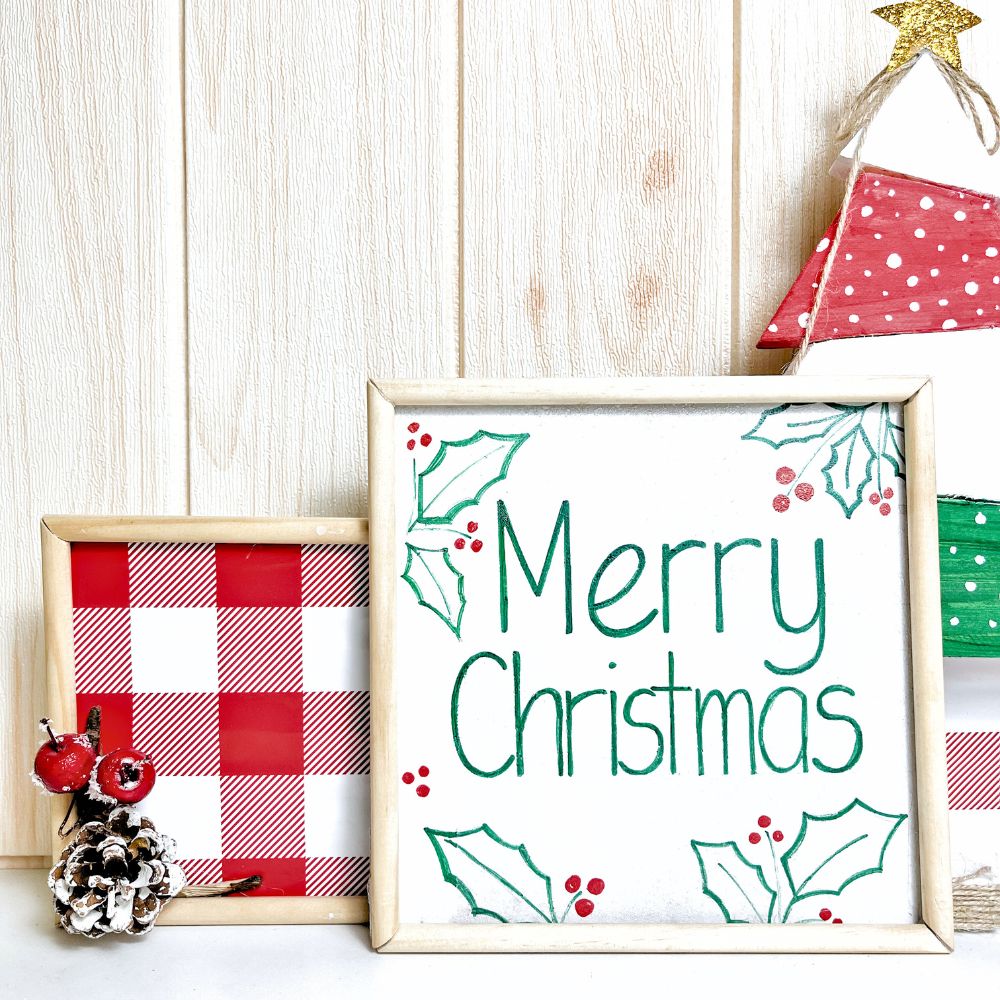
Now write “Merry Christmas” in a fun and festive font using a green sharpie marker.
Don’t worry if you’re not confident in your hand-writing skills, there are many free templates and tutorials available online that you can use for inspiration.
You can also search for different fonts or phrases to personalize your sign even more.

For a more polished look, consider going over your design a few times with the Sharpie or using different line thicknesses to make certain letters stand out.
Feel free to draw other decorative elements or designs as well, such as holly leaves, snowflakes, or stars.
Would you like to save this?
You can also start sketching with a pencil before going over it with the sharpie to make sure you’re happy with the design before making it permanent.
This is a great way to practice and perfect your design before committing to it. Just remember to have fun and be creative with it!
Check out our blog post on how to paint letters on a sign without any machine or stencil!
Attaching Wooden Dowel Frames
Adding the wooden dowel frames is the final step in creating this adorable small Christmas sign.
To attach the frames, simply apply a generous amount of hot glue to each corner and press them onto the wooden bases.
Make sure to hold them in place until the glue dries completely.
The dowel frames not only add stability to the sign but also give it a rustic and farmhouse feel. Plus, they can easily be painted or stained to match your home decor if desired.
You can also switch up the size or shape of the frames for a more unique look.
Here’s our farmhouse Christmas decor and rustic Christmas decor if you want more farmhouse and rustic themes for your holiday decor.
Once the frames are attached, you’re ready to display your sign and spread some holiday cheer! You can prop it up on a shelf, hang it on a wall, or even use it as part of a festive centerpiece.
Spread out more merriment throughout your home with another simple and easy project like this Merry Christmas standing sign.
You can even make more than one and create a gallery wall of small signs for an eye-catching display! Here are DIY Christmas signs and homemade Christmas signs you can easily create.
More Tips for Creating Your Small Merry Christmas Sign
Creating a small Merry Christmas sign is all about getting creative and making it personalized. One tip to make your sign stand out is by using different colors or fonts for the design.
Don’t be afraid to mix things up and experiment with different combinations until you find one that speaks to you. You can also use stencils or pre-made letters if hand-lettering isn’t your thing.
Get fresh and trendy ideas from these modern Christmas signs to jazz up your Christmas decor. If you’re looking for a festive sign to hang on your front door, check out these wooden Christmas door signs for inspiration!
Try out different shapes and sizes, check out some examples of vertical Christmas signs here. Consider adding some horizontal Christmas signs to create a unique and beautiful holiday arrangement!
Another way to make your sign unique is by adding personal touches that hold special meaning to you. This could include adding a family name, a quote that holds sentimental value, or using these Christmas sayings for signs.
These small additions will make your sign one of a kind and add an extra layer of warmth and nostalgia.
Lastly, don’t be afraid to draw inspiration from other designs. Whether it’s a similar sign you saw at a store or one you found on social media, use it as a starting point for your own creation.
You can take bits and pieces from different designs and combine them to make something truly unique. Just remember to always put your own spin on things and have fun with the process.


Small Merry Christmas Sign
This small merry Christmas sign is perfect for some little DIY action for the most wonderful time of the year!
Materials
- Wooden Dowel
- Old Wooden Square (one bigger and one smaller)
- Checkered Wrapping Paper
- Small Christmas Ornament
Instructions
- Measure and cut the dowels to create frames for the wooden bases. Cut the ends in 45 degree angles and glue them together to form a square shape.
- Cover the smaller wooden base with festive wrapping paper, smoothing out any creases or bubbles as you go. Add a small ornament for an extra touch of holiday charm.
- Use a green sharpie marker to write "Merry Christmas" in your desired font on the bigger wooden square. Feel free to add other decorative elements like holly leaves or snowflakes.
- Attach the wooden dowel frames to the bases using hot glue, holding them in place until dry. This not only adds stability, but also gives a rustic feel to the sign.
- Display your small merry Christmas sign on a shelf, wall, or as part of a centerpiece to spread some holiday cheer.
Recommended Products
As an Amazon Associate and member of other affiliate programs, I earn from qualifying purchases.


More Christmas Decor Ideas
- DIY Dollar Tree Christmas Signs
- DIY Funny Christmas Signs
- Wooden Spindle Sign For Christmas
- DIY Reindeer Christmas Sign
- Christmas Tree Farm Signs

Follow us on YouTube to get more tips for painting furniture. Or share your project with us on our Facebook Group and be part of our community. See you there!