
The Furniture Stripping Trick I Expected to Fail: Refinishing a Wood Dresser With Acetone and Paint Wash
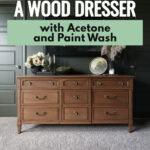
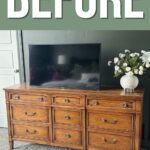
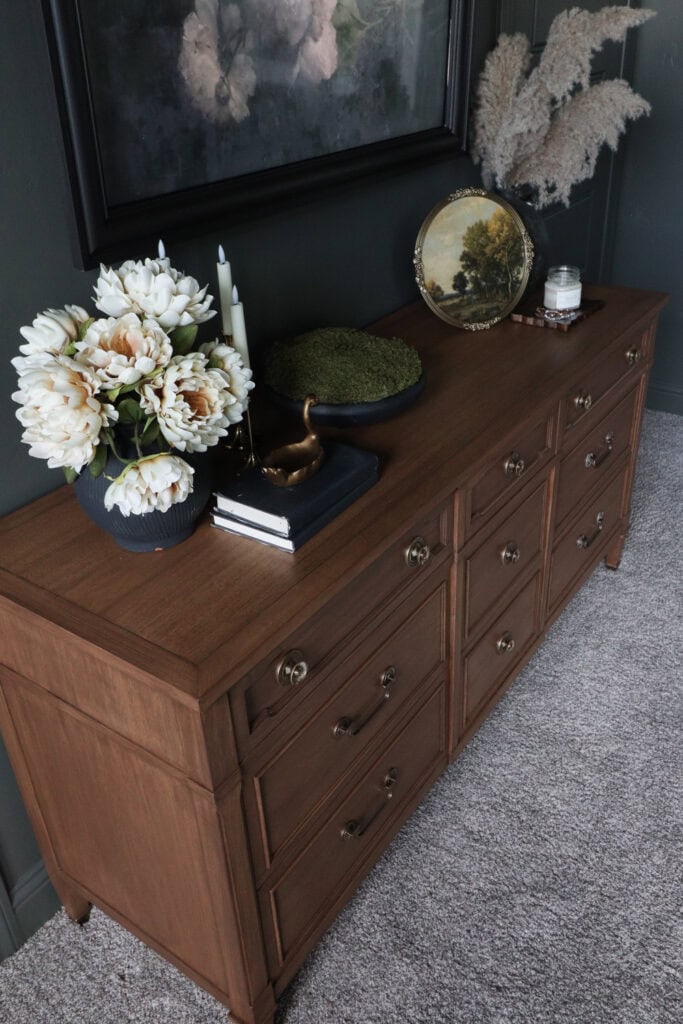
This refinishing a wood dresser with acetone and paint wash project started with a $125 Drexel dresser I found on Facebook Marketplace. I originally planned a quick flip, but after bringing it home, I realized the style would be amazing in our bedroom.
But I didn’t want to go through the whole stripping process and spend weeks on it. So I tried another method instead. Keep reading to see how this dresser makeover turned out, and check out these refinishing furniture techniques for more ways to transform old furniture.
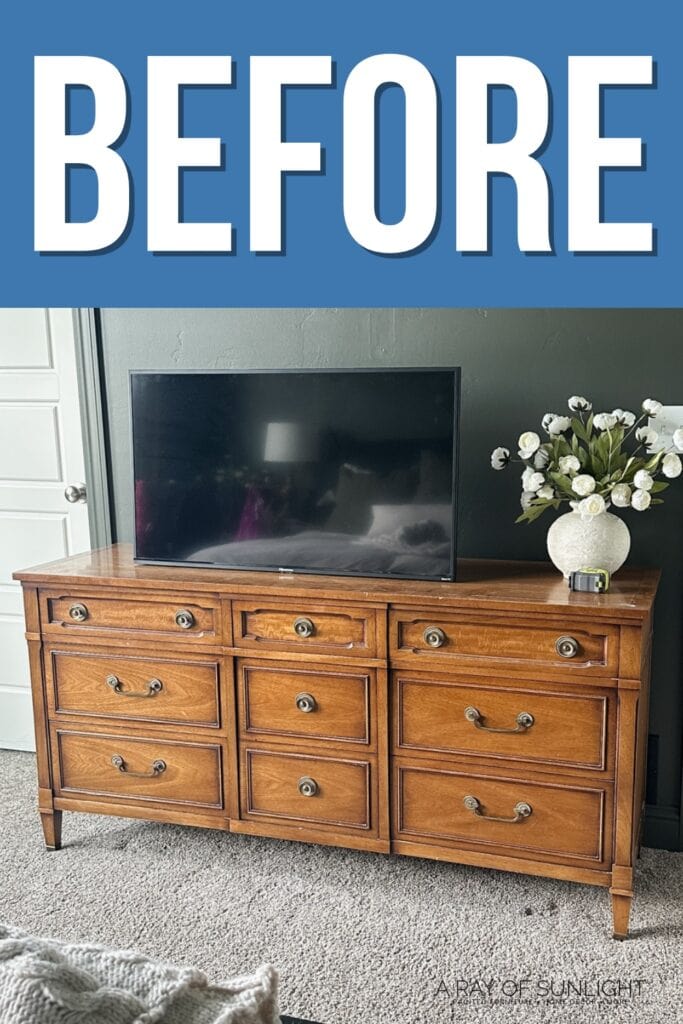
Welcome to Furniture Fixer Upper day, where we join 4 of our talented furniture friends and bring you brand new makeovers! I’ll link to my friend’s makeovers after our after photos at the bottom of this post! Don’t forget to check out their masterpieces!! Okay, back to our makeover!
I’ve seen people all over the internet use acetone to remove an old finish from furniture and saying it works so well and fast. I finally had to try it. We painted our nightstands and the bed, so I really wanted something that was left wood in our room. Check out how to darken a warm wood bed frame without stripping it for our bed frame makeover, and the fastest way to make old furniture look expensive for our nightstands makeover.

But I also didn’t want to go through the whole process of stripping, waiting for the wood to dry, and sanding everything down. I really wanted a quick flip, but I wanted it done right. I also didn’t want the reddish, orangish, or too warm wood tone you often get with a gel stain.
Recently, I came across a furniture account called Katie&Co Home, and I absolutely love the wood tone that she keeps creating on her furniture. I decided to try to recreate what she’s been doing and found out the stain she’s been using is one I actually have on hand.
She also uses the acetone method, so I thought, “You know what? Let’s give it a try.” I fully expected it wasn’t going to work and would be just as much work as stripping with regular strippers. I figured I’d probably have to go back to my typical stripping methods shown here: how to remove paint from wood without sanding.

Supplies Used for Refinishing a Wood Dresser With Acetone and Paint Wash
As an Amazon Associate, I earn from qualifying purchases. I also may earn from other qualifying purchases with other companies or get free product to review and use. All opinions are my own.
- Acetone
- Shop Towels
- Protective Gloves
- Respirator
- Carbide Scraper
- Nylon Brush
- SurfPrep Sander (Use code RAY10 to get 10% off your order)
- SurfPrep Medium+ Grit Foam Pad (Use code RAY10 to get 10% off your order)
- SurfPrep Fine Grit Foam Pad (Use code RAY10 to get 10% off your order)
- Dixie Belle Voodoo Gel Stain in Tobacco Road
- 3″ Synthetic Bristle Brush
- Delicate FrogTape
- Waterbased Topcoat
- Paint Sprayer
- Zibra Topcoat Brush
- Krud Kutter
Stripping Furniture With Acetone
I followed what I saw from Katie. Cover the (small) surface with paper towels, then pour on the acetone, dab it around, make sure it’s everywhere, and then wipe it off.
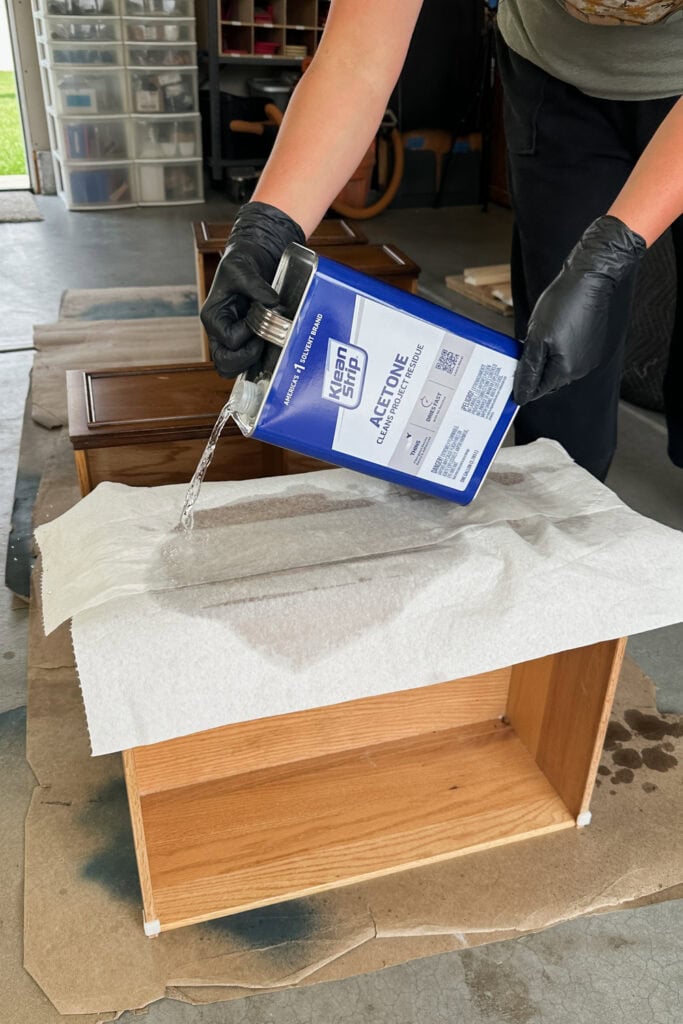
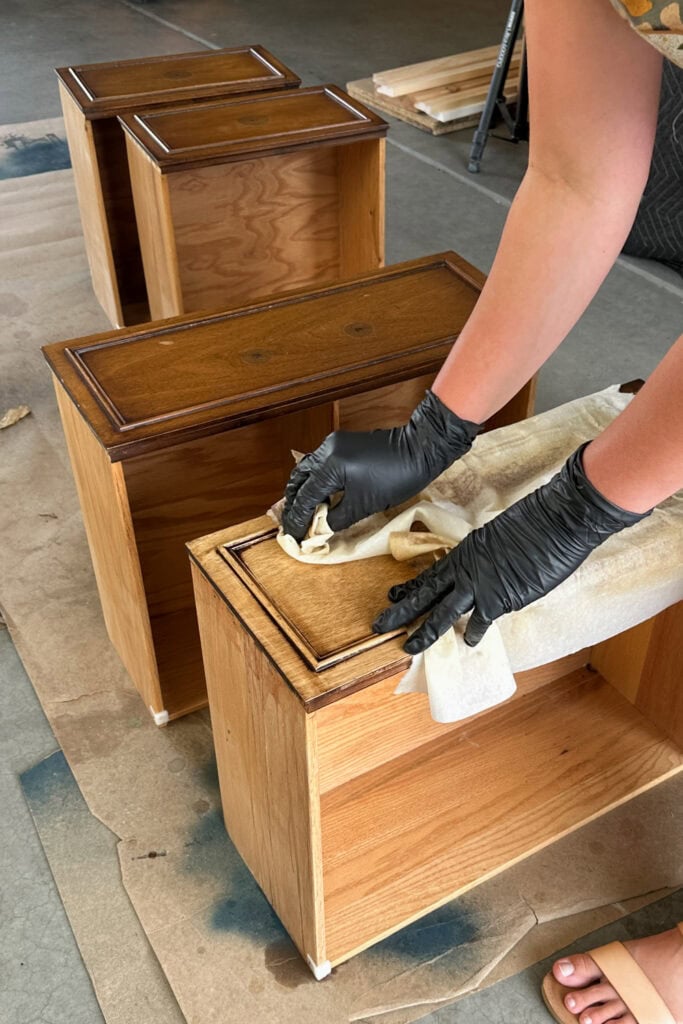
I tested it on one drawer first, and I made sure I wore good gloves because acetone is really strong and has a lot of fumes (definitely wear a respirator too!). Within about 10 seconds, I could see the yellowing of the finish coming up onto the white shop towel!! What!! I couldn’t believe it! Then I used the paper towel to rub it, and within a couple of seconds, the finish was gone!
I’ve heard acetone doesn’t work on every finish, so definitely test a piece. But this still blows my mind! It also dried within a few minutes, so you don’t have to wait forever for the wood to dry before moving on to the next step.
I used a nylon brush to help scrub the tougher areas in the crevices, and a carbide scraper for the very few spots where I couldn’t get the residue off with acetone alone. Here are more tips on how to scrape paint off wood.
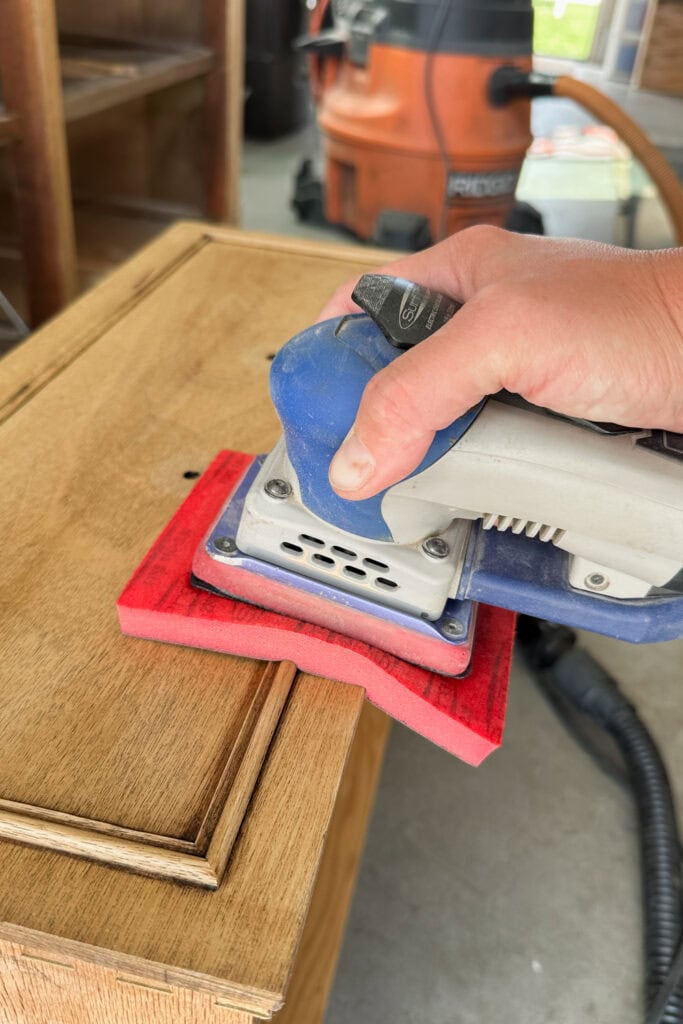
I lightly sanded the surface with my SurfPrep sander and medium+ grit foam pad from SurfPrep for the curvy areas. I just lightly sanded to smooth the surface out, nothing crazy. Stripping the whole dresser took me about 2 hours, and I used a whole gallon of acetone.
How to Refinish a Wood Dresser with Paint Wash
Then I had a nice clean slate and had to decide how to stain it. I already had the waterbased Dixie Belle Voodoo Gel Stain in Tobacco Road on hand, and I’ve used it before and liked it for the most part… But I remember it dried fast, which made my stain splotchy.. so I tried to avoid that this time.
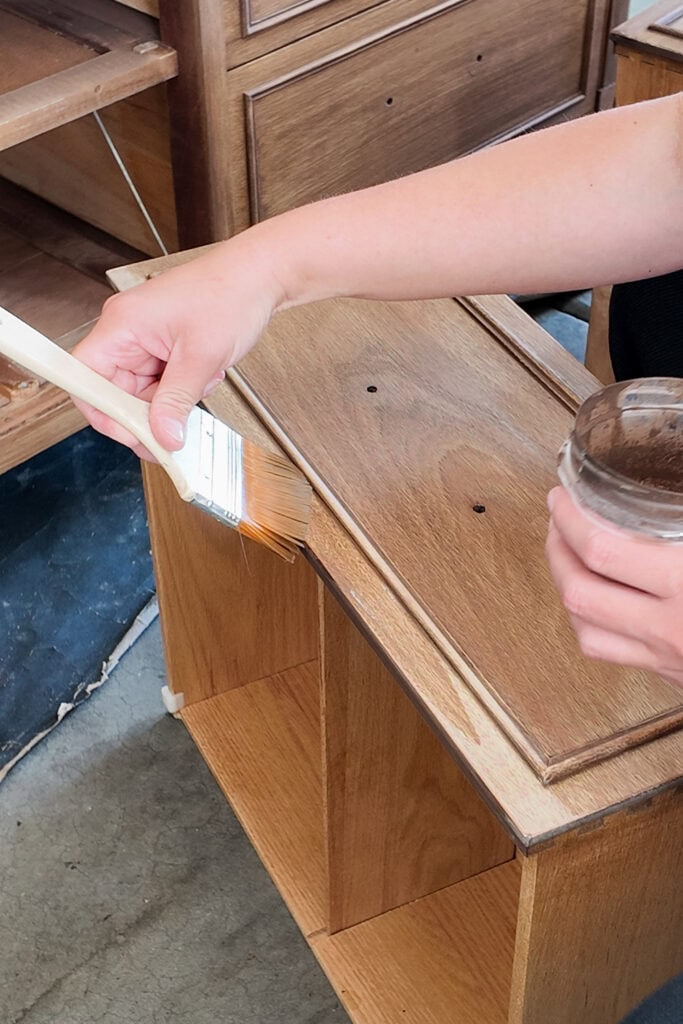
Since it was hot here (80s and 90s), I mixed about 1 part water with 1 part stain to make it more of a thinner paint wash. I tested brushing it on, brushing and wiping off the excess, and different types of brushes. This 3″ wide brush with synthetic bristles was probably my favorite because it left the least amount of brush marks.
Would you like to save this?
The biggest problem I had was working fast enough so it wouldn’t be streaky with brush marks or have lighter and darker spots. In the end, what worked best was watering it down more, to 75% water and 25% stain. I also liked brushing it on evenly instead of wiping it back off.
The top was a very big surface, and surprisingly, it worked really well. I taped off where the wood went in an opposite direction around the edge with Delicate FrogTape, so I wouldn’t get the stain going against the wood grain.
I worked as fast as I could, going completely across the dresser from edge to edge and working my way through the entire top. After that was dry, I did the two little edges where the wood grain went the opposite way.
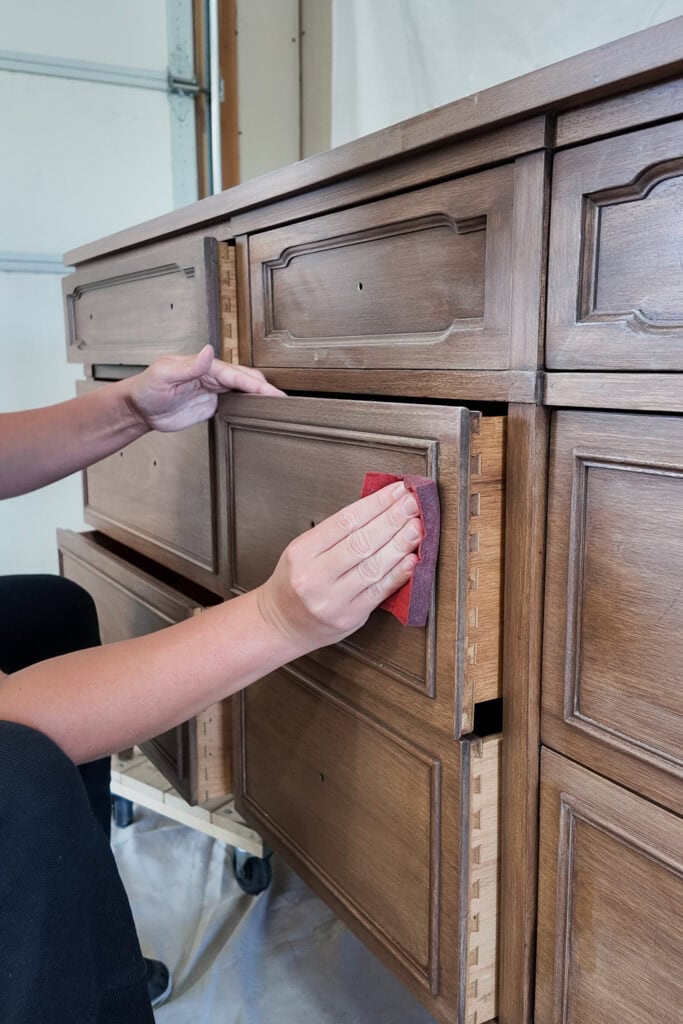
Then when I thought I was done, I looked at everything overall, and 4 of the drawers were too streaky and a lot darker than everything else. There were too many brush marks, and I didn’t want to make the rest of the dresser that dark. I went back with the SurfPrep sander and 220 grit sandpaper, sanded those 4 drawers basically down to raw wood, and restained them.
This time, I used about 75% water and 25% stain with the nicer quality paintbrush that left fewer brush marks. After about two coats, they finally looked pretty much the same as everything else.
How I Made a Toner To Hide the Uneven Stain
But I still had some splotchiness where you could see brush marks and uneven spots. To remedy this, I made a homemade toner by mixing my waterbased topcoat with the waterbased gel stain. It looked kind of like chocolate milk.
I sprayed it on, and this was like magic. It blended everything together, so I didn’t see the brush marks; the lighter areas looked a little darker and blended with the rest. I ended up applying two coats.
When you spray topcoat on in the heat, it dries very fast which makes it feel rougher, so in the morning when it was in the low 70’s, I sanded the top of the dresser smooth with a fine grit foam pad (without the vacuum holes) and used our Zibra topcoat brush to apply so it would feel extra smooth.
I really liked the original gold hardware, so I cleaned it up with Krud Kutter to sanitize it and remove built up residue from years of use and tarnish. I didn’t want it to look like polished brass because I liked the worn, vintage look. Then we reattached it to the drawers. Learn more about how to clean old furniture hardware here if you want your hardware to really shine.
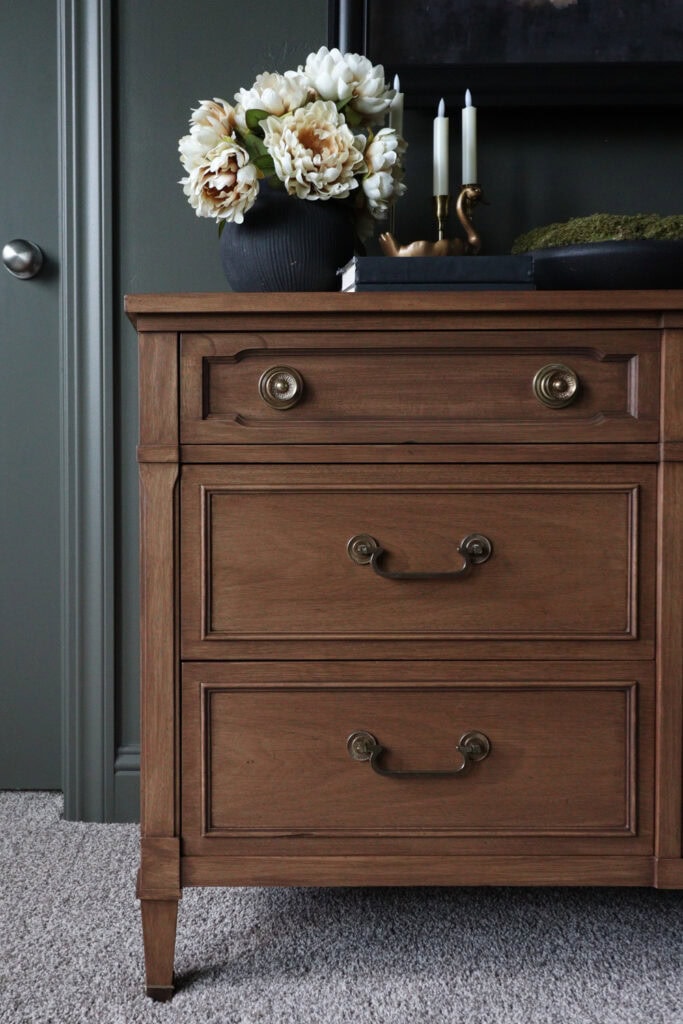
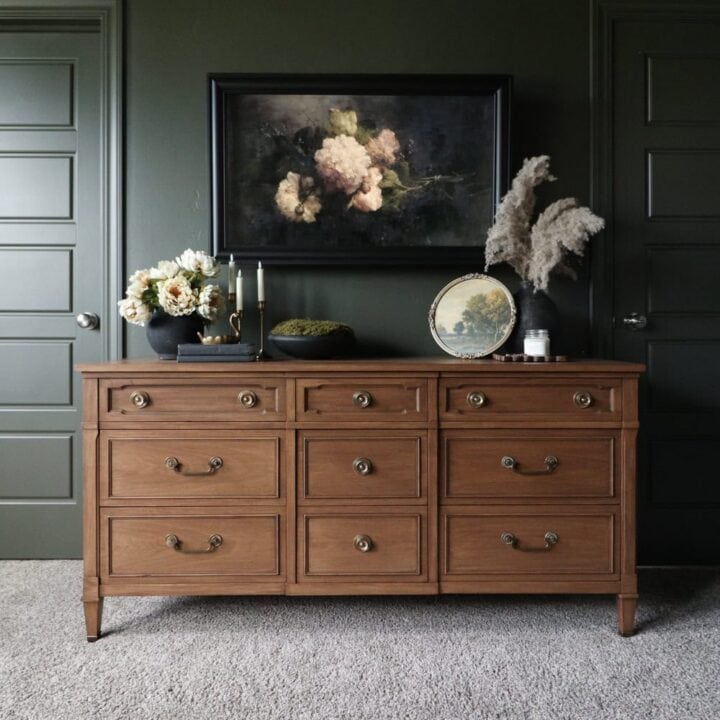
And here’s what it looks like now, all dolled up in my bedroom with the deep moody green walls. Isn’t it perfect!?
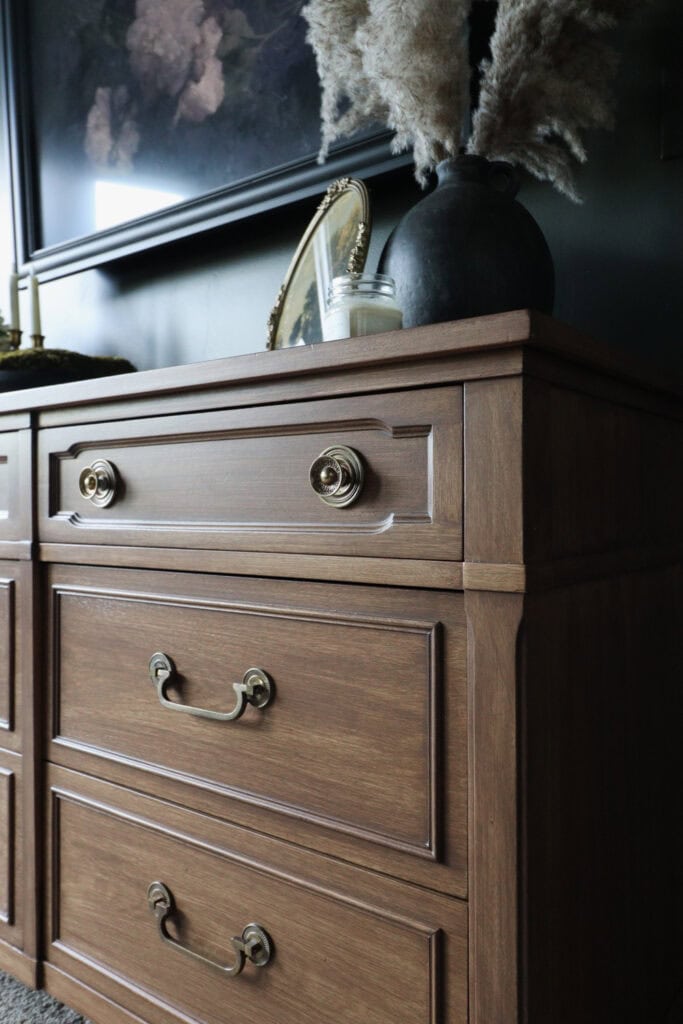
We have so much more storage in here now, and I love the gold hardware and the wood in this room. I love having a little bit more of that natural wood, and it goes so well with our green walls. All decorated, it feels cozy, nice, and elevated.
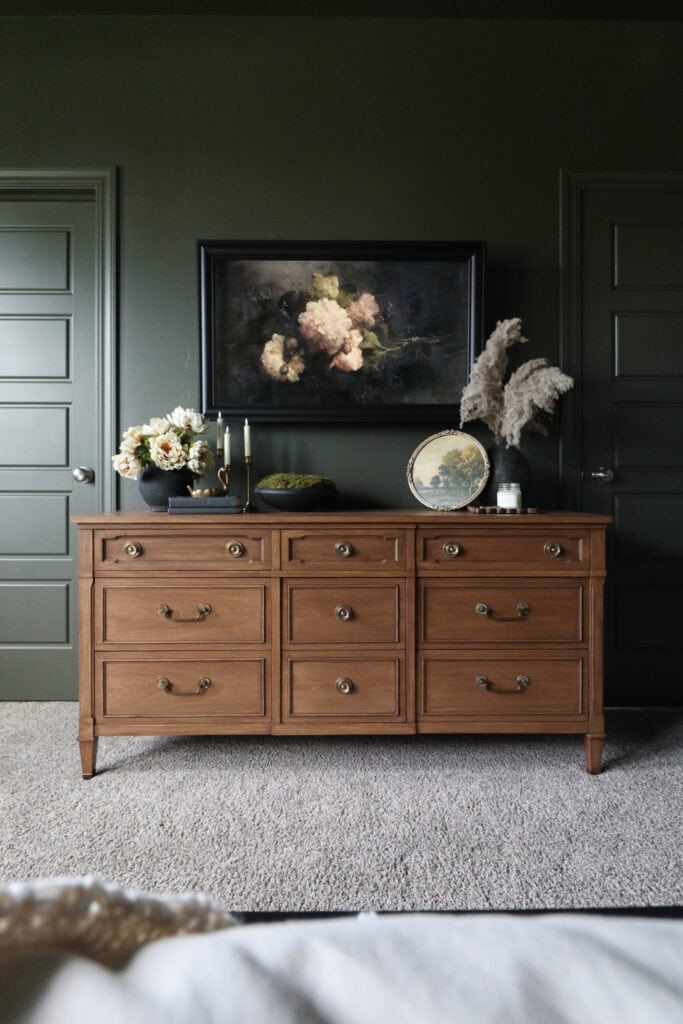
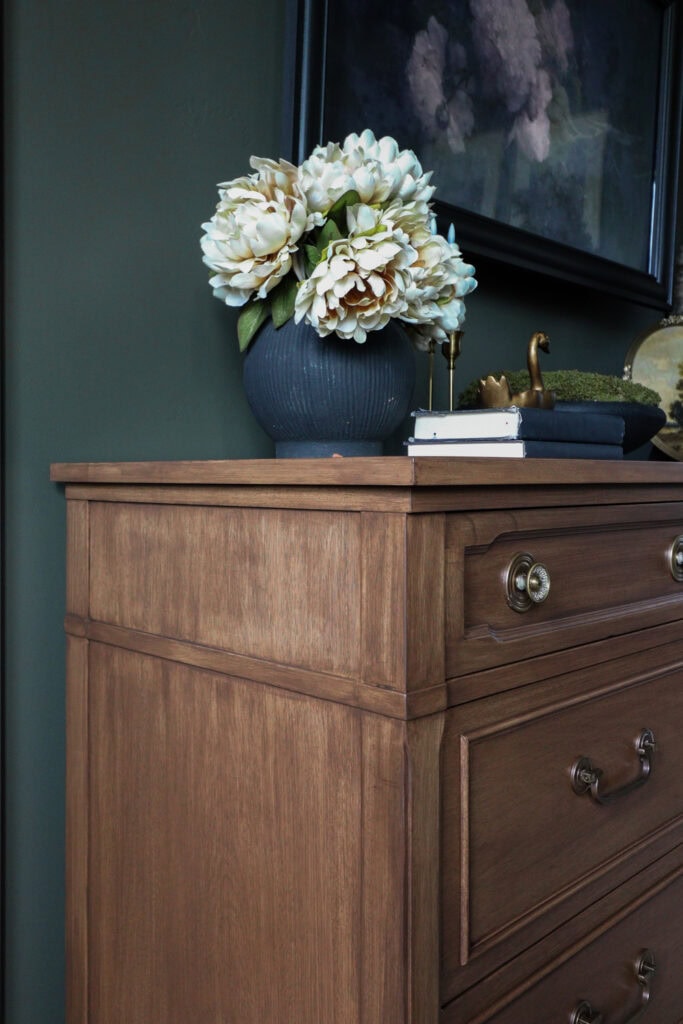
I loved using acetone as a stripper! It went so much faster than normal. It’s for sure the way to go when you have a finish it works on, although I wouldn’t use it indoors because it has a really strong smell.
The other big game changer for me was creating a toner with the topcoat and stain because it made everything blend together so well. When I do a stained finish like this again, I’m gonna skip brushing on the paint wash and create a toner to spray on instead. It’ll save soo much time and look so much better in the end.
Don’t forget to check out these other awesome before and after furniture makeovers from my Furniture friends!! (Click the links below the photos!)
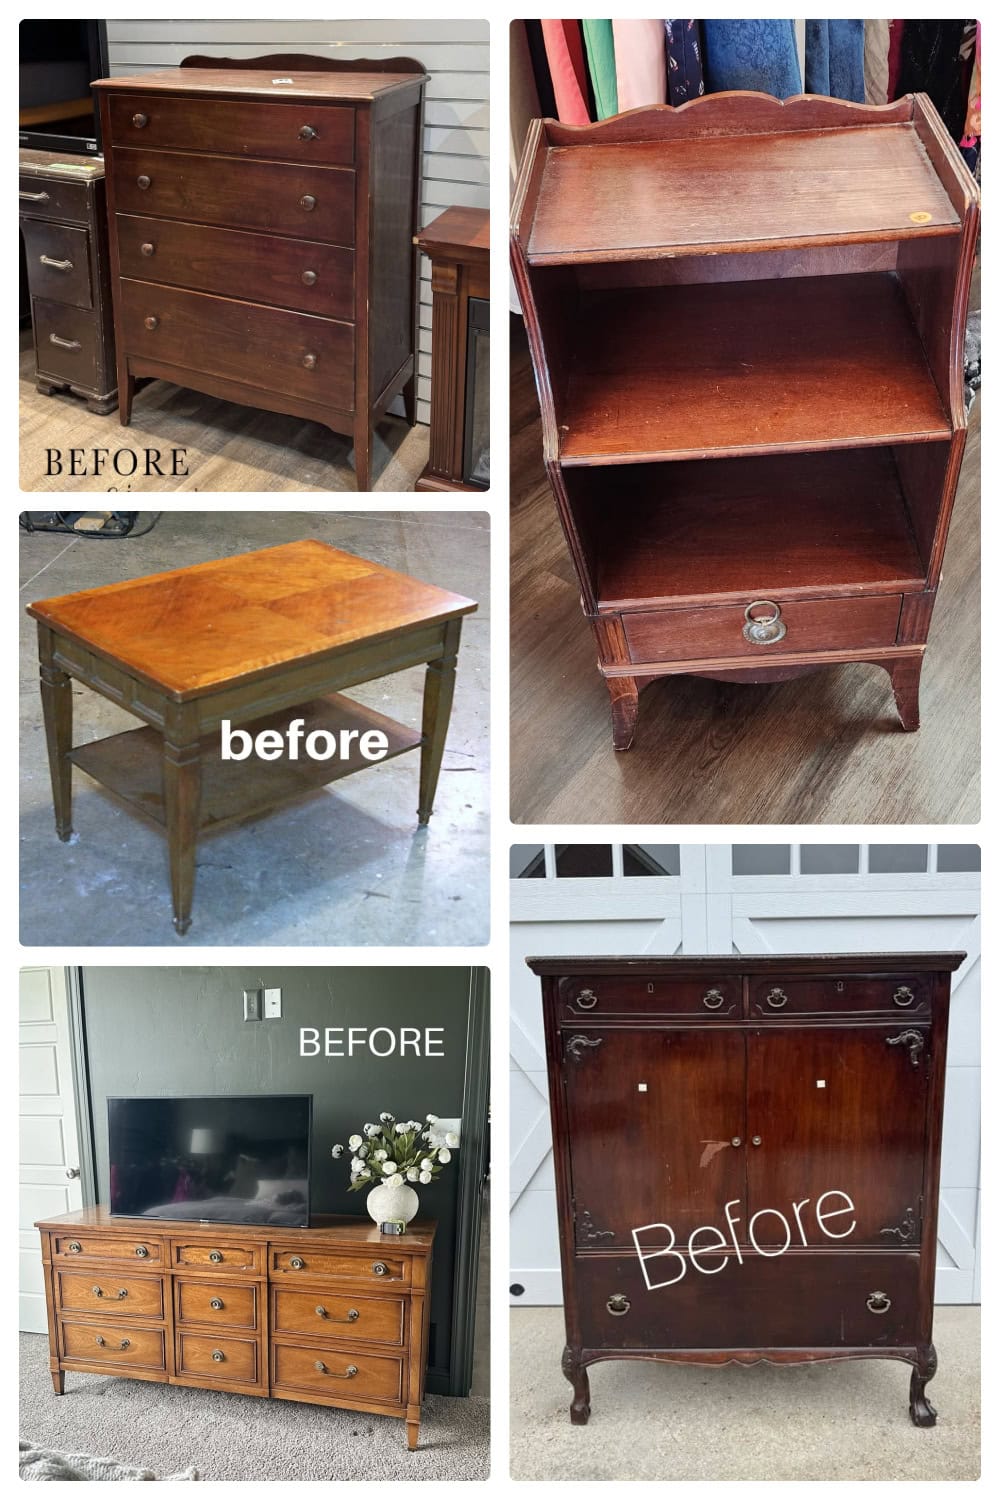
- Stenciled MCM Furniture Makeover from Petticoat Junktion
- Vintage Telephone Stand Makeover from My Repurposed Life
- Hiding Imperfections With Stenciling Makeover from Salvaged Inspirations
- Antique Gentlemen’s Cabinet Makeover from Confessions of a Serial DIYer

Refinishing a Wood Dresser With Acetone and Paint Wash
See how refinishing a wood dresser with acetone, a brown paint wash, and homemade toner gave this old dresser a fresh new look.
Materials
Tools
Instructions
- Remove the hardware and put on protective gloves before working with the acetone. Lay a shop towel over the wood, pour the acetone on, and dab it around to make sure it gets everywhere.
- Once the shop towel starts changing color, use it to rub away the old finish. Use a nylon brush for tougher areas in the crevices and a carbide scraper anywhere the residue does not come off with the acetone alone.
- Lightly sand the stripped wood to make sure everything feels smooth. Use a SurfPrep sander with a medium plus grit foam pad for the curvy areas.
- Mix Dixie Belle Voodoo Gel Stain in Tobacco Road with about half water to make a thinner paint wash. If needed, water it down even more to about 75% water and 25% stain to help avoid brush marks and lighter and darker spots.
- Brush the paint wash evenly onto the wood with a three inch synthetic bristle brush, working in the direction of the wood grain. Work quickly, especially in warmer temperatures, and brush it on evenly instead of wiping it back off.
- Use Delicate FrogTape on areas where the wood grain changes direction. Work completely across the dresser from edge to edge, then let it dry before staining the sections where the wood grain goes the opposite way.
- Check the drawers once the stain dries to see if the color looks even. If any are too streaky or dark, sand them basically back down to raw wood with 220 grit sandpaper and restain them using about 75% water and 25% stain.
- Make a homemade toner if you still have splotchiness, brush marks, lighter areas, or darker spots. Mix the waterbased topcoat with the waterbased gel stain, then spray it over the dresser to help everything blend together.
- Apply two coats of the toner, preferably when it is cooler outside so the topcoat does not dry too fast. Once dry, sand everything smooth with a fine grit foam pad and spray another coat.
- Brush the final coat of topcoat onto the dresser top with a Zibra topcoat brush so it feels extra smooth. Let the finish dry before putting the dresser back together.
- Clean the original gold hardware with Krud Kutter to remove the residue and years of use while keeping the worn, vintage look. Reattach the hardware to the drawers once everything is dry and ready.
Recommended Products
As an Amazon Associate and member of other affiliate programs, I earn from qualifying purchases.

More Refinishing Furniture Makeover Ideas
Follow us on YouTube to get more tips for painting furniture. Or share your project with us on our Facebook Group and be part of our community. See you there!