How to Prep Furniture for Painting – Video Series
The most important part of painting furniture is honestly how to prep furniture for painting. If no preparations are done before painting, your paint could peel off, or easily scratch off. Even with “No prep furniture paint.”
Don’t worry though! Prepping furniture for paint doesn’t have to take very long. These painting furniture ideas and tips are easy to follow and will make the painting process go much smoother and the end results more professional and long lasting.
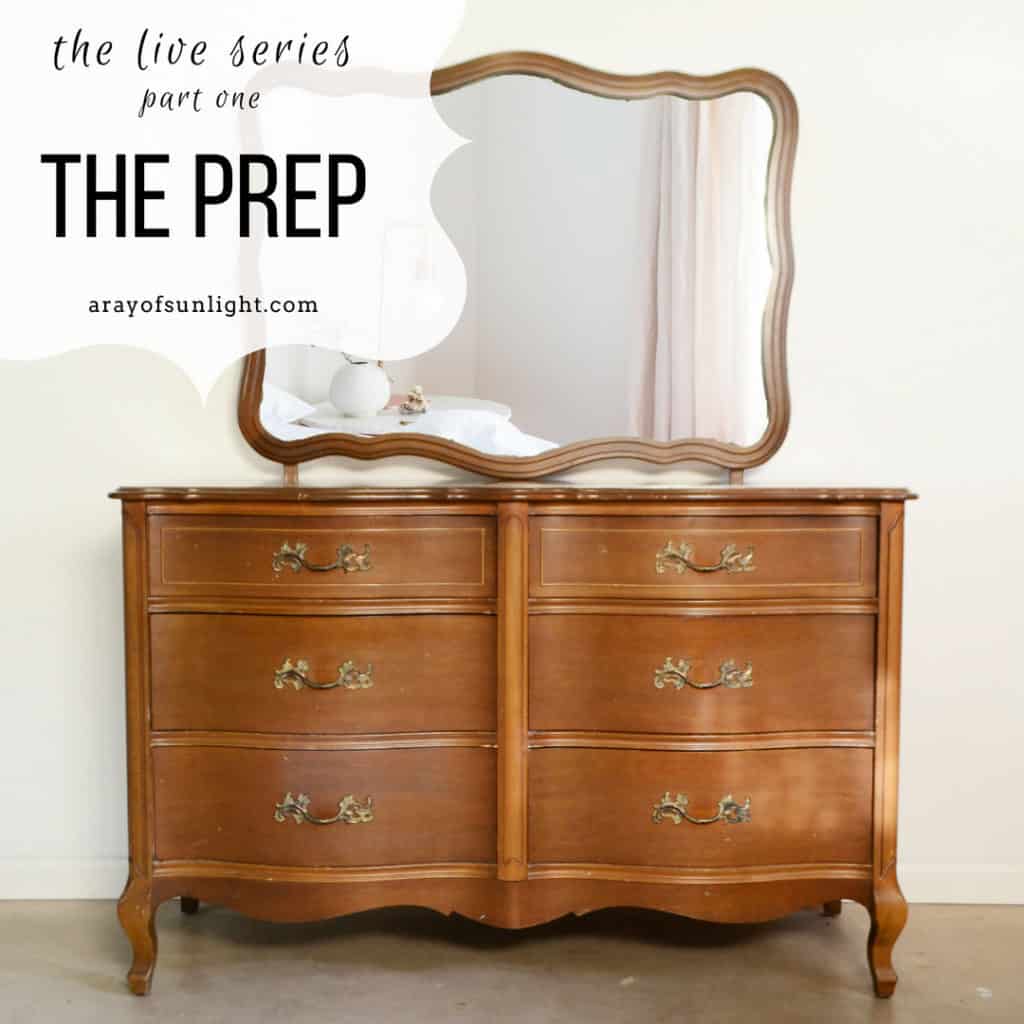
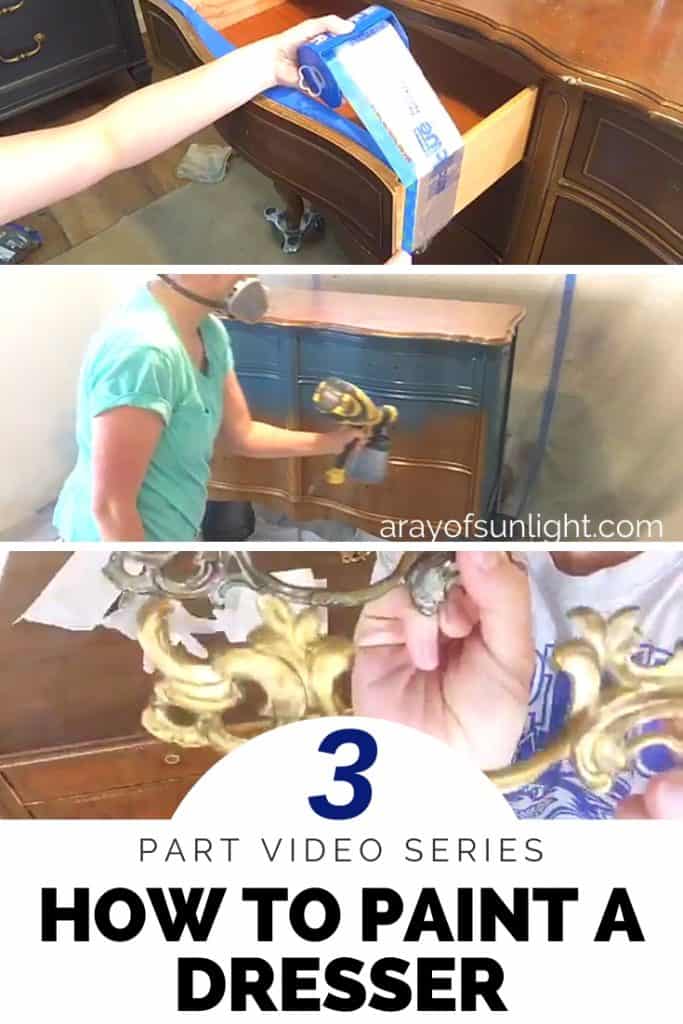
We did a 3 part Facebook LIVE video series on how to paint a dresser from start to finish. But if you missed them, we’ve compiled them all right here for you! In video ONE (this one!) we talked all about how to prep for painting.

Now you might think that you want to skip this one, but you really really shouldn’t. It’s full of gold. Tips and tricks and why you really need to prep before painting old furniture. And I’m not just talking about wiping it down with a wet rag.
- What if you have to change out the hardware to a different size?
- What if you have chipping veneer that needs fixed? (Here’s how to repair chipped veneer furniture to tackle chipping veneer!)
- What about that pesky bleed through that won’t go away on it’s own?
I’ve got you covered! Plus I talk all about the basic prep AND how to prep when you’re painting a dresser with a paint sprayer. Because prep is just a little bit different with a paint gun.
Chalk Painting Furniture Video
Grab some popcorn, and pull up a seat. Or grab your favorite craft, and get crafting while you listen to all the nuggets in this first chalk painting furniture video.
Supplies Used to Prep Furniture for Painting
As an Amazon Associate, I earn from qualifying purchases. I also may earn from other qualifying purchases with other companies or get free product to review and use. All opinions are my own.
- Krud Kutter
- Old Damp Rag
- 220 Grit Sandpaper
- Vacuum
- Clean Damp Rag or Tack Cloth
- Primer
How to Prep Furniture for Painting
If you don’t want all the nuggets of info from the video, but just want a quick overview, here are the basic steps for prepping when painting furniture with chalk style paint (also known as no prep furniture paint.)
- Clean any grease and grime off of your furniture with TSP or Krud Kutter. Use an old damp rag to wipe it down. (Wearing gloves – especially when using TSP – is a great idea!) Let dry.
- Scuff sand with 220 grit sandpaper. Scuff sanding is just rubbing the sandpaper over the entire dresser a couple of times. You aren’t trying to remove the finish, just removing the shine of the old finish.
- Remove the dust with a vacuum hose and a clean damp rag or tack cloth.
- You’re ready to paint!
Here are some of my favorite painting prep supplies that I use for basically every furniture makeover, including this one.
What happens if you don’t sand before painting?
So what happens if you skip the sanding step and jump straight into painting? Well, first of all, the paint won’t adhere as well to the surface, especially if it’s a glossy or slick finish. This means that your paint will easily chip or peel off with any kind of pressure or even just normal wear and tear.
Not only will the paint not stick as well, but it also won’t look as smooth and professional without sanding first. Any imperfections on the surface of the furniture will show up even more when painted over. This could include scratches, dents, or bumps from previous use or damage. Sanding helps smooth out these imperfections for a flawless finish.
Overall, skipping sanding before painting can lead to a frustrating and disappointing outcome. It’s always better to take the extra time to properly prep your furniture! You can learn more about what happens if you don’t sand before painting furniture here.
If you’re set on skipping sanding, here’s how to paint wood furniture without sanding to guide you on what to do to compensate for the lack of sanding and still get a beautiful paint job.


How to Prime Furniture
If you’re working with laminate furniture, or are working with a light color of paint, you will need to know when to prime furniture.
When painting light colors, you will often see stains in your paint. They usually show up either tan, red or pink. When you’re painting with dark colors you might not see them, even though they are there. The best way to paint a dresser is to prevent this (bleed through) from happening before it even has a chance (before you paint!) Learn all about how to stop stains from coming through paint here.
Laminate will repel most types of paint, even no prep furniture paint. So you need to use the best bonding primer for laminate furniture before any paint!
Would you like to save this?
How to Change Hardware on Furniture
If you’re looking to change the hardware, learn about the best way to fill hardware holes and change hardware on a dresser. Here are the many ways of filling holes when replacing cabinet or furniture hardware, and you can follow our guide on how to change hardware on a dresser here!
There are a few different products you could use, and some are easier than others! So check out these posts to learn more!
How to Prevent Overspray When Painting
When you’re spraying paint, you don’t want the overspray to get inside the drawers, or all over your floor. Learn how to prevent overspray when painting furniture and how I tape off drawers for a paint sprayer here, so you can have a smooth paint finish without the mess!
Now that you know all about prep, it’s time to move on to the next video – painting a piece of furniture.
In video TWO we talk all about using a paint sprayer. You don’t want to miss it! I talk about efficiency, the professional finish and even how to avoid problems with the paint sprayer. So you can overcome the fear of using one.


And as always, please share and pin for your friends and family who want to create beautiful furniture for their own home or others! See you in video two!

How to Prep Furniture for Painting
How to prep furniture for painting is honestly the most important part of painting furniture. Prepping furniture for paint doesn’t have to take very long.
Materials
- Krud Kutter
- Old Damp Rag
- 220 Grit Sandpaper
- Clean Damp Rag or Tack Cloth
- Primer
Tools
Instructions
- Clean any grease and grime off of your furniture with TSP or Krud Kutter. Use an old damp rag to wipe it down. (Wearing gloves – especially when using TSP – is a great idea!) Let dry.
- Scuff sand with 220 grit sandpaper. Scuff sanding is just rubbing the sandpaper over the entire dresser a couple of times. You aren’t trying to remove the finish, just removing the shine of the old finish. Remove the dust with a vacuum hose and a clean damp rag or tack cloth.
- Prime furniture to prevent bleed through from happening. This is especially important when using a light color of paint or painting over laminate furniture. Use a high quality bonding primer to make sure the paint adheres properly.
- If you’re looking to change the hardware, remove them and fill hardware holes.
- Before spraying paint, prevent overspray by taping off areas you want to protect. This will save you from a messy cleanup later.
- You’re ready to paint!
Recommended Products
As an Amazon Associate and member of other affiliate programs, I earn from qualifying purchases.


More Painting Furniture Resources
- Furniture Painting Tools And Supplies
- Painting Techniques for Furniture
- How to Choose the Right Furniture for Painting
- How to Clean Furniture Before Painting
Follow us on YouTube to get more tips for painting furniture. Or share your project with us on our Facebook Group and be part of our community. See you there!