
$500 Laundry Room Makeover: How I Made Our Tiny Laundry Room Mudroom Combo Actually Work
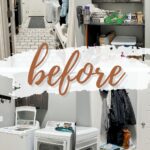
This laundry room makeover started because our small walk through laundry room just was not working for our family of five. Between coats, shoes, backpacks, snow gear, and laundry, one tiny space, I needed better storage and a setup that actually made sense.
The goal was to make it function better, feel brighter, and stay under a $500 budget for the whole room. If you love budget friendly projects like this, check out these furniture makeover ideas for more ways to update your home.
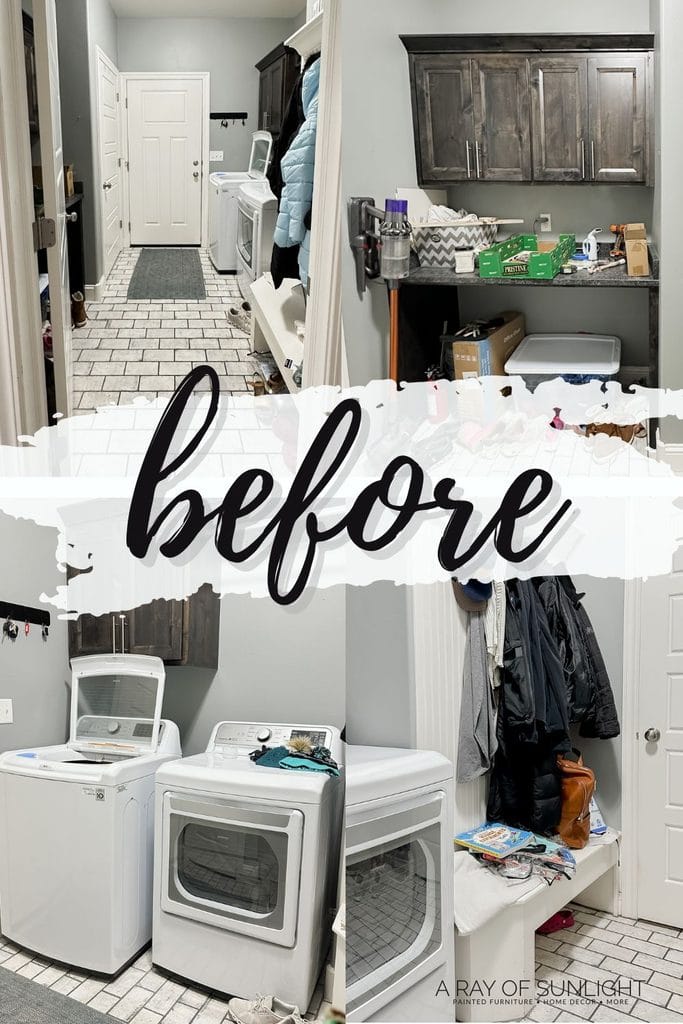
One of the biggest problems is that this room is also the walk through to the garage, so its the obvious place for shoes and all outdoor clothing. But it also has to function as a small laundry area, and drop zone. On one whole side of the laundry room there was a large countertop for folding laundry, but who wants to fold clothes in this little dungeon with no windows, and a door in the way of where you should stand?
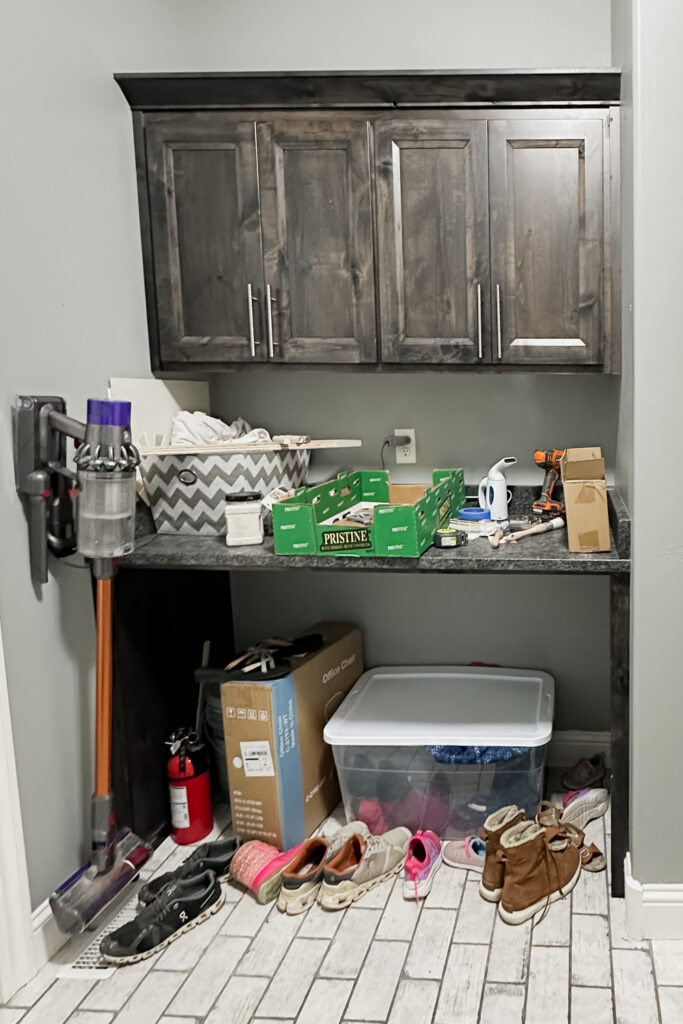

Across from that was a cute little bench area, but the three hooks were clear at the very top. How in the world are little kids supposed to grab their coat and hang up their coats? Underneath the bench was also so small, so where do they put all their boots and shoes?
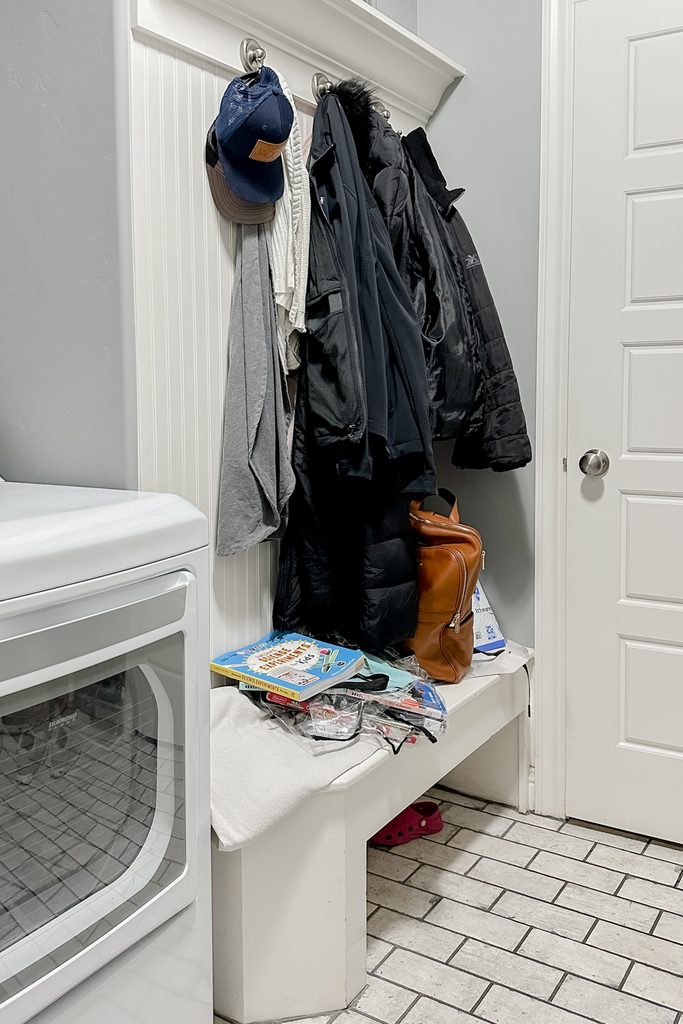
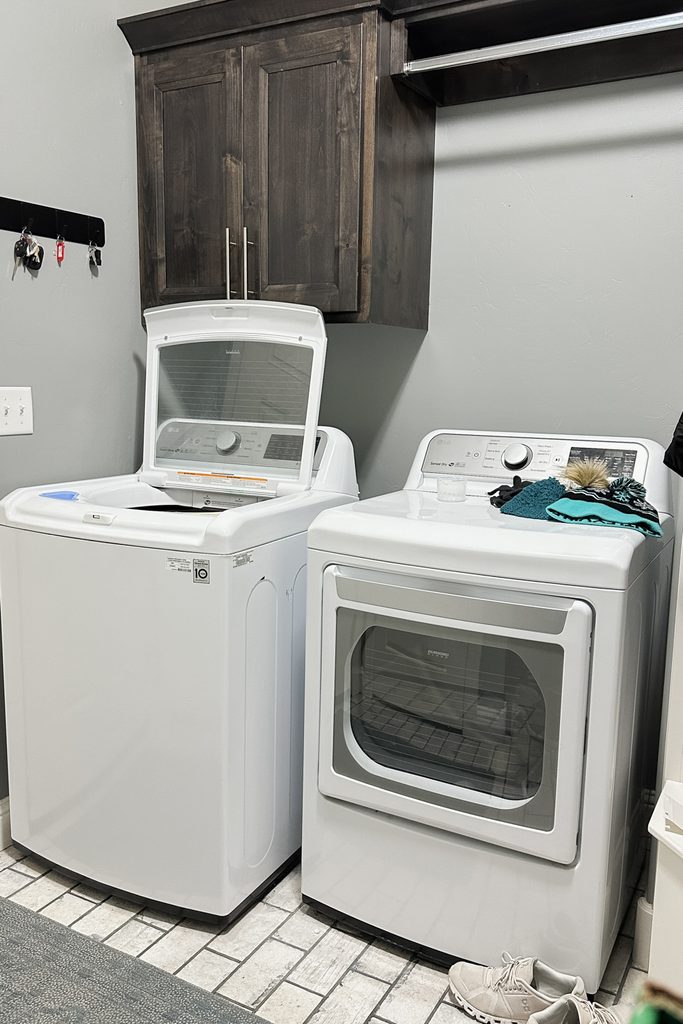
Then there was the laundry area with our top load washer, which I love to death. But the lid couldn’t open all the way if the washer was pushed back, and we couldn’t get into the cabinet where the laundry soap was with the washer’s lid open. The hanging rod was also so high I could barely reach it, and so this wall space was just wasted.
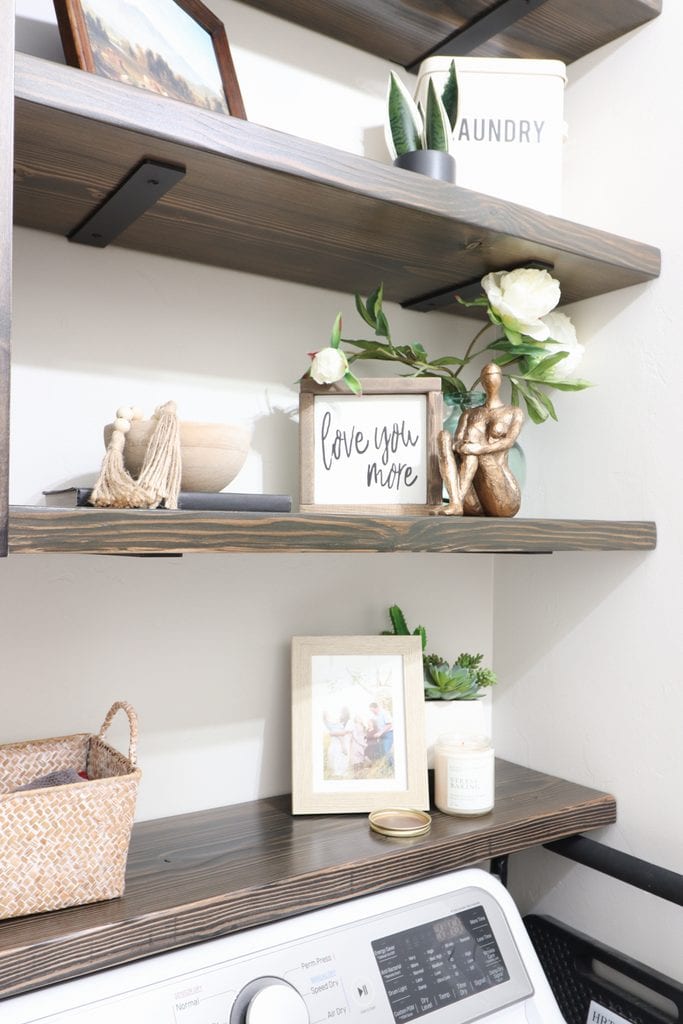
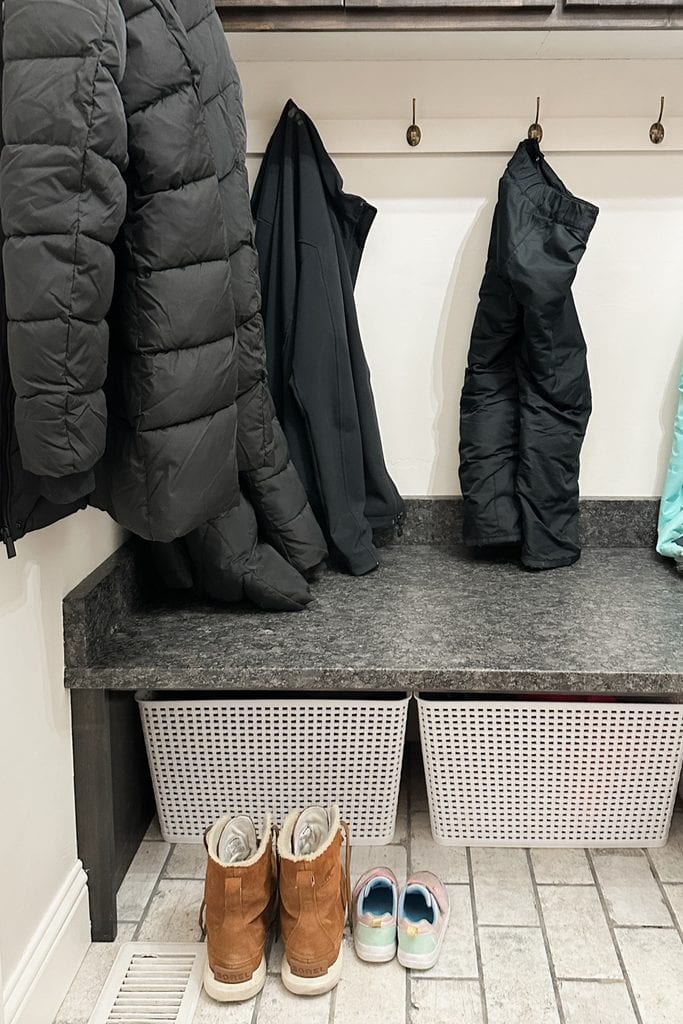
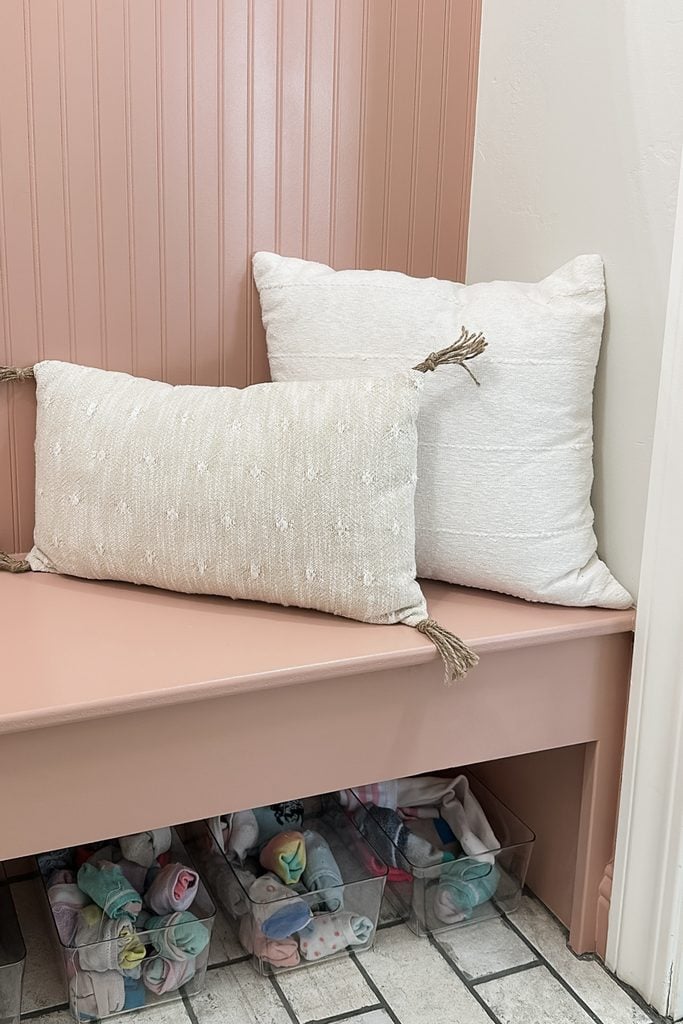
Keep reading to see how we turned this laundry room into a space that works so much better! But first, here are a few photos for a little sneak peek at the transformation.

Supplies Used for Laundry Room Makeover
As an Amazon Associate, I earn from qualifying purchases. I also may earn from other qualifying purchases with other companies or get free product to review and use. All opinions are my own.
- Utility Knife
- Table Saw
- Nail Gun
- Spackling
- Sherwin Williams Latex Paint
- Clear Caulking
- Hooks
- 1×4″ Wood Boards
- Primer
- Power Drill
- 2×12″ Pine Boards
- Painter’s Tape
- Ebony Stain
- Dark Walnut Stain
- Green Tinted Waterbased Stain – Tinted in “Gentle Olive”
- Dark Wax Sticks
- Laser Level
- Shelf Brackets
- Bondo Wood Filler
- Wood Filler
- Caulking
- Krud Kutter
- 220 Grit Sandpaper
- Shop Vac
- Tack Cloth
- Green FrogTape
- Pre Taped Plastic
- Sherwin Williams Emerald Urethane Trim Enamel
- Wagner 3500 Paint Sprayer
- New Cabinet Hardware
DIY Mudroom Storage
The biggest thing I was determined to fix here is storage for coats, boots, and all the snow stuff, let alone the backpacks and everyday shoes. They all need a place to go so they aren’t in the walkway out to the garage. So the first place we started was behind this door: this wasted countertop space for folding clothes.
Now I didn’t have a budget to build lockers here, so I had to work with what I already had. So the goal here was basically to cut the countertop down and make it shorter so it was bench height. Then I could have this as the main mudroom area where we can store most of the stuff. This was where the storage space was gonna come from.
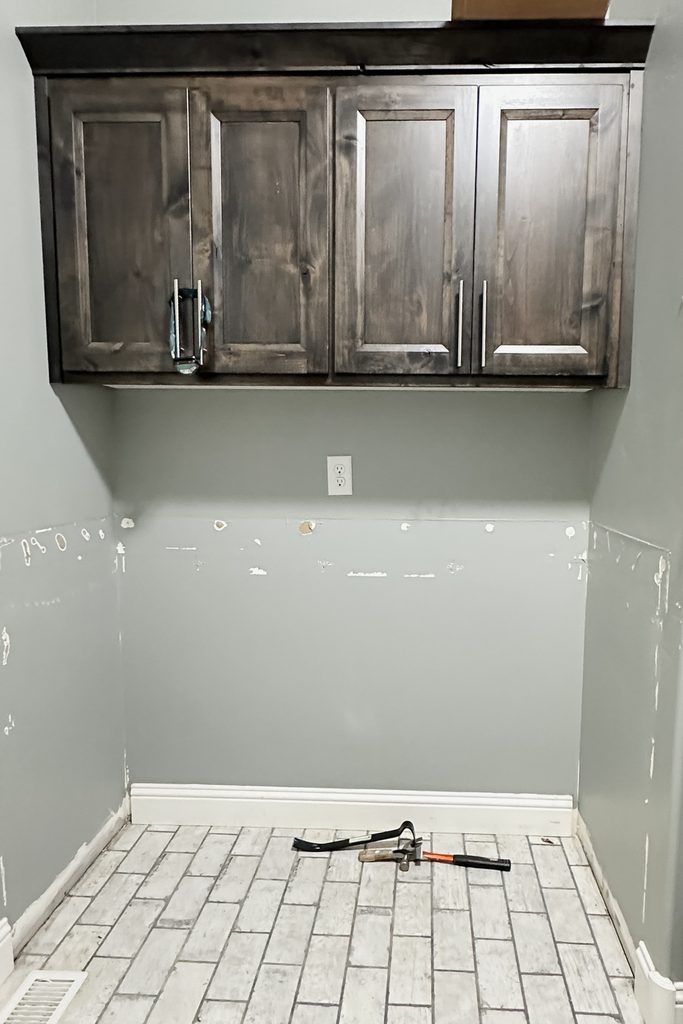
We used a knife to cut through the caulk, and then removing that countertop was so heavy. Thankfully, the wood braces holding up the countertop were just nailed into the wall in a few places, so we could easily pry them off. We took it out to the table saw, ripped it down to bench height, and then nailed the braces for the countertop back in.
We patched all the holes in the wall with spackling, and my dad helped us move the outlet that was now in a really weird spot. We moved it up into the cabinet so I can charge things in there. We also painted this whole section with Sherwin Williams Cashmere paint, and put the countertop back in, and clear caulked around the counter’s edge like it was done before..
For the hooks, we attached 1×4″ wood boards to the wall, making sure they were screwed into the studs. Then we primed and painted them to match the wall and screwed the hooks directly into them, so they won’t go anywhere.
I also got some large storage baskets from Hobby Lobby to go underneath the deep bench, which gives me lots of space to store all of our winter clothes when we aren’t using them.
Updating the Washer and Dryer Area
Now on to the next section, the laundry area. The biggest pain here was that the cabinet above our washer and dryer was too low. Whenever we opened up the lid, it would hit the bottom of the cabinet. We also had to have the washing machine pulled as far forward as possible so the lid could open all of the way.
Would you like to save this?
The game plan was to remove the hanging rod area and raise up the cabinet. It was pretty simple to unscrew the cabinet from the wall with our power drill. Once it was down, I patched all the holes that would be seen when we put the cabinet back up, took the crown molding from the hanging rod area, and attached it to the top of the cabinet.
Then I reattached the cabinet to the wall about six inches higher. Once we raised it, we could push the washing machine back against the wall, and the lid could open underneath the cabinet! Finally! It’s also no further of a reach to get to the stuff inside the cabinet, so that’s fantastic (I was worried it would be hard to reach things inside a higher cabinet).
DIY Laundry Room Shelves
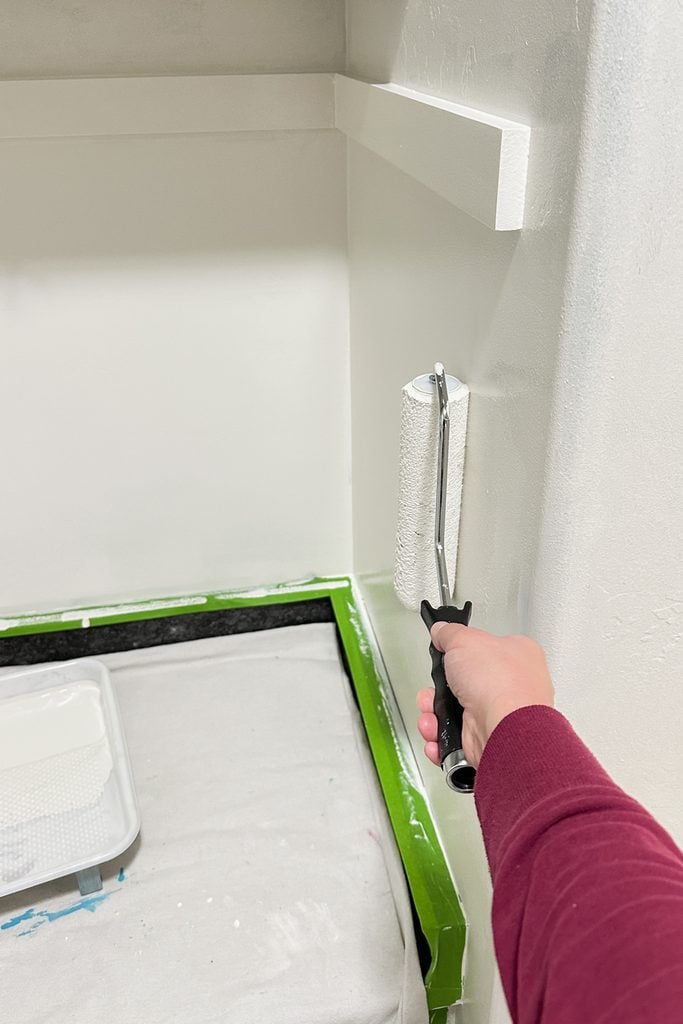
I also painted the wall behind this whole area the same creamy gray color called Classic Grey I used in the other parts of the laundry room and the rest of the main area of our house.
Then instead of leaving this wall blank… and a cheaper option than buying more cabinets, I made some shelves out of 2×12″ pine boards to put on the side of the cabinet. I hung up blue painter’s tape to mimic the shelves so I could decide exactly where I wanted them.
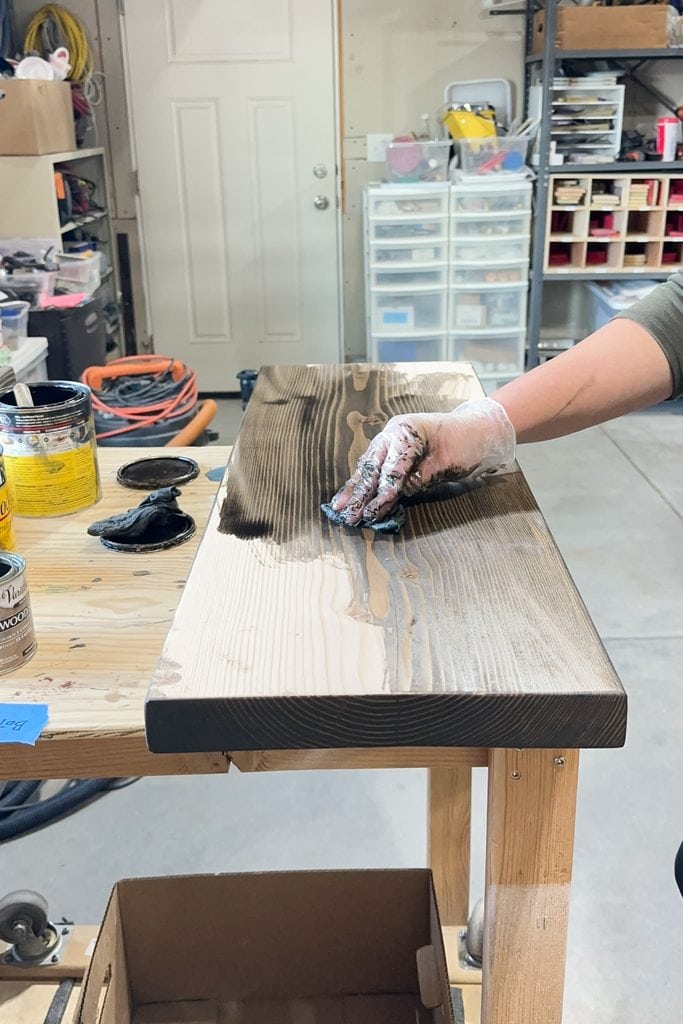
I cut them down to the right length, sanded them smooth, and then mixed Ebony and Dark Walnut stain with some green tinted waterbased stain to get it to match the cabinets without such a red/warm wood tone underneath. There were some little holes in the cabinets from the hanging rod so I used these dark colored wax sticks to fill them in.
After staining the shelves, I used a laser to make sure the shelf brackets were level on the wall. It made it so much easier to hang three shelves, completely level, with even spacing.


Painting the Laundry Room Bench
I originally wanted to remove the small original bench area, but the builder put the bench in first and then did the flooring around it. Removing it would leave a big gap in the floor. Since we’re on a budget, I worked around it and turned it into a really fun focal point.
All of this was made with MDF, not real wood. MDF is harder to work with because it can bubble and expand, especially if it gets wet (waterbased products.) So to fix the holes left behind after removing the old hooks, we used a couple of applications of Bondo wood filler and sanded it smooth.
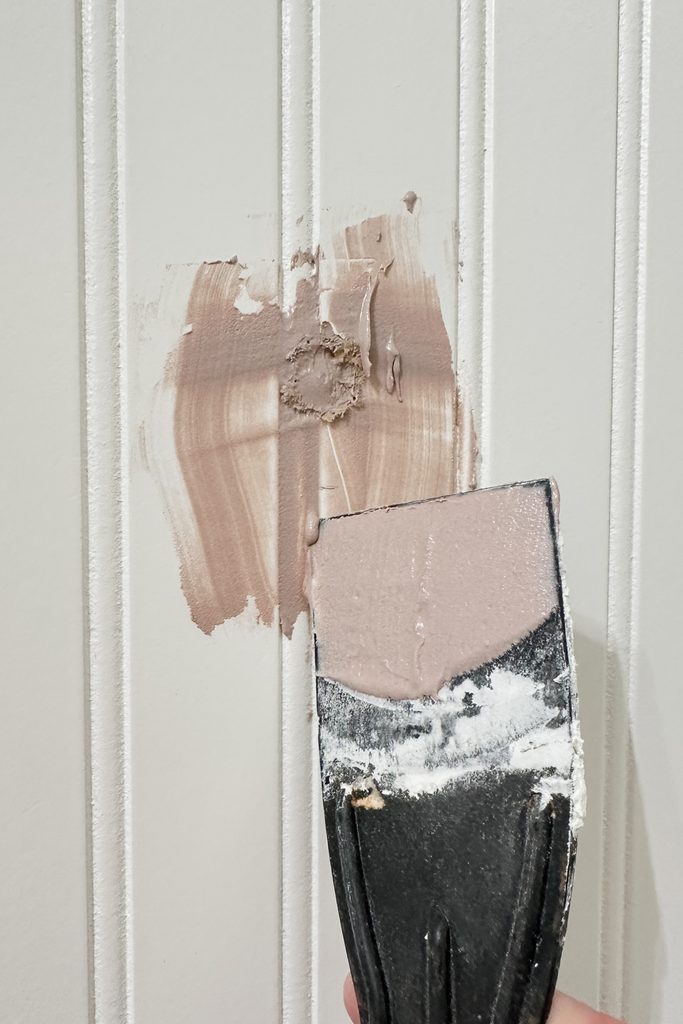
We also fixed some damage with regular wood filler, caulked the cracks on the edges, cleaned everything really well with Krud Kutter, and lightly sanded the surface with 220 grit sandpaper to get it ready for paint. Then we vacuumed off the dust and wiped everything down with a tack cloth.
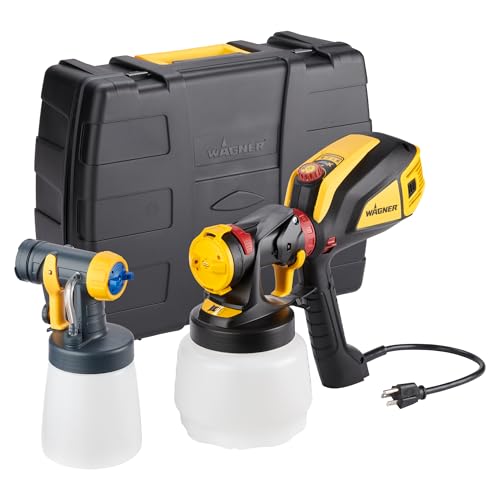
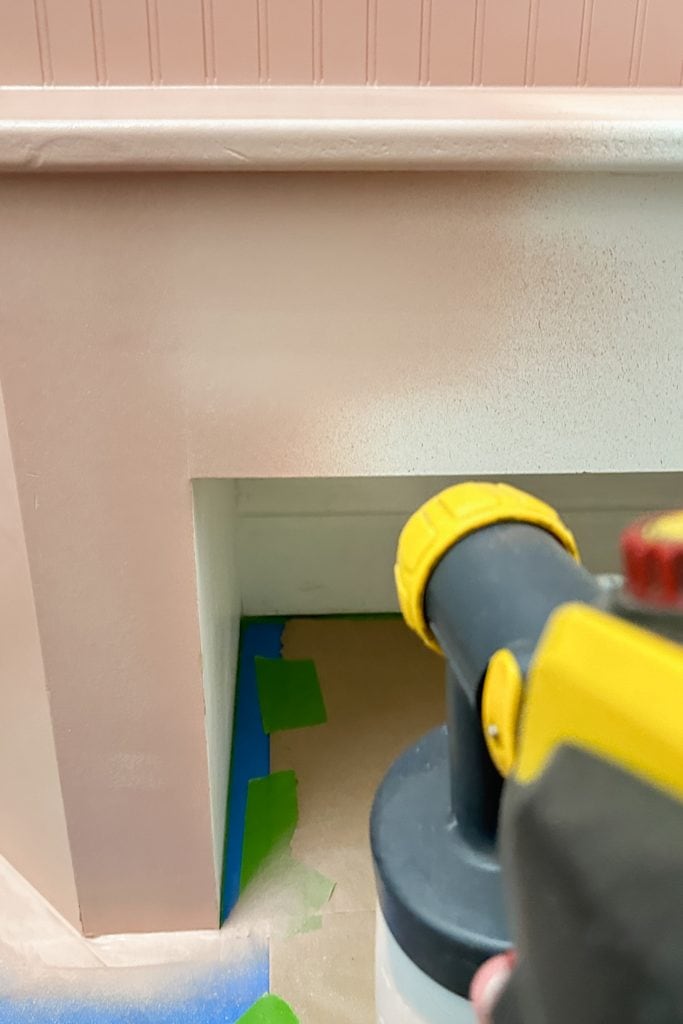
Instead of brushing and rolling around all the grooves and details in this bead board and trim, we sprayed the paint onto the bench area. I taped everything off with green FrogTape (it’s the best to prevent paint bleed seeping under the tape) and pre taped plastic (to keep the spray off of surrounding areas), and some brown paper roll, then sprayed a couple of coats of Sherwin Williams Emerald Urethane Trim Enamel with my Wagner 3500 sprayer. I used a pretty muted salmon pink color called Cabbage Rose that went with the accent rug in our living room. Check out my Wagner 3500 paint sprayer review here for more info on this sprayer.
Budget Laundry Room Makeover Before and After
I decorated the bench with an adorable mirror, a plant, and a couple of cute accent pillows, and it’s so stinking cute now. Underneath, we store the kids’ socks so they can grab them when they’re putting on their shoes. Here are painted bench ideas for more inspiration.
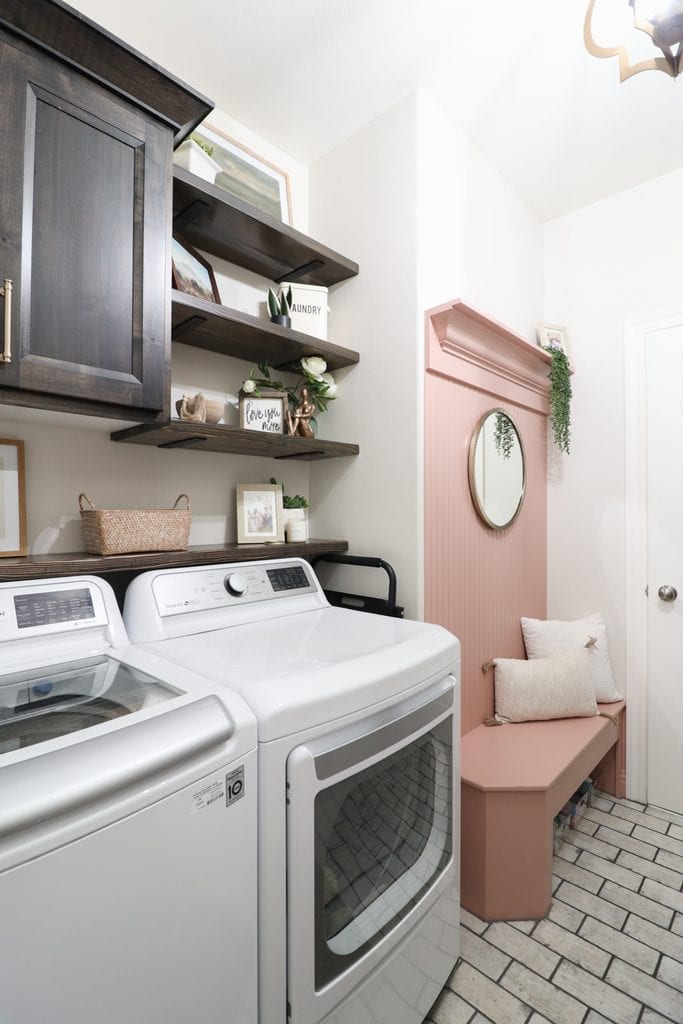
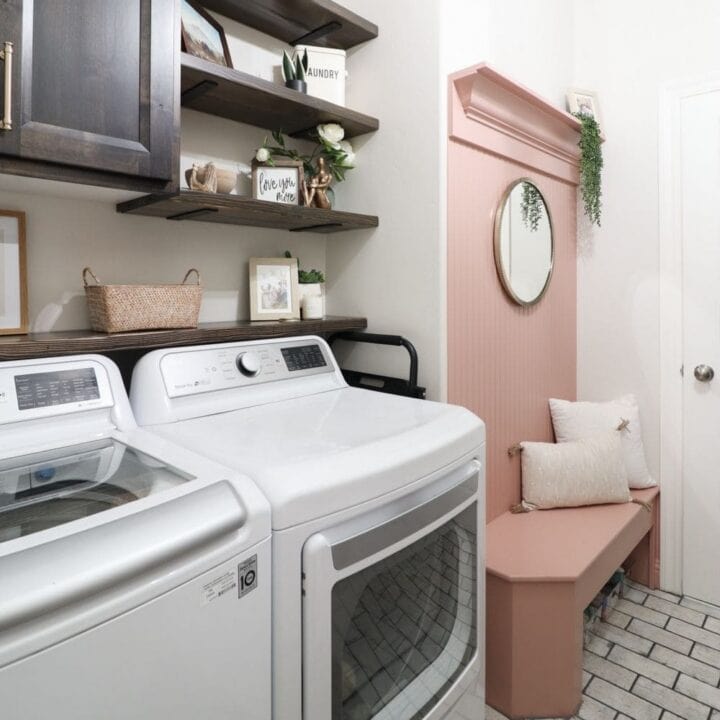
In the end, we spent just under $500 on the ENTIRE laundry room makeover. It looks like a completely different room, but more importantly, we now actually have a place for our backpacks, coats, shoes, snow gear, and to do laundry. It feels so nice to walk into this space and not feel like I’m going into a dungeon every time, tripping over shoes left in the walkway. (Okay who am I kidding, kids are still kids haha.)
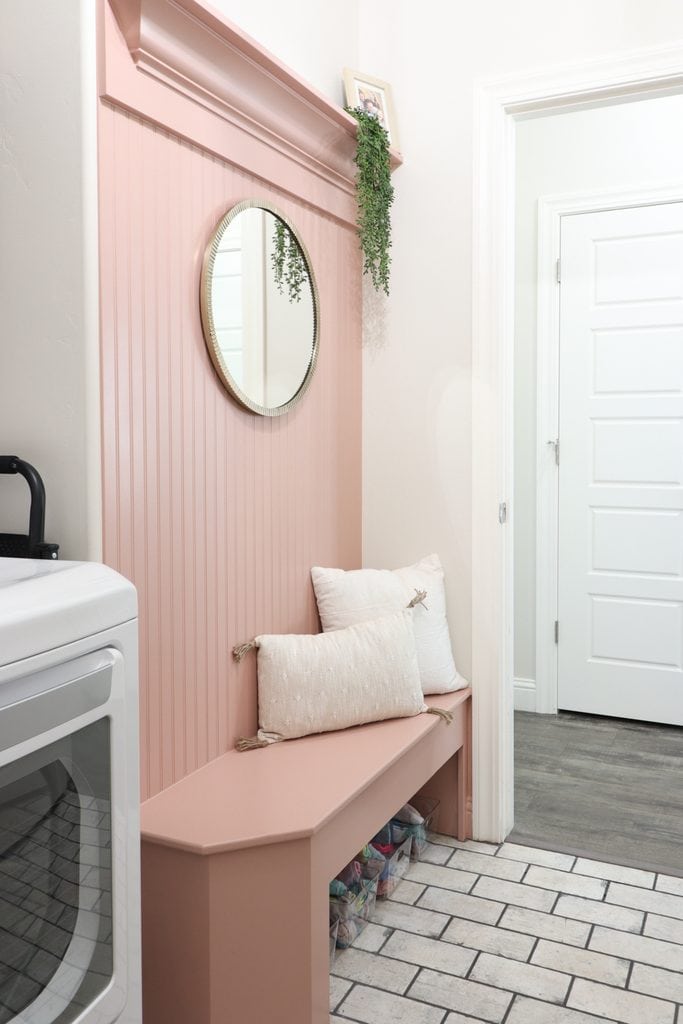
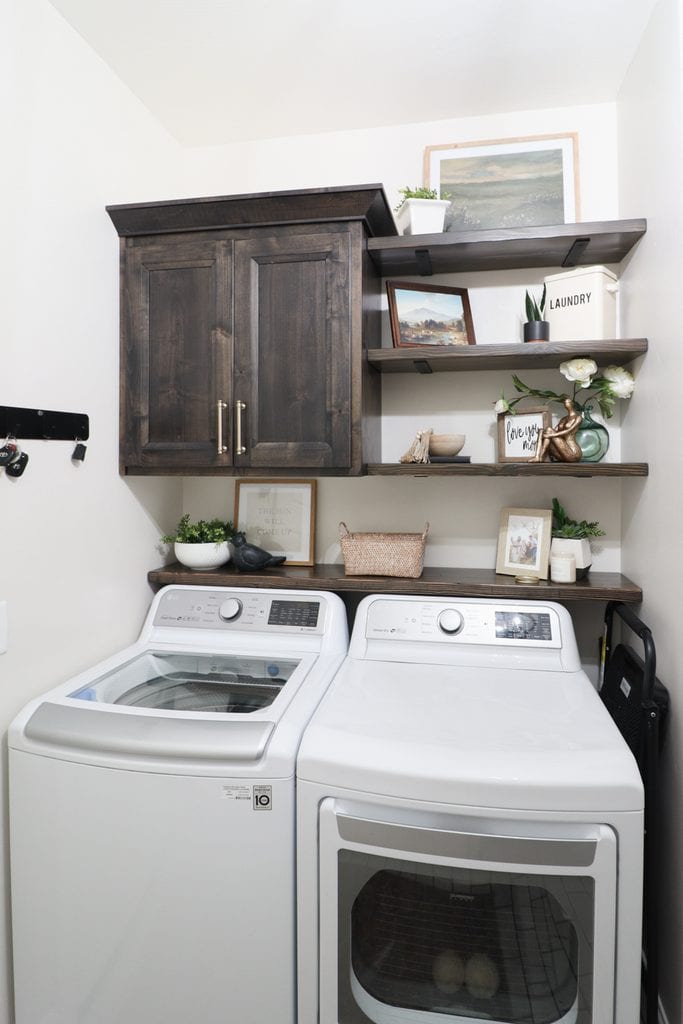
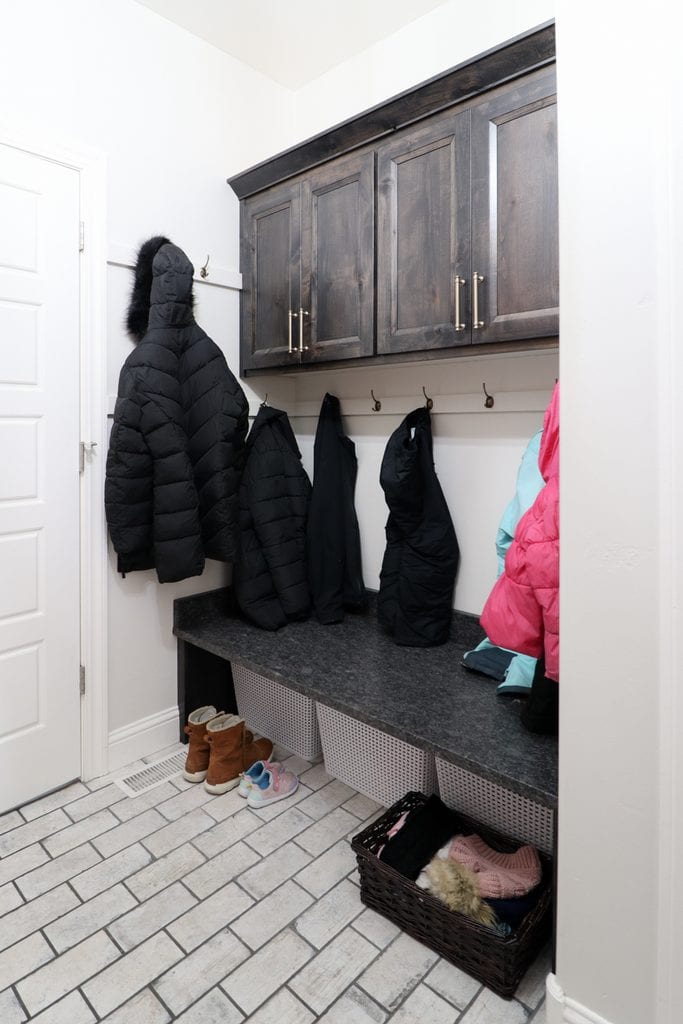
And it’s fun to see what you can create! You can turn a space from something ugly, outdated, and not functional into something unique to you that meets your needs. There’s just nothing like it.

$500 Laundry Room Makeover
This laundry room makeover is a budget friendly update that turned a cramped space into a cute and functional room with DIY storage.
Materials
- Spackling
- Sherwin Williams Latex Paint
- Clear Caulking
- Hooks
- 1×4″ Wood Boards
- Primer
- Storage Baskets
- 2×12″ Pine Boards
- Painter’s Tape
- Ebony Stain
- Dark Walnut Stain
- Green Tinted Waterbased Stain
- Dark Wax Sticks
- Shelf Brackets
- Bondo Wood Filler
- Wood Filler
- Caulking
- Krud Kutter
- 220 Grit Sandpaper
- Tack Cloth
- Green FrogTape
- Pre Taped Plastic
- Sherwin Williams Emerald Urethane Trim Enamel
- New Cabinet Hardware
- Mirror
- Plant
- Accent Pillows
Instructions
- Use a utility knife to cut through the caulk, remove the countertop, and pry the wood braces off the wall. Use a table saw to cut everything down to bench height, then put the countertop back in.
- Fill in all the holes and paint the whole section. Put the countertop back in and move any outlets that are now in a weird spot.
- Attach one by four inch wood boards to the wall, making sure they are screwed into the studs. Prime and paint the boards to match the wall, then screw the hooks directly into them.
- Put storage baskets underneath the deep bench to make use of all that space. Use them to store anything that needs a place to go and keep the area more organized.
- Remove the hanging rod area and unscrew the cabinet above the washing machine from the wall. Patch the holes, move the crown molding to the top, and reattach the cabinet higher or lower depending on your preference.
- Paint the wall behind the washer and dryer, then use blue painter's tape to mimic where you want the shelves. Move the tape around until you decide exactly where you want them.
- Use pine boards for the shelves and stain them to match the cabinets. Mix Ebony and Dark Walnut stain with some green tinted waterbased stain to keep the wood tone from being too warm.
- Use a laser to make sure the brackets are level on the wall. Hang the three shelves above each other with even spacing.
- Remove the old hooks from the bench area and fill the holes with Bondo wood filler. Fix the other damage with regular wood filler, caulk the cracks, and sand everything smooth.
- Clean everything really well and lightly sand the surface. Vacuum off the dust and wipe everything down with a tack cloth.
- Tape everything off with green FrogTape and pre taped plastic to protect the floor and walls. Spray a couple of coats of Sherwin Williams Emerald Urethane Trim Enamel.
- You can decorate by adding a mirror, a plant, and a couple of cute accent pillows.
Recommended Products
As an Amazon Associate and member of other affiliate programs, I earn from qualifying purchases.


More Furniture Makeover Ideas
- Buffet Turned Into Bathroom Vanity
- The Easiest Way to Paint Furniture (It Took Me One Day)
- Painting A Kitchen Bench
Follow us on YouTube to get more tips for painting furniture. Or share your project with us on our Facebook Group and be part of our community. See you there!