
I Hated Restaining Furniture Until I Tried These Time Saving Hacks
I used to hate staining furniture, so when I started figuring out how to restain a dresser faster, I was shocked! I’ve tried many refinishing furniture techniques over the years, but between stripping old finishes and trying to get the stain color even, it always felt like a headache.
When we brought home this $75 dresser, boy, was it in rough shape. I thought I knew how this makeover would go, but these time saving furniture refinishing hacks blew me away!
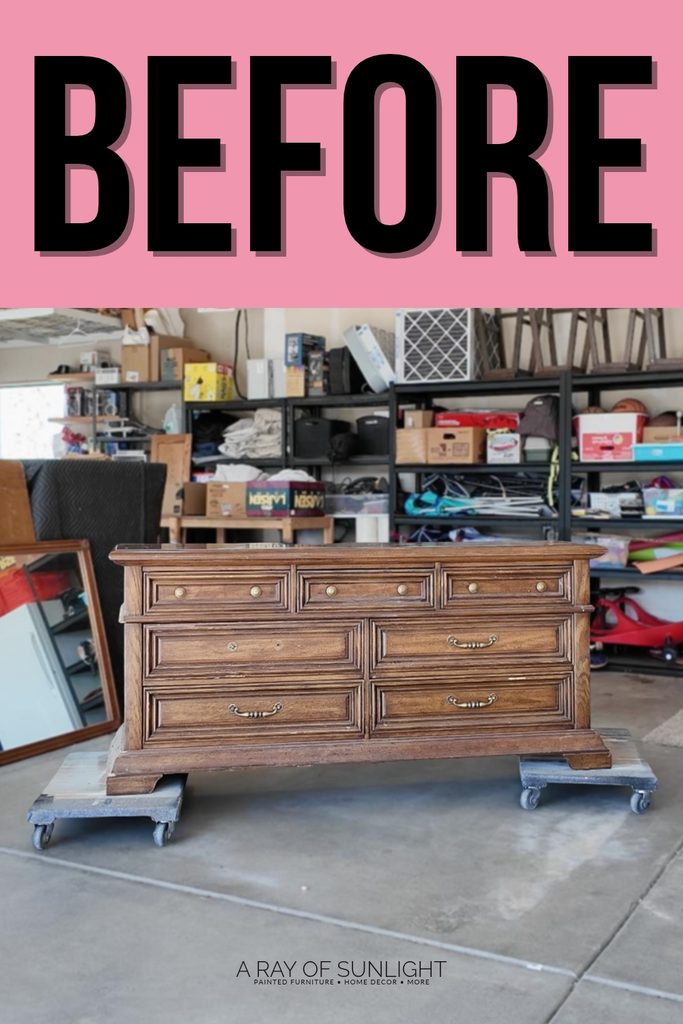
Welcome to Furniture Fixer Upper day, where we join 4 of our talented furniture friends and bring you brand new makeovers! I’ll link to my friend’s makeovers after our after photos at the bottom of this post! Don’t forget to check out their masterpieces!! Okay, back to our makeover!
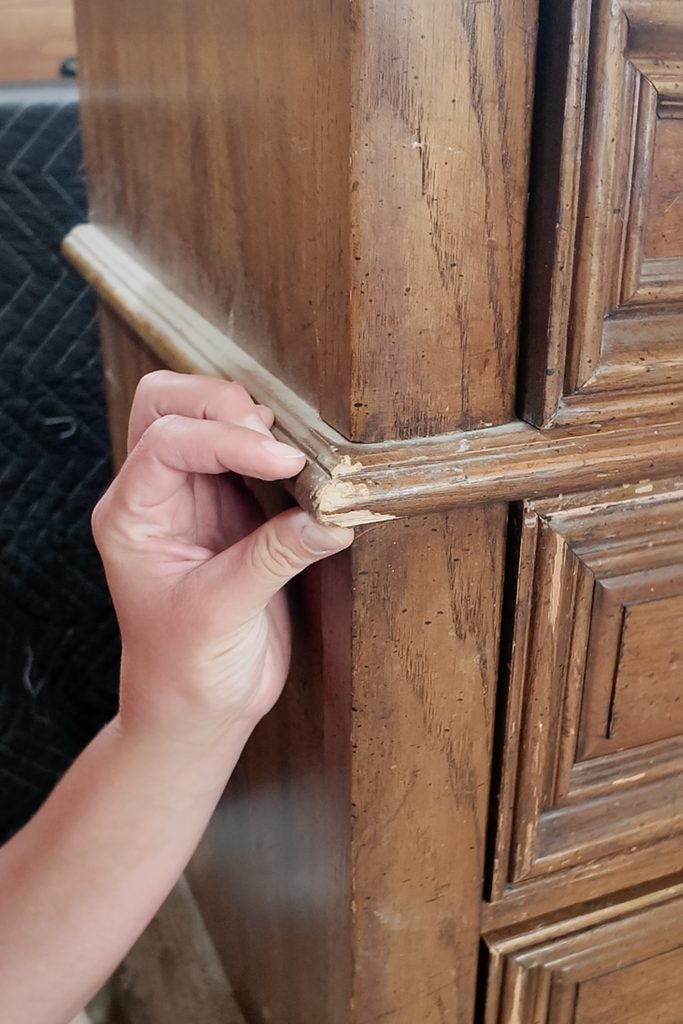
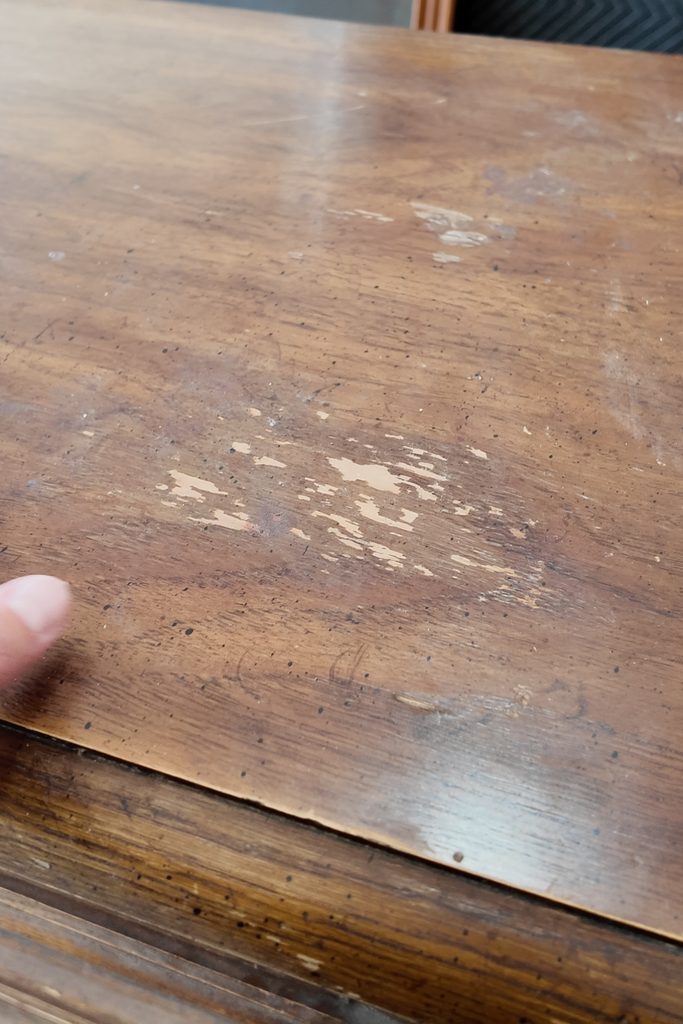
The corners were damaged, there were scratches all over, and the old finish was coming off. And oh my goodness, it was so gross inside and out! But the shape of this dresser was just so good! It’s giving me all the pottery barn vibes!
We had bought another dresser at the same time, and I’d already tried removing the old finish with acetone on that one. Check it out in this post on refinishing a wood dresser with acetone and paint wash. It worked so well, just like it had on a sofa table I’d refinished before. Check out the sofa table makeover here. So naturally, I figured it would be a piece of cake on this dresser too.
Well, not exactly! Once we removed the hardware and got started, I realized this finish was different, and it wasn’t coming off nearly as easily as I’d hoped. But that was only the beginning of this makeover!

Supplies Used for Restaining Furniture
As an Amazon Associate, I earn from qualifying purchases. I also may earn from other qualifying purchases with other companies or get free product to review and use. All opinions are my own.
- Shop Towels
- Acetone
- Nitrile Heavy Duty Gloves
- Plastic Bristle Scrub Brush
- Carbide Scraper
- DeWalt Orbital Sander
- Sanding Screens
- Foam Sanding Pad
- 120 Grit Sandpaper
- Shop Vac
- Tack Cloth
- Bondo Wood Filler
- Wood Filler
- Mohawk Blendal Sticks
- Drop Cloths
- PreTaped Plastic
- Paint Sprayer
- Behr Special Walnut Wood Stain
- Fusion Mineral Paint in Bayberry
- Varathane Waterbased Polyurethane
- Black Chalk Paint
- Brown Paper Bag
- New Hardware
- New Knobs
How to Remove Old Finish From Wood Furniture
Taylor and I taped the drawer pull holes from inside, then laid shop towels over the wood. We put on our heavy duty nitrile gloves and poured on plenty of acetone so it would take a while to evaporate. The key on this finish was to let the acetone soak in for at least a few minutes.
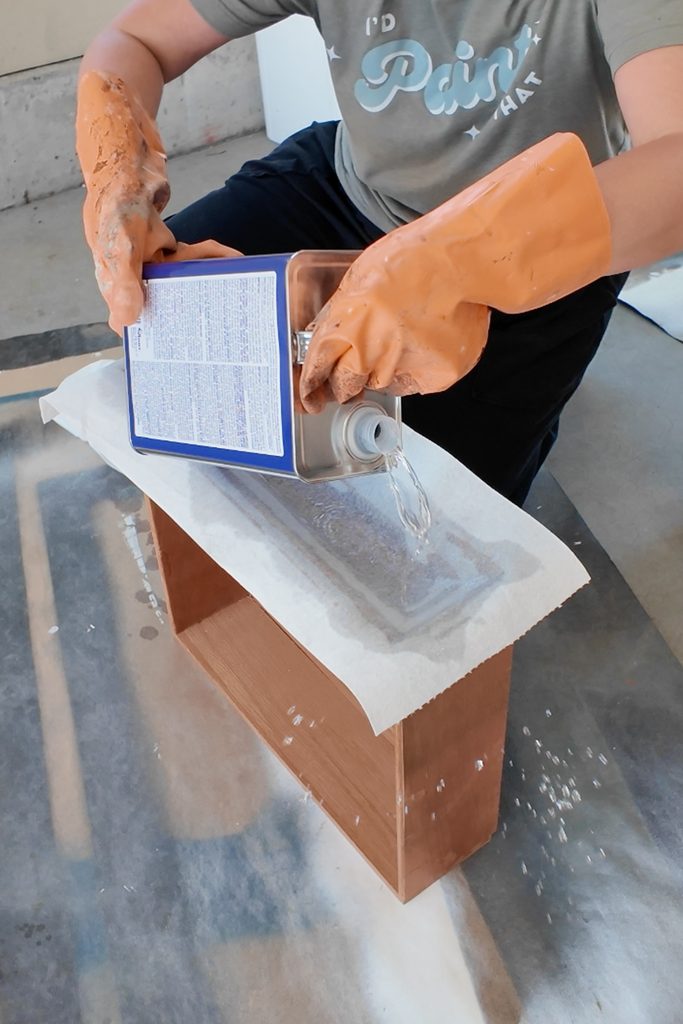
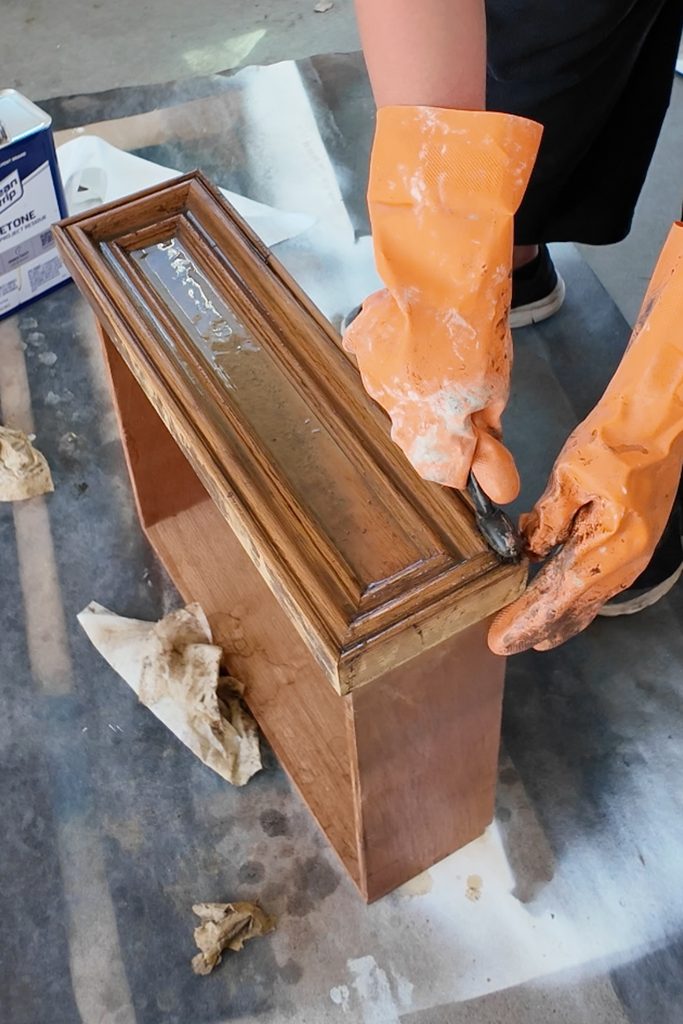
We used a gallon and a half of acetone on this dresser, compared to just one gallon on the last one. I think this finish was thicker, so the acetone took longer to eat through it. It took about twice as long to eat through the finish and we had to scrub a little more with a plastic bristle brush to get all the finish off.
Still, it blows my mind how quickly acetone removes old stain finishes! But since we were working on a hot day, the acetone kept drying too fast and running over the edges on the top of the dresser. After soaking the top in acetone, I also used our carbide scraper to remove the old finish.
How to Sand Furniture Faster
There were still a few rough spots and tiny areas where some old finish was left behind, so we sanded everything smooth. I started sanding by hand, but this dresser had so many curves and little details that my arm was tired after five minutes! Plus, there was dust flying everywhere.
So I used our DeWalt orbital sander with this cheap adapter and a skinny hose that connects to my shop vac, so it collects the dust while I sand. For the flat surfaces, I used regular sanding screens, and for the curves, I used a foam sanding pad. The foam bends around all those details so you don’t sand them away. I love these things!
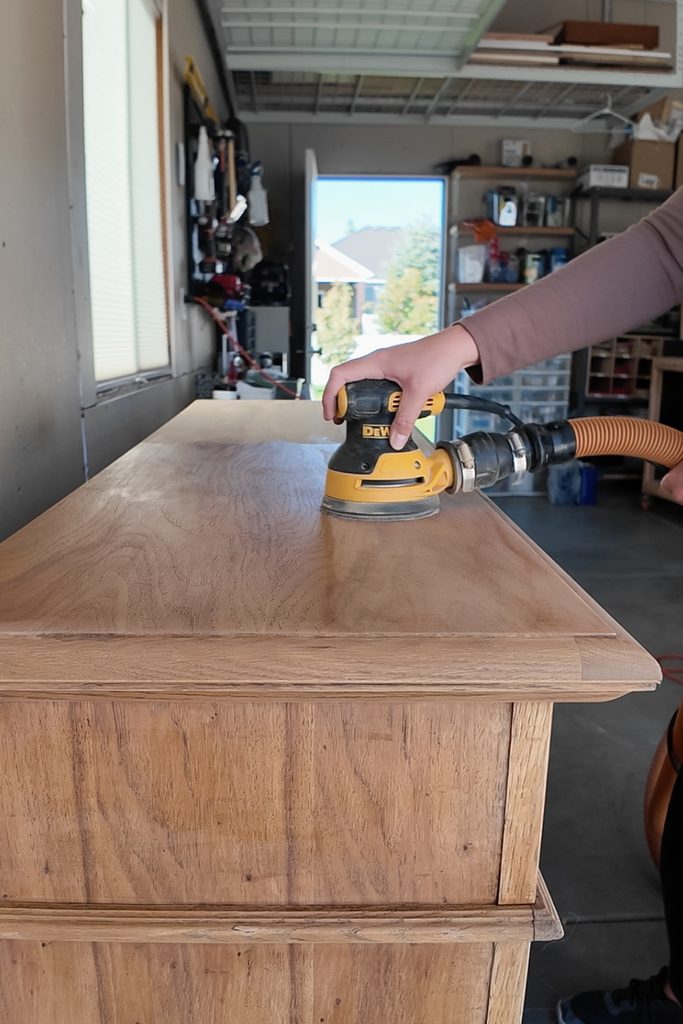
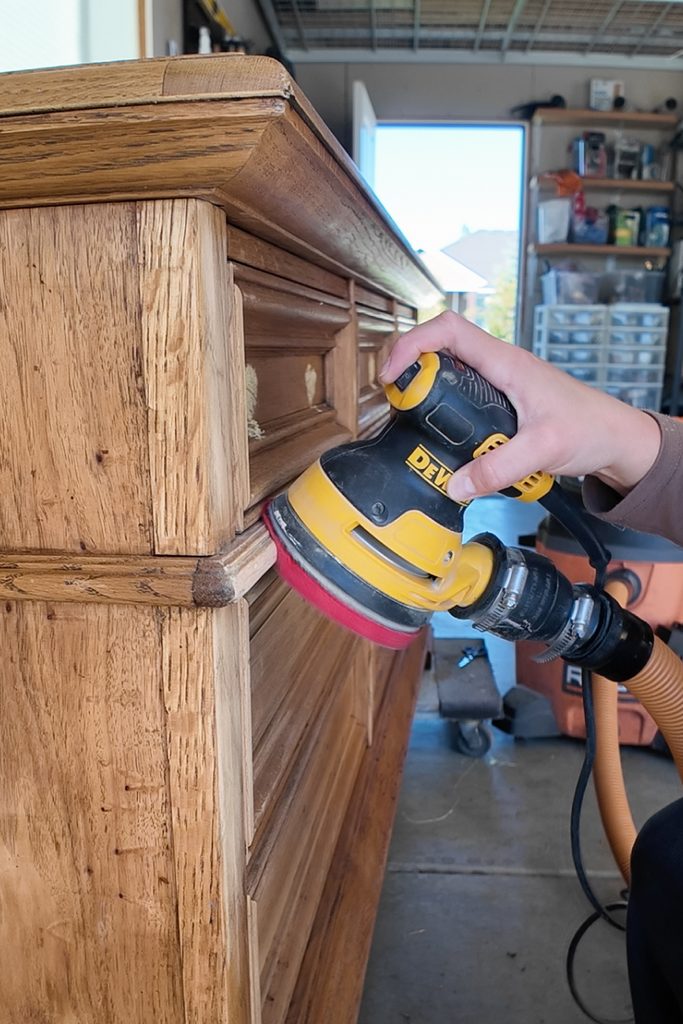
This cheap foam pad is the easiest way to add a foam pad to your sander. For an upgrade though, I prefer these 1/2″ foam pads that are way more flexible (Use code RAY10 to get 10% off your order).
I sanded some stubborn spots by hand with 120 grit sandpaper, then went over everything with a fine 220 grit foam pad. I didn’t go crazy here, just enough to get everything feeling smooth. That’s what I love about acetone instead of regular stripper. It doesn’t leave much to be sanded down, and makes the project SOOO much faster.
Then I vacuumed up the dust with the brush attachment and wiped the remaining dust off with a tack cloth so the dust wouldn’t get under my finish.
How to Restain Furniture
Before staining, I needed to fix the hardware holes on the top three drawers. Each drawer had two knobs, and I hate that because pulling from one side makes the drawer open unevenly! So those two knobs per drawer had to go.
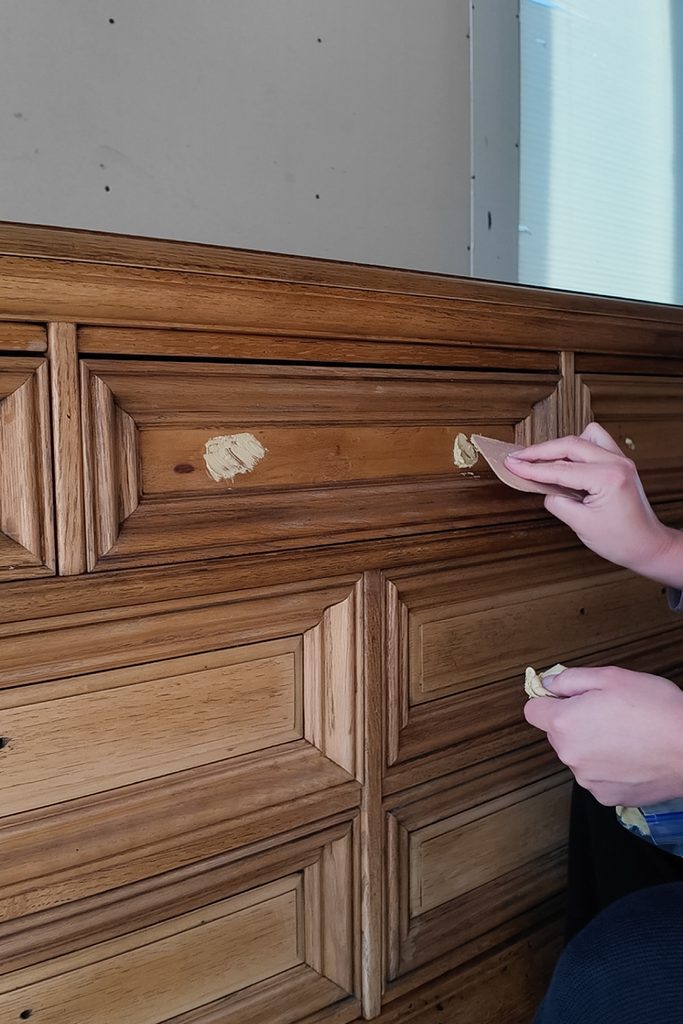
I filled the holes with Bondo wood filler this time because it dries faster than Kwikwood and I was outside, where I can use stinky Bondo without stinking up my house. After about 30 minutes, I sanded everything down, then filled the tiny divots left behind with regular wood filler. But now those filled holes were a completely different color from the wood!
Would you like to save this?
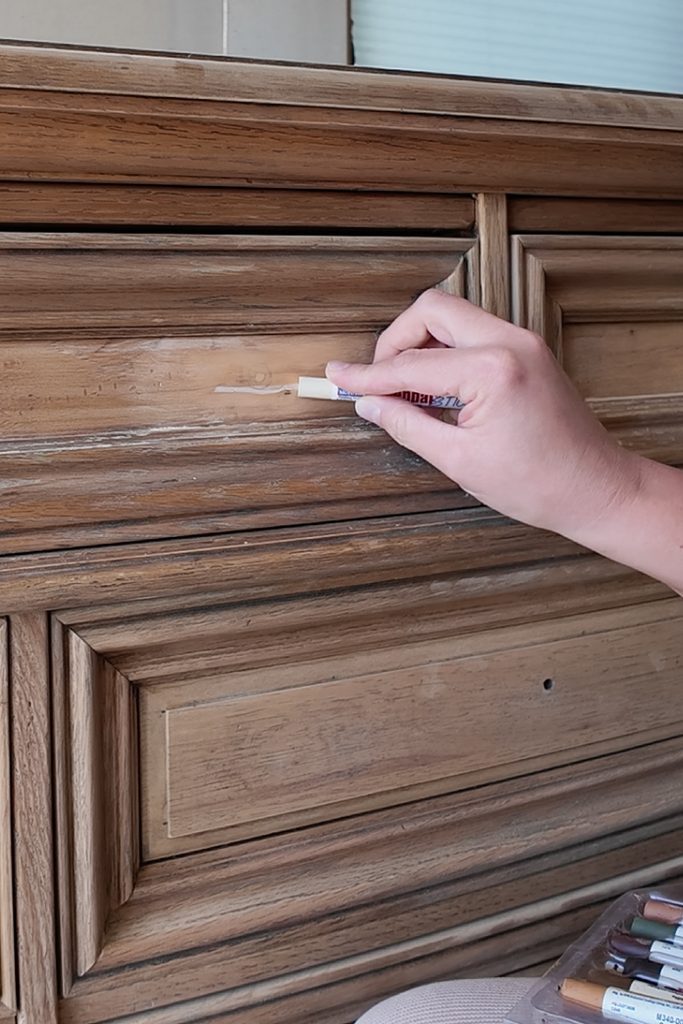
And stain doesn’t soak into wood filler the same way as real wood, so those circles would stand out like a sore thumb. But here’s my trick: I grabbed four or five shades of blending wax sticks and started coloring over the filled areas, layering and smudging the colors together. It wasn’t perfect, but natural wood isn’t perfect either!
Next, I needed somewhere to spray, but I didn’t want to drag out my spray tent. Instead, I have the 3rd bay of the garage dedicated to my projects, so I hung a drop cloth and used another one to cover the floor underneath. Simple and easy!
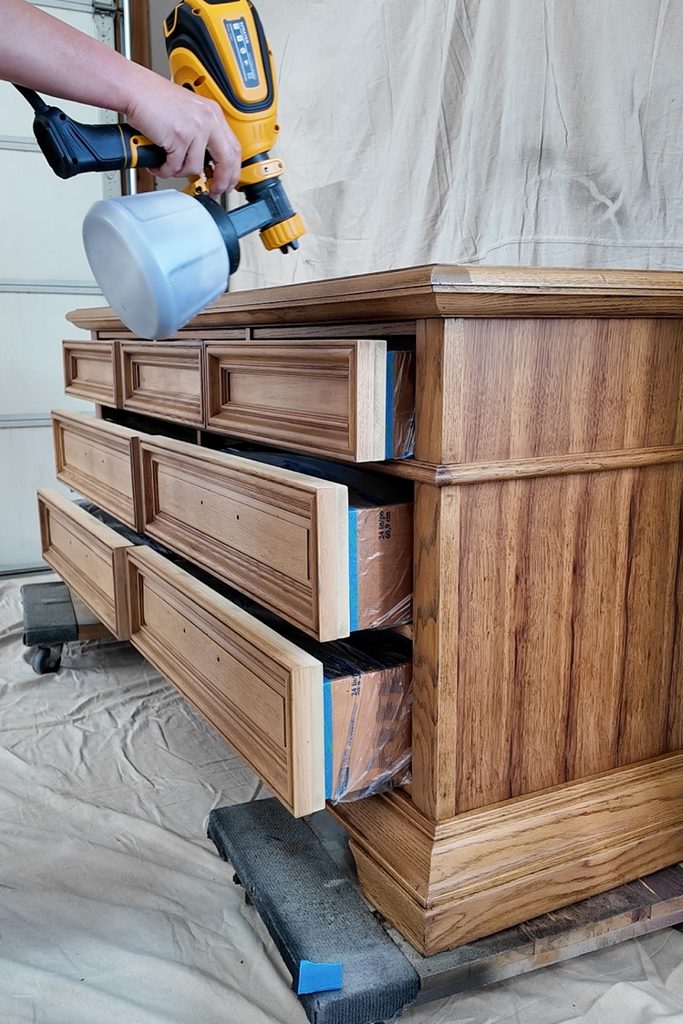
And here’s another trick I use when spraying furniture. I leave the drawers inside the dresser because it saves floor space and keeps me from bending over. I wrap them with pretaped plastic, then pull them out and stagger them when it’s time to spray the edges of the drawers.


How to Get Even Wood Stain Color
Now for the trick that’s BLOWING MY MIND! On my last project, I was struggling to get the stain even because it was coming out splotchy with brush marks everywhere. So I tried mixing some of the waterbased stain into my topcoat and spraying it on instead and it worked SO WELL.
To make my own tinted polyurethane for wood furniture, I mixed Behr waterbased wood stain in Special Walnut and a little Fusion Mineral Paint in Bayberry into my Varathane waterbased polyurethane.
Now I tested it out before I sprayed it on the dresser. I wanted very thin coverage that I could build up over a few coats, so the final mixture was maybe 75% poly with 25% stain mixture.
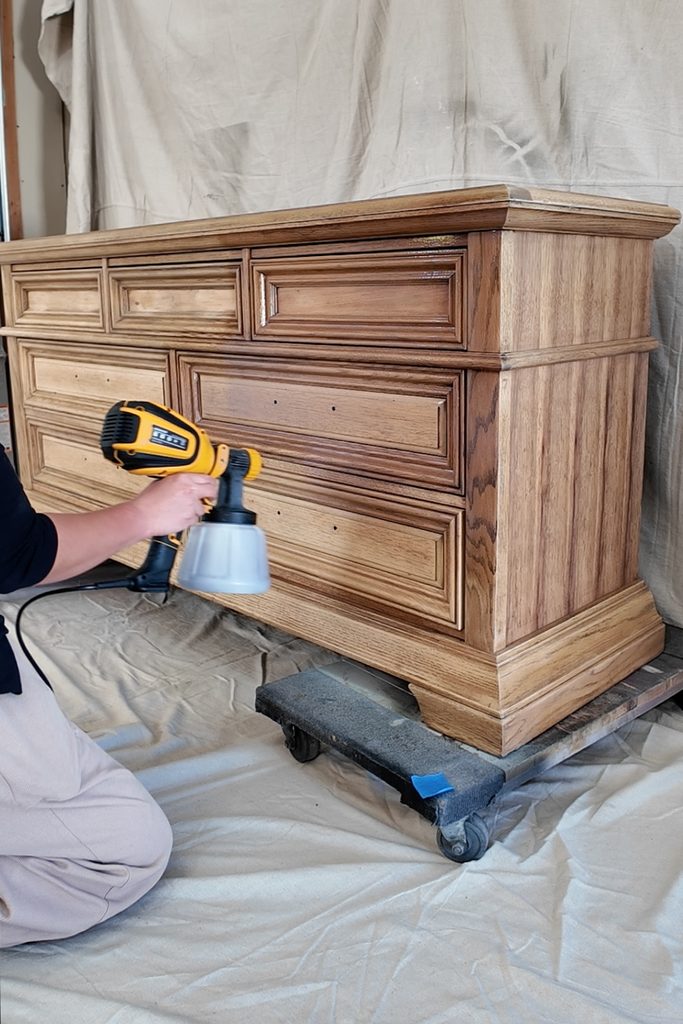
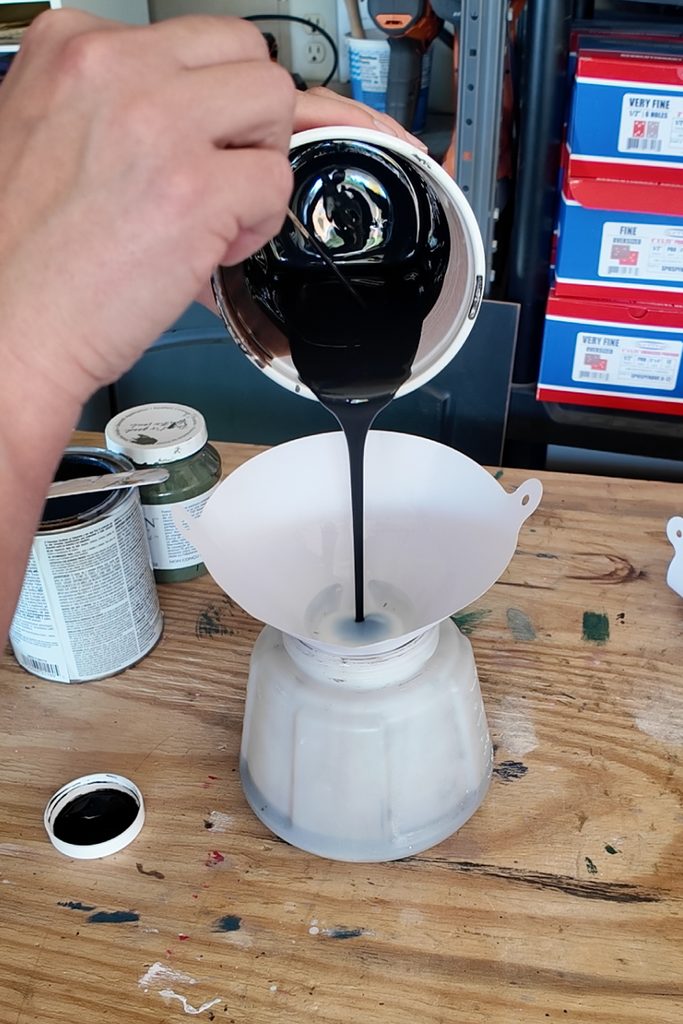
I sprayed several thin coats, but after a few, the color wasn’t getting as dark as I wanted. So I added some black chalk paint, but I added way too much! When I tested it on an oak board, the mixture was very dark (kind of like dark brown paint), so the stain looked splattery, and splotchy.
So I poured out most of the mixture and added more polyurethane, and that was the ticket! I love how the black gave me that darker brown stain color, while the green helped counteract the orange and red tones in the wood.
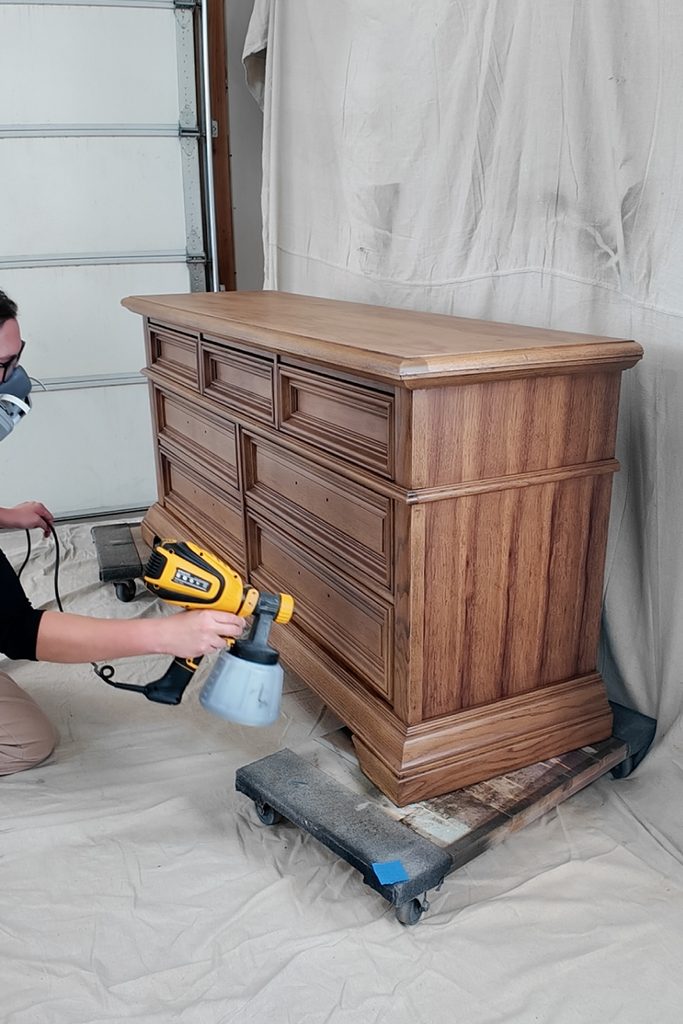
I ended up spraying about five thin coats of the tinted topcoat, and oh my goodness, it looks so good! I sprayed more coats on the lighter wood to make it darker and fewer coats on the areas that were already dark. It’s basically like a homemade toner, so you’re getting an even stain color, and building up the protective coat at the same time!
I had planned to spray another coat of plain polyurethane because I figured the finish would feel rough after spraying. But when I checked it, it was only slightly rough (thank goodness for cooler weather in the fall), so I used my brown paper bag trick instead.
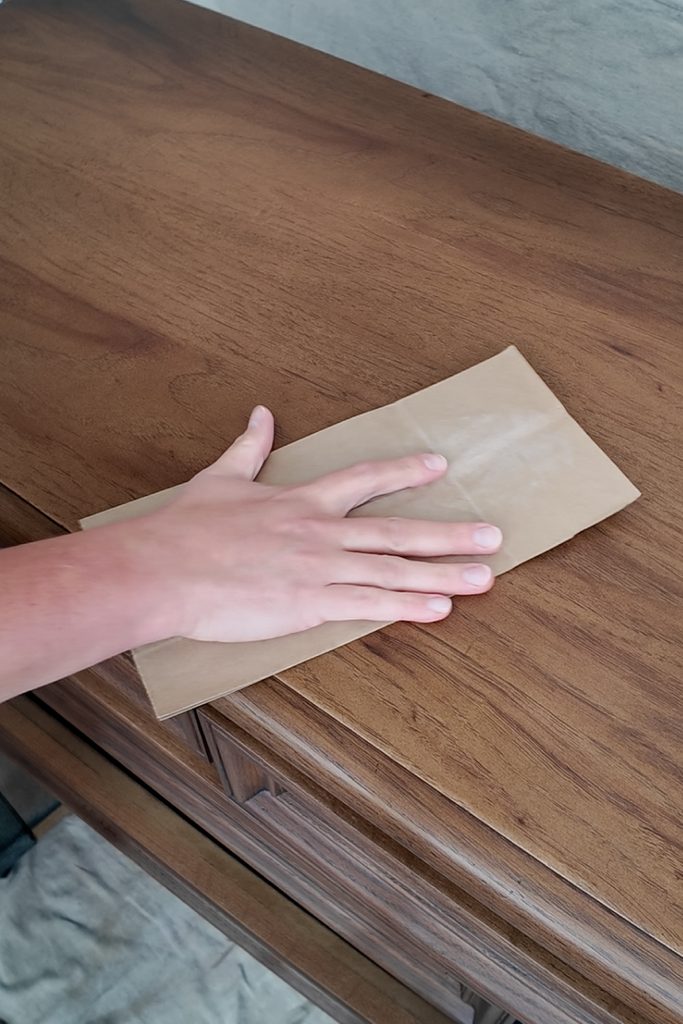
A brown paper bag works almost like really fine sandpaper, but it doesn’t actually sand away the finish or noticeably change the sheen. I rubbed it all over the dresser, and it felt so much better! I wouldn’t say it was silky smooth, but it felt nice and smooth.
Finally, it was time to put the hardware back on. I drilled new holes for the knobs on the top three drawers, then widened the holes on the bottom four drawers because the spacing was a little too narrow for the new pulls.
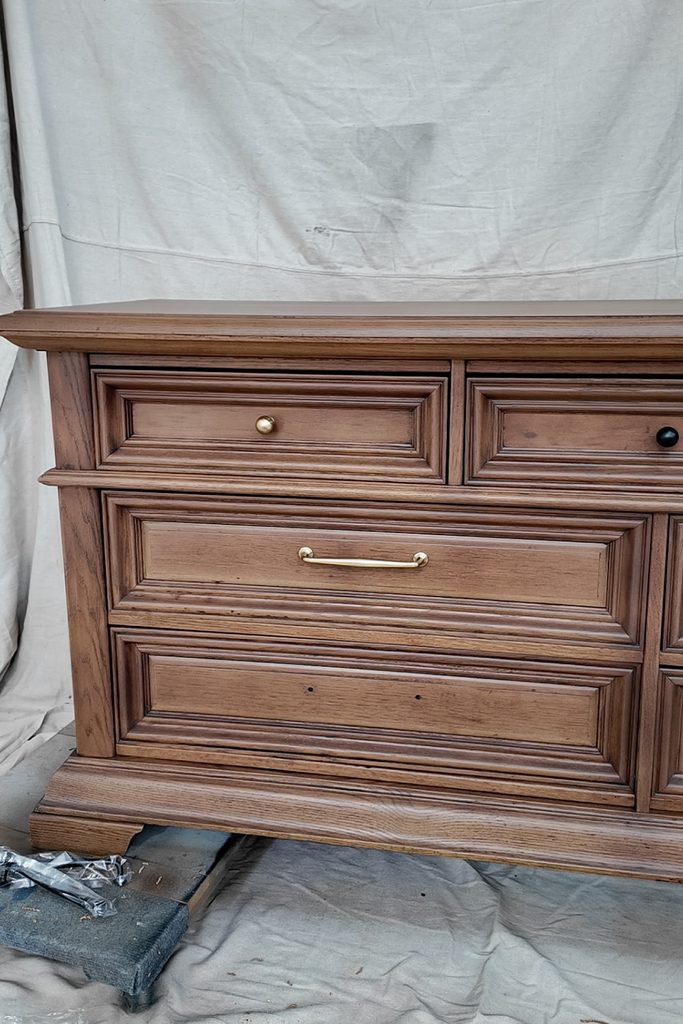
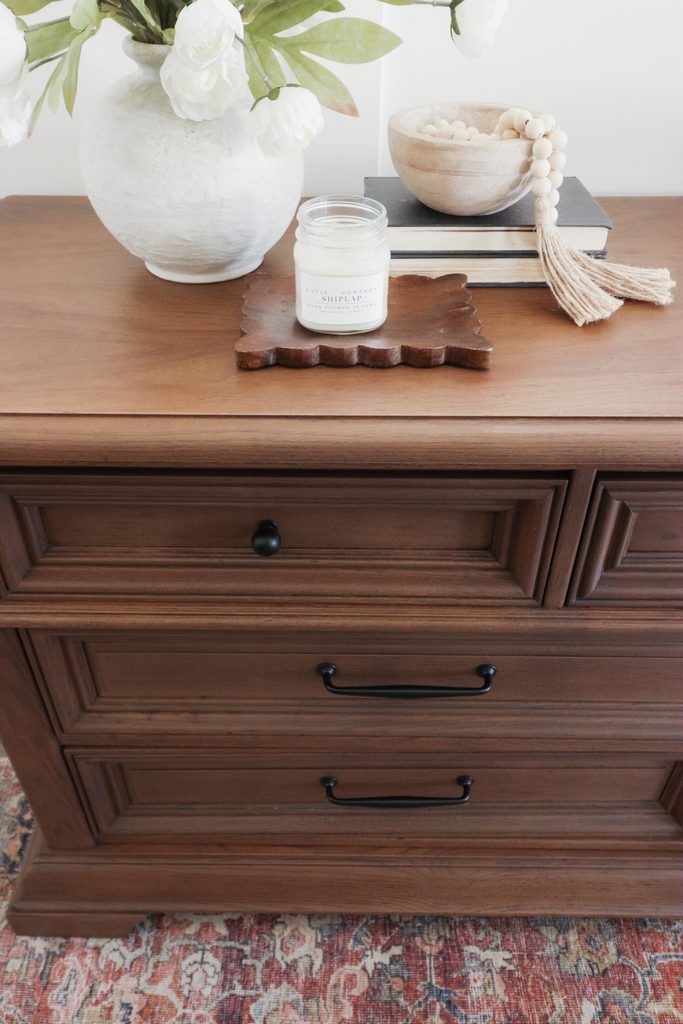
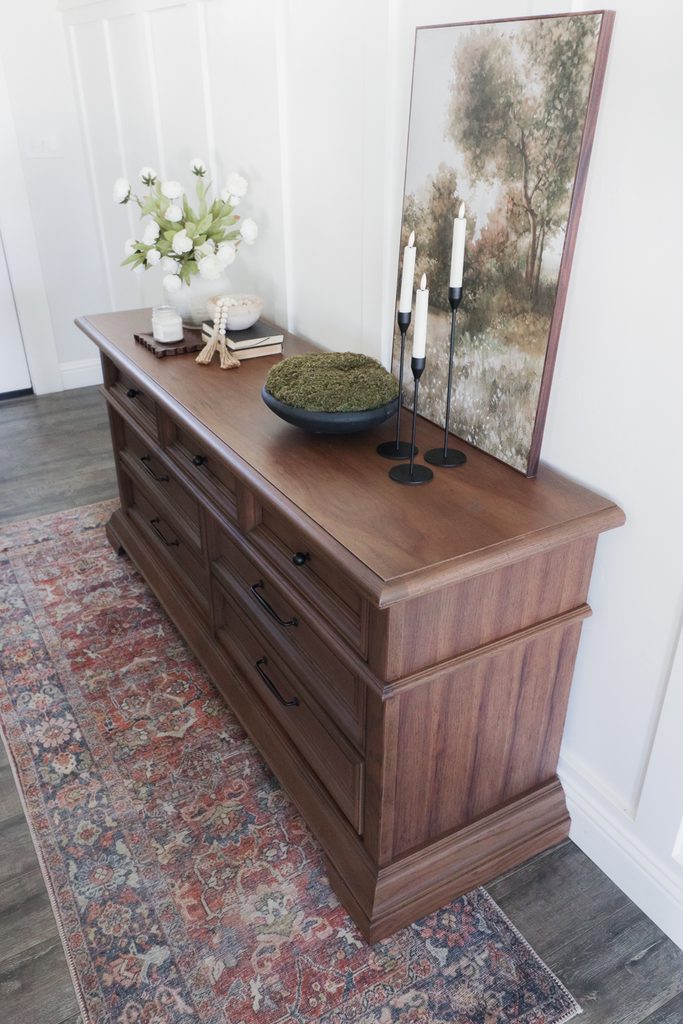
I bought both gold and black hardware to see which looked better against the wood. I ended up choosing black, and I’m still planning to wax the drawer tracks to make these old drawers open and close easier, but I haven’t done that yet. But here’s what the dresser looks like now!
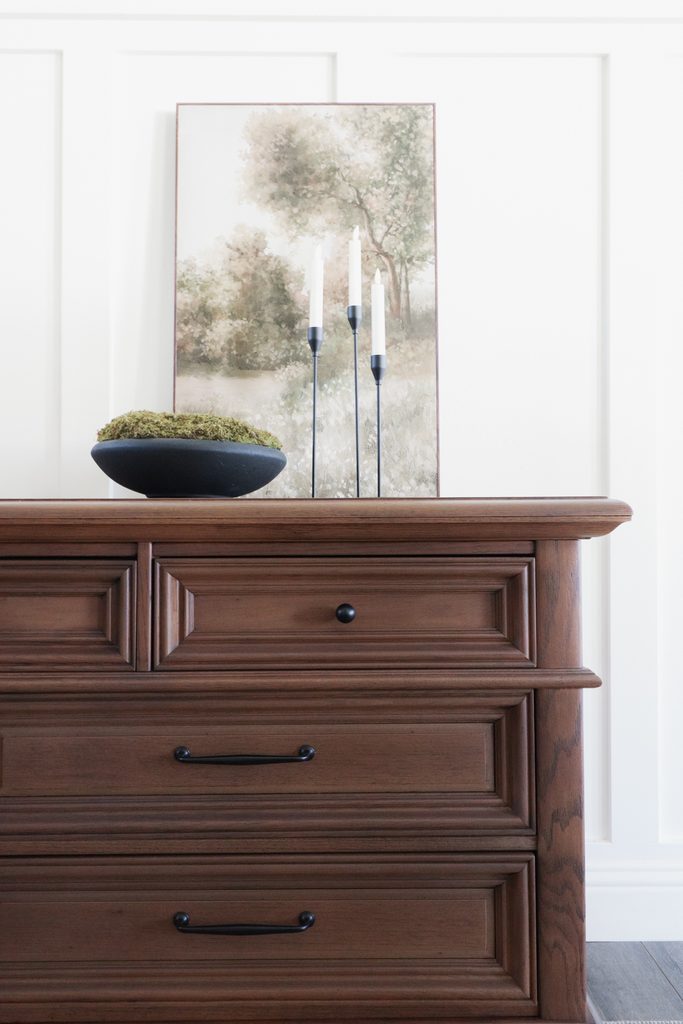
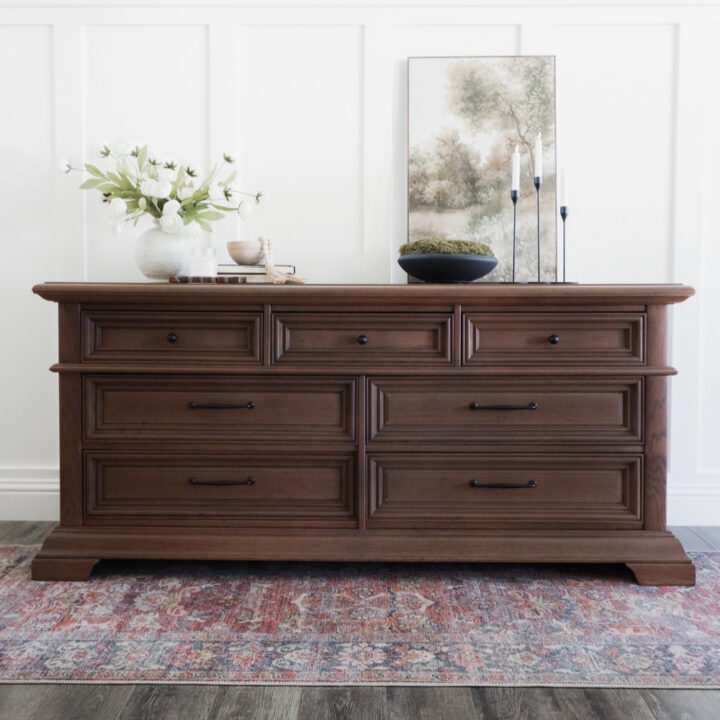
We brought it inside, and the wood looks so fresh and new. It looks like something you’d buy from a store today for around $2000!
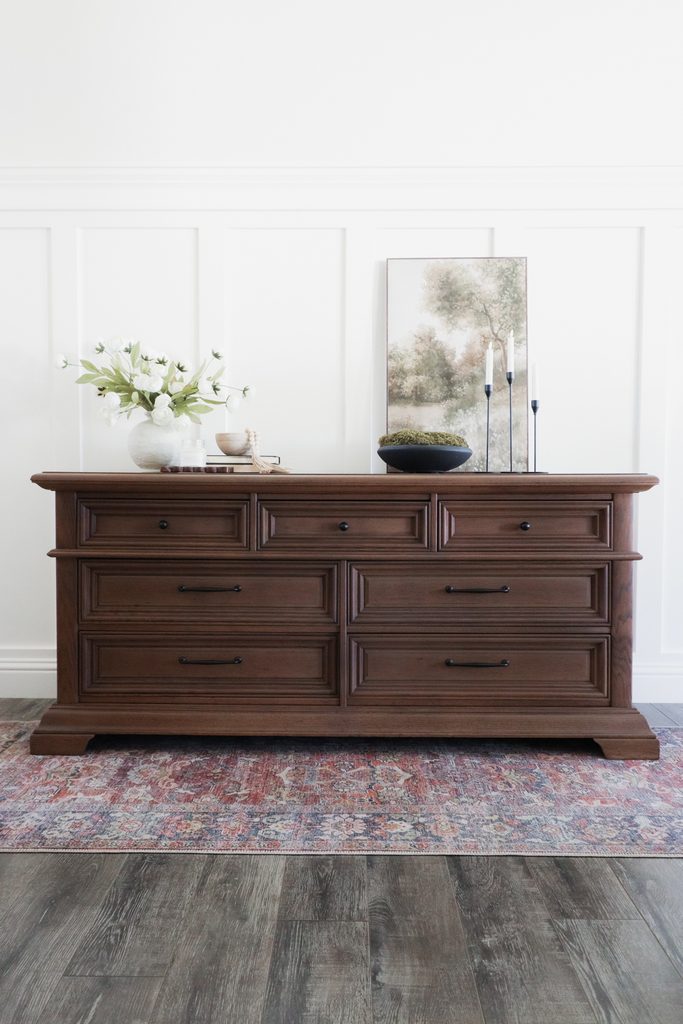
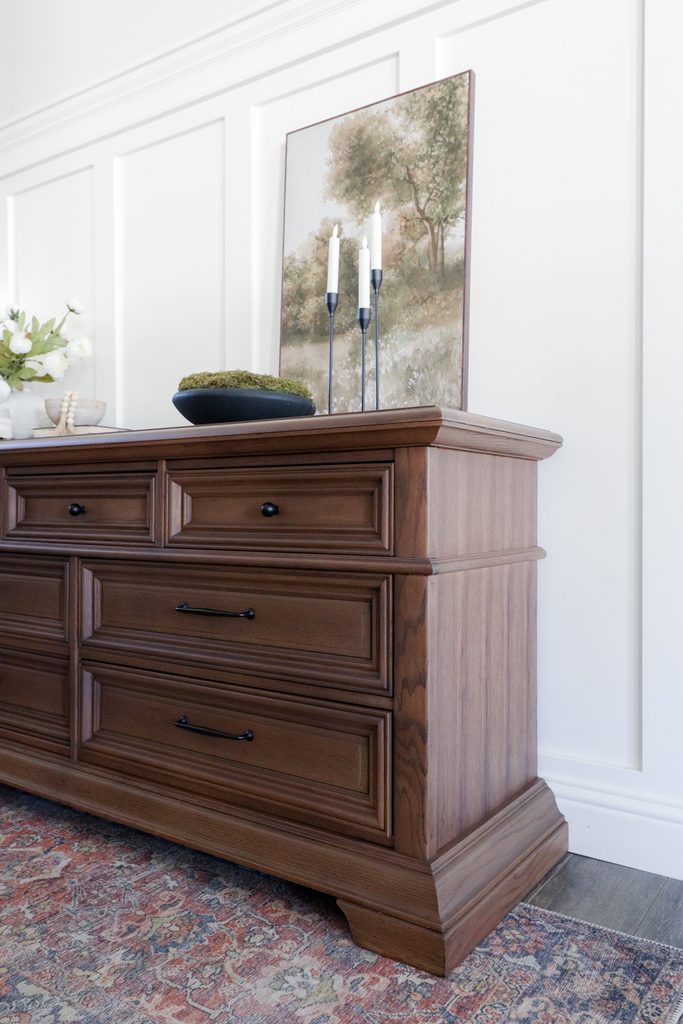
I’m so happy with how even the color turned out, especially since some areas started out much lighter than others. The hardest part was just making sure I got the tinted poly in the color I wanted, but spraying it on was so much faster and easier than spending hours messing with the stain and brushing it onto the wood.
Do you think this looks like Pottery Barn for less??
Don’t forget to check out these other awesome before and after furniture makeovers from my Furniture friends!! (Click the links below the photos!)
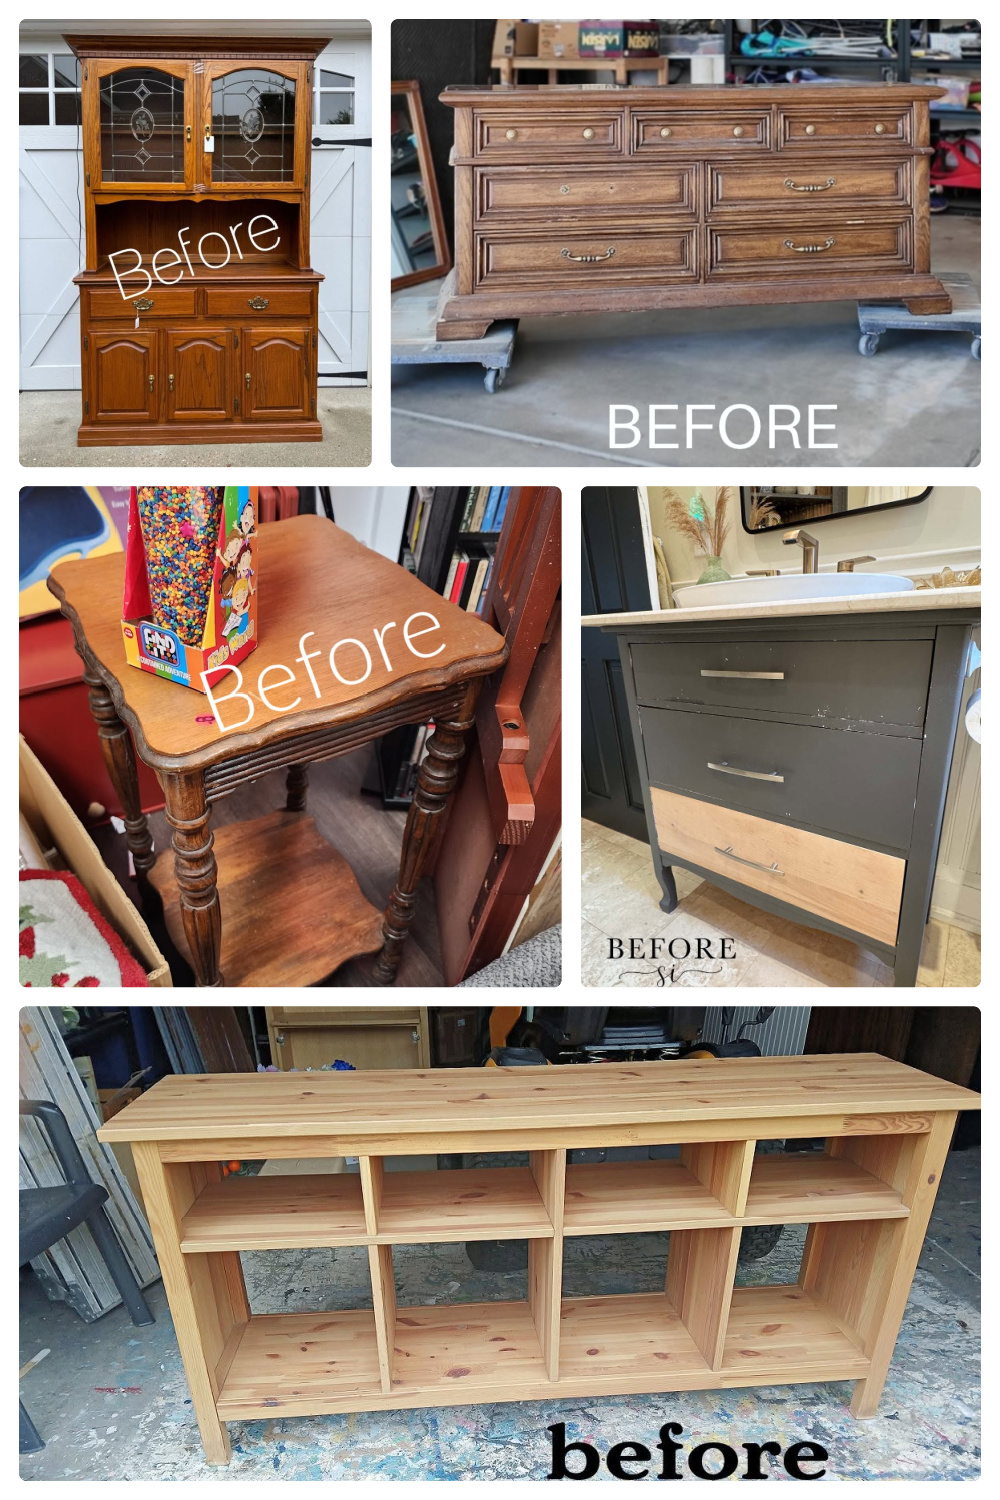
- Painted Oak Hutch Makeover from Confessions of a Serial DIYer
- Quick Refinished Dresser Makeover from A Ray of Sunlight (You are here.😊)
- Vintage Side Table Makeover from My Repurposed Life
- How to Paint a Bathroom Vanity to Look Like Wood from Salvaged Inspirations
- Ikea Console Table Makeover from Petticoat Junktion

How to Restain a Dresser Faster
Learn how to restain a dresser faster with time saving hacks for removing old finish, sanding, and getting an even wood stain color.
Materials
- Shop Towels
- Acetone
- Nitrile Heavy Duty Gloves
- Plastic Bristle Scrub Brush
- Sanding Screens
- Foam Sanding Pad
- 120 Grit Sandpaper
- Tack Cloth
- Bondo Wood Filler
- Wood Filler
- Mohawk Blendal Sticks
- Drop Cloths
- PreTaped Plastic
- Behr Special Walnut Wood Stain
- Fusion Mineral Paint in Bayberry
- Varathane Waterbased Polyurethane
- Black Chalk Paint
- Brown Paper Bag
- New Hardware
- New Knobs
Instructions
- Remove the old hardware from the dresser, then tape the drawer pull holes from the inside so acetone won't leak through.
- Lay shop towels over the wood and pour plenty of acetone onto them. Use a plastic bristle scrub brush to remove the old finish from the grooves and details, then use a carbide scraper on large, flat surfaces.
- Connect your orbital sander to a shop vac with an adapter to collect dust while sanding. Use sanding screens on flat surfaces and a squishy foam sanding pad around the curves and details.
- Sand any stubborn spots by hand with 120 grit sandpaper, then go over everything with a fine 220 grit foam pad. Vacuum up the remaining dust with a brush attachment and wipe everything down with a tack cloth.
- Fill the old knob holes with Bondo wood filler and let it dry. Fill any tiny divots with regular wood filler, let it dry, and sand again.
- Use different shades of blending wax sticks to color over the filled holes. Layer and smudge the colors together until the repairs blend with the surrounding wood.
- Mix Behr Special Walnut waterbased wood stain and a little Fusion Mineral Paint in Bayberry into Varathane waterbased polyurethane.
- Spray several thin coats of the tinted polyurethane. Add black chalk paint to darken the mixture as needed, testing and adjusting with more polyurethane if the mixture is too dark.
- Spray about five thin coats of the tinted topcoat, applying more coats to lighter wood and fewer coats to darker areas to even out the color.
- For the drawers, wrap them with pretaped plastic and leave them inside the dresser while spraying. Pull them out at different lengths to spray the edges, then push them back in for the next coat.
- Once the finish is dry, rub a brown paper bag over the slightly rough areas to make the finish feel nicer and smoother.
- Drill new holes for the knobs and widen the existing holes as needed. Install the new hardware to finish the makeover.
More Refinishing Furniture Makeovers
- How To Refinish Antique Furniture
- Can you Refinish Particle Board Furniture
- How to Make Paint Look Like Stain
Follow us on YouTube to get more tips for painting furniture. Or share your project with us on our Facebook Group and be part of our community. See you there!