How I’m Turning Old Nightstands Into $1,000 for My Bedroom Makeover

If you’re looking for ideas to update furniture that no longer fits your style or ways to make money flipping furniture, this painted nightstand makeover might inspire you. I actually painted these over 10 years ago, and I’ve decided it was time to give them another update and see if I could turn them into a profitable furniture flip.
In this post, I’m sharing this painted furniture before and after, along with these furniture makeover ideas that can completely change the look of outdated pieces. Keep reading to see the transformation!
Welcome to Furniture Fixer Upper day, where we join 4 of our talented furniture friends and bring you brand new makeovers! I’ll link to my friend’s makeovers after our after photos at the bottom of this post! Don’t forget to check out their masterpieces!! Okay, back to our makeover!
Can you really turn an old piece of furniture into something that looks high end and sell it for $1,000? That was the goal with this project, because this is going to fund the bedroom makeover I’ve been wanting to do for years.

This wasn’t just about giving them a fresh coat of paint, but creating a finish that looked polished, durable, and worth every penny. But what I thought would be a straightforward furniture flip ended up with a few unexpected setbacks.
If you’re interested in making money with furniture makeovers too, be sure to check out my guides on flipping furniture for profit here. Now, if you’re curious about how to paint nightstands black and how I’m turning old nightstands into $1,000, let’s get started!

Supplies Used for Black Nightstand Makeover
As an Amazon Associate, I earn from qualifying purchases. I also may earn from other qualifying purchases with other companies or get free product to review and use. All opinions are my own.
- Electric Screwdriver
- Krud Kutter
- Drill Brush Attachment
- Drill
- Heirloom Traditions Paint in Warm Embers
- Vonforn Paint Sprayer
- Paint Filters
- Sprayer Liners
- Elmer’s Wood Filler
- SurfPrep Sander (Use code RAY10 to get 10% off your order)
- Shop Vacuum
- 220 Grit Sanding Screens (Use code RAY10 to get 10% off your order)
- SurfPrep Fine Grit Foam Pad (Use code RAY10 to get 10% off your order)
- Tack Cloth
- Painter’s Tape
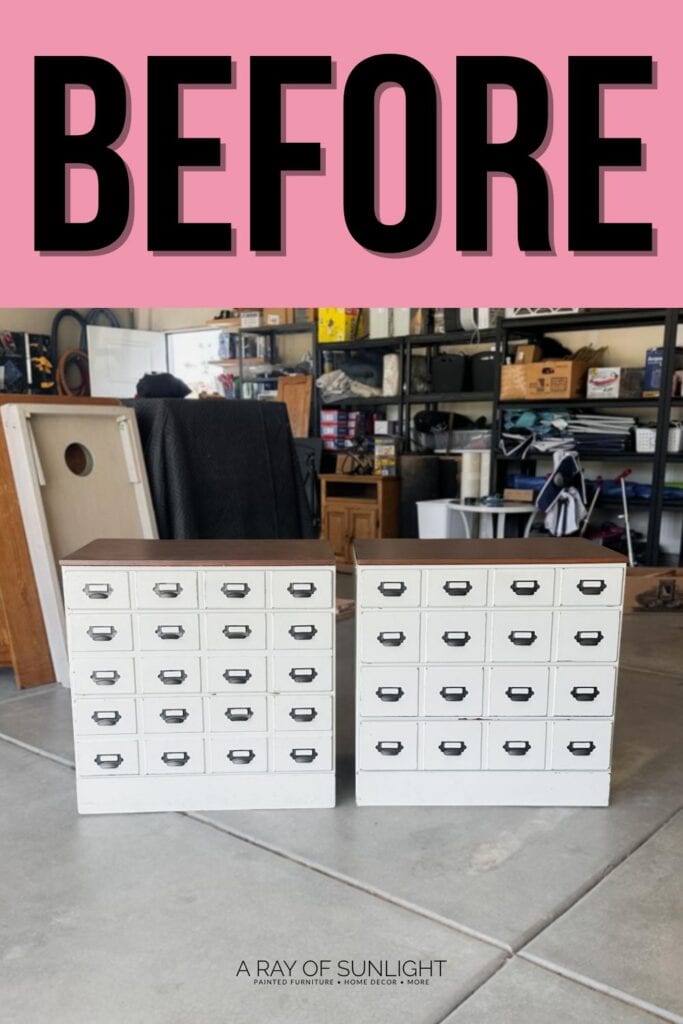
Why I Decided to Update These Old Nightstands
These nightstands have quite a bit of history. We bought them over 10 years ago down in Tucson, Arizona, and completely changed the look by adding card catalog style drawer fronts and painting them to fit the farmhouse trend that was popular at the time.
And guess what? The finish has held up over those 10 years. We moved from Tucson to Minnesota, then Minnesota back to Idaho, and it still looks the same as it did when I painted it. That just goes to show how durable painted furniture can be when you follow the right process. Check out the full DIY card catalog dresser makeover here.
Now, I found another set of oversized nightstands on Facebook Marketplace for $150. They’re high quality Henredon furniture, and after updating them for our bedroom, it was finally time to update these original nightstands. Here’s the fastest way to make old furniture look expensive to see the new nightstands we worked on.
How I Updated These Nightstands With Black Paint
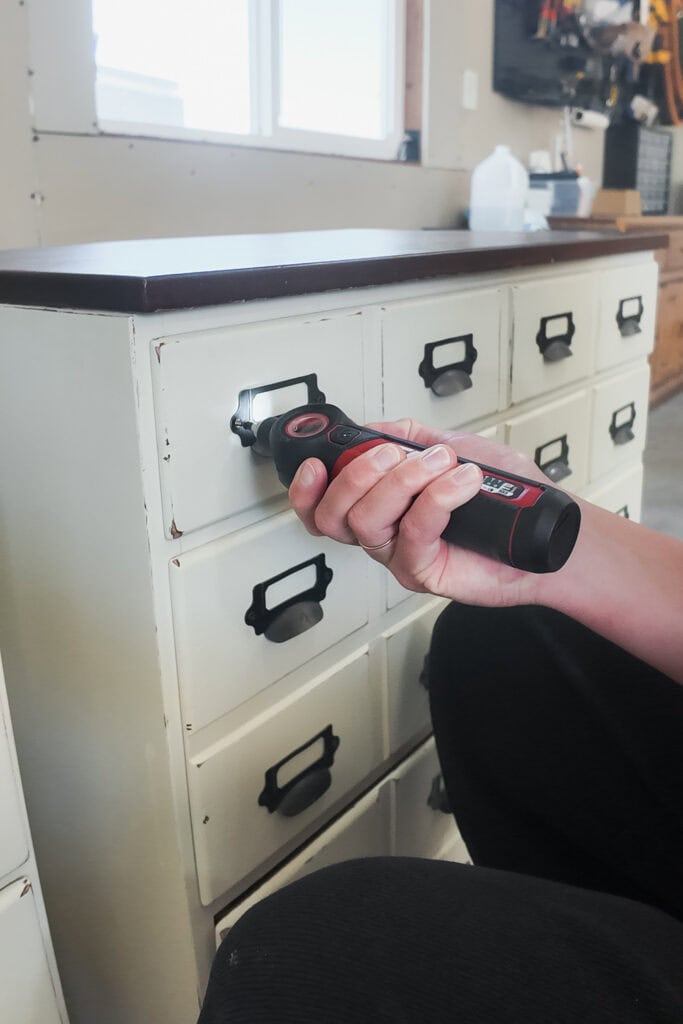
The first thing I had to do was remove all of the hardware with my electric screwdriver, and honestly, there was way more of it than I realized. Between the two nightstands, there were around 60 screws, and I can’t even imagine how long it would’ve taken to remove them all with a regular screwdriver.
Then it was time to clean, and I almost talked myself into skipping it. These nightstands have been in our house for over 10 years, and I felt pretty confident they couldn’t be that dirty. But I was totally wrong.
As soon as I started scrubbing with Krud Kutter and my drill brush attachment, years of built up grime started coming off, especially around the hardware where dust, dirt, and oils from our hands had collected.
I was honestly shocked by how much gunk came off these nightstands. Once everything was scrubbed clean, I wiped them down twice with a damp rag to remove any residue from the cleaner and let them dry.
My Process for Painting Furniture Quickly
Now, I typically would’ve done the scuff sanding, priming, and filling in any chips and dings. But with this specific paint, I’ve found a really quick method that lets me go straight into painting. It sticks well, is very durable, and allows me to paint furniture in just one day.
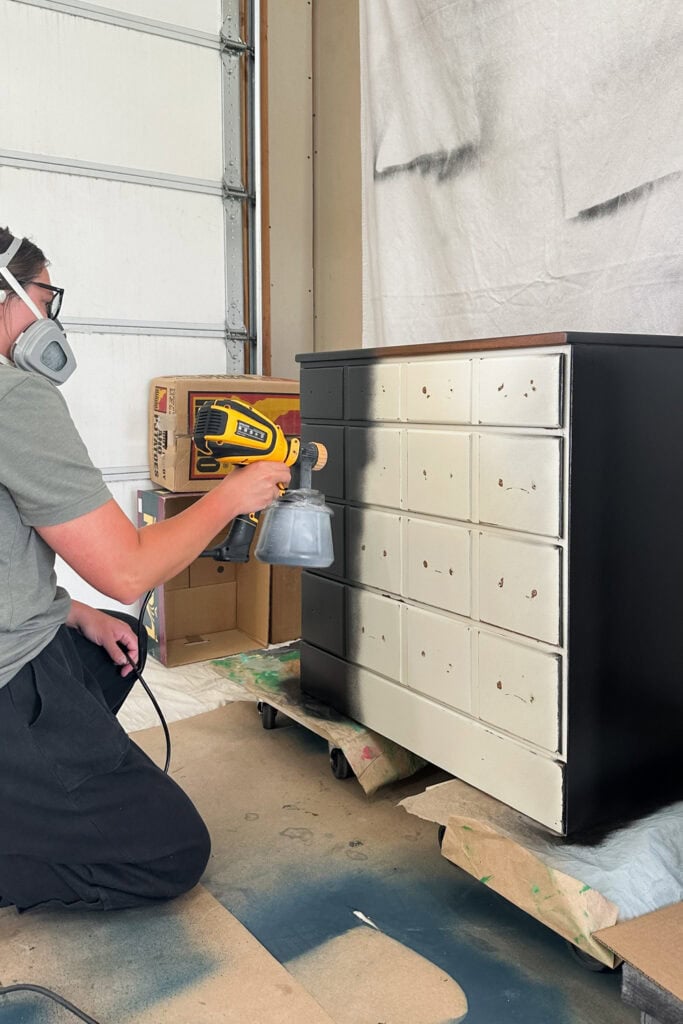
I loaded up my Vonforn sprayer with Heirloom Traditions Paint in Warm Embers, which is the same warm black I used on the nightstands now in our bedroom. I love spraying this paint on because I could never get it to look right with a brush and roller without streaks and bubbles.
Check out my Heirloom Traditions All In One Paint review here, and here are the best Heirloom Traditions Paint colors to choose from.
Why I Use a Paint Sprayer for Furniture Painting
Plus, spraying saves me so much time. A coat takes about five minutes per nightstand, compared to more than an hour per coat if I brushed it on by hand. The finish also looks much more professional, with smooth coverage instead of brush marks, roller texture, and uneven sheen.
Using a sprayer is completely non negotiable for me at this point. This one costs around $50, is easy to use, sprays paint beautifully, and honestly does a better job than my first sprayer did 10 years ago, even though that one cost more. Learn more about it in my Vonforn paint sprayer review here.
Fixing Paint Texture on a Furniture Makeover
I sprayed on a coat and got everything looking good. The problem was that I was working in the middle of a hot day, and when temperatures get above 70 degrees, paint dries faster and doesn’t have as much time to level out, which can leave the finish feeling rough.
I wasn’t too concerned because I knew I still needed to fill some chipped paint, scratches, and other imperfections before moving on. Once the first coat is on, it’s much easier to see exactly where the repairs need to be made instead of guessing.
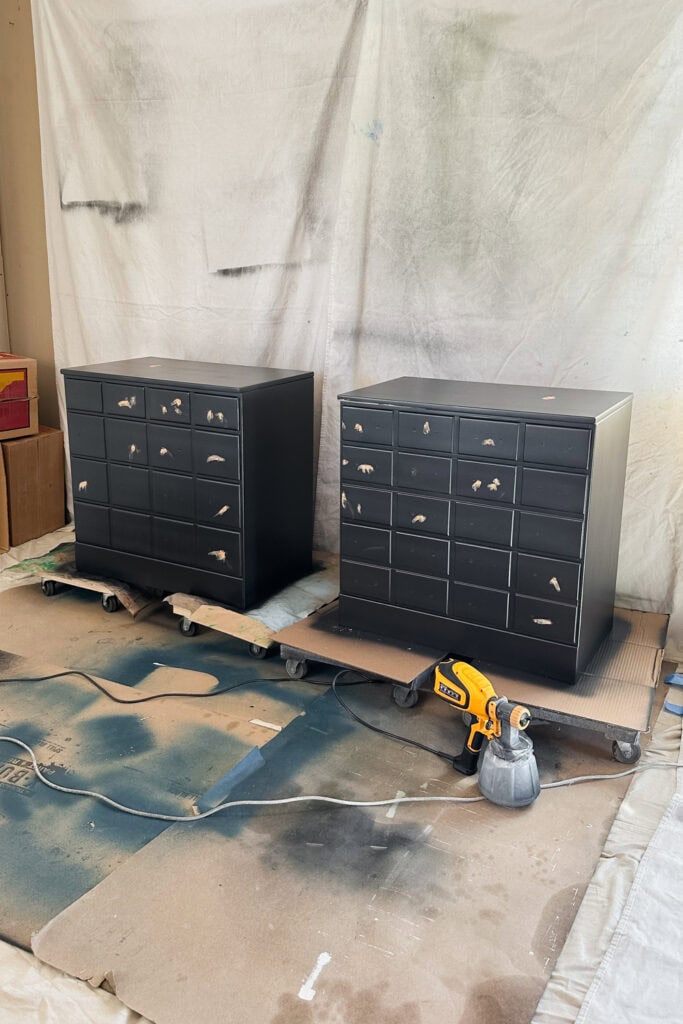
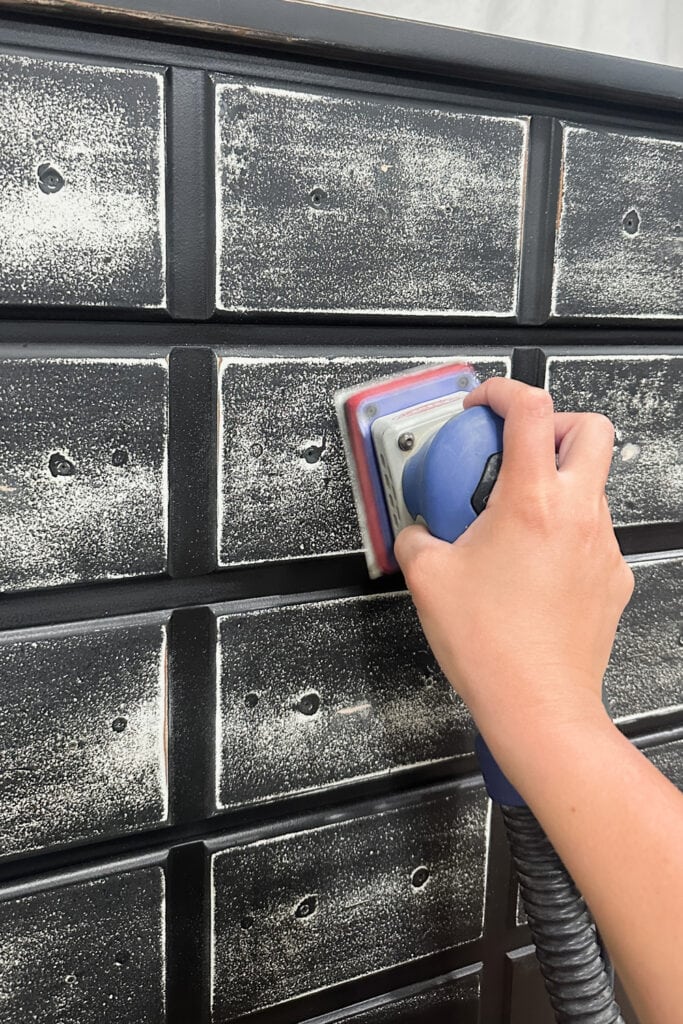
So I filled those and let everything dry for a couple of hours. Later that evening, I came back to sand everything smooth, and that’s when I noticed all the texture left behind from when I painted these nightstands 10 years ago. Everywhere I lightly sanded, little white bumps appeared.
The good news was that the black paint wasn’t peeling off when I sanded it. I was using 220 grit sandpaper with my SurfPrep sander, and it was sticking really well, which told me the prep work and the paint itself had done their jobs.
If you don’t have a SurfPrep sander, you could sand by hand and also use a foam pad to help sand curves and details. You could also use a Dewalt orbital sander with this cheap little foam pad, and this is a great, cheap way to start. Here are more of the best sanders for beginners.
Would you like to save this?
But it wasn’t cool enough outside to do another coat. So I ended things for the day and cleaned out my sprayer. For this paint, I don’t leave it in the sprayer overnight for long periods of time. I tackle more about “Can I leave paint in a sprayer between coats?” in this post.
Now, I’ve been using these liner bags for I don’t know how long now. Sometimes they have leaked on me, and that’s frustrating, so I got in the habit of double bagging. But the last few times that I’ve done a project, both bags have leaked.
Guys, I love these liner bags when they work. But really, I think the cheaper ones just aren’t worth it now. I did find these slightly more expensive Wagner liner bags. They’re much more durable. I’ve never had a leak with them, and I just use one at a time.
So I was able to keep most of the paint in the bag and get it back into the paint container. There was some that I had to scrape out, and I still wasted some paint, which I was not happy about. But I still got everything cleaned up. I was able to get the sprayer cleaned in about 10 minutes. Get more tips on how to clean Vonforn paint sprayer here.
The next morning, I went outside and used my shop vacuum and tack cloth to clean the dust left over from sanding. I wanted to make sure everything felt nice and smooth before spraying the next coat.
And the second coat looked so good. I was so excited. Then I remembered that I still had to paint behind the drawers. But I honestly just sprayed it on too thick, trying to get to those areas. And the front drawer fronts also ended up getting too much, you could see the paint starting to build up.
Then, when I was taking all the drawers out to actually paint behind them, you could see the texture in the light. I was actually shocked it didn’t run, and just kind of built up and left all this weird texture.
It definitely did not look good at this point, so I had to fix it. I couldn’t just move on and think somebody was going to pay $1000 for these. This set doesn’t have to be perfect, but it needs to be smooth and nice, and this was not it.
And this is what I get when I try to rush through things instead of taking the time. So I sprayed the front part of the nightstands where the drawers had been covering, then I took some wood filler and filled in a couple of scratches I hadn’t noticed before. Then I let everything dry and fully cure.
When I came back, I sanded everything smooth with 220 grit sandpaper, so I could do a final coat on the drawer fronts. I wanted everything to look factory finished with a professional sprayed on finish.
I feel like that’s the difference between furniture that can be sold for some money and furniture that can be sold for a lot. Some people rush through the process so fast that they don’t care to look for drips and runs or look at things in different lighting to make sure the finish looks good.
Then they just go put it up for sale, and for some people, that doesn’t bother them, and that’s fine. But to me, that is the difference between amateur work and something that looks high end. I don’t want my stuff to look homemade and rushed.
I’ve been painting furniture since 2014. And I still make mistakes and run into problems. Sure, I could’ve done some things differently to prevent some of this and caught some of it earlier. But we live and learn, right?
So that is the part of the project where I am currently at. I got the SurfPrep back out with 220 grit sanding screens this time and sanded everything smooth, especially focusing on those drawers where there was just so much texture.
Some places I sanded by hand, like the tops of the nightstands. Then I went back and sanded everything with a fine grit foam pad to make sure there wouldn’t be any sanding swirls.
I sprayed on a nice, even coat with almost full coverage over everything again, then waited about 30 minutes. When I came back out, everything was dry to the touch. So I opened up the drawers just a little bit to get paint everywhere that I needed it.
So I sprayed that last coat, and when I came back out again, it looked so good. The temperature outside that day was also about 10 degrees lower than the previous days, so the paint didn’t dry as fast. It had time to level out and dry smooth instead of rough.
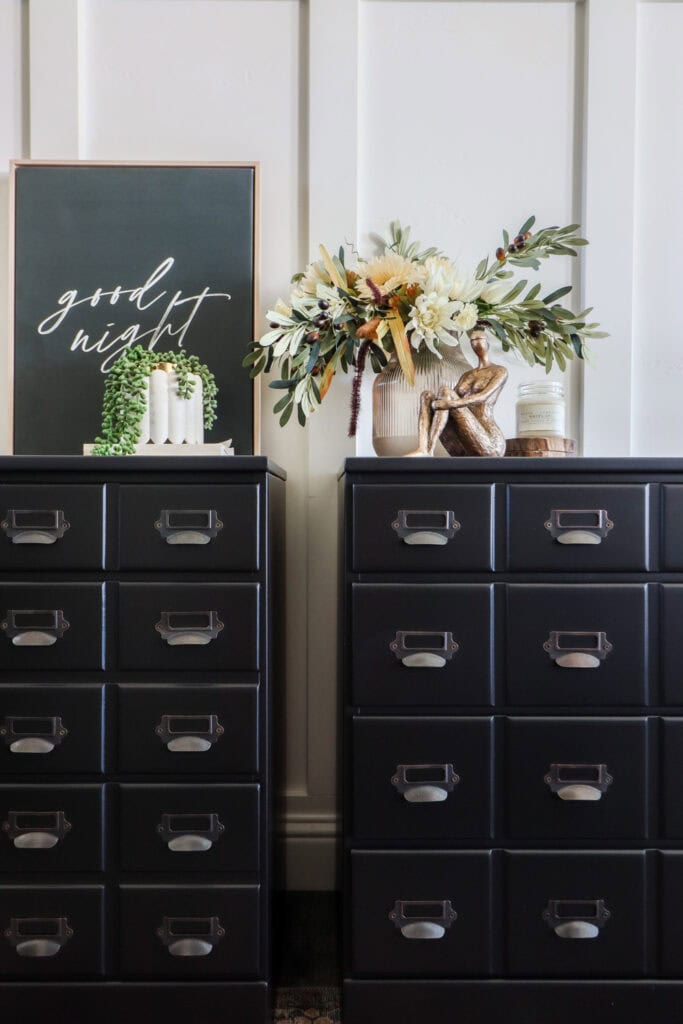
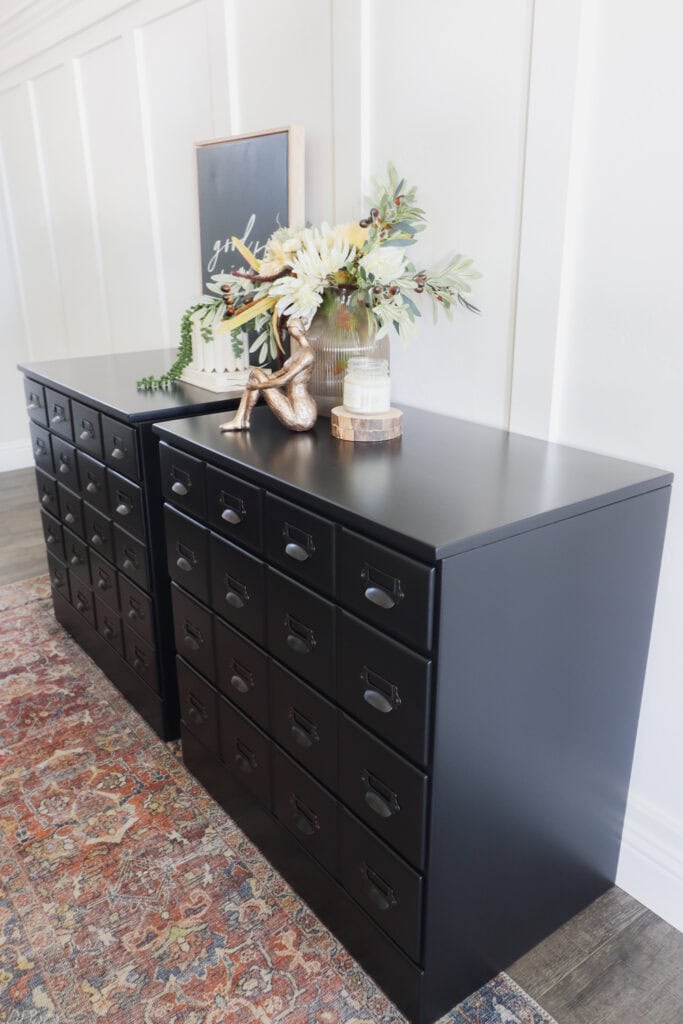
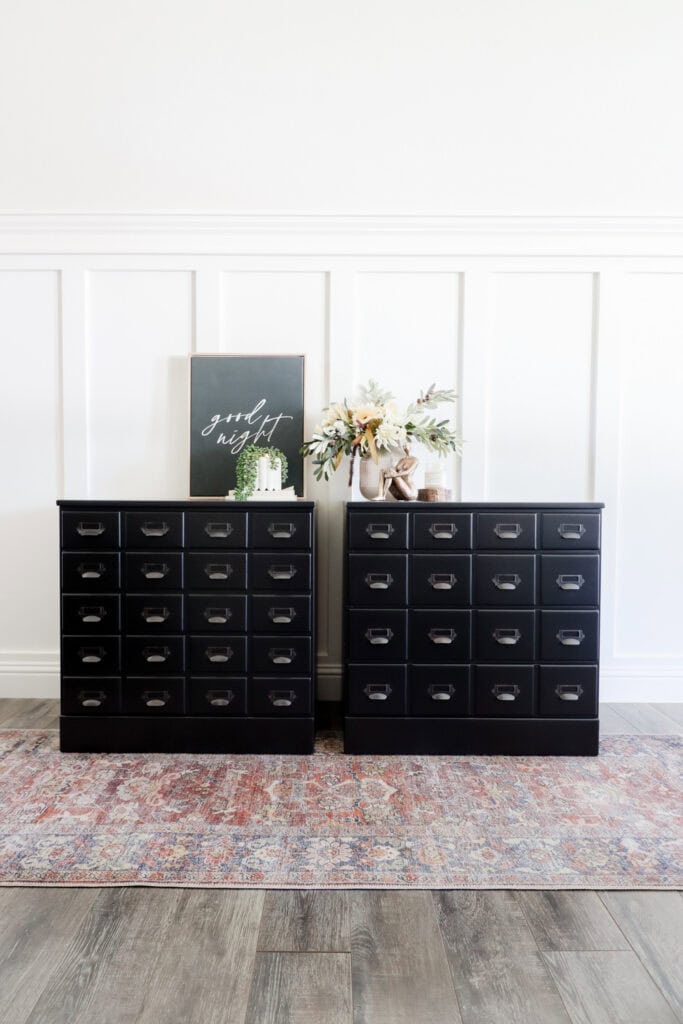
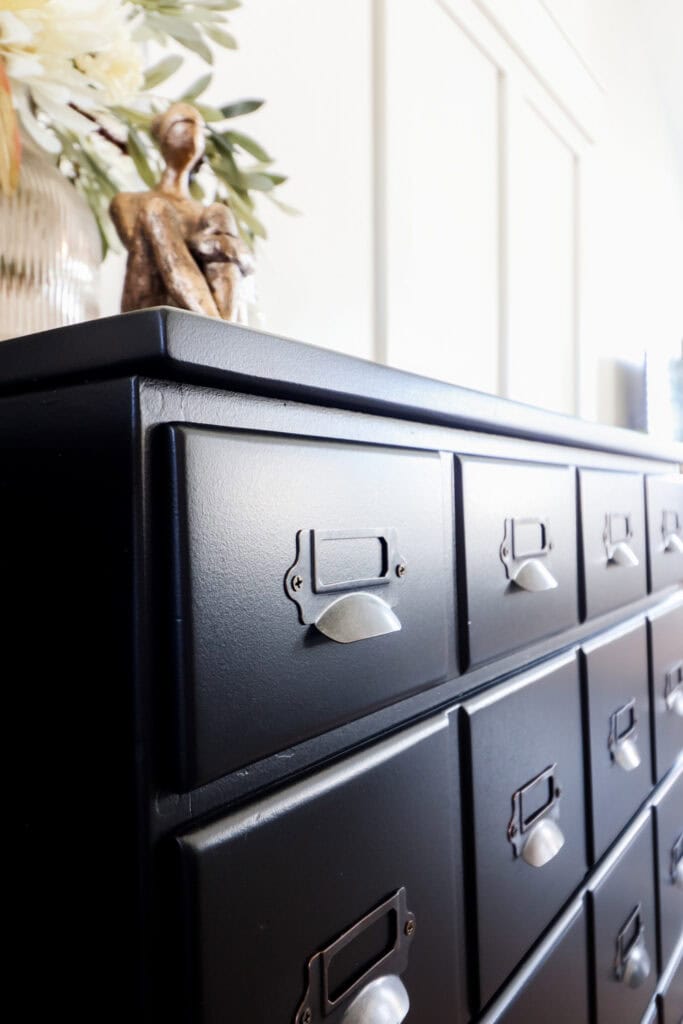
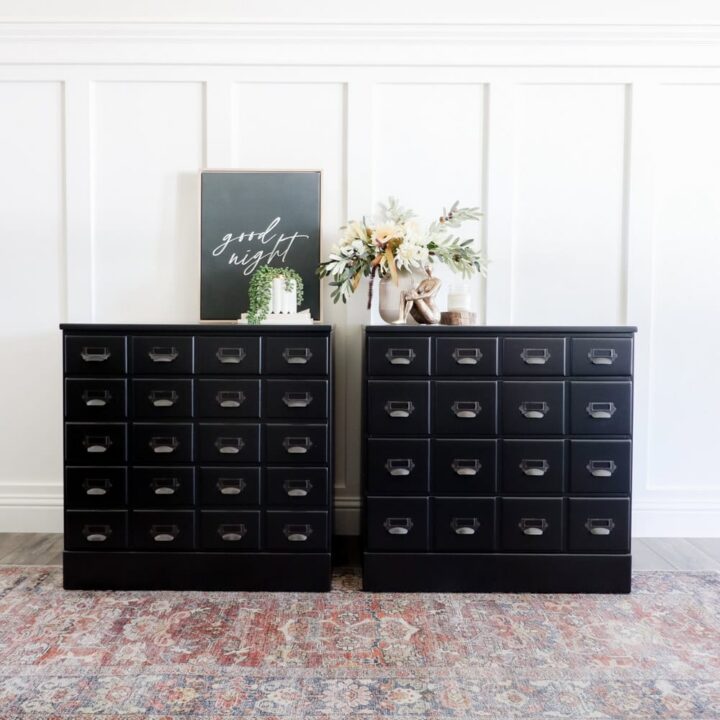
Then I waited 24 hours before putting all the hardware back on. I didn’t want to get new ones or anything, so I just put the original hardware back on. And here is what these nightstands look like now!
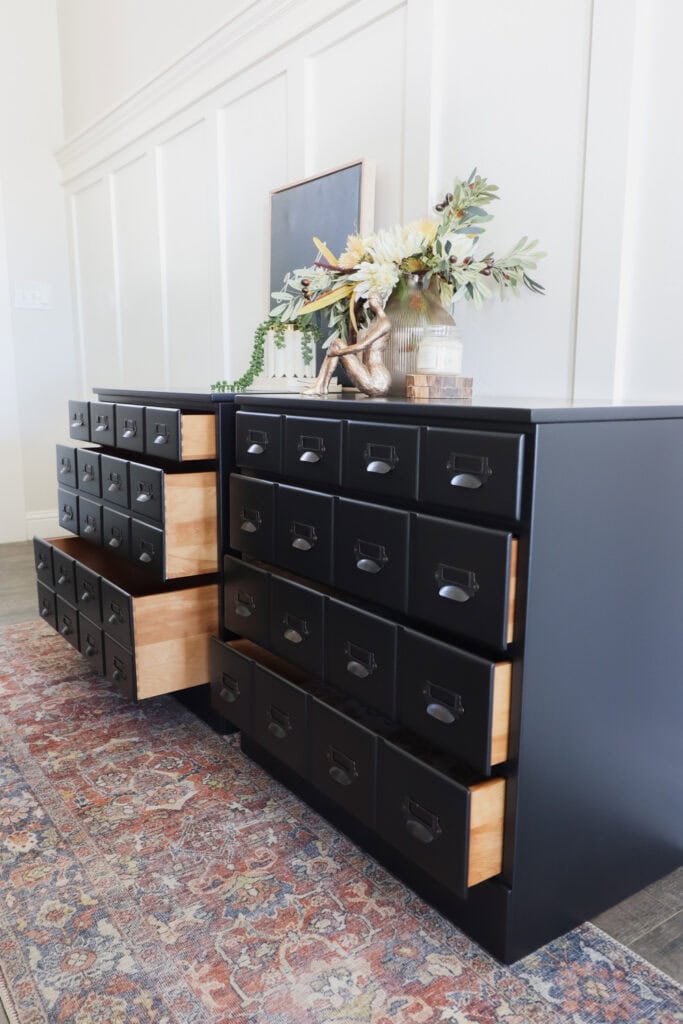
They’re completely out of the farmhouse era, there’s no more distressing on them, and they look and feel so good and professional. They’re painted in this warm black color, so they’re going to work with just about any space. And this oversized nightstand holds so much and fills a master bedroom beautifully.
Will These Painted Nightstands Sell for $1,000?
Now we get to list them on Facebook Marketplace for $1,000. We’ll see how long it takes for somebody to purchase them. In the past, we’ve sold big matching nightstands for $600. They weren’t quite this big, but they were still large, and in a beautiful green color.
But these are black, and they’ll fit with more people’s decorating styles. So they should still be a quick sell, even at $1,000. I mean, if you went to a furniture store, this type of quality furniture and this size of nightstand would be at least $750 each.
So whoever gets these is going to get a great deal. Plus, I know that this paint will hold up. None of it was simply scratching off when I was sanding. So that gives me a lot of confidence in the durability.
Don’t forget to check out these other awesome before and after furniture makeovers from my Furniture friends!! (Click the links below the photos!)
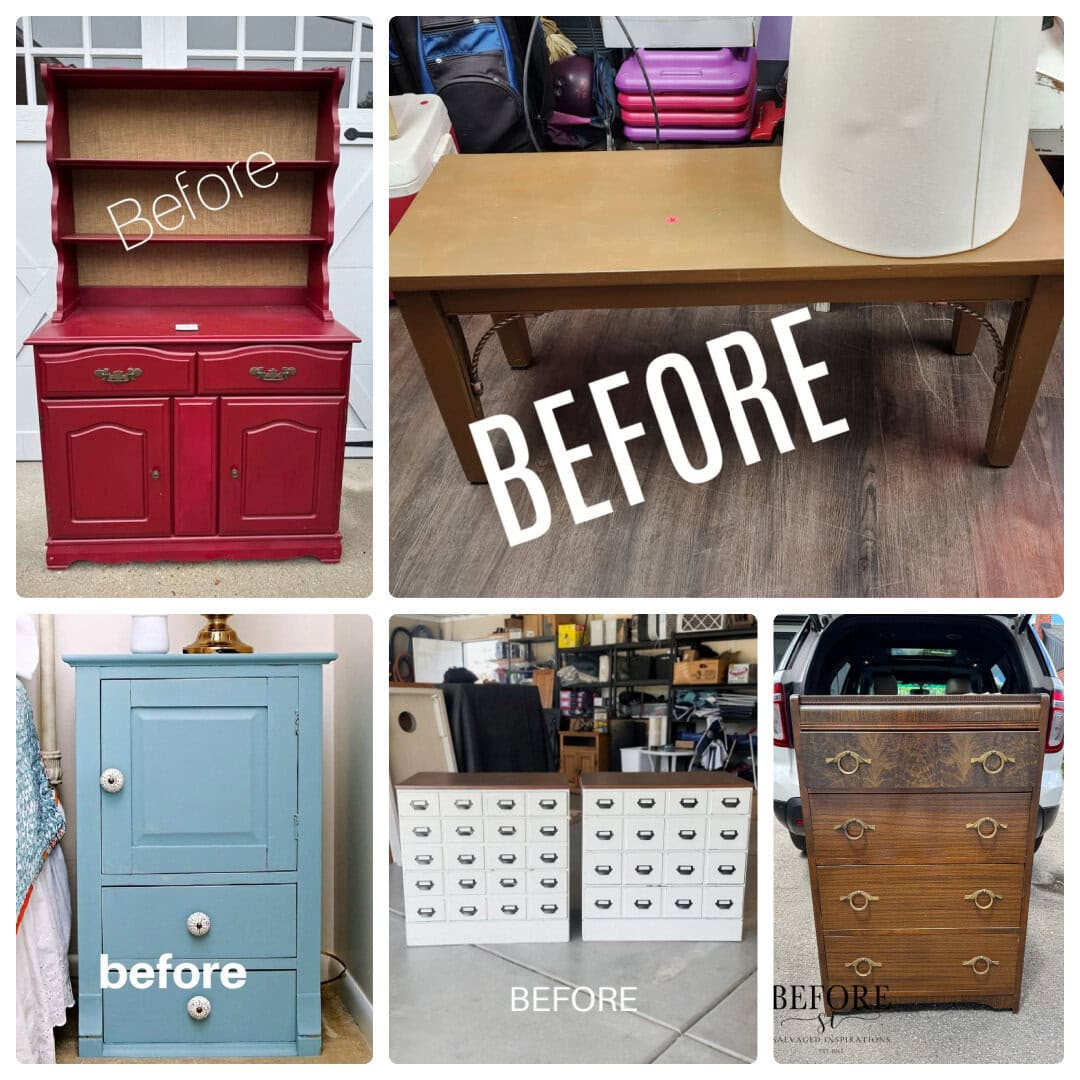
- Repainting Furniture For a Modern Look from Petticoat Junktion
- Bench Makeover With Stripes from My Repurposed Life
- Waterfall Dresser Makeover from Salvaged Inspirations
- Painted Hutch Makeover from Confessions of a Serial DIYer

Black Nightstand Makeover
In this black painted nightstand makeover, see and learn how I'm turning old nightstands into $1,000 for my bedroom makeover.
Materials
Tools
Instructions
- Remove all of the hardware from your nightstands before you start painting. An electric screwdriver can save you a ton of time, especially if you're dealing with dozens of screws.
- Clean the furniture thoroughly with Krud Kutter and a drill brush attachment. Even if the piece looks clean, years of dust, dirt, oils, and grime can prevent a smooth finish. Wipe everything down with a damp rag and let it dry completely.
- Load your Heirloom Traditions Paint into a sprayer through a paint filter, and then apply the first coat. A sprayer gives you smooth coverage much faster than a brush and roller while eliminating brush marks and roller texture.
- Let the first coat dry, then inspect the piece for chipped paint, scratches, dents, and other imperfections.
- Fill any chips, dings, or scratches with wood filler and allow it to dry. Once dry, sand those repairs smooth so they blend seamlessly into the surface.
- Vacuum away all sanding dust and wipe the surface with a tack cloth. You want the furniture to feel completely clean before applying another coat.
- Spray on your next coat, making sure not to apply too much product in one area. If you're painting around drawers or tight spaces, take your time so you don't create buildup or texture issues.
- If you notice texture, drips, or other imperfections, stop and fix them before moving on. Let everything dry and sand the problem areas smooth. Don’t forget to clean up all the dust from sanding.
- Apply a final coat once the surface is smooth and ready. Wait at least 24 hours before reinstalling the hardware.
- Once everything is reassembled, your furniture should have a smooth, durable, factory finished look that's ready to use or sell.
Recommended Products
As an Amazon Associate and member of other affiliate programs, I earn from qualifying purchases.


More Furniture Makeover Ideas
- Changing Wood Color Without Sanding
- Updating Oak Furniture: How to Get a High End Look (Without Replacing It!)
- How to Take Orange out of a Wood Dining Table
Follow us on YouTube to get more tips for painting furniture. Or share your project with us on our Facebook Group and be part of our community. See you there!